Print

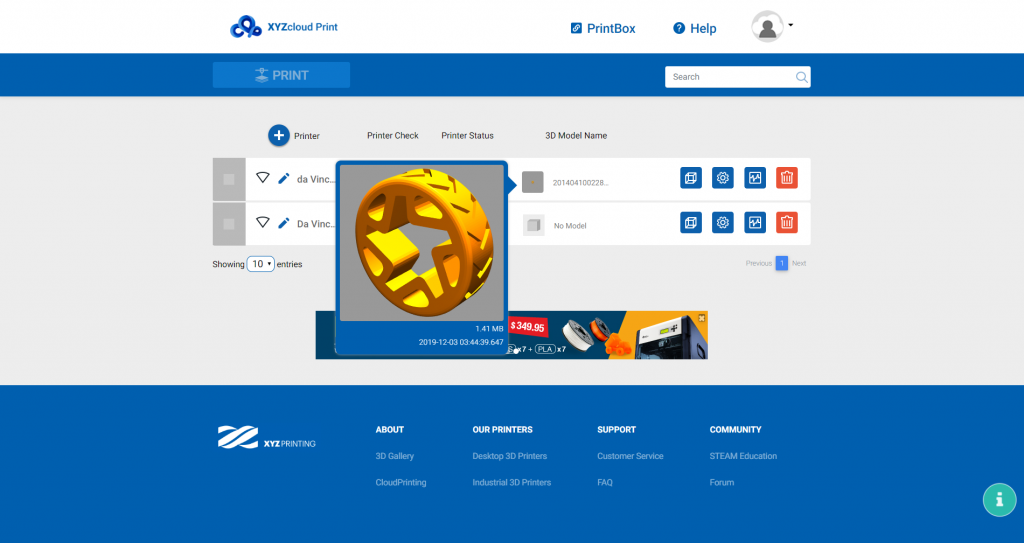
Once you have finished setting up your model and printer, you can now select which printer you want to print. You can select multiple printers if you want.

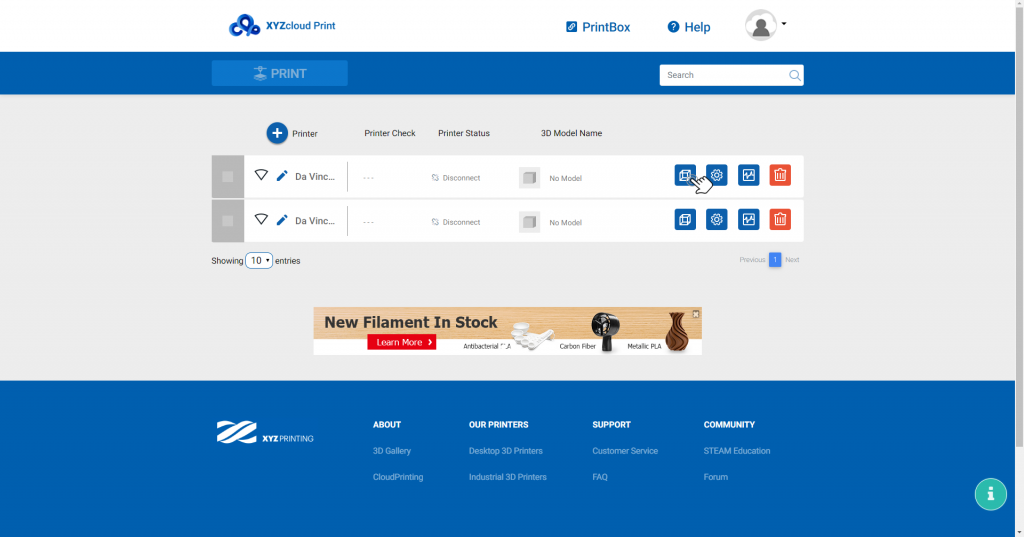
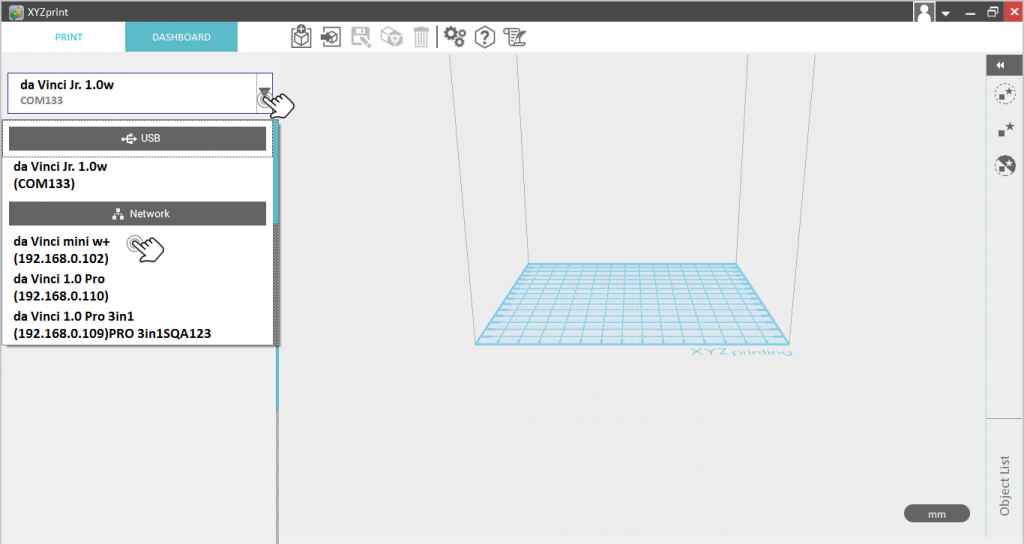
  1. Select the printer you want to print (can be multiple selected as long as the printer is online).
    Select-Printer
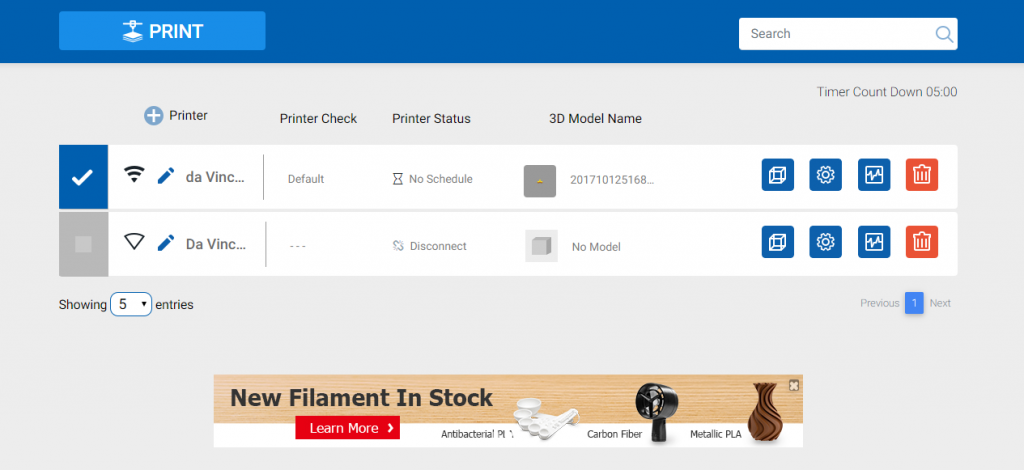
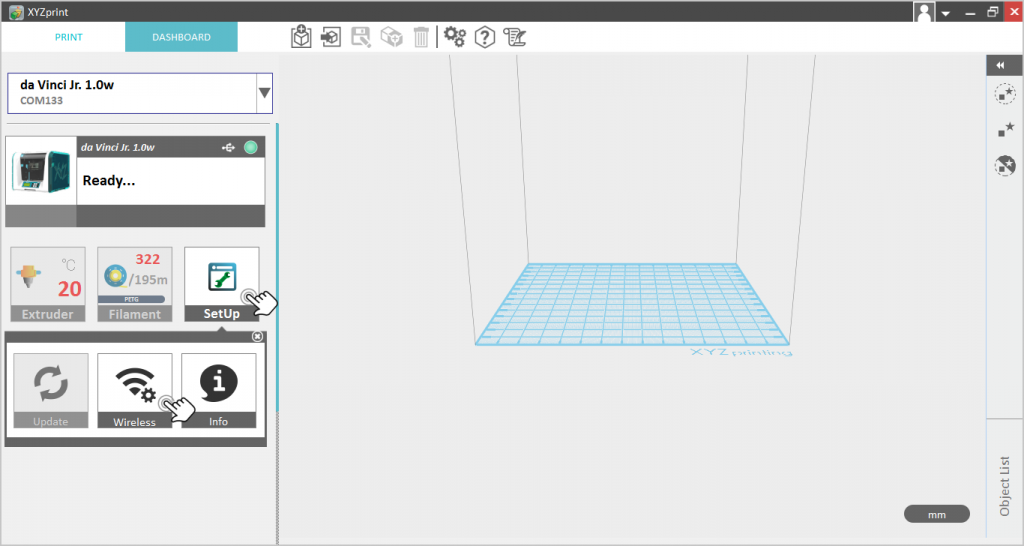
  2. Click “PRINT” button to start printing
    Print-Button


FAQ

  • What are the difference between CloudPrint and XYZprint?
    • They are most likely the same but the CloudPrint can manage multiple print jobs unlike XYZprint that can manage only one. Below are the key features of CloudPrint.

Key Features

● Intuitive interface that shows an overview of your printer fleet, including printer configurations and print status.

● Customize and save printing profiles to the cloud.

● Prepare, assign, and manage multiple print jobs to connected printers in your fleet.

● Track and monitor progress for all print jobs.

Equipment

Equipment you will need to prepare before using Cloud Print.

  • Printers that you would like to add on Cloud Print.
    XYZ Printers
  • Internet connection and devices that can install Print Box and can visit Cloud Print website.
    Cloud Print Connections

Specifications

Hardware Requirements

Installation

Intel i3 CPU equivalent or better 4GB RAM or above

Operation

20GB of free HDD space (recommended)

Supported Web Browsers (Cloud Platform Management)

Google Chrome

Supported Printer Models

All wireless-enabled XYZprinting models

Supported File Formats

.stl, .obj, .3cp, .3w

Upload Model

There are two (2) ways on how you can add a Model: Local Drive and XYZ Gallery.

Upload a Model from local drive

  1. Click “Model Setup” icon.
    Model-Setup-1
  2. Model Setup window will be shown. Drag or click “Choose File” to upload Model (supported file types: stl, obj, 3W).
    Upload-Model-1
  3. Uploaded model will be displayed to the Model Setup window.
    Model-Display
  4. Click “SAVE MODEL” button to save the model.
    Save-Model

Upload a Model from XYZ Gallery

  1. Click the “Model Setup” Icon.
    Model-Setup-1
  2. Model Setup window will be shown, then choose XYZ Gallery tab.
    XYZ-Gallery-Upload
  3. Enter a Gallery URL (you may check all the models from XYZ Gallery here or simply click “Find more!” on the Model Setup window) and press Enter to submit; supported file types: stl, obj, 3W.
    XYZ-Gallery-URL
  4. Uploaded model will be displayed to the Model Setup window.
    Model-Display-Gallery
  5. Click “SAVE MODEL” button to save the model.
    Gallery-Save-Model

How to update/delete a model

  1. Click the “x” button.
    X-button
  2. The delete window will be shown. Choose “YES” button if you are sure to delete the current model or click “NO” button otherwise.
    Delete-Window

How to preview a model

  1. From the printer management page, hover your mouse on the preview image icon beside the Model name.
    Model-Preview

Add Printer

Add a 3D printer for the first time

  1. Add 3D Printer window will be shown first if there is no added printer on the Printer Management Page after login.
    Add-3DPrinter-1
  2. Enter a valid serial number and the name of the printer.
    Enter-SN-PName-1
  3. Click “SUBMIT” button to add printer.
    Add-Printer-button

Add another 3D printer 

  1. Click “+ Printer” button.
    Add-Printer
  2. Add 3D printer window will be shown.
    Add-3DPrinter-2
  3. Enter a valid serial number and the name of the printer.
    Enter-SN-PName-2
  4. Click “SUBMIT” button to add printer.
    Add-Printer-button-2

Download and Install Print Box

To manipulate and establish a connection between printers and Cloud Printing service, download and install Print Box software.

  1. Visit XYZcloud Print website.
    login
  2. Click the Print Box menu and choose your current operating system (Windows or Mac)
    PrintBox-2
  3. Print Box executable file will start to download.
    PrintBox-Download-1
  4. Install the Print Box executable file on a PC or laptop. Jut follow the instructions to install the software.
    Printbox-installation
  5. Once the installation is done you may notice that a new icon is added to your desktop notification area. Here you will receive a notification once your printer is connected to the Print Box (as shown on the image below).
    printbox-notif

Note: 

  • To successfully navigate all commands from web to Print Box client, close all launched XYZ software (e.g. XYZPrint, XYZWare, XYZMaker).
  • The Print Box runs on the background. If you would like to close the Print Box, right click on the Print Box icon on the notification area of your PC or close it from task manager.


Connect Printers

Connect your printers to a local network using XYZmaker Suite (XYZprint).

  1.  Setup the wireless network on your PC and launch the XYZmaker Suite (XYZprint) app.
    xyzcloud_print_sec5_1
  2. On the Dashboard, select the printer you want to connect with your local network.
    XYZmaker-Dashboard-1
  3. Once the Printer is “Ready…” click SetUp –> Wireless.
    Printer-Ready-1
  4. Click the “CONNECT TO NEW NETWORK” button to see the list of wireless network available.
    New-Network
  5. Find and select the wireless network where your PC was connected.
    Network-List

    Note: The network printing function is only available when the printer and computer are both connected to the same wireless network.

  6. Key-in your password and click the “CONNECT” button.  Wait until the “Setup completed” message displayed.
    XYZmaker-password