Nachhärtungsprofil

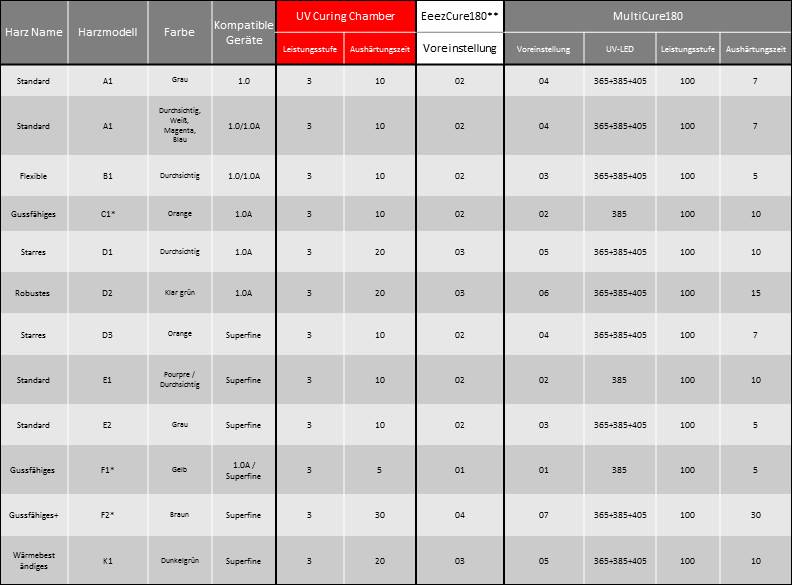
Gedruckte Objekte aus Kunstharz sollten nachgehärtet werden, um sicherzustellen, dass das Material vollständig polymerisiert ist, um die besten Materialeigenschaften zu erzielen. Dies ist besonders wichtig bei funktionellen Kunstharzen wie Gießharz und Hochleistungsharz.

Wenn Sie die XYZprinting UV Härtekammer für XYZprinting Kunstharze verwenden, befolgen Sie die nachstehenden Härtungsanweisungen für die Nachbearbeitung:


Hinweis
*Die beste Leistung erhalten Sie, wenn Sie Gießharz in Wasser nachhärten.

** Aushärtungsparameter sind für EeezCure180 und die UV-Härtekammer gleich. Wechseln Sie bei Verwendung von EeezCure180 einfach zwischen verschiedenen Voreinstellungen, um die vorgeschlagenen Aushärtungseinstellungen anzuwenden.

Modelldesigntipps

Anwendbarer Drucker: Nobel 1.0A

Für ein ideales Druckergebnis und vollständige Ausgabe der Designdetails folgen Sie bitten den nachfolgenden Designvorgaben, wenn Sie die Modelle entwerfen.

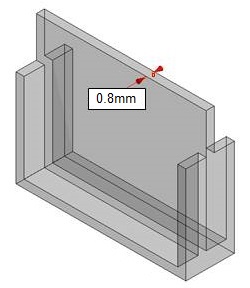
Wandstärke ≥ 0,8mm

Wände, die dünner als empfohlen sind, können sich beim Ablöseprozess verziehen oder brechen.

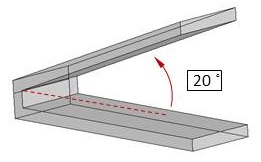
Überhangwinkel ≥20°

Stützstrukturen sind für steile Überhänge erforderlich, deren Winkel größer ist als die empfohlenen Grenzwerte. Ansonsten können sich die Überhänge verformen oder brechen.

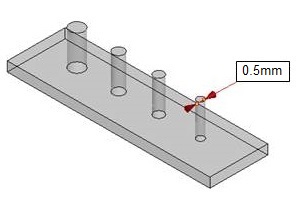
Mindestdurchmesser Vertikaldraht ≥0,5mm

Netze oder Drähte, die dünner als empfohlen sind, können beim Ablöseprozess brechen oder sich verformen.

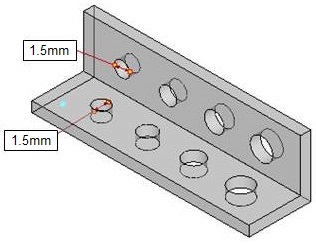
Lochdurchmesser ≥1,5mm

Löcher, die kleiner als die empfohlenen sind, können Harz im Objekt einschließen oder sich beim Druck verschließen.

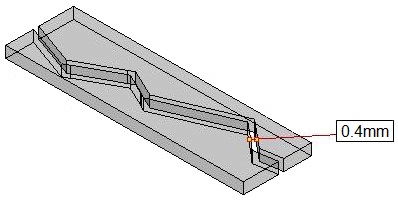
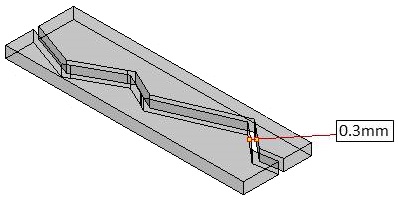
Abstand ≥0,4mm

Abstände, die kleiner als die empfohlenen sind, können beim Druck schmelzen. Bewegliche Teile können dann nicht funktionieren.

Hinweis
» Die Empfehlung basiert auf dem Druckergebnis bei einer Schichthöhe von 0,1 mm.
» Achten Sie darauf, die Unterseite des Tanks sowie dessen Beschichtung nicht mit scharfkantigen Werkzeugen zu verkratzen oder zu beschädigen. Eine beschädigte Tankoberfläche kann sich auf die Druckqualität auswirken.
» Die Spezifikationen für einige Merkmale sind unterschiedlich für bestimmte Kunstharze. Bitte halten Sie sich an die Designvorgaben auf der Wiki-Seite für jeden Kunstharz, falls vorhanden.

Modelldesigntipps

Anwendbarer Drucker: Nobel Superfine

Für ein ideales Druckergebnis und vollständige Ausgabe der Designdetails folgen Sie bitten den nachfolgenden Designvorgaben, wenn Sie die Modelle entwerfen.

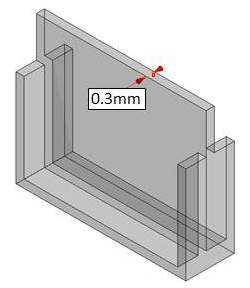
Wandstärke ≥ 0,3mm

Wände, die dünner als empfohlen sind, können sich beim Ablöseprozess verziehen oder brechen.

Überhangwinkel ≥20°

Stützstrukturen sind für steile Überhänge erforderlich, deren Winkel größer ist als die empfohlenen Grenzwerte. Ansonsten können sich die Überhänge verformen oder brechen.

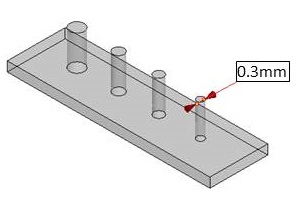
Mindestdurchmesser Vertikaldraht ≥0,3mm

Netze oder Drähte, die dünner als empfohlen sind, können beim Ablöseprozess brechen oder sich verformen.

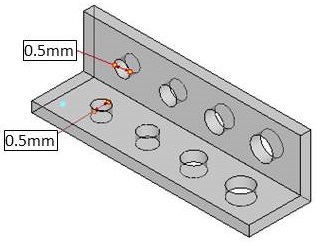
Lochdurchmesser ≥0,5mm

Löcher, die kleiner als die empfohlenen sind, können Harz im Objekt einschließen oder sich beim Druck verschließen.

Abstand ≥0,3mm

Abstände, die kleiner als die empfohlenen sind, können beim Druck schmelzen. Bewegliche Teile können dann nicht funktionieren.

Hinweis
» Die Empfehlung basiert auf dem Druckergebnis bei einer Schichthöhe von 0,025 mm.
» Achten Sie darauf, die Unterseite des Tanks sowie dessen Beschichtung nicht mit scharfkantigen Werkzeugen zu verkratzen oder zu beschädigen. Eine beschädigte Tankoberfläche kann sich auf die Druckqualität auswirken.
» Die Spezifikationen für einige Merkmale sind unterschiedlich für bestimmte Kunstharze. Bitte halten Sie sich an die Designvorgaben auf der Wiki-Seite für jeden Kunstharz, falls vorhanden.

Standardharz (E1)

Anwendbarer Drucker: Nobel Superfine
Harzmodell: E1 (Farbe: Lila, klar)

Für ein ideales Druckergebnis und vollständige Ausgabe der Designdetails folgen Sie bitten den nachfolgenden Designvorgaben, wenn Sie die Modelle entwerfen.

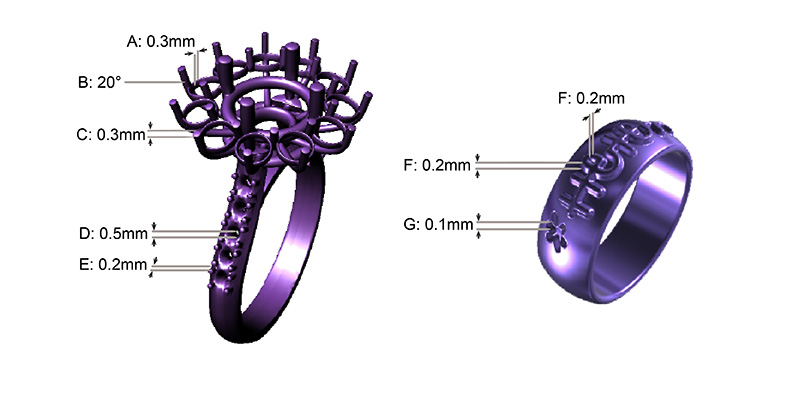
# Merkmale Empfohlen
A Wandstärke Wände, die dünner als empfohlen sind, können sich beim Ablöseprozess verziehen oder brechen. ≥0,3mm
B Überhangwinkel Stützstrukturen sind für steile Überhänge erforderlich, deren Winkel größer ist als die empfohlenen Grenzwerte. Ansonsten können sich die Überhänge verformen oder brechen. ≥20°
C Mindestdurchmesser
Vertikaldraht
Netze oder Drähte, die dünner als empfohlen sind, können beim Ablöseprozess brechen oder sich verformen. ≥0,3mm
D Lochdurchmesser Löcher, die kleiner als die empfohlenen sind, können Harz im Objekt einschließen oder sich beim Druck verschließen. ≥0,5mm
E Abstand Abstände, die kleiner als die empfohlenen sind, können beim Druck schmelzen. Bewegliche Teile können dann nicht funktionieren. ≥0,2mm
F Geprägtes
Detail
Solche Einzelheiten, die kleiner sind als für Höhe und Stärke empfohlen, sind auf dem Druck eventuell nicht sichtbar. ≥0,2mm
G Graviertes
Detail
Solche Einzelheiten, die kleiner sind als für Höhe und Stärke empfohlen, sind auf dem Druck eventuell nicht sichtbar. ≥0,1mm
Hinweis
» Die Empfehlungen basieren auf dem Druckergebnis mit Allzweckharz von XYZprinting mit einer Schichthöhe von 0,025 mm.
» Die Druckqualität kann beeinträchtigt werden, wenn man mit einem trüben Harztank druckt.
» Bitte tempern Sie die Ausdrucke mit UV-Härtekammern um die Härte und Haltbarkeit der gedruckten Produkte zu erhöhen.

Gussfähiges Kunstharz (F1)

Anwendbarer Drucker: Nobel Superfine
Harzmodell: F1

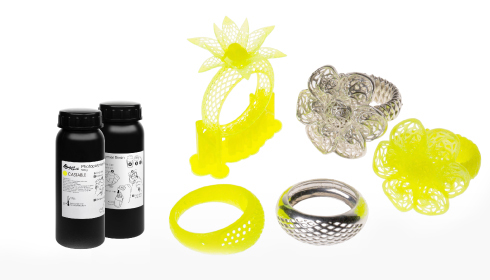
Die Eigenschaften von gussfähigem Kunstharz ähneln denen von Wachs. Es gibt nach dem Erhitzen keine Ascherückstände und es eignet sich für Wachsausschmelzverfahren, Aufbewahrungsverfahren, d. h. im konventionellen Produktionsprozess verwendetes Wachs-Carving.

Modelldesigntipps

Die Eigenschaften von gussfähigem Harz ähneln denen von Wachs; beide sind strukturell weich und spröde und der Ausdruck kann aufgrund der Zugkraft während des Drucks leicht brechen. Bitte befolgen Sie die nachstehenden Designtipps für optimierten Druck.

» Wandstärke ≥0,4mm

» Lochdurchmesser ≥1,0mm

» Abstand ≥0,4mm

» Für die Spezifikationen für andere Merkmale, befolgen Sie bitte die allgemeinen Designvorgaben hier.

Hinweis
» Die Empfehlungen basieren auf dem Druckergebnis mit Gussfähiges Kunstharz von XYZprinting mit einer Schichthöhe von 0,025 mm.
» Größere Objekte mit Abmessungen von mehr als 40x30x40 mm oder einem Gewicht von mehr als 6g erfordern möglicherweise Stützen zur Haftung an der Plattform.
» Achten Sie darauf, die Unterseite des Tanks sowie dessen Beschichtung nicht mit scharfkantigen Werkzeugen zu verkratzen oder zu beschädigen. Eine beschädigte Tankoberfläche kann sich auf die Druckqualität auswirken.

Empfehlungen zur Druckeinrichtung

Wie beim Einsatz von Harz für allgemeine Zwecke gewährleisten zusätzliche Stützstrukuren, dass das Objekt vollständig ausgedruckt werden kann, wenn das Modell Überstände oder eine eher kleine Kontaktfläche mit der Plattform aufweist.

Die Drucksoftware XYZware_Nobel hat eine Funktion zum automatischen Zufügen von Stützen, mit der die Modellstruktur analysiert und automatisch Versteifungsstrukturen generiert werden. Manchmal müssen Sie zur Gewährleistung der Objekthaftung weitere Stützen im manuellen Modus zufügen.

Klicken Sie hier für die Anweisungen für Support-Funktionen.

Falls der Druck fehlschlägt, ändern Sie bitte die Objektposition und passen Sie Winkel und Versteifungsstrukturen an.

Empfohlener Ausbrennprozess

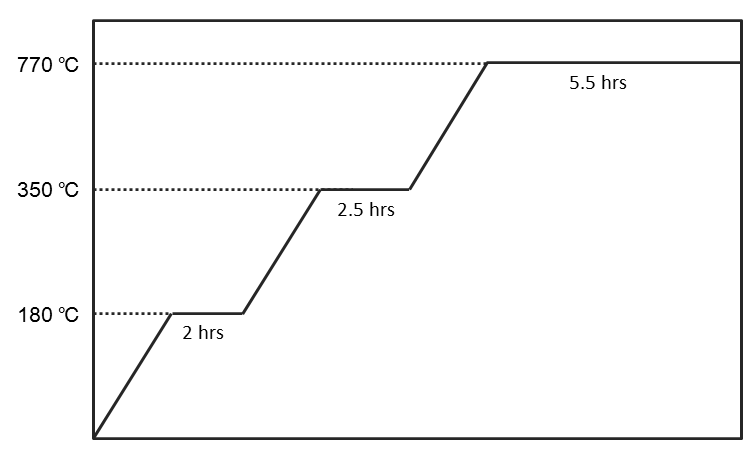
Beim Gießen von Ausdrucken können Sie basierend auf der in folgendem Diagramm beschriebenen Temperatursteuerungsempfehlung arbeiten und so das vollständige Abbrennen von Harz und eine glatte, makellose Oberfläche des Gussobjekts gewährleisten.
Empfehlung zur Veredelung

Reinigung

Bitte reinigen Sie das Druckobjekt nach Entfernen von der Plattform mit Ethylalkohol in einer Konzentration von mehr als 75 %. Während der Reinigung sollten Sie das Druckobjekt mit einem Streichnetz halten und das Streichnetz zur Beseitigung von Harzresten von der Oberfläche des Druckobjekts im Alkohol schwenken.
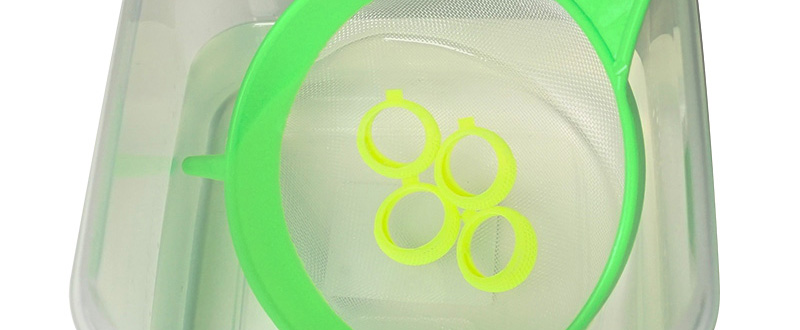
Spritzen Sie mit einer Sprühflasche Alkohol auf die detaillierten Strukturen, um nicht ausgehärtetes Harz zu entfernen.

Schwenken Sie das Druckobjekt nach der Reinigung aus dem Alkohol und warten Sie, bis sich der Alkohol auf der Oberfläche verflüchtigt hat.

Hinweis 
» Aufgrund der Sprödigkeit dieses Harzes dürfen Sie das Druckobjekt nicht mit einer Bürste abschrubben. Andernfalls könnte die Oberfläche des Druckobjekts verkratzt werden. 
» Tauchen Sie das Druckobjekt nicht länger als 10 Minuten in Alkohol; andernfalls kann der Alkohol die Struktur des Objekts angreifen und das Objekt schädigen. 
» Es ist normal, dass die Farbe nach Eintauchen des Druckobjekts in Alkohol verblasst. Dies wirkt sich nicht auf das Gussergebnis aus.

Alkohol auf der Oberfläche des Druckobjekts an der Luft trocknen lassen

Nach der Reinigung befinden sich Alkoholreste auf der Oberfläche des Druckobjekts.
Bitte halten Sie das Druckobjekt nach der Reinigung still und führen Sie keine Nachhärtung aus, bis Sie sichergestellt haben, dass sich der Alkohol vollständig verflüchtigt hat. Prüfen Sie nach Trocknung des Alkohols sorgfältig, ob sich noch Harzreste in den Merkmalen befinden. Bitte achten Sie darauf, nicht ausgehärtetes Harz zu entfernen, damit die Designdetails des Originalmodells nicht blockiert werden.

Hinweis 
» Falls die Aushärtung durchgeführt wird, während sich noch Alkoholreste auf der Oberfläche des Druckobjekts befinden, kann die Oberfläche des Druckobjekts weiß und dunstig wirken, was sich möglicherweise auch auf das Gussergebnis auswirkt.

Stützen entfernen

Bitte schneiden Sie Stützen mit Werkzeugen ab, anstatt sie abzuziehen (durch Abziehen kann die Oberfläche des Objekts leicht beschädigt werden).

Nachhärtung

Das vom gussfähigen Kunstharz produzierte Druckobjekt muss zur Gewährleistung der Festigkeit beim Wachsausschmelzverfahren mittels UV-Licht nachgehärtet werden.
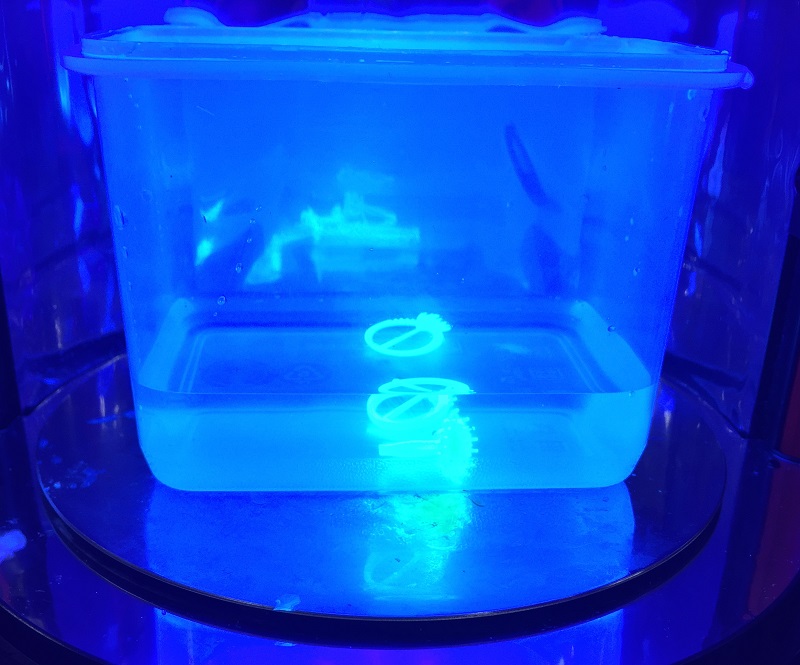
Für optimale Materialeigenschaften sollten Sie die gedruckten Teile 5 Minuten lang in Wasser nachträglich mittels UV-Licht aushärten.

Empfehlung
» Bei Verwendung der UV-Aushärtungskammer von XYZprinting können Sie die gedruckten Teile 5 Minuten lang in Wasser nachträglich aushärten.
» Bei einer UV-Wellenlänge von 375~405 nm und einer Strahlungsintensität von 14 mW/cm² sollten Sie das Objekt 5 Minuten nachhärten, wenn die Stärke der Objektstruktur 7 mm übersteigt.

Aufbewahrung von nicht ausgehärtetem Harz

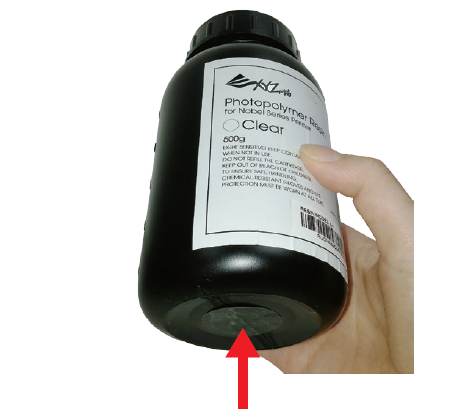
Nicht ausgehärtetes Harz im Harztank sollte keinem Licht ausgesetzt werden. Das nicht ausgehärtete Harz kann nach dem Filtern in einem opaken Behälter aufbewahrt werden. Gießen Sie das Harz vor dem nächsten Druck wieder in den Harztank.
Nobel 1.0 Offener Modus

Einrichtung Offener Modus

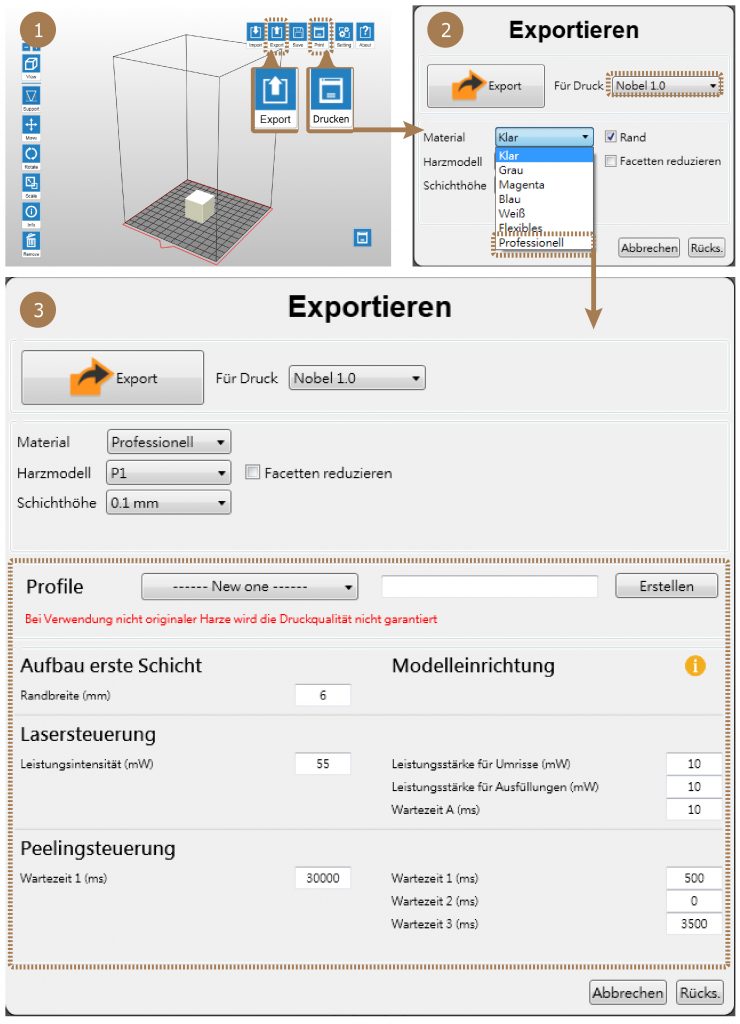
Um zum offenen Modus zu gelangen:

“Exportieren” oder “Drucken” auswählen und unter “Material” “Professionell” auswählen.

Hinweis
Die Druckqualität kann mit Harz von anderen Anbietern abweichen.
Die automatische Ladefunktion wird bei Harz von anderen Anbietern deaktiviert. Wenn Sie Harz von XYZprinting verwenden, wählen Sie bitte die entsprechenden Optionen für XYZprinting-Druckmaterialien.

Druckvorgang

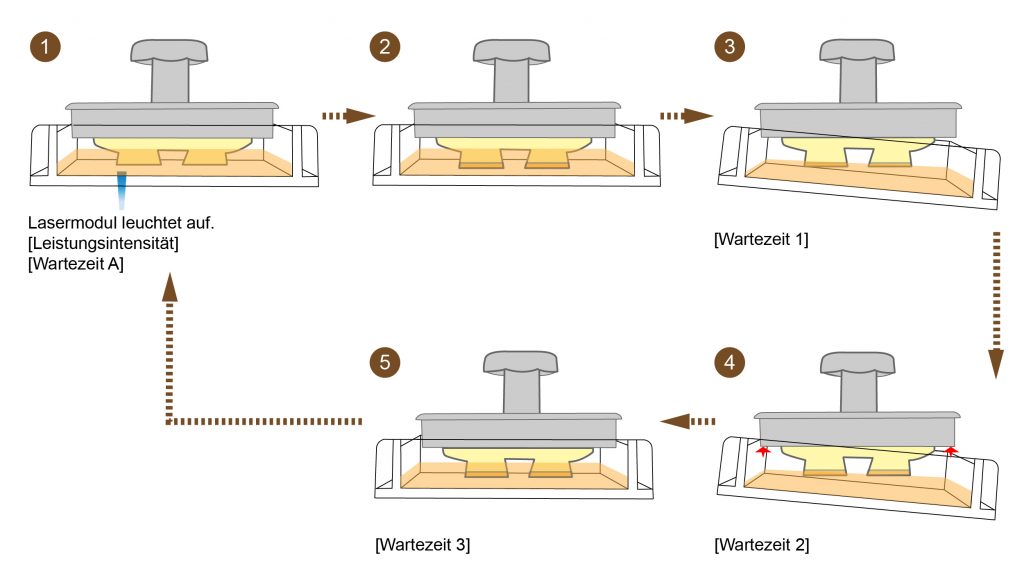
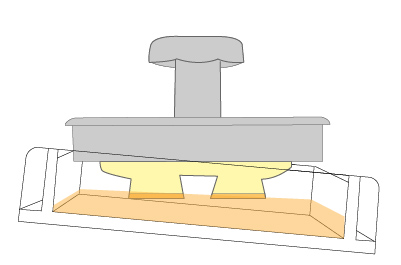
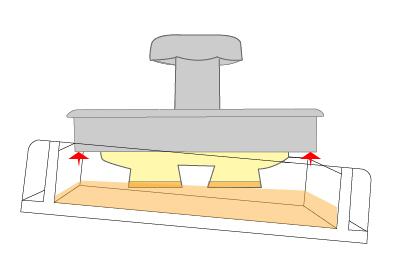
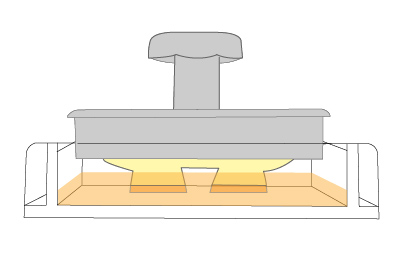
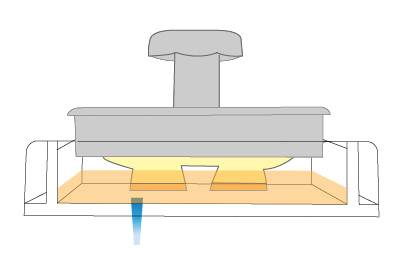
Der Druckvorgang von Nobel 1.0 funktioniert wie abgebildet. Nachfolgend ist die Liste der einstellbaren Parameter, um in jedem Stadium mit Harz anderer Anbieter zu drucken.


Einstellbare Parameter in jedem Stadium

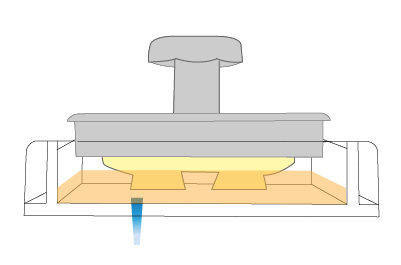
1. Das Lasermodul leuchtet auf, basierend auf den Einstellungen der Lasersteuerung:

Leistungsintensität

Der Gegenstand steuert die Leistungsintensität des Laserstrahls.
Bereich: 0 – 72 mW

Hinweis
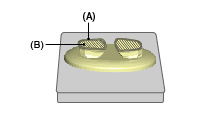
Sie können eine andere Leistungsstärke zum Härten der Umrisse und Ausfüllungen des Modells einstellen.

(A) Umrisse
(B) Ausfüllungen
Wartezeit A

Der Laserstrahl erlischt nach einem vorher festgelegten Zeitraum, wenn in der gleichen Ebene von einem Abschnitt zum nächsten übergegangen wird.
Bereich: 10 – 15 ms

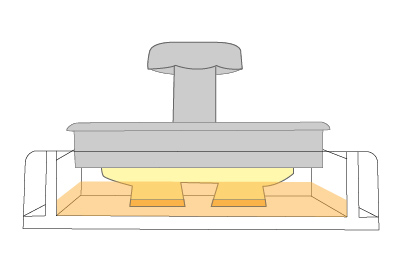
2. Der Laserstrahl erlischt nachdem die gesamte Ebene nachgezeichnet wurde.

3. Der Tank neigt sich, um die ausgehärtete Schicht von der Oberfläche der Beschichtung abzuziehen und wartet.

Wartezeit 1

Der Tank neigt sich und der Drucker wartet die festgelegte Zeit, bis das Harz vollständig polymerisiert ist.
Bereich: 0 – 65535 ms

4. Die Standfläche bewegt sich gemäß der eingestellten Schichthöhe nach oben und wartet.

Wartezeit 2

Die Standfläche bewegt sich nach oben und der Drucker wartet die festgelegte Zeit, bis das Harz abgekühlt ist.
Bereich: 0 – 65535 ms

5. Der Tank wird zurückgestellt und wartet.

Wartezeit 3

Der Tank wird zurückgestellt und der Drucker wartet die festgelegte Zeit, bis der Harzfluss aufhört.
Bereich: 0 – 65535 ms

6. Das Lasermodul leuchtet auf um die nächste Schicht auszuhärten.

Best Practice

To ensure the printing quality, check the following items before printing.

Filter the resin in tank

Sift any residue or cured debris from the platform and tank with the scraper, high-density filter or other tools. Resin can be reused after filtering.

Note
Filter the resin after every prints may ensure the stability of printing. 
Resin resided in the black filling tube may drip on the printer case. Please cover the opening of the tube with paper towel before removing the tank.

Clean the tank bottom

Mop the fingerprint or resin under the tank or on the glass with with lint-free cloth dampened with alcohol.

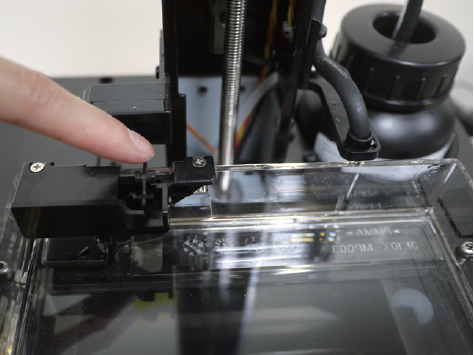
Clean the level sensor

Brush the level sensor with alcohol if it gets stuck.
Level sensor should return to the original position after a soft push. When the tank is full or the resin gets sticky, the sensor’s movement may be hindered greatly. Normally, it may take 1 minute for sensor to return. If stuck, remove the remaining resin from tank before cleaning. If resin in tank is cured, please replace the tank.

Platform calibration

Re-calibrate the platform after changing the platform or the tank. Make sure that the platform is paralleled with the tank.
Please note that platform calibration should be done with an empty tank.

Avoid cloudy area

Check if the tank is cloudy at where you place the model. Move the model away from the cloudy area in the software with the “Move” function. Replace the tank if the overall surface is cloudy.

Note
The placement on the virtual platform in the software is opposite to the actual placement in the tank. For models placed at the right side of the virtual
platform, they will be built on the left side of the tank.
Printing at the left side of the tank (right side on the virtual platform) will be less affected by the peeling force during build process.

Check for optimized setup

Optimize the placement and the support structure of the model with the ”Rotate”, “Support” and “Brim”functions in the software.

Rotate

For models of top-heavy structure, with less contact with the platform, or with any larger solid layer, please rotate the model to reduce the effect of peeling force during build process.

Support

For models of top-heavy structure, with overhanging parts or with less contact with the platform after rotated, please add support structures.

Tips
For larger overhanging parts, please choose the support structure with higher density and larger contact point.

Brim

One of the keys to successful printing on the bottom up type SL printer is to ensure the adhesion of the model to the platform. If rotating the model doesn’t increase the contact between the models and the platform greatly, please check “Brim” while exporting or printing the file. Also add “support” if necessary.

Avoid non-manifold geometry

For models with non-manifold geometry (black-highlighted in the software), please repair the models before printing.

Post-Processing

Post processing to printouts may be required

Remove Support Structure

Use pliers or other tools to remove the support structure from the cleaned prints to ensure perfect finish.

Empty Uncured Resin Inside the Prints

Hollow prints with uncured resin inside may break as time passes. To ensure the durability of hollow prints, leave a weep hole at the bottom of your 3D design, so you can empty the uncured resin easily.

Post-cure Prints for Optimal Results

The post-curing process maximizes the mechanical properties of resin-printed objects. It ensures the stable performance of functional resins and successful burnout of castable material. It’s essential for professionals such as dentists or jewelers. Post-cure with XYZprinting UV Curing Chamber is easy. Refer to the curing profile here.

Problemlösung

When an error occurs, please refer to the service code on the printer and/or in the software, and check the suggestion below for troubleshooting.

If any error persists, please contact customer service center for support.


Error Code 1000

Cause: Vibration generator movement abnormalities or tank sensor malfunctioned.

Suggestion:

Contact customer service center directly

[collapse]
Error Code 1001

Cause: Z axis motor upward movement abnormalities or Z axis top sensor malfunctioned.

Suggestion:

Select “INFO”>”SENSOR STATUS” on the printer, touch Z axis top sensor, and see if the status of “Z-T” switches from 0 to 1.

If the value doesn’t switch accordingly, then the sensor is malfunctioning. Then select “UTILITIES”>”MOVE PLATFORM”>”TO TOP” to raise the . If the platform doesn’t rise accordingly, then the motor is malfunctioning.
Contact the service center after you have checked the status of the printer.

[collapse]
Error Code 1002

Cause: Z axis motor downward movement abnormalities or Z axis bottom sensor malfunctioned.

Suggestion:

Select “INFO”>”SENSOR STATUS” on the printer, touch Z axis bottom sensor, and see if the status of “Z-B” switches from 0 to 1.

If the value doesn’t switch accordingly, then the sensor is malfunctioning. Then select “UTILITIES”>”MOVE PLATFORM”>”TO BOTTOM” to descend the platform. If the platform doesn’t descend accordingly, then the motor is malfunctioning.

Contact the service center after you have checked the status of the printer.

[collapse]
Error Code 1003

Cause: NFC tag reader malfunctioned.

Suggestion:

Contact customer service center directly.

[collapse]
Error Code 1004, 1006, 1007, 1008

Cause: Engine board malfunctioned.

Suggestion:

Contact customer service center directly.

[collapse]
Error Code 1005

Cause: Y axis movement problem.

Suggestion:

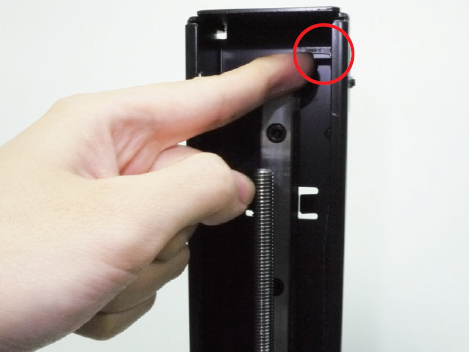
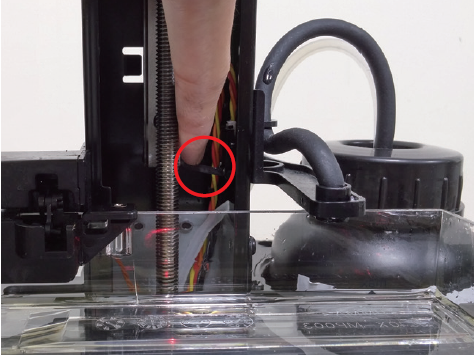
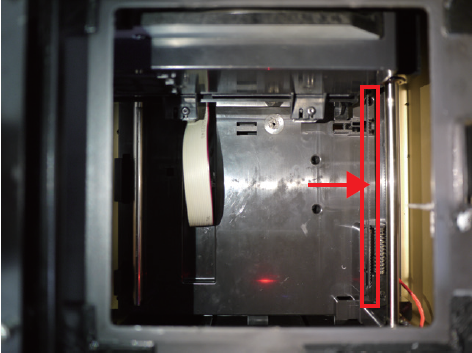
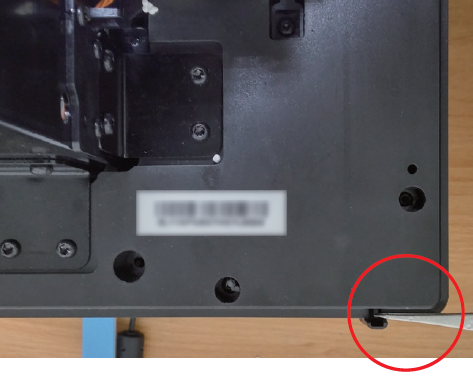
Remove the resin tank, release 3 latches by the glass and remove the glass. If you find any object falls inside the printing chamber and blocks the movement of the printing module, please remove it. If you find the belt is broken, please contact the service center.

Y-axis belt

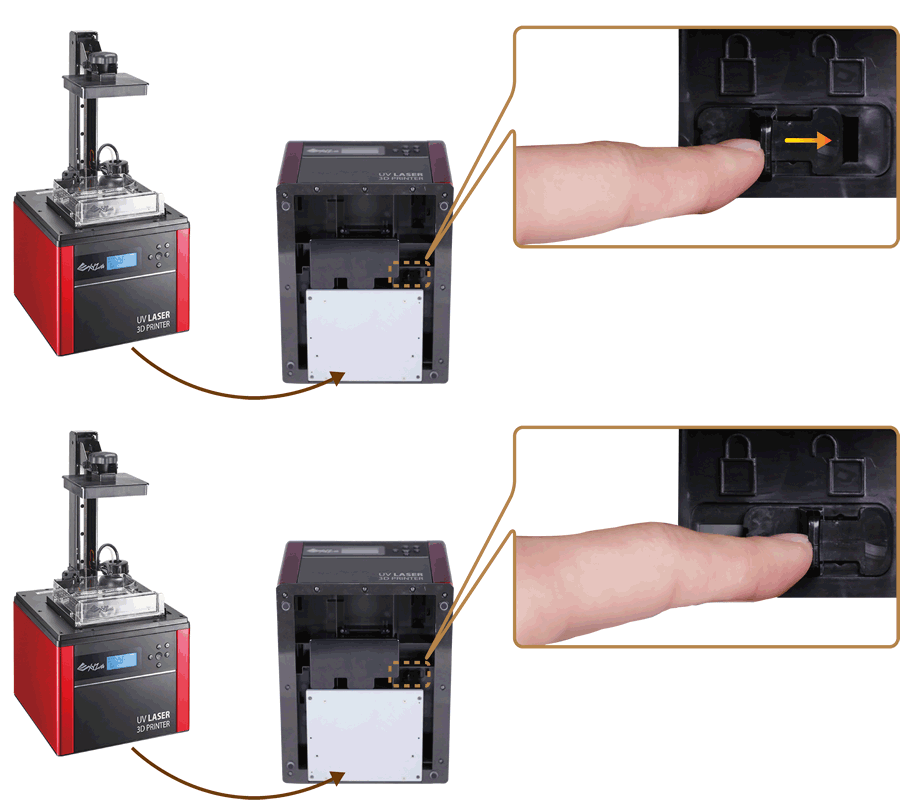
Please also check if the printing module lock at the bottom of the printer has been released.

[collapse]
Error Code 1009

Cause: WIFI module malfunctioned.

Suggestion:

Contact customer service center directly.

[collapse]
Error Code 100A

Cause: Z axis motor malfunctioned.

Suggestion:

Turn off the printer and confirm if the printing platform and the resin tank are installed correctly. If the error still occurs, contact customer service center.

[collapse]
Error Code 100C, 100D, 100C

Cause: Internal error.

Suggestion:

Contact customer service center directly.

[collapse]
Error Code 1020

Cause: Printer not found.

Suggestion:

Make sure printer is powered on, and connected to PC correctly. If the error persists, please try to restart your PC or refer to FAQ on XYZprinting website.

[collapse]
Error Code 1021

Cause: XYZware_Nobel slicer not found.

Suggestion:

Reinstall XYZware_Nobel.

[collapse]
Error Code 1022

Cause: Transmission failed.

Suggestion:

Make sure the USB wire is securely connected to the printer. Do not remove the wire before data transmission is completed.

[collapse]
Error Code 1023

Cause: Insufficient memory to load file(s).

Suggestion:

Increase system memory to 4G RAM and 1G graphics RAM or above. Leave some prints for next task if you are printing several models.
For better performance, it is recommended to run the program on 64-bit operating system.

[collapse]
Error Code 1024

Cause: XYZware_Nobel runtime error.

Suggestion:

Restart XYZware_Nobel.

[collapse]
Error Code 1025

Cause: Unable to save the file.

Suggestion:

Please check if there is enough space on the selected disk/device. Delete some files and try again. If you are saving the file to external device, make sure that the device is securely connected.

[collapse]
Error Code 1026

Cause: Non-manifold issue is found in the file.

Suggestion:

Repair the file with 3D model repairing software (such as netfabb or MakePrintable) and slice the model with XYZware_Nobel again.

[collapse]
Error Code 2000

Cause: Resin filling timeout.

Suggestion:

If the resin bottle is not empty, and the NFC tag matches the cartridge, first check if the nozzle cap is securely closed. Then check if the tank level sensor is functioning. Select “INFO”>”SENSOR STATUS”, and touch the tank level sensor. If the value doesn’t switch from 1 to 0 after “L”, the sensor is not working.


Then tap the floater to see if it moves smoothly.
If the sensor gets stuck, clean the sensor by following the cleanup procedure.
Also check the status of the filling pump. Disconnect the transparent filling tube, and select “UTILITIES”>”INSTALL RESIN”. If you don’t feel air releasing from the tube, then the pump is malfunctioning.
Contact the service center after you have checked the status of the printer.

[collapse]
Error Code 2001

Cause: Resin bottle not found.

Suggestion:

Make sure resin bottle is placed correctly and NFC tag is in place under the bottle.

If the NFC label is missing, please contact customer service center.

[collapse]
Error Code 2002

Cause: UV laser module not calibrated.

Suggestion:

Contact customer service center directly.

[collapse]
Error Code 2003

Cause: Resin bottle empty.

Suggestion:

Resin bottle is empty is based on the the reading from the NFC tag. Select “INFO”>”RESIN STATUS” to check resin level. When “REMAINING” is shown as “0%”, then the resin bottle should be empty. Please install another XYZprinting resin bottle before printing.

[collapse]
Error Code 2004

Cause: Lid not covered during printing.

Suggestion:

Place the lid on the printer before printing. If the lid is placed correctly, please remove the lid, select “INFO”>”SENSOR STATUS”, tap the lid sensor and see if the status of “C” switches from 0 to 1.

If the value doesn’t switch accordingly, then the sensor is malfunctioning.

Contact the service center after you have checked the status of the printer.

[collapse]
Error Code 2005

Cause: Unrecognized resin tag.

Suggestion:

Check the record of the resin bottle by selecting “INFO”>”RESIN STATUS”. If the display shows “UNIDENTIFIED TAG”, please change to XYZprinting resin bottle.

[collapse]
Error Code 2006

Cause: Unable to resolve the file.

Suggestion:

Slice the file again with XYZware_Nobel. Be sure to select the “Printer Type” according to the printer model used while slicing the file.

[collapse]
Error Code 2007

Cause: File too large.

Suggestion:

Please select a .3wn file, size no more than 200MB.

[collapse]
Error Code 2008

Cause: Non-manifold issue is found in the file.

Suggestion:

Repair the file with 3D model repairing software (such as netfabb, MakePrintable, or 3D Builder) and slice the model with XYZware_Nobel again.

[collapse]
Error Code 2009

Cause: Resin tank is not installed correctly.

Suggestion:

Confirm if the resin tank is installed correctly. If the resin tank is placed correctly, remove the tank, select “INFO”>”SENSOR STATUS” on the printer, touch the resin tank sensor, and see if the status of “T” switches from 0 to 1. If the value doesn’t switch accordingly, then the sensor is malfunctioning. Contact the service center after you have checked the status of the printer.

[collapse]
Error Code 2020

Cause: Printer is busy.

Suggestion:

Wait until the printer finishes current task. If the error persists when the printer is idle, please try to restart the printer.

[collapse]

User Interface

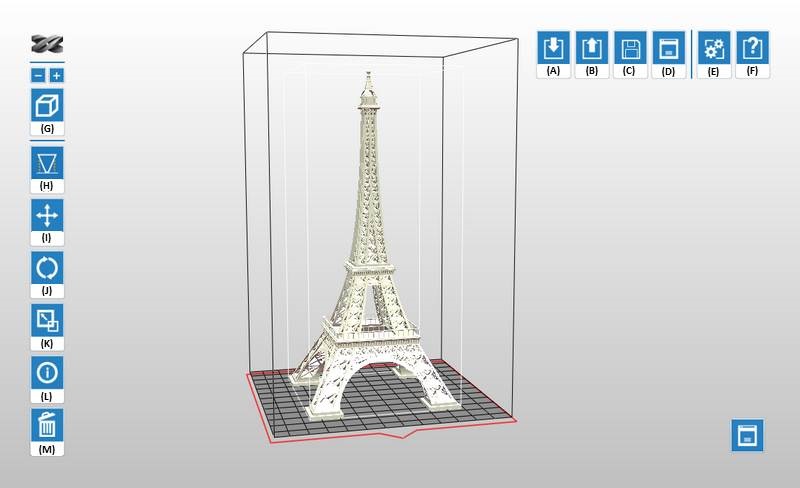
XYZware_Nobel is not only for printing, it also enables basic edits and printer setups. Below is the descriptions of all functions.

(A) Import

Import objects in .stl/.3ws/.3wn format.

Open the file browser and select the files to print.

Note
Only one 3ws or 3wn file is allowed on the workspace.
Tip 
You may also drag the files from a folder into XYZware_Nobel. To load more than one file, press Shift key while selecting the files and drag them into XYZware_Nobel.

(B) Export

Export the objects on the workspace to sliced file in 3wn format. Click here to read the description on each options.

(C) Save

Save as .stl or .3ws file.

Save all objects on the platform to a single stl/3ws file. Any adjustment to the size or placement of the objects will apply to the file.

(D) Print

Setup printing preference and send the objects for printing.

The options are the same as for the Export function. Click here to read the description on each options.

(E) Setting

Setup interface language, display units, printer type, printout scaling, light strength tuning and sign in as XYZprinting member. Click here to read the description on each options.

(F) About

Software and firmware version are displayed here.

To update software or printer firmware, please click in the update/upgrade button in this window. In this section, you can also find the contact information of XYZprinting in different regions.

Tip 
Apply printer firmware and XYZware_Nobel updates when prompt by the software for stable printing performance.

(G) Zoom

Zoom in/out the view.

Zoom in or out the platform to view the details of objects.

Tip
You can also zoom with the scroll wheel on the mouse.

(H) View

Switch views.

Switch views with a click to view objects from different angle.

Tip
You can also drag the mouse to rotate the view.

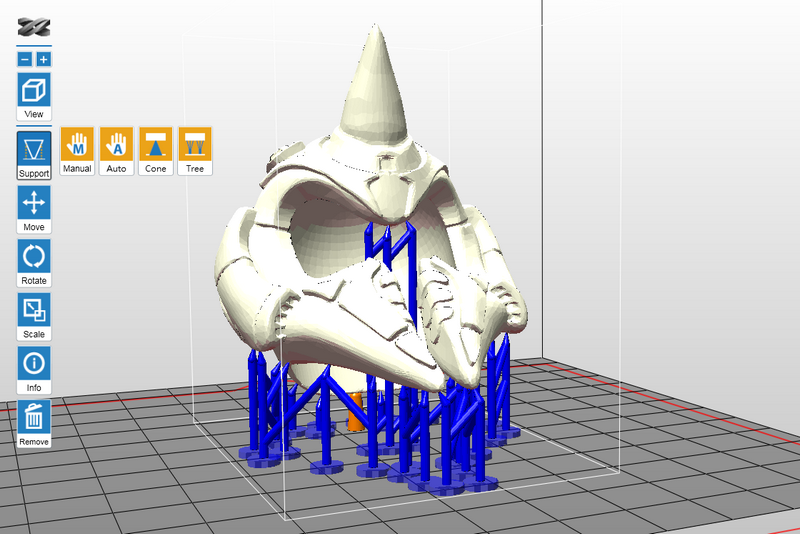
(I) Support

Add supports to overhangs on the models.

Support structure is required under overhangs. It prevents the falling for gravity and the deforming due to the peeling force during printing, and increases adhesion of the model to the platform. Click here to read more.

(J) Move

Move the object along the x, y, or z axis.

You can move the object by dragging the slider or inputting a value in the field by the slider.

Keyboard shortcut
Press and hold ALT key and drag the mouse to move the object horizontally.

(K) Rotate

Adjust the angle of the object around the x, y, or z axis.

Orientation is one of the keys to a successful print. For models of top-heavy structure, with less contact with the platform, or with any larger solid layer, please rotate the model to reduce the effect of peeling force during build process.

To rotate the model, drag the mouse over the circular slider or input the desired angle in center of the circular slider.

(L) Scale

Scale the object as you desire. The adjustment to the object on the platform will not affect the size of your original file.

To scale up or down the model, input the desired size on X, Y or Z axis, drag on the slider bar, or input the scale ratio directly.

Tip
To resize the whole model, be sure to check "Uniform". Unselect "Uniform" if you wish to make non-uniform scaling.

(M) Info

View info of the object.

You can check the dimension and location of the object in this function. For sliced objects, the info window also shows printing related data, including selected printer type, estimated print time and resin volume.

(N) Remove

Remove the object from the platform.

Select an object and click the option to delete it from the platform.

Keyboard shortcut
You can also press Delete key to remove the selected object from the platform.

(O) Printer Monitor

View printer status, including printing progress and the resin level in the resin cartridge.

“My Printer” window shows the information on the connected printer(s). However, only one connection is allowed. To switch to another printer, click “Connect” button below the target printer.

Note
"Wireless Setting" is only compatible with printer model Nobel Superfine.