Grey Resin (E2)

Applicable printer: Nobel Superfine

The dark and opaque color shows the details easily. The material is ideal for general purpose prototyping.
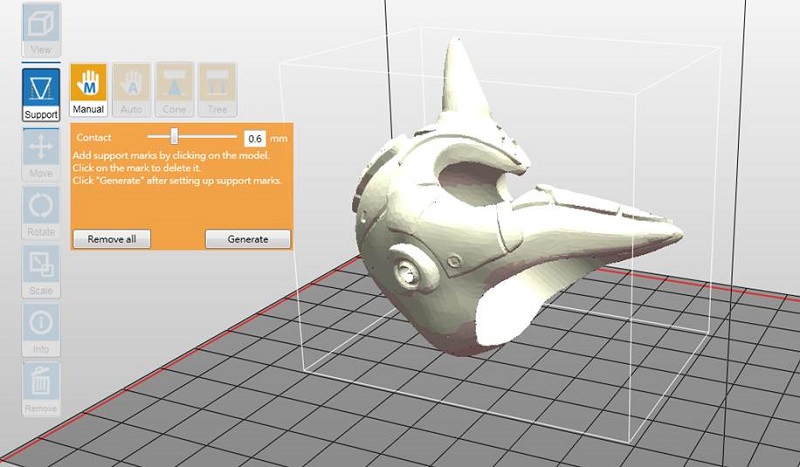
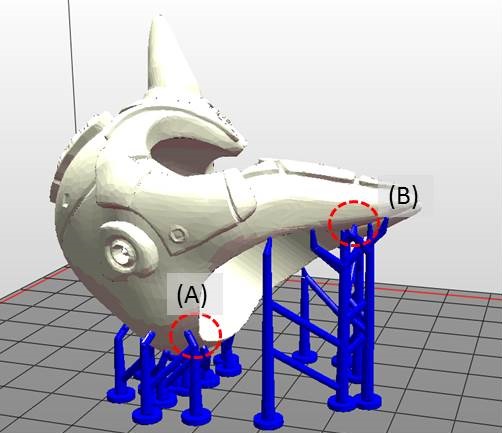
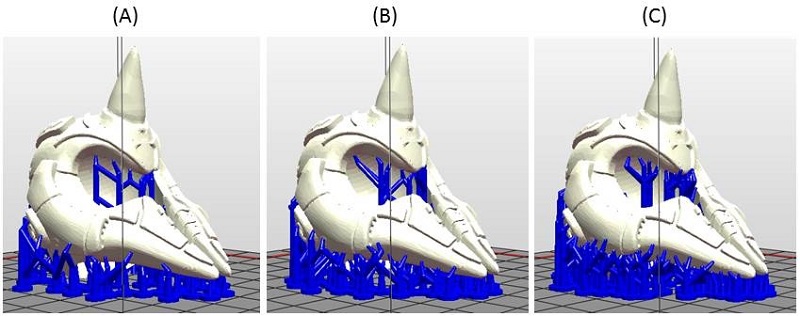
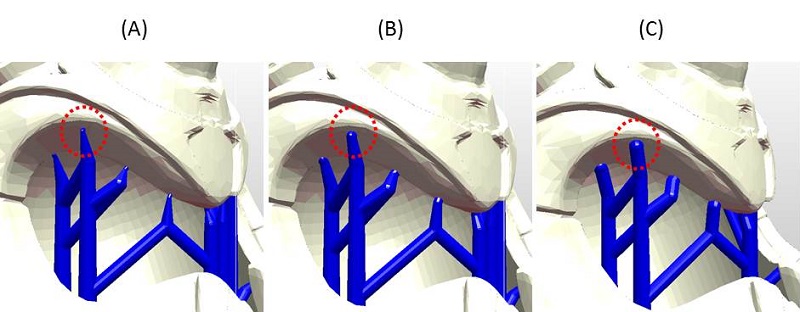
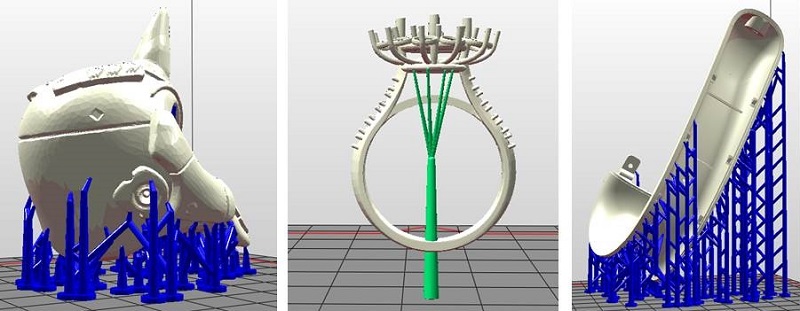
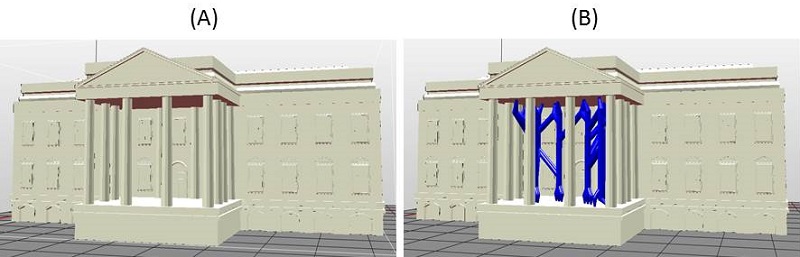
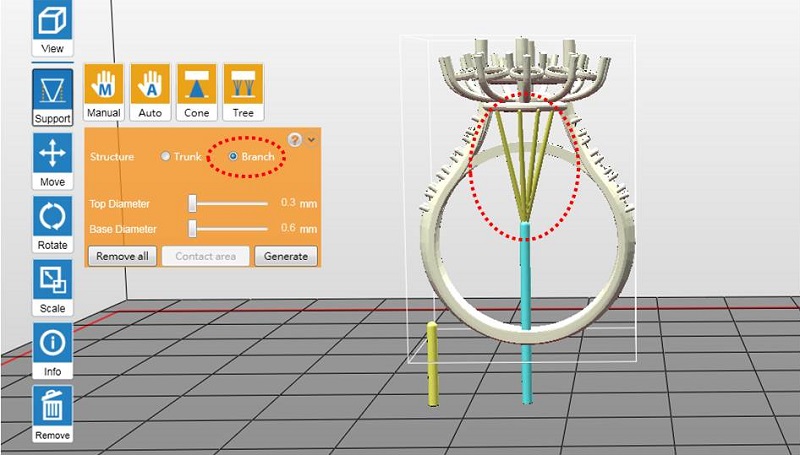
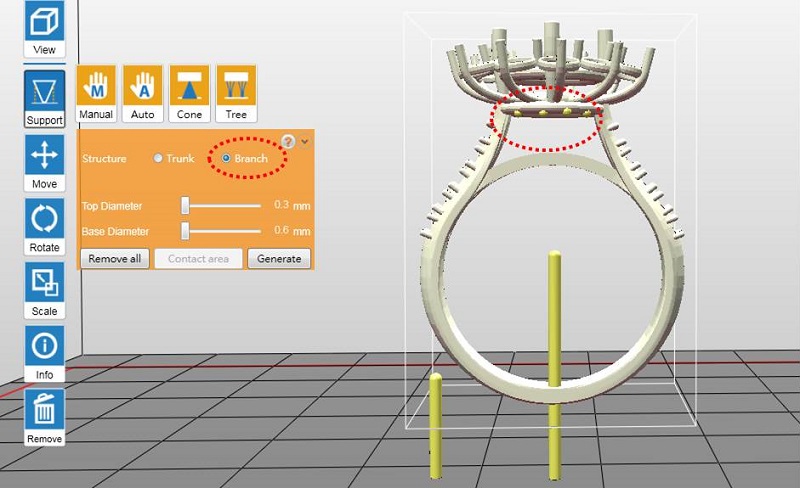
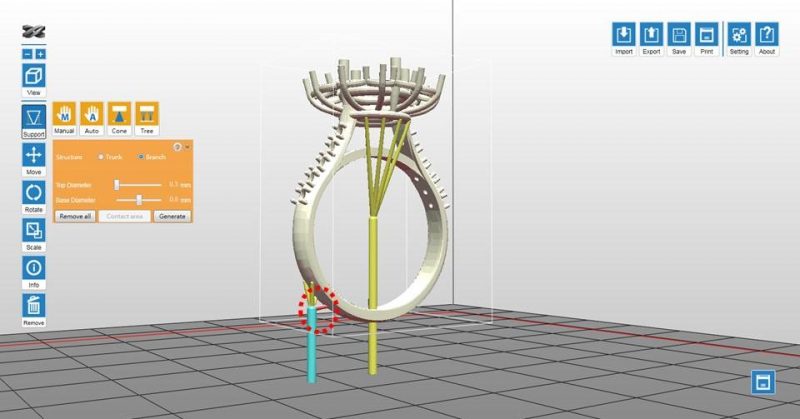
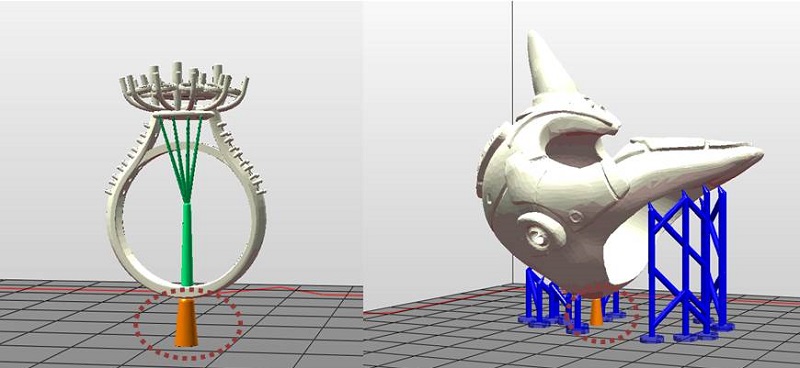
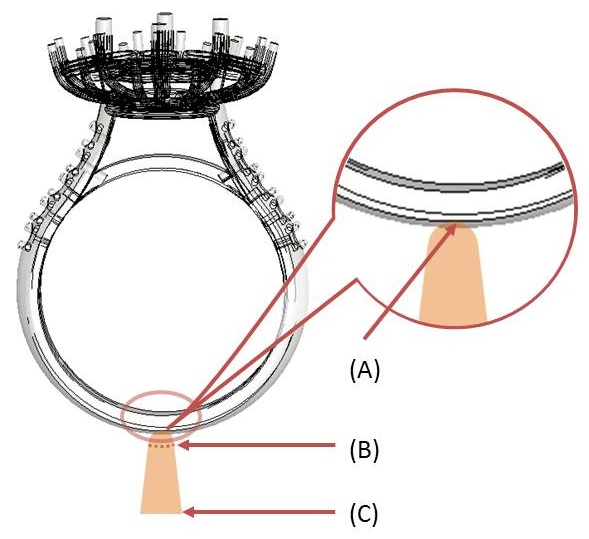
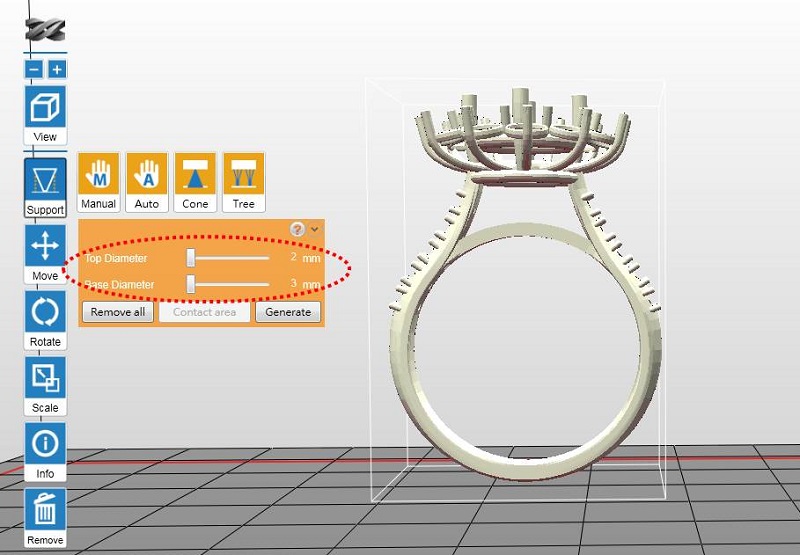
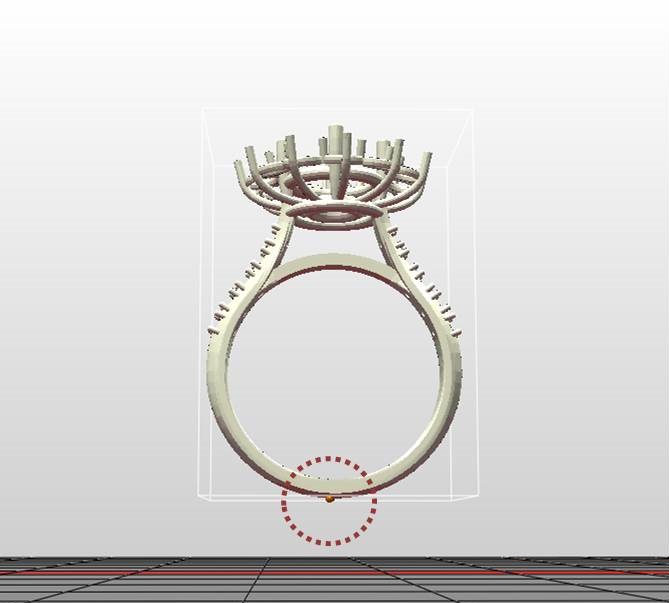
Model Design Tips

For the ideal printing result and the complete output of design details, please follow the design specifications here when designing the models.

Instructions for Use

To ensure the performance of the resin, a homogeneous mixture of the resin is required before starting every print job. Please follow below steps closely before start printing.

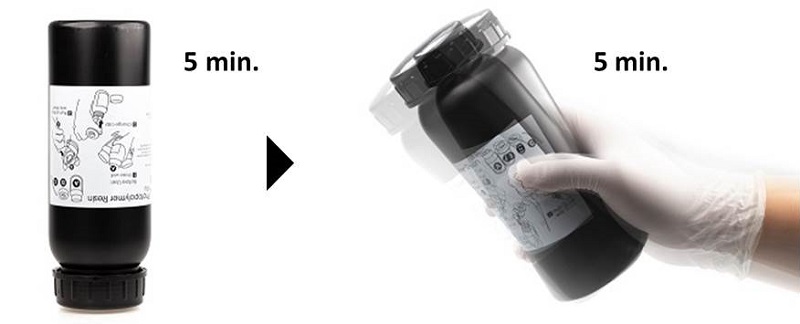
Before Installing a New Bottle

Follow below instruction to ensure the color uniformity of the resin material:

Tighten the original cap closely, place the bottle upside down for 5 minutes, and shake the bottles for around 5 minutes.

Before Every Print Job

Stir the resin left in the tank before starting every print.

Please note that the surface coating on the bottom of the resin tank may be damaged when contacting with sharp or hard tools. Follow below methods to stir the resin.

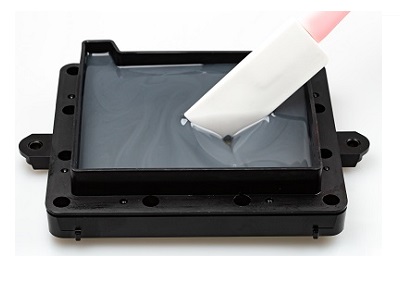
Method 1: Stir the resin with a silicon scraper.

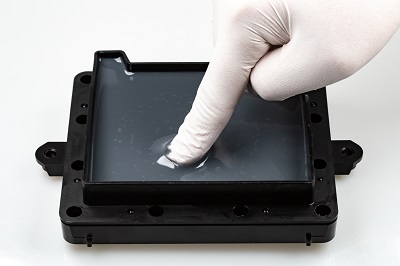
Method 2: Wear impervious gloves and stir the resin with fingers.

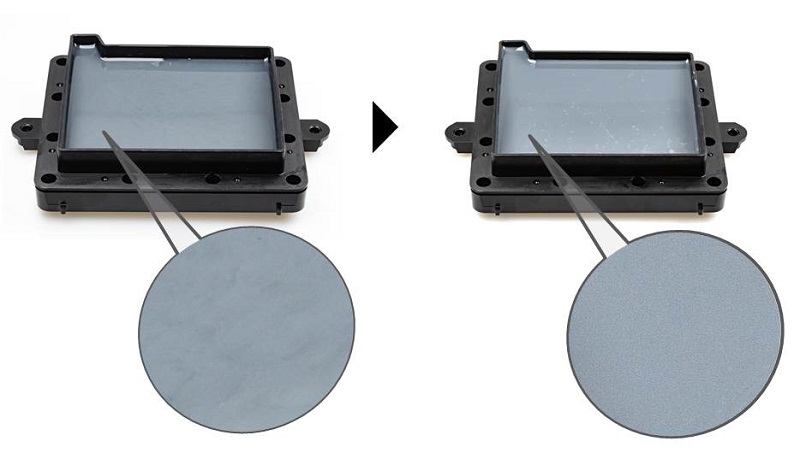
When the resin is mixed thoroughly, it should look like below image:

Note
» Pay special attention when stirring the resin. Avoid scratching the coating on the bottom of the tank.
» Check the resin level in the tank before printing. Fill the resin until the material reaches the "Max" mark on the tank.

» If the resin in the bottle has been left used for more than 24 hours, please change to the original cap and overturn the bottle and shake the bottle for approx. 5 minutes respectively before printing.

Preservation of the Uncured Resin

Uncured resin inside of the resin tank should not be exposed to light. If the resin in tank will be left unused for more than 24 hours, store it in a clean container after it is filtered. Avoid sunlight or UV light exposure.

Pour the resin back into the resin tank prior to the next printing.

Note
» Opaque polypropylene containers are recommended for storing the resins.
» Overturn and shake the container of unused resin for approx. 5 minutes before pouring it back to the tank right before the next print.

Recommendation on Finishing

Please refer to the complete guide here for post-processing.

Manual Mode

You can build the supports from scratch with the manual mode, or use it to adjust the supports generated in the Auto mode.

In Auto Mode, all supports are in the same size at the contact points. However, the size of the contact can be set to different based on the features of the object.

(A) Larger contact may be required for heavy part.

(B) Smaller contact is good enough for holding lighter structure. Also it is easier for post-processing.

To Edit Supports Manually

Step 1: Resize, rotate and/or move the object as the way you want to print it.

However, if you have already generate supports with the Auto Mode, you can only move the object horizontally. Other adjustments to the object will lead to the reset of supports.

Step 2: Setup below settings based on the features of your object.

If supports were added in the Auto Mode, they will be shown as blue dots in the manual editing mode.

To add support, simply select a proper size of the contact point and then click on the model at the overhangs.

To delete support, just click on the support mark (the blue dot).

Step 2: Click “Generate” to finish editing.

Note 
» When there is more than one object on the platform, you will need to select one of the model before you can launch the support options.
» If the object is resized, rotated, or moved vertically, the support structure will be reset. Please set up the supports again.

Auto Mode

In Auto Mode, the software will analyze the features of the model and add support structure to where necessary.

To Add Supports Automatically

Step 1: Resize, rotate and/or move the object as the way you want to print it.

The orientation  of the object is especially essential for a successful print. The above object was rotated to avoid below issues:

(A) Heaviest part is away from the bottom

Objects may drop easily when the heaviest part is away from the bottom due to the peeling force. Also, heavy supports may be required to hold the whole object steadily. The best practice is to rotate your object to move the heaviest part of it to the bottom. 

(B) Horizontal structures

Due to the nature of SLA printing technology, horizontal structures over the platform may result in drooping between supports.

Step 2: Setup below settings based on the features of your object.

Density: Large overhangs will require more support structure. However, more support structure will take longer for printing.

(A) Low density

(B) Medium density

(C) High density

Contact: Thicker contact point will lead to higher strength but it may require more efforts to remove them in the post-processing steps.

(A) Small contact / 0.4mm

(B) Mid contact / 0.9mm

(C) Large contact / 1.3mm

Lift: Lift the objects over the print platform is necessary for those without any flat surface or not suitable for laying on the platform. Be sure to check if the supports are enough to hold the objects on the platform before printing.

Inner Support: For objects with inner overhanging structure, supports will be added when “Inner Support” is selected. However the support at inside may not be removed easily for some structures with small openings, you may consider printing without inner support.

(A) Without inner support

(B) With inner support

Step 3: Click “Auto Generate” to add supports.

Note
» When there is more than one object on the platform, you will need to select one of the model before you can launch the support options.
» If the object is resized, rotated, or moved vertically, the support structure will be reset. Please set up the supports again.
» To change the size or location of individual support structure, please edit it in the Manual Mode.

Tree Support

Tree support is a new support function in XYZware_Nobel. Please update to the latest software to use this function.

Tree supports connect to your 3D objects with very small contact. It is suitable for holding the details on jewelry designs.

Structure of Tree Supports

(A) Contact Area: the area where the tree support connect to the objects. A larger contact area may be required for heavy objects.

(B) Branch: the thin support which contacts the objects directly.

(C) Trunk: the base of the tree support.

To Add Tree Supports

Step 1: Set up the trunk

Click on the desired location on the platform to add a trunk. To move a trunk, click and drag on the trunk. To delete a trunk, click on it directly.

Step 2: Set up the branches

Switch to “Branch” setup. Click on the targeted trunk with a click on it. Click on the overhangs on the model to add branches to the selected trunk.

To delete a branch, click on the thin stick to delete it.

Step 3: Click “Generate” after setting up all marks

Step 4: Adjust the contact area of the branches if necessary

To adjust the contact area of the branches, go back to the function menu “Support” > “Tree”, and select the button “Contact Area”.

Click on the targeted branch (selected branch will change to blue) and drag the slider to adjust the contact area.

Click “Done” once you have adjusted the contact area of all cones.

Tip
To adjust all connected branches to a trunk at once, please click on the button "Contact Area", and click on the trunk to select all branches.

Notice

1. When no trunk is selected, the branches will be shown as yellow marks. Simply click on a trunk, the branch marks will be connected to the selected trunk.


2. Branch mark should be higher than the top of the selected trunk.

3. Branch setting is disabled when no trunk is added. Please set up trunks before adding branches.

4. Branches over 45 degree slope will be shown in red, as they may be displaced in the printing process.

5. Trunk with no branch connected will be deleted while generating the supports.

Cone Support

Cone support is a new support function in XYZware_Nobel. Please update to the latest software to use this function.

Cone support is thicker than the original support. It is ideal for adding  sprues at the base of castable prints. When using cone support as the sprues, simply leave them on the prints for casting.

Cone support also provides better adhesion to the platform, making it helpful for holding the base of heavy objects on the platform. When the cone support is added to the object, it’s recommended to sand it away for better surface finish.

Structure of Cone Supports

(A) Contact Area; a larger contact area may be required for heavy objects.

(B) Top Diameter; minimum diameter: 2mm.

(C) Base Diameter; minimum diameter: 3mm. The base diameter of the support should be at least 1mm larger than the top diameter.

To Add Cone Supports

Step 1: Set up cone marks (shown as orange dots)

Click on the overhangs on the model to add cone marks. To delete a cone mark,  click on the orange dot to remove it.

Step 2: Generate cone structure

Generate cone: click “Generate” after setting up cone marks.

Step 3: Adjust the contact area of the cone support if necessary

To adjust the contact area of the cone support, go back to the function menu “Support” > “Cone”, and select the button “Contact Area”.

Click on the targeted cone (selected cone will change to blue) and drag the slider to adjust the contact area.

Click “Done” once you have adjusted the contact area of all cones.

Notice

1. Cone support is only available when the overhang is at least 6mm above the platform. The software will lift the object when necessary.

2. The diameter of the support is fixed once added. To adjust the support, please delete the mark, change the diameters and add the cone mark again.