Post-process

Post-Process Your Prints

To prepare the objects for the perfect functioning, please follow below instructions:

Remove support structures

Use pliers or other tools to remove the support structure from the cleaned prints to ensure perfect finish.

Empty uncured resin Inside the prints

Hollow prints with uncured resin inside may break as time passes. To ensure the durability of hollow prints, leave a weep hole at the bottom of your 3D design, so you can empty the uncured resin easily.

Post-cure the prints

The post curing process increases the hardness and durability of the printed products.

Resin Tank Cleanup

To remove any residue stuck to the bottom of the resin tank, clean the tank level sensor covered resin, or to clean the tank thoroughly, follow the procedure for cleaning:

Empty the tank

Pour uncured resin in the tank into a clean container. For remaining resin, scrape the surface of the tank gently while pouring the liquid out.

Clean the tank bottom

Scrape off the residue stuck on the tank gently. Avoid damaging the silicon finish.

Clean the tank level sensor

Clean the tank level sensor if it gets stuck. Rinse the sensor with alcohol, or brush it with a soft-bristled brush gently.

Alcohol-bath the tank

Spray alcohol on the tank and the silicon finish, and wait for around 1 minute. Gently scrape residue and pour remaining alcohol left in the tank into the waste bin. Repeat these steps until all residue has been removed.

Dry the tank

The wall of the tank may leave white marks after washed with Alcohol. Wipe the wall of the tank with a lint-free cloth.

As to the bottom of the tank, you can wait until the alcohol evaporates completely.

Note
Replace the tank when it is impossible to remove the cured residues in the tank.


Object Removal & Cleaning

Printed Object Removal and Cleaning

When removing prints from the printer, follow the procedure to post-process the object and maintain your printer.

Remove the platform

Wear gloves before removing the prints. Turn the platform locker counterclockwise until it stops. And pull the platform to remove it.

Note:
Always remove the platform before removing the resin tank to avoid dripping leftover material on printer surface.

Use the scraper to remove the prints

Rinse

Rinse parts in ≧75% Alcohol. Pour alcohol into the rinse basket, shake the print for 10 minutes, then rub it with your fingers thoroughly.

Cleanup and reinstall

Remove any residue in the resin tank. Operate gently to avoid scratching the surface of the resin tank. Reinstall the resin tank after cleaning.
Scrap off any residue and remove excess resin from the surface of the platform. Turn the platform locker clockwise until it stops when reinstalling
it to the printer.
Uncured resin in the tank can be left for future printing. To prevent dust from accumulating on the resin, always cover the lid over the printer after removing any residue from the tank or the platform.

Note:
Place the printer away from direct sunlight or UV lighting, even if the lid is covered, or resin in tank may cure and solidify.

Estructura de Soporte

Se necesita una estructura de soporte debajo de las partes salientes. Impide la caída por gravedad y la deformación debido
al grosor durante la impresión; también aumenta la adhesión del modelo a la plataforma.

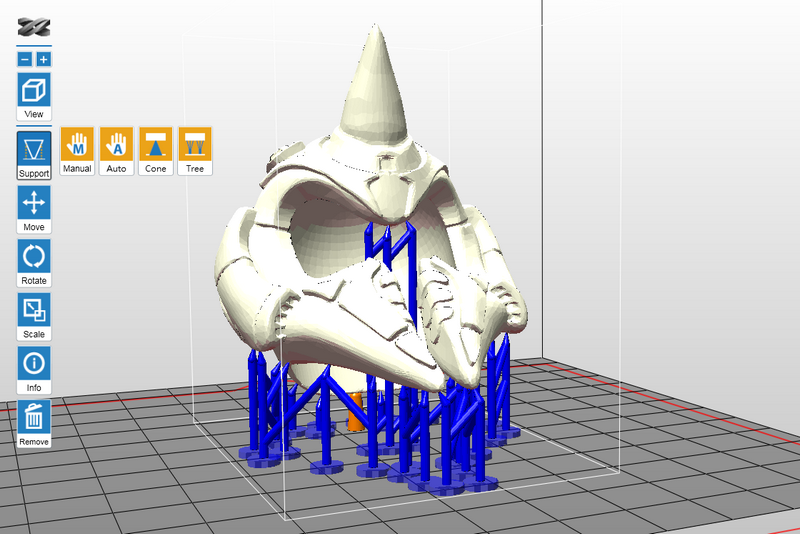
Hay 4 modos de generación de soportes en XYZware_Nobel.

Por favor, haga clic en los títulos siguientes para más información sobre las instrucciones de cada modo.

Modo Automático: el software puede analizar las características del modelo y añadir una estructura de soporte donde sea necesario.

 Modo Manual: puede añadir o eliminar manualmente la estructura de soporte en función de las características de la impresión.

 Soporte de Cono: modo de edición manual para generar soportes más gruesos que los soportes originales.

 Soporte de Àrbol: los soportes de árbol se conectan con los objetos 3D en áreas de contacto muy pequeñas.

Sugerencia
» Puede generar el soporte automáticamente con XYZware_Nobel y, a continuación, agregar o eliminar la estructura de soporte basándose en sus experiencias de impresión. El uso de ambas funciones ayuda a garantizar el éxito de la impresión y puede reducir el consumo de resina y acortar el tiempo de impresión.
» Cuando las estructuras de soporte estén configuradas, podrá guardar el objeto en formato .3ws. Con este formato de archivo, podrá reajustar el diseño de soporte.
Nota
» Si el objeto se mueve en vertical o se modifica el tamaño, la estructura de soporte se reajustará. Configure los soportes de nuevo.

Export / Print

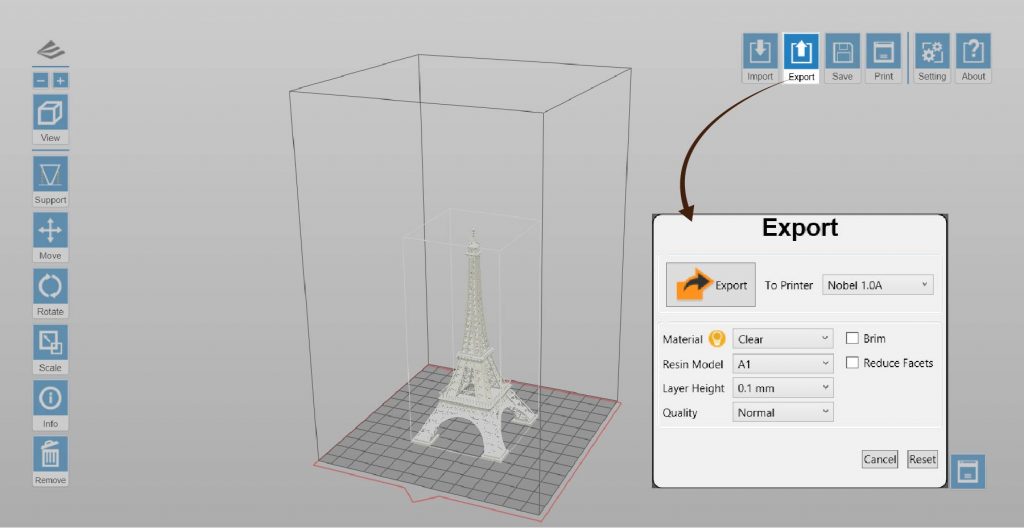
To export your stl file into sliced file or to print, you will need to go through the following setup. Once setting up all items, press “Export” or “Print” to proceed.

Click on below items to read more information on each setting:

Material

Printing setup varies based on the color and material of the resin. Please set the option based on the resin cartridge installed on the printer before printing.

It is advise to include color setting in filename for instant distinction in the future.

Please note that printing will be stopped if the selected resin type doesn’t match the resin installed.

Note 
Detailed instructions on using the resins are available. To read more on the material, click below links or the bulb icon by material. 
» Nobel 1.0/1.0A - Standard resin 
» Nobel 1.0/1.0A - Flexible resin 
» Nobel 1.0A - Castable resin
» Nobel Superfine - Standard resin
» Nobel Superfine - Castable resin 

Resin Model

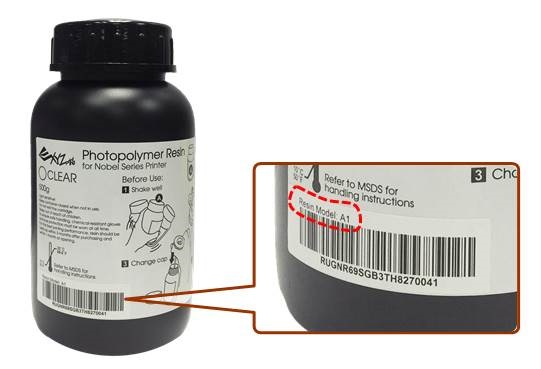
“Resin Model” can be found under “Info”>”Resin status” on the printer and on the serial number label on the resin bottle. For resin bottles without the info of resin model, please select “A1”.

[collapse]
Layer Height

“Layer Height” indicates the resolution of a print at Z axis.

Note
Layer resolution allowed on Nobel 1.0A varies based on the total height of the object.
» 25 microns; maximum allowed height: 50 mm
» 50 microns; maximum allowed height: 100 mm
» 100 microns; maximum allowed height: 200 mm

Quality

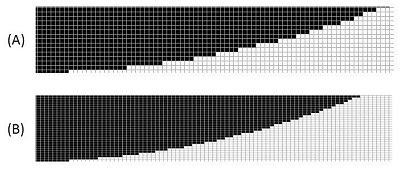
The setting of Quality has impact on the smoothness of the surface of the printout. Printing with Good quality will take slightly longer than normal printing.

(A)Normal quality; (B) Good quality

To Printer

Printing parameters vary from printer models. Select the printer model you are going to print with.

Note
If the selected printer model is different from the printer connected, print job submission will be canceled.

Brim

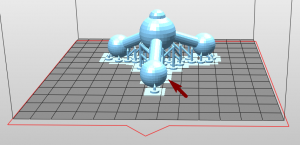
Check “Brim” for the 3D objects that has less contact with the platform to increase adhesion.

Brim will be shown after slicing is finished.

Reduce Facets

Complex 3D models are composed of a large amount of meshes. Enable this function for slicing such models may save the render time as it will reduce the facets to 200 thousand elements. This function can also repair the 3D model when necessary.

Read Before Using

Read the following safety instructions and contents of this manual before use, operation, maintenance, replacement or removal of any parts, components, or materials of the printer.

Safety and Compliance

For the latest information about the Nobel 1.0A 3D Printer and XYZprinting products, please visit XYZprinting website or contact the customer service.
The instructions have been written in order to cover all possible printing scenarios. For scenarios which occur outside the scenarios detailed in the instructions, the user will be held accountable for their own safety.

Important Safety Information

– Do not let children operate this device without adult supervision. Moving parts may cause serious injury.
– Electric shock hazard.
– Do not place the printer on an unlevel or unstable surface. Printer may fall or tumble causing harm and/or injury. Also tank level detection may be inaccurate.
– Do not place any object on top of the printer. Liquid and solid objects that fall into the printer may lead to printer damage or safety risks.
– Please keep the printer, resin, or alcohol away from fire.
– Do not disassemble or replace the printer cover with non-XYZprinting covers.
– Insert and secure the power cord firmly for proper usage and to avoid potential electricity and fire dangers.
– Do not attempt to service the printer beyond the instructions specified in this tutorials. In the case of irrecoverable problem, contact XYZprinting service center or your sales representative.
– Do not place the printer in humid or dusty environments such as bathrooms and high traffic areas.
– Some components of the printer move during operation. Do not attempt to touch or change anything inside before powering off the printer.
– Please keep the lid closed during printing to avoid injury.
– This printer is a Class 1 Laser Product. A Class 3B laser module is used as a light source. Never disassemble the product.
– For optimized printing quality, only use resin supplied by XYZprinting.
– Make sure to set the power switch to the off position and remove the power cord before transporting the device.
– Only use the grounded power adapter and power cord supplied with the printer to prevent possible electrical shocking.
– Please place and use the printer in a well ventilated area. The process of printing will produce a small amount of non-toxic odor. Having a well ventilated area will ensure a more comfortable environment.

Resin Care

– Wear proper protective equipment, avoid raw material contact and vapor inhalation.
– Chemical-resistant gloves should be worn when you make contact with resin.
– Avoid exposing resin to high temperatures, localized heat sources (i.e., drum or band heaters), oxidizing conditions, freezing conditions, direct sunlight, ultraviolet radiation, inert gas blanketing.
– Never pour the waste resin back to the bottle or down the sink, as it may pollute the remaining resin or clog the drain.
– You may pour resin waste into plastic bag and expose it to sunlight or UV light source to cure the resin. The cured resin can then be discarded.
– Avoid dripping resin on anything other than the platform or the resin tank, or the printer may malfunction.
– The stability of printing quality is affected by temperature and humidity. Please ensure that the recommended operating conditions are adhered to (Operating temperature 18-28℃ (64.4-82.4℉)/humidity 40-80% RH; If a different operating temperature is printed on the label on the resin bottle, please adhere to recommended conditions on the label.)

Resin Tank Care

– Due to the nature of the print technology and material, the resin tank may develop cloudy regions overtime where the laser cures the resin frequently and may lead to print fails. Moving the print location around the platform can help prolong the life of the tank.
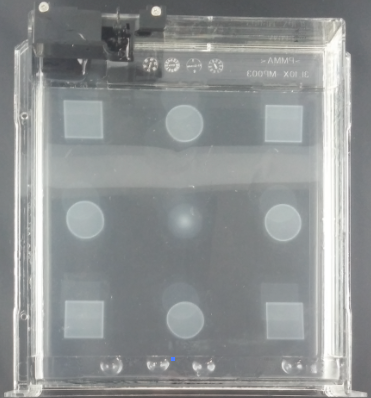
– Avoid printing over cloudy area in the tank. Laser power may be reduced by the cloud. This may decrease the adhesion between the model and the
platform.
– Change to a new tank when over 2/3 of the surface gets cloudy.
– Use an isolate resin tank when using resin of different colors. Mixing resin of different color may affect printing quality.
– Sift any residue or cured debris from the tank with the scraper, high-density filter or other tools. Resin can be reused after filtering.

Copyright

All other trade names and trademarks are properties of their respective owners.

Basic Info

To print with Nobel printers, please first install XYZware_Nobel on your device. “XYZware_Nobel” Installer can be found in the bundled USB drive in the package of the printer or at XYZprinting website.

Note 
Login in XYZprinting member is required to download the software.

Compatible printer model

XYZprinting Nobel 1.0

XYZprinting Nobel 1.0A

XYZprinting Nobel Superfine

System requirements

Windows version   Mac Version
Supported operating systems:
Windows 7, 8, 10 Mac OS X v10.9, 10.10, 10.11, 10.12, 10.13
Minimum system requirement:
32-bit operating system
System RAM: 4GB
Graphics RAM: 1GB (OpenGL 2.1+ compatible)
Hard disk space: 300MB and more
Recommended system requirement:
64-bit operating system
System RAM: 8GB
Graphics RAM: 4GB (OpenGL 2.1+ compatible)
Hard disk space: 1GB and more
System RAM: 8GB
Graphics RAM: OpenGL 2.1+ compatible
Hard disk space: 1GB and more

Supported file type

File Type Description
.stl The file format is native to 3D CAD software. It is widely used for 3D printing.
.3ws After adding supports to the object in XYZware_Nobel, you can save the file in this format. The support layout can be re-adjusted.
.3wn The XYZware_Nobel proprietary file format contains detailed instructions for the printer to follow for each layer. The file is unadjustable. The file type also contains the data of the targeted printer type. When exporting objects to “3wn” format, be sure to select the corresponding printer model in the settings.

LCM Menus

Most operations of the printer are activated with the LCM menus. Below is the description on the function of each item in the menus.

(A) Page 1

(B) Page 2. Press to go to page 2 on the printer screen.

UTILITIES

“Utilities” menu provides the control of the printer. You can instruct to fill the resin tank manually, and calibrate the printer when necessary.
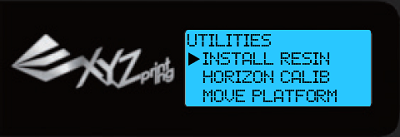
Below is the list of functions under the Utilities menu:

INSTALL RESIN

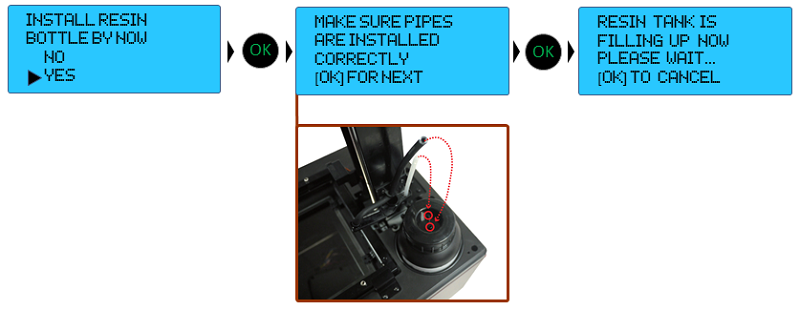
Resin auto filling function is enabled by default. The tank will be refilled automatically when resin level low or empty is detected. You may still activate resin-filling function manually.

Before doing so, make sure the resin bottle, resin tank and the lid are installed correctly.
Select “Yes” and press  to begin:

Note
» “Auto Fill” function is enabled by default. You may skip loading resin manually when auto-fill is enabled.
» Shake the resin bottle well before use to ensure an even color.
» The printer detects the tank level after "Install Resin" is activated. Resin will be filled only when the tank level is low.

HORIZON CALIB

HORIZON CALIBRATION is for calibrate the print platform. Platform calibration ensures the platform is parallel with the resin tank for more stable printing performance. If the platform is not calibrated, objects may fall during printing.

Note
» Click here to read step-by-step instructions on platform calibration. 
» Always calibrate the platform after changing to a new tank or a tank or a platform different the one used for last print.

MOVE PLATFORM

Activate the function when you need to move the platform manually.
Simple select move the platform “to top” or “to bottom” to proceed:

When the platform has moved to the bottom or top as indicated, press  to exit the function.

[collapse]

SETTINGS

The Settings menu allows you to adjust printer settings, including below items:

(A) Page 1

(B) Page 2. Press the down key to go to page 2 on the printer screen.

BUZZER

When the buzzer is turned on, the printer will output an audible signal when a button is pressed. Buzzer is turned on by default.

To switch off the buzzer: Select “OFF” and press to change the setting.

[collapse]
AUTO-FILL

When “Auto Fill” is enabled, the printer will fill the resin tank before printing and when low tank level is detected. With the auto-fill function, you no longer need to manually refill the resin during printing. This is especially useful when printing large objects. “Auto Fill” is enabled by default.

To disable the function: Select “OFF” and press to change the setting.

Note
» Be sure to place the printer on a leveled surface, or tank level detection may be inaccurate. 
» Auto-fill will be switched off when the timeout expires. Timeout may be caused by an empty resin bottle or the tank level sensor soaked by resin. Please replace the resin bottle or clean up the level sensor before enabling the function.

[collapse]
LANGUAGE

You may switch the display language on the printer. The default language is English.

To switch to other language: Select a language and press to change the setting.

[collapse]
ENERGY SAVE

LED back-light of the LCM enhances the readability of the content of the display.

To save energy consumed, the back-light will go off after the printer idles for 3 minutes (shown as 03M on the display) by default. To set a longer time interval: Select “OFF” and press to change the setting.

A. Backlight will never go off.

B. Backlight will go off after the printer idles 3 minutes.

C. Backlight will go off after the printer idles 6 minutes. Select an option, and press to change the setting.

[collapse]
RESTORE DEFAULT

All settings can be reset to factory default with a few clicks.

To reset all settings at once: Simply select “YES” and press to reset.

[collapse]

INFO

Under “Info” menu, you can check the statistics and firmware version of the printer, status of resin bottle installed, and information on XYZprinting.

(A) Page 1

(B) Page 2. Press  to go to page 2 on the printer screen.

STATISTICS

In “Statistics”, you can check the accumulated print time. The accumulated working time for the printer is shown in hours.

[collapse]
SYSTEM VERSION

Firmware version is shown here. To ensure optimal printing performance, it is advised to keep the firmware up to date. To check for firmware updates, please go to XYZware_Nobel.

[collapse]

RESIN STATUS

“Resin Status” provides the information on resin level, and the capacity, color and material of the resin. Press  on the printer to read the second page.

A. Original amount of resin in the cartridge.

B. Resin level in the resin cartridge

C. The color or material type of the resin cartridge installed.

D. Resin Model indicates the resin version. While setting up printing preference in XYZware_Nobel, please select the correct resin model. The info is also printed on the serial number label on the resin bottle. For resin bottles without the info of resin model, the resin model is A1.

[collapse]

SENSOR STATUS

When you encounter exceptional status during the operation of the printer, you may check the status of each sensor here. The information is especially helpful for troubleshooting.

The content may look like this:

How to read the status:

C: 1 – Lid (Top cover) covered; 0 – Lid not covered Z-T: 1 – Platform at top; 0 – Platform away from top Z-B: 1 –Platform at bottom; 0 – Platform away from bottom T: 1- Tank motor in action (Right side of the tank sinks slightly); 0 – Tank motor idling (Tank is leveled) L: 1 – Tank level low; 0 – Tank full or tank not installed Y: 1 – laser engine in action; 0 – laser engine idling

[collapse]

HELP

The URL to XYZprinting website can be found here. You may go to the website for the latest information, product documents, tutorial video and more.

[collapse]


PRINT FROM USB

Insert USB flash drive to the USB drive port at the back of the printer, and select “PRINT FROM USB” on the printer.

Press on the printer to browse the menu, and press to select a file to print.

Note: 
» Please slice the 3D model with XYZware_Nobel and save it in .3wn format. Files in other format or not sliced with XYZware_Nobel will not be shown. (Read more)
» For correct file name display, please name the file with English and Japanese (Katakana preferred) alphabets and numbers.
» Sample files are provided in the bundled USB drive. To print the sample, please slice the stl files with XYZware_Nobel before printing, or selected the sliced .3wn files.

Printer Setup

Tank Installation

Install the resin tank by pushing the tank all the way into its slot.

Calibration

Platform calibration ensures the platform is parallel with the resin tank for more stable printing performance. If the platform is not calibrated, objects may fall during printing.

Note
Click here to read step-by-step instructions on platform calibration.
•Always perform platform calibration after changing to a new tank or a tank or a platform different the one used for last print.

Resin Bottle Installation

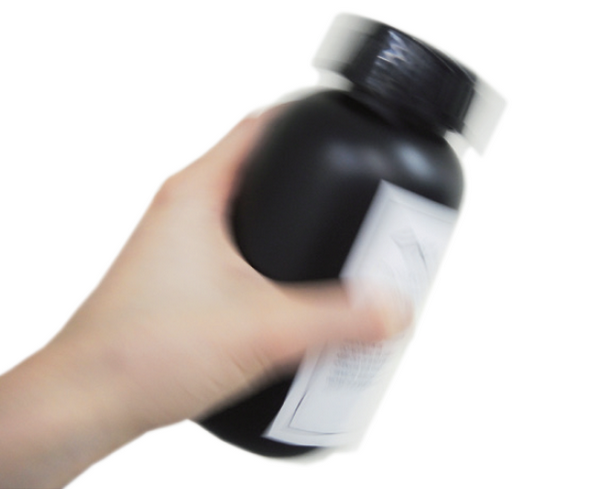
Shake the resin cartridge for about 10 seconds.

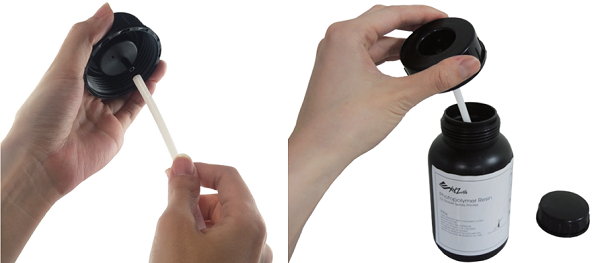
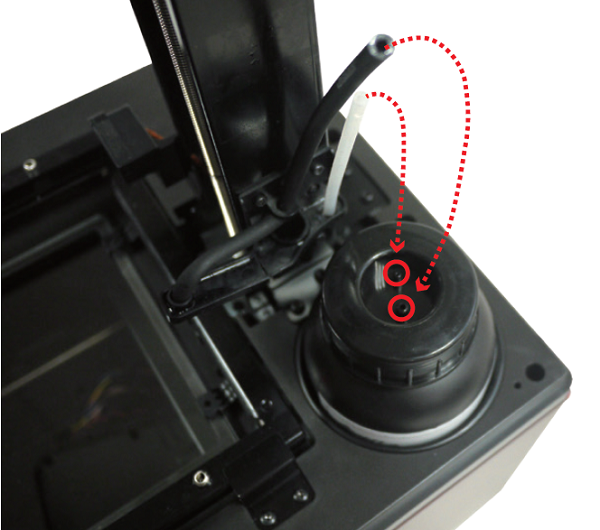
Assemble the nozzle cap and the inner tube and replace the bottle cap with the assembled nozzle cap.

Insert the resin bottle into the cartridge slot and install the filling tubes by first connecting the black tube to the thick nozzle. Then attach the transparent tube to the thin nozzle and push the tube all the way down.

Note
“AUTO FILL” is enabled by default. The resin tank is auto-filled before printing and when resin low is detected. You don’t need to fill the tank manually.
Before changing the resin bottle, please detach the transparent tube from the cap and then the black tube.

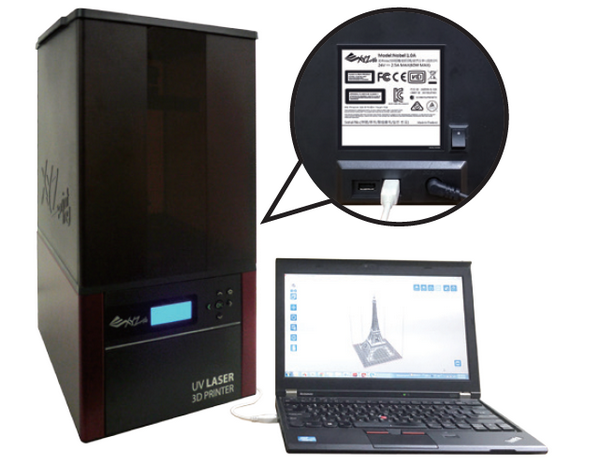
Connect to PC

Connect the printer to your PC via USB wire.

Note
USB wire port is at the back of the printer.

Software Setup

The printing software, XYZware_Nobel, is essential when printing with the Nobel printers.
“XYZware_Nobel” Installer can be found in the bundled USB drive in the package or at XYZprinting website:

Note
Login in XYZprinting member is required to download the software.
Apply printer firmware and XYZware_Nobel updates when prompted by the software for stable printing performance.

Unboxing

Follow the video to unpack your printer.


Note
Keep original packaging material in the event of sending your unit back for repair.

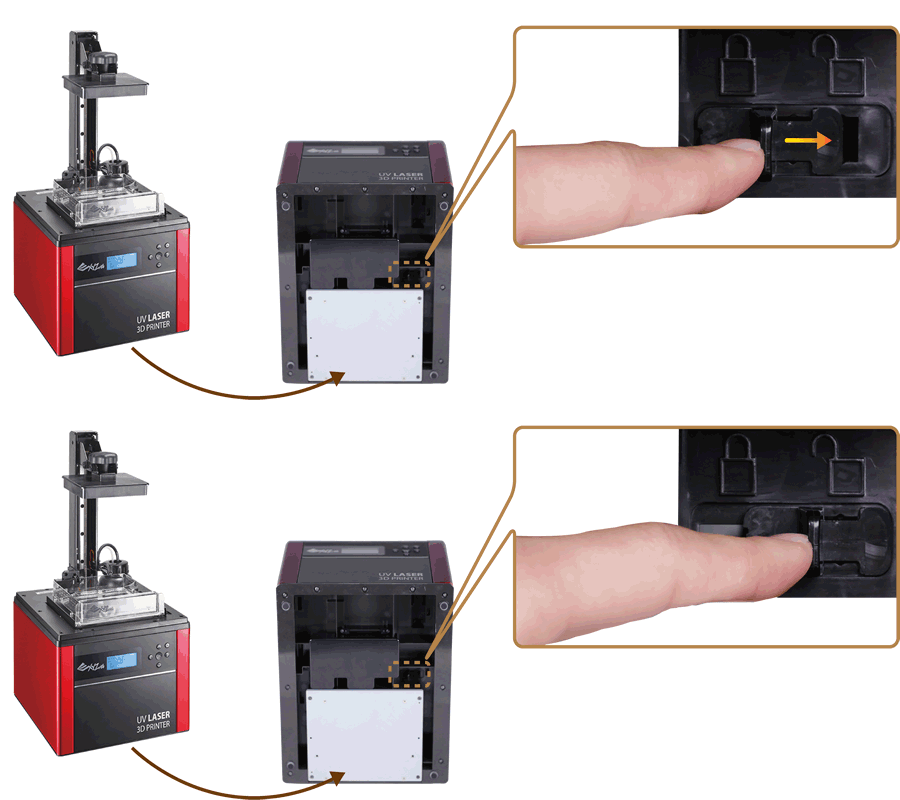
Unlock the printer

Lay down the printer, and release the printing module locker by pushing it to the right.

Accessories

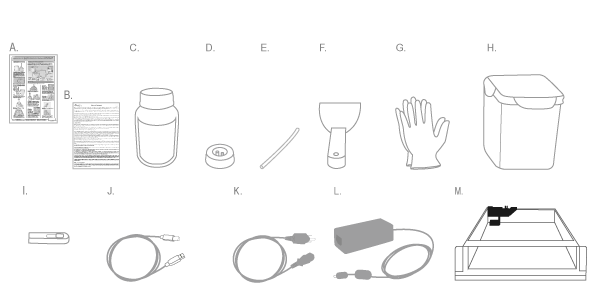
Nobel 1.0A is shipped with the following parts and accessories.

A. User quick guide
B. Warranty card
C. Starter Resin
D. Nozzle cap
E. Inner Tube
F. Scraper
G. Gloves
H. Rinse Basket
I. USB Flash Drive
J. USB Wire
K. Power Cable
L. Power Adapter
M. Resin Tank
Note
After unpacking, please inspect the interior and exterior of the printer and accessories for damage. Please contact support for any missing or defective parts and accessories.

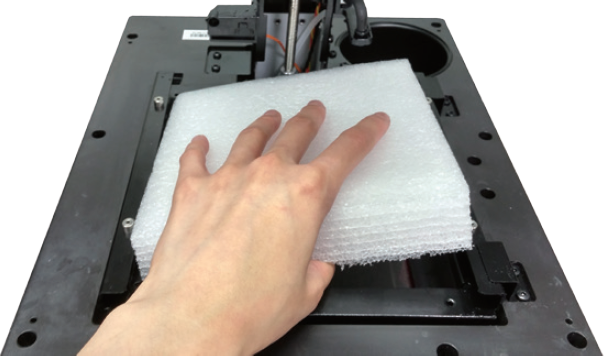
Remove the protective foam under the platform

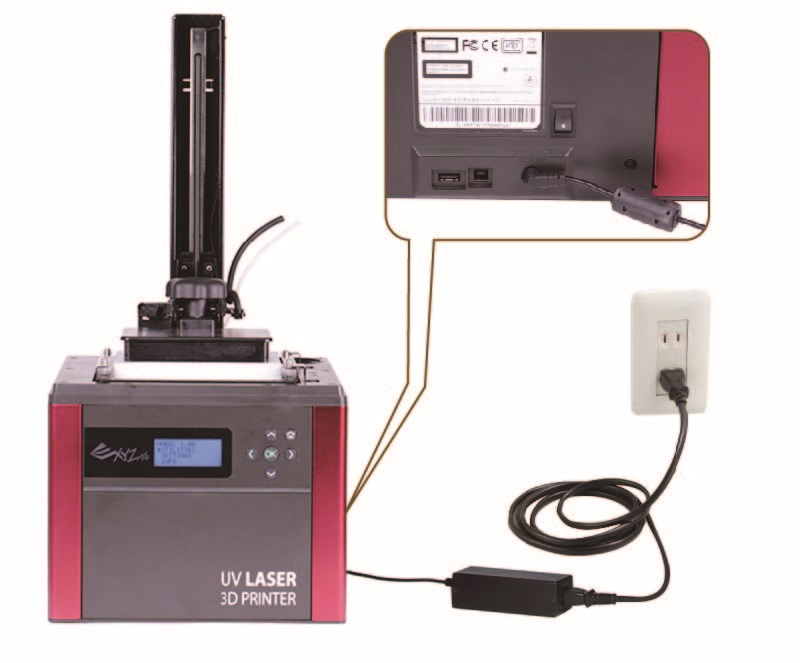
Connect the power source to the printer and power on the printer.


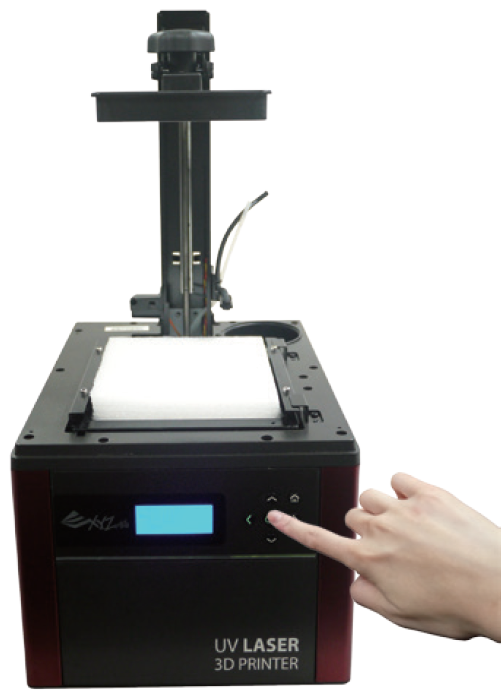
On the printer, select “UTILITIES” > “MOVE PLATFORM”>“TO TOP”>“YES” to raise the platform.

Remove the protective foam from the tank slot.

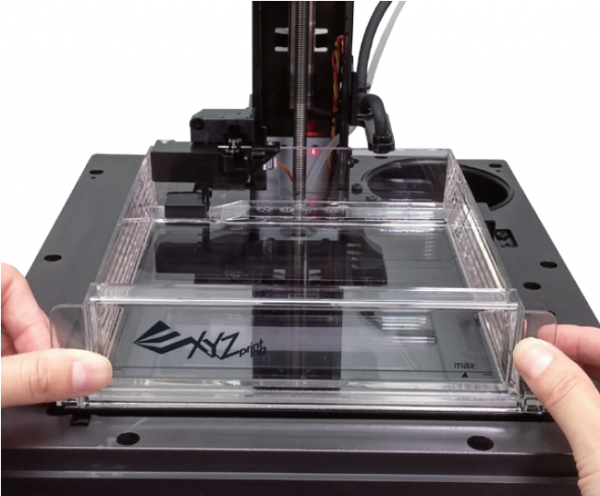
Assemble the lid

Assemble the top case by following the instructions in the box and the video below.


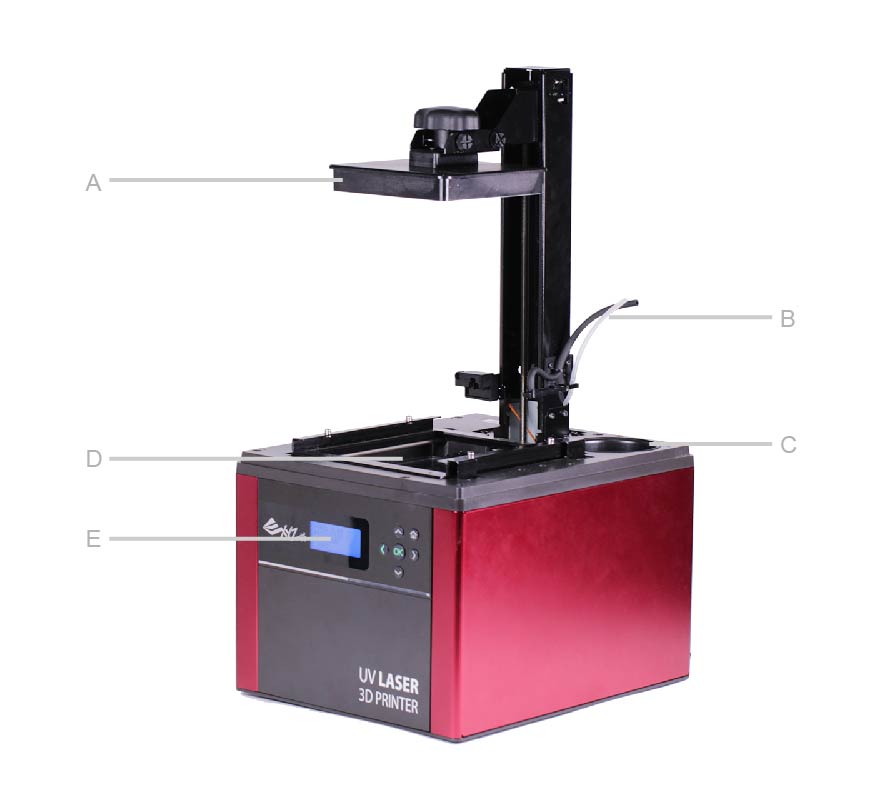
Printer overviews

Below is the list of the main components on the printer.

A. Platform The print bed of the printer.
B. Filling Tubes To be attached to the cap of the resin bottle for filling resin to the tank.
C. Cartridge Slot For holding the resin bottle on the printer.
D. Tank Slot For holding the resin tank.
E. Operation Panel For displaying messages and setting up the printer.

Use the operation panel

To control and maintain the printer, you will need to operate certain functions with buttons on the control panel. Here is the map of the buttons:

A. Move up along the menu
B. Back, cancel selection
C. Move down along the menu
D. Confirm selection and settings, save the settings and exit
E. Select and go to the next page
F. Back to home