XYZmaker tutorial – Airplane part 4

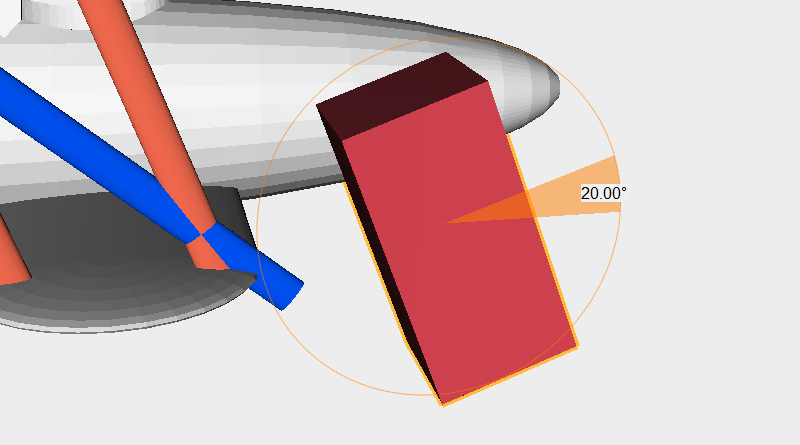 Create a cube and enlarge the Z dimension value to 60mm. Next, rotate the cube 20° along the X axis and call it the cutting part. Change the center support’s color so we can see it more clearly.
 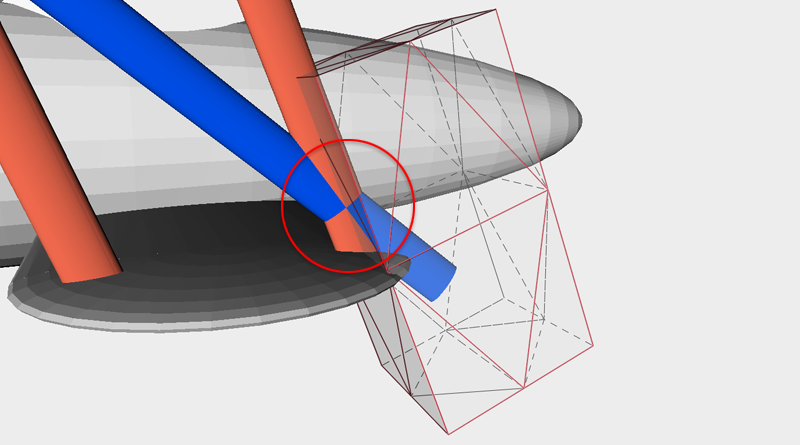 Move the cutting part to the same position as shown in the image above. This will be used to cut the overhanging part of the support. Shown in the red circle above, this area is where you need to check the edge alignment of where the two supports intersect.
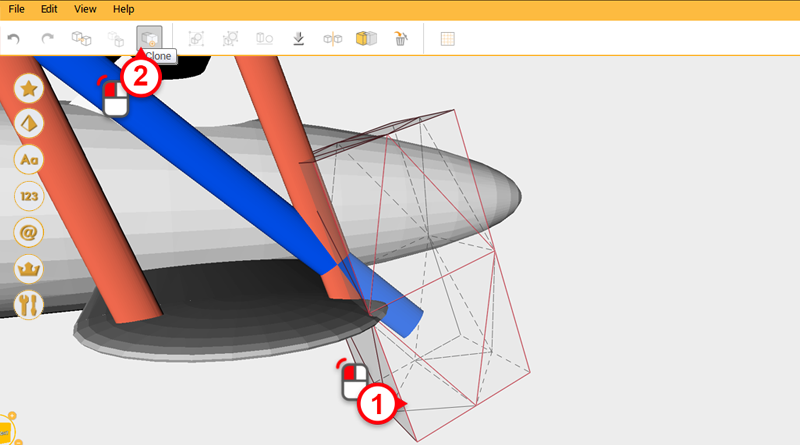
 Select the cutting part and click on the Clone button, move the copied cutting part as shown in the image above. The same as before, this will be used to cut the overhanging part of the support so carefully check the edge alignment of where the two supports intersect.
  When you zoom out, the plane should look as above.
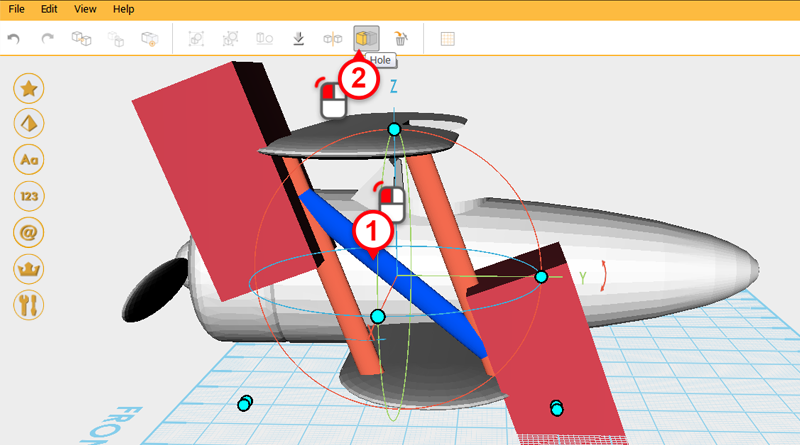
 Select the support in the middle and click on the Hole button. Next, select the bottom cutting part and then press Hole again to remove the part of the support that is overhanging.
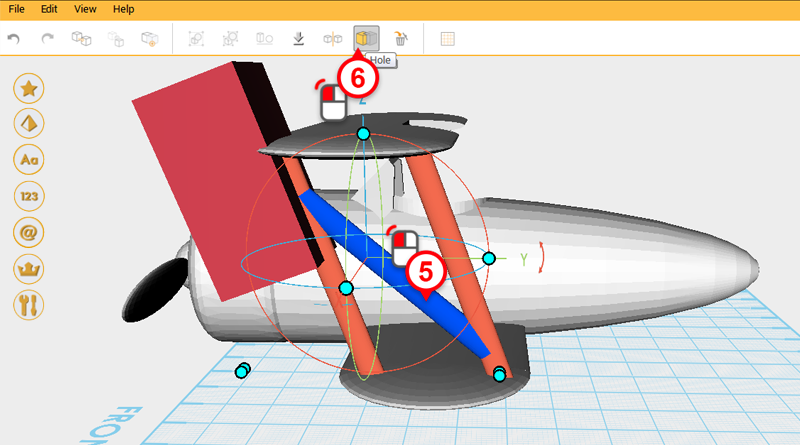
 Use the same method to cut the overhanging material on the other end of the support.
 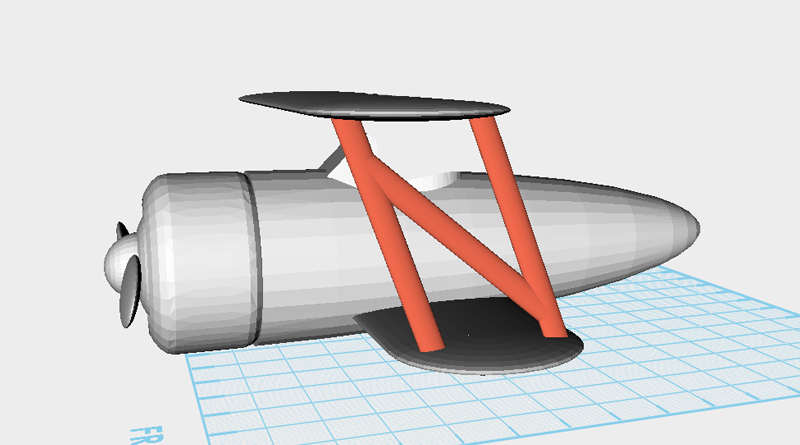 After cutting the supports the model should look as above.
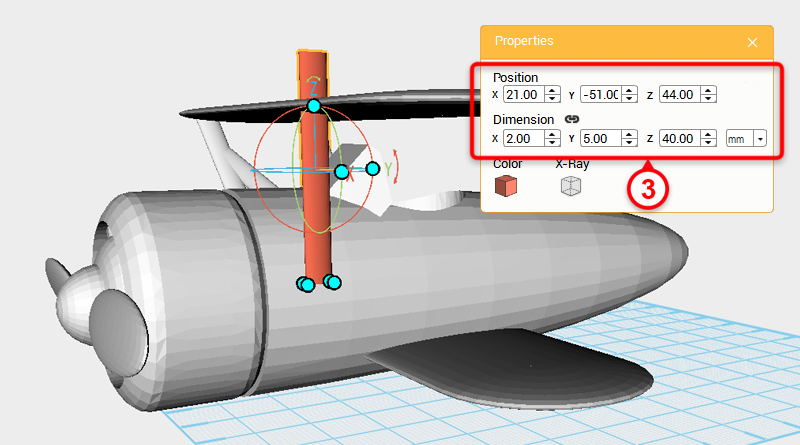 Next, make a support that is closer to the cockpit, for simplicity first copy the support you just created and place it on the other side of the plane. Create a Cylinder and in the Properties window change its dimensions to X: 2,Y: 5,Z: 40 mm and position to X: 21,Y: -51,Z: 44. Call this new part support.
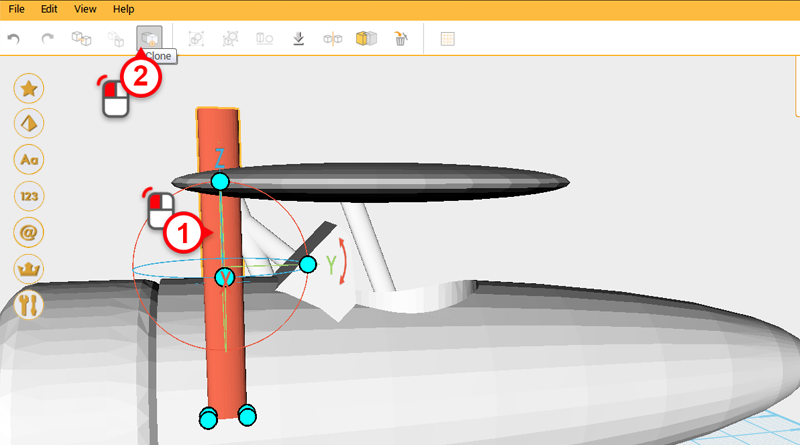
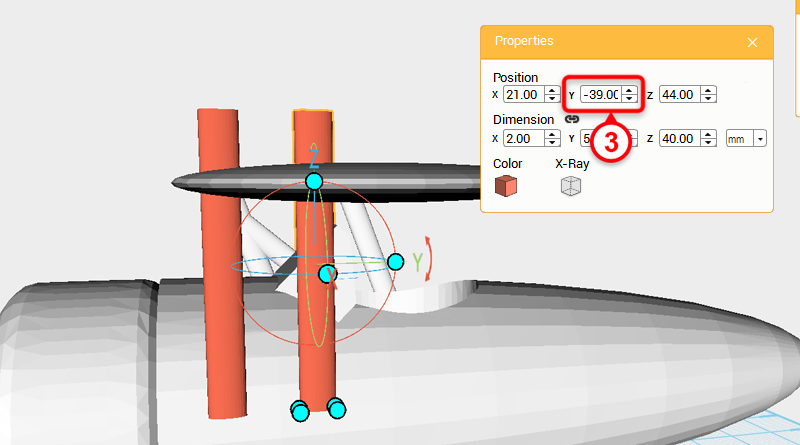 Select support and press the Clone button to duplicate the support. Change this new part’s Y position to -39.
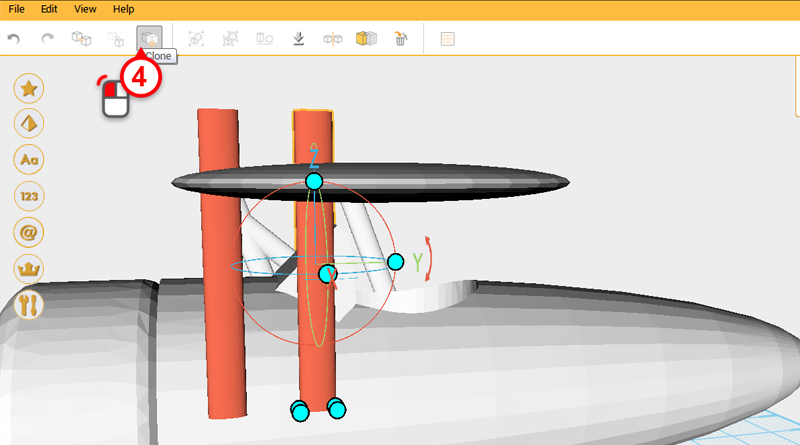
 Select the support again and click on the Clone button. Change the third support’s Y position to -27.
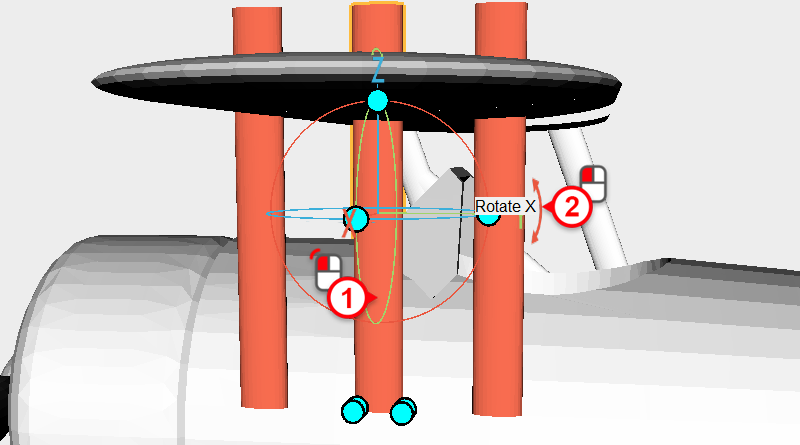
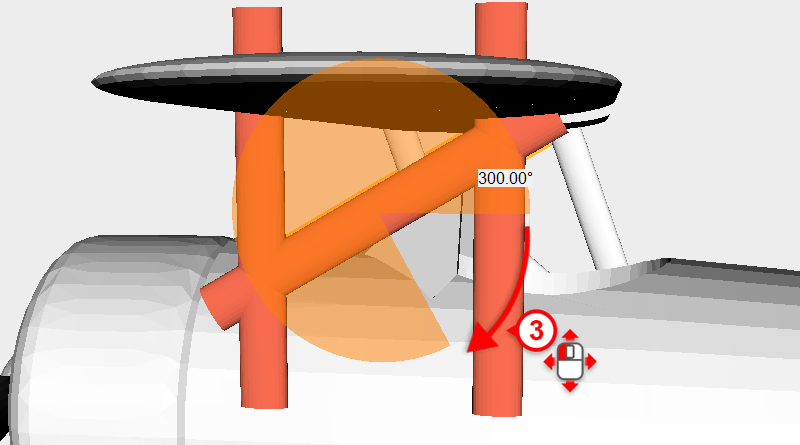 Select the support in the middle and in the control orb, left mouse click on the arrow above the Y axis, with the left button still held down, move the cursor down to rotate the part 300°
 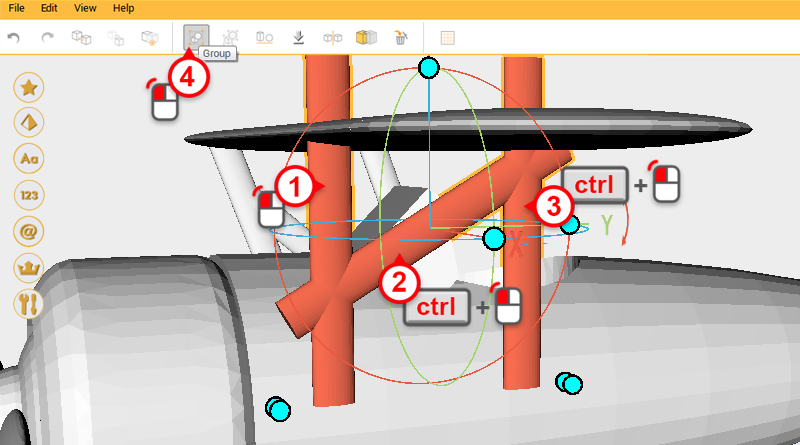 Select the center support and hold down the ctrl key then click to add the remaining two supports to the selection. Click the Group button to group together the three supports.
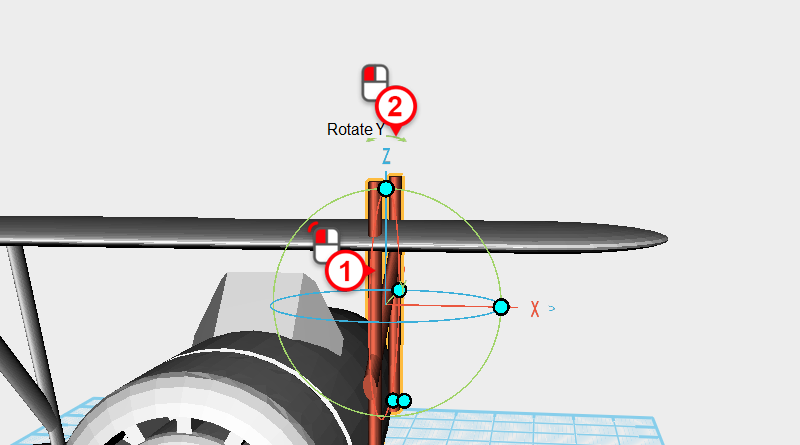
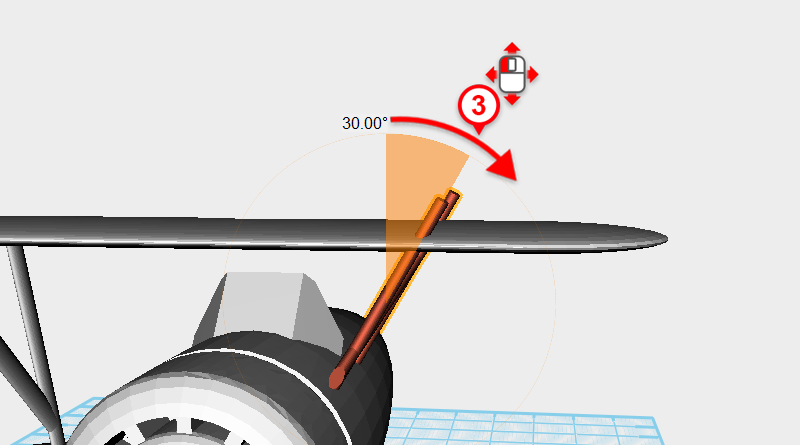 To get a better view of the grouped supports change your viewing angle as above. Select the grouped supports and click and hold the arrow above the Z axis, move the mouse button to rotate the part 30°
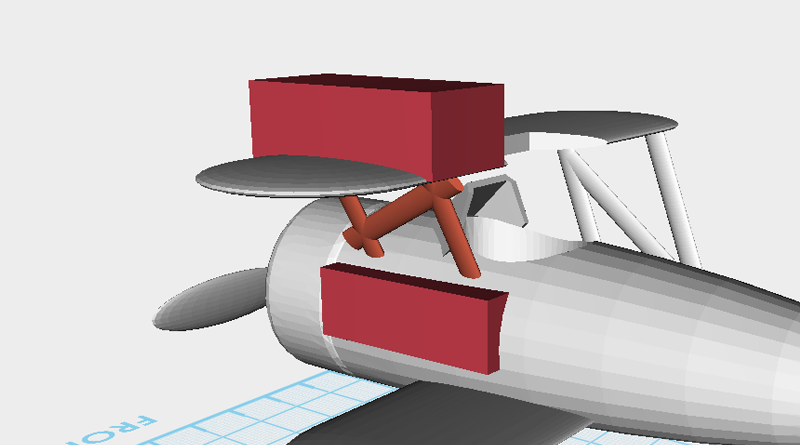
 Next, cut away the overhanging supports. Create a cube, adjust it’s size and make it cover the unwanted areas as shown in the image above. The bottom edge should be roughly in the center of the plane wings. Call this part the cutting part.
 Select the cutting part, and click on the clone button, move the duplicated part so that is overlaps the other end of the support – refer to the image above.
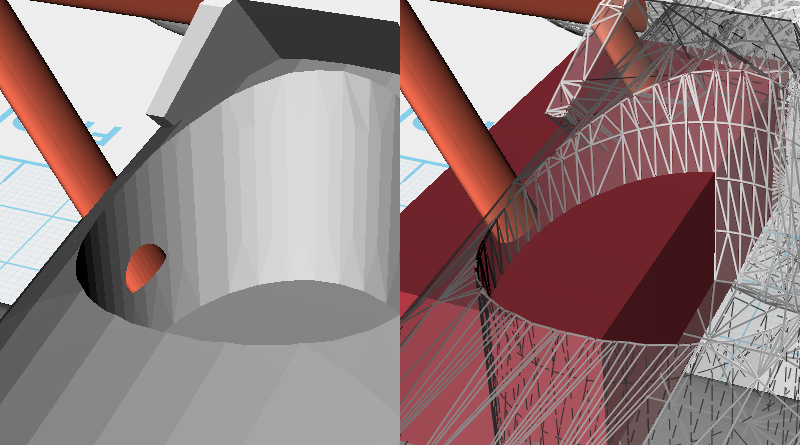
Tip: When you're creating cutting parts, you can use the Properties window X-ray function button to make the part transparent so that it is easier to inspect.
 The two cutting parts should be in the same position as the image above.
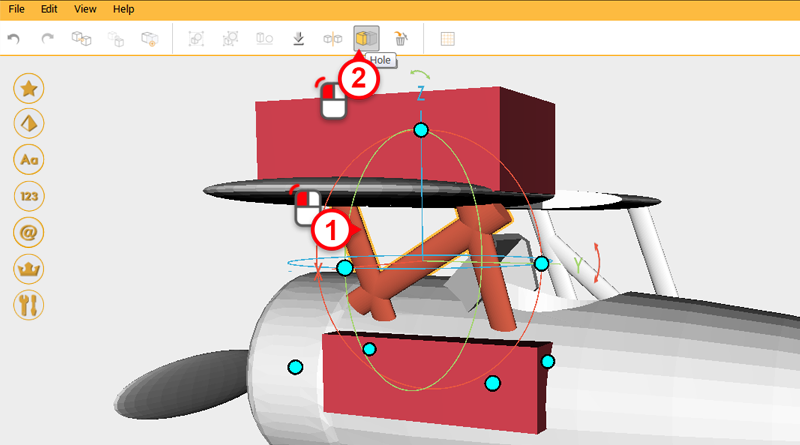
 Select support and click on the Hole button, then click on the upper cutting part and click the Hole button again. This will cut away the overhanging sections.
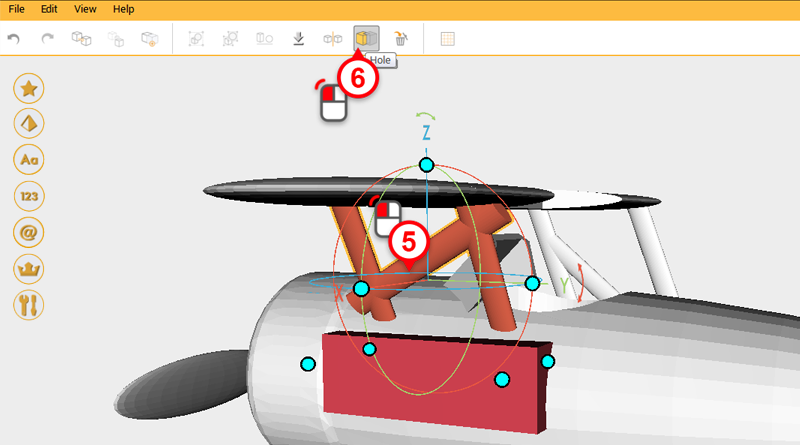
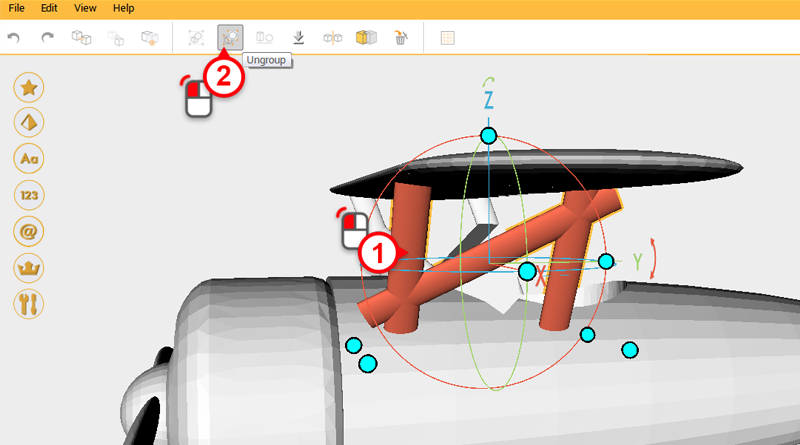 All that is remaining is the two overlapping parts on the left and right of the support. Because you only need to remove material from the support crossbeam , you need to first ungroup the supports. Select support and click on the Ungroup button.
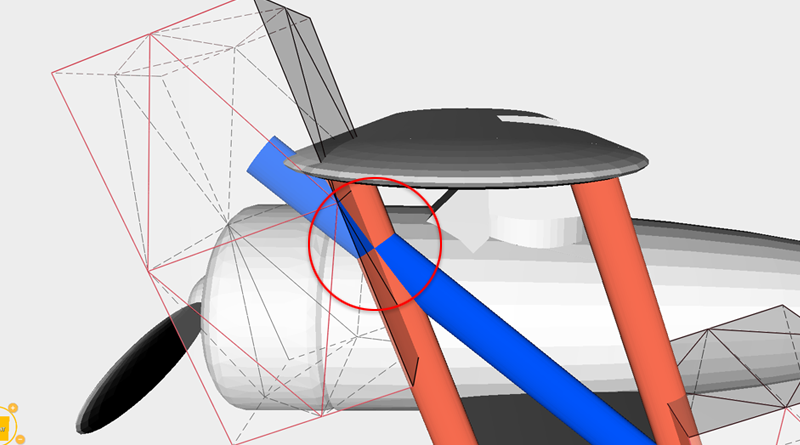
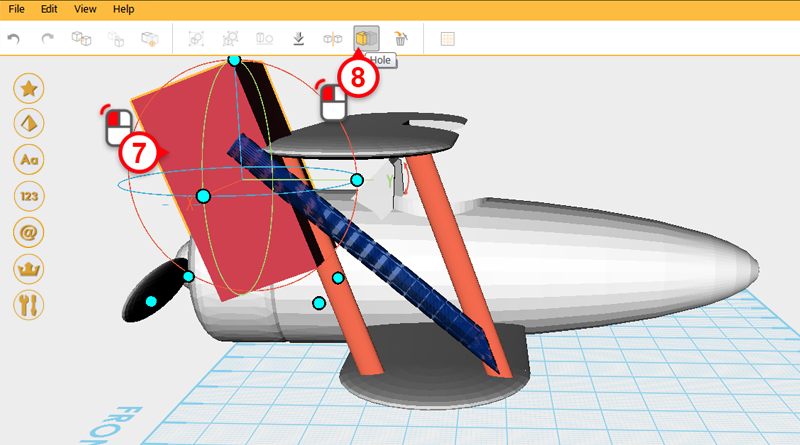
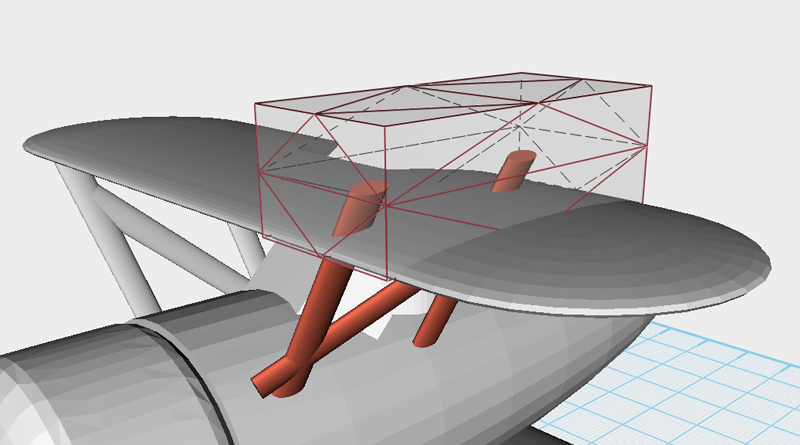
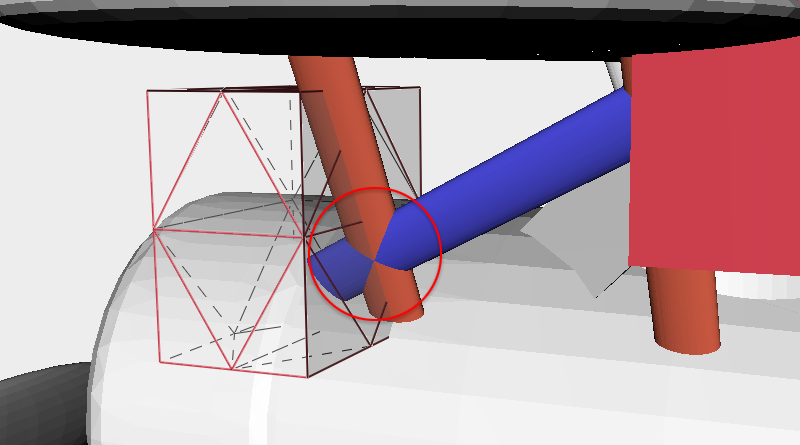
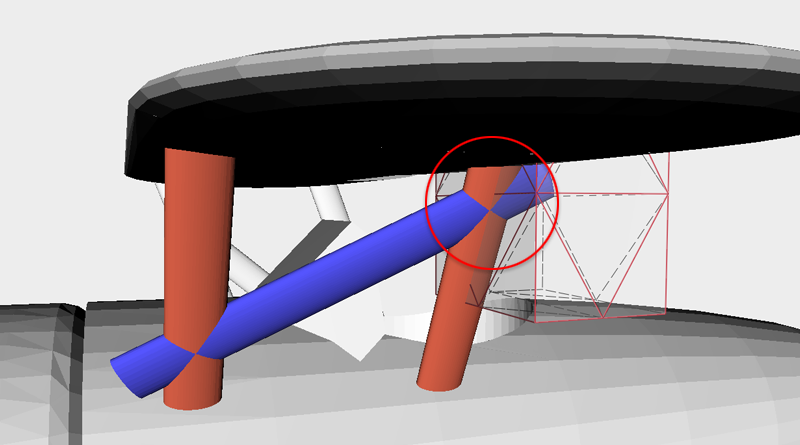 First change the support crossbeam’s color so that it is easier to inspect. Now create a cube called cutting part. Alter the dimensions and move it to the position shown in the image above so that it overlaps the areas that you don’t want. As shown in the red circle, ensure that the cutting part’s edges are as close as possible to where the two supports intersect.
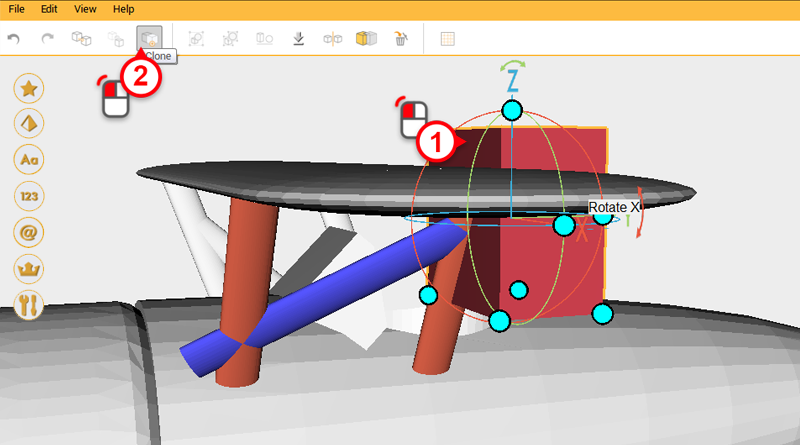
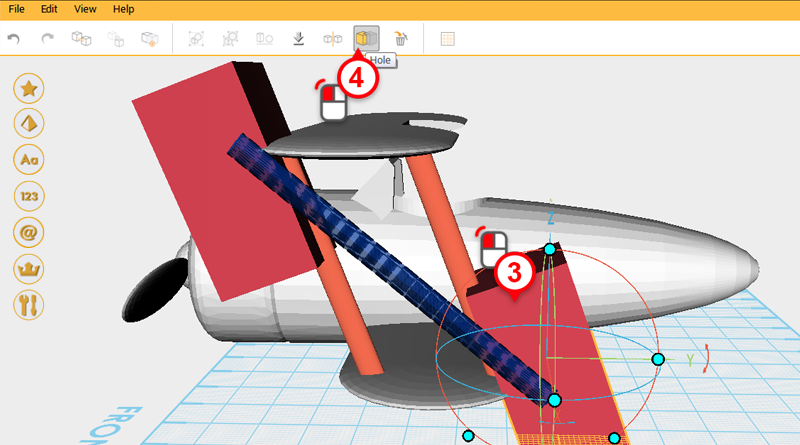
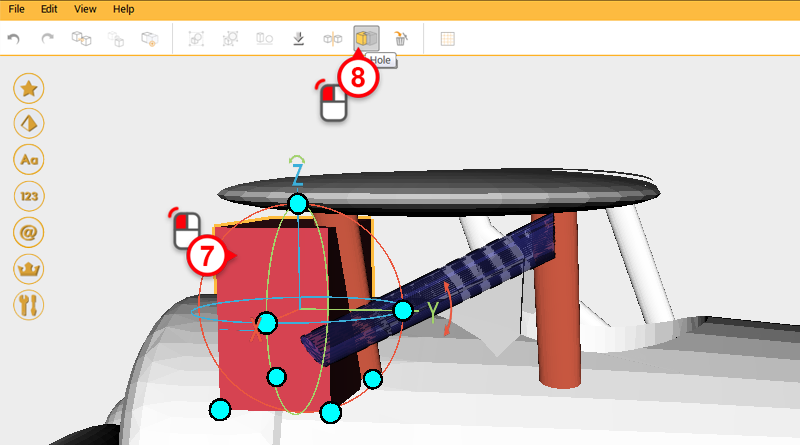
 Clone the cutting part and move it the other end of the support crossbeams. The same as before, make sure that it overlaps the areas you don’t want, and that the cutting part’s edges are as close as possible to where the two supports intersect.
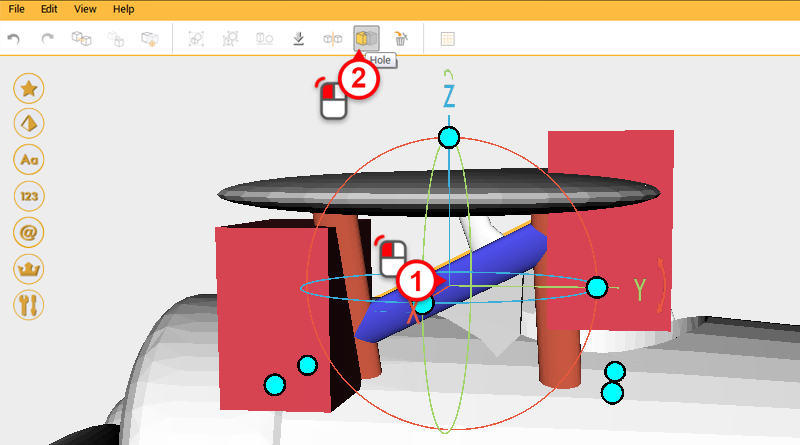
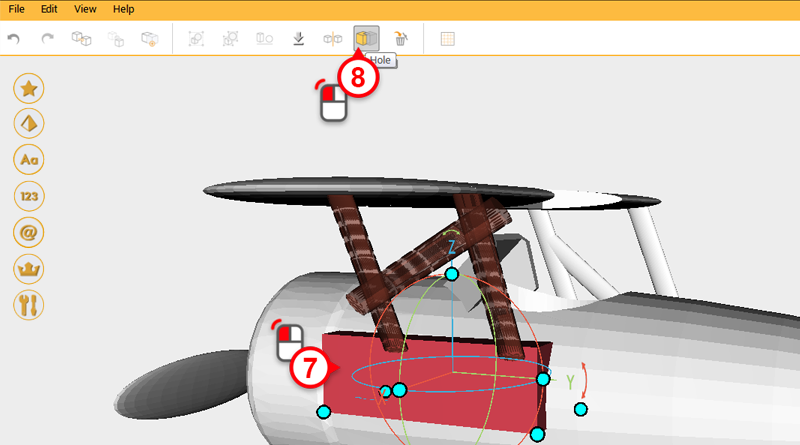
 Select the support then click on the Hole button, now select the cutting part on the right and click on the Hole button again to cut away the overlapping support.
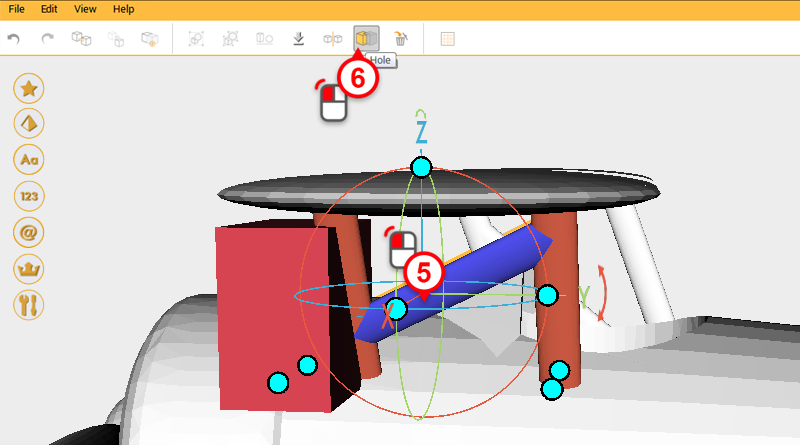
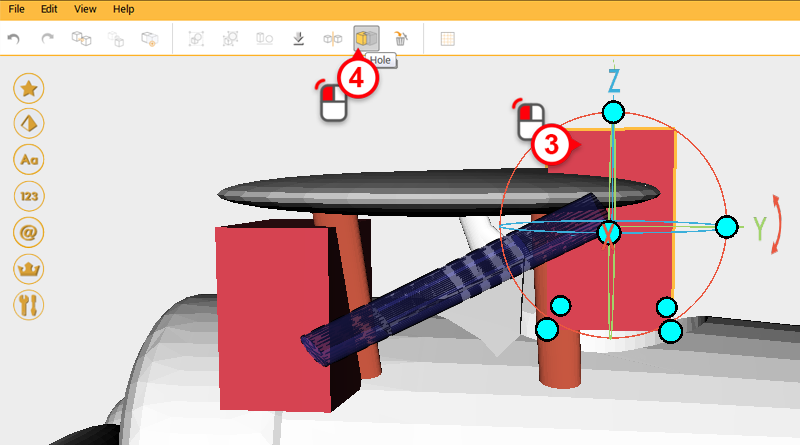
 Select the support again and click on the Hole button, click on the left-hand side cutting part and click on the Hole button again to cut away the overhanging part.
 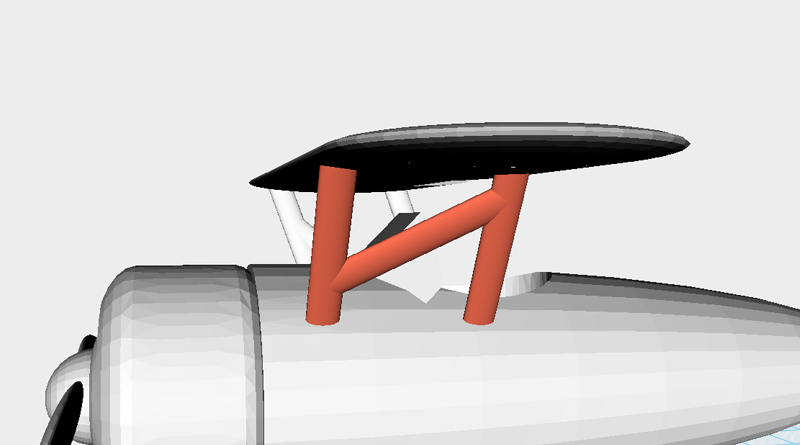 After finishing the support, it should look the same as the image above.
 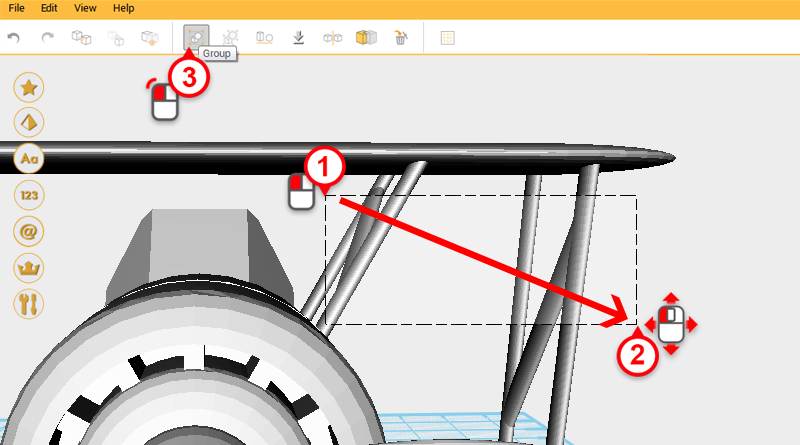 Take the support you just finished and move it back to its original position, drag select all the supports and click on the Group button. The Right-hand side supports are finished.
Tip: If you accidentally selected a different part, press and hold the ctrl key then you click on the part to deselect it.
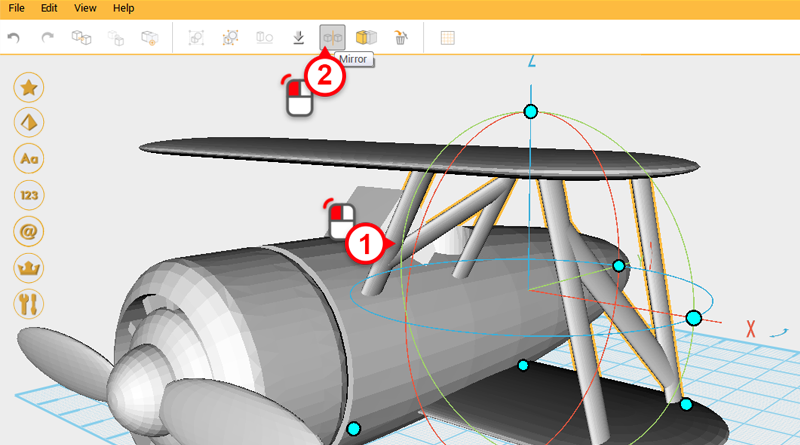
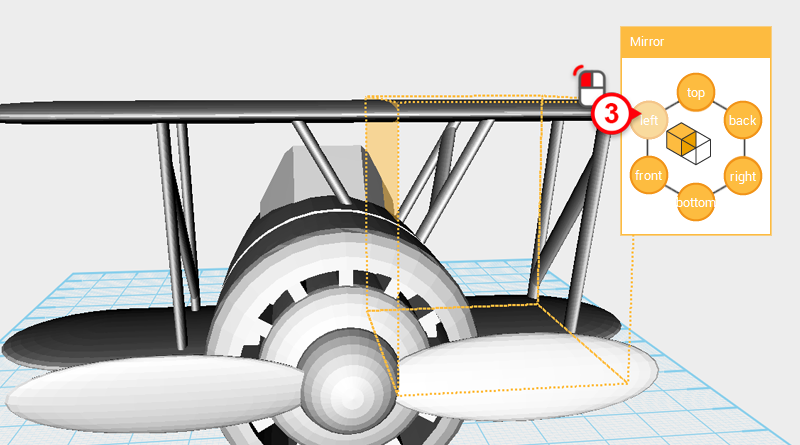 Select the right-hand side support and click on the Mirror button. In the Mirror Properties window click on the Left button to mirror the supports and make Left-hand side supports.
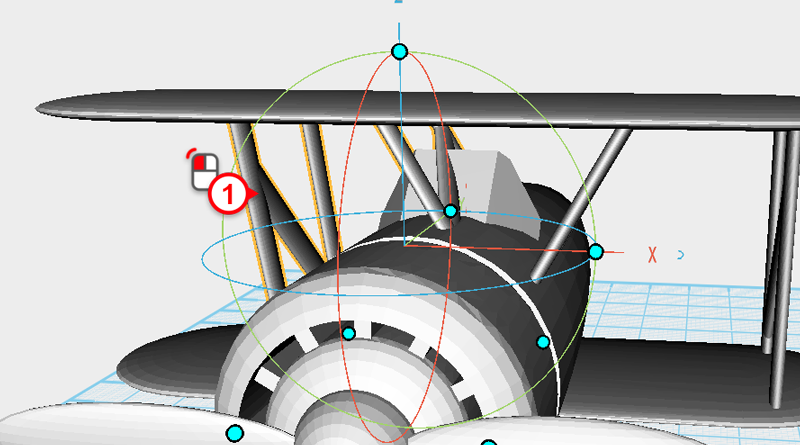
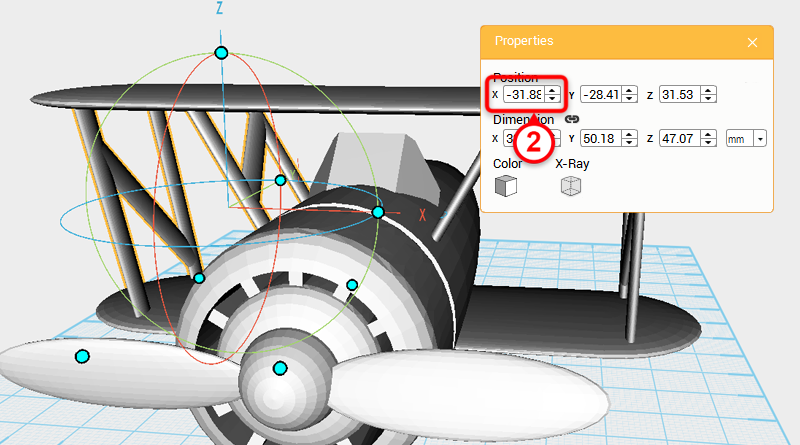 Select the left-hand supports and change the group’s X axis position to -31.88.
 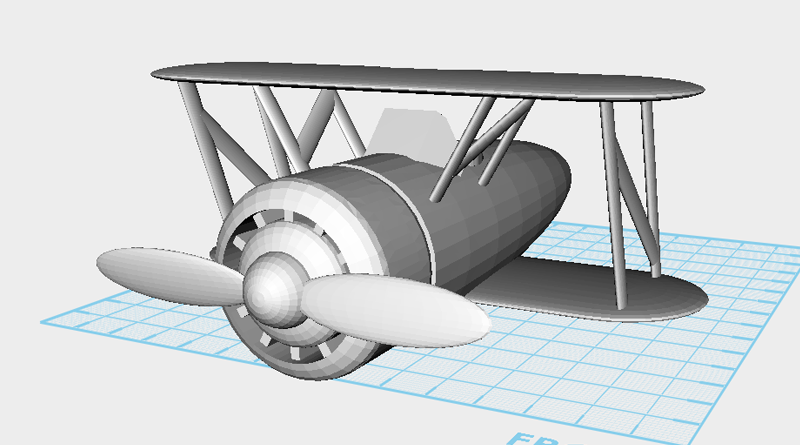 At this stage the model should look like this.