XYZmaker mobile에 관련 하여

Last updated on September 20th, 2018 at 09:06 am

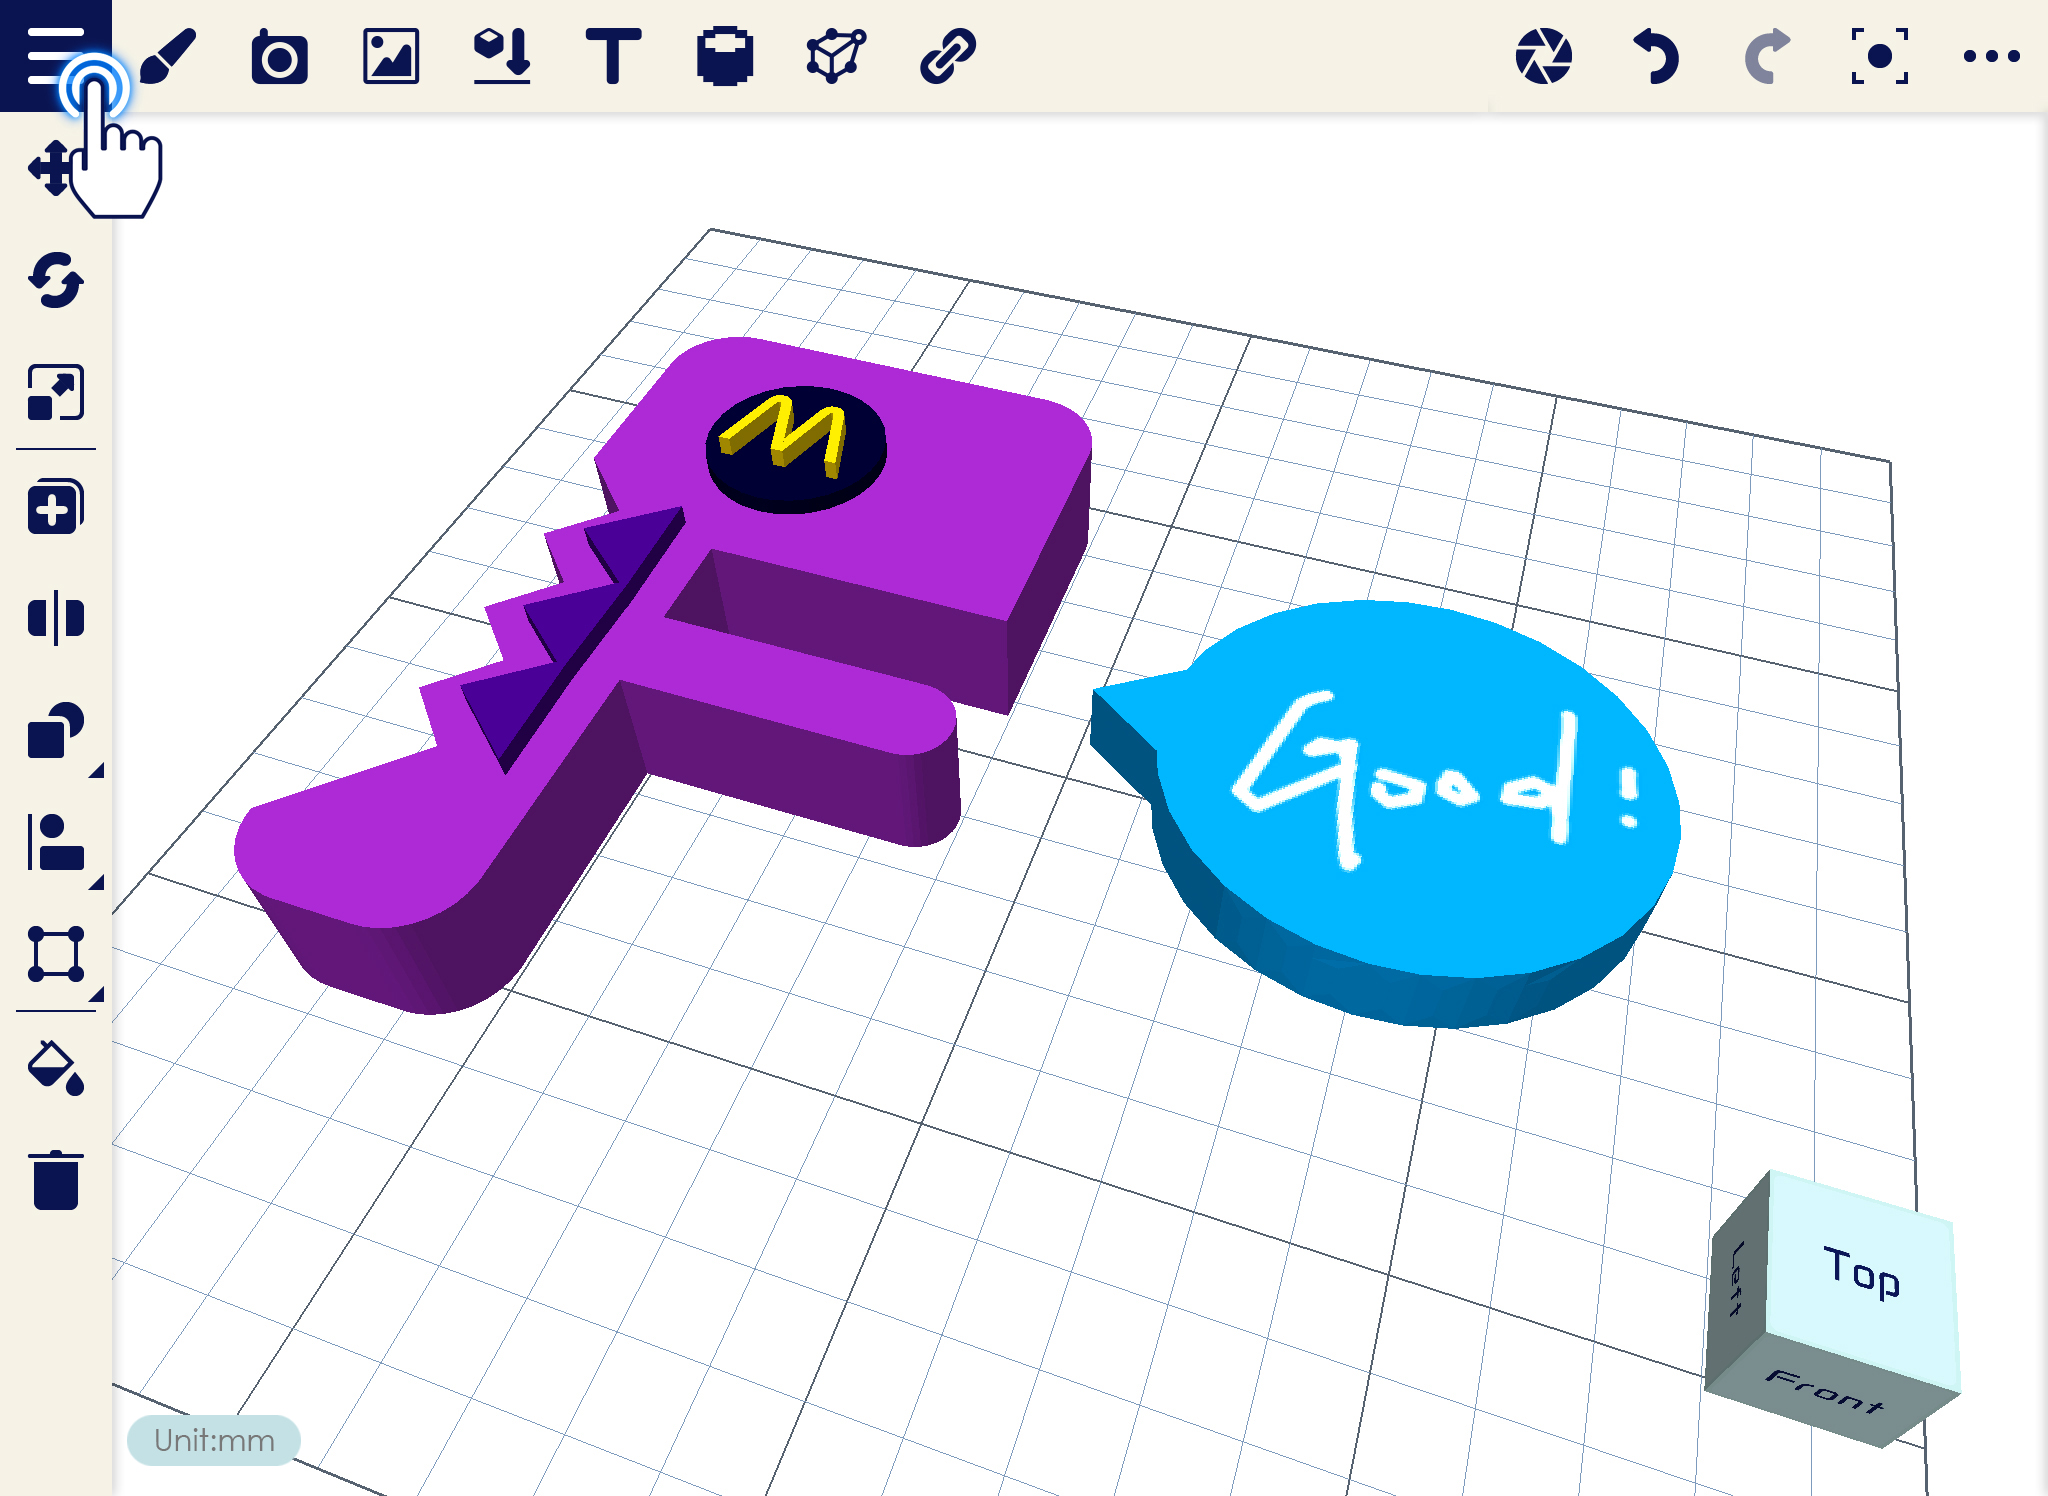
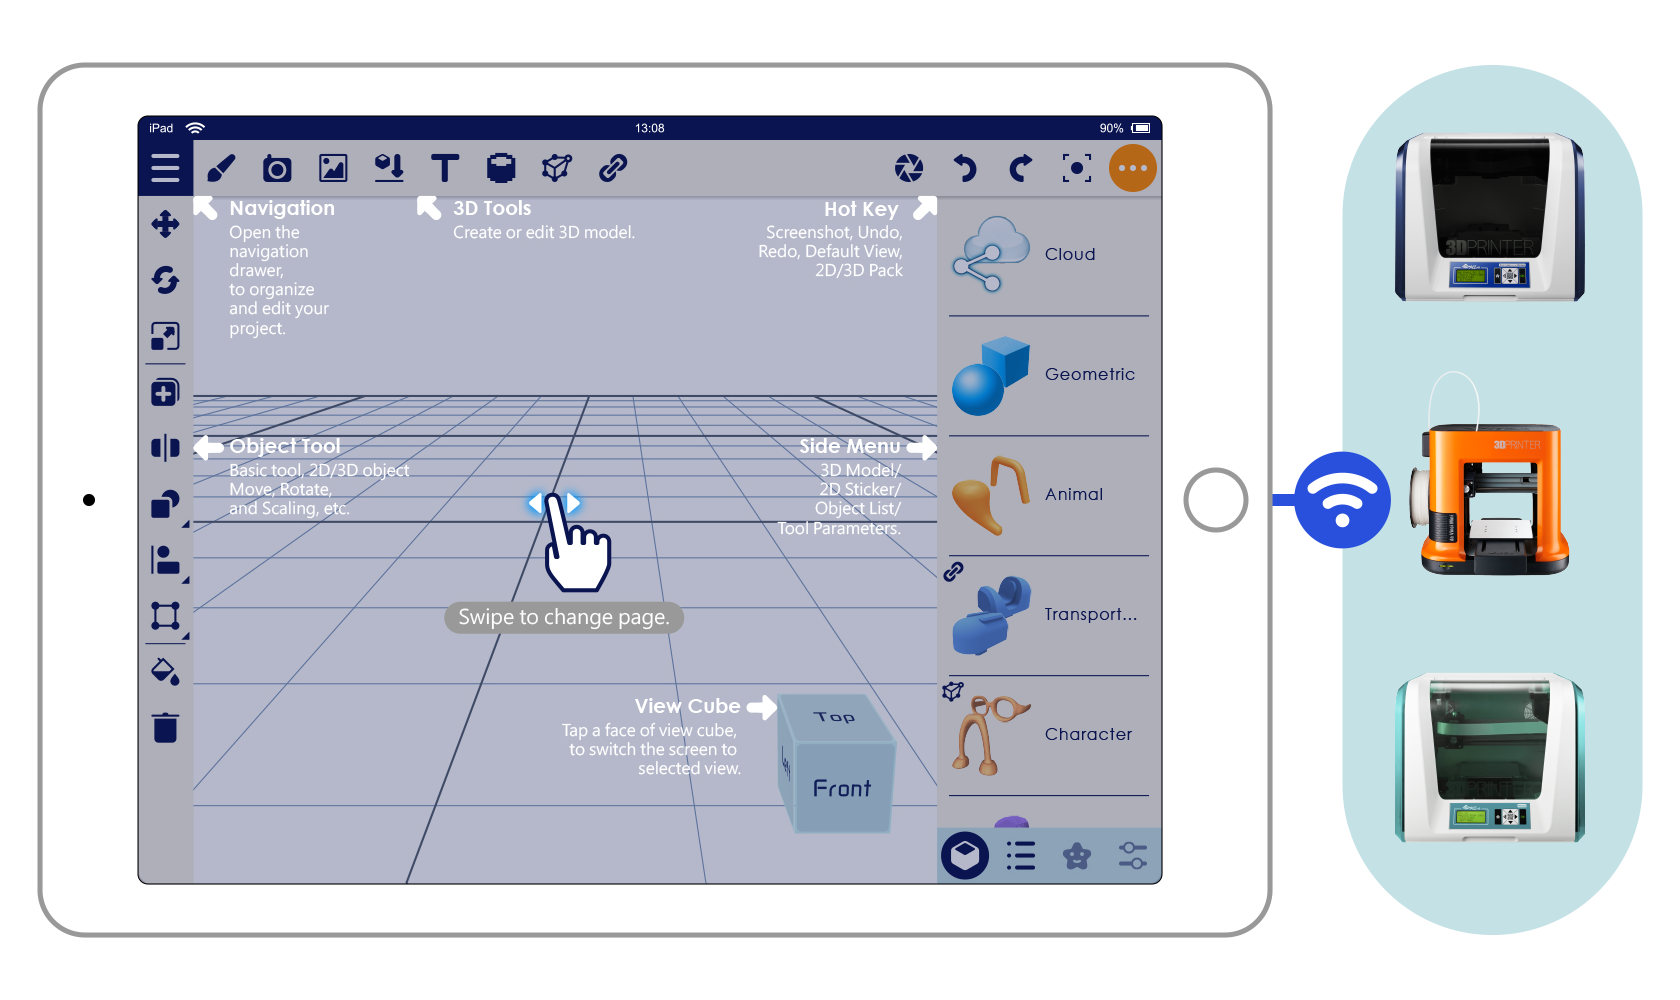
XYZmaker Mobile은 3D 모델링에 익숙 하지 않는 초보 사용자들을 위해 디자인된 3D 모델링 앱 입니다. 이 프로그램은 재미 있고, 교육적이며, 예술적 모델 생성과 3D 프린팅을 1개의 프로그램에서 실행 가능 합니다. XYZmaker 모바일은 3D 디자인을 인쇄 워크플로우로 개선 했으며, 칼라 편집 옵션을 추가 하여 고객님이 원하는 맞춤형 디자인으로 만들수 있습니다.

About-XYZmaker-Mobile_1

해당 3D 모델링 앱에는 서로 다른 물체와 편집 도구가 있기 때문에 서로 결합 하여 사용 하면 특별하고 멋진 디자인을 만들수 있습니다. 또한, 고객님의 디자인을 보다 현실적이게 만들고, 인쇄를 더 쉽게 하실수 있습니다, XYZmaker 모바일은 XYZprinting에 의해 da Vinci 3D 프린터 시리즈와 결합하는 기능을 보유 하고 있습니다.
XYZmaker 모바일의 또 다른 장점은 iOS 와 android OS 모두 사용 가능한 점입니다. iPad 혹은 일반 tablet PC 모두 사용 가능 합니다. 고객의 편의를 위하여 각 다른 OS기능을 모두 지원하도록 설계 했습니다.

클릭하여 다운로드
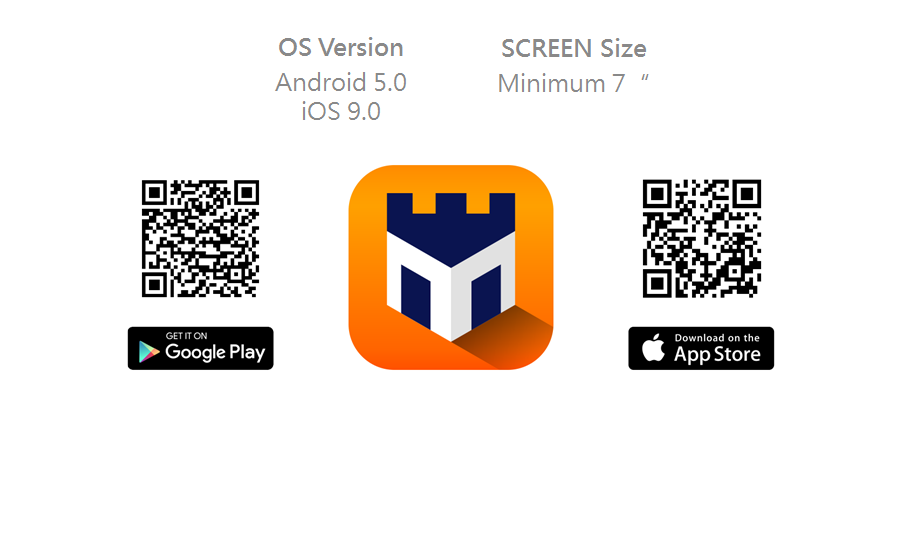
안드로이드 버젼 다운로드
iOS 버젼 다운 로드

link


기본 사양
소프트 웨어
OS 버젼 Android 5.0
iOS 9.0
스크린 사이즈 최소 7“
3D 양식 지원 AMF, STL, OBJ, PLY
앱 기본 3D 양식 AMF
지원하는 이미지 양식 PNG
iOS 디바이스 제안 iPad 시리즈와 iPad mini 2이후 출시 제품 과 iPad Air.

Service

Last updated on September 20th, 2018 at 09:40 am

Notification


E-shop


Support

Video Tutorial

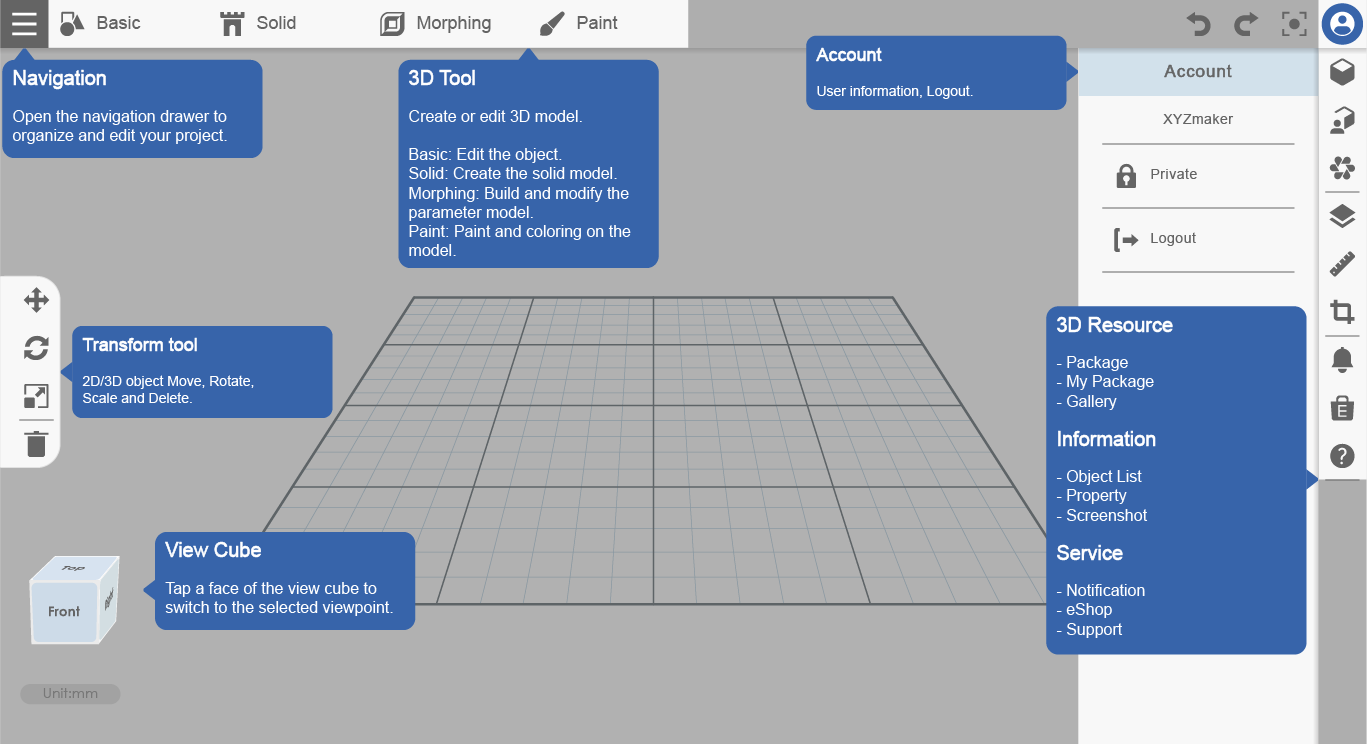
The Teach function is just like the Tutorial. It will display some information about what you can see on the main window of XYZmaker Mobile.

Fast Step Tutorial

XYZprinting website will launch and you can find more stuff about XYZmaker Mobile.

Feature Overview

About-XYZmaker-Mobile_Introduction

Contact Us

This will help you to send your feedback on the application. If there are some issues, suggestions, just simply select “Contact Us”.

Setup Wireless Printing

Last updated on September 20th, 2018 at 09:58 am

Some mobile devices, such as the Chromebook, cannot automatically search for a printer, you can set up the network connection between “Mobile Device” and “Printer” by the IP address. 

The steps as following:

1. Set the “Mobile Device” and “Printer” in the same wireless network

Connect by IP_1


The network printing function is only available when the printer and the mobile device are both connected to the same wireless network.

– How to setup the WiFi of Printer?
– Printer support WiFi:
da Vinci nano, Jr. 1.0A (with Wi-Fi Box)
da Vinci mini w / da Vinci Jr. 1.0 w / Jr. 1.0 3-in-1 / Jr. 2.0 Mix / da Vinci 1.0 Pro / Pro 3-in-1


2. Get the IP address

Please following the steps to get the IP address:

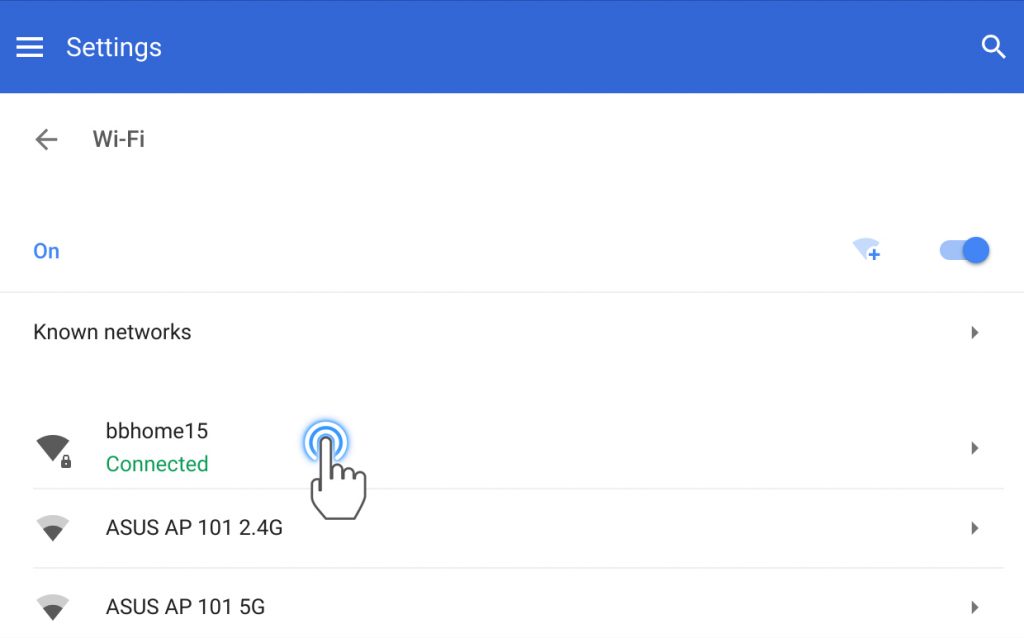
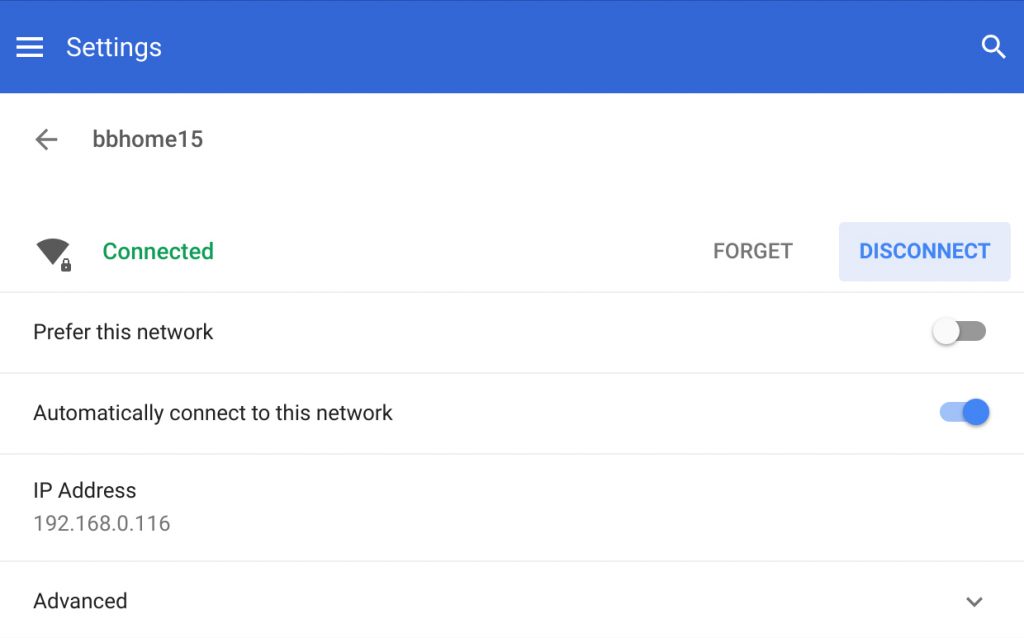
Setting > Network > WiFi > Select the same WiFi with the printer
> IP address(ex: 192.168.0.104)

– Get the IP address:

Connect by IP_2

3. Input the IP address to set up the network connection between “Mobile Device” and “Printer”.

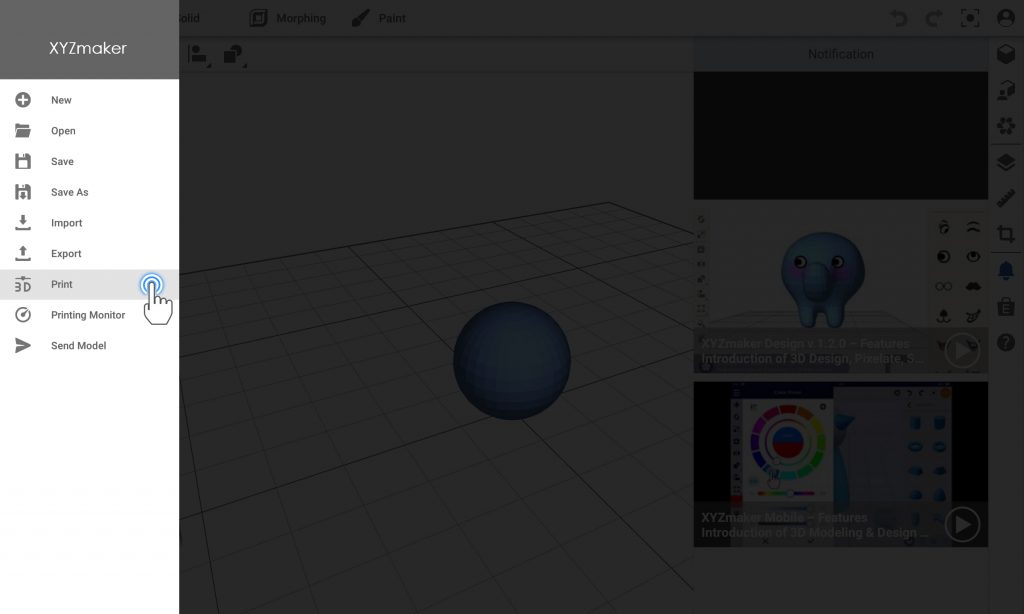
XYZmaker Mobile > Navigation > Print > Printer searching bar > Connect by IP > Input the IP address > Setup the connection

– Open the Navigation drawer, and then tap “Print”.

Connect by IP_3

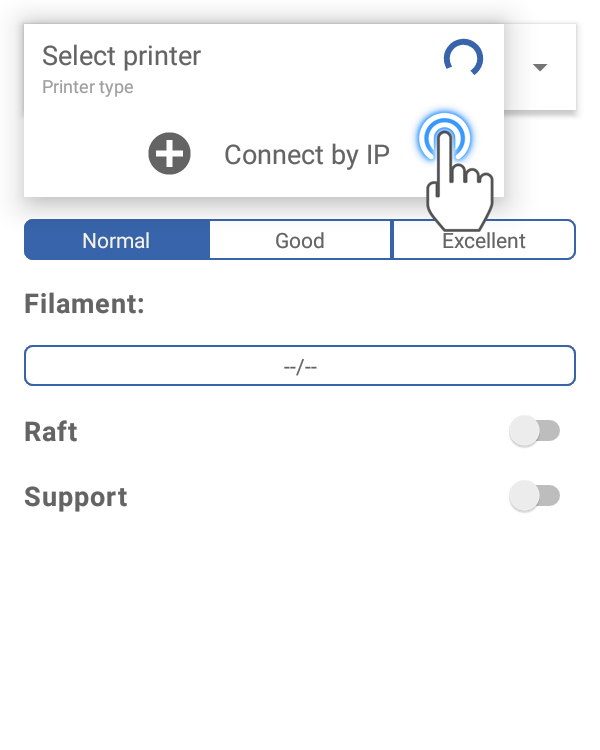
– Tap the “Printer searching bar”, and then select “Connect by IP”.

Connect by IP_4


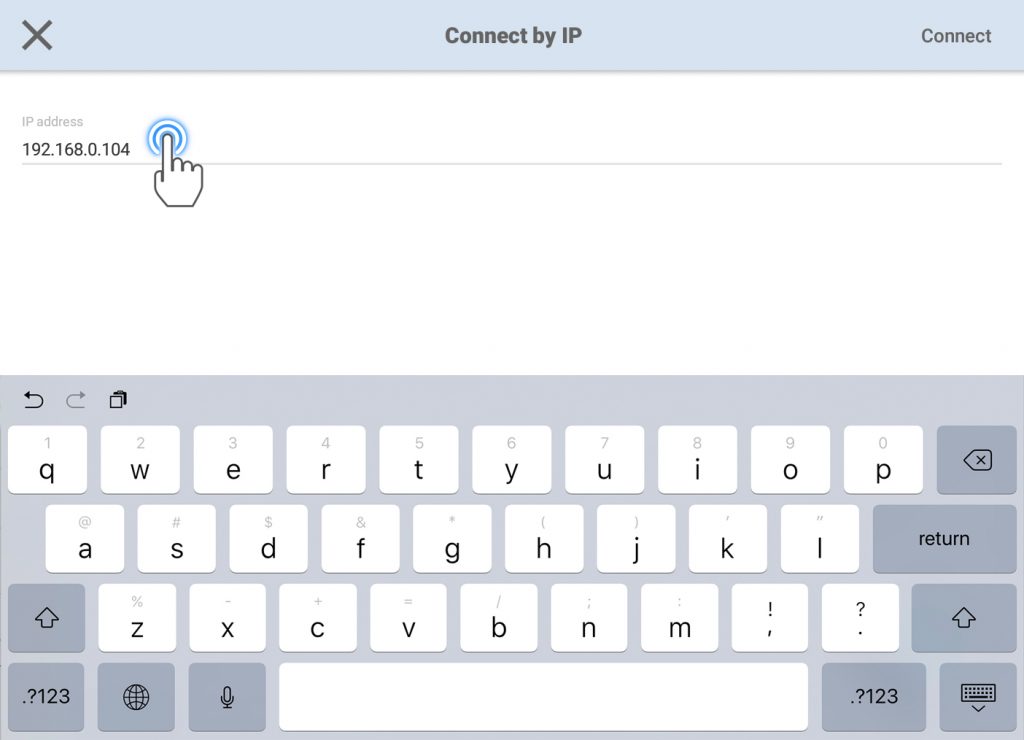
– Input the IP address, and set up the network connection with the printer.

Connect by IP_5

Download App

Last updated on March 26th, 2018 at 03:48 pm


SPECIFICATION
Software
OS Version Android 5.0
iOS 9.0
Screen Size Minimum 7“
Supported 3D Format AMF, STL, OBJ, PLY
App Default 3D Format AMF
Supported Image Format PNG
Suggested iOS Device iPads series launch after iPad mini 2 and iPad Air.

 20170504_XYZmaker Mobile_Logo

FREE DOWNLOAD

Sign in with your XYZprinting membership account or register as a new member to experience XYZmaker Mobile for free! What are you waiting for?


Android_QRcode

1280px-Get_it_on_Google_play.svg

CLICK TO DOWNLOAD
Download Android Version

                                          iOS_QRcode

appleAppStoreBadgeBig

CLICK TO DOWNLOAD
Download iOS Version

Navigation Drawer

Last updated on September 20th, 2018 at 09:49 am

This drawer consists of different functions that will help you to do more operations, especially on the printing task. It will help you to print your design into a real one.

New File

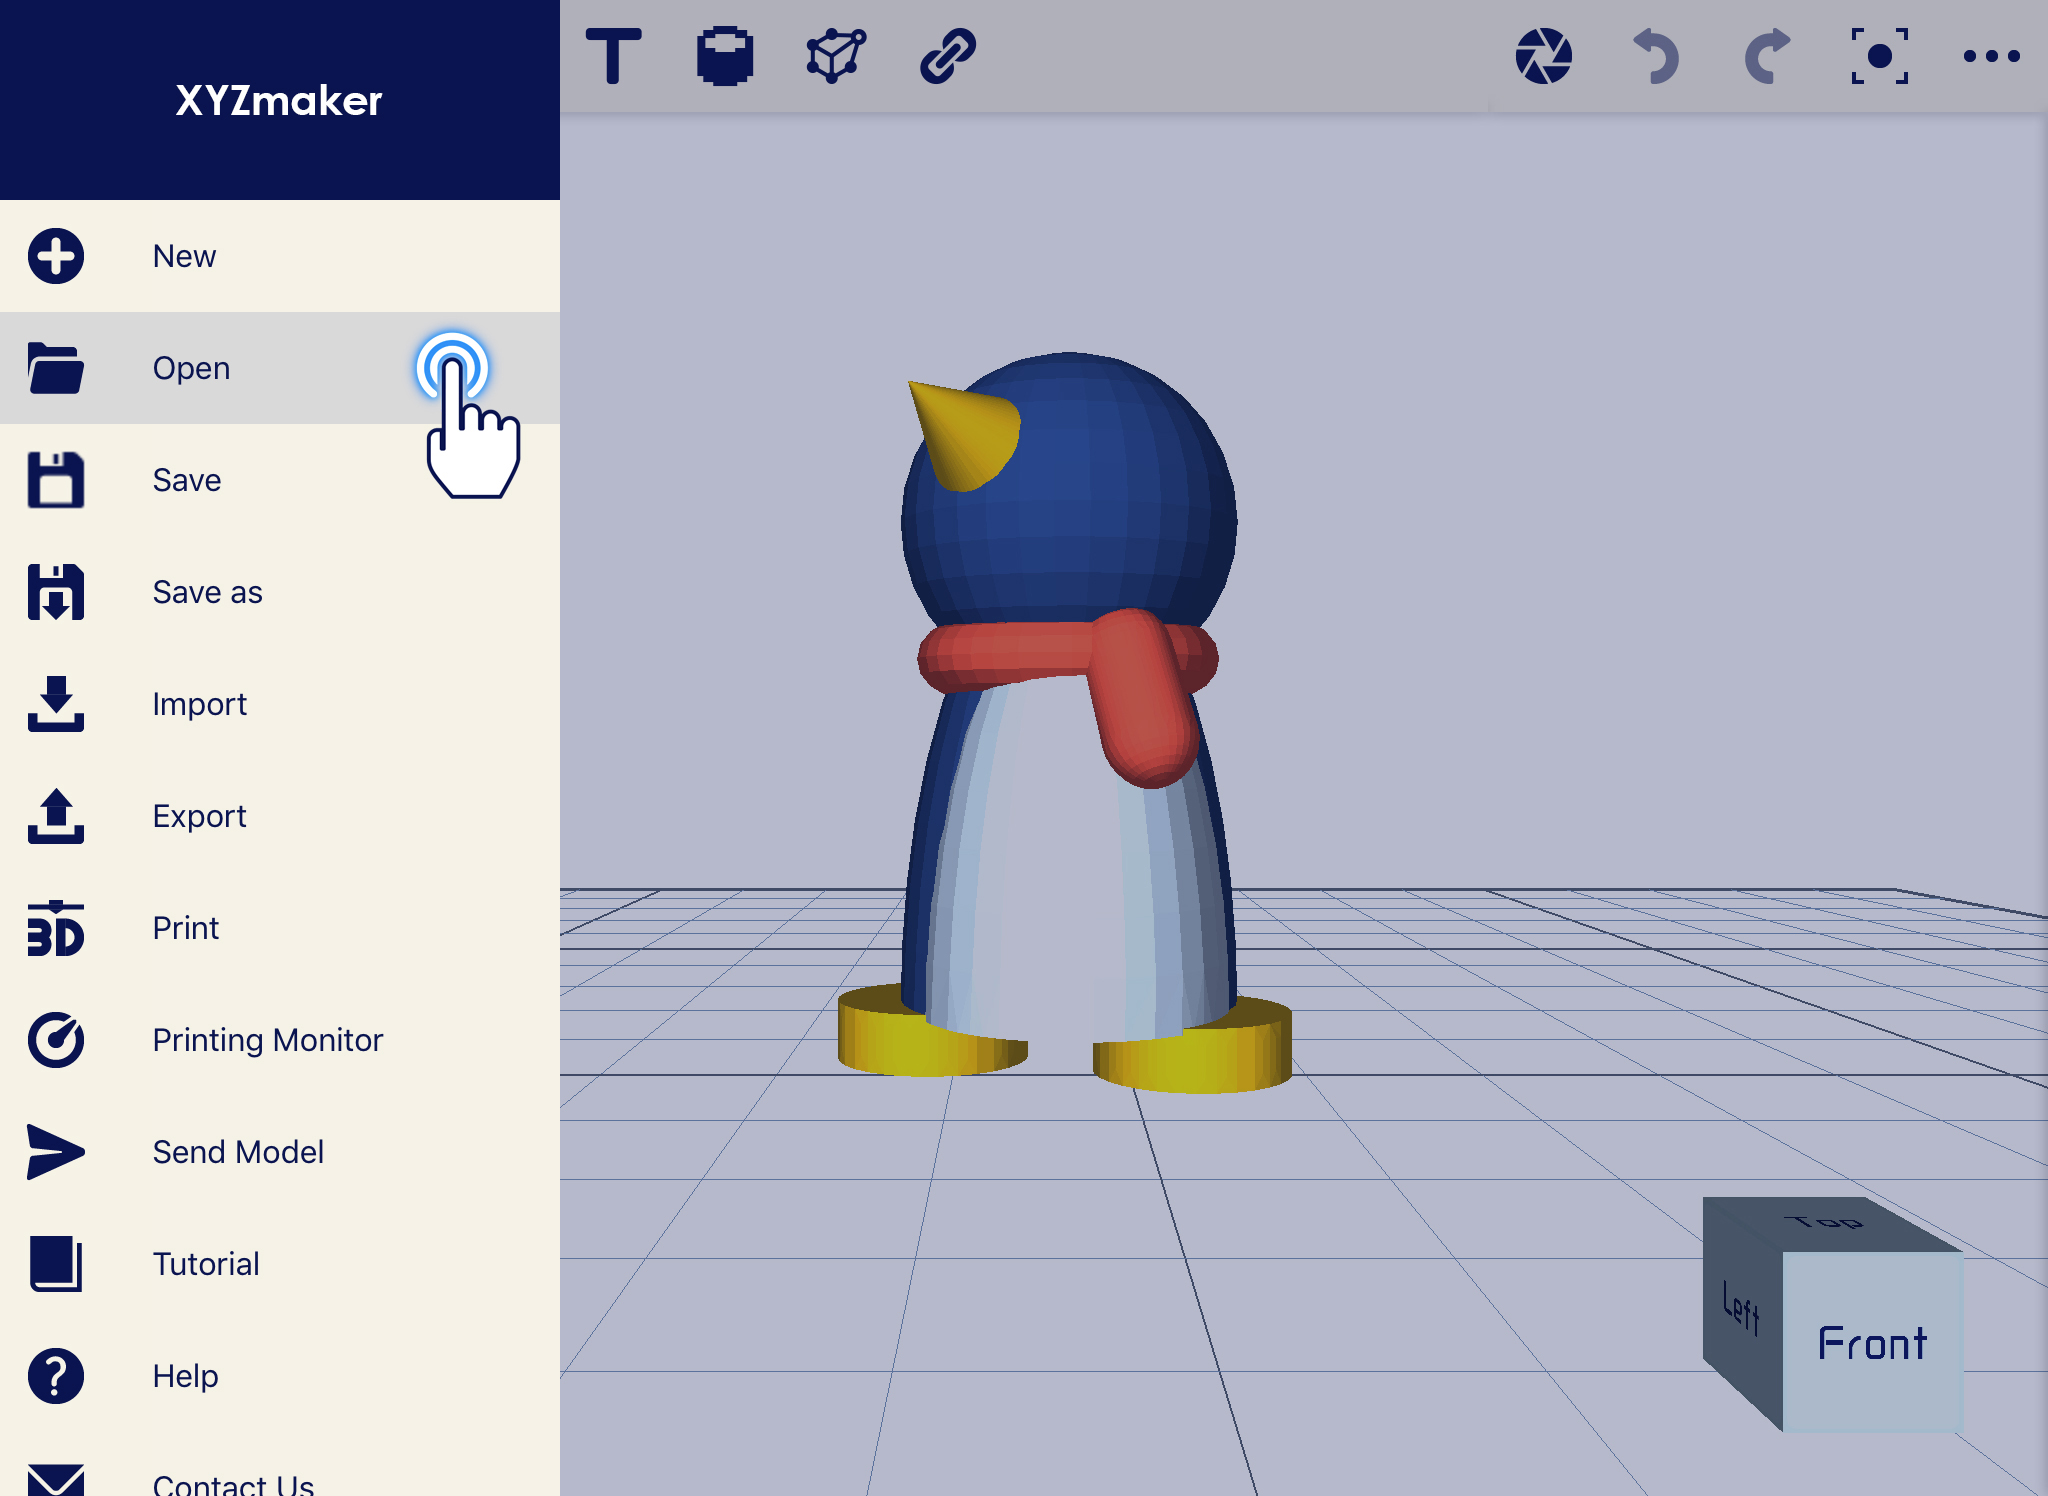
This function will just reset the workplace. If there is an object in the workplace and you want to create a new one, just simply click the Navigation Drawer then click New File.

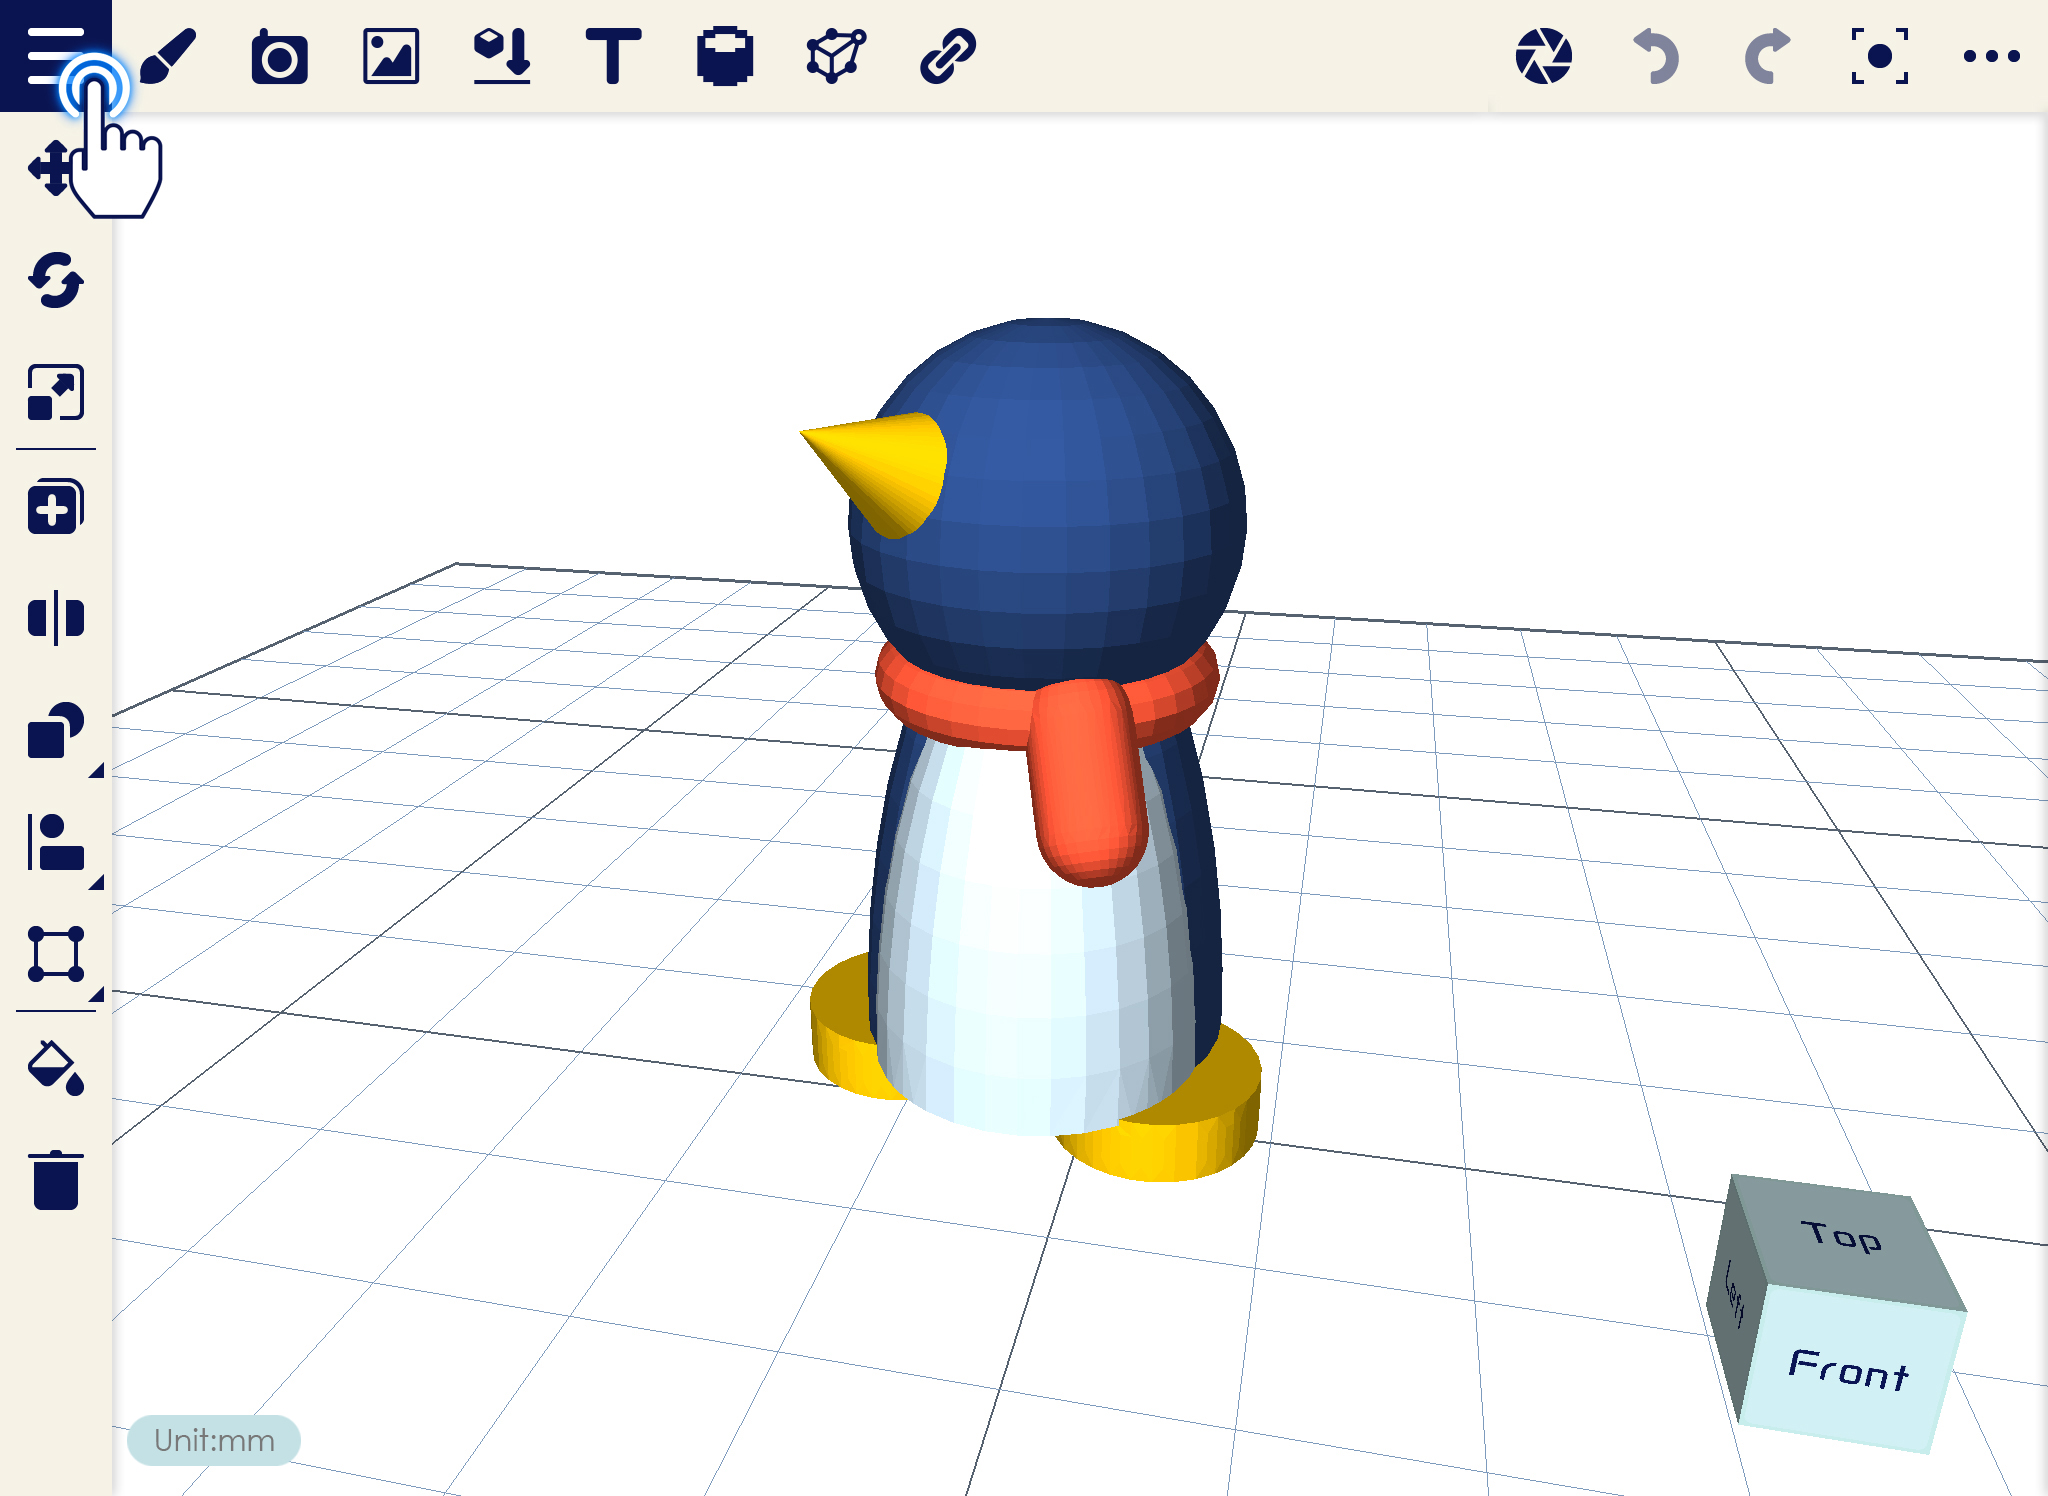
1. Click on Navigation Drawer.NAV_01_new_1

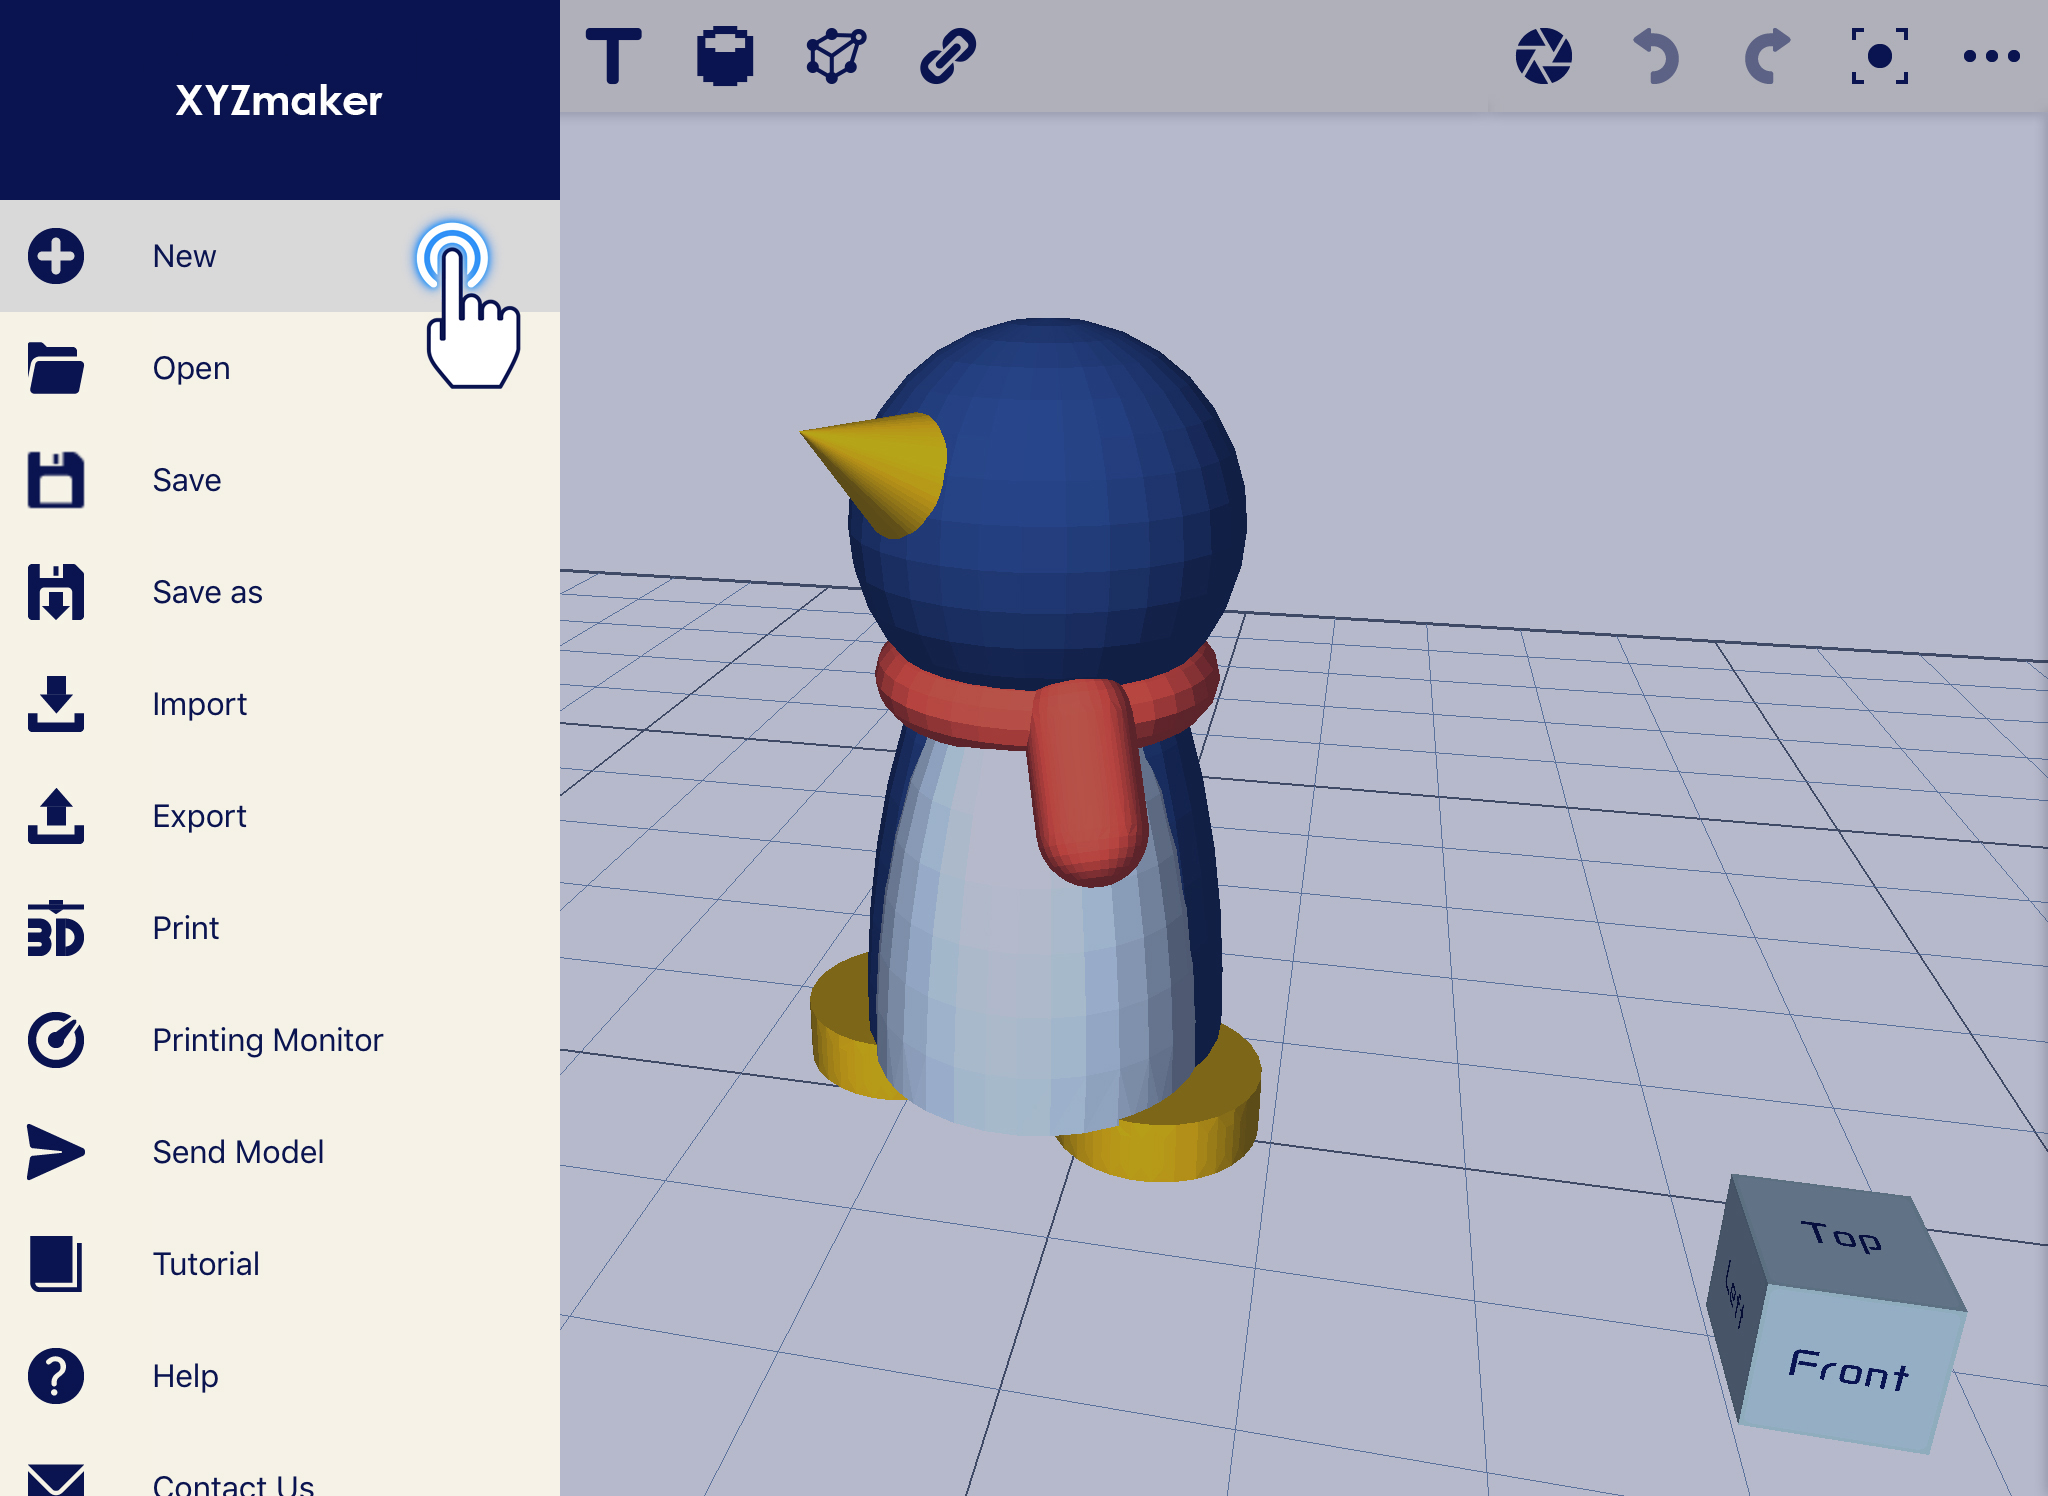
2. Select New File.NAV_01_new_2

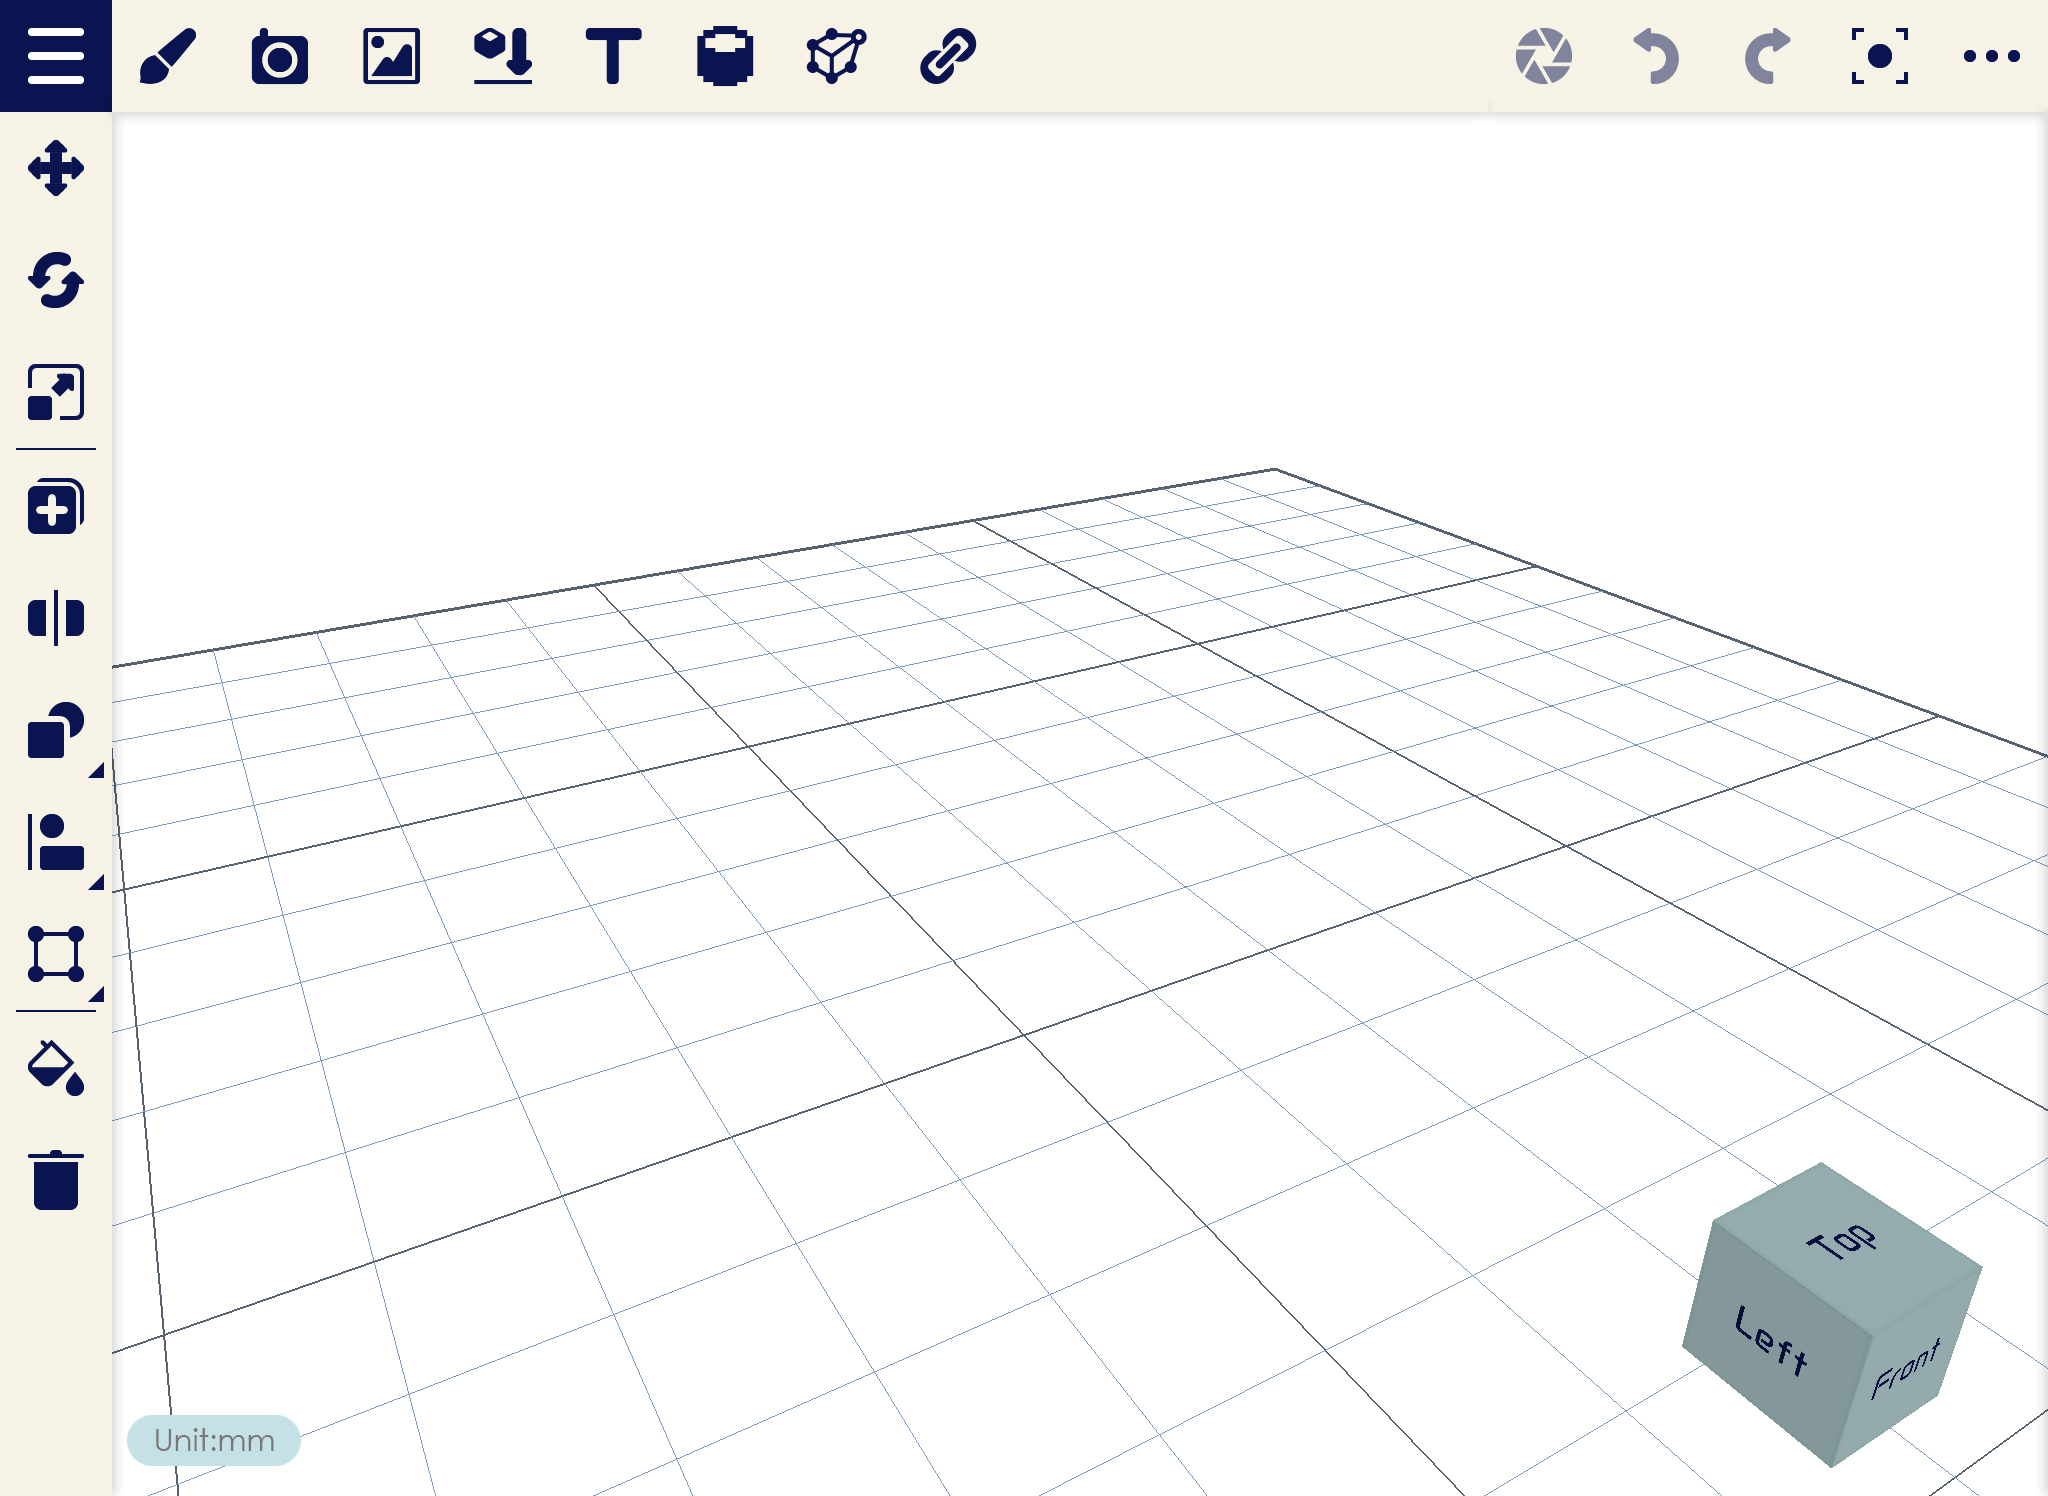
3. The workplace is already reset to new workplace.NAV_01_new_3

Open

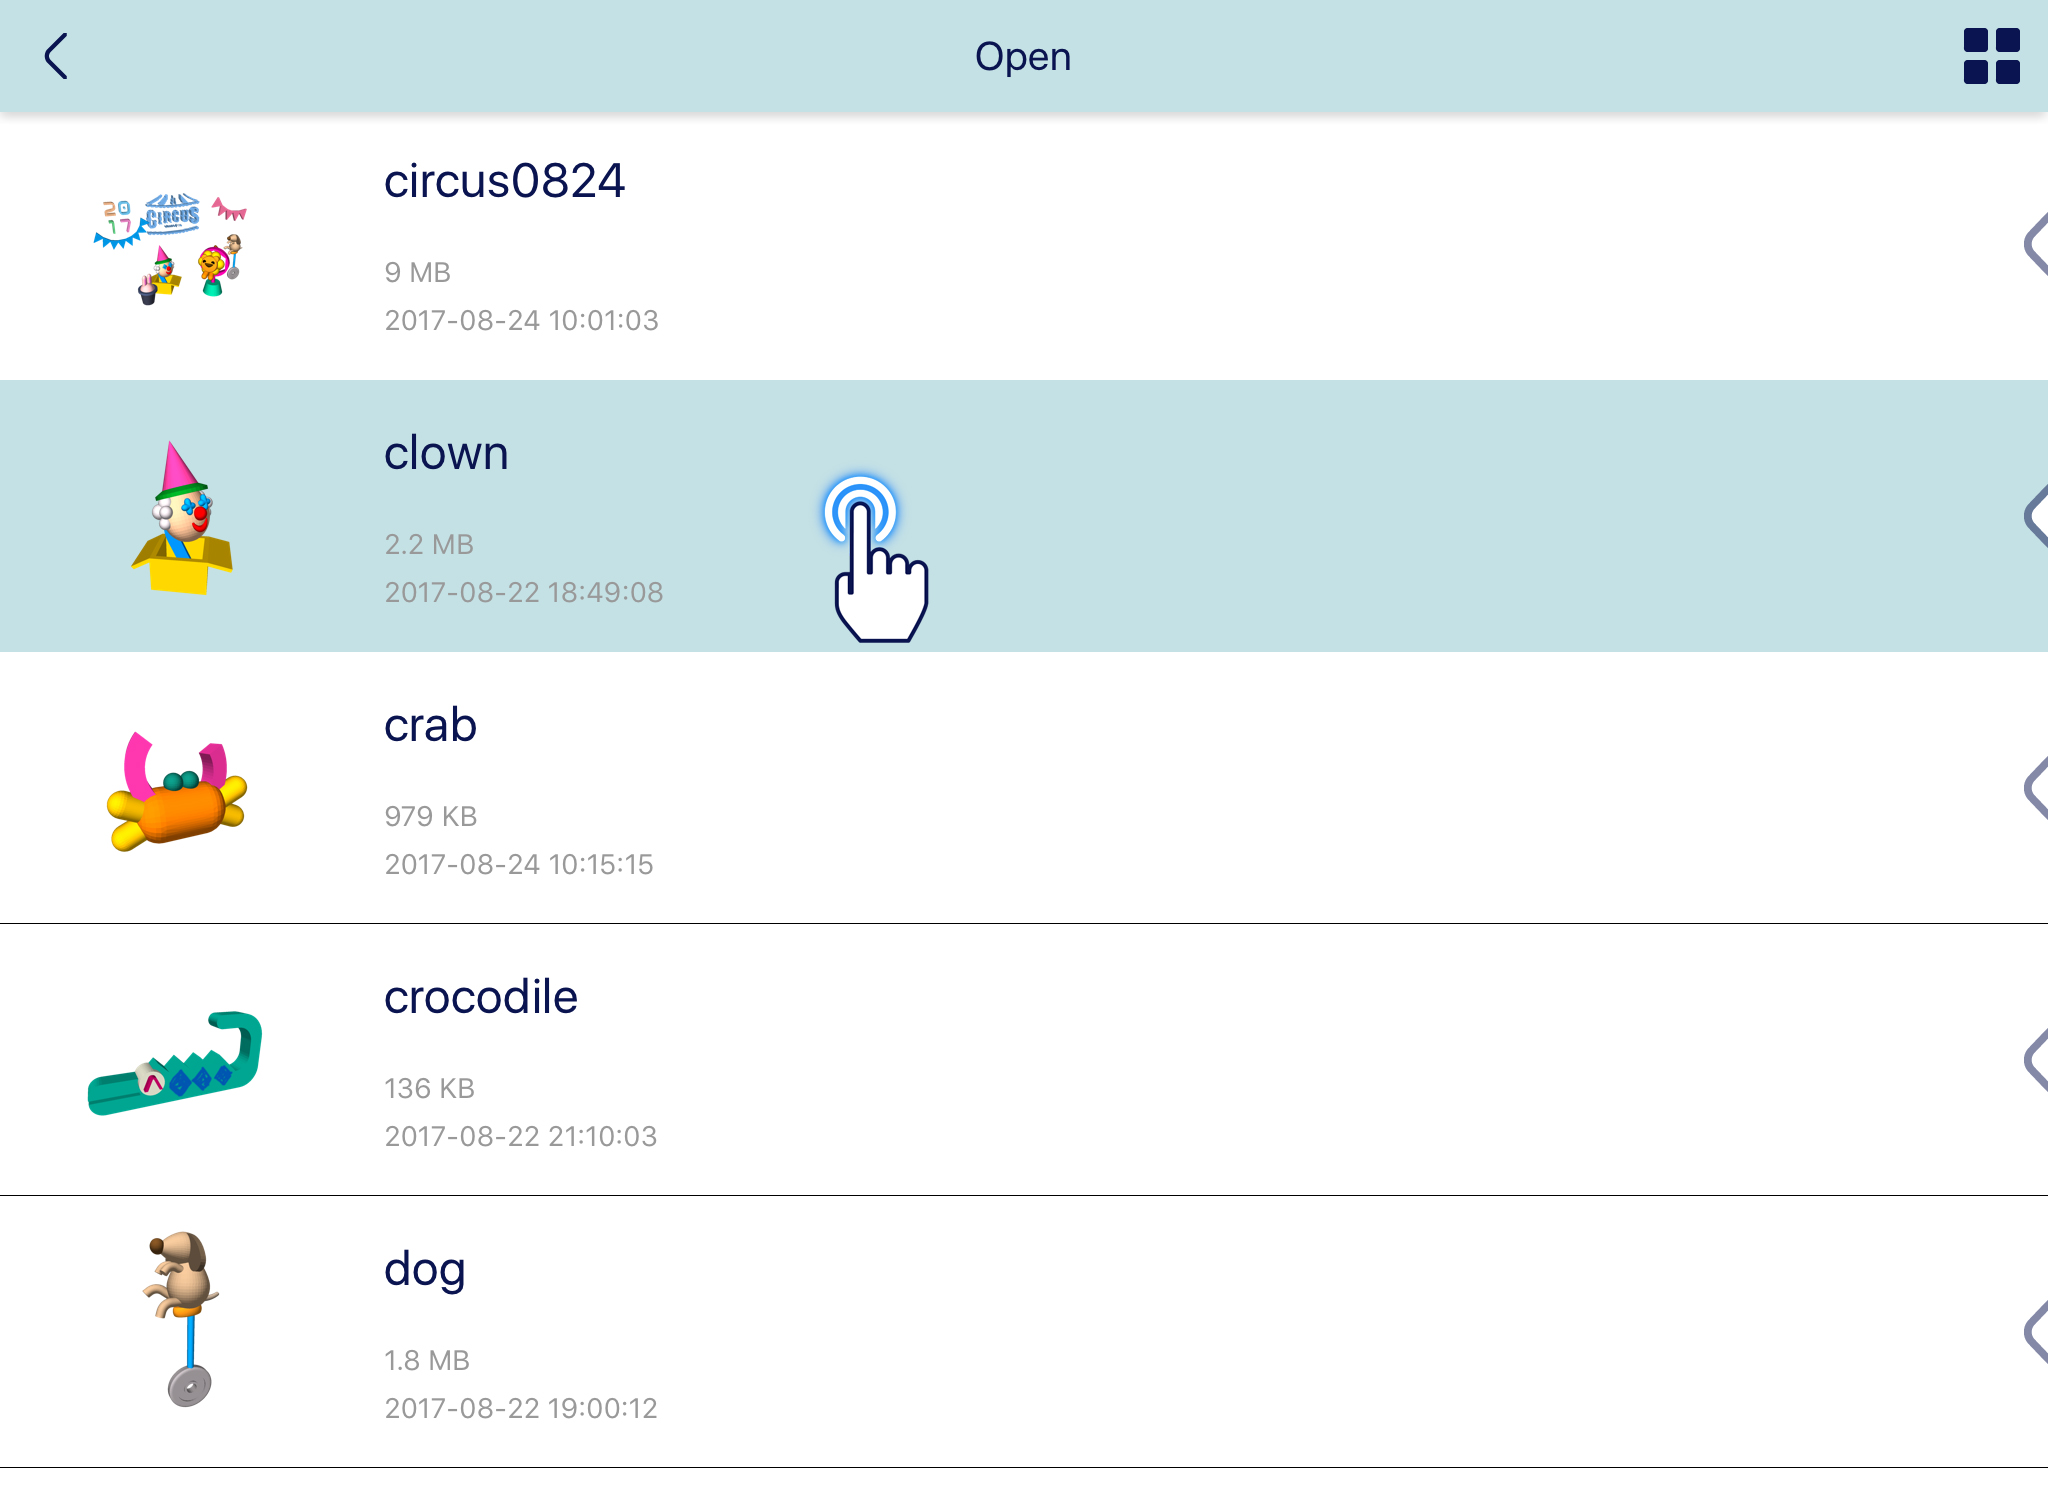
This function will help you to open a file. The file that can be open using Open function is exclusive for AMF only.

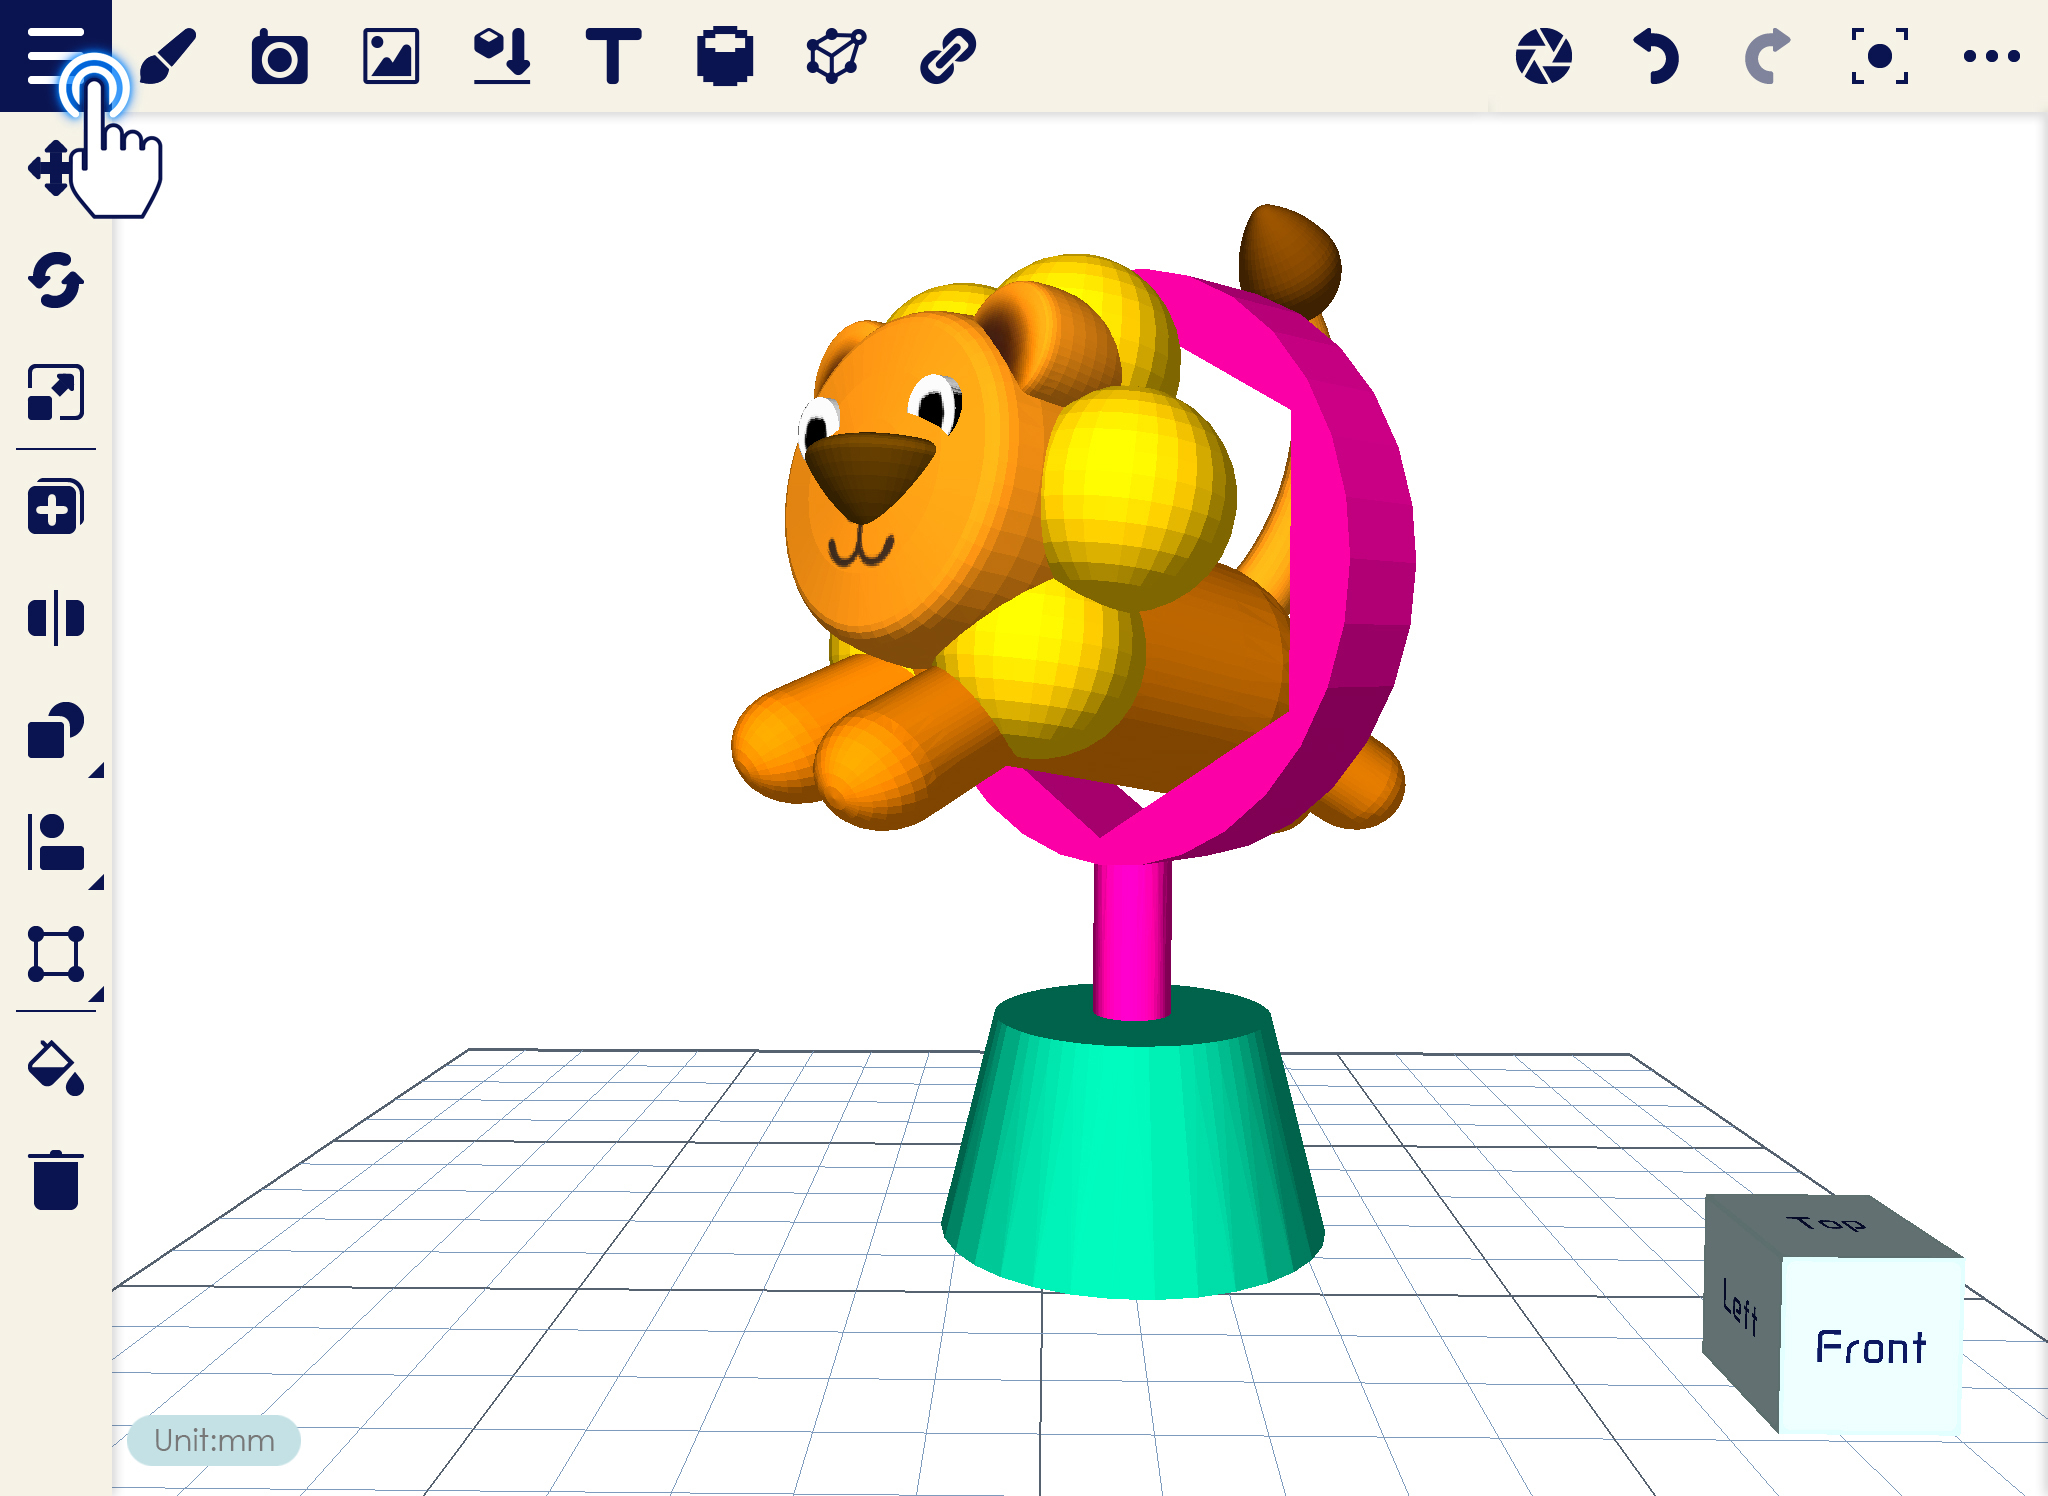
1. Click on Navigation Drawer.NAV_02_open_1

2. Select the Open function.NAV_02_open_2

3. Select the file that you want to open.NAV_02_open_3

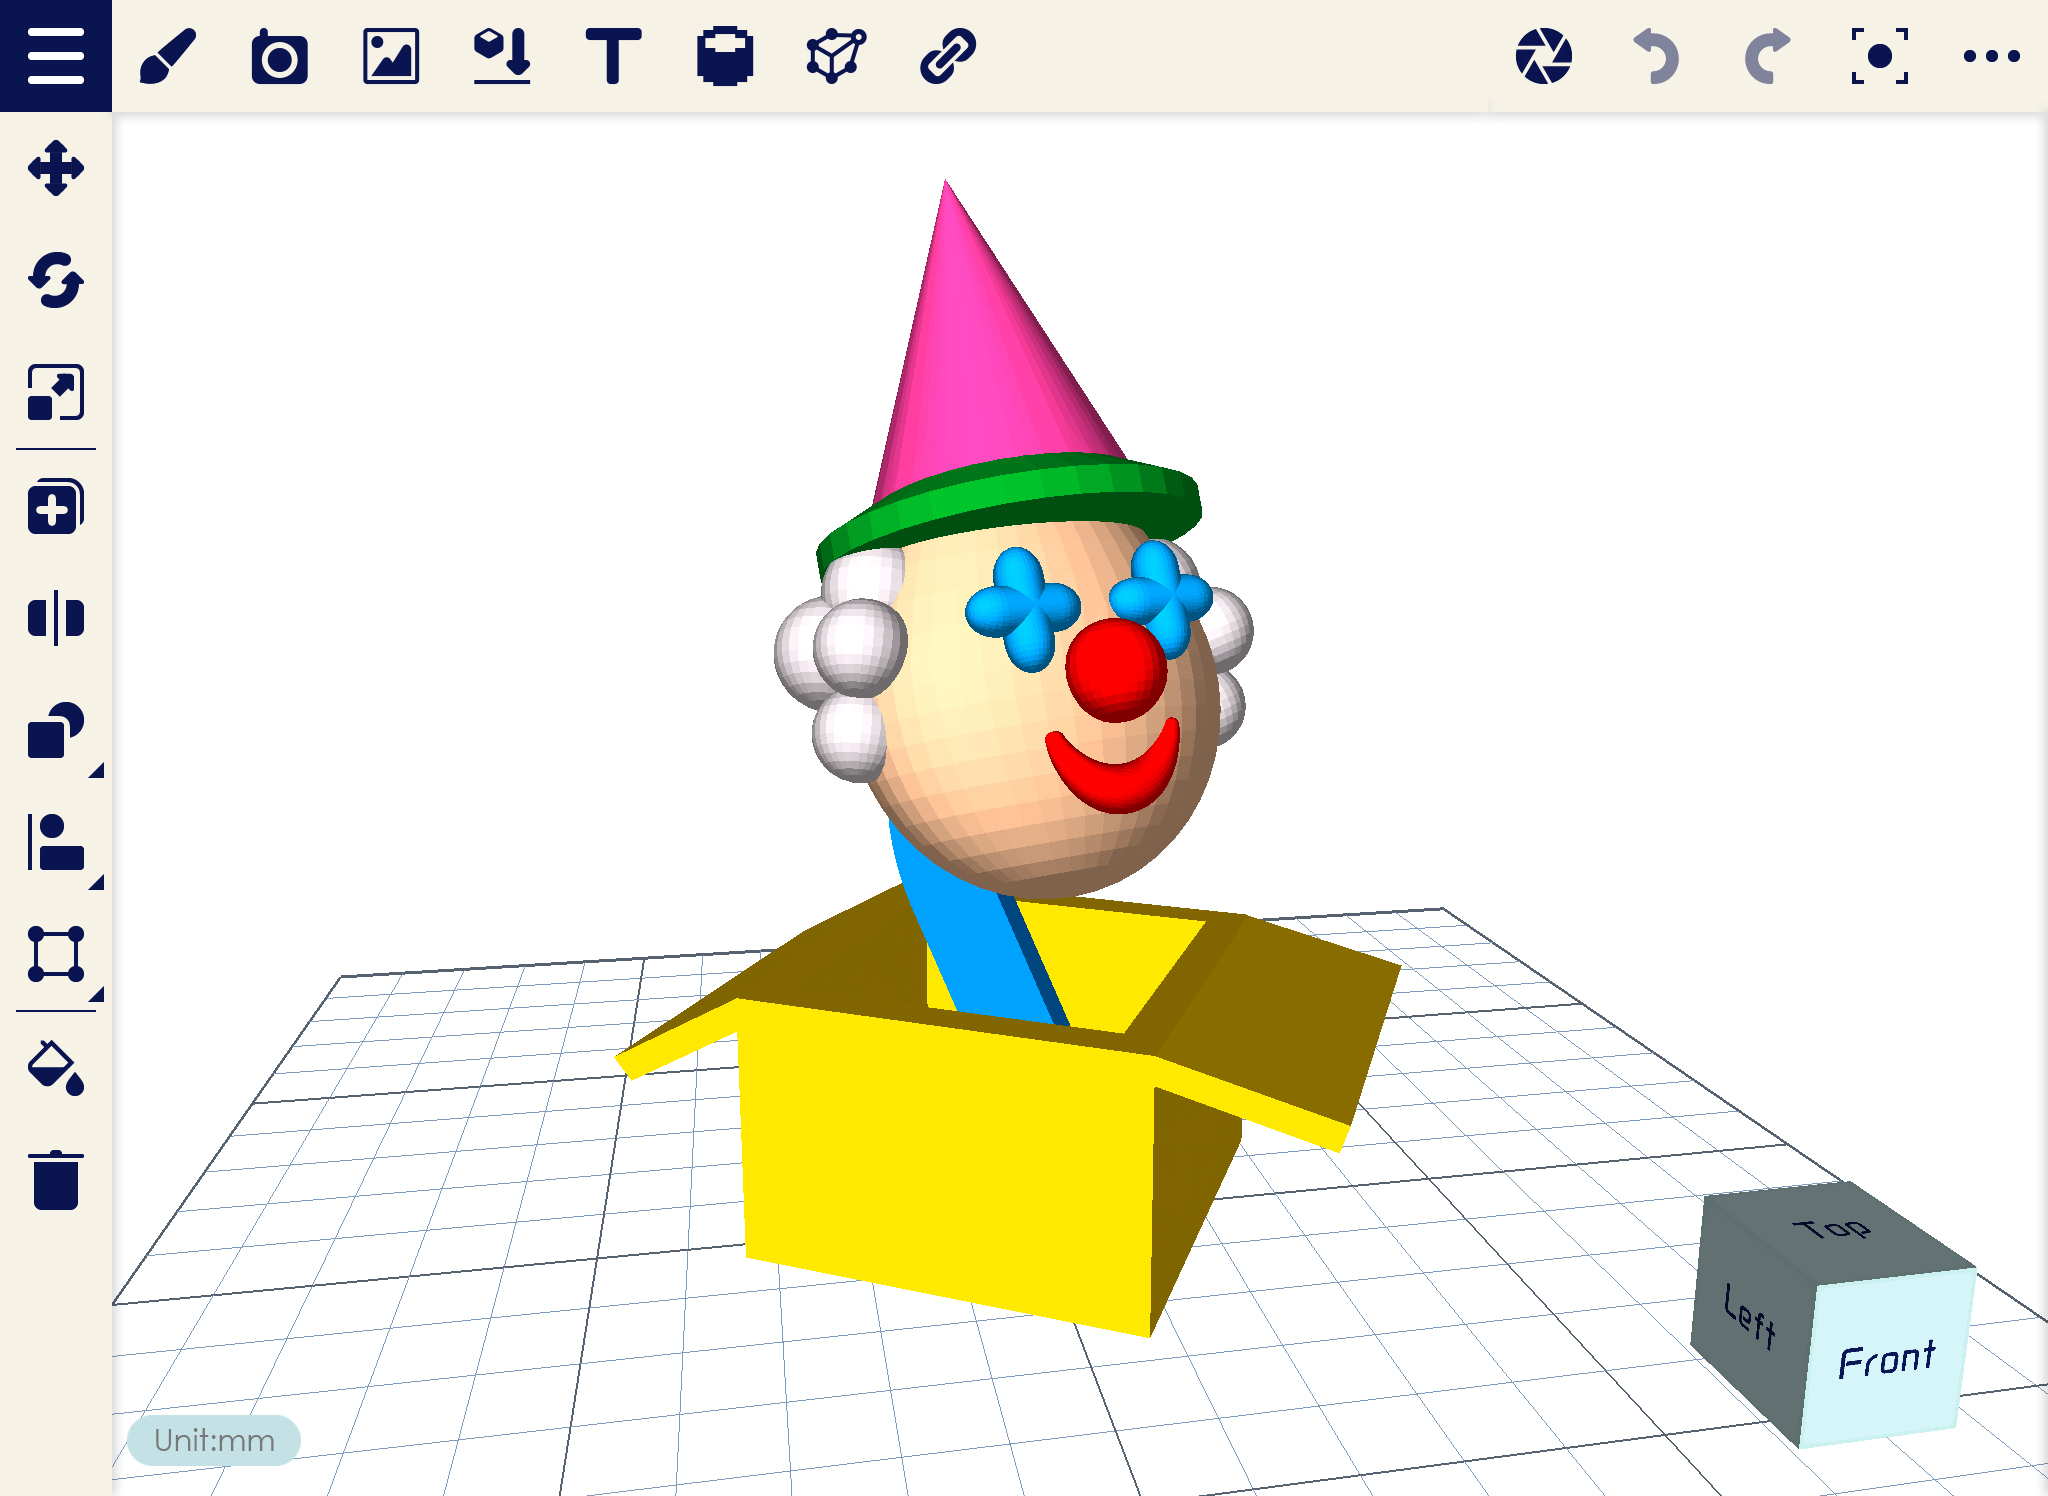
4.Object is already open.NAV_02_open_4

Save and Save As

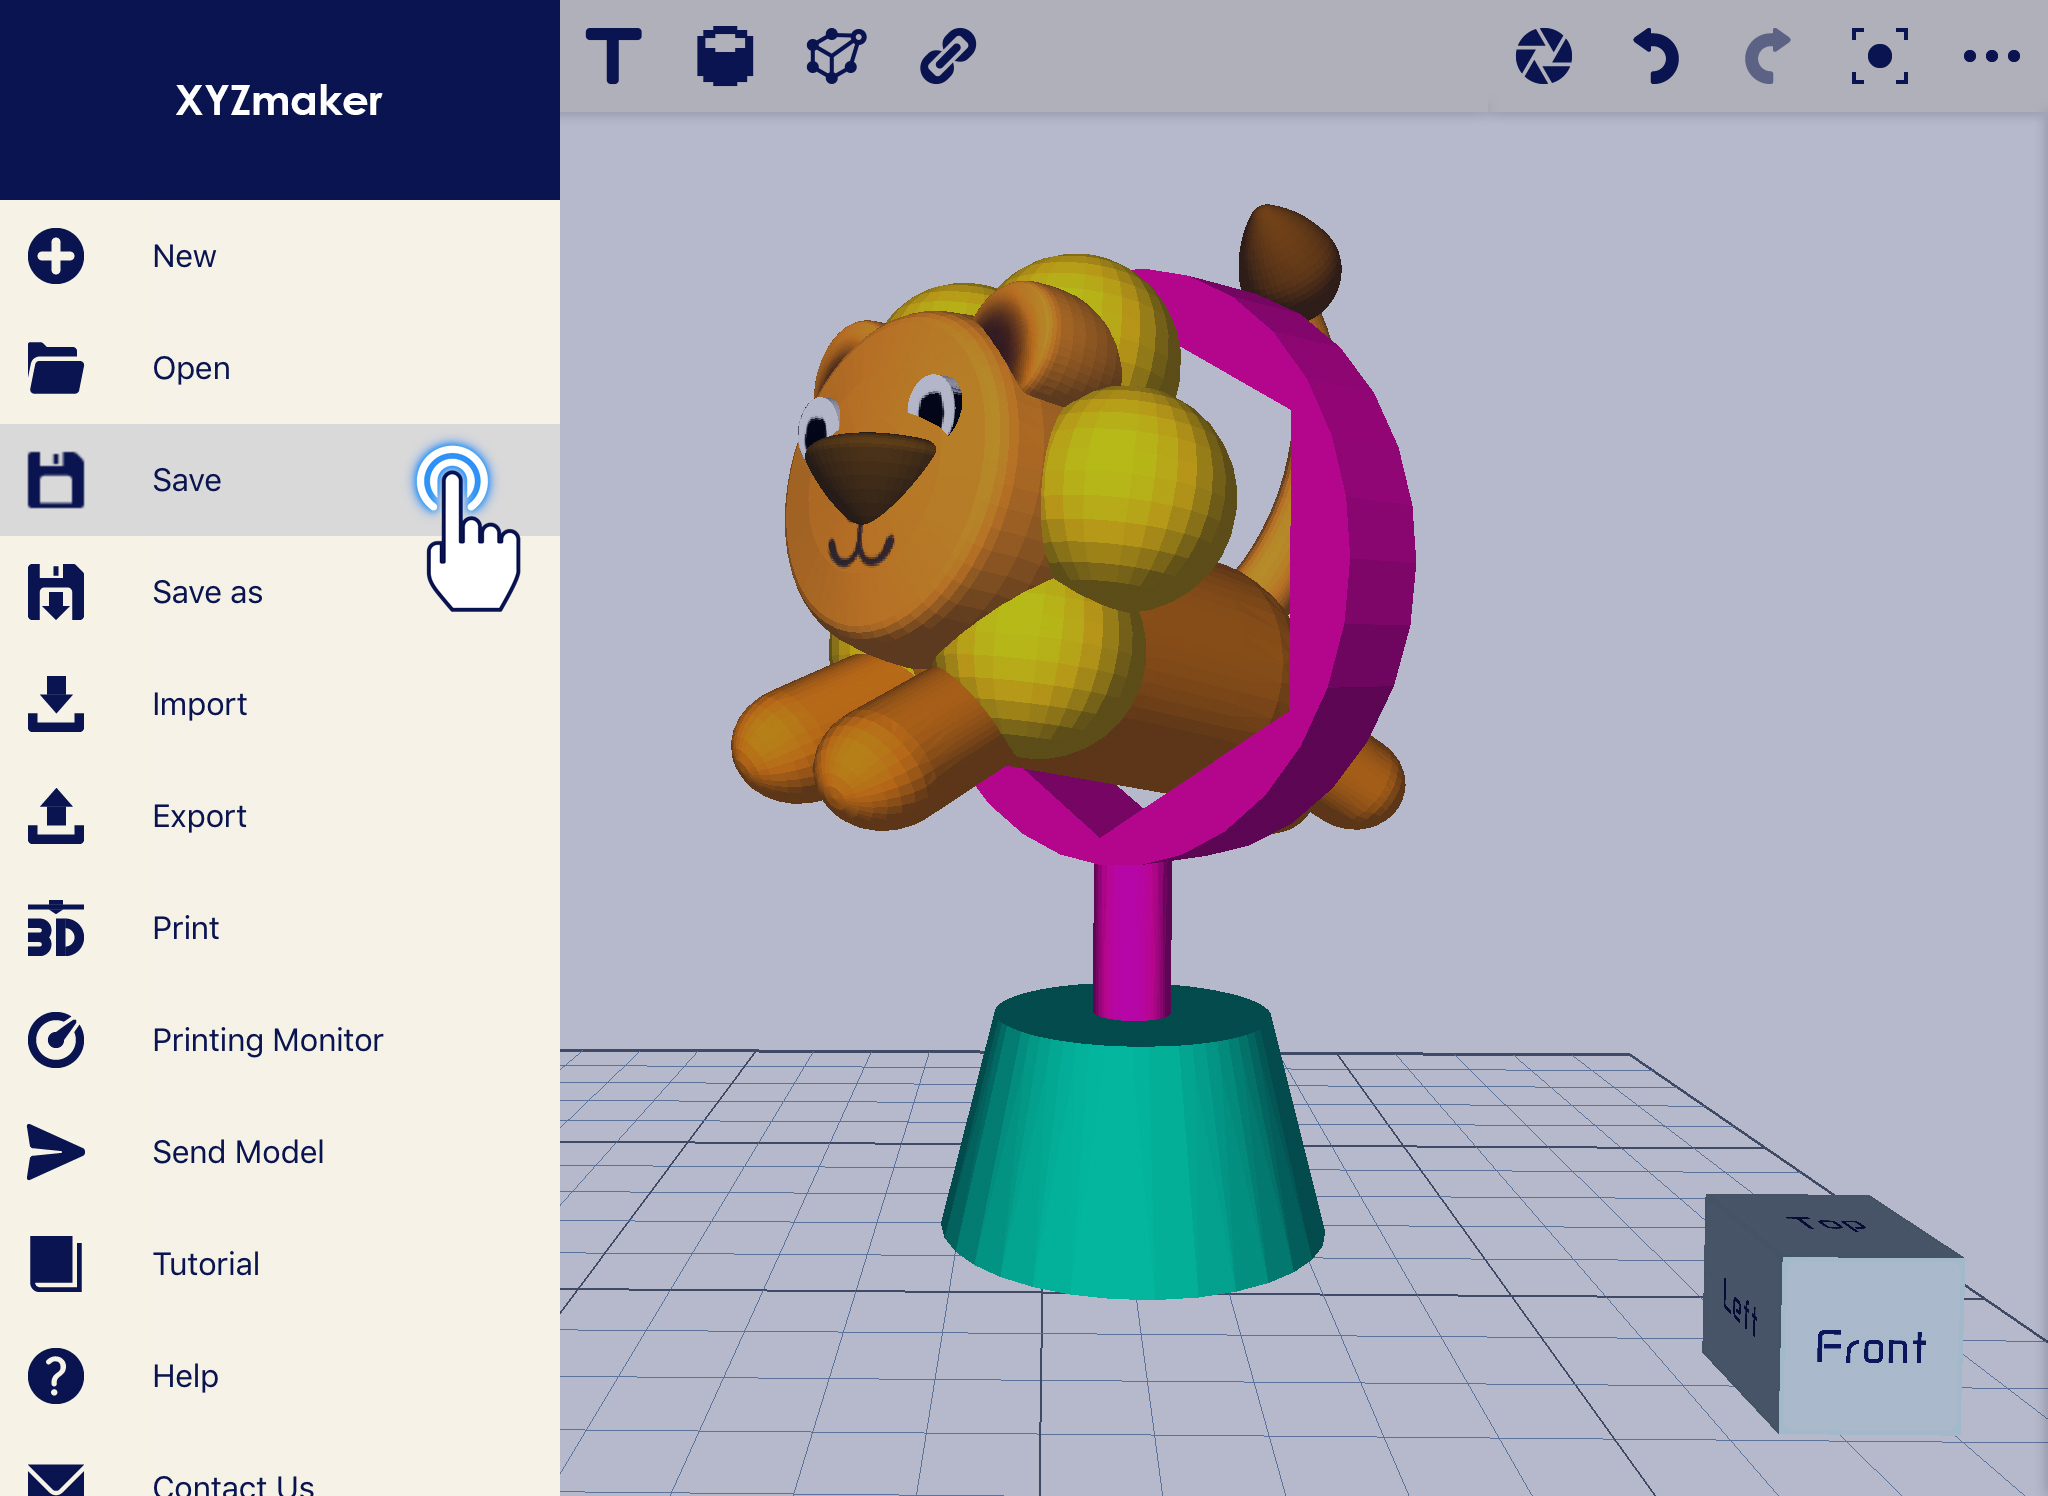
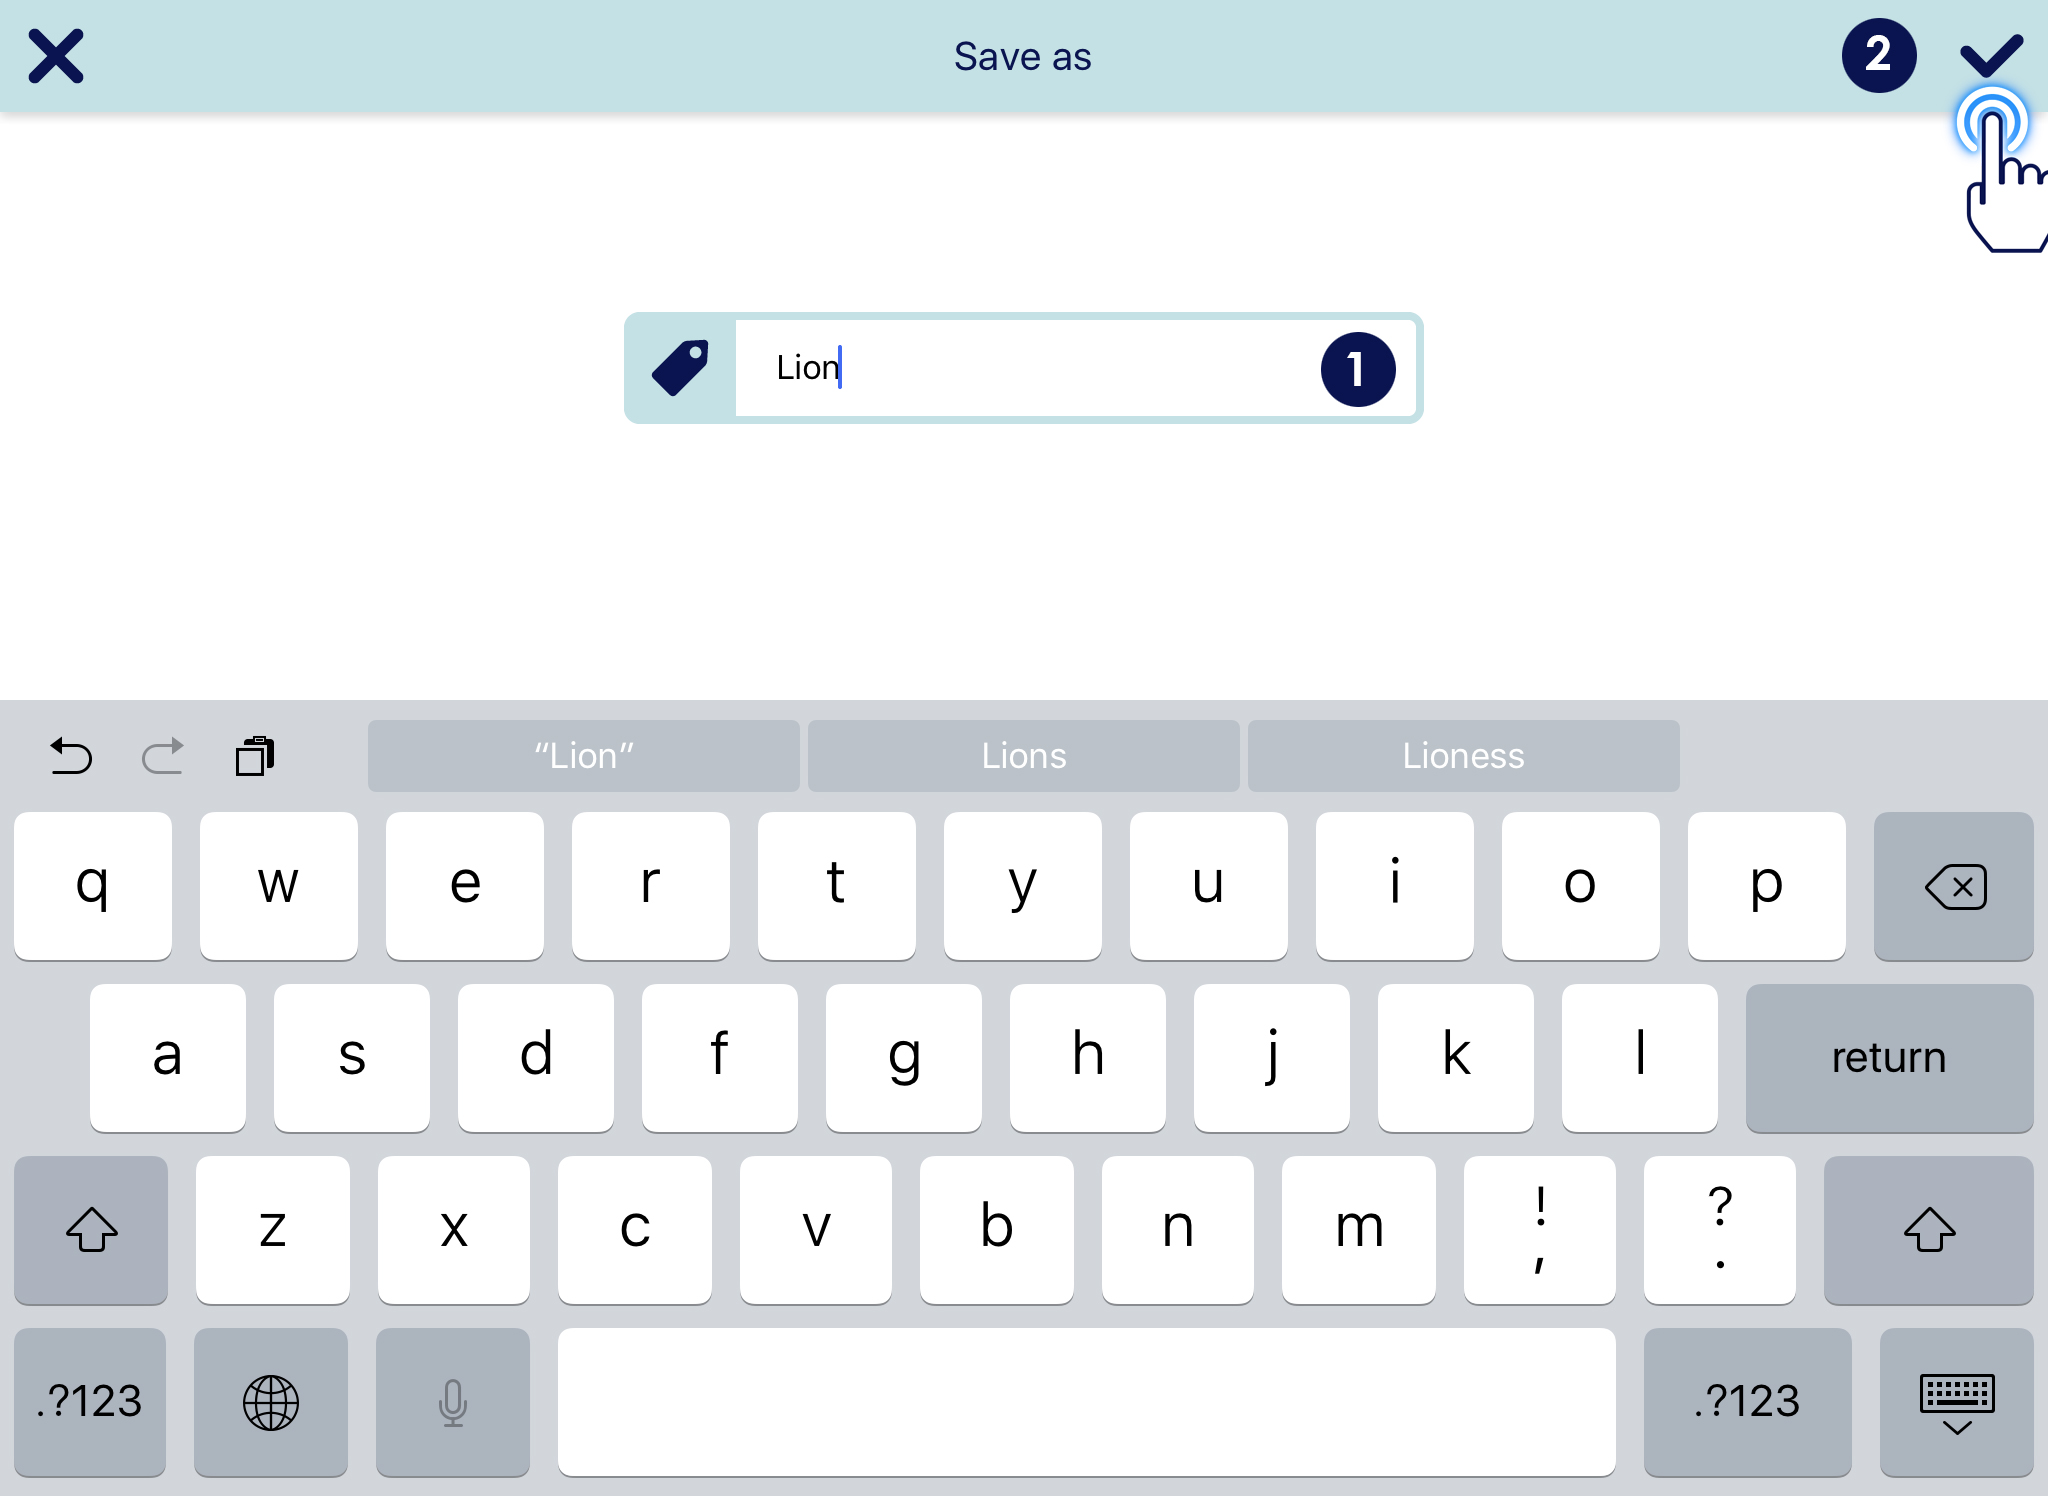
Choosing Save/ Save As simply saves your work into AMF file extension. If you opened different file type or you made some design, you can save it as AMF using this function.

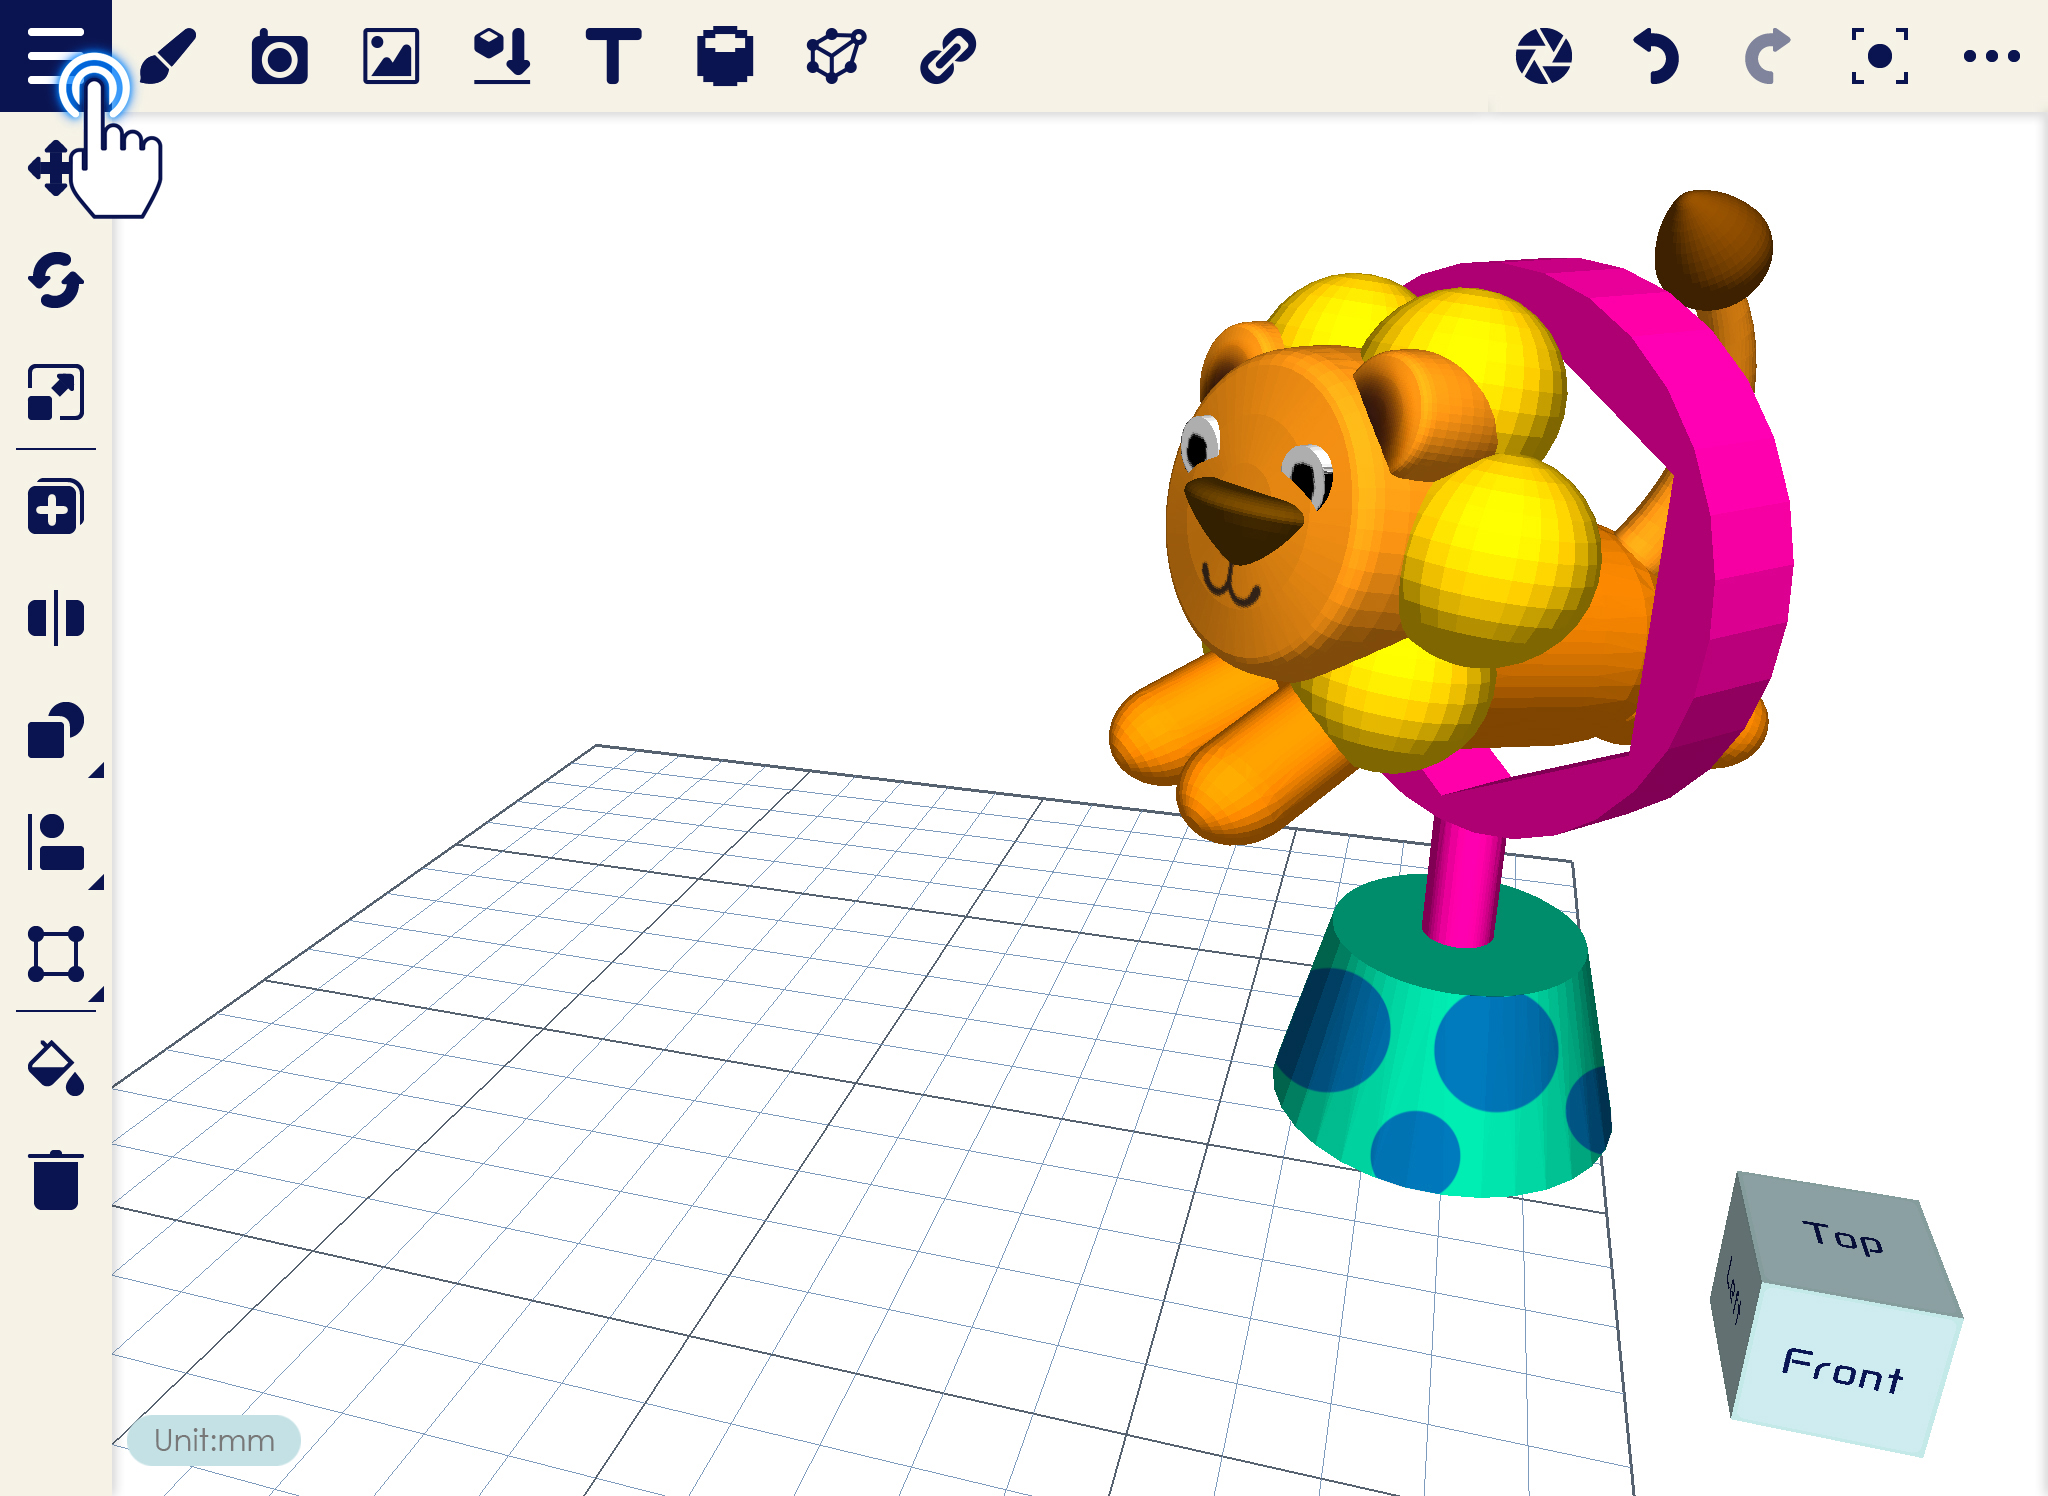
1. Make sure you already have your design, then click on Navigation Drawer.NAV_03_save_1

2. Select Save or Save As from the list.NAV_03_save_2

3.Save window will display, input the desired filename then click the check icon on the upper right corner to save.NAV_03_save_3

Import

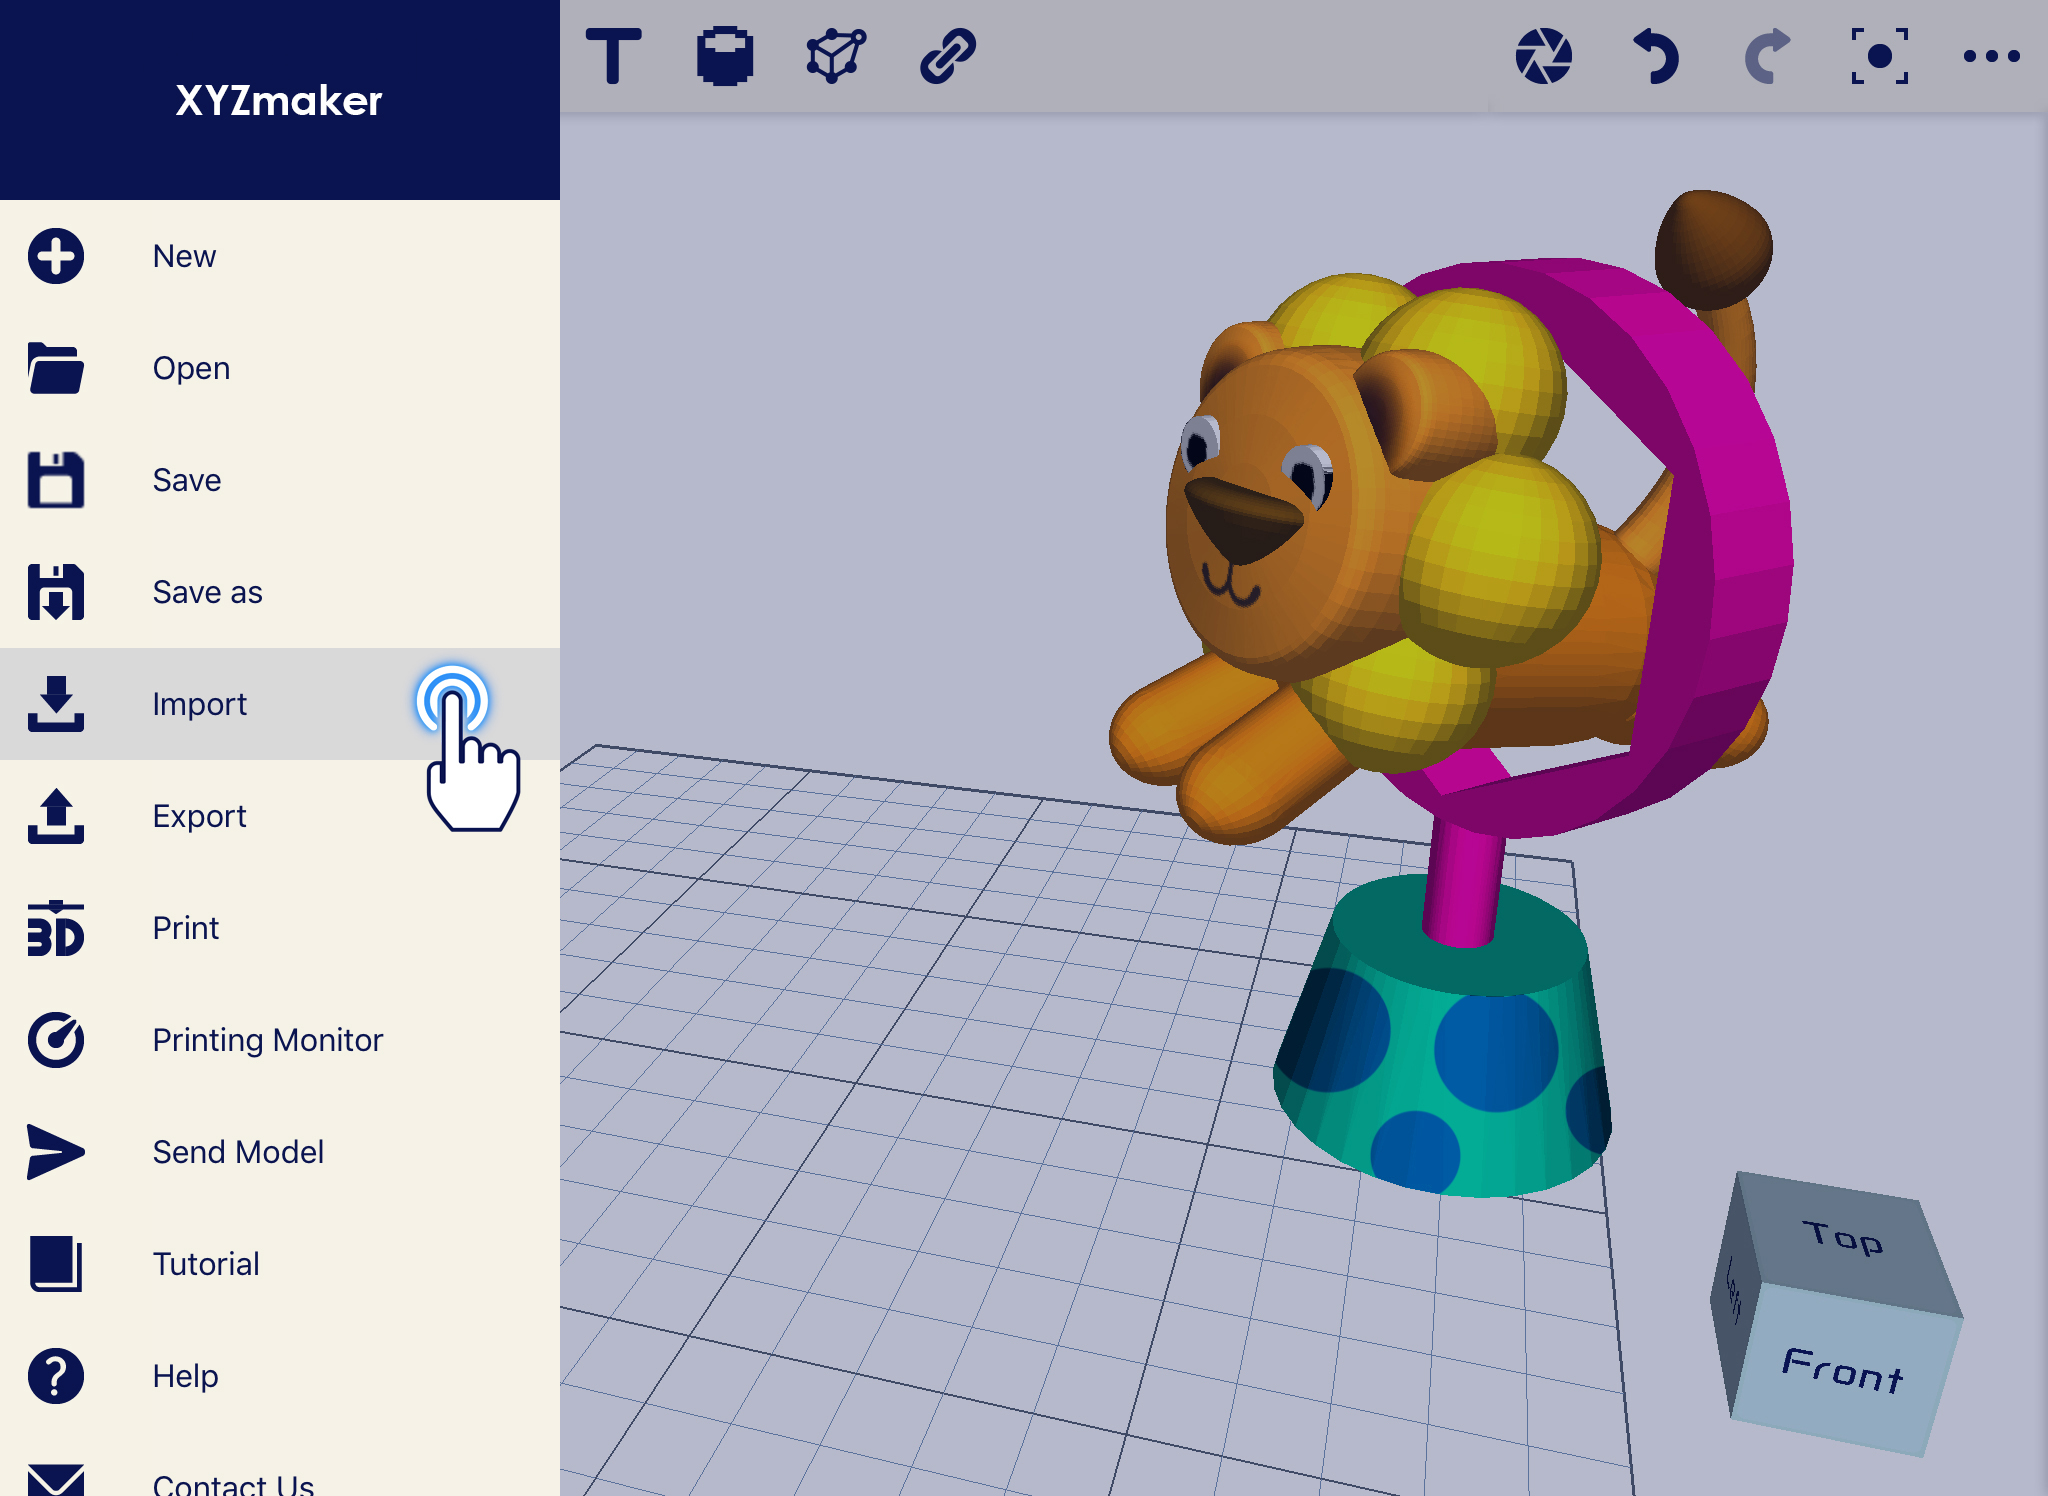
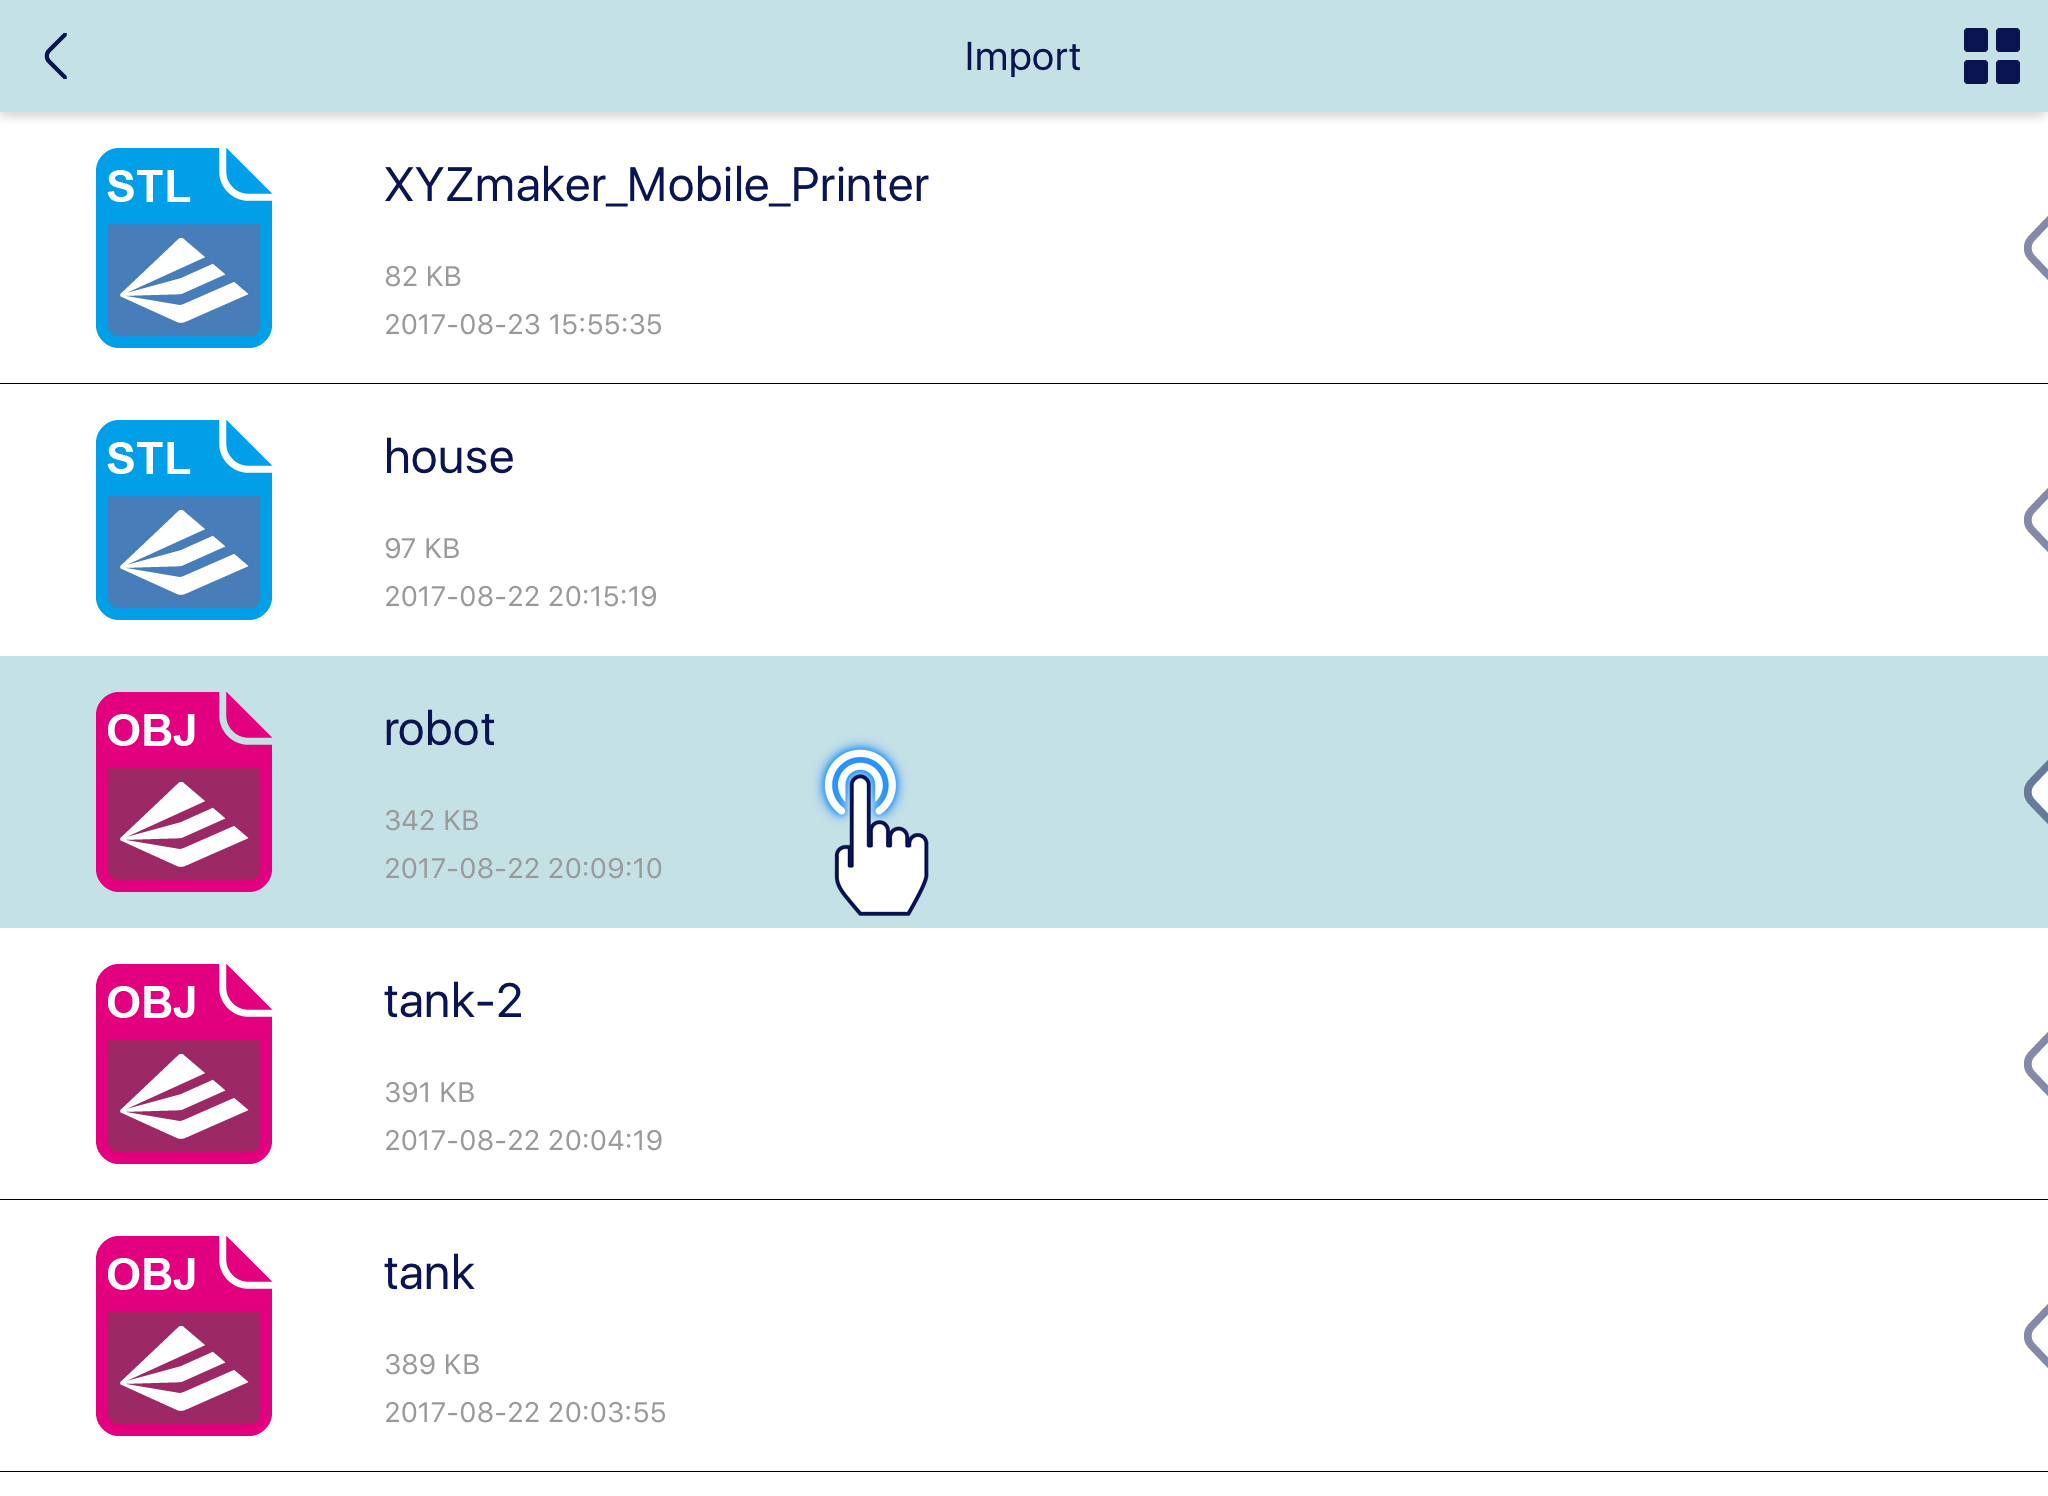
This function will help you to combine several objects in the workplace. Once you use the Import, you can add any object as many as you can in your current project. You can import only STL, OBJ and PLY file type.

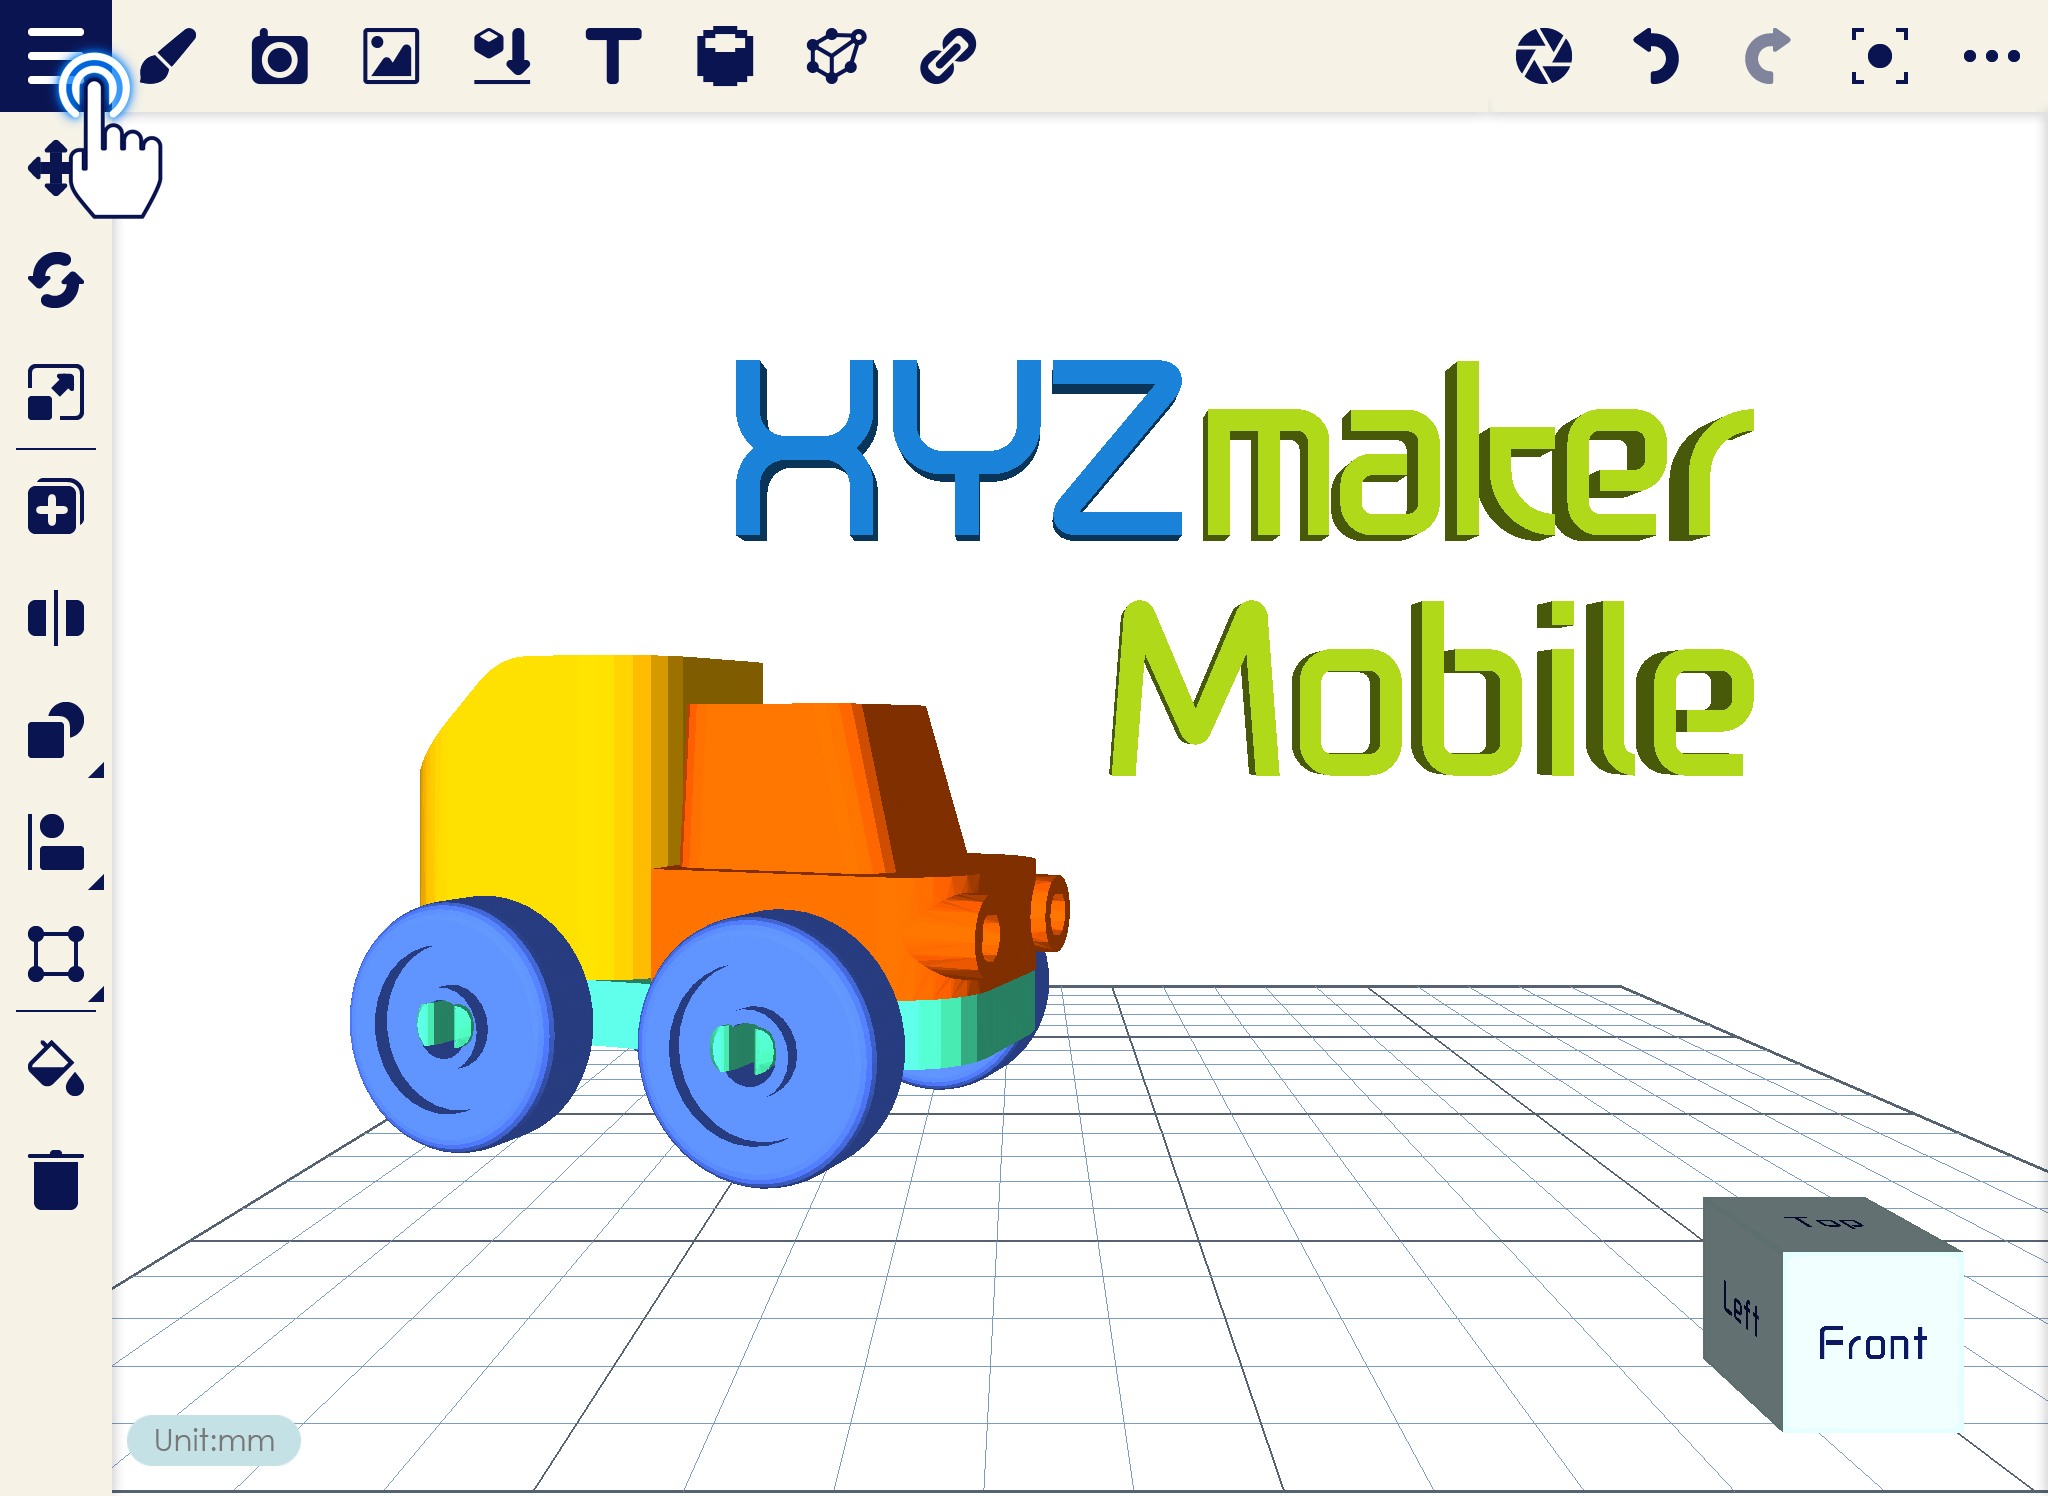
1. Click on the Navigation Drawer.NAV_05_import_1

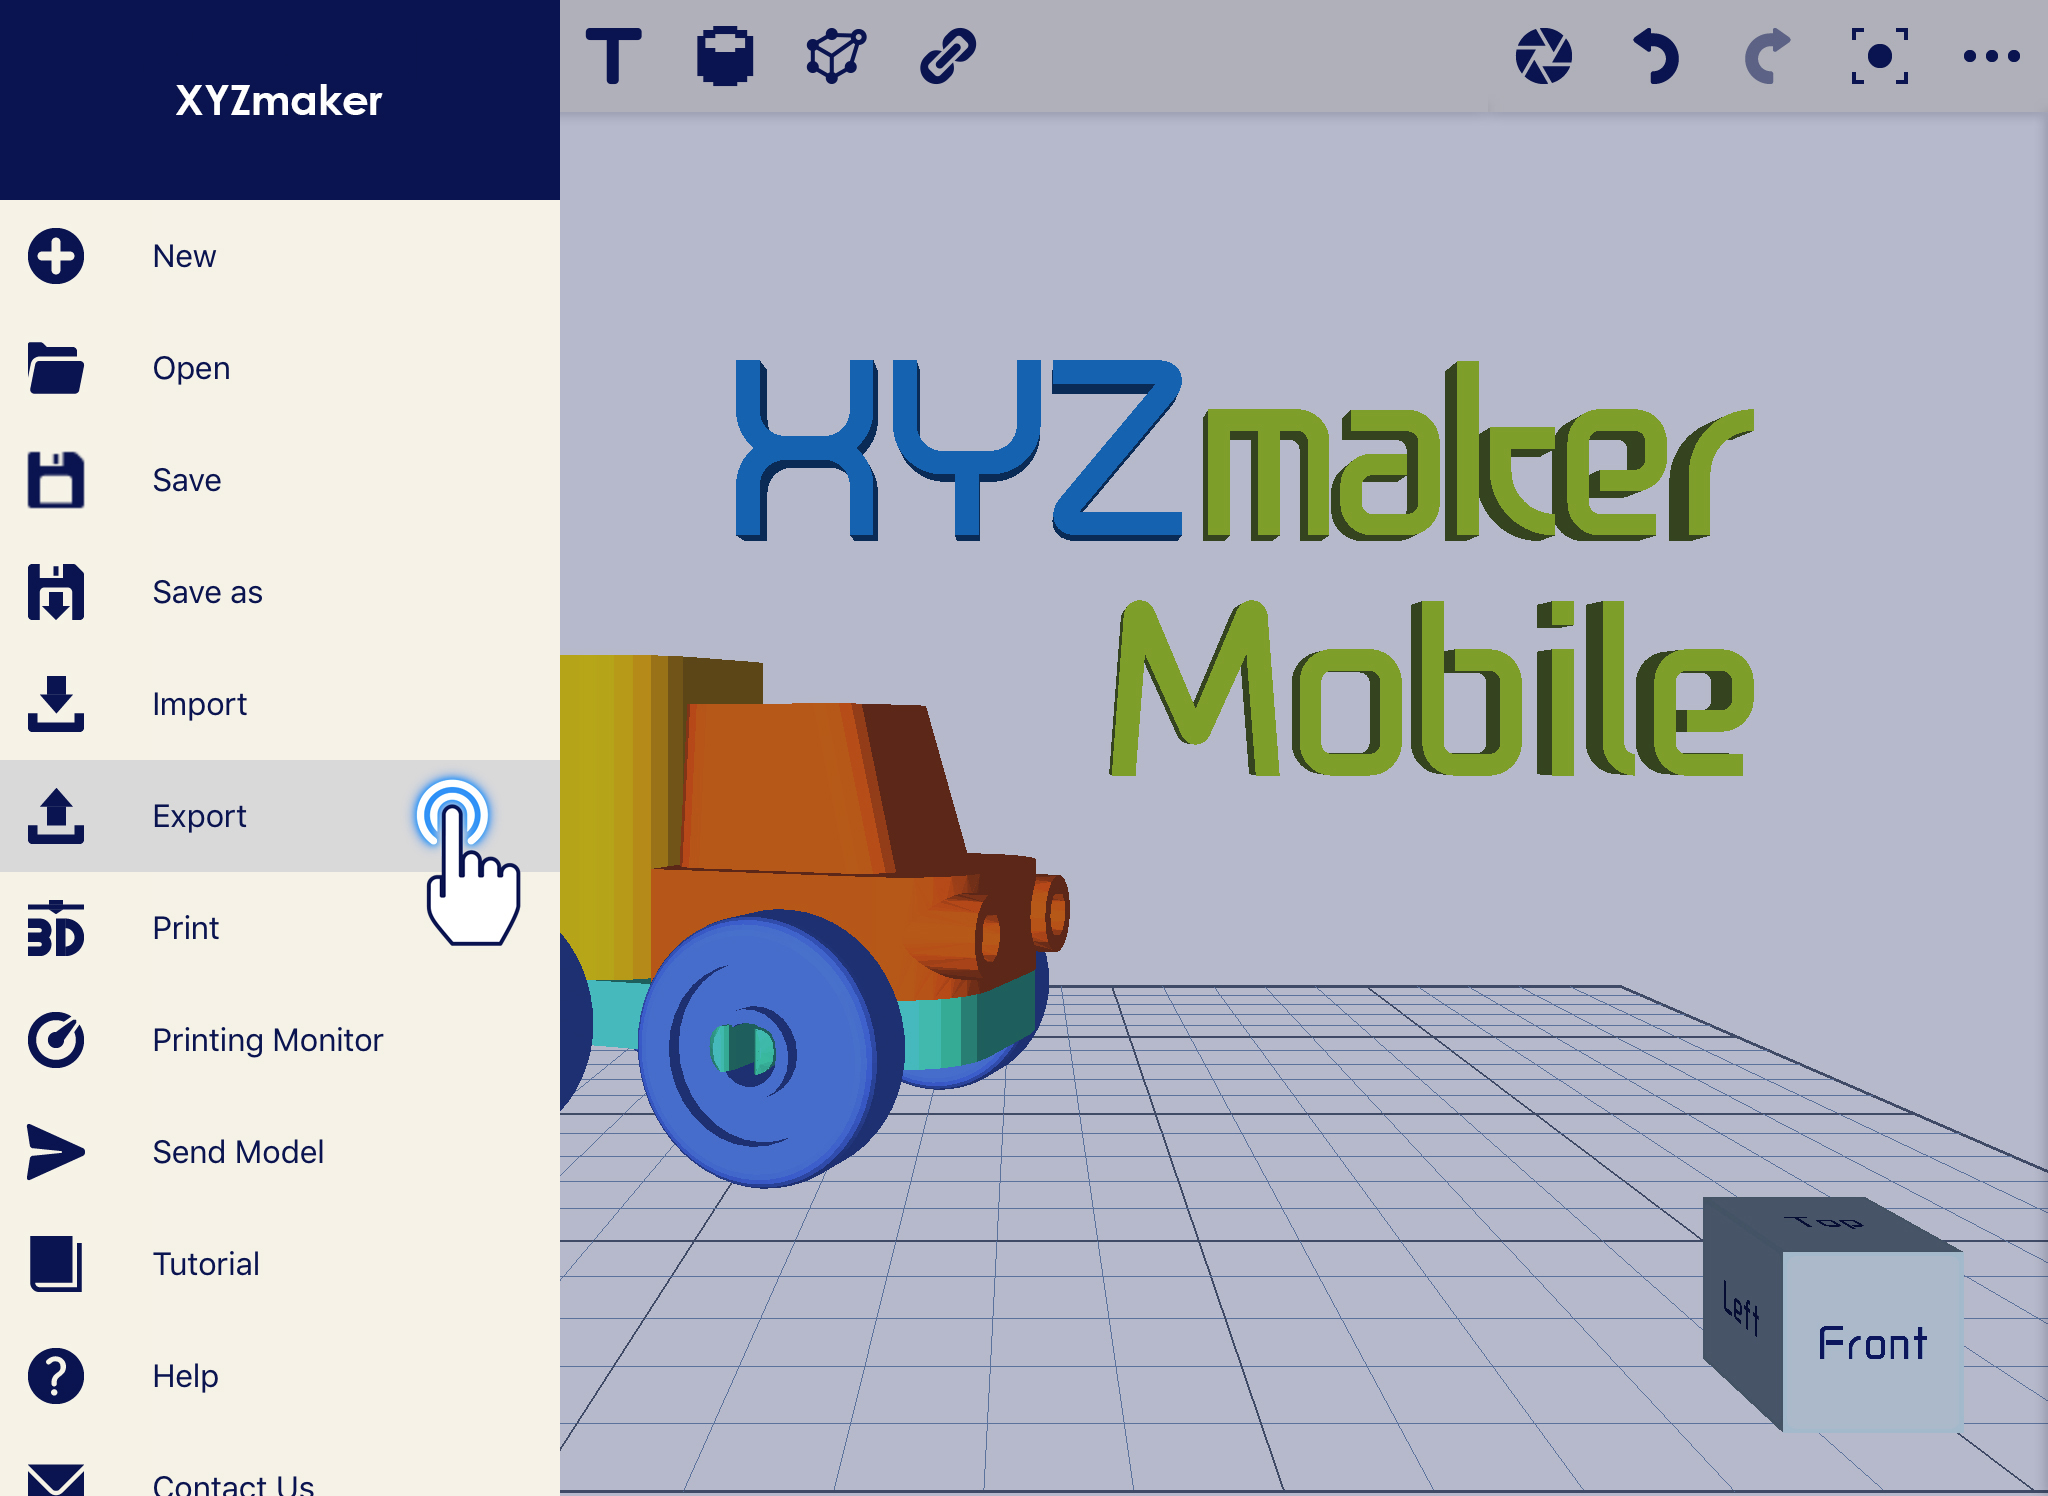
2.From the list, select Import.NAV_05_import_2

3. Import Window will display, from that, select the file type that you want to add on your current project. It can be STL, PLY or OBJ.NAV_05_import_3

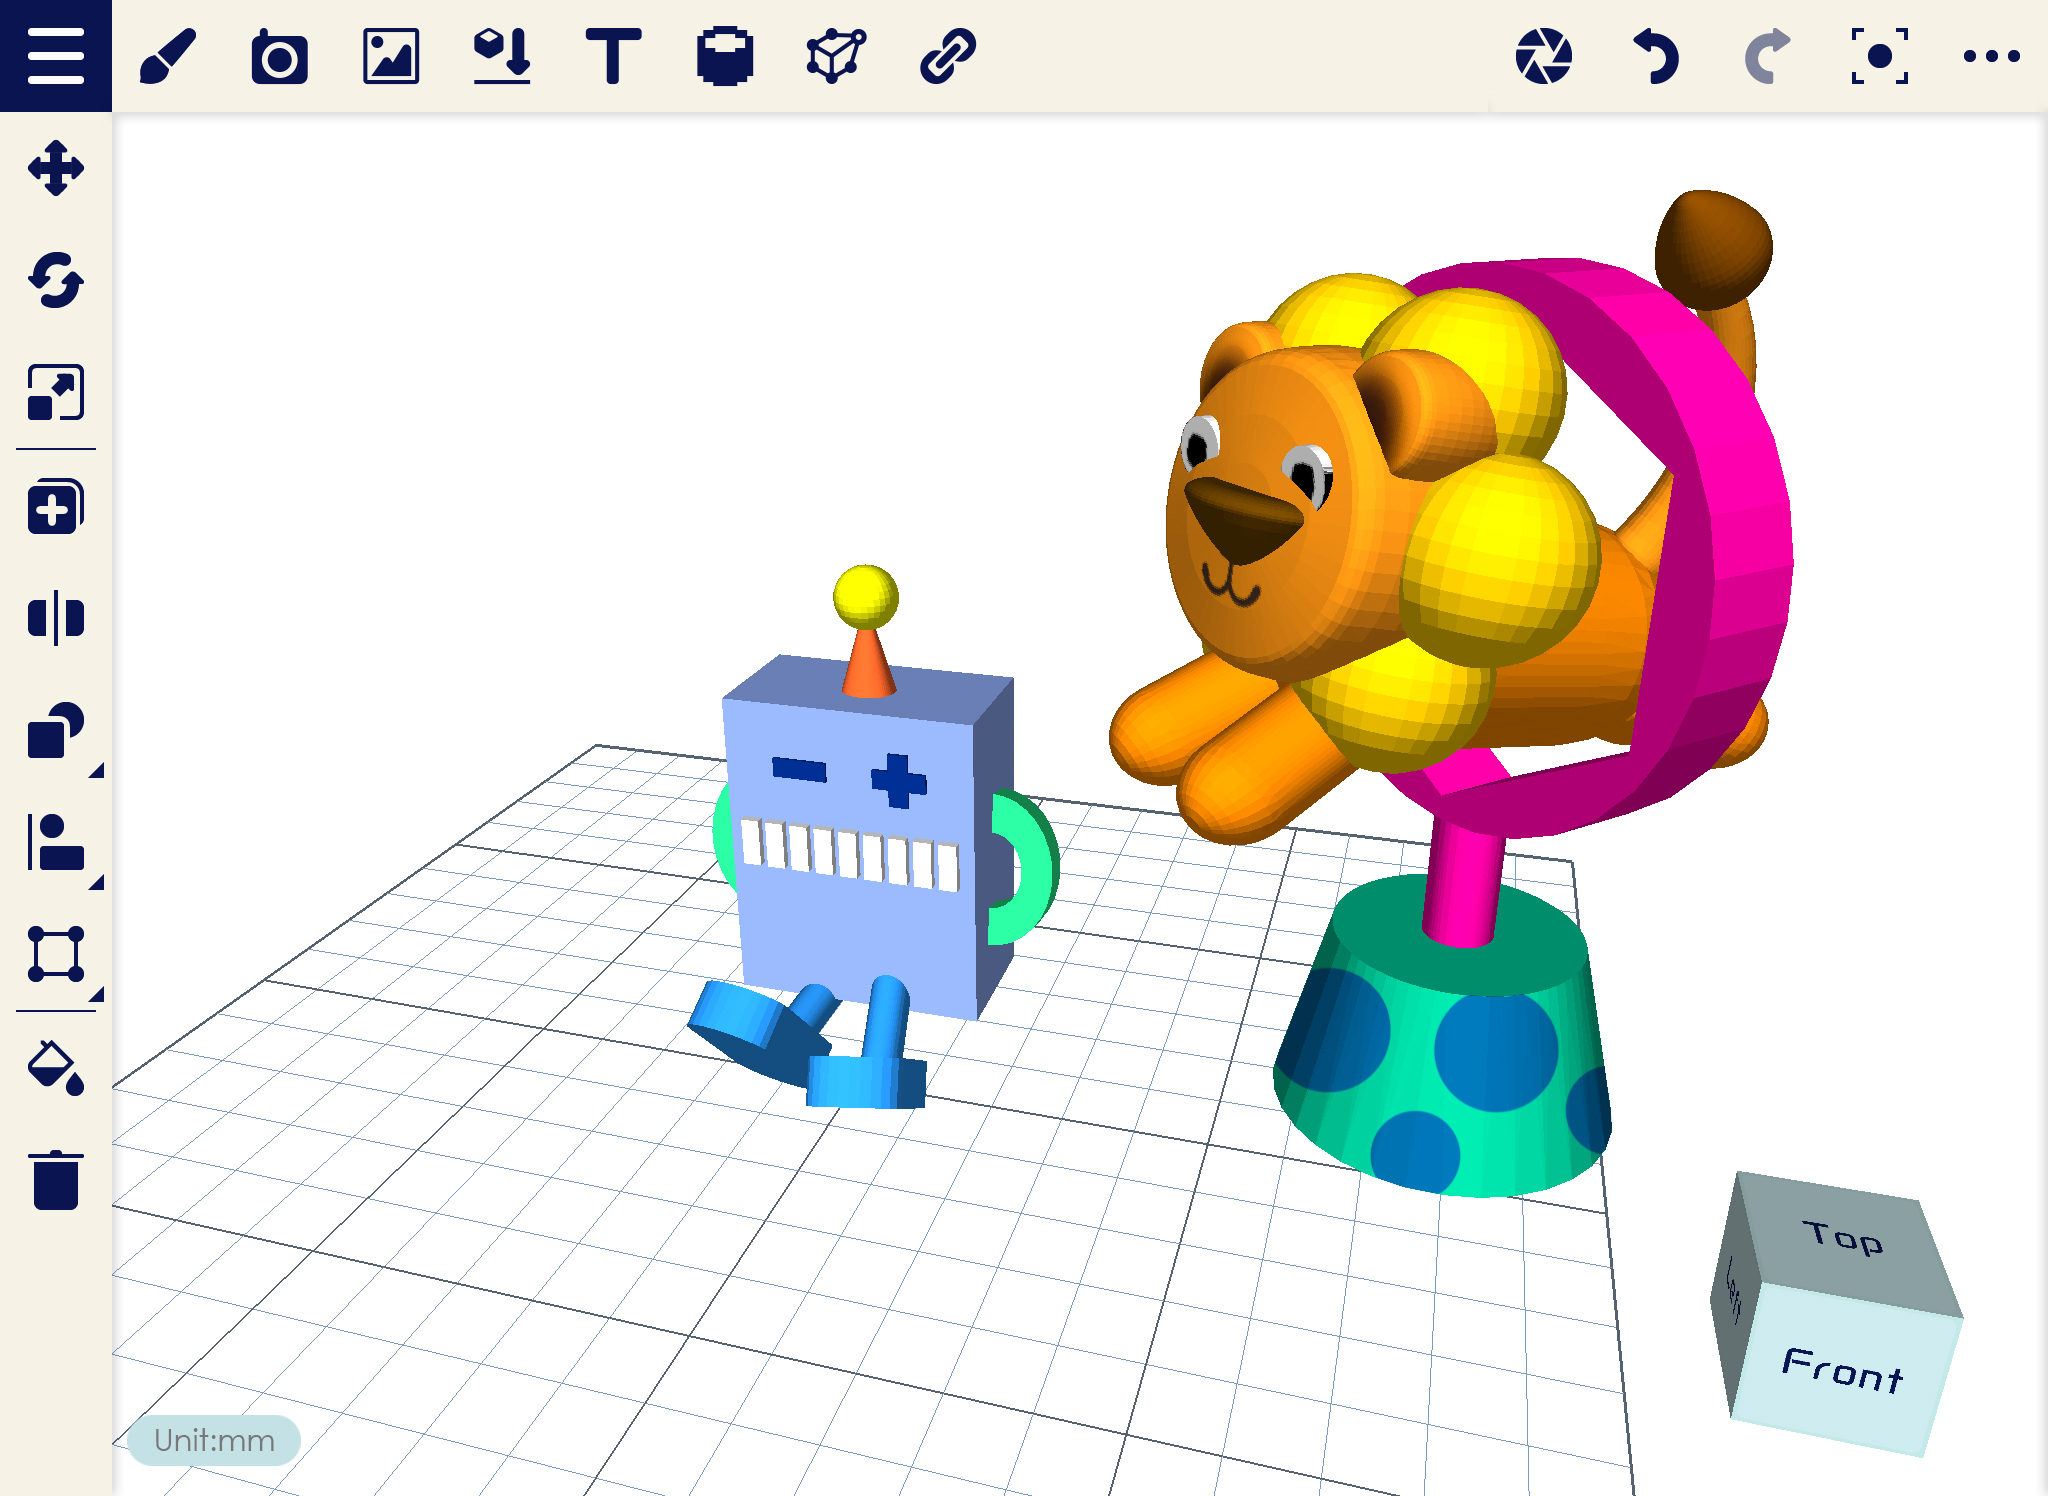
4.Selected object is already added on the workplane.NAV_05_import_4

Export

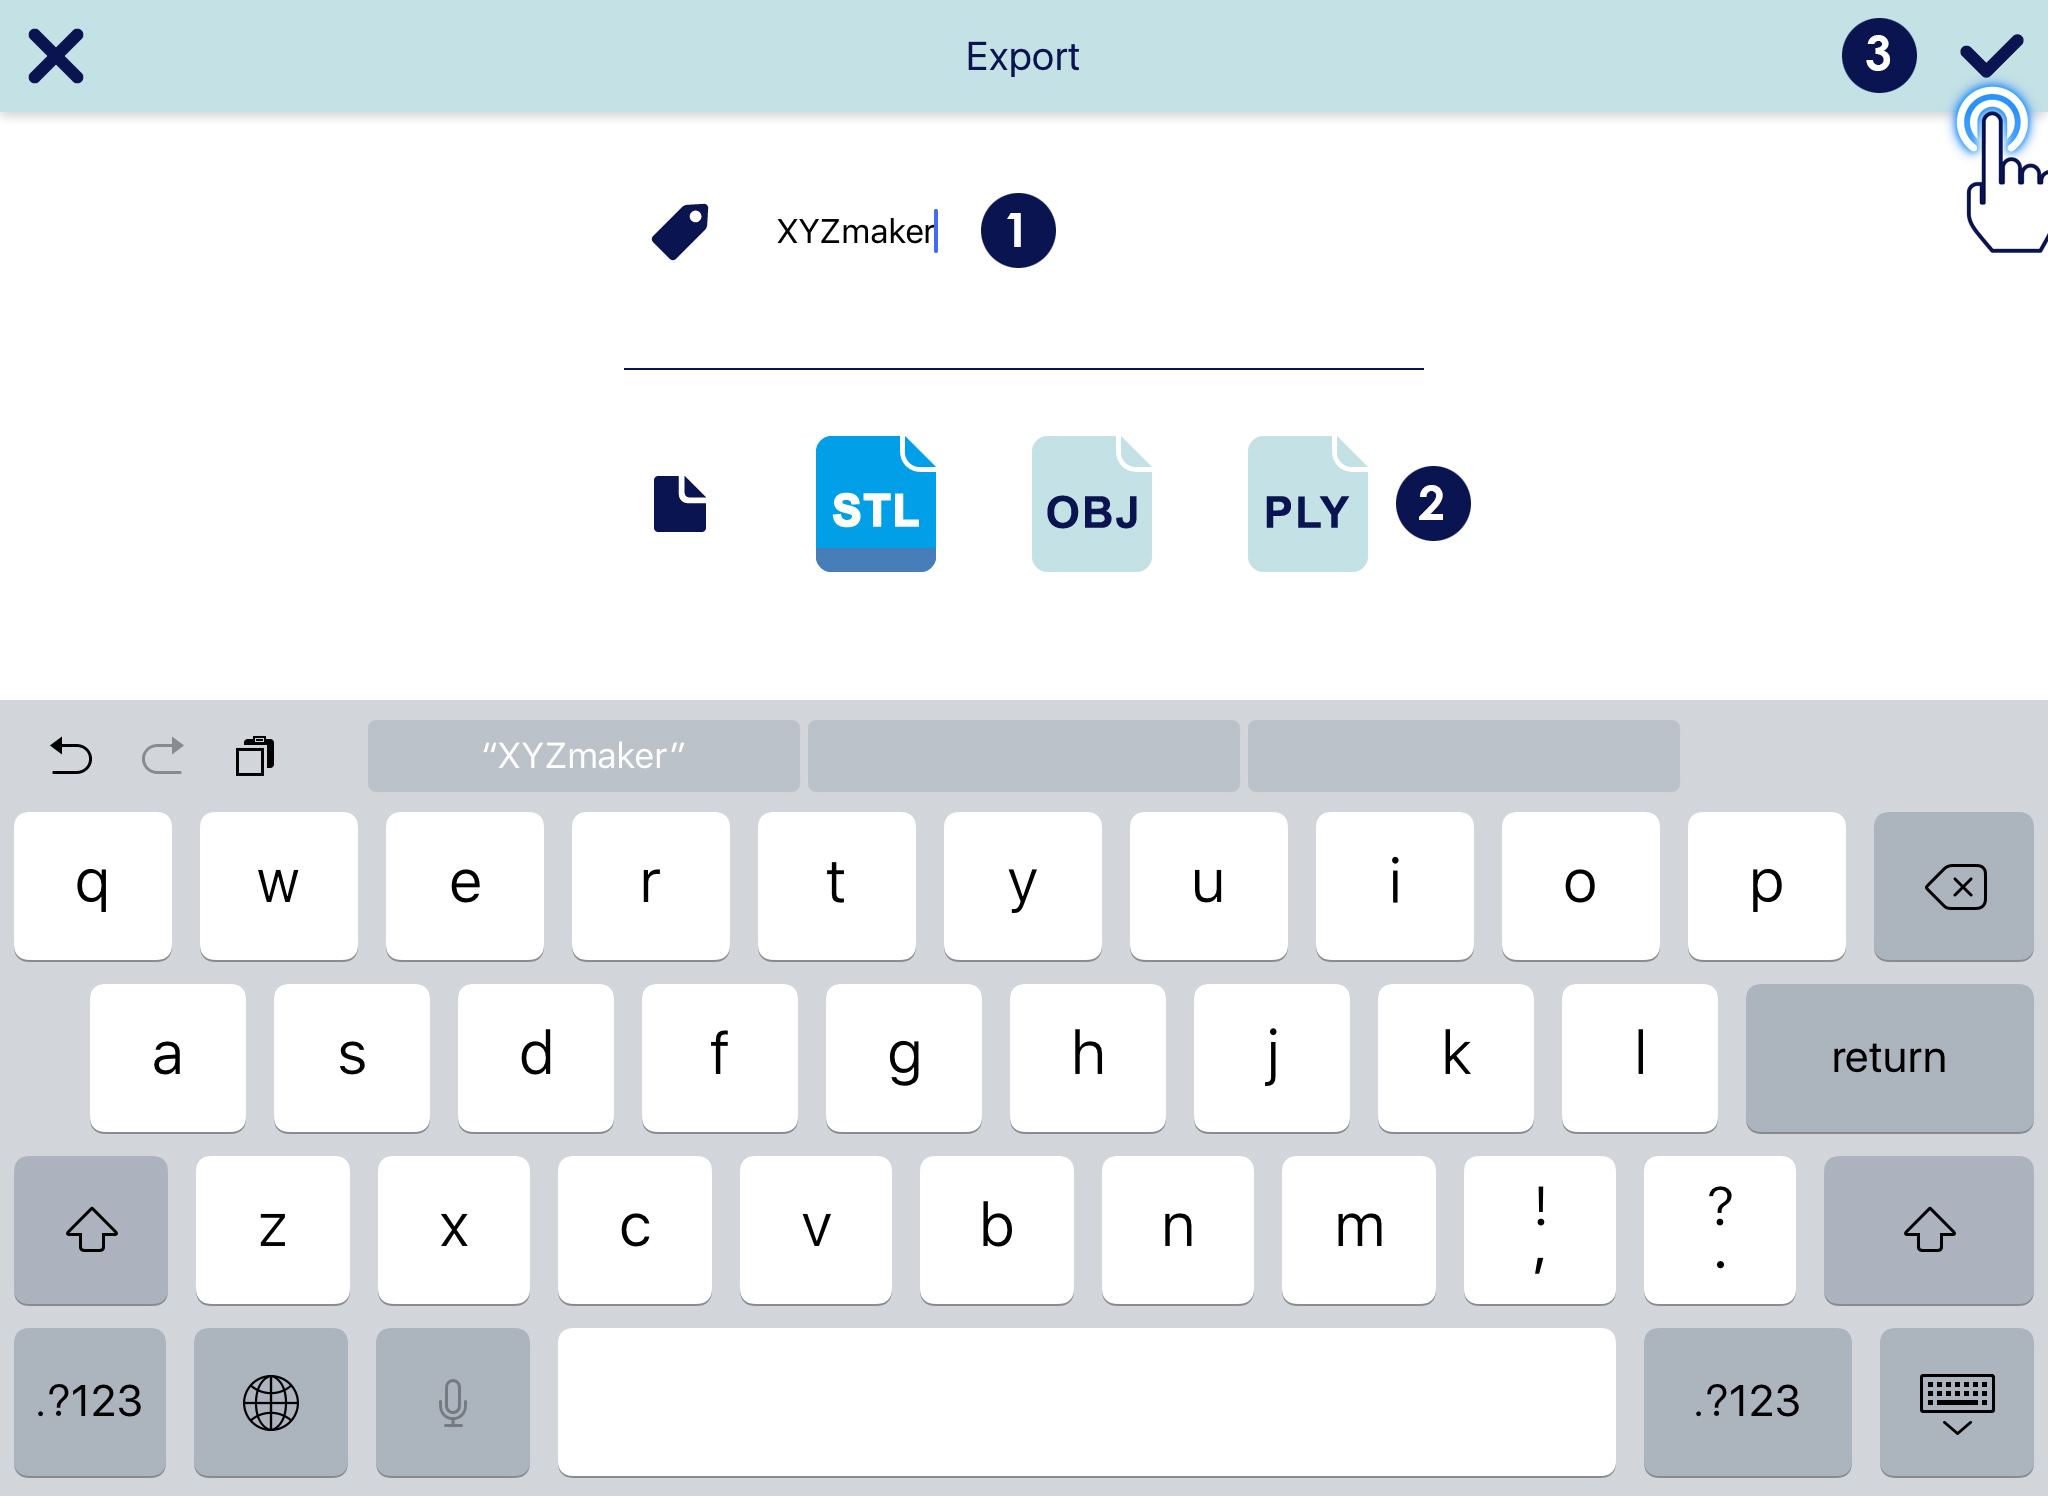
Export function will help you to save your current project into different file extensions such as STL, PLY, and OBJ.

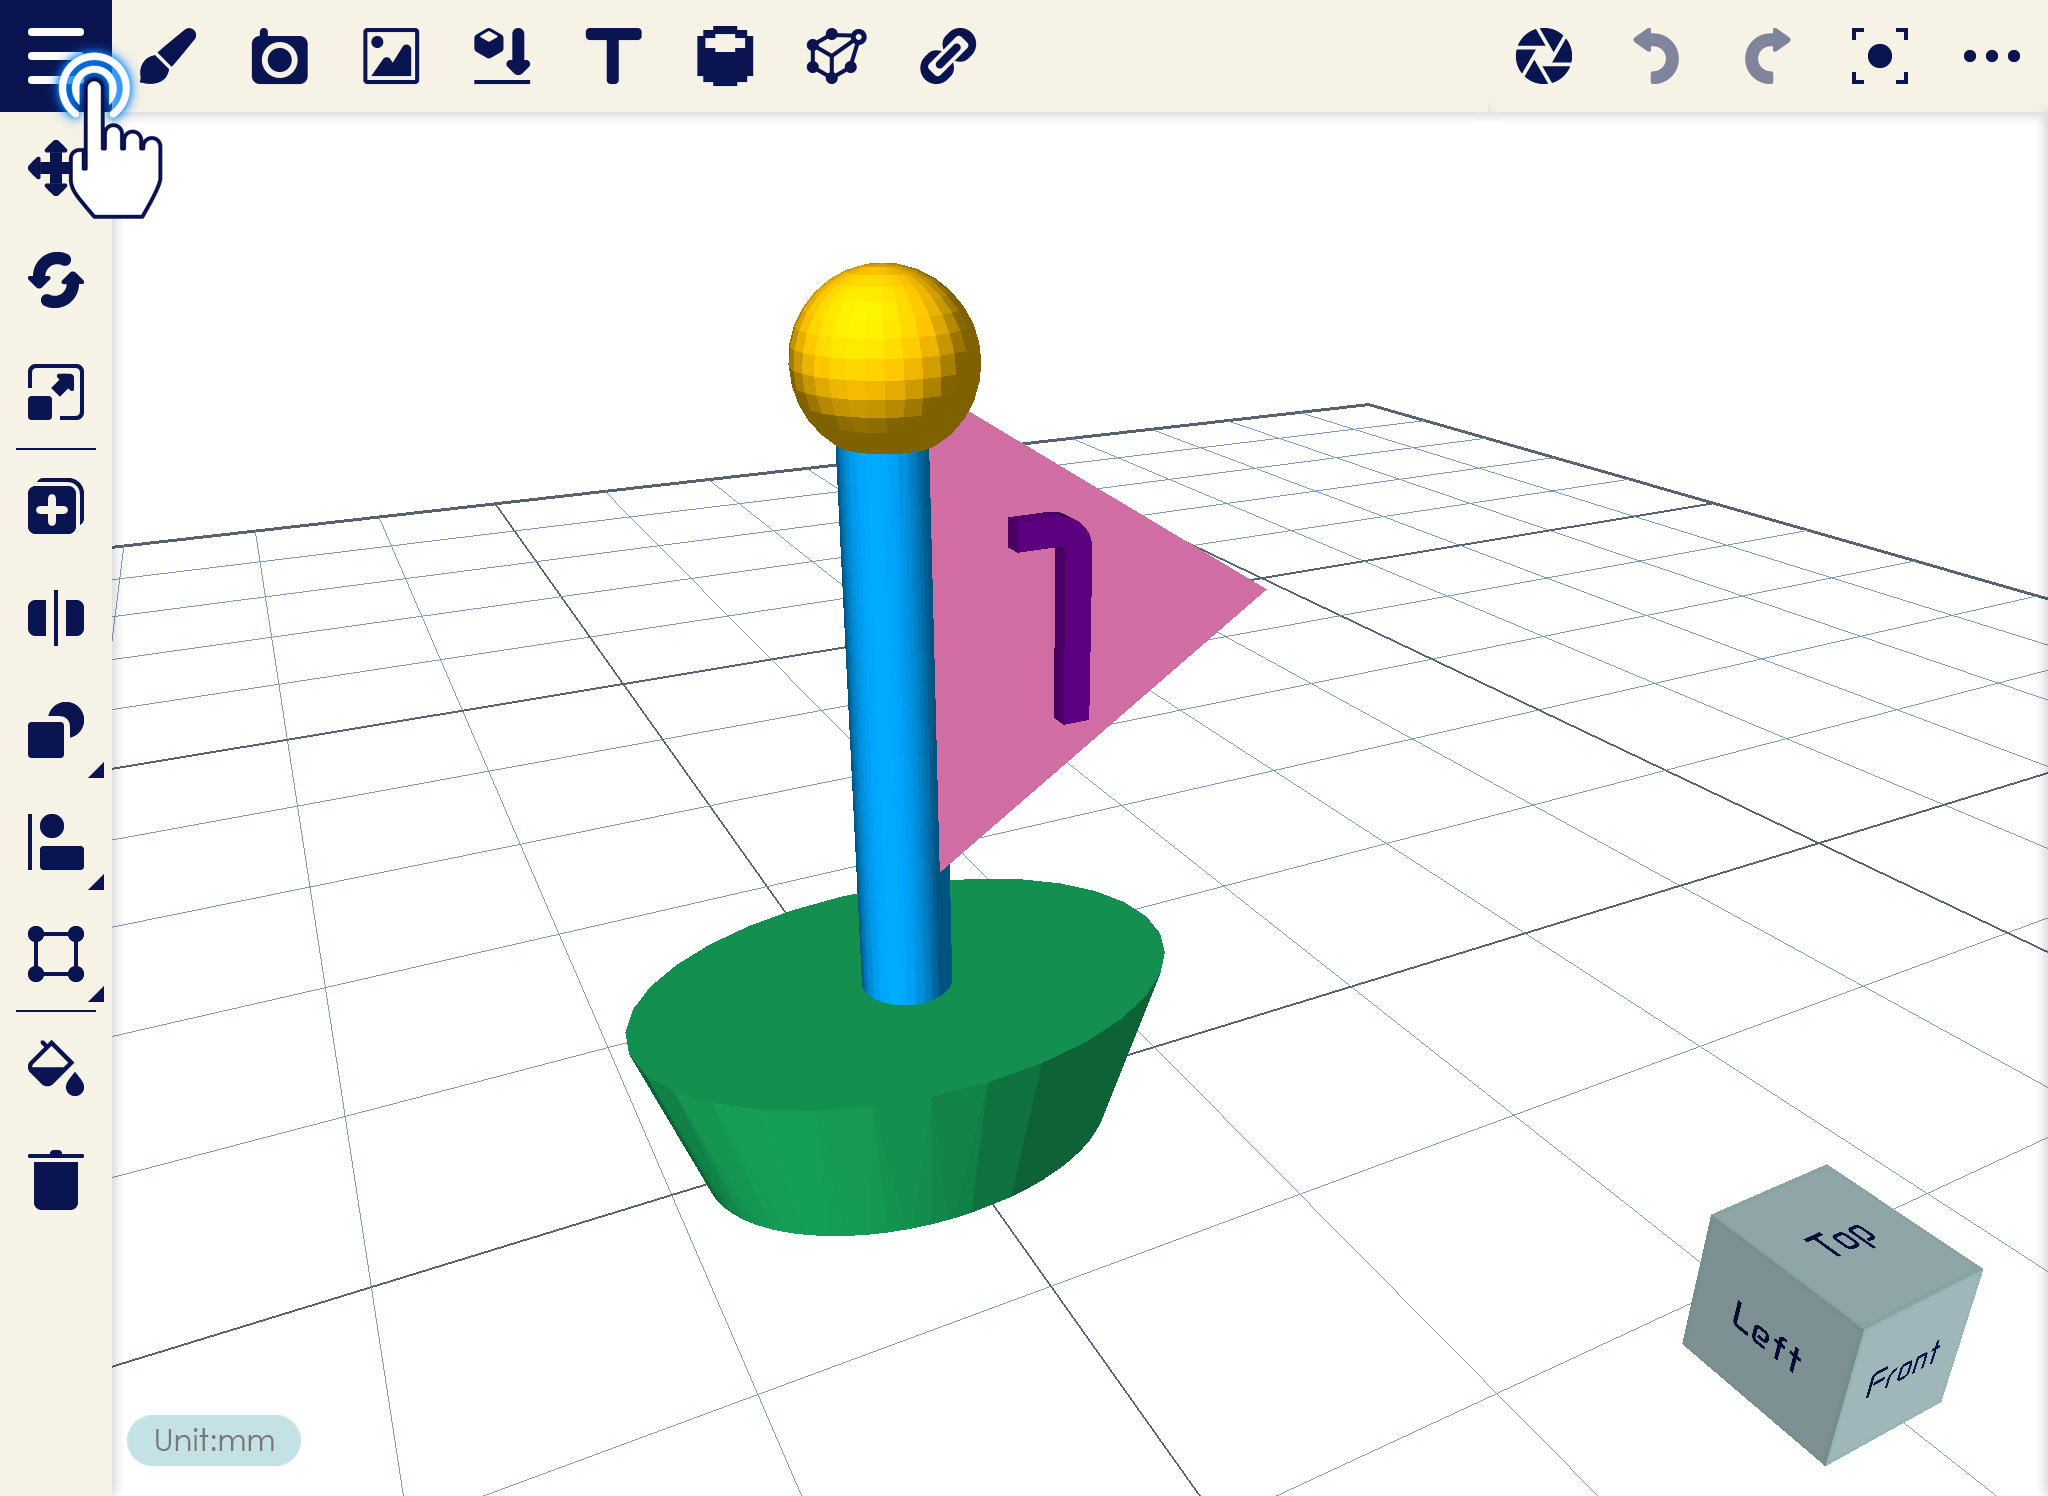
1. Create any design on the workspace then click on Navigation Drawer.NAV_06_export_1

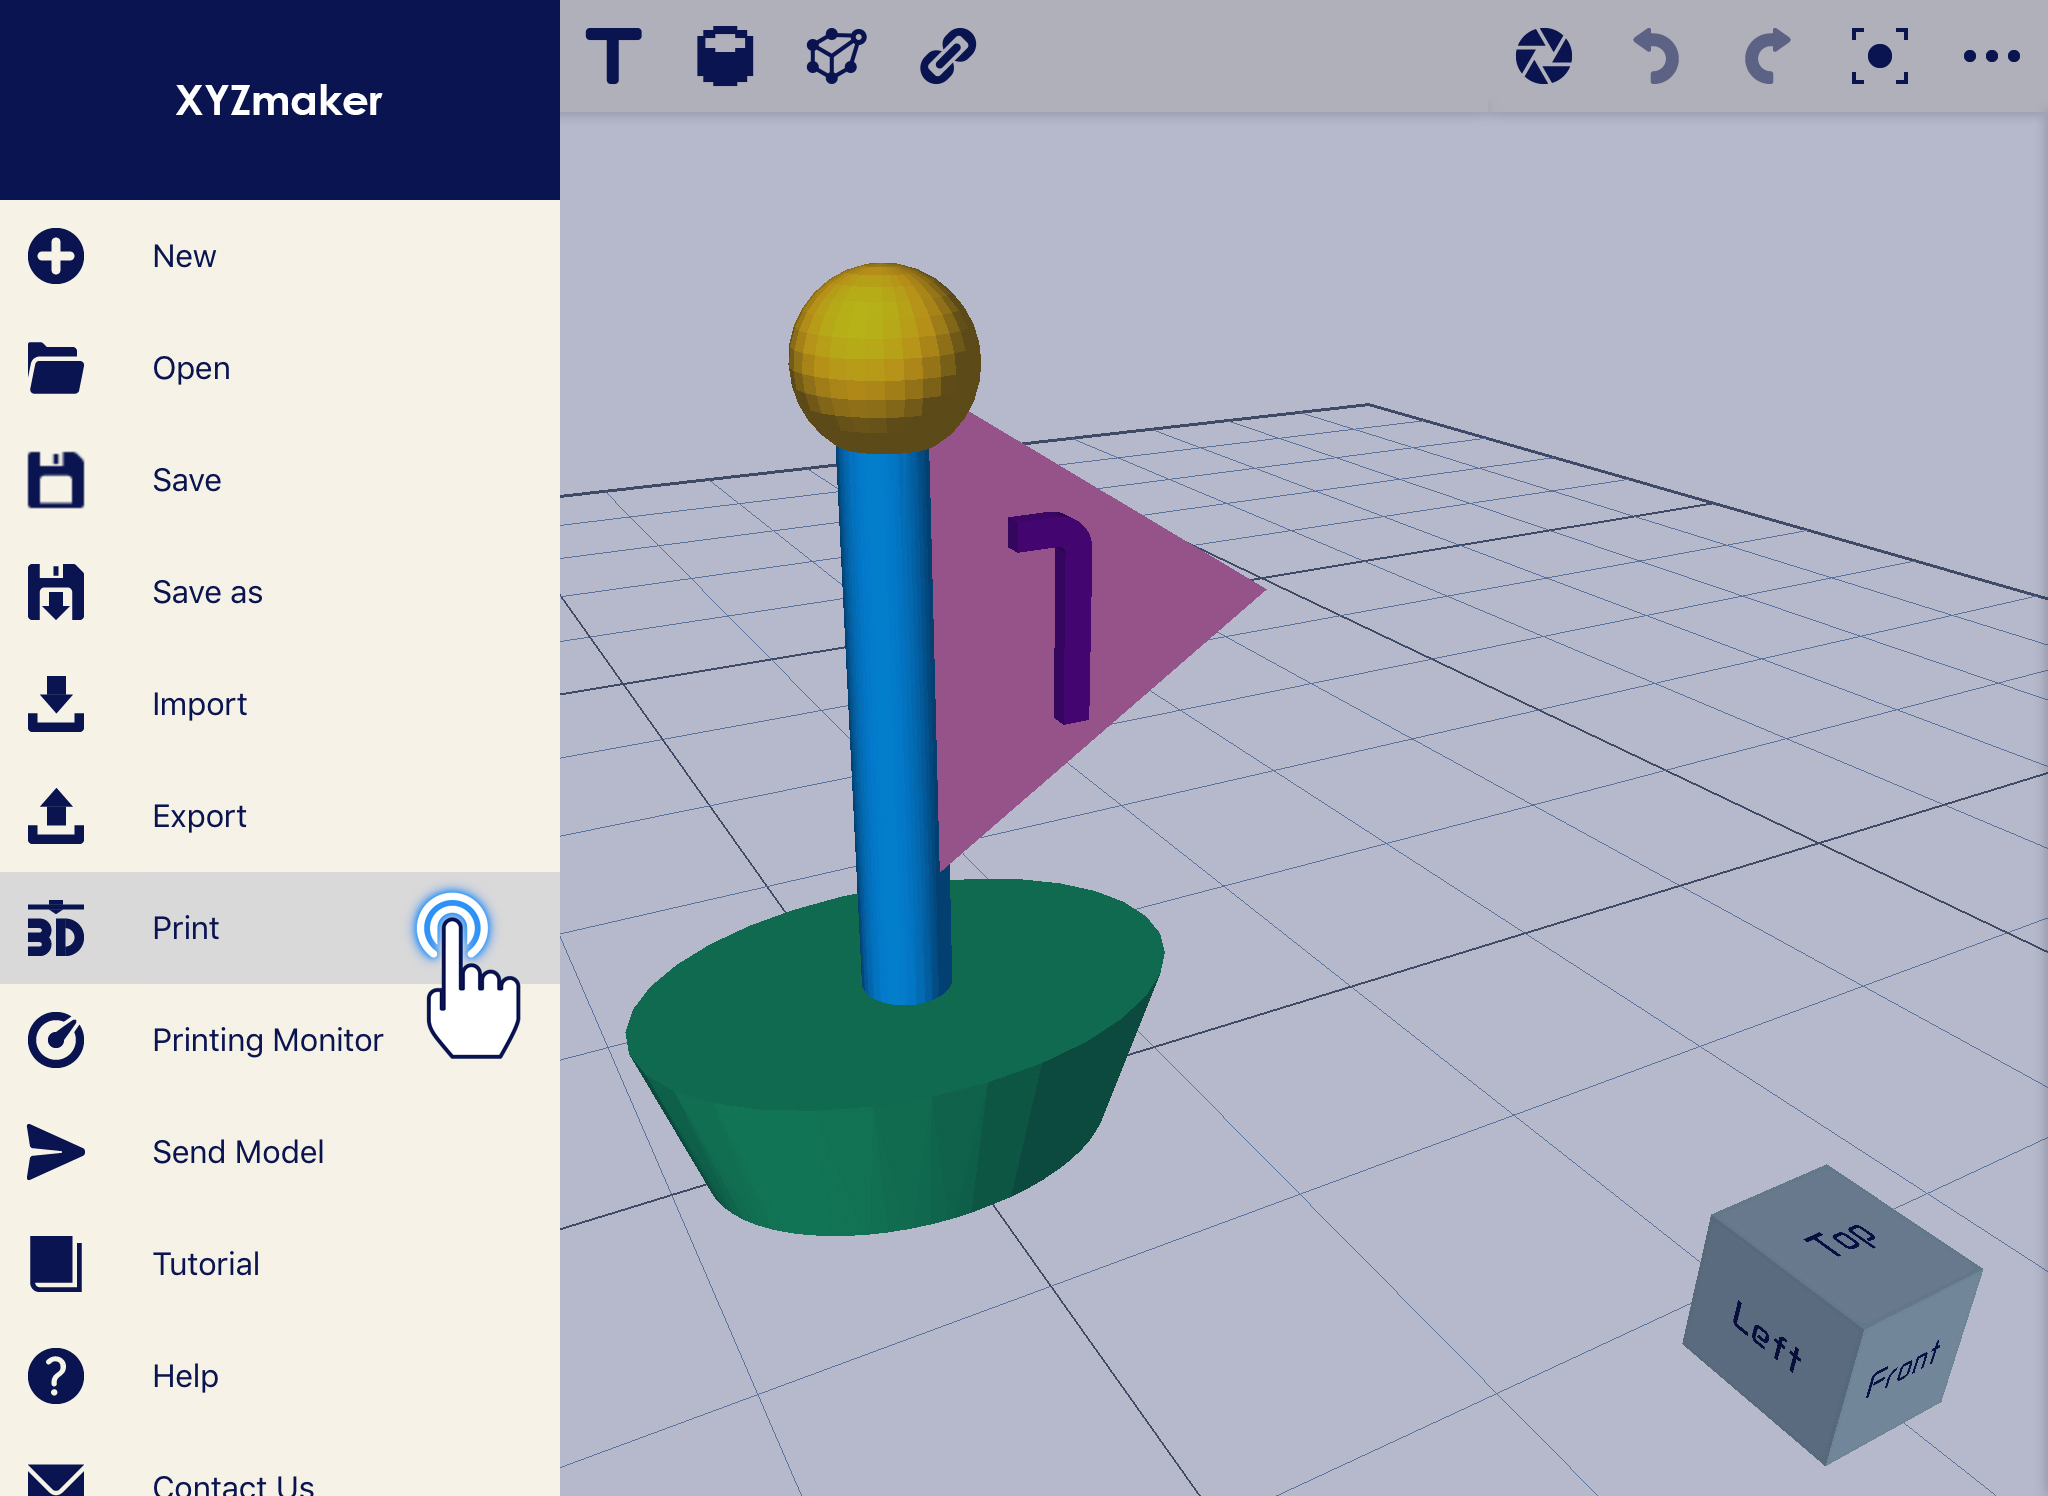
2. Select Export from the list.NAV_06_export_2

3. First, set the filename you want. Second, choose your desired file extension then lastly, click on check icon.NAV_06_export_3

Print

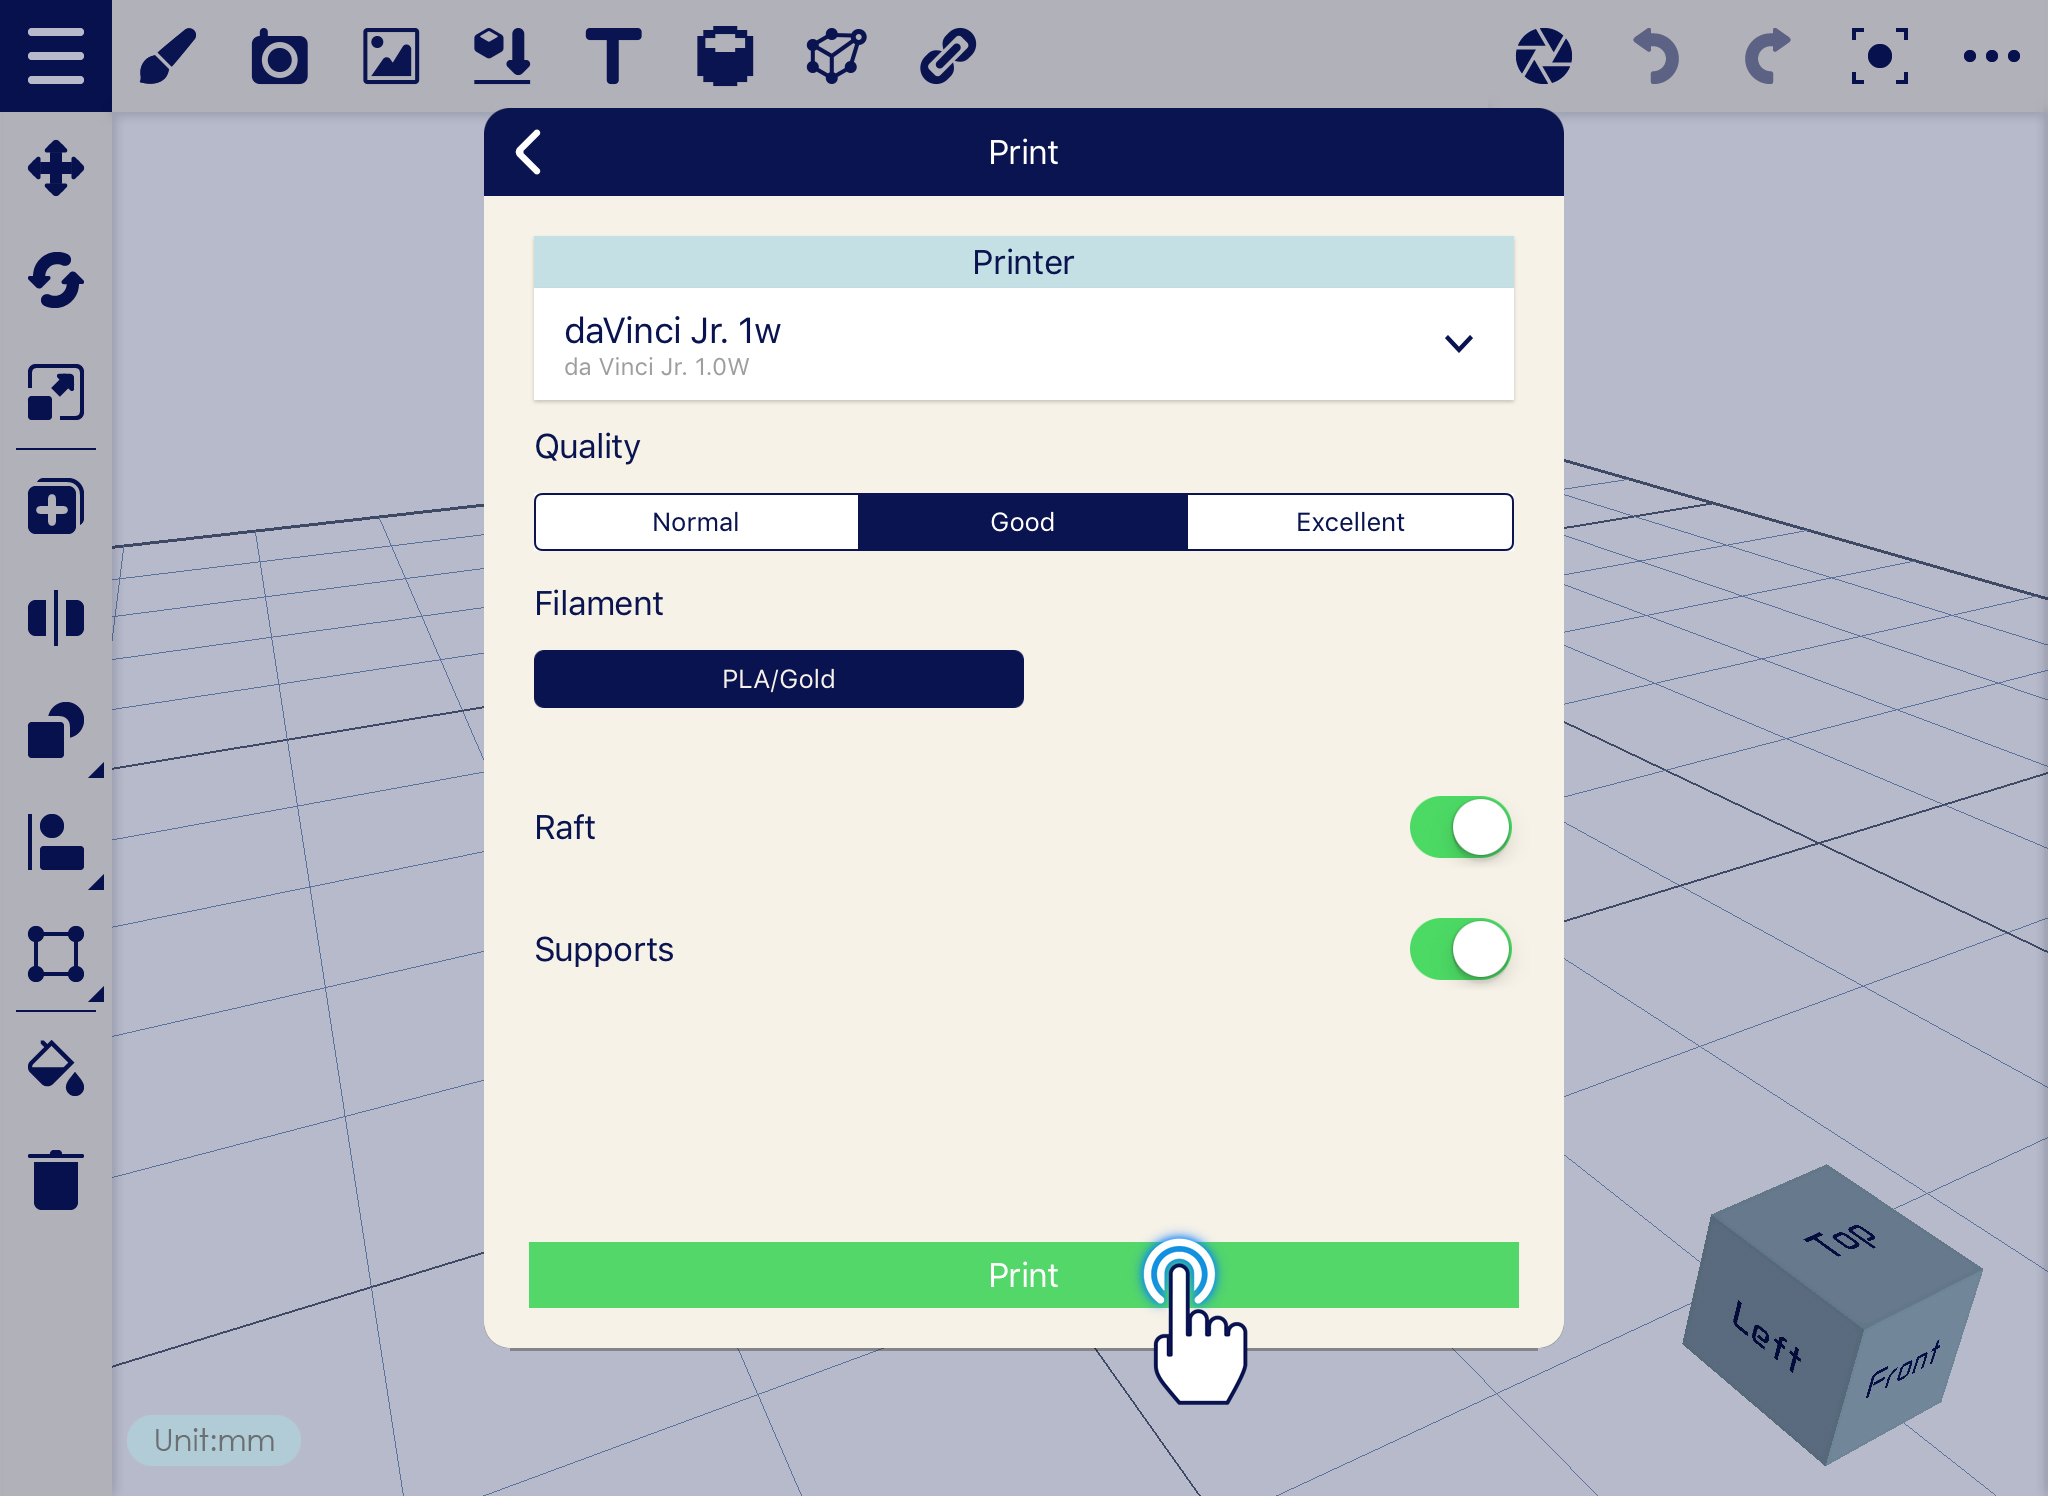
Print function will let you print your design into XYZprinting printers supported by XYZmaker Mobile. There are also several parameters to set when sending job to printers.

1. Import or create any design that you want to print. Then click on the Navigation Drawer.NAV_07_print_1

2. Choose Print from the list.NAV_07_print_2

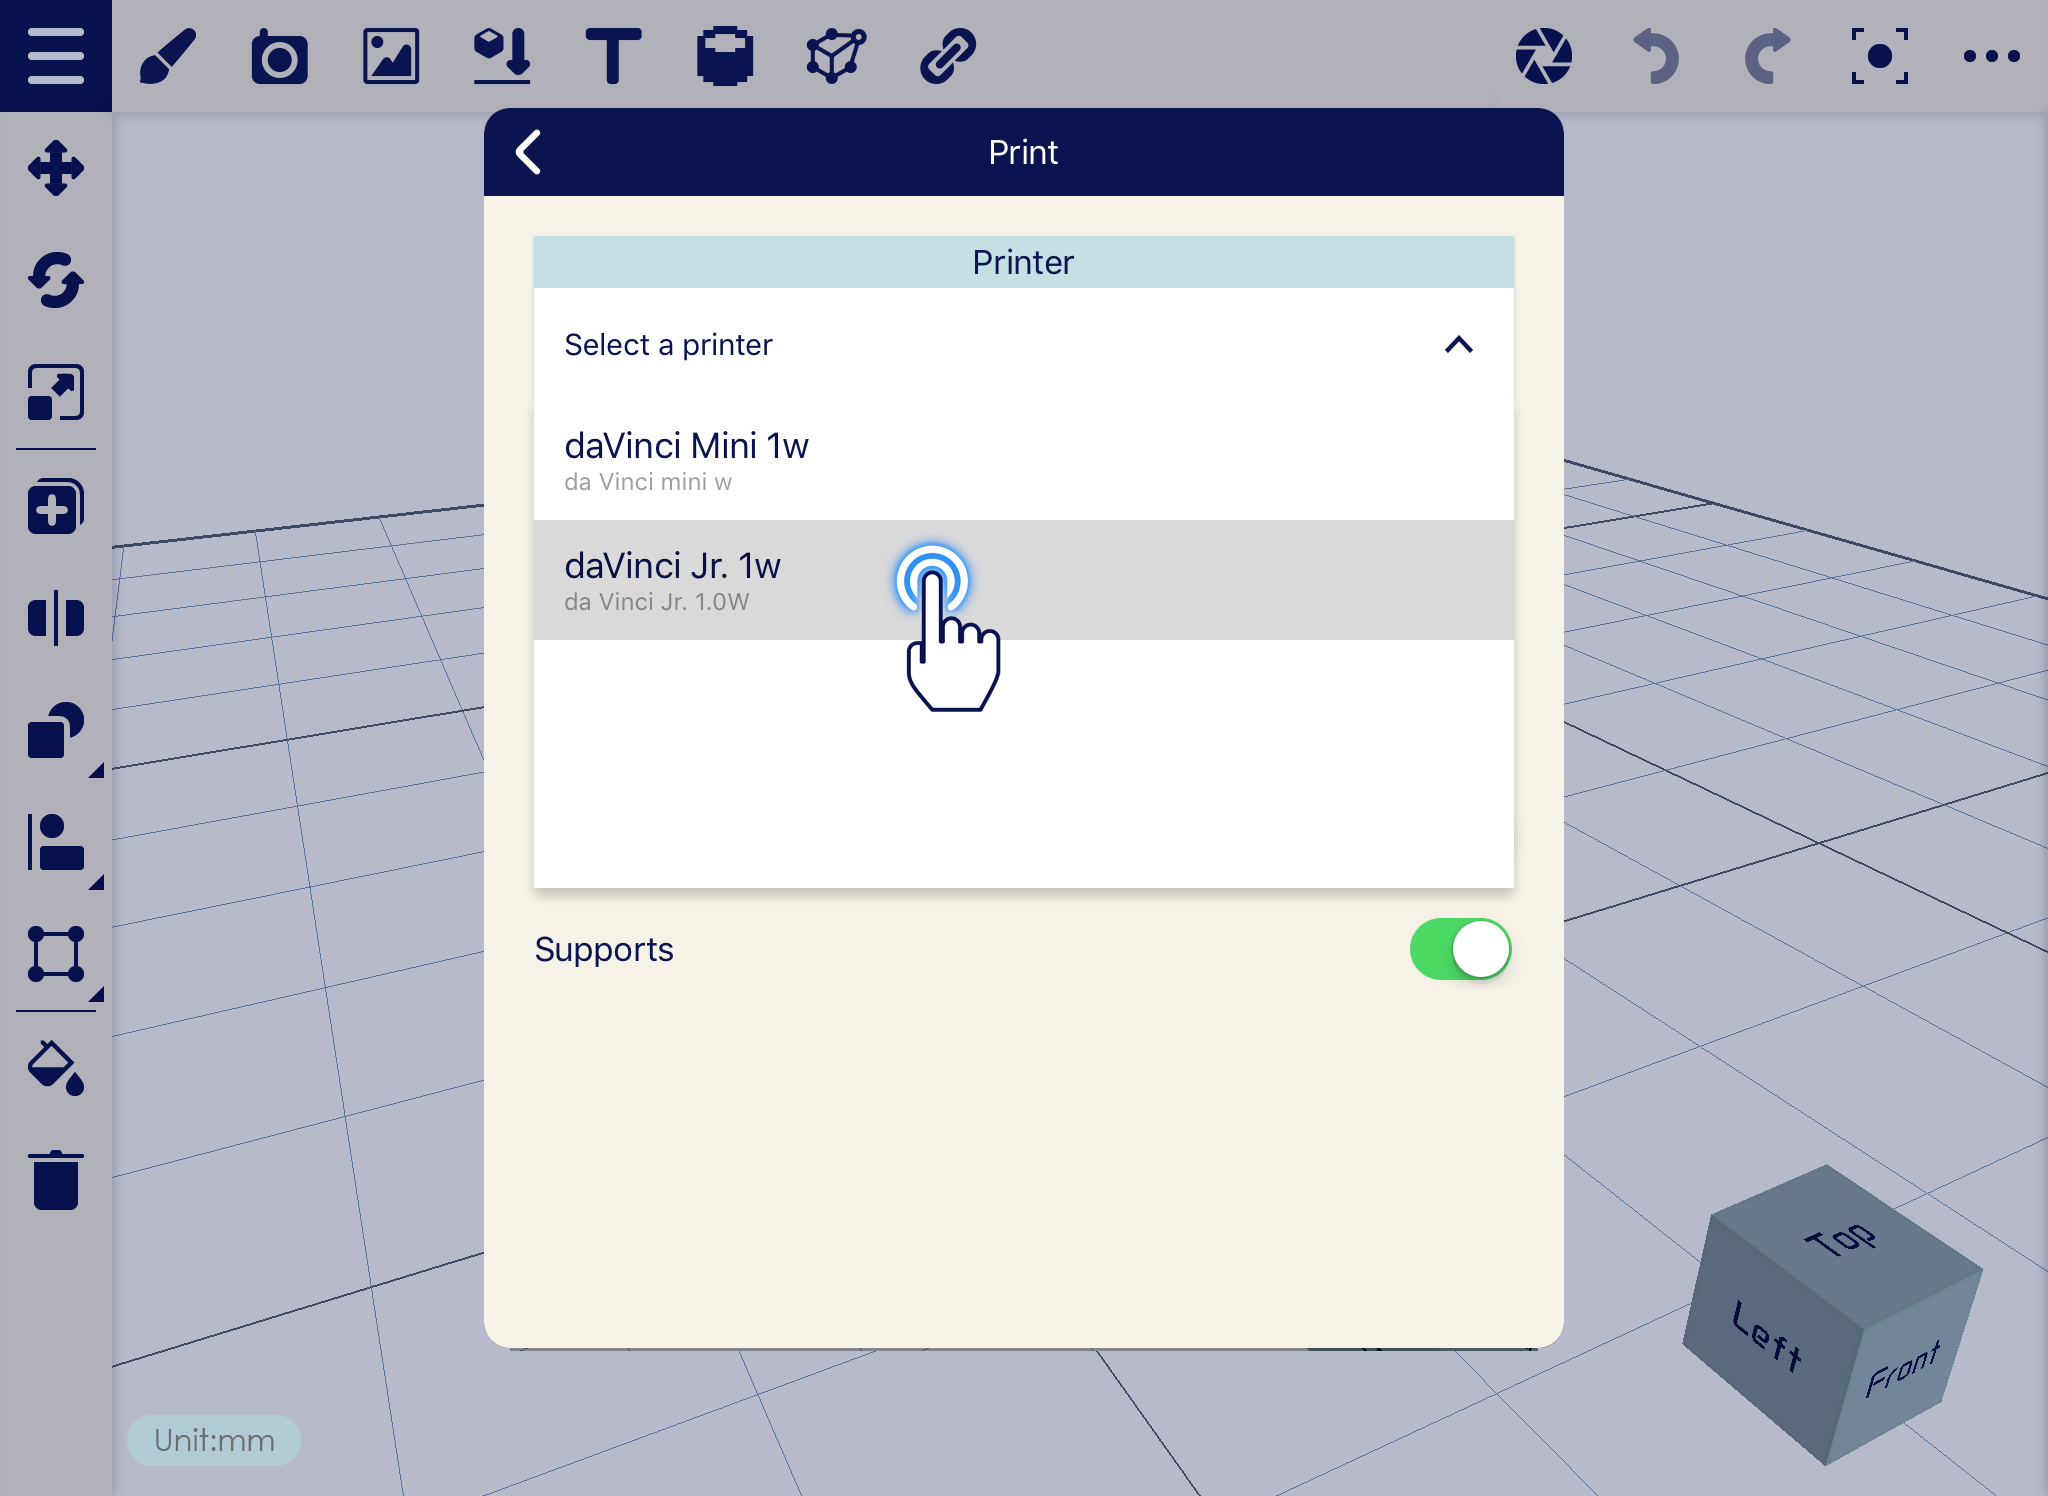
3. Select the printer connected. After selecting the printer, click on Settings icon.NAV_07_print_3

4. Set the printing parameters then click Print.NAV_07_print_4

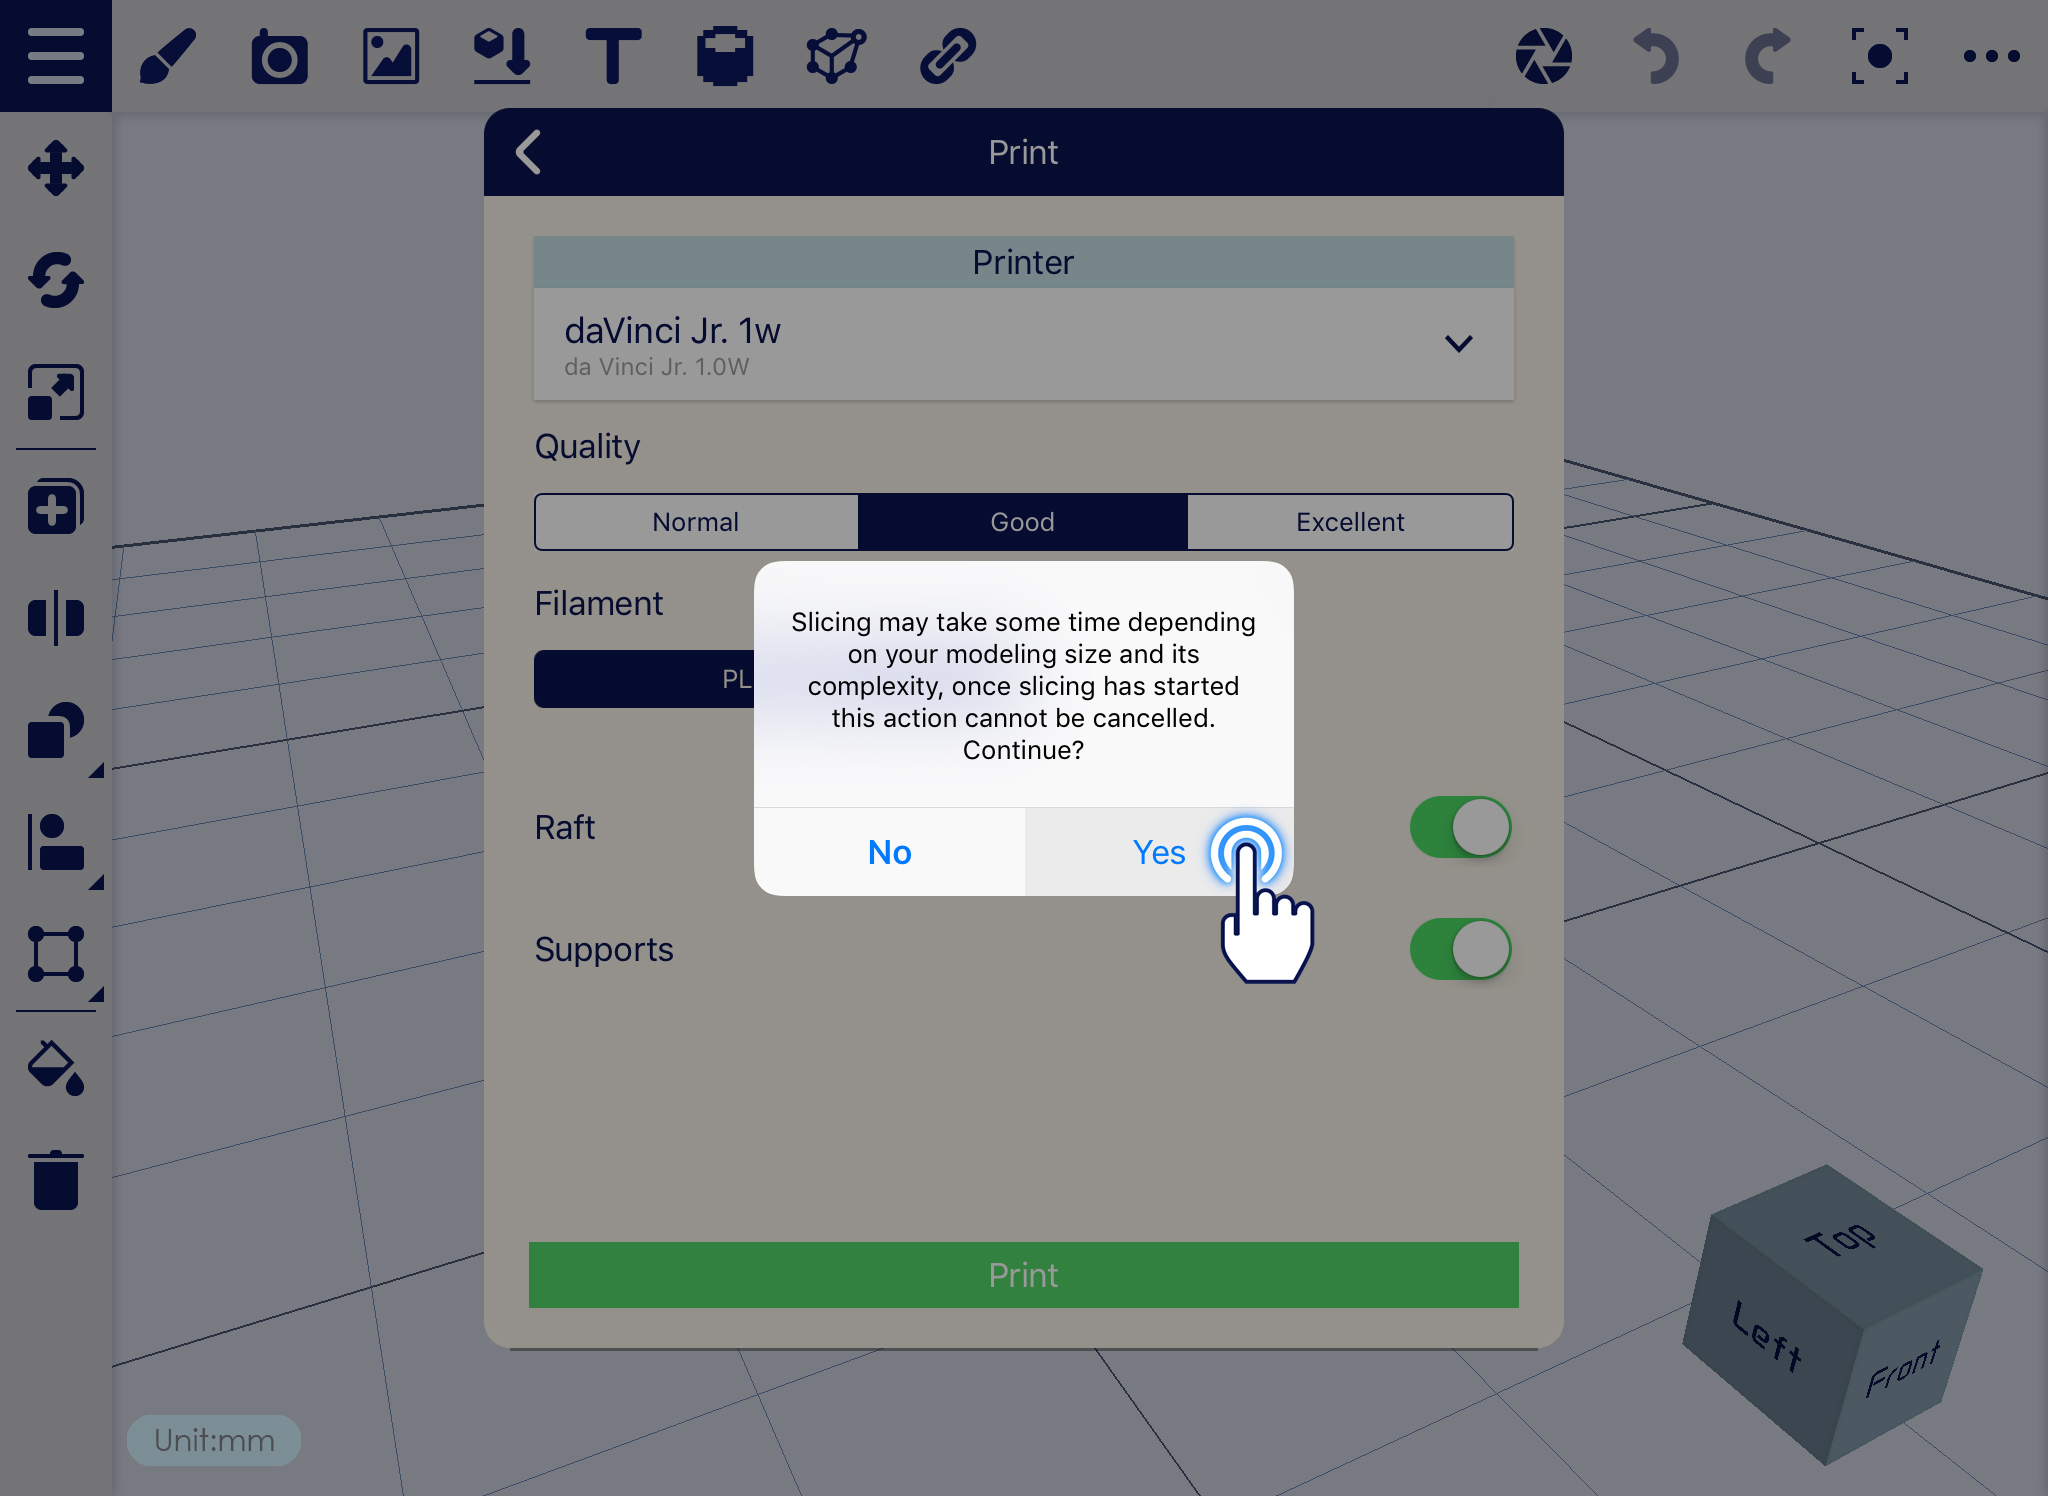
5. After clicking Print, click Yes.NAV_07_print_5

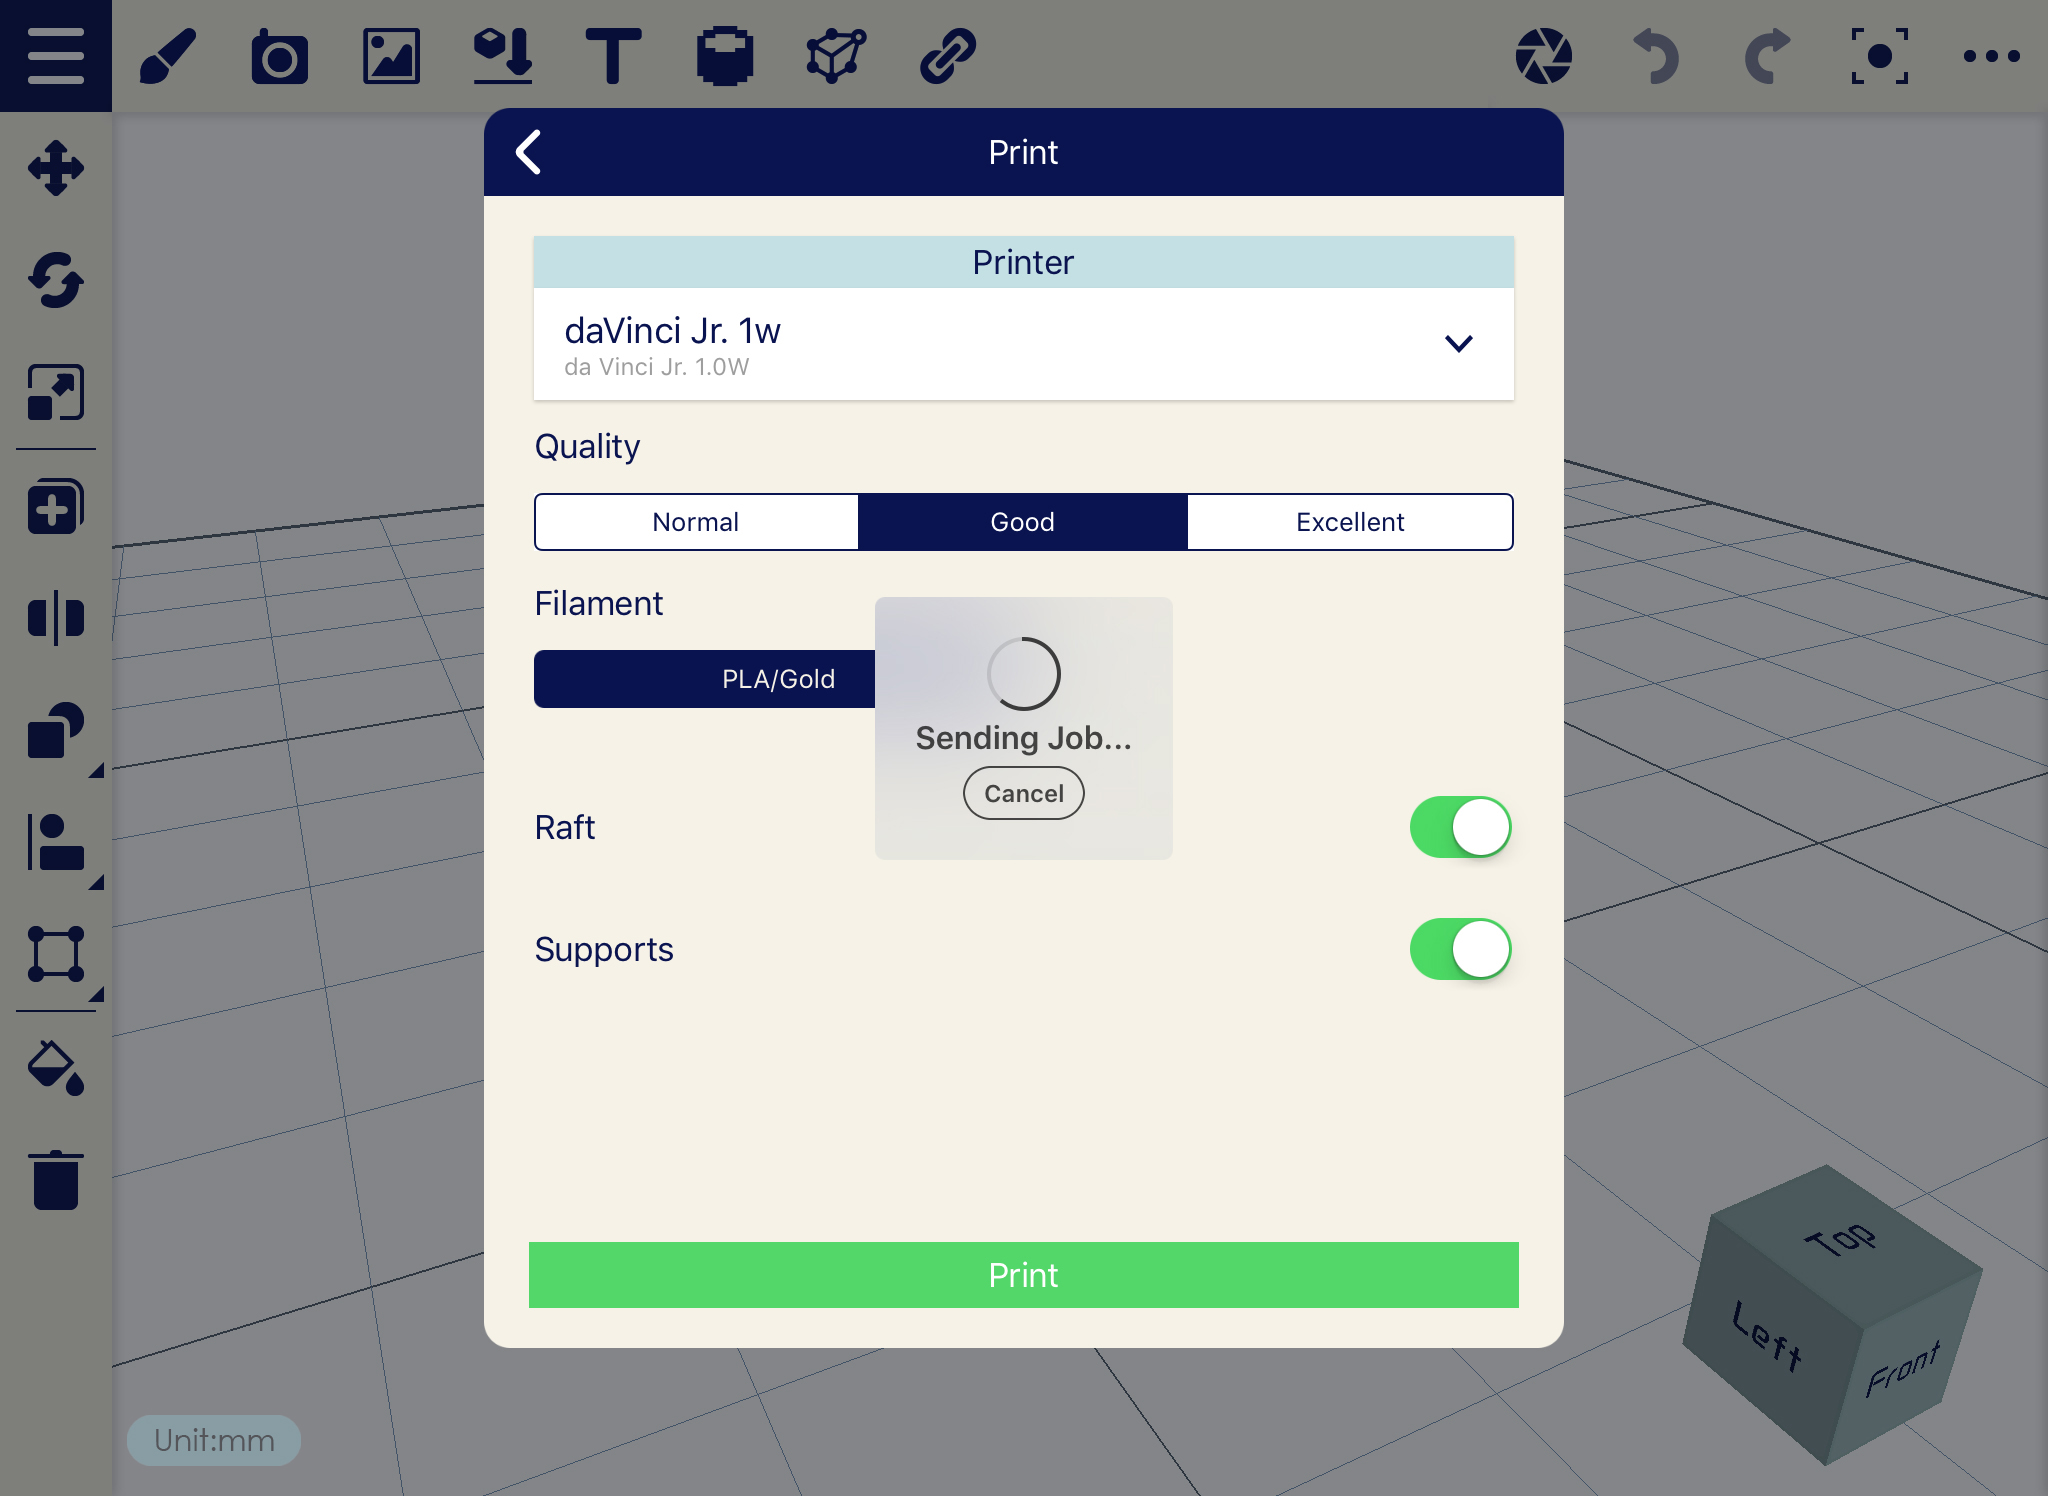
6. Sending Job process is on-going.NAV_07_print_6

Printing Monitor

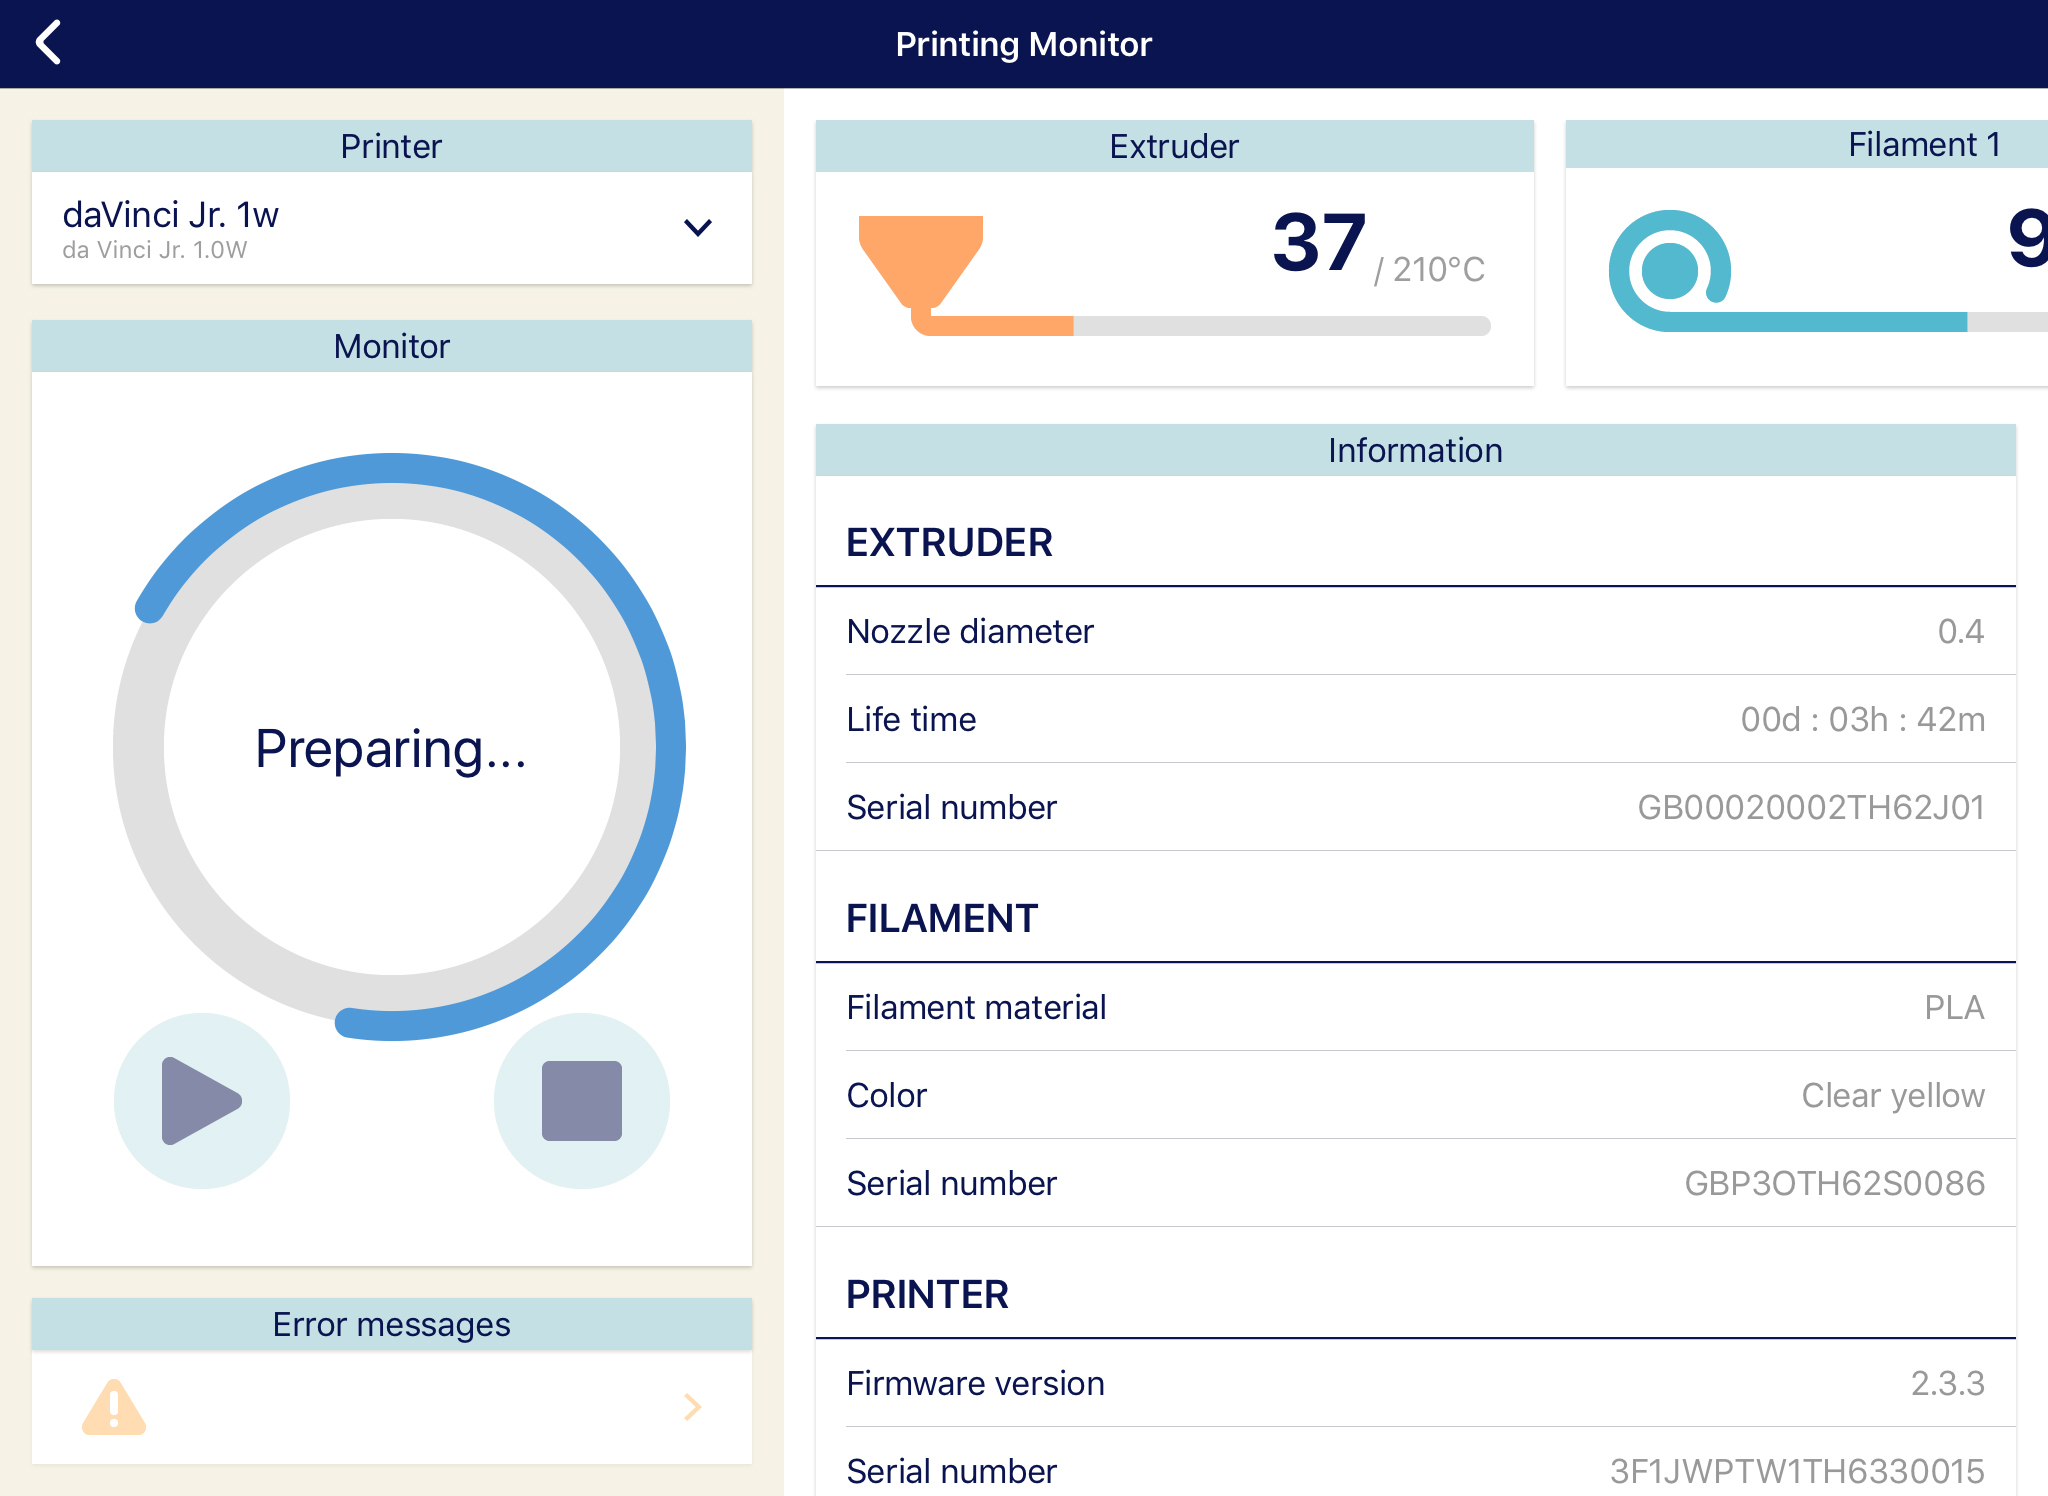
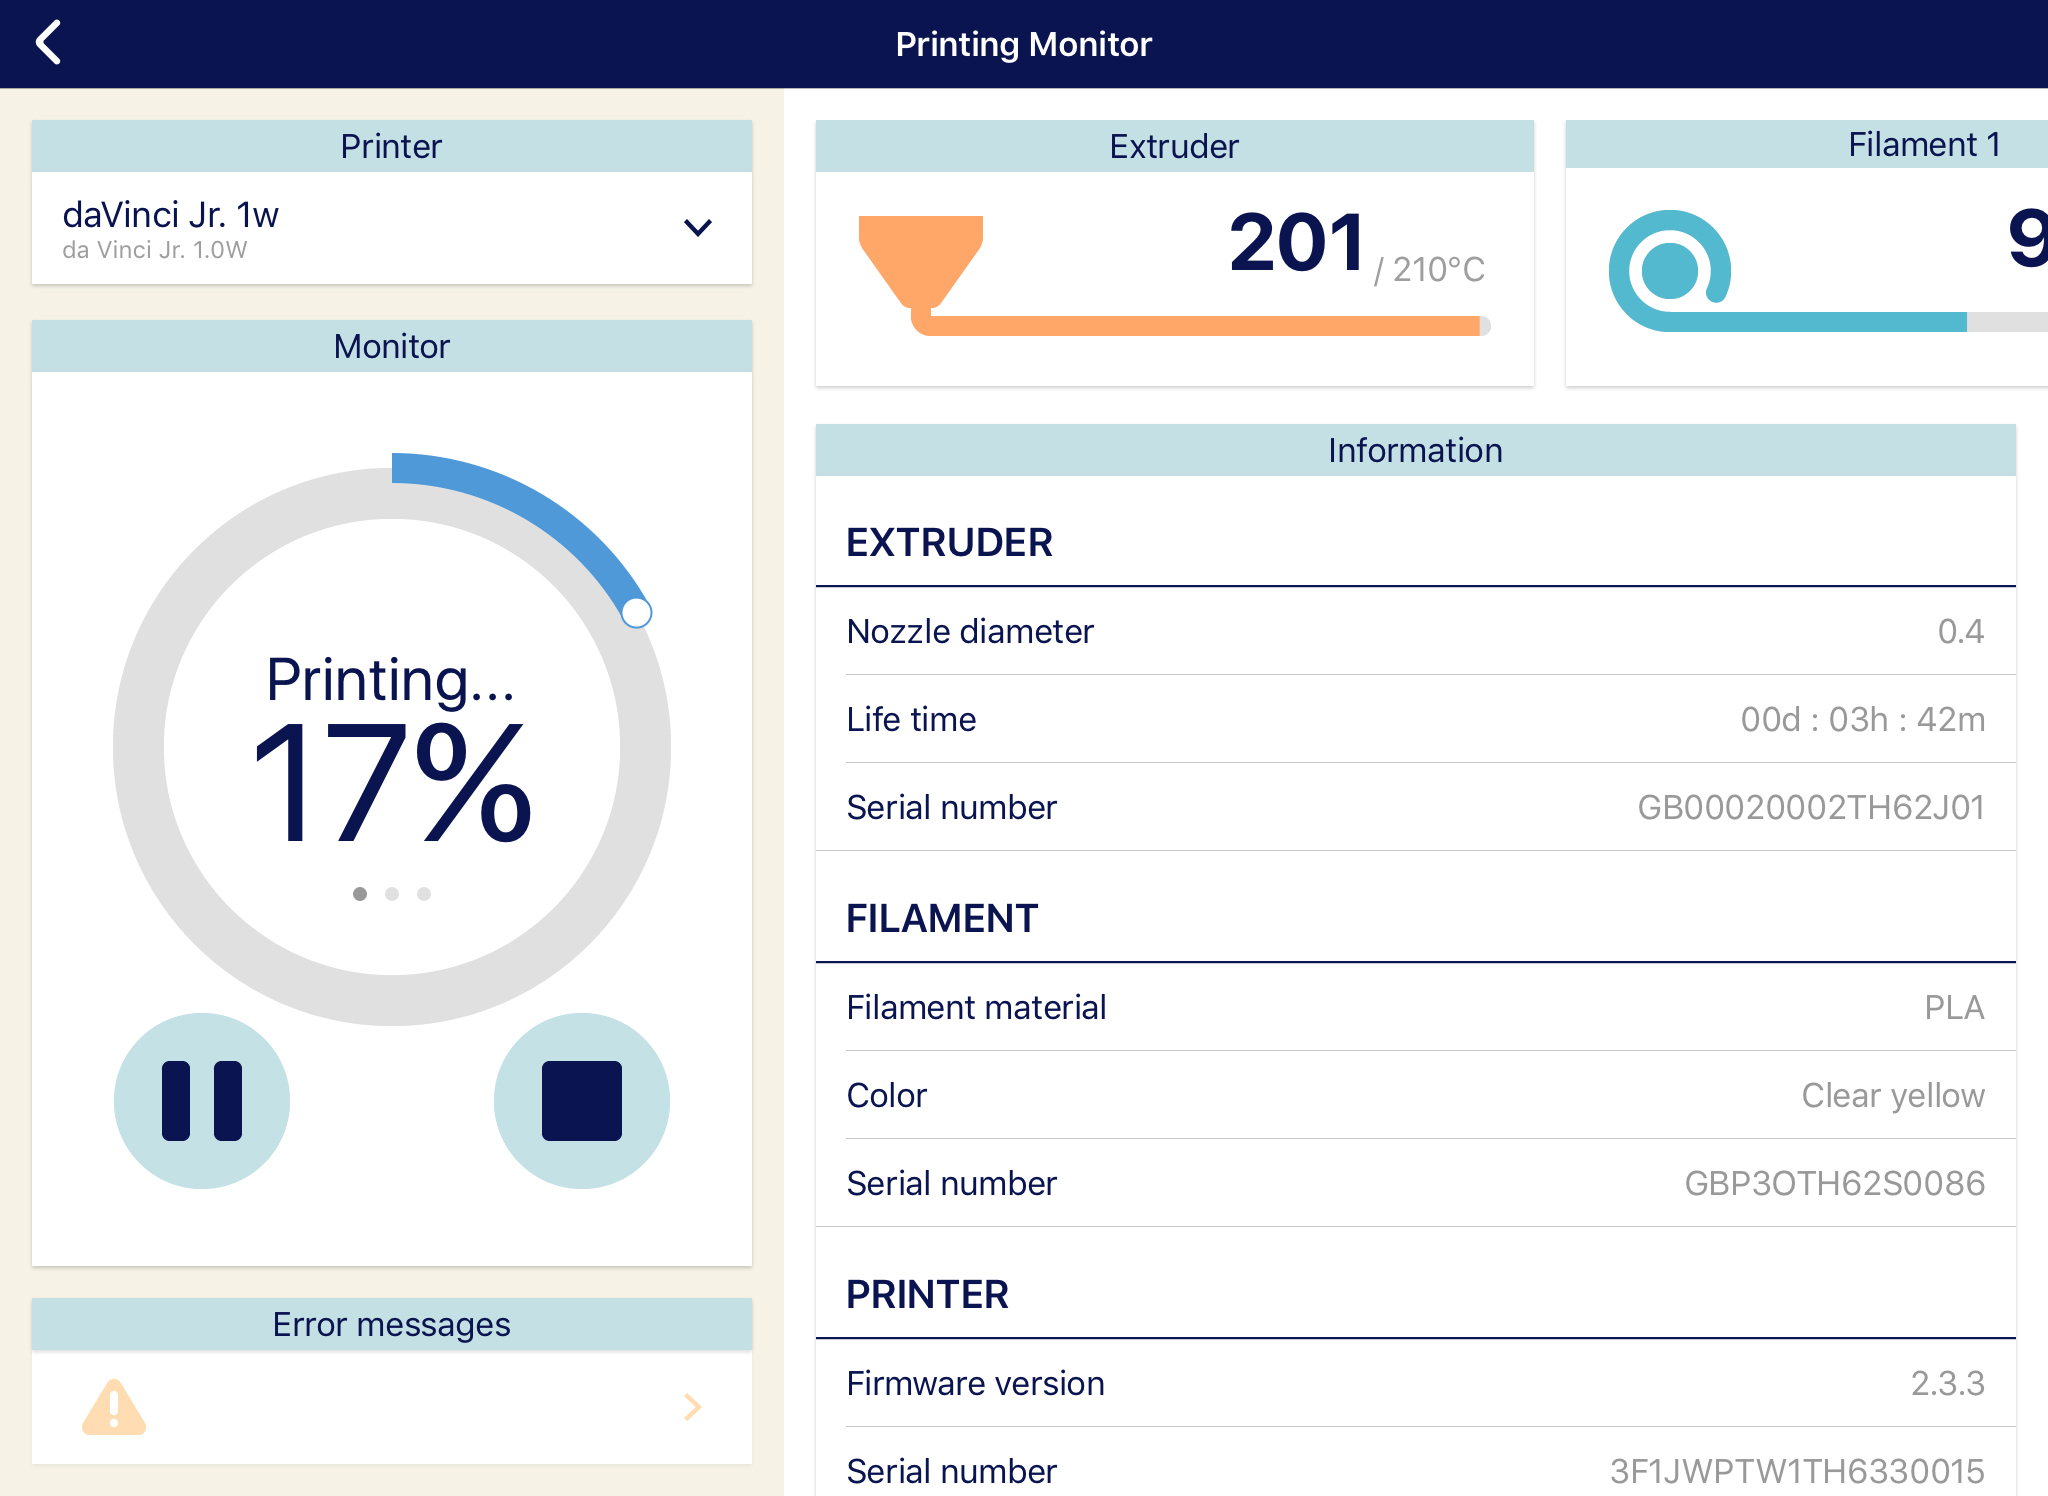
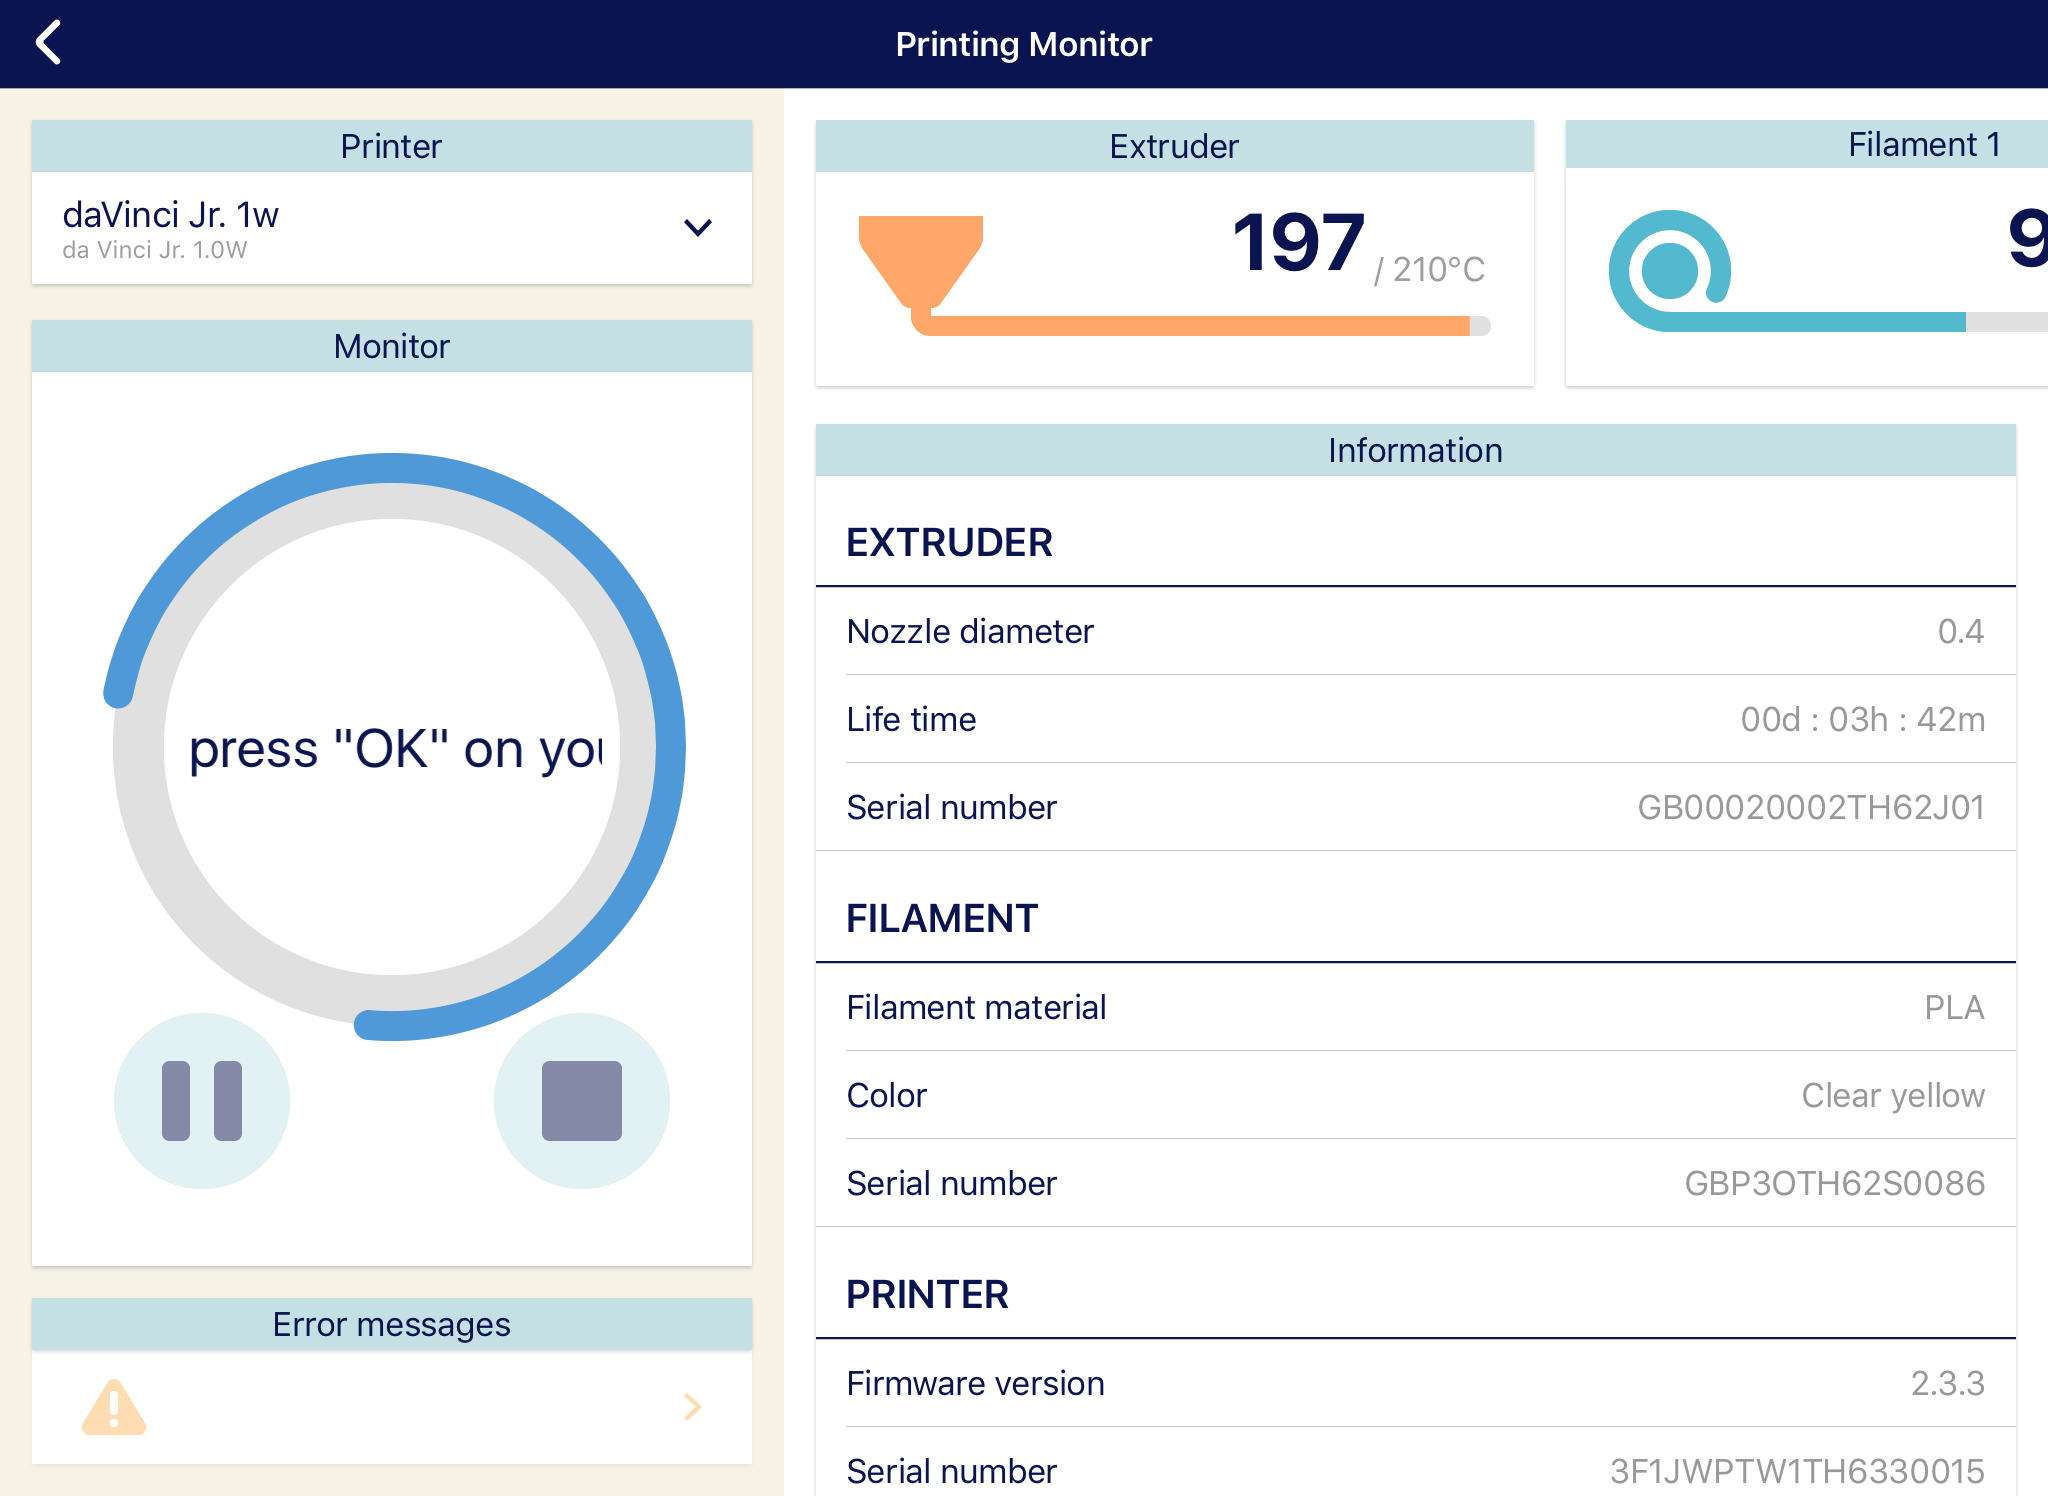
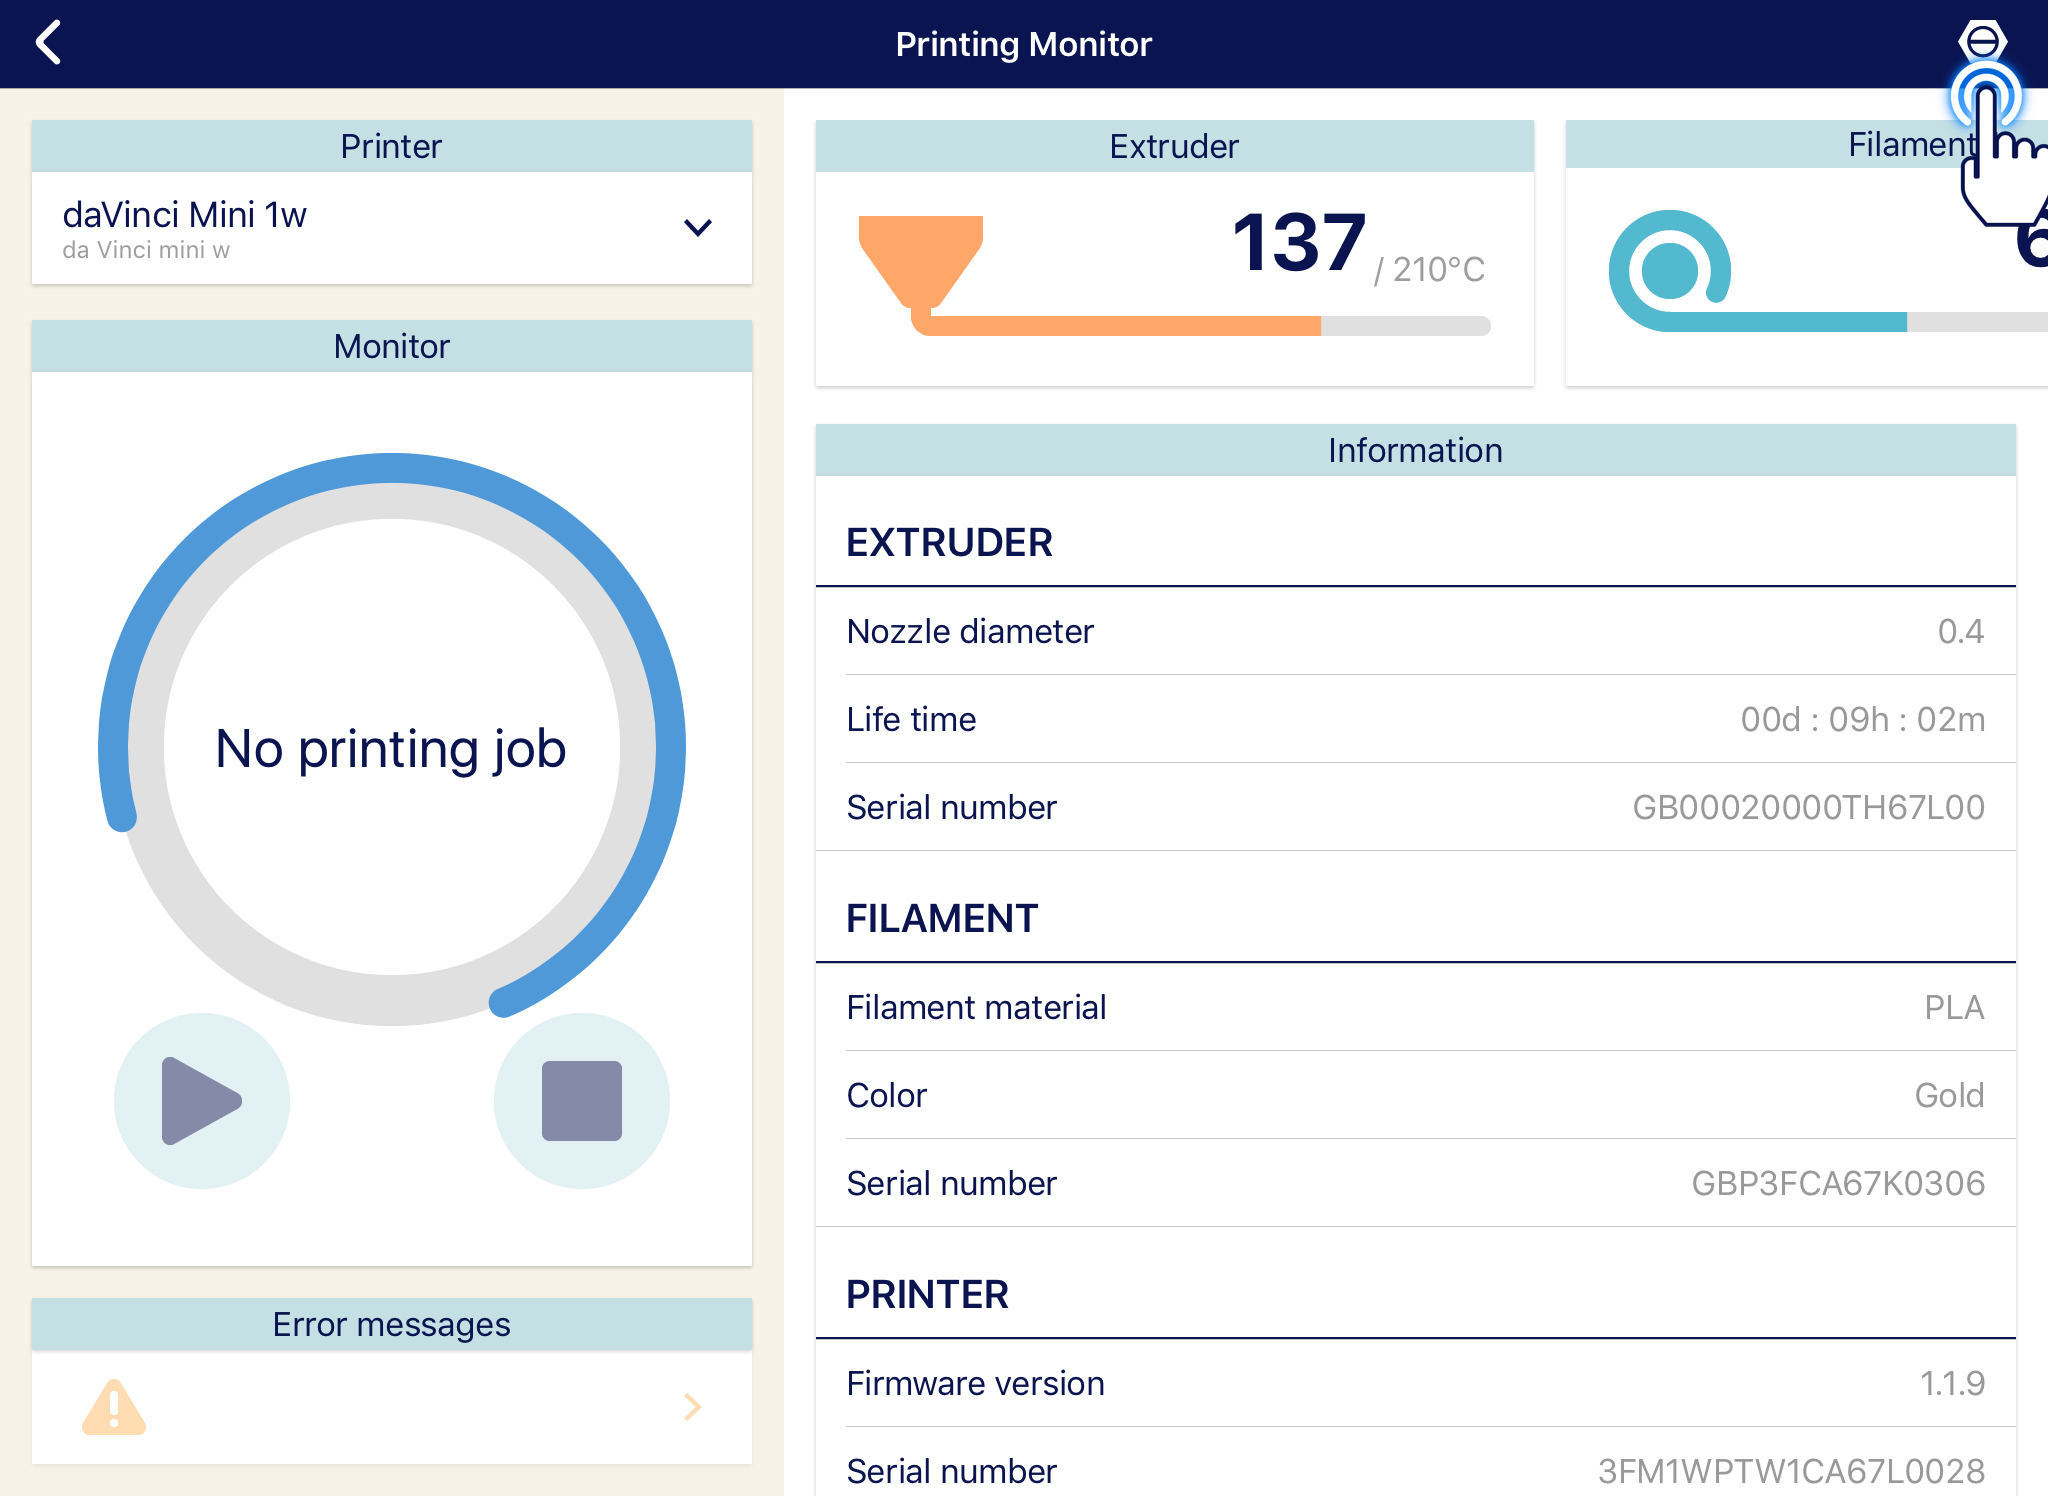
Printer Dashboard will display the status of the printer. You can view the Printer, Filament and Extruder information.

Dashboard display will vary on the connected printer. Viewing for non LCD printer is quite different from LCD printers.

JR. series printer

1. Click on Information icon, all Printers information will display.NAV_08_dashboard_1

2. Also can monitor the printing job.NAV_08_dashboard_2

3. Then Finish the Printing Job.

NAV_08_dashboard_3

Mini series printers

1. Click on Information icon. 

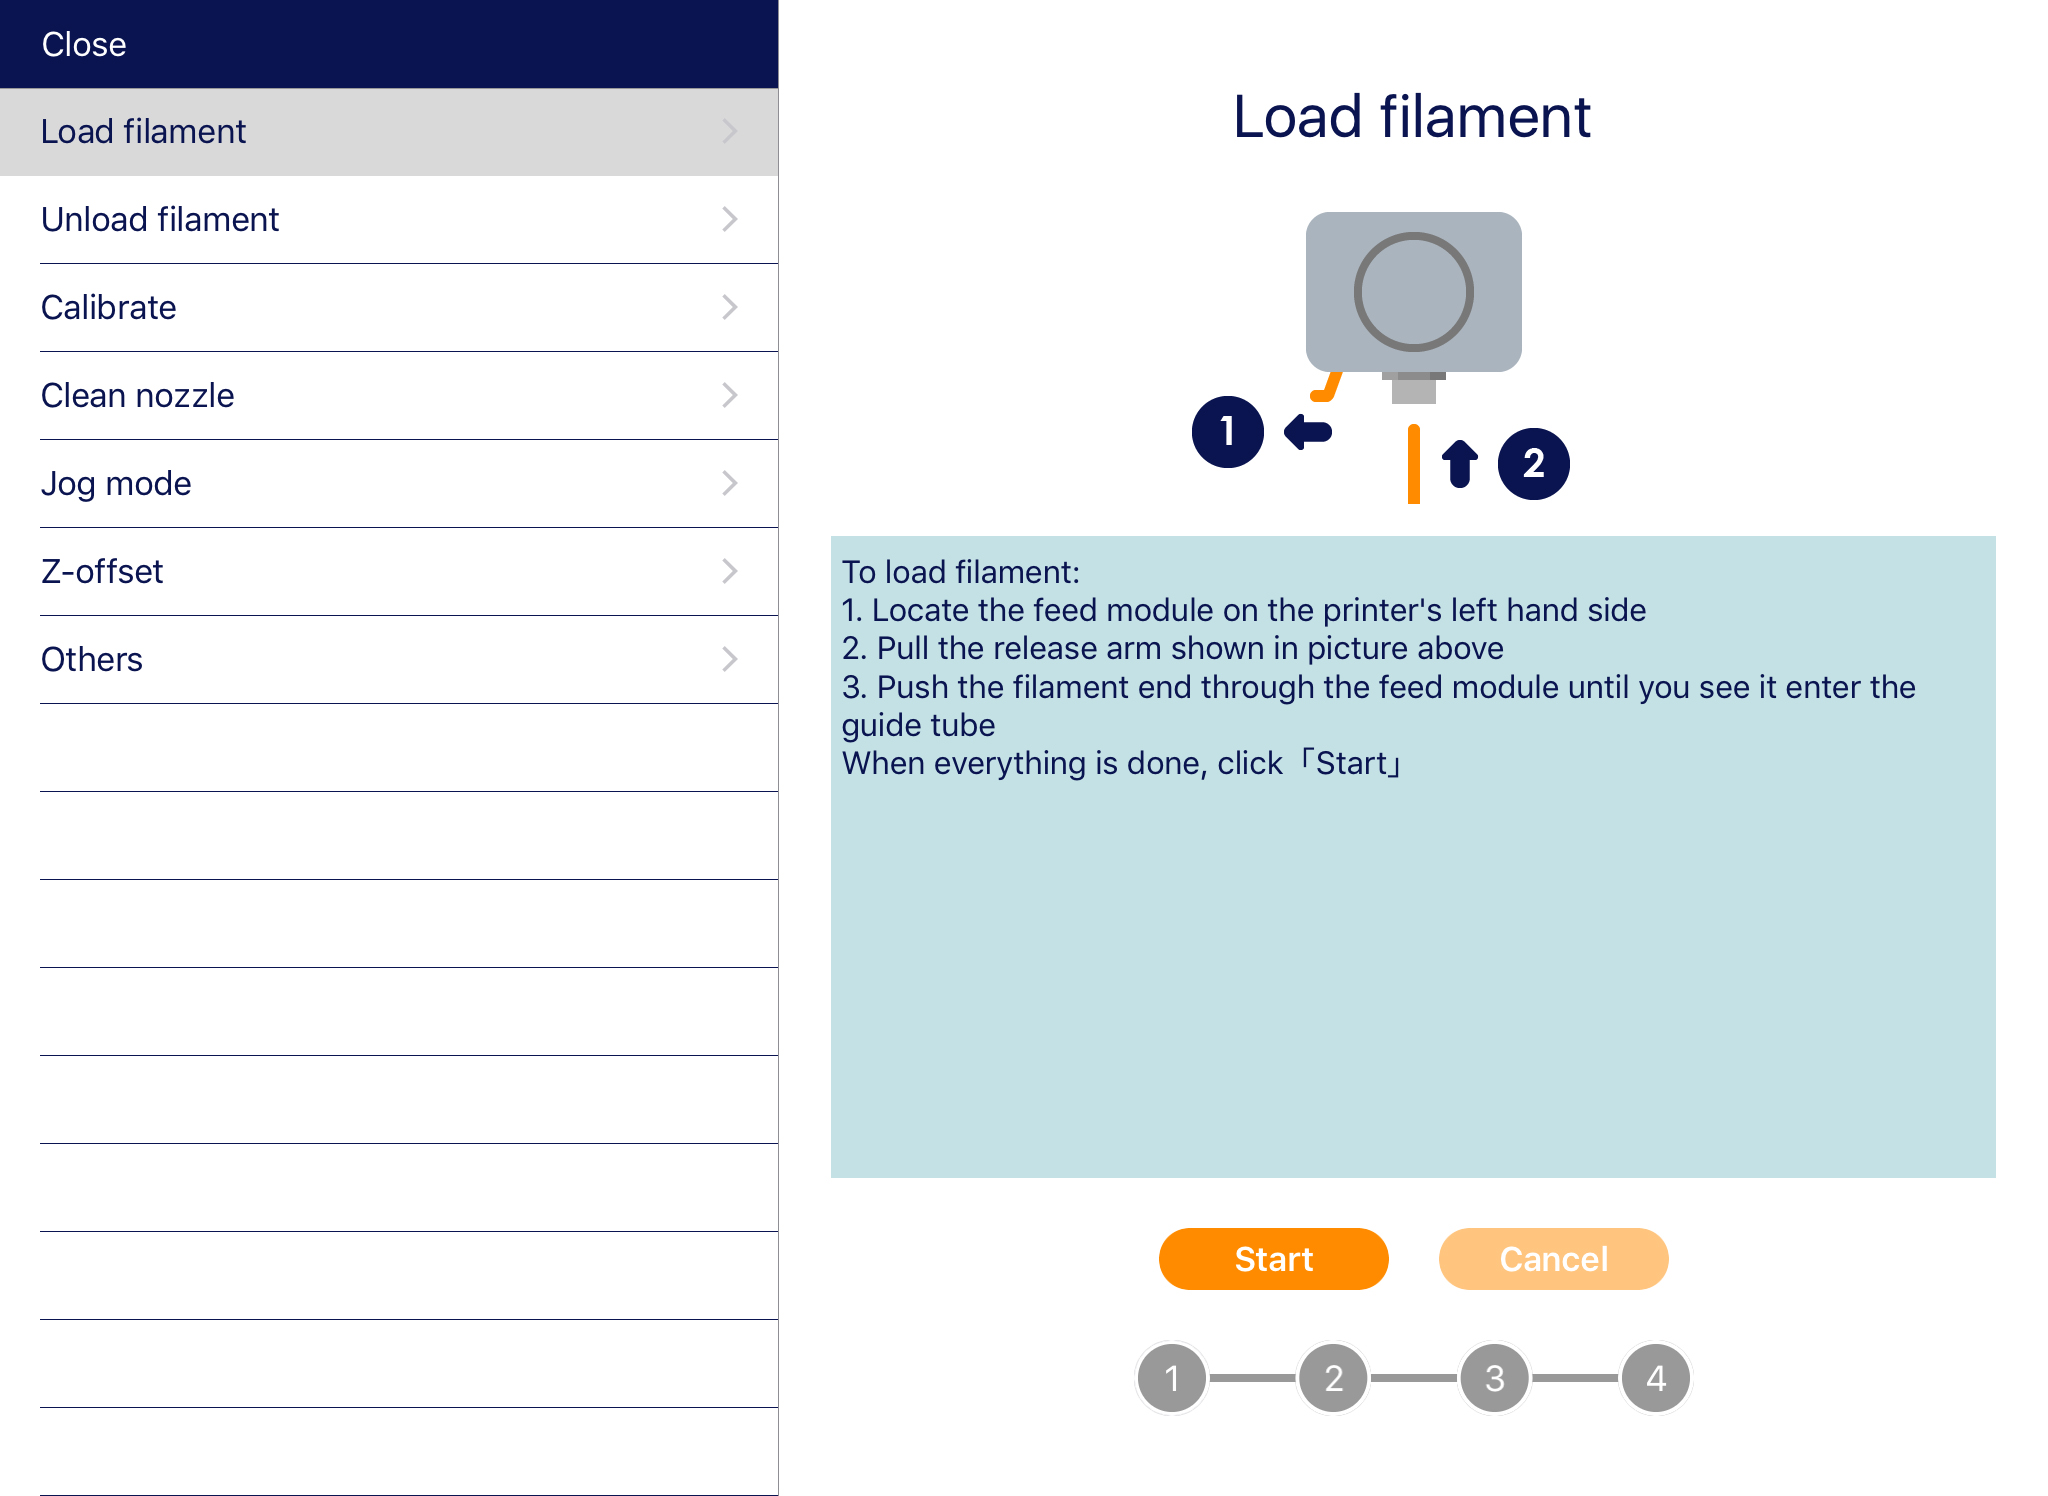
NAV_08_dashboard_mini_22. Different items will display such as Load/Unload Filament, Clean nozzle, Calibrate, Z-Offset and Jog mode.NAV_08_dashboard_mini_3


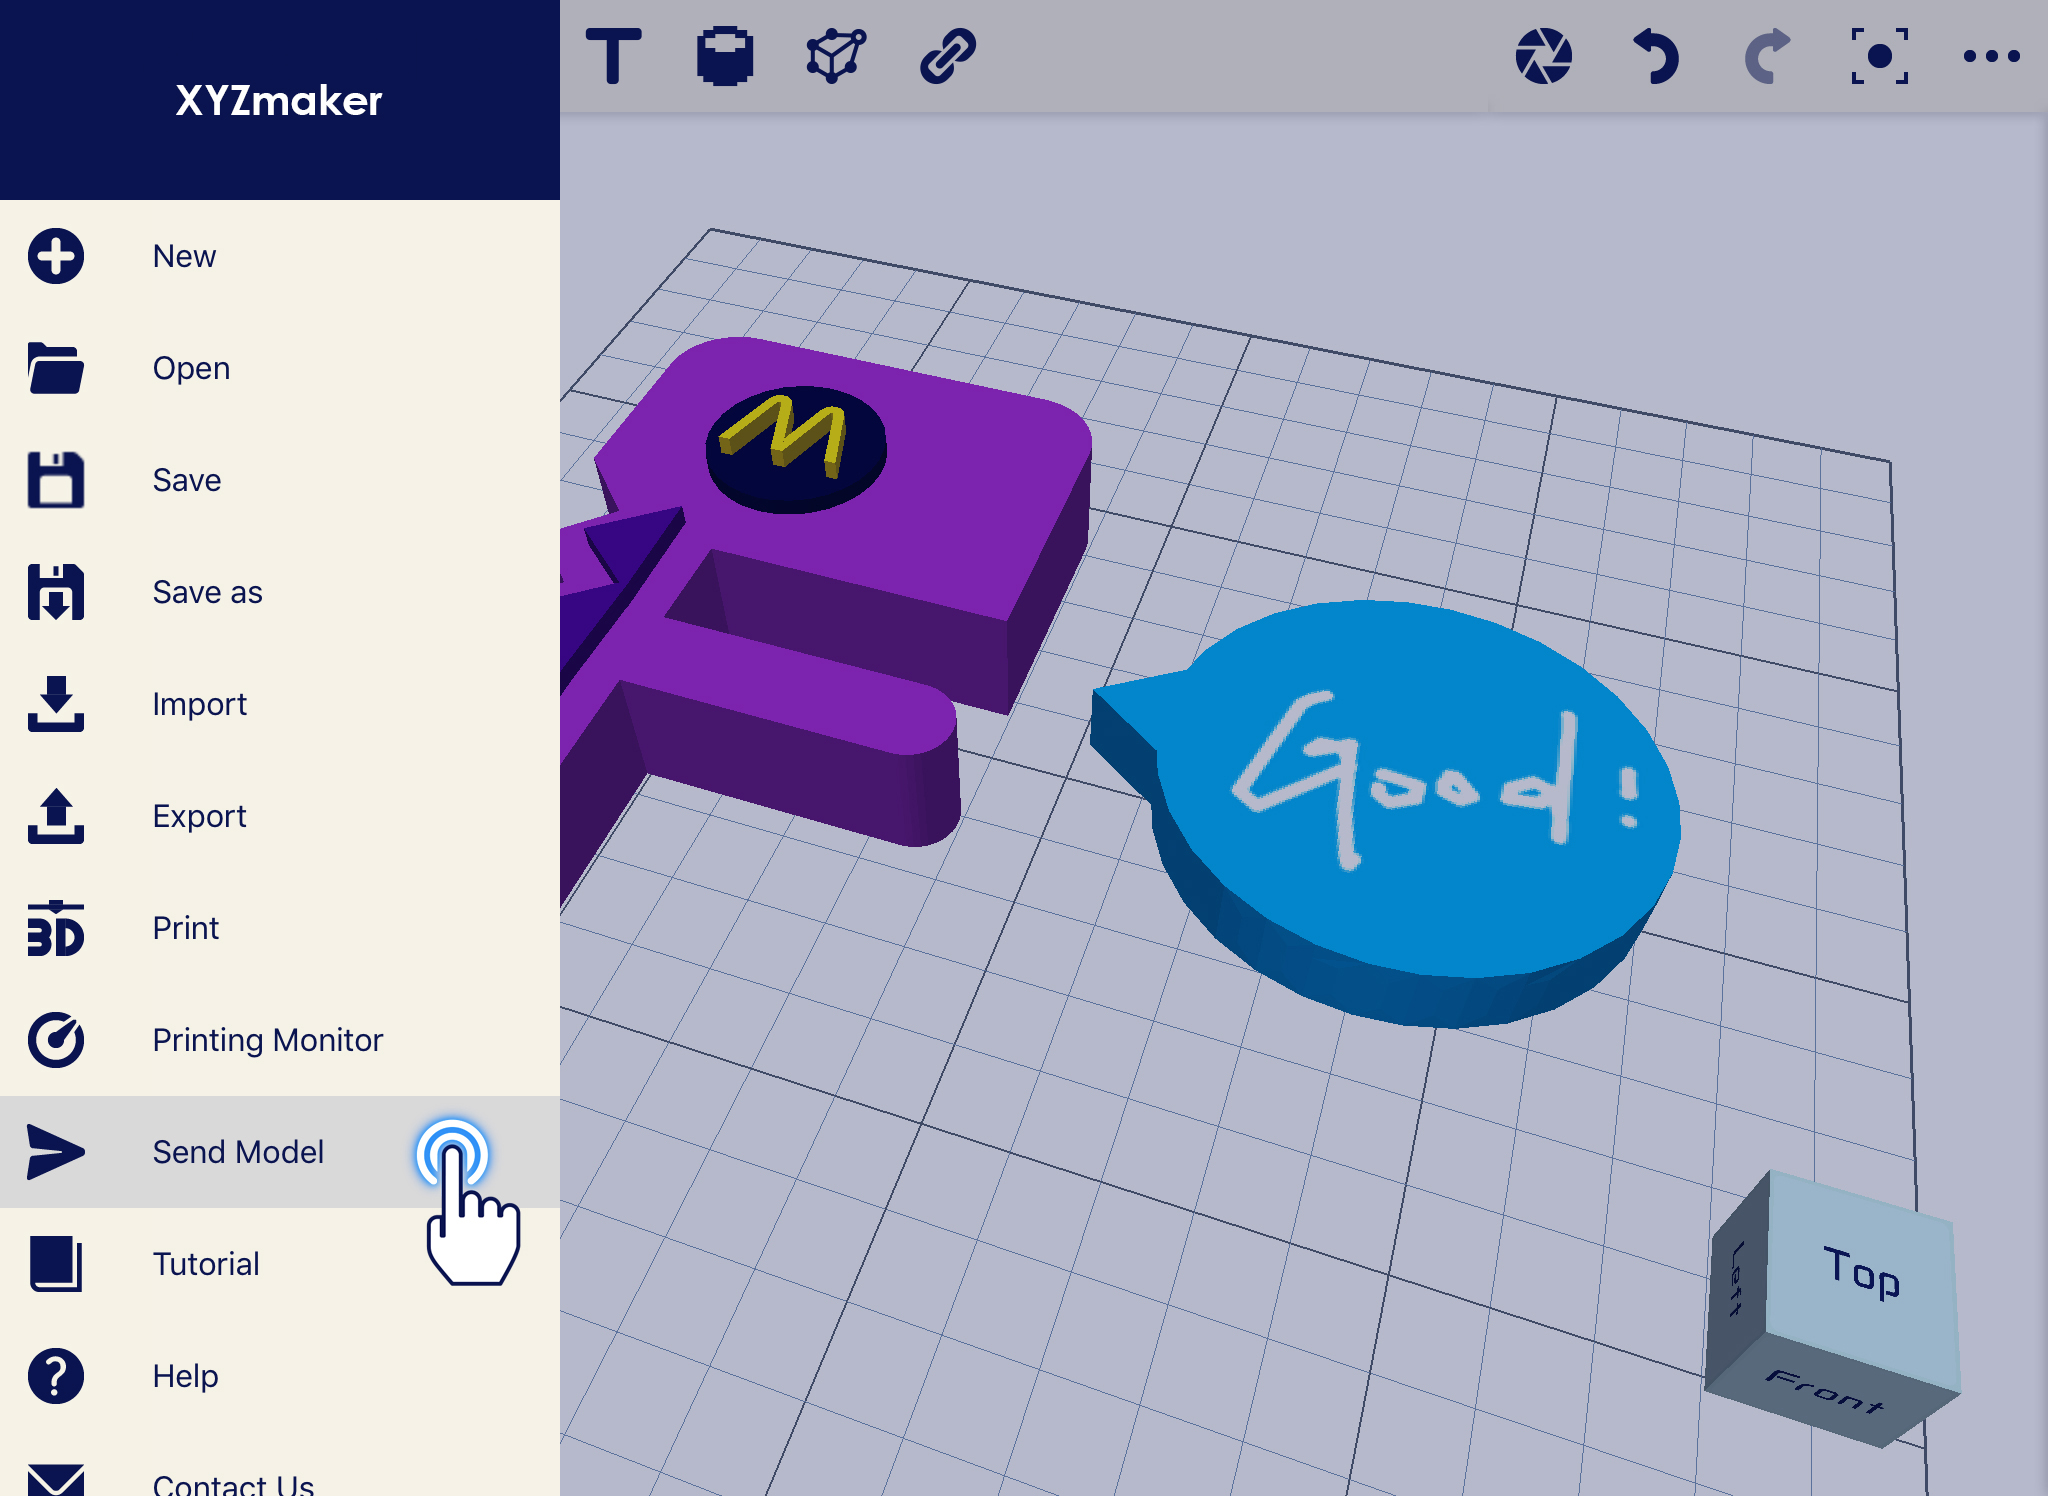
Send Model

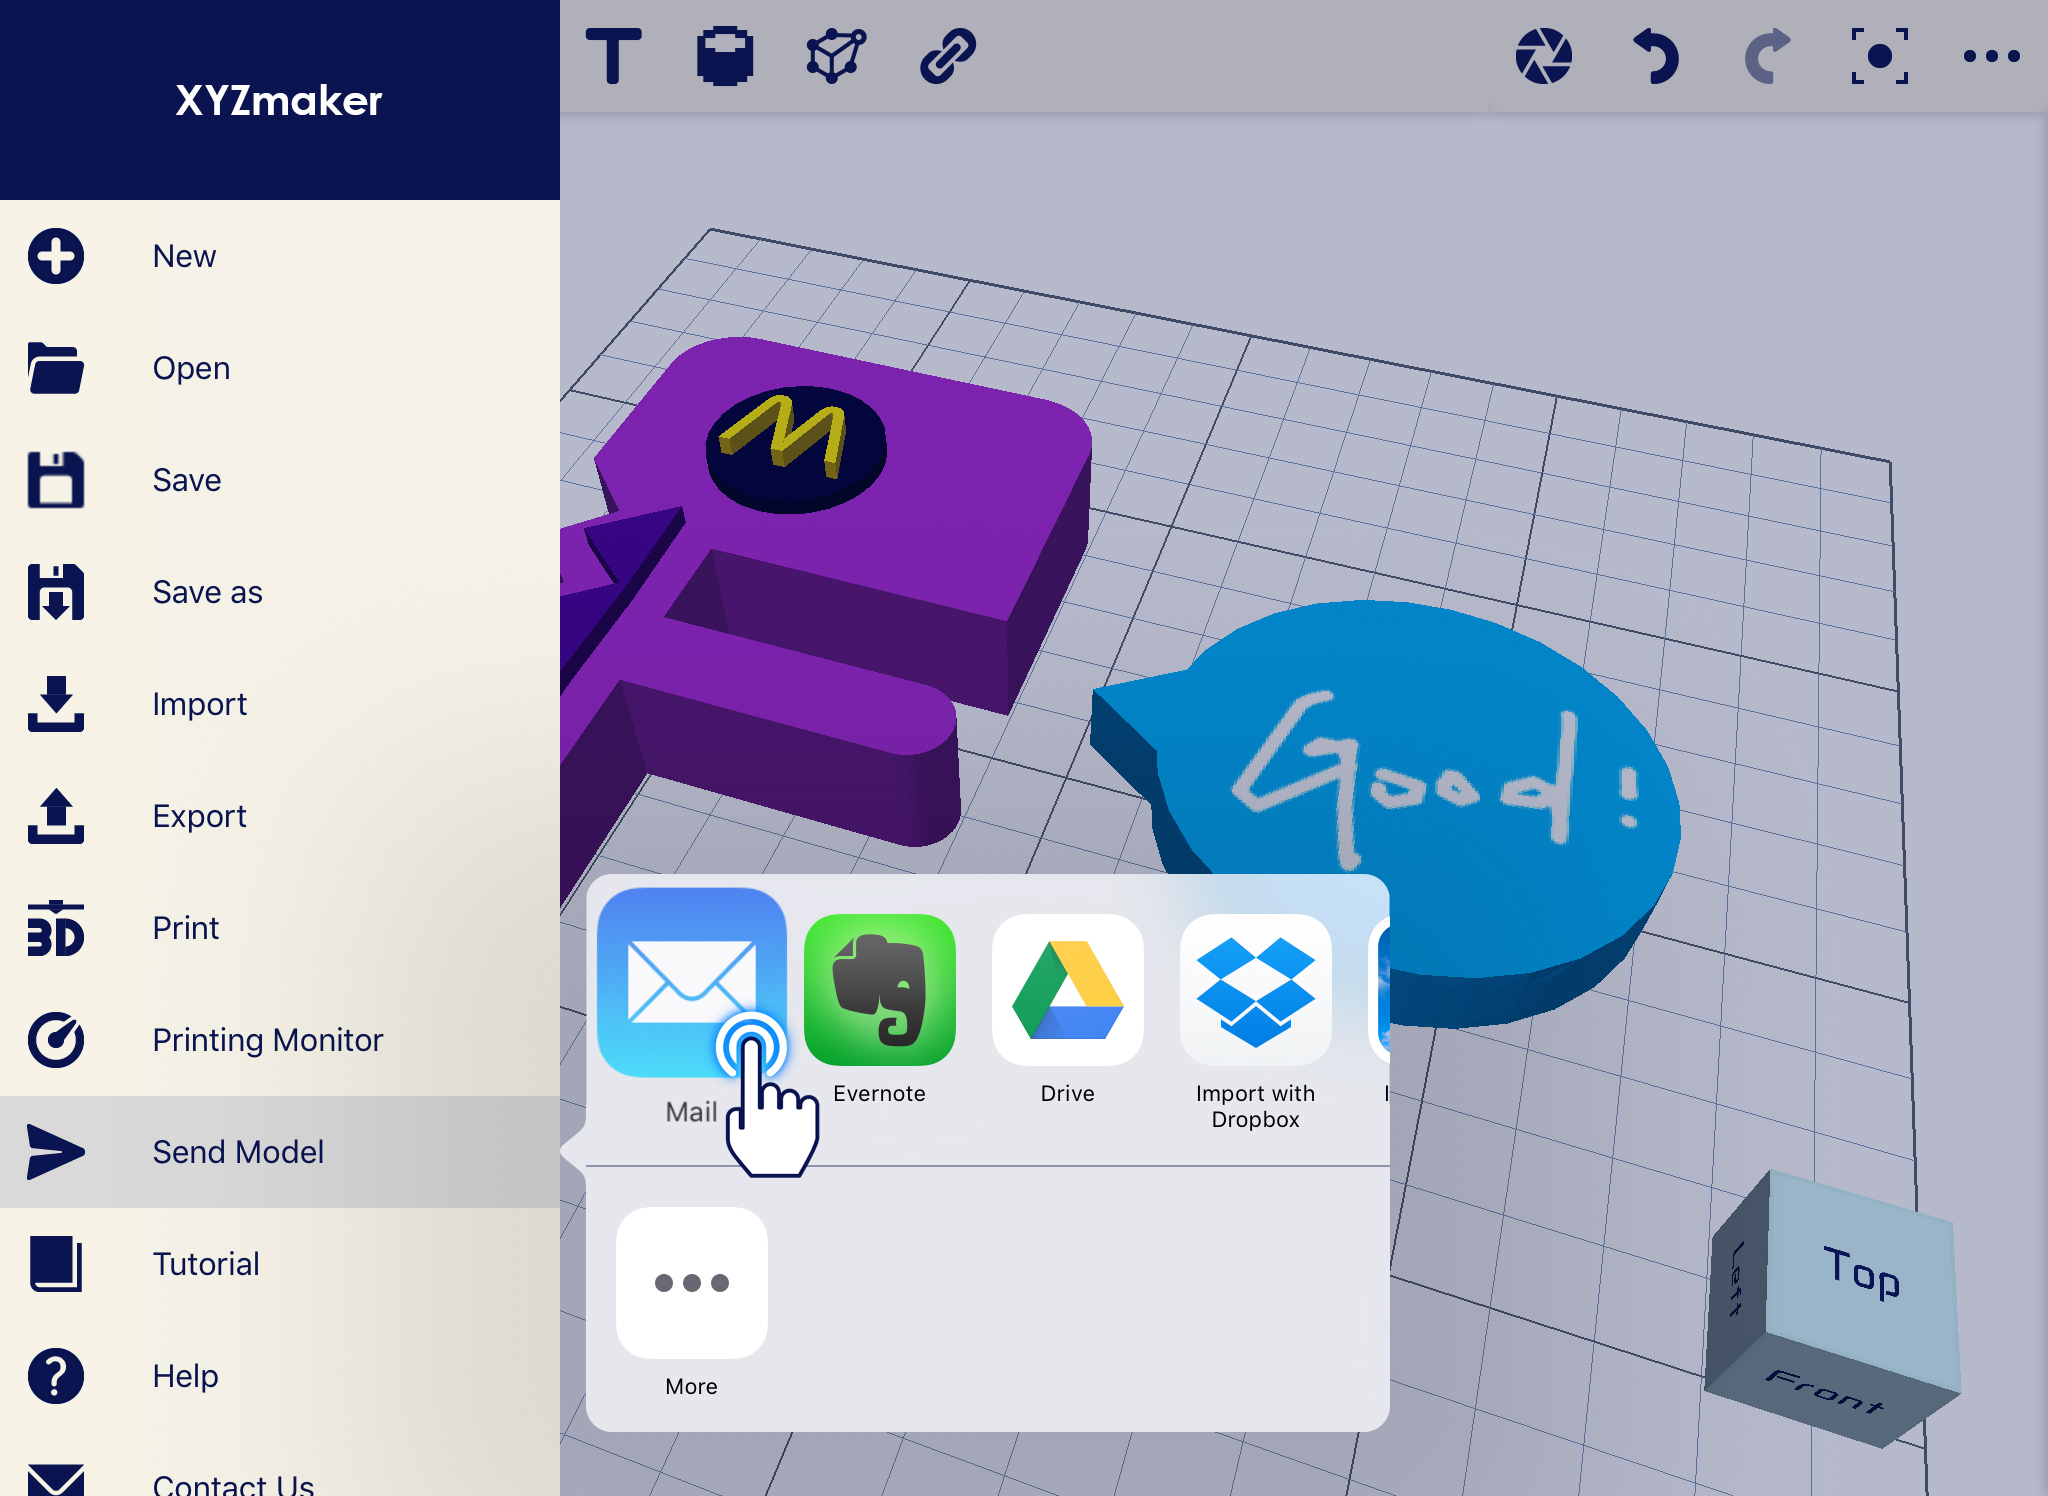
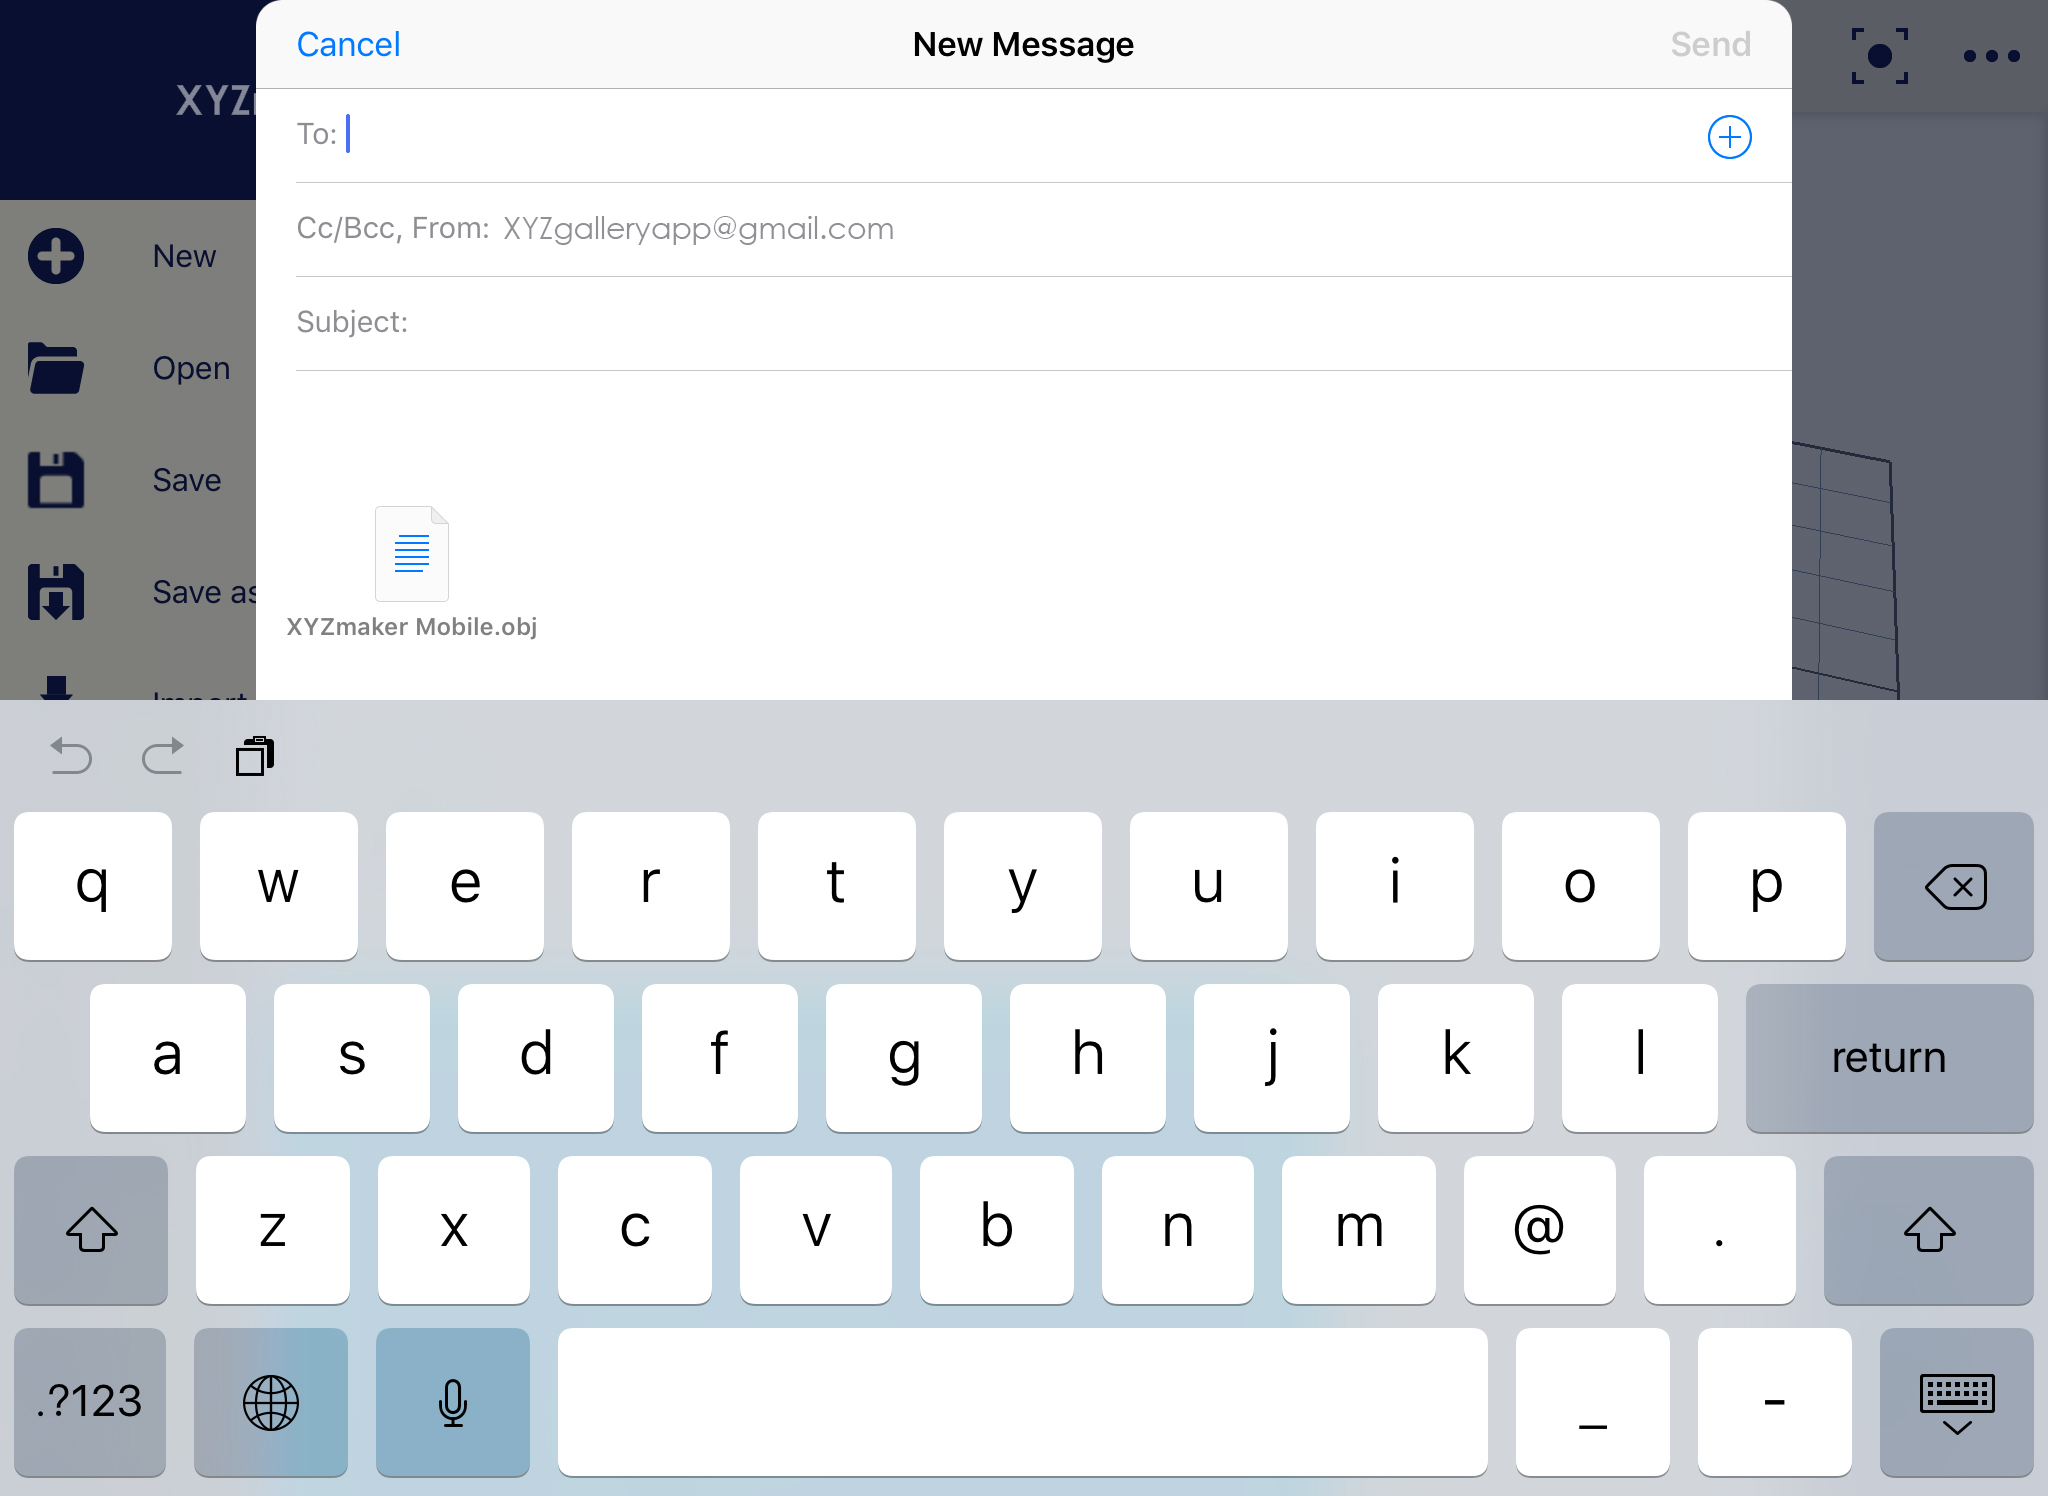
Mail function will help you to send the object that you made. It will be send via email with STL file attachment.

1. Click on Navigation Drawer.NAV_09_send model_1

2. Select “Send Model” from the list.

NAV_09_send model_2

3. Choose the Application that you are going to share. In example is Mail.NAV_09_send model_3

4. Chosen Email Client will open together with attached STL file. The attached file is the current project on the workplane.NAV_09_send model_4