| 树脂名称 | 树脂型号 | 树脂颜色 | 相容机种 | Post 光固机 | EeezCure180** | MultiCure180 | ||||
|---|---|---|---|---|---|---|---|---|---|---|
| 能量级别 | 固化时间 | 快速设定 | 快速设定 | 固化光源 | 能量级别 | 固化时间 | ||||
| 标准 | A1 | 灰 | 1.0 | 3 | 10 | 02 | 04 | 365+385+405 | 100 | 7 |
| 标准 | A1 | 透明/白/蓝/洋红 | 1.0 / 1.0A | 3 | 10 | 02 | 04 | 365+385+405 | 100 | 7 |
| 弹性 | B1 | 透明 | 1.0 / 1.0A | 3 | 10 | 02 | 03 | 365+385+405 | 100 | 5 |
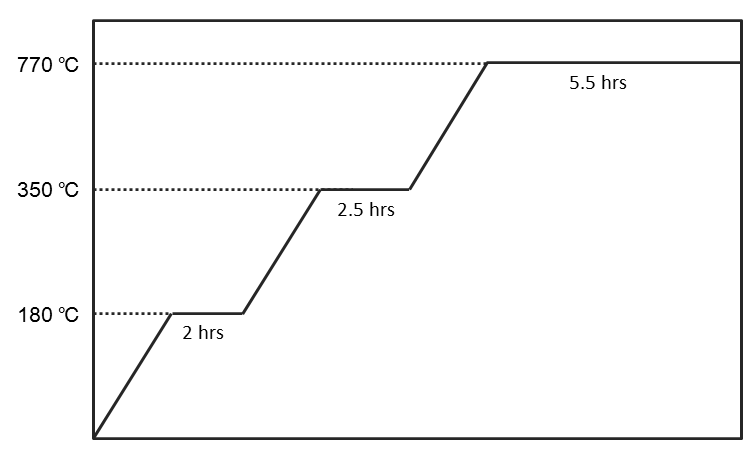
| 失蜡铸造用 | C1* | 橘 | 1.0A | 3 | 10 | 02 | 02 | 385 | 100 | 10 |
| 高硬度 | D1 | 透明 | 1.0A | 3 | 20 | 03 | 05 | 365+385+405 | 100 | 10 |
| 高韧性 | D2 | 透明绿 | 1.0A | 3 | 20 | 03 | 06 | 365+385+405 | 100 | 15 |
| 高硬度 | D3 | 橘 | Superfine | 3 | 10 | 02 | 04 | 365+385+405 | 100 | 7 |
| 标准 | E1 | 紫 | Superfine | 3 | 10 | 02 | 02 | 385 | 100 | 10 |
| 标准 | E1 | 透明 | Superfine | 3 | 10 | 02 | 02 | 385 | 100 | 10 |
| 标准 | E2 | 灰 | Superfine | 3 | 10 | 02 | 03 | 365+385+405 | 100 | 5 |
| 失蜡铸造用 | F1* | 黄 | 1.0A / Superfine | 3 | 5 | 01 | 01 | 385 | 100 | 5 |
| 脱蜡铸造用Plus | F2* | 棕 | Superfine | 3 | 30 | 04 | 07 | 365+385+405 | 100 | 30 |
| 耐高温 | K1 | 深绿 | Superfine | 3 | 20 | 03 | 05 | 365+385+405 | 100 | 10 |
**EeezCure180与Post 光固机之固化设定值相同,使用EeezCure180时直接切换快速设定即可套用适用的固化设定值。
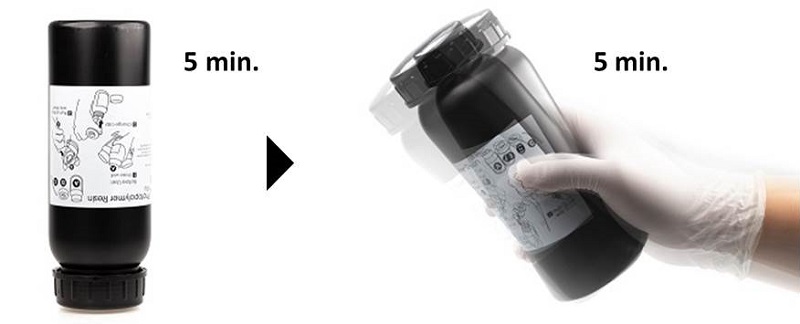
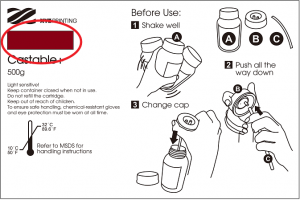

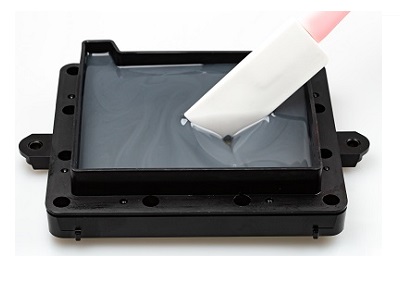
 » 树脂罐内的树脂如已超过 24 小时未使用,请换回原装瓶盖、将树脂罐倒置 5 分钟、摇晃 5 分钟,再继续打印。
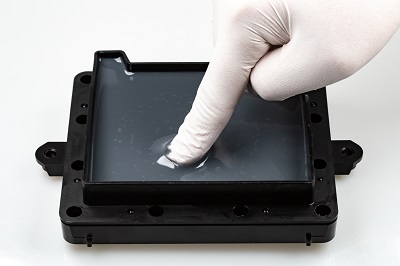