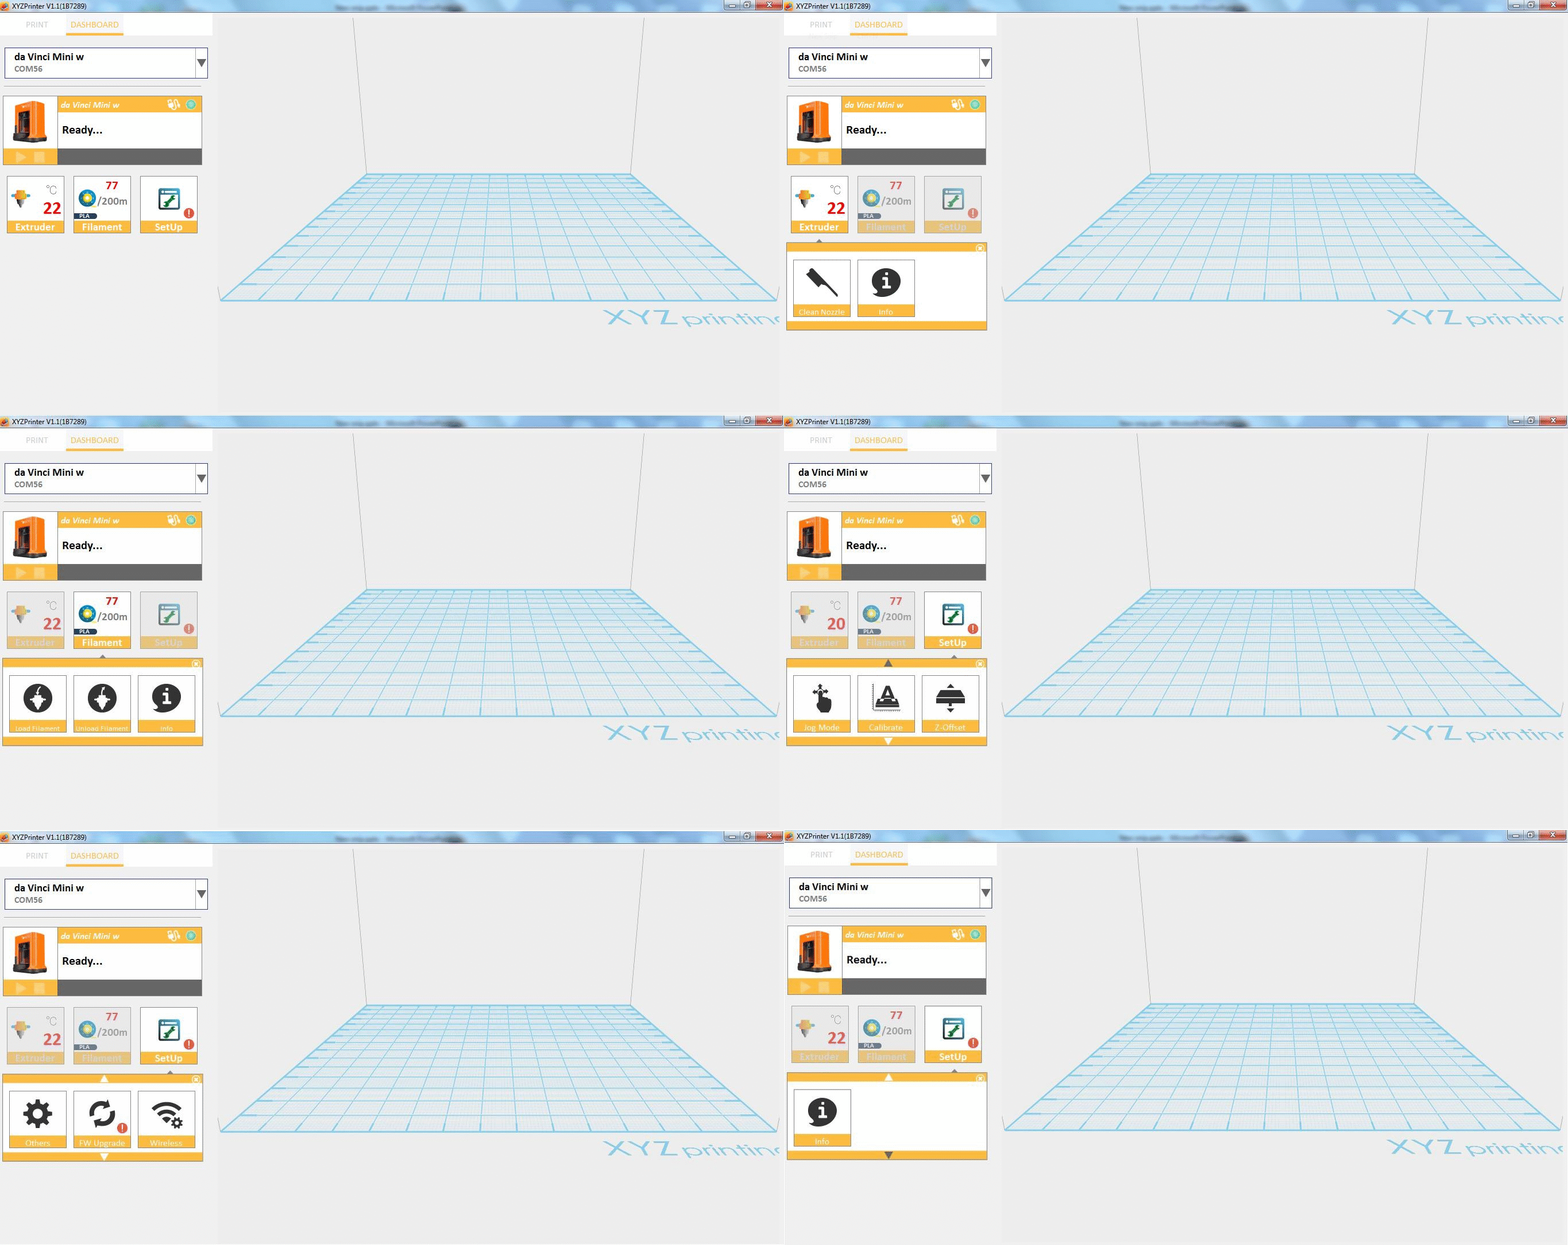
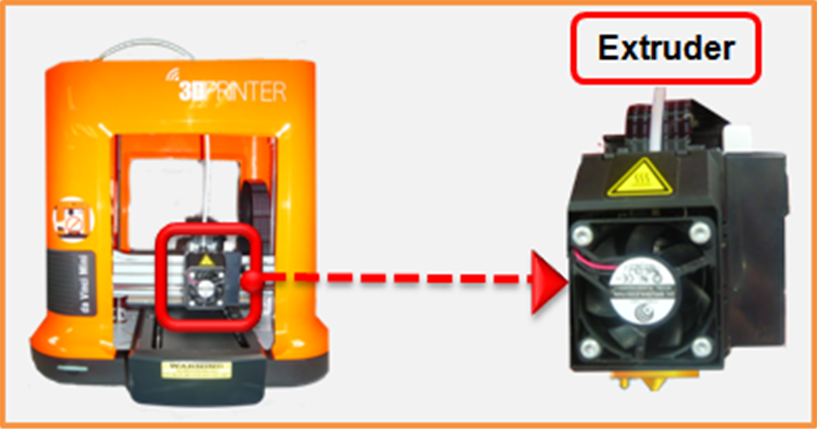
Extruder

Last updated on March 28th, 2018 at 03:59 pm

Clean Nozzle

Once this function is selected, the nozzle will heat up automatically and move the nozzle to a proper location where you can easily clear away all residual filaments in the nozzle.


1.Connect the PC to da Vinci nano.

22


2.Click File then select Print – da Vinci Printer.
1

3.Click on Dashboard.

2

4. Click on Extruder then select Clean Nozzle.

23


5. Click start to begin.

24


6. The printer will start heating.

25


7.After heating,  place the cleaning wire through the nozzle.

26


8.After cleaning, click on Finish.

3


Info

This will display the information of the extruder inserted to connected printer. It will show the Temperature, Diameter, Serial Number and Total Print Time of the extruder.

1. Connect the PC to da Vinci nano printer.

22

2.Click File then select Print – da Vinci Printer.

1

3.Click on Dashboard.

2

4.Click on Extruder then select Info.

27

5.Extruder Information will display. It includes Temperature, Nozzle Diameter, Total Print Time and Serial Number.

28


Filament

Last updated on March 28th, 2018 at 03:59 pm

Even da Vinci nano doesn’t have LCD panel unlike any other printers, as easy as them, you can perform the loading and unloading of filament using XYZmaker in a very simple step. Just follow the instruction below and wait for the extrusion process.

Load Filament

1. Connect the PC to da Vinci nano.

22

2.Click File then select Print – da Vinci Printer.

1-10

3.Click Dashboard.

2

4. Click Filament then select Load Filament.

1

5.Click start to begin.

3

6. Heating process will begin and wait for the filament to extrude.

25

7.After extruding filament, click Finish.

3

Unload Filament

Same as loading of filament, unloading can also be done easily in miniseries printers with just a simple step. Just follow the procedure in the image and you can unload your filament successfully.

1.Connect to printer.

22

2.Click File then select Print – da Vinci Printer.

1-10

3. Click on Dashboard.

23

4.Click on Filament then select Unload Filament.

14

5. Click Start to begin heating.

4

6. Wait until the heating is done.

25

7. After unloading filament, click on Finish to complete the process.

3

Setup

Last updated on March 28th, 2018 at 03:59 pm

The Dashboard is a special feature that is designed for non LCD printers (da Vinci miniMaker, da Vinci miniWifi and da Vinci nano). It will serve as a caption panel of those non-LCD printers. Operations like Loading/Unloading Filament/ Clean Nozzle and other related operations on extruder and printer can be done easily with the help of XYZmaker Dashboard.Webp.net-gifmaker (6)

Filament

Last updated on March 28th, 2018 at 03:59 pm

Loading of filament for non LCD printers is made easier using XYZmaker. By simply following the procedure below, you can load your filament in a just a minute. Make sure that your connected printer has spool with filament placed on the spool holder.

Load Filament

1.Connect to printer.

8

2.Click on File then select Print – da Vinci Printer.

1

3.Click Dashboard.

2

4. Click Filament then select Load Filament.

2

5. Click start to begin.

3

6. Heating process will begin and wait for the filament to extrude.

5

7. After extruding filament, click Finish.

5

Unload Filament

Same as loading of filament, unloading can also be done easily in miniseries printers with just a simple step. Just follow the procedure in the image and you can unload your filament successfully.

1.Connect to da Vinci nano.

8

2. Click File then select Print – da Vinci Printer.

1

3. Click on Dashboard.

2

4. Click on Filament then select Unload Filament.

6

5. Click Start to begin heating.

3

6. Wait until the heating is done.


9

7. After unloading filament, click on Finish to complete the process.

10

Print Setting

Last updated on March 28th, 2018 at 03:59 pm

Print Type

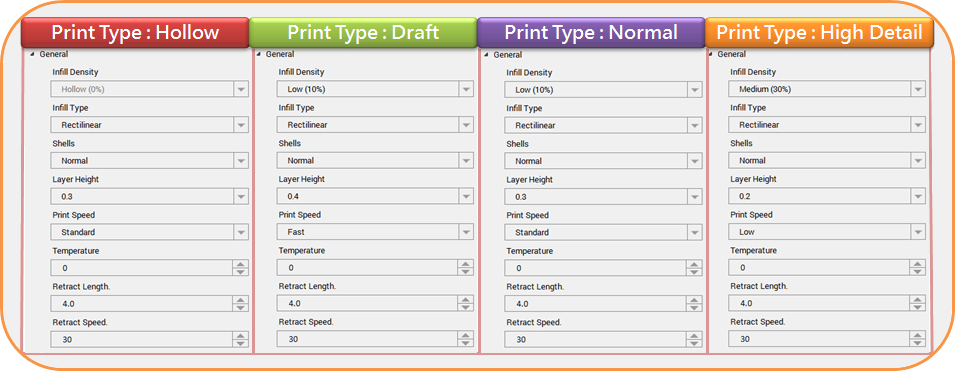
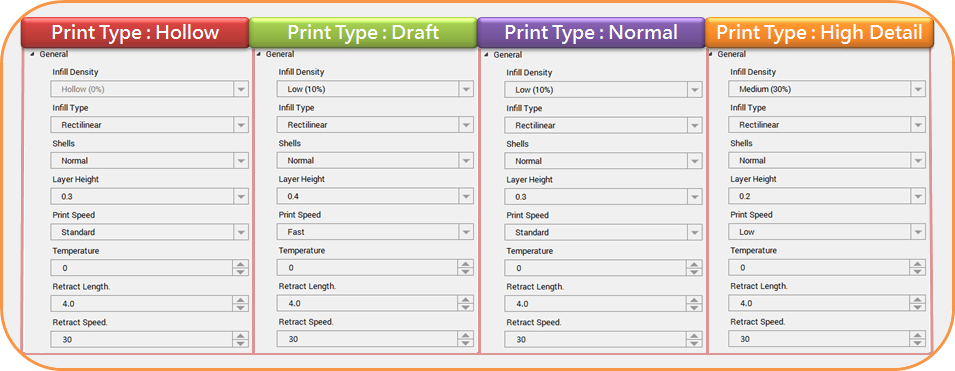
Print Type will impact the estimated time it will take for an object to print. For example, high quality prints will take longer to make than low quality prints as each layer printed is thinner creating a more detailed finish.

Print Type

Infill Density

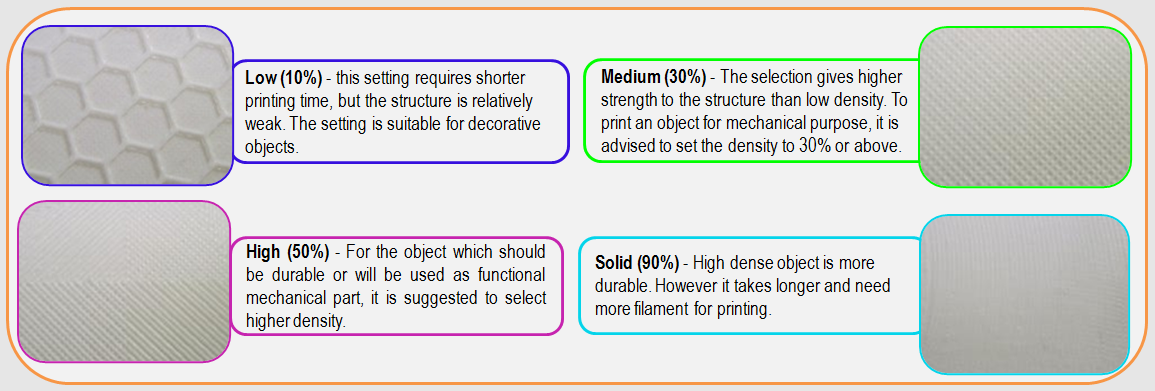
Before printing, users may use this function to adjust the print density of the object(s). The default printer setting on the da Vinci 3D printer will create the internal structure of the object(s) based on honeycomb structures. Using the 3D density pull-down menu, you can adjust the honeycomb structure density from hollow to high to create desired strength requirements.

1. Import object or create any design.

1

2.Click File then select Print – da Vinci Printer.

2

3.Click on General then select Infill Density. Infill Density ranges from 10 – 100. 

16

Layer Height

By setting different layer heights, you can alter the thickness of each layer that your printer creates. The printed layer thickness for da Vinci nano can be adjusted between 0.1mm – 0.3mm. For best results, we recommend 0.2-0.3mm layer printing.

19

Print Speed

Printing Speed is use to change the settings based on the size and precision of the object. In general a better object quality is accompanied with a lower printing speed. It can be Slow, Standard or Fast only.

20

1. Import object or create any design.

1

2.Click File then select Print – da Vinci Printer.

2

3. Set the Printing speed by clicking General then select Print Speed.

21

Support

The supportive structures are printed according to the objects features. Support is used to create structural strength and ensure that your model does not collapse during the printing process.


1.Import any object that has overhang parts.

1

2.Click File then Print – da Vinci Printer.

2

3.When Printer Window display, enable Support then click Prepare.

13

4.Overhang parts has already support.

14

Raft

Printing thinner and longer objects require more attention due to the shapes physical instability; the object may buckle or twist under its own weight. When printing long thin objects, you should consider increasing the area of contact between your object and the print bed by checking the “Raft” box. Rafts create stability and can be removed after your object has been printed.


1.Import a long or thing object that you want to print. Click on File then select Print – da Vinci Printer

10

2. Select da Vinci nano in the printer list. Enable Raft then click Prepare.

11

3. Object has already Raft.

12

Brim

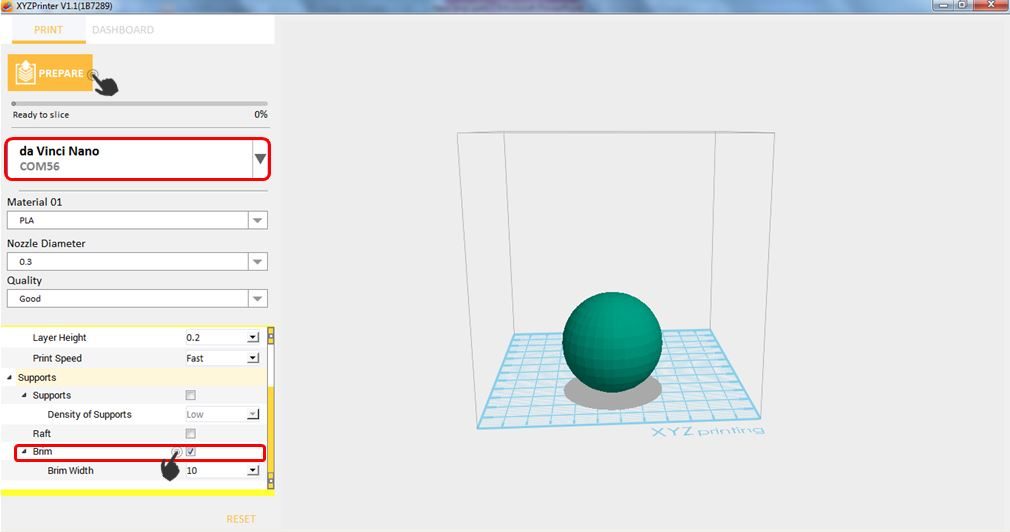
Brim function allows users to enlarge the range of contact with bottom area of print bed in printing relatively elongated object to prevent swing due to print from influencing print quality.


1. Import any object.

1

2.Click File then select Print – da Vinci Printer

2

3. Enable Brim and set the Brim Width.

15

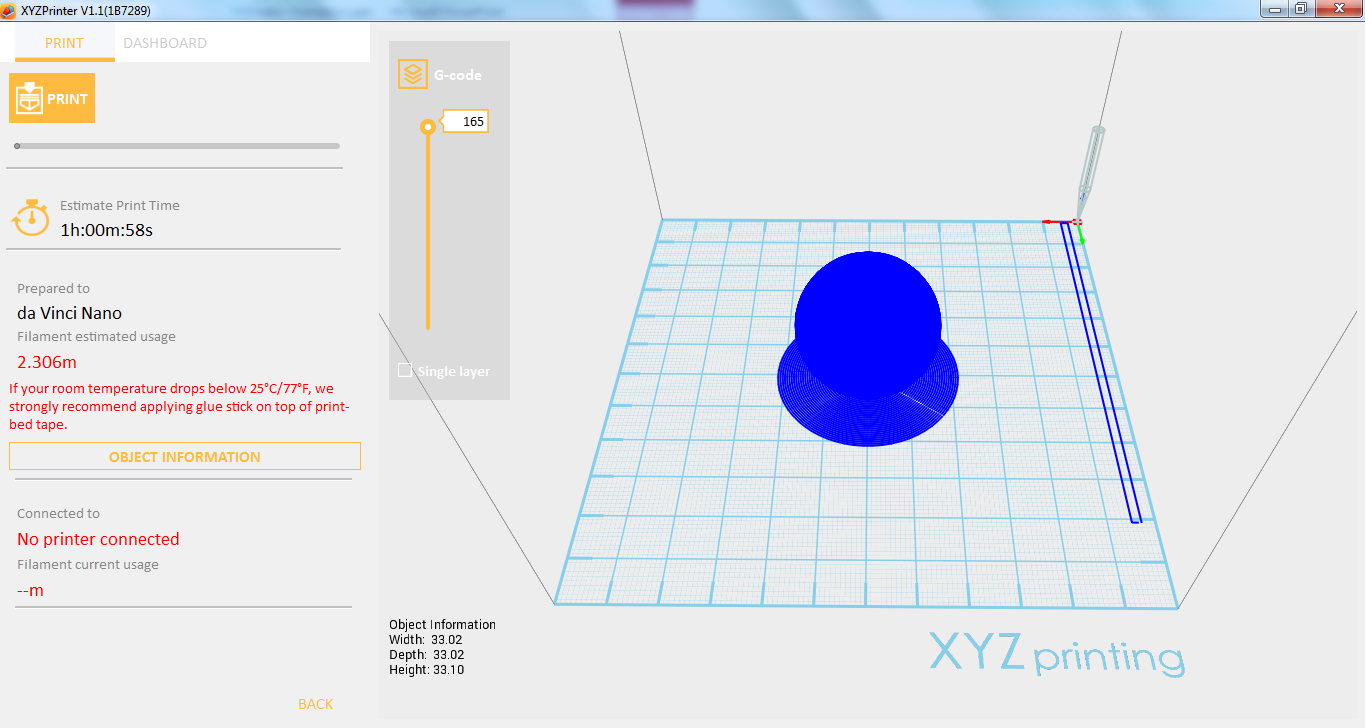
4.Notice that there is an added Brim on the surface.

^8F154020D52A5439B233AE3F33D3086484BFB899FD8DCDF2A3^pimgpsh_fullsize_distr

General

Last updated on March 28th, 2018 at 03:59 pm

This function supports adjustment for print structure of object, and the use of setting options of structure density and shell print in conjunction to result in different effects.


Temperature

Operating temperature of print bed and print module is adjusted. The temperature information is saved in object slicing information. Professional series printer temperature can be set manually since it can support a third party filament.

Temp

1. Import any object.

1

2. Click File then select Print – da Vinci Printer.

2

3. Select the printer then click on General then set the Temperature.

3

Shell Thickness Normal

For the number of print layers of the shell for the body of the object, two layers (layer = 3) are printed from outside to inside to obtain robust shell layer and repair defects due to print of the first layer, such that neither void nor hole is resulted on surface.

1


1.Import any object.

1

2.Click File then select Print – da Vinci Printer.

2

3.Click on General then select Shell Thickness Normal and set the desired value.

2

Shell Thickness Top Surface

The top is usually the last part of object in print process. Users may adjust the number of layers    to be printed on the top. Larger number of print layers, if used, will result in denser and more solid sealing structure on the top.

Top Surface


1.Import any object then click on File and select Print – da Vinci Printer.

11

2.Click on General and select Shell Thickness Top Surface. Value are ranges from 1-10.

10

Shell Thickness Bottom Surface

Before it prints the infill structure of the bottom part of the print object, a complete and solid bottom surface of object is printed. A perfect void free bottom surface is usually resulted through three-layer print (layer = 3). In addition to bottoming effect, better object stability is provided in printing.

12

If you are accustomed to the settings of those printer that does not support of third party filament with style of selection for shell thickness, please refer to the following information setup:

  • Thin: 1 layer
  • Normal: 2 layers
  • Thick: 3 layers

If the top part and solid layer (infill) are set to 0, the result will be hollow object.

1.Import any object or create any design.

1

2.Click File then select Print – da Vinci Printer.

2

3. Select any Professional Printer. Click on General and set the desired value on Shell Thickness Bottom Surface.

13

エクスポート設定

Last updated on September 19th, 2018 at 11:25 am

印刷タイプ

印刷品質は、オブジェクトの印刷に要する時間に影響します。 例えば、高品質の印刷物は、印刷する各層が薄くなるにつれて、低品質の印刷物よりも作成に時間がかかります。Print Type

温度

印刷中に使用されるプリンタの温度は、設置されている材質によって若干異なります。 この設定を使用して、-10〜+ 10°の温度を調整できます。

temperature

後退する長さ

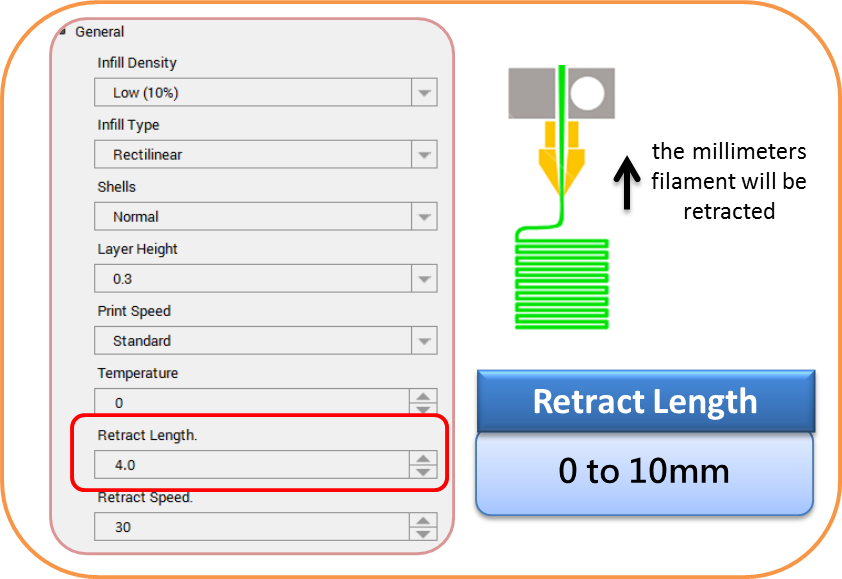
収縮は、フィラメントの滲出を最小にするように設定される。 フィラメントは、各トラベル時に、引出し長さで設定した値だけ引っ込められます。 0〜10mmの範囲で調整できます。
retract length

後退速度

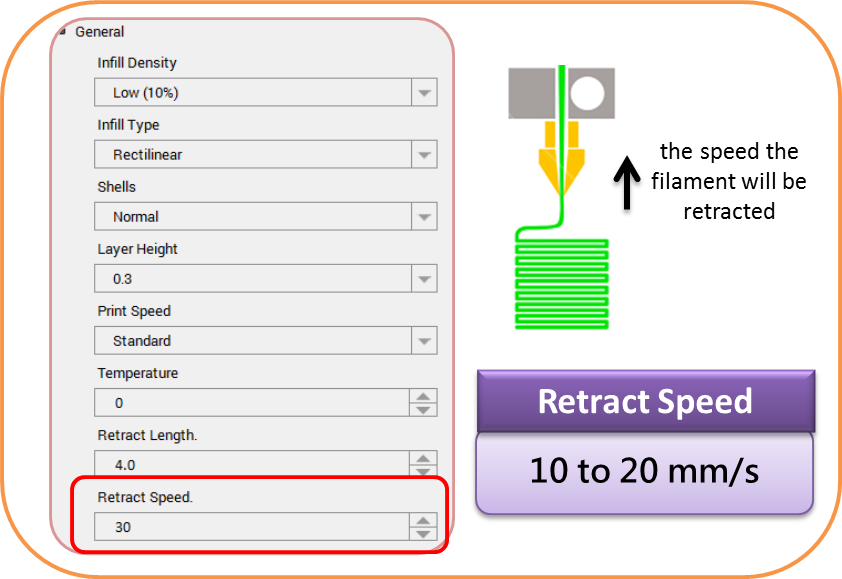
これは、押出機が材料を引っ込める速度(ミリメートル/秒)である。 あなたは10から120ミリメートル/ sに調整することができます。

retract speed

レイヤーの高さ

異なるレイヤーの高さを設定することで、プリンタが作成する各レイヤーの厚さを変更することができます。 印刷された層の厚さは、0.1mm〜0.4mmの間で調整することができる。 最良の結果を得るには、0.2〜0.3mmのレイヤー印刷をお勧めします。

LH

充填密度

印刷前に、ユーザーはこの機能を使用して、オブジェクトの印刷濃度を調整することができます。 da Vinci 3Dプリンタのデフォルトのプリンタ設定では、ハニカム構造に基づいてオブジェクトの内部構造が作成されます。 3D密度プルダウンメニューを使用して、ハニカム構造密度を空洞から高水準に調整して、所望の強度要件を作成することができます。

Infill Density
1. オブジェクトをインポートするか、デザインを作成します。

1

2.[ファイル]をクリックし、[印刷 – da Vinciプリンタ]を選択します。

2

3.Generalをクリックし、Infill Densityを選択します。 インフィル密度は10〜100の範囲である。

5

シェル

シェルはオブジェクトの外側のレイヤーです。 厚いシェルはより良い印刷品質で終わりますが、印刷には時間がかかります。 薄いシェルは印刷時間を短縮しますが、破損する可能性があります。

オブジェクトの強さは、3D密度とシェルの設定によって影響されます。 異なるサイズ、形状、目的のオブジェクトの持続性を保証するためには、異なる密度とシェルの設定が必要です。

18


1. オブジェクトをインポートするか、デザインを作成します。

1

2.[ファイル]をクリックし、[印刷 – da Vinciプリンタ]を選択します。

2

3. Generalをクリックし、シェルを設定します。 Normal、Thin、Thickのいずれかです。

17

印刷速度

印刷速度は、オブジェクトのサイズと精度に基づいて設定を変更するために使用します。 一般に、より良いオブジェクト品質は、より低い印刷速度を伴う。 スロー、スタンダード、またはファーストにすることができます。 レイヤー高さの設定が0.2mmの場合、印刷速度オプションは低、中、高、高速です。


1


1.オブジェクトをインポートするか、デザインを作成します。

1

2.[ファイル]をクリックし、[印刷 – da Vinciプリンタ]を選択します。

2

3.Generalをクリックし、Layer Heightを選択して、目的の値を入力します。

7

サポート

支持構造体は、オブジェクトの特徴に従って印刷される。 サポートは、構造的強度を作り出し、印刷プロセス中にモデルが崩壊しないようにするために使用されます。 マテリアルセットがABSの場合、Support DensityをLow、Medium、Highに設定できます。

1.オーバーハングした部品を含むオブジェクトをインポートします。

1

2.「ファイル」→「印刷 – da Vinciプリンタ」をクリックします。

2

3.プリンタウィンドウが表示されたら、[サポート]を有効にし、[準備]をクリックします。 また、希望のサポート品質に応じてサブ設定を変更することもできます。 設定を調整したら、[準備]をクリックします。

3

4.突出部分はすでに構造をサポートしていることに注意してください。

4

サポート密度

サポートの密度は、モデルのサポートの構造を定義します。 これを[高]に設定すると、より強力で優れたサポートが得られますが、削除するのは難しくなります。 サポートの低、中、高から選択できます。

s1

オーバーハングしきい値

あなたのモデルのオーバーハング部分は、あなたの設定した角度までサポートを生成します。 オーバーハングのしきい値は1°〜90°に設定できます。

s2

サポートギャップ

これは、モデルとサポートのギャップを設定します。 0〜3のレイヤーに設定できます。 設定した値が大きいほど、サポート構造がモデルに当たる機会が少なくなります。

s3

サポートを拡張する

拡張サポートサポートを構築するためにモデルの周囲を拡張します。 これにより、より堅固な支持構造が得られる。
s4

ラフト

オブジェクトがプラットフォームに接触する面積が小さい、または形によってバランスが不安定の場合、印刷するときに失敗または変形する可能性があります。その際、ラフトをつけることは安定性を高め、印刷はより成功しやすくなります。

1.バランスの悪いオブジェクトをインポートします。

1

2.ファイル→印刷→ダヴィンチ プリンターを選択します。

4

3. プリンターを選択し、ラフトを有効にします。

2

4.ラフトが追加されました。

3

底辺

本機能はオブジェクトの周りに板構造を追加し、オブジェクトの安定性を高める機能です。

1. オブジェクトをインポートします。

1

2.ファイル→印刷→ダヴィンチ プリンターを選択します。

2

3. 底辺を有効し、底辺の幅を設定します。

3

4.底辺が追加されました。

4

Extruder

Last updated on March 28th, 2018 at 03:59 pm

In extruder, there are two options in the list, first is the Clean Nozzle and the second one is the Info. This operation can be done only in miniseries printers of XYZprinting.

extruder

Clean Nozzle

Once this function is selected, the nozzle will heat up automatically and move the nozzle to a proper location where you can easily clear away all residual filaments in the nozzle.

1.Connect to printer.

8

2.Click File then select Print – da Vinci Printer.
1

3.Click on Dashboard.

2

4. Click on Extruder then select Clean Nozzle.

3

5. Click start to begin.

4

6. The printer will start heating.

5

7.After heating,  place the cleaning wire through the nozzle.

6

8.After cleaning, click on Finish.

7

Info

This will display the information of the extruder inserted to connected printer. It will show the Temperature, Diameter, Serial Number and Total Print Time of the extruder.

1. Connect to printer.
8

2.Click File then select Print – da Vinci Printer.

1

3.Click on Dashboard.

2

4.Click on Extruder then select Info.9

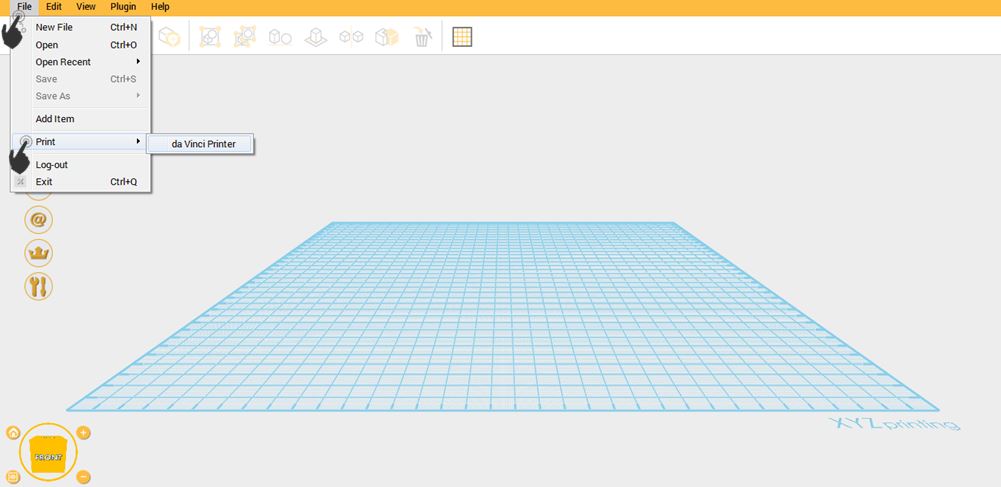
5.Extruder Information will display. It includes Temperature, Nozzle Diameter, Total Print Time and Serial Number.
10

SetUp

Last updated on March 28th, 2018 at 03:58 pm

You can perform setting up your printers’ calibration, Jog mode, Wireless Connection, Z offset, Auto level and information of the printers with the use of XYZmaker. On this chapter, you will learn how to use different set up that will help you to maintain the performance of your printer.

SetUp

Jog Mode

Jog mode enables you to freely move the extruder module along the X, Y and Z-axis. This is useful for maintenance and repair. It manually adjusts the movement of X/Y/Z Axis for printer maintenance.

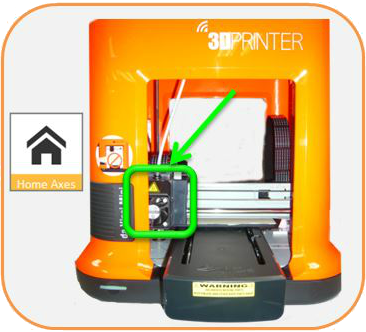
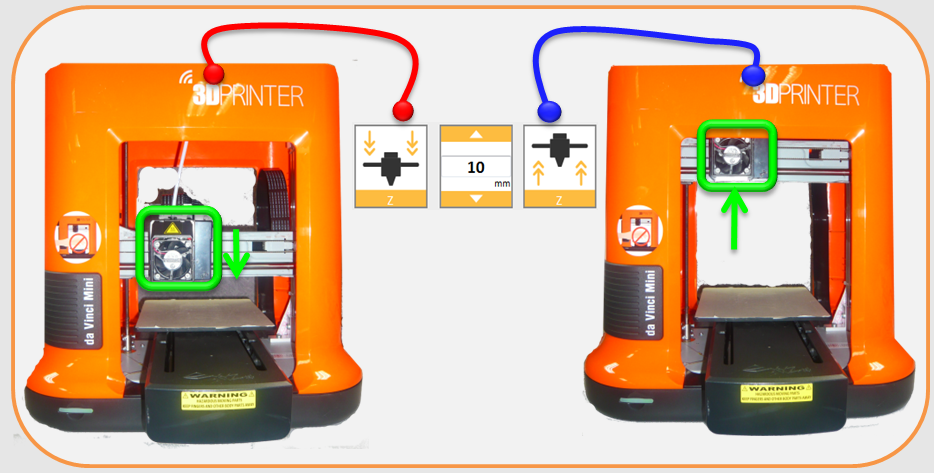
First click on [Home Axes]. The printing device will be returned to the initial axis position at the lower left corner of the printing area. Then adjust the positions of the printing module (X-AXIS), printing platform (Y-AXIS), and printing axes (Z-AXIS). When you select “X-AXIS” it will move the extruder rightwards and leftwards, while if you select “Y-AXIS” the print bed will move forwards and backwards hence if you select “Z-AXIS” the print axis (Z-AXIS) will move upwards and downwards.

1.Connect to printer.
8

2.Click File then select Print – da Vinci Printer.
1

3.Click on Dashboard.

2

4.Click SetUp then select Jog Mode.

1

5.To start the Jog Mode, the extruder should be in the Home position, so click on Home Axes.

2

6. You can now start using Jog Mode function.

3


When clicking Home Axes, the extruder will move to its Home position.

4

Choosing X axis, the extruder will move to the left or to the right.

5

When you choose Y axis, the Printbed will move backward and forward.

6

While, choosing Z, the extruder will move downward or upward.

Jog Mode Z

Calibrate

Platform calibration should be implemented before the printing process. The printing device may move to the lower left corner of the printing area. Please refer to the platform calibration instructions provided in the software.

Before calibration, press Button A of the printing module. After calibration, press Button B on the printing module in order to retract the sensor device. If calibration was failed, please make sure that Button A (detector) has been pressed before restarting the calibration process.

1.Make sure that you are connected to printer.8

2.Click on File then select Print – da Vinci Printer.

1

3.Click on Dashboard.

2

4.Click SetUp then select Calibrate.

6

5.Click start to begin.

1

6.Extruder is moving to Home position. This may take a few minutes.

2

7. Press the detect module on the extruder, as shown in the image. Then click Next.

3

8. Calibration will start. It may take a few minutes.

4

9. When the calibration is completed, you need to disable the detect module by pressing the button shown in the image. Click Finish to complete the process.

5

Z offset

This function will help you to adjust the printing distance between the bed and the printing module. Each adjust has step of 0.05mm. If the first layer distance is too high (too large) or too low (too close), we recommend you using z-offset to adjust the printing distance.

1.Connect to printer. Make sure that the printer is ready.8

2.Click File then select Print – da Vinci Printer.

1

3.Click on Dashboard.

2

4.Click on SetUp then select Z offset.

1

5. Choose whether you want to decrease or increase the Z-Offset. In example, the selected is increase the distance between the print bed and the print module.

3

6.After changing the value, click Accept if you want to apply the changes or Default if you want to return the value in default one.

4

Others

In Others, you can enable or disable the Buzzer, Auto Level and Restore Default command. Automatic horizontal calibration may either be ON or OFF. Default: ON. The software would automatically implement horizontal calibration and compensation accordingly. Printing speed may be improved if automatic horizontal calibration has been switched OFF. However, this may affect printing quality.

Buzzer is turned on by default; you can select “OFF” to change the setting. When the buzzer is turned on, the printer will output an audible signal when a button is pressed, receiving data, print job is finished, or issue is detected. While using “Restore Default” all settings will be reset to factory default.


1.Connect to any printer with lower firmware version.8

2.Click File then select Print – da Vinci Printer.

1

3.Click on Dashboard.

2

4.Click SetUp then click Others.

1

5. You can turn on the Buzzer and the Auto Level. Click OK to accept  changes, Default to return to default value, while if you don’t want to apply changes click Cancel.

2

FW Upgrade

For the best 3D printing experience, please keep the software and/or firmware updated. Updating is simple: Just connect the printer then click on File  Print — da Vinci Printer — Printer Plugin — Select the printer on the dropdown list — Click Dashboard — Setup — FW Upgrade.

Note : Please make sure that you have Internet access on the PC before updating the firmware or XYZmaker software. 


1.Connect to any printer with lower Firmware version.8

2.Click File then select Print – da Vinci Printer.1

3.Click on Dashboard.

2

4.Click on SetUp then select FW Upgrade. 

1

5.Click Upgrade Now to begin. Please do not turn off or interrupt the printer while it is upgrading.

2

6.After upgrading, it will display that the firmware version is already updated.

3

Wireless Communication

The network printing function is only available when the printer and the computer are both connected to the same wireless network.

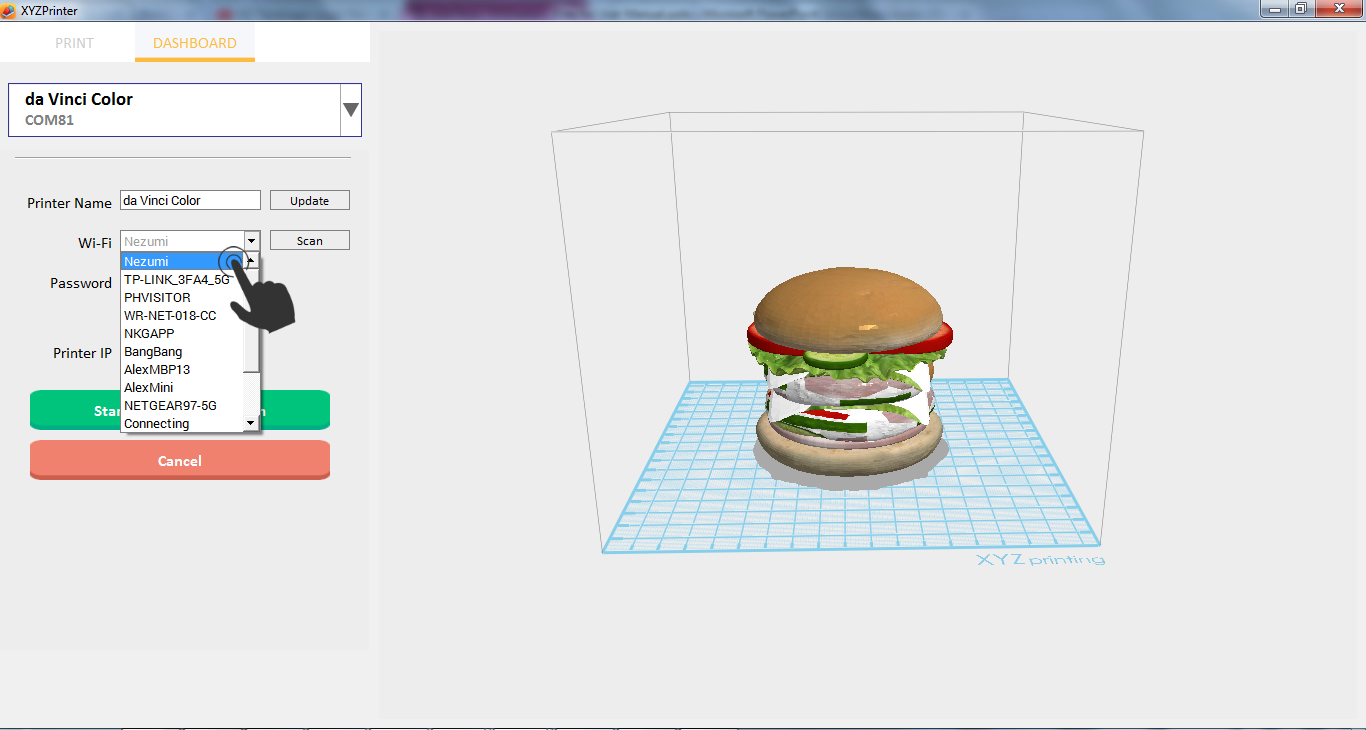
1. Setup the wireless network on your PC and connect to any printer that support wireless sending job.

1

2. Click File->Print->da Vinci Printer.

1-10

3. Click SetUp->Wireless.

4

4.Click Scan and select the Wireless network where your PC is connected.

6

5. Key-in the Password then click Start Wi-Fi.

7

6. Start attempting connection.

8

7. Start Wi-Fi button will become Stop Wireless Connection/ Change Setting when already connected.

9

Info

Printer Information can be view under SetUp — Info. It will display all the Printer Information, Connection Information, and Calibrate Information. All of these will be summed up on this page.

1.Connect to any printer. 8

2.Click File then select Print – da Vinci Printer.

1

3.Click on Dashboard.

2

4.Click SetUp then select Info.

1

5.You can view the Printer Information, Connection Information and Calibration Information.

2

ツールバー

Last updated on September 19th, 2018 at 10:36 am

ツールバー画面の上部にあり、オブジェクトに対する操作を提供しています。

Toolbar

内容は左から元に戻す、繰り返し、コピー、貼り付け、元の場所にコピー、グループ化、グループ化の解除、揃い、ランド、ミラー、サブトラクトおよび削除、最後はグリッドボタンです。

元に戻すと繰り返し

元に戻す機能はCTRL+Zや該当ボタンで起動できます。使用すると、前の操作を戻すことができます。また、繰り返しボタンは元に戻すボタンを使用した後に使用可能です。

1. オブジェクトAをインポートします。
1

2.オブジェクトBをインポートします。

2

3.元に戻すを起動します。

3

4. 直近の操作がキャンセルされます。その際、繰り返しを起動すると。

5

5.最後の操作が再度行われます。

6

コピーおよび貼り付け

この二つの機能はオブジェクトをコピーまたは特定する位置に張り付けます。

1.オブジェクトを選択してからコピーアイコンをクリックします。9

2.続きまして、貼り付けボタンをクリックします。

8

元の位置にコピー

本機能は選択されたオブジェクトを元の位置にコピーする機能です。オブジェクトを移動すれば、コピーされたオブジェクトを確認できます。

1. オブジェクトを選択してから元の位置にコピーボタンをクリックします。10

2.この時、オブジェクトは元の位置にコピーされます。

11

グループ化とグループ化の解除

グループ化機能は複数のオブジェクト一つのグループにする機能です。グループ化されたオブジェクトは一緒に移動されます。複数のオブジェクトを選択するためには Ctrlを押しながらオブジェクトを選択する必要があります。本機能のショットキーはCtrl + G。

1.複数のオブジェクトをインポートします。14

2.Ctrl+Aを押しましたらすべてのオブジェクトを選択することができます。選択した後に、グループ化ボタンをクリックすると、選択されたオブジェクトは一つのグループになります。

13

3. グループ化の解除はグループを選択してから解除ボタンをクリックするとグループが解除されます。

15

揃い

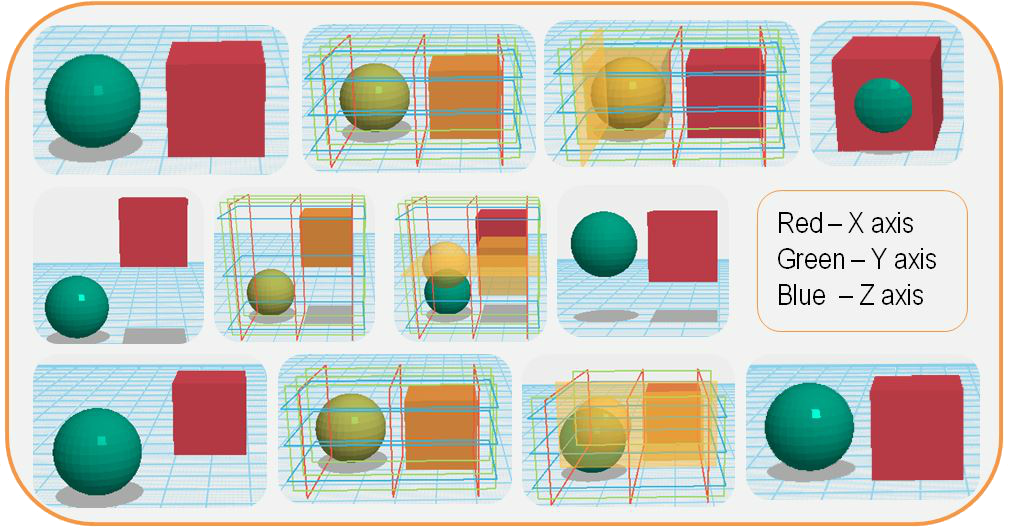
複数のオブジェクトを指定位置に揃う機能です。マウスを移動すると、X 軸、Y 軸、 Z 軸の線が表示され、線をクリックしましたら選択されたオブジェクトがその線に揃うことになります。

1.揃うオブジェクトを選択してから揃いボタンをクリックします。
11

2.揃う軸を選択します。

Align

ランド

オブジェクトが空中にある場合、本機能を使用し、地面にランドさせることができます。

1.ランドするオブジェクトを選択します。16

2.ランドボタンをクリックします。

17

3.オブジェクトが地面に移動されます。

18

ミラー

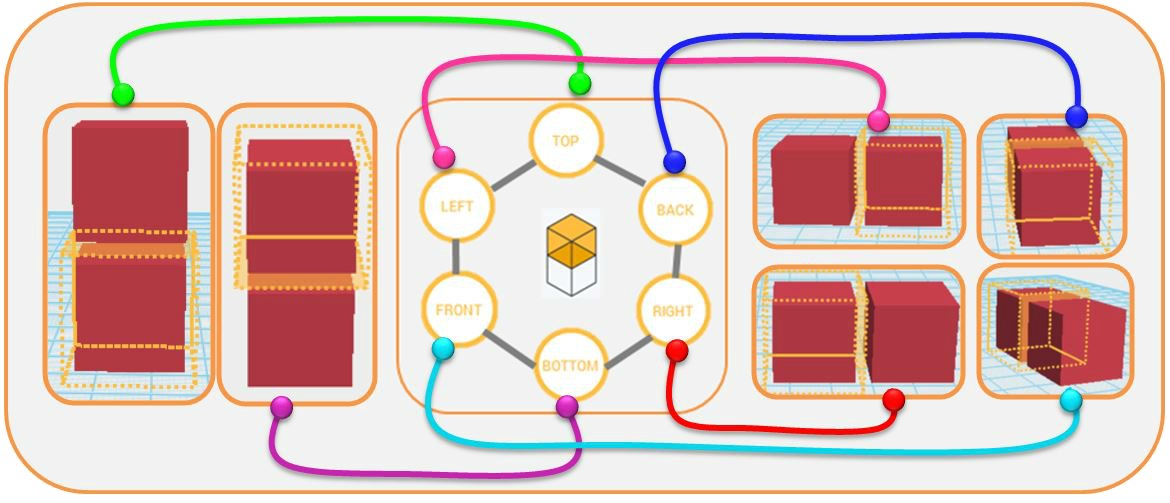
本機能は左右対称の同一オブジェクトを生成する機能です。ミラーする方向は上、左、後ろ、前、下および右を選択できます。

1. ミラーするオブジェクトを選択します。20

2.ミラーする方向を選択します。

Mirror

サブトラクト

本機能は重なるオブジェクトの部分を抜き取ることができます。本機能は単一オブジェクトやグループ化されたオブジェクトでも対応できます。残すオブジェクト→機能ボタン→抜き取るオブジェクト→機能ボタンの順で操作すると、オブジェクトが重ねた部分が抜き取られます。

1.サブトラクト機能は二つ以上のオブジェクトが保存する場合のみ機能します。1

2.保留するオブジェクトを選択し、サブトラクトをクリックします。(例:紫のオブジェクト)

3

3.紫のオブジェクトは待機状態になります。

4

4.抜き取るオブジェクト(例:XYZmakerの文字)を選択し、再度サブトラクトをクリックします。

6

5. 抜き取りの作業が完了しました!

7

削除

オブジェクトを削除する機能です。

1.削除するオブジェクトを選択してから削除ボタンをクリックします。
9

2.オブジェクトが削除されました。

10

グリッド

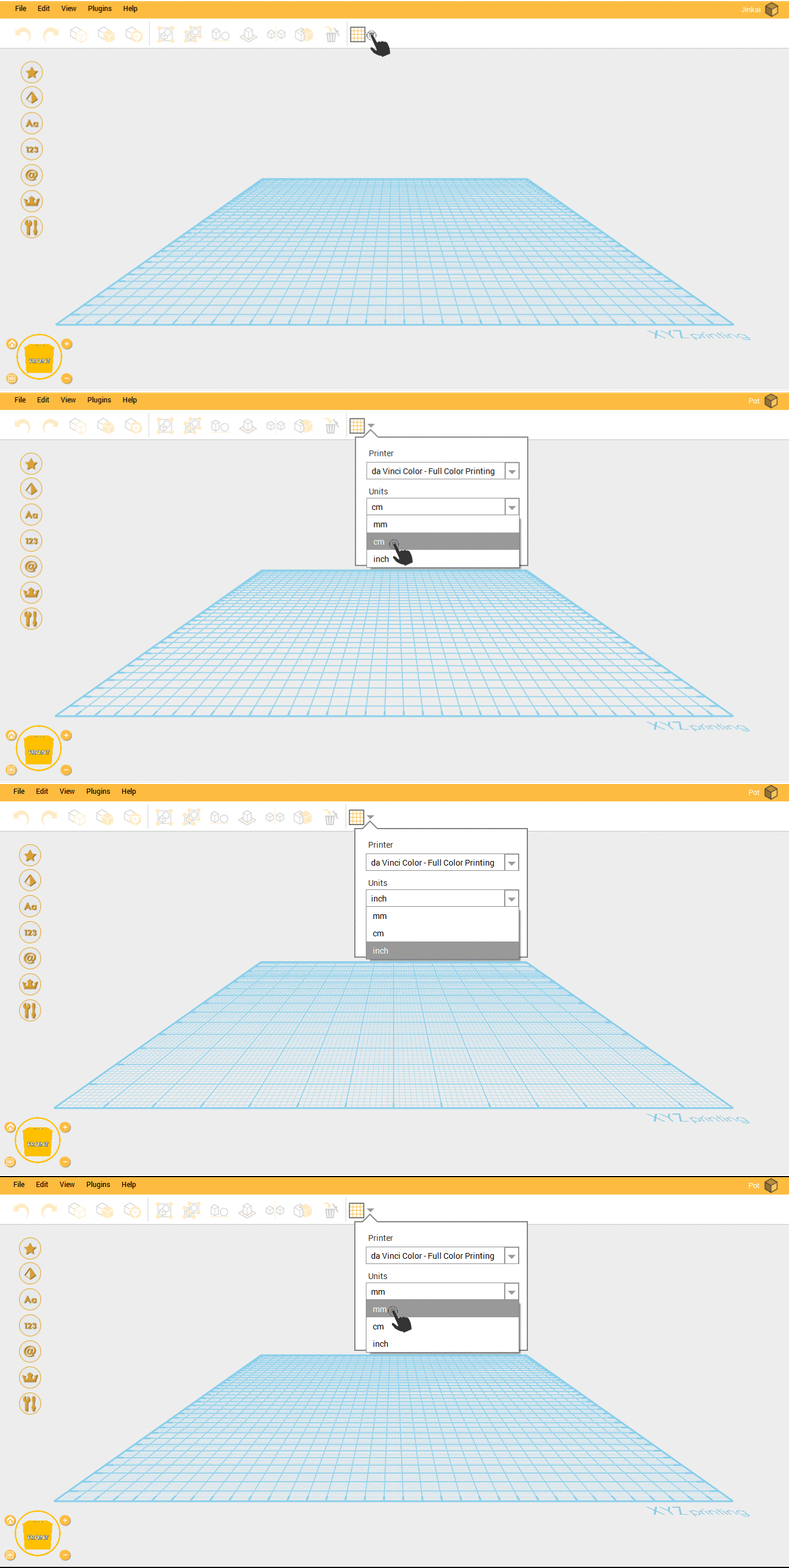
この機能により、作業面のグリッドサイズを変更することができます。 グリッドのデフォルトサイズであるミリメートルから、センチメートルまたはインチに変更することができます。 オブジェクトの単位サイズは、選択したグリッドに基づいて決まります。

Grid


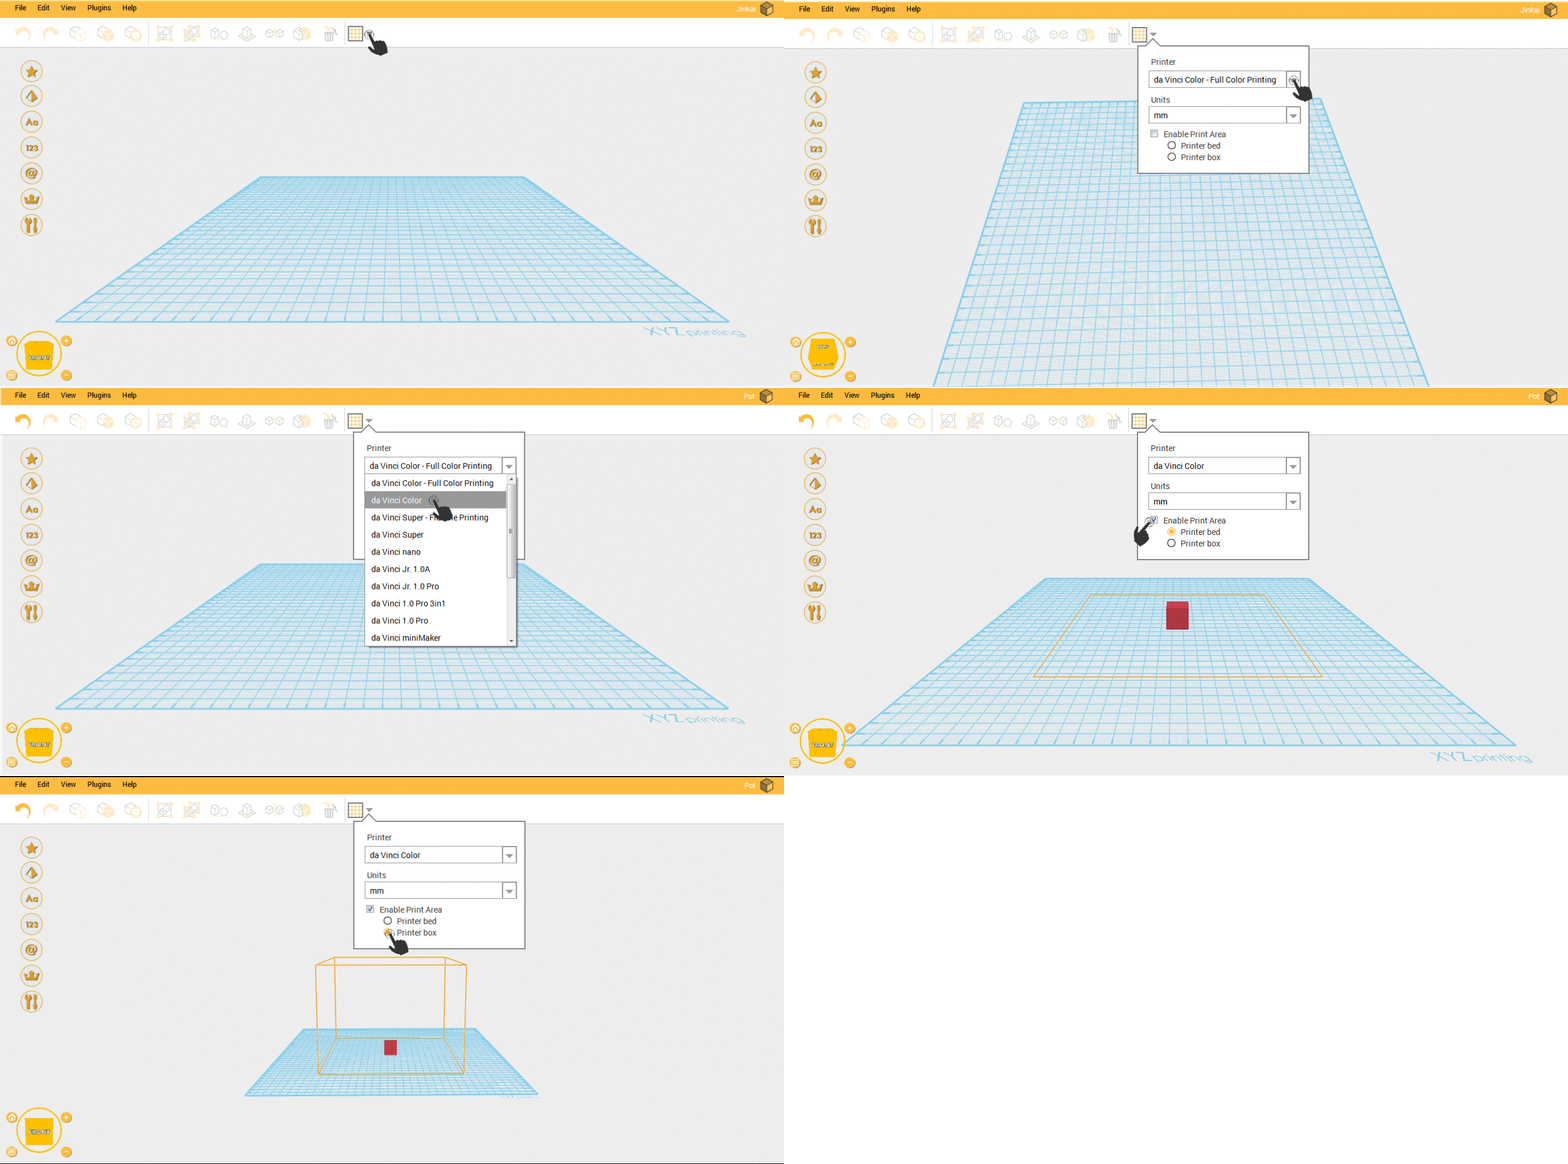
グリッド機能では、プリンタプラグインウィンドウで、プリンタ内のモデルの実際のプレビューを表示することもできます。 この機能を使用することで、プリンタで印刷できない大きなオブジェクトの設計や、オブジェクトを境界から外すことを避けることができます。

Print bed and box final