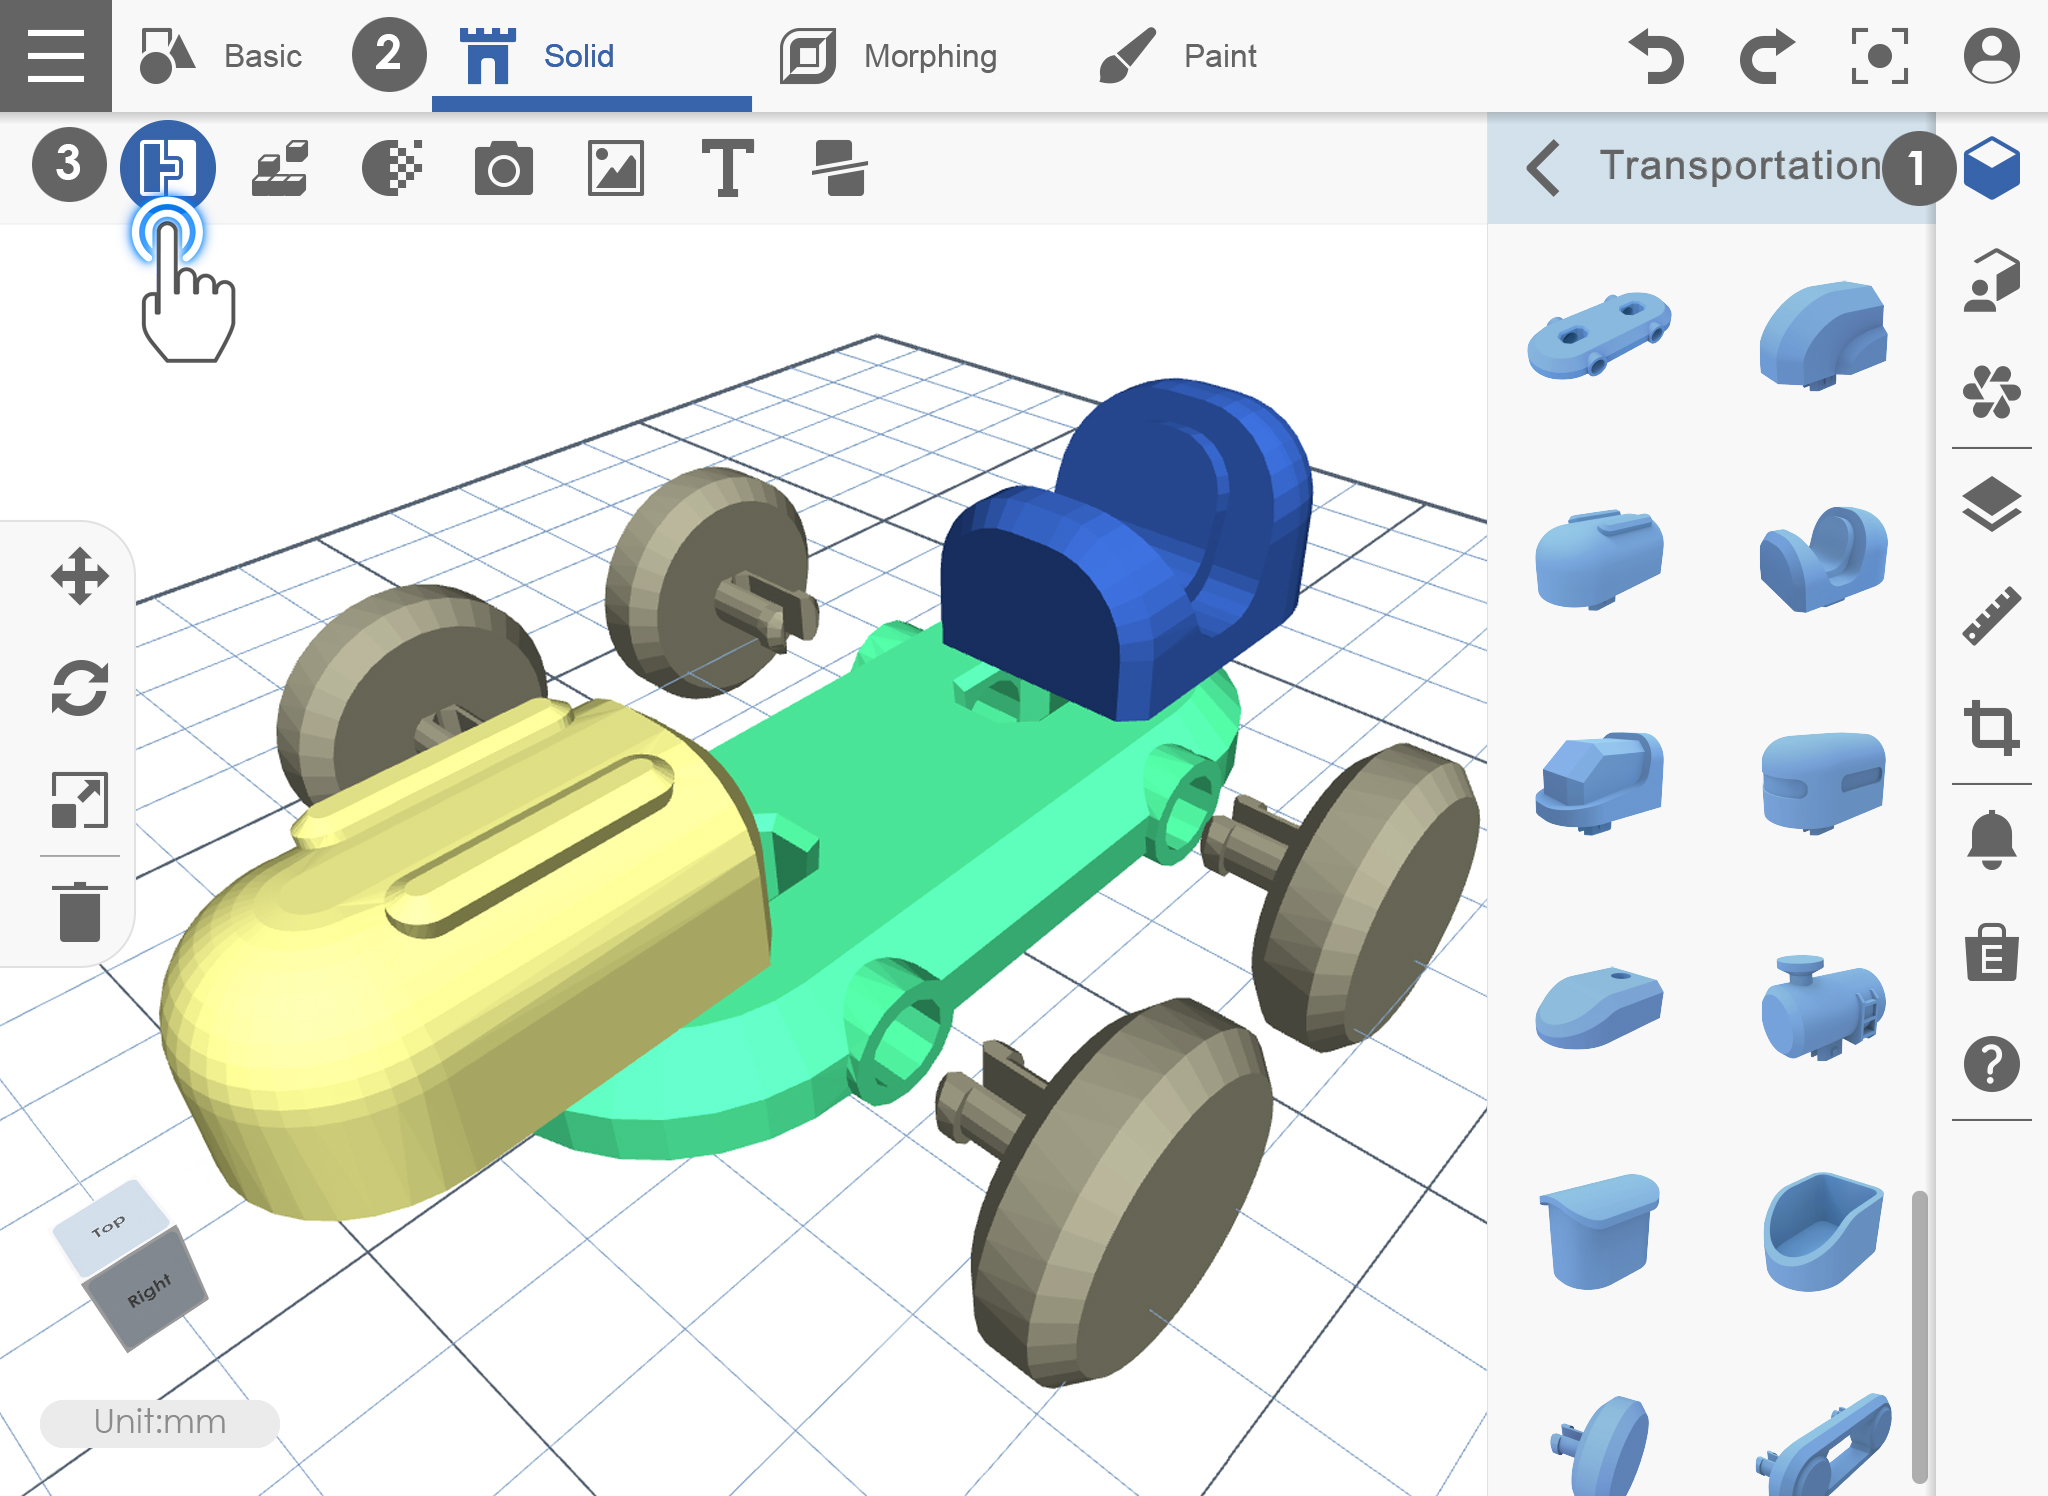
랜드 Land
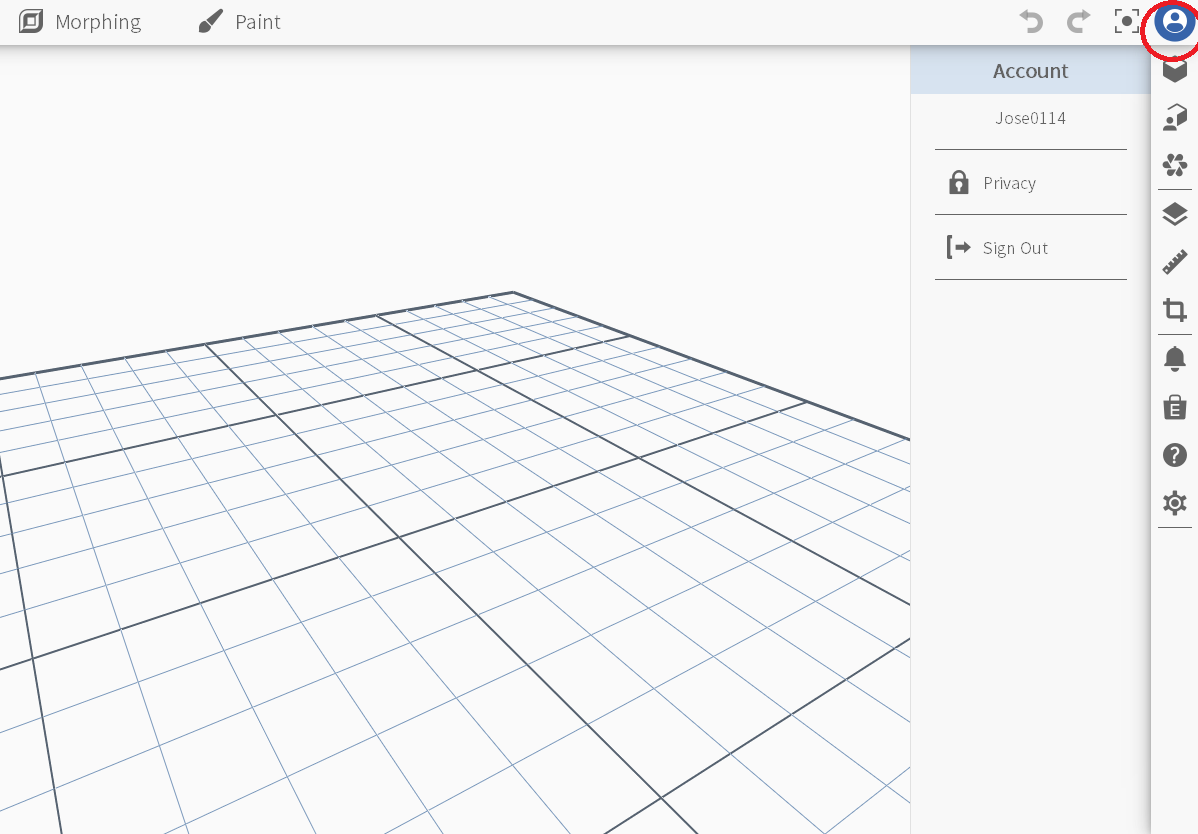
선택한 객체 (Z 축)가 작업 기준면에없는 경우이 기능을 사용하십시오. 객체의 Z 축은 0으로 되돌아갑니다. 로그인 아이콘을 선택하고 오브젝트를 선택하여 오브젝트를 작업 화면에 놓습니다.
1. “랜드” (Land) 아이콘을 클릭하고 작업 평면에 착륙시킬 객체를 선택하십시오.
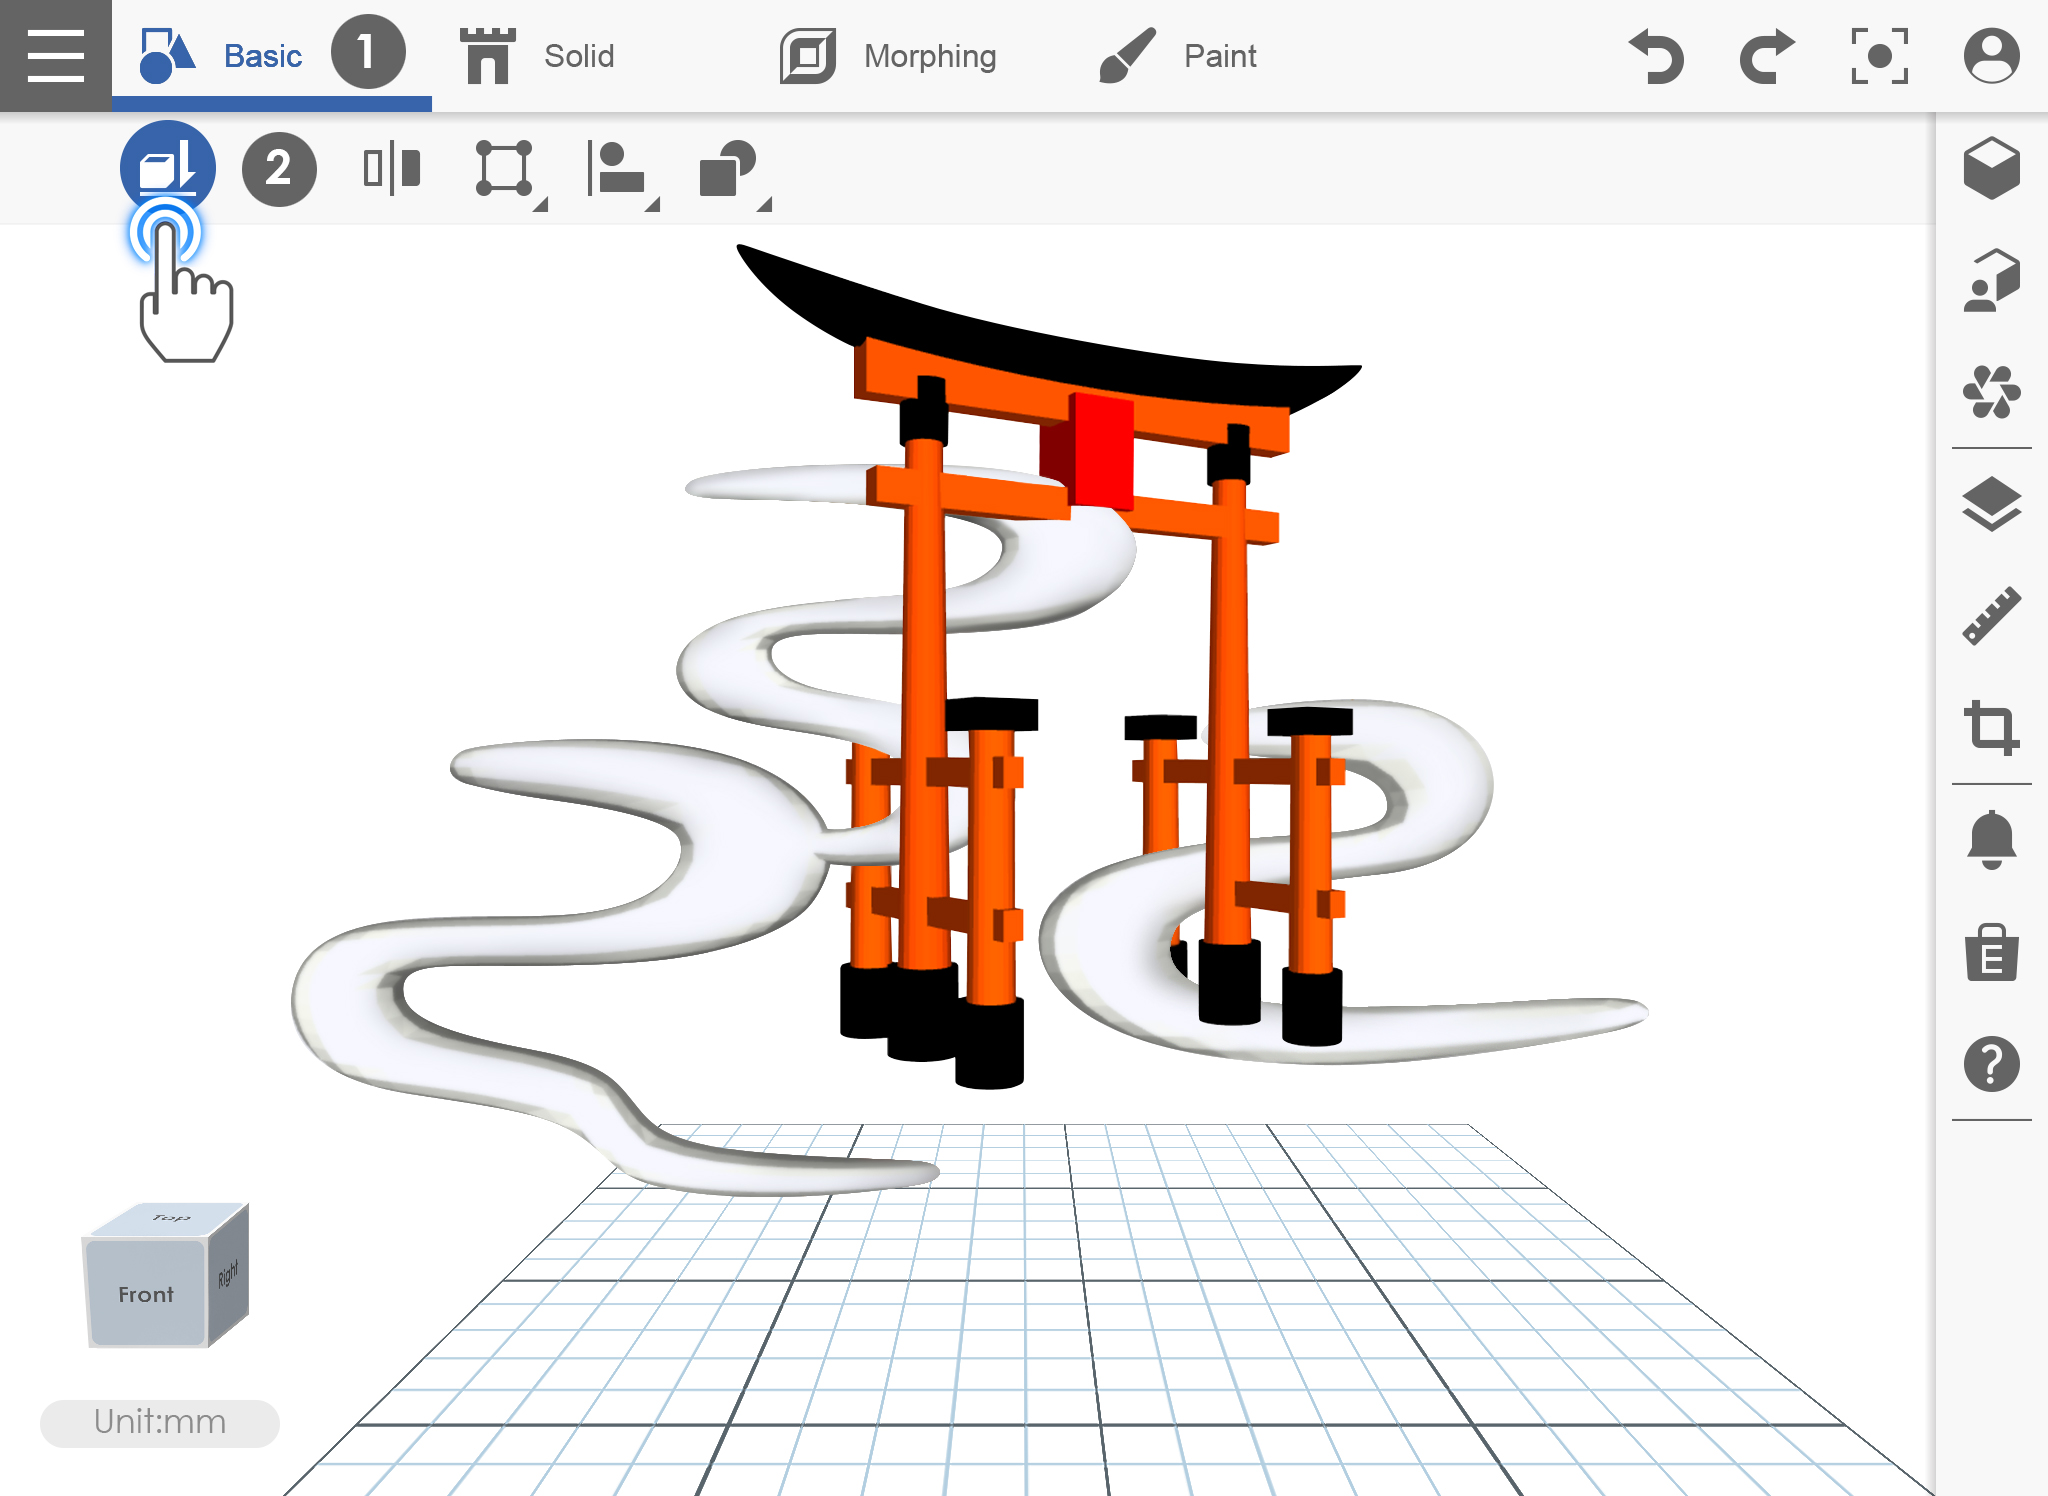
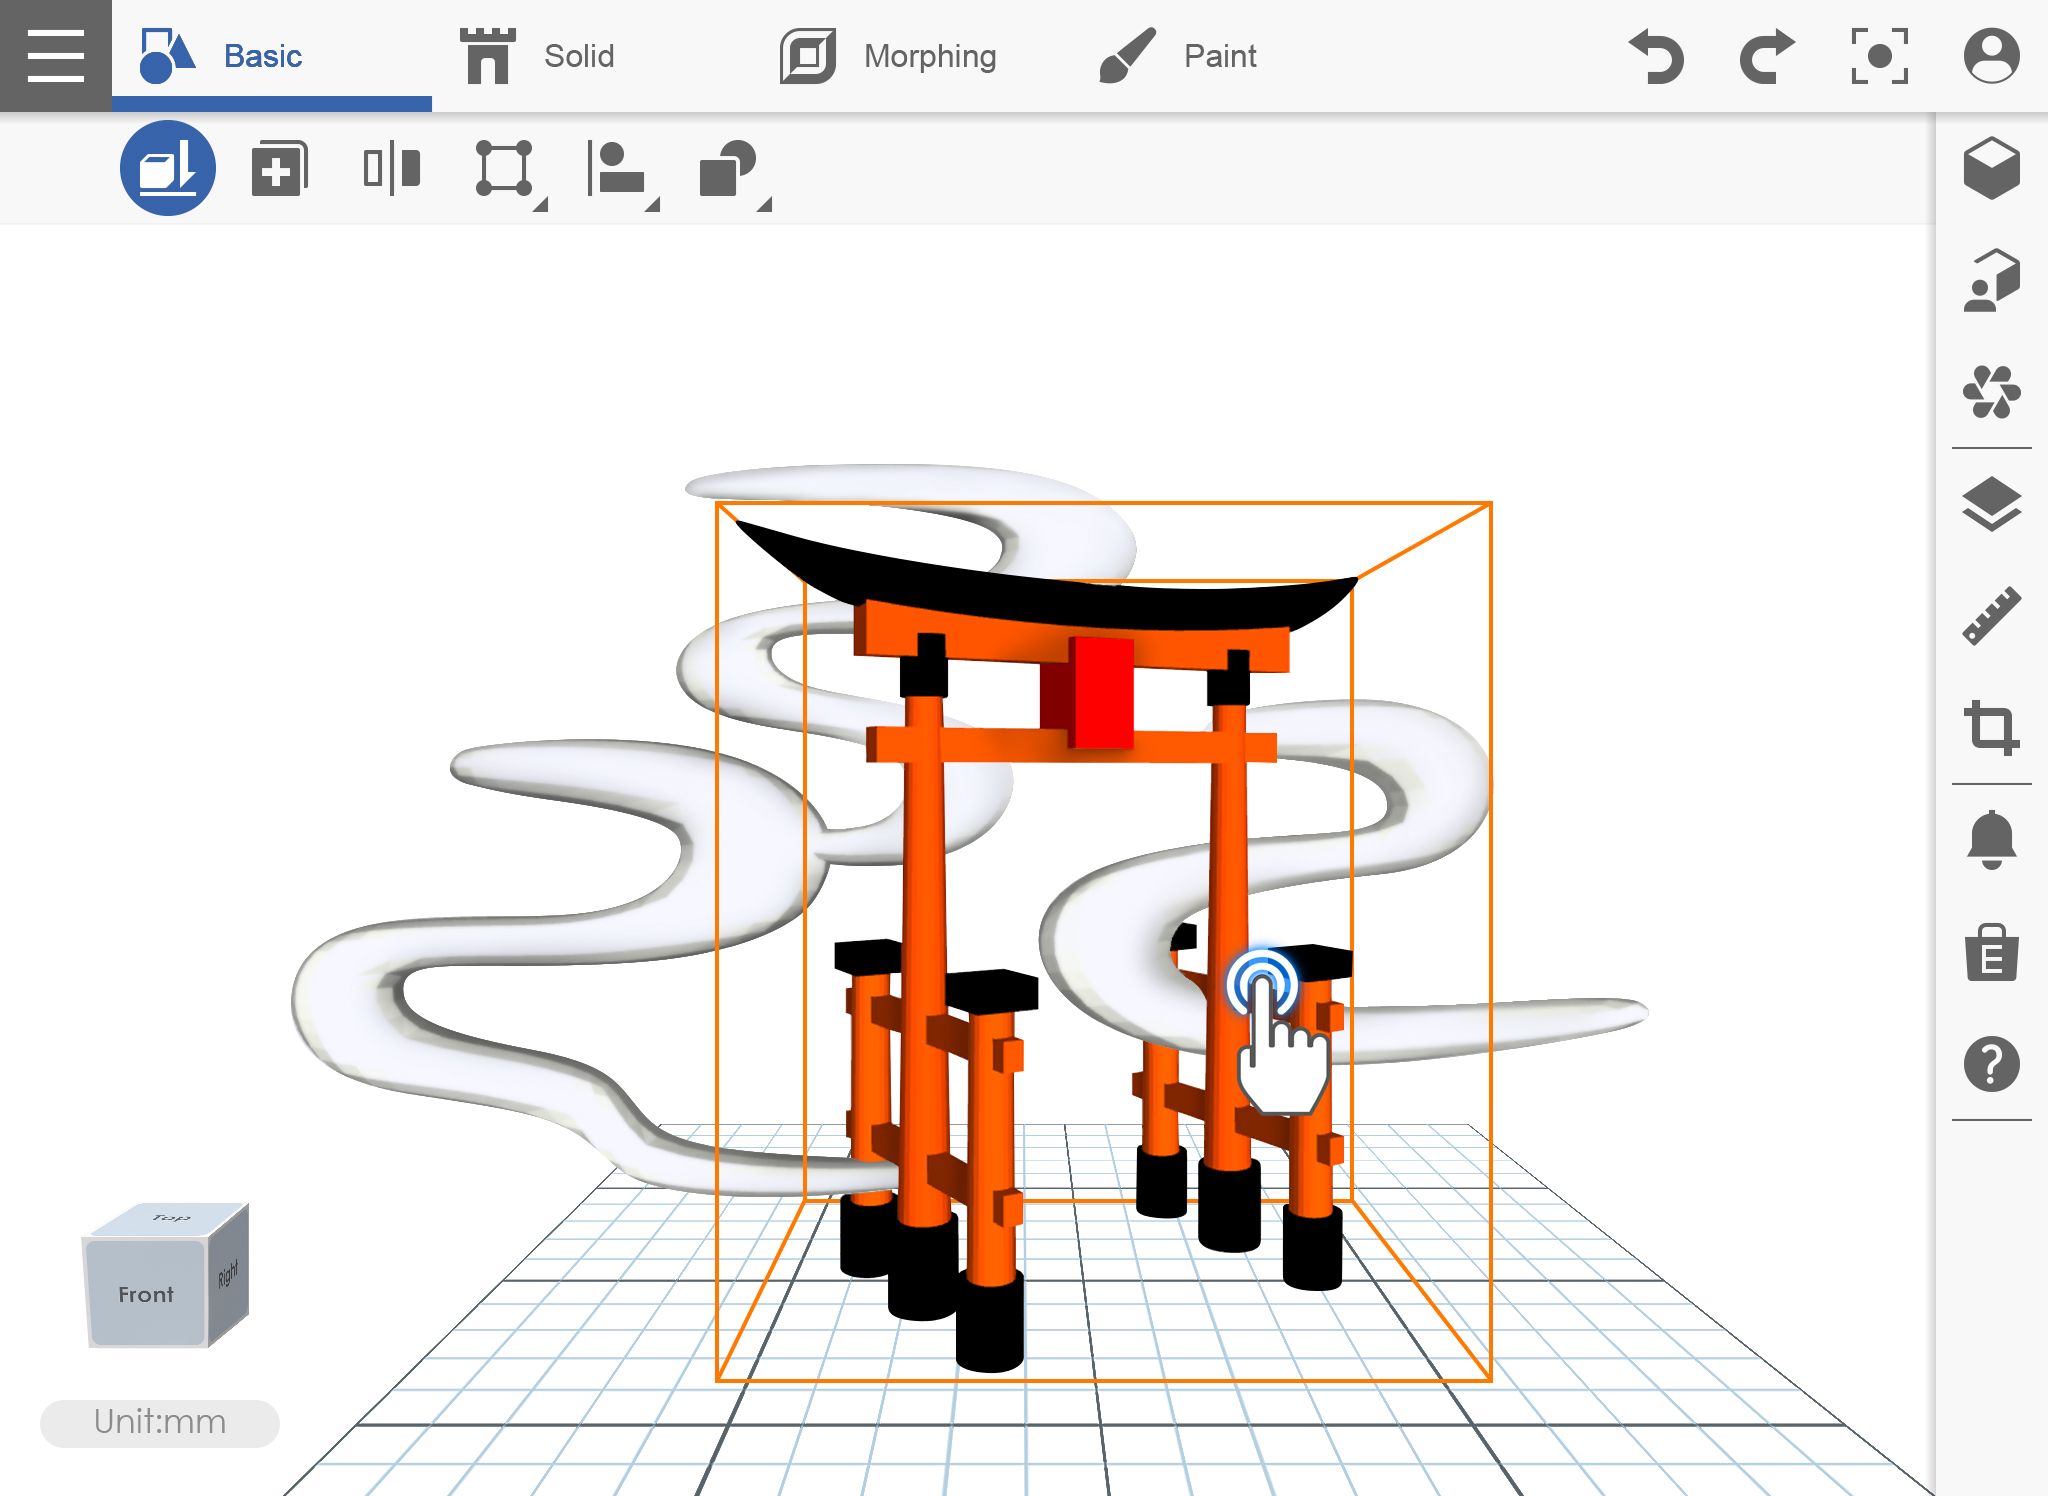
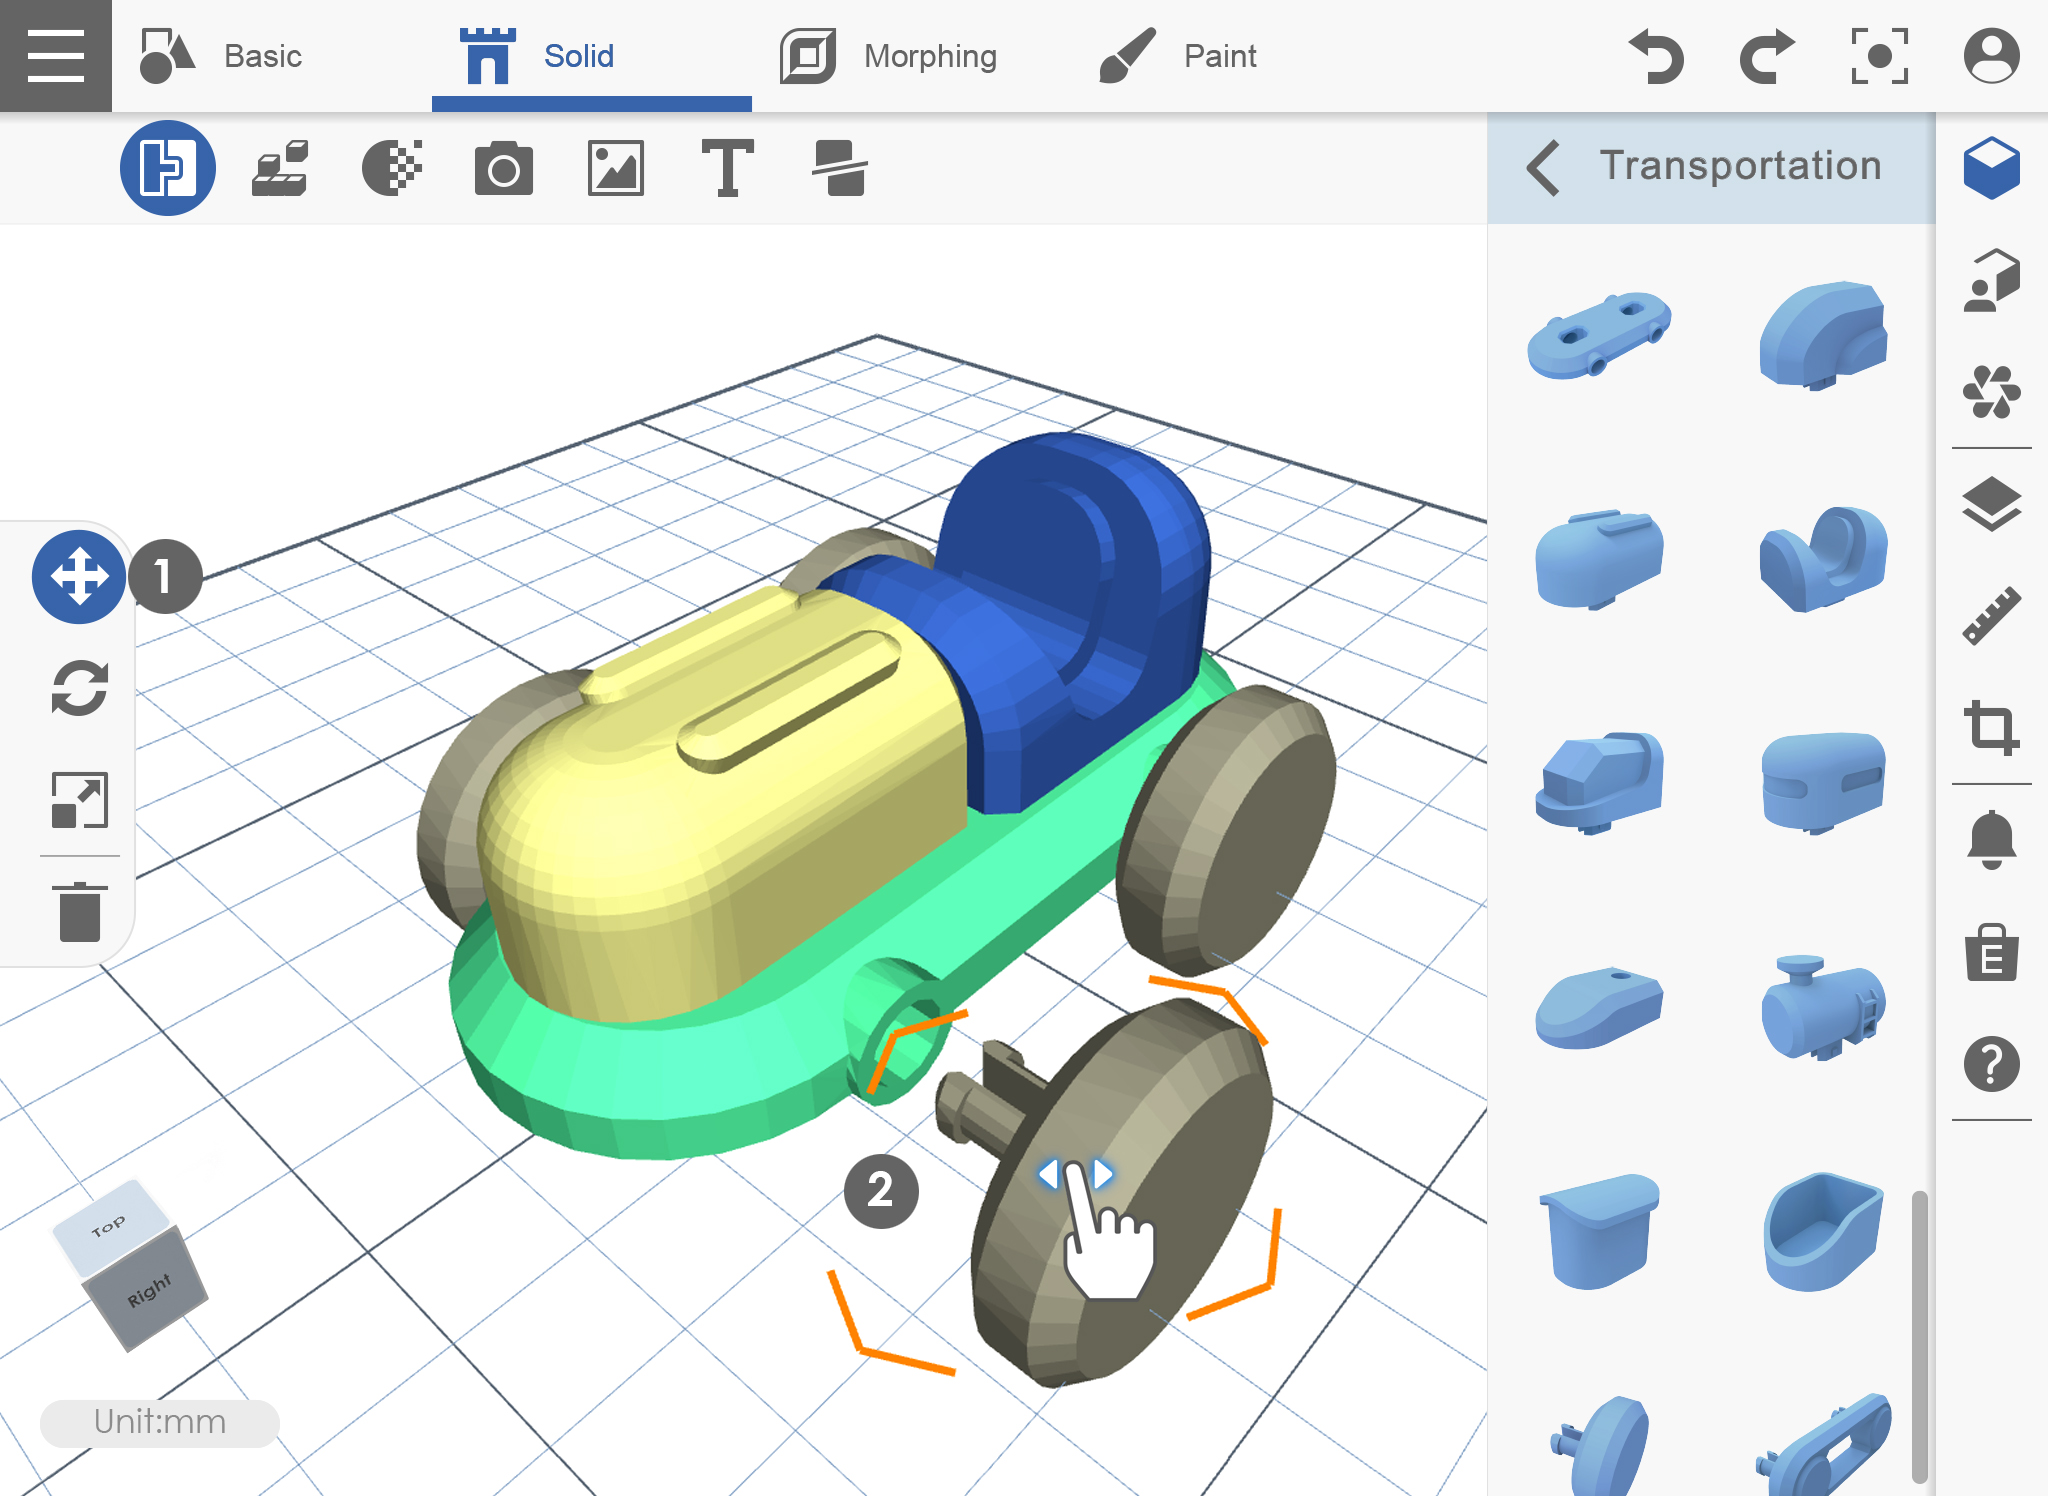
2. 물체가 작업면에 놓입니다.
복사 Clone
복사 기능은 선택한 오브젝트 만 복사합니다. 복사 된 객체를 보려면 손가락을 움직여야합니다.
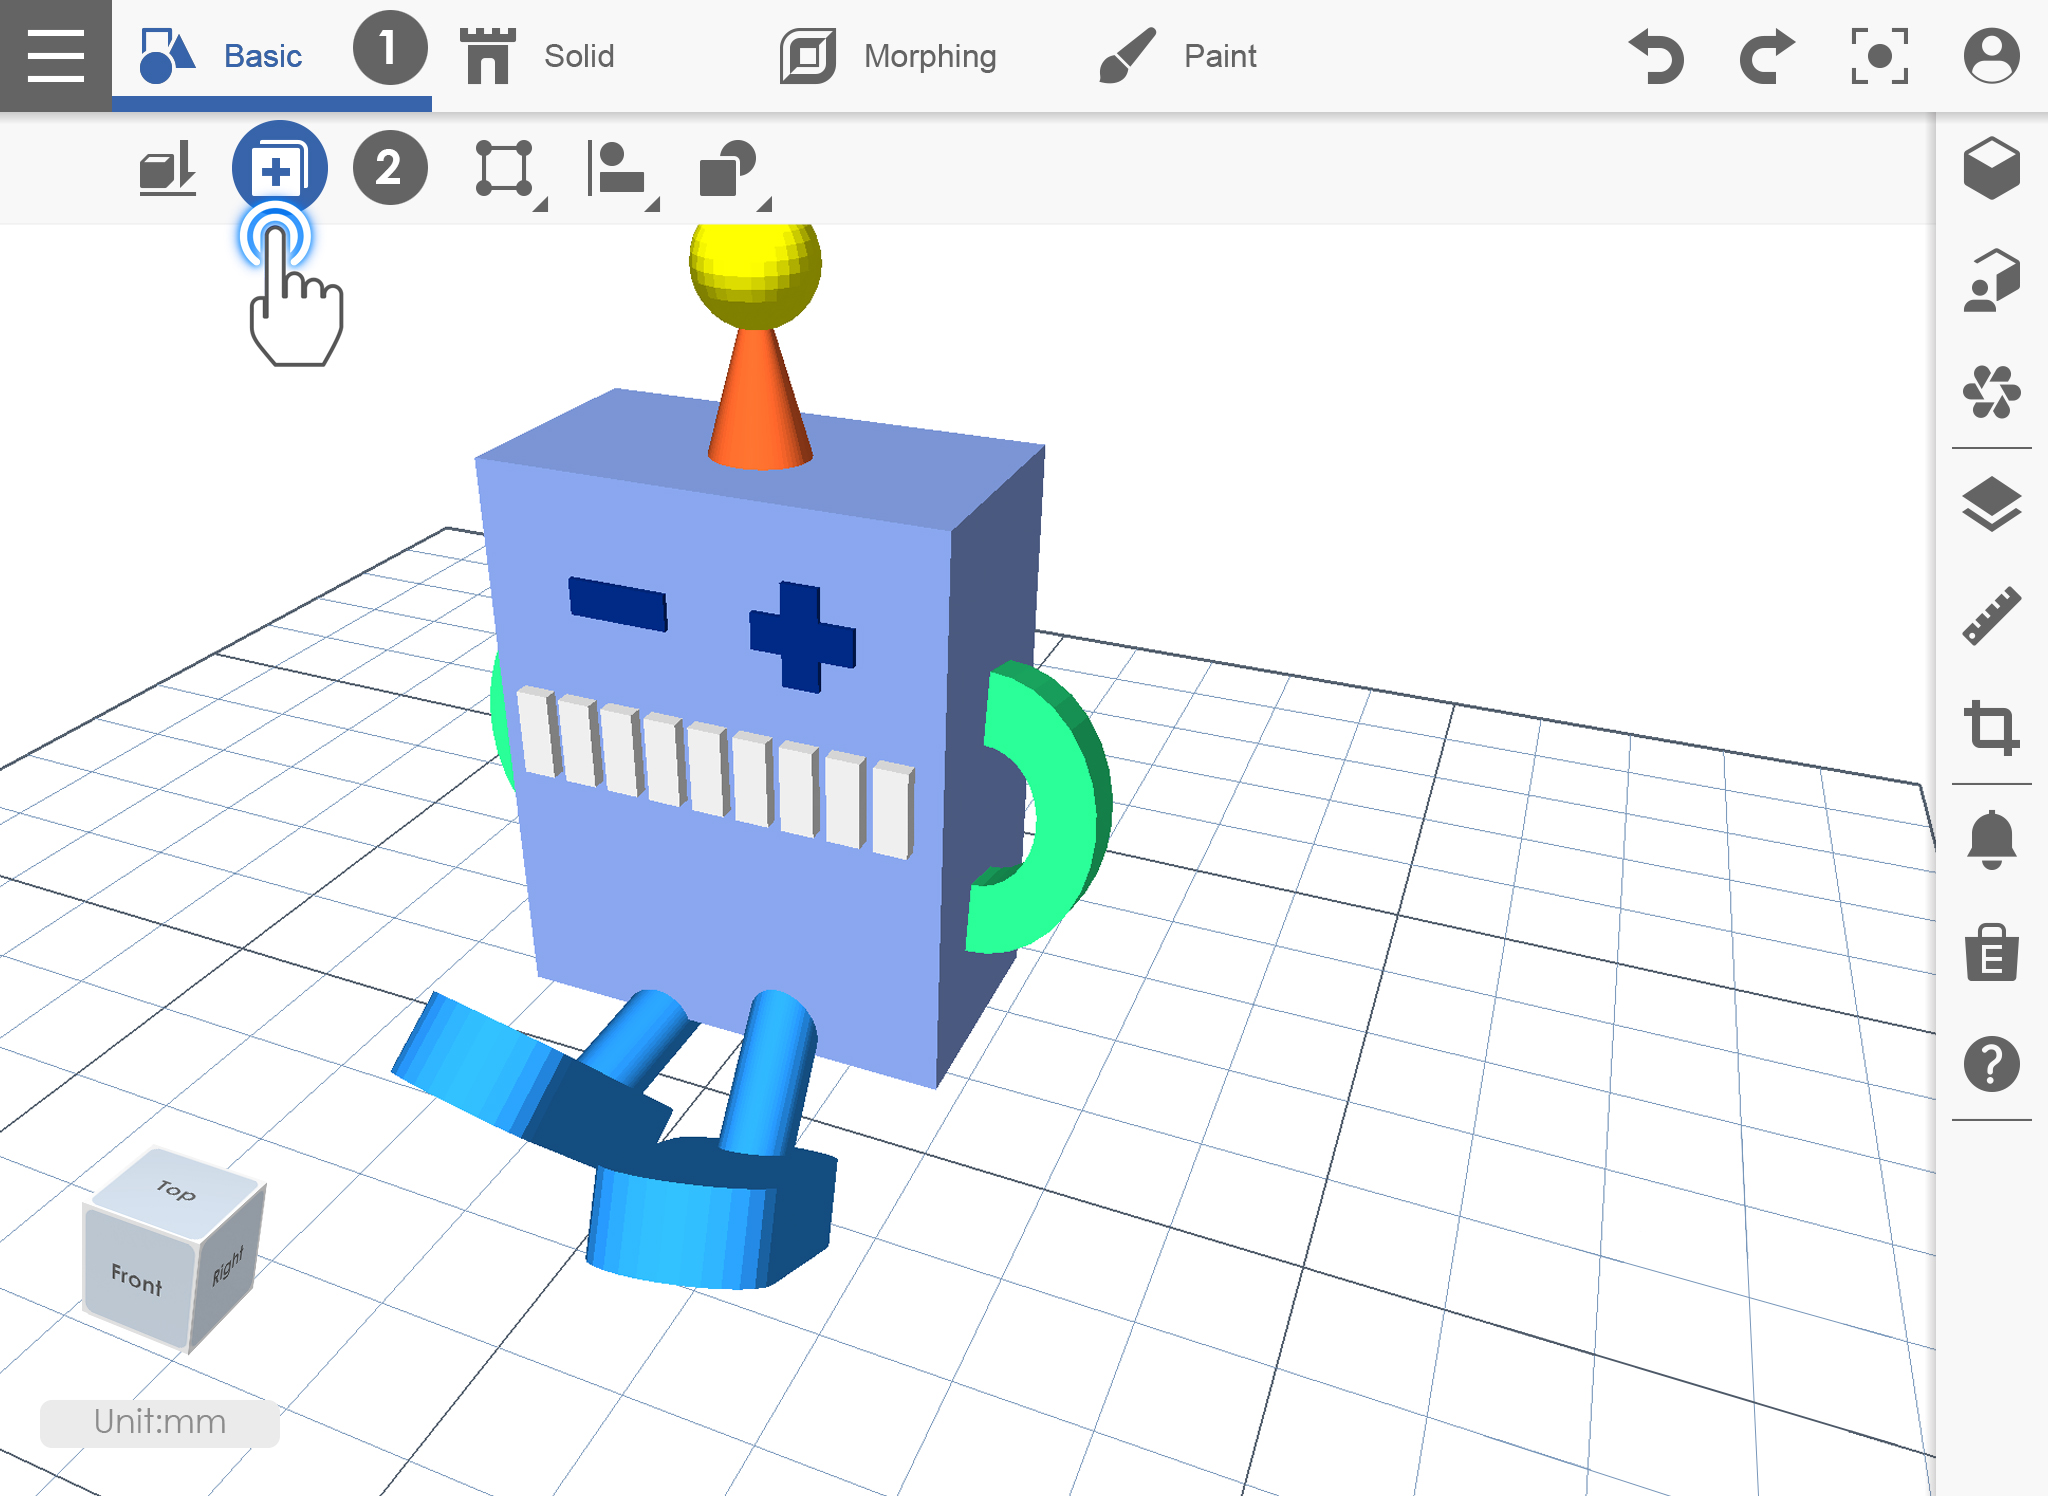
1. 작업 공간에 개체가 있는지 확인하고 복사 아이콘을 클릭하십시오.
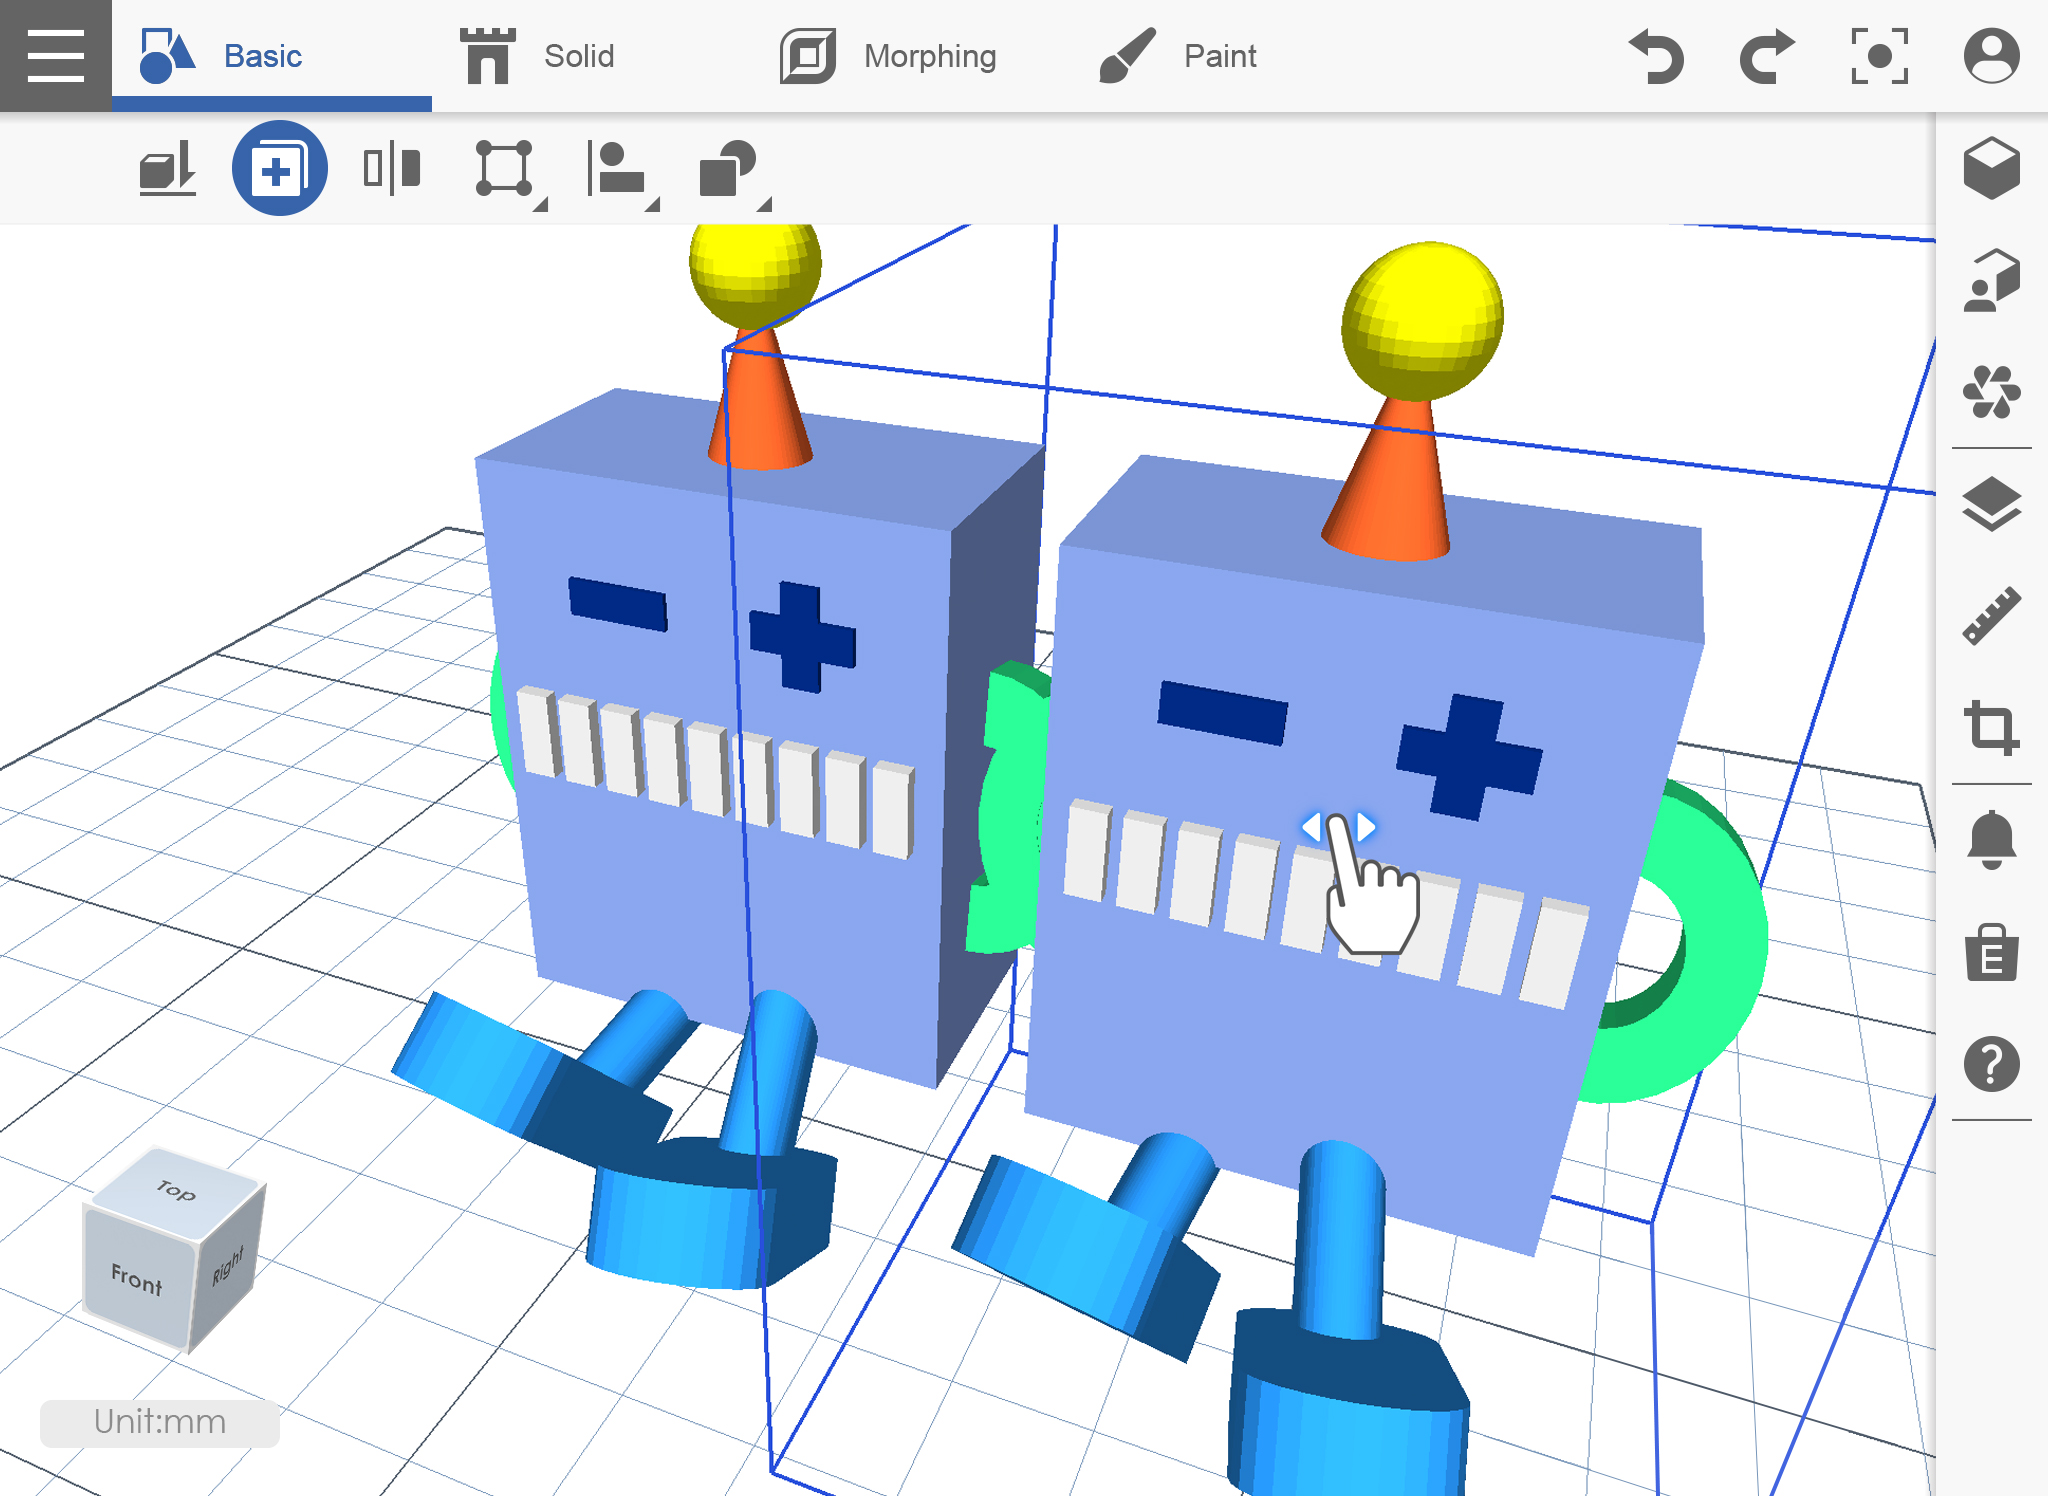
2. 항목을 클릭하십시오. 개체 사본을 보려면 이동 기능을 사용하여 개체를 특정 위치로 이동하십시오.
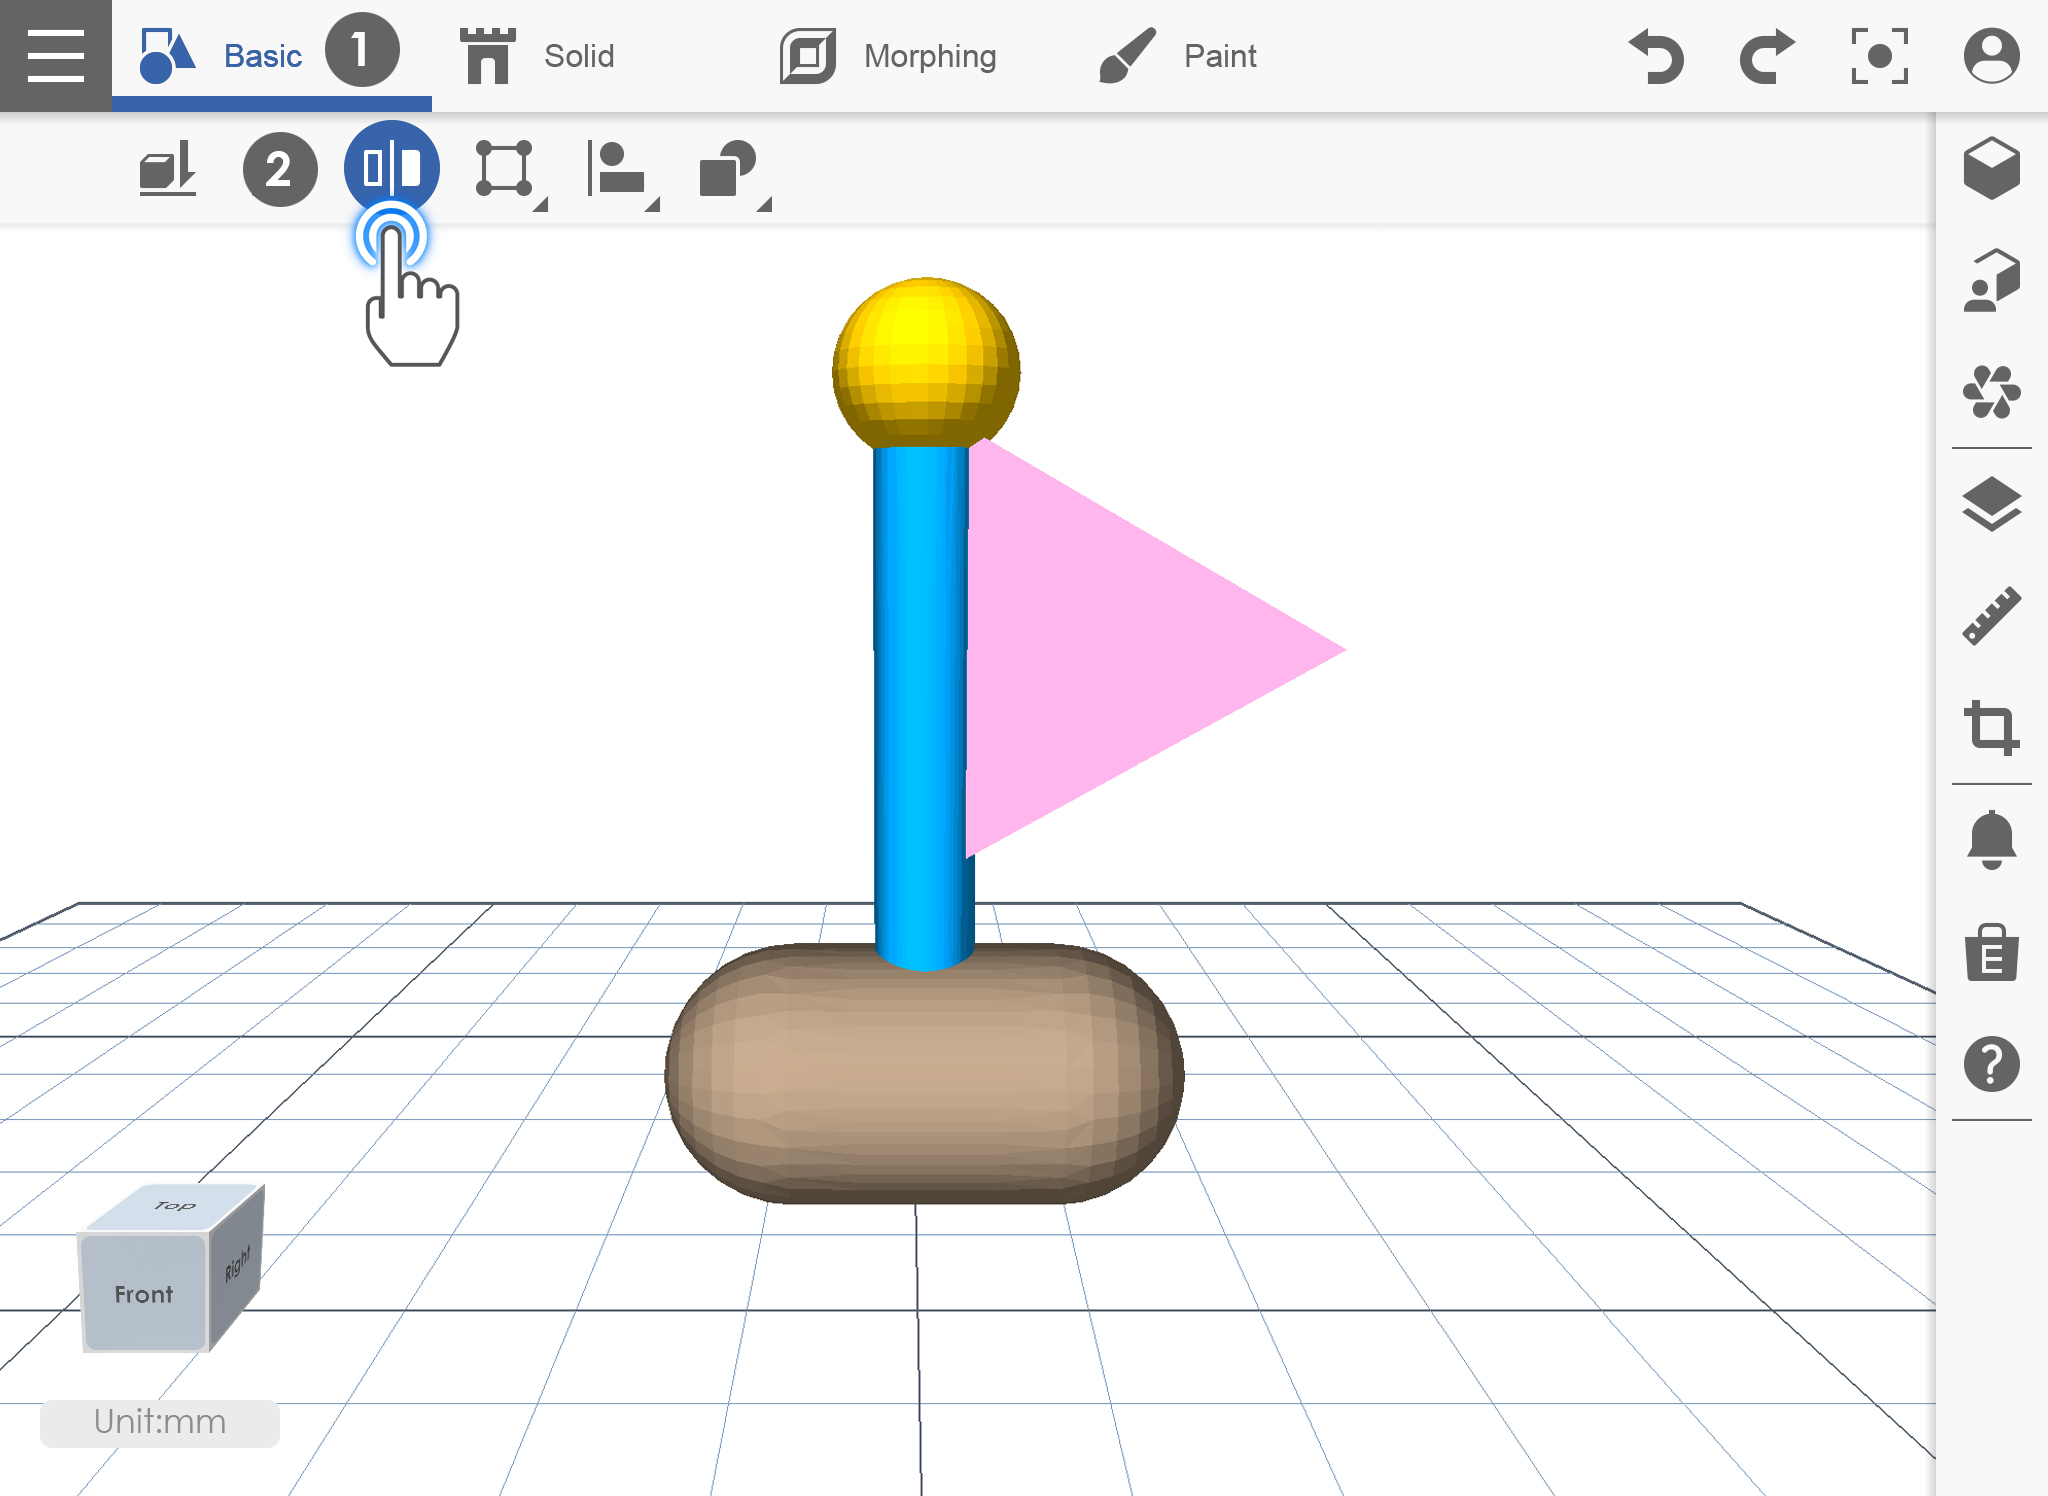
거울 Mirror
이 기능은 되돌릴 개체의 복사본을 만듭니다.
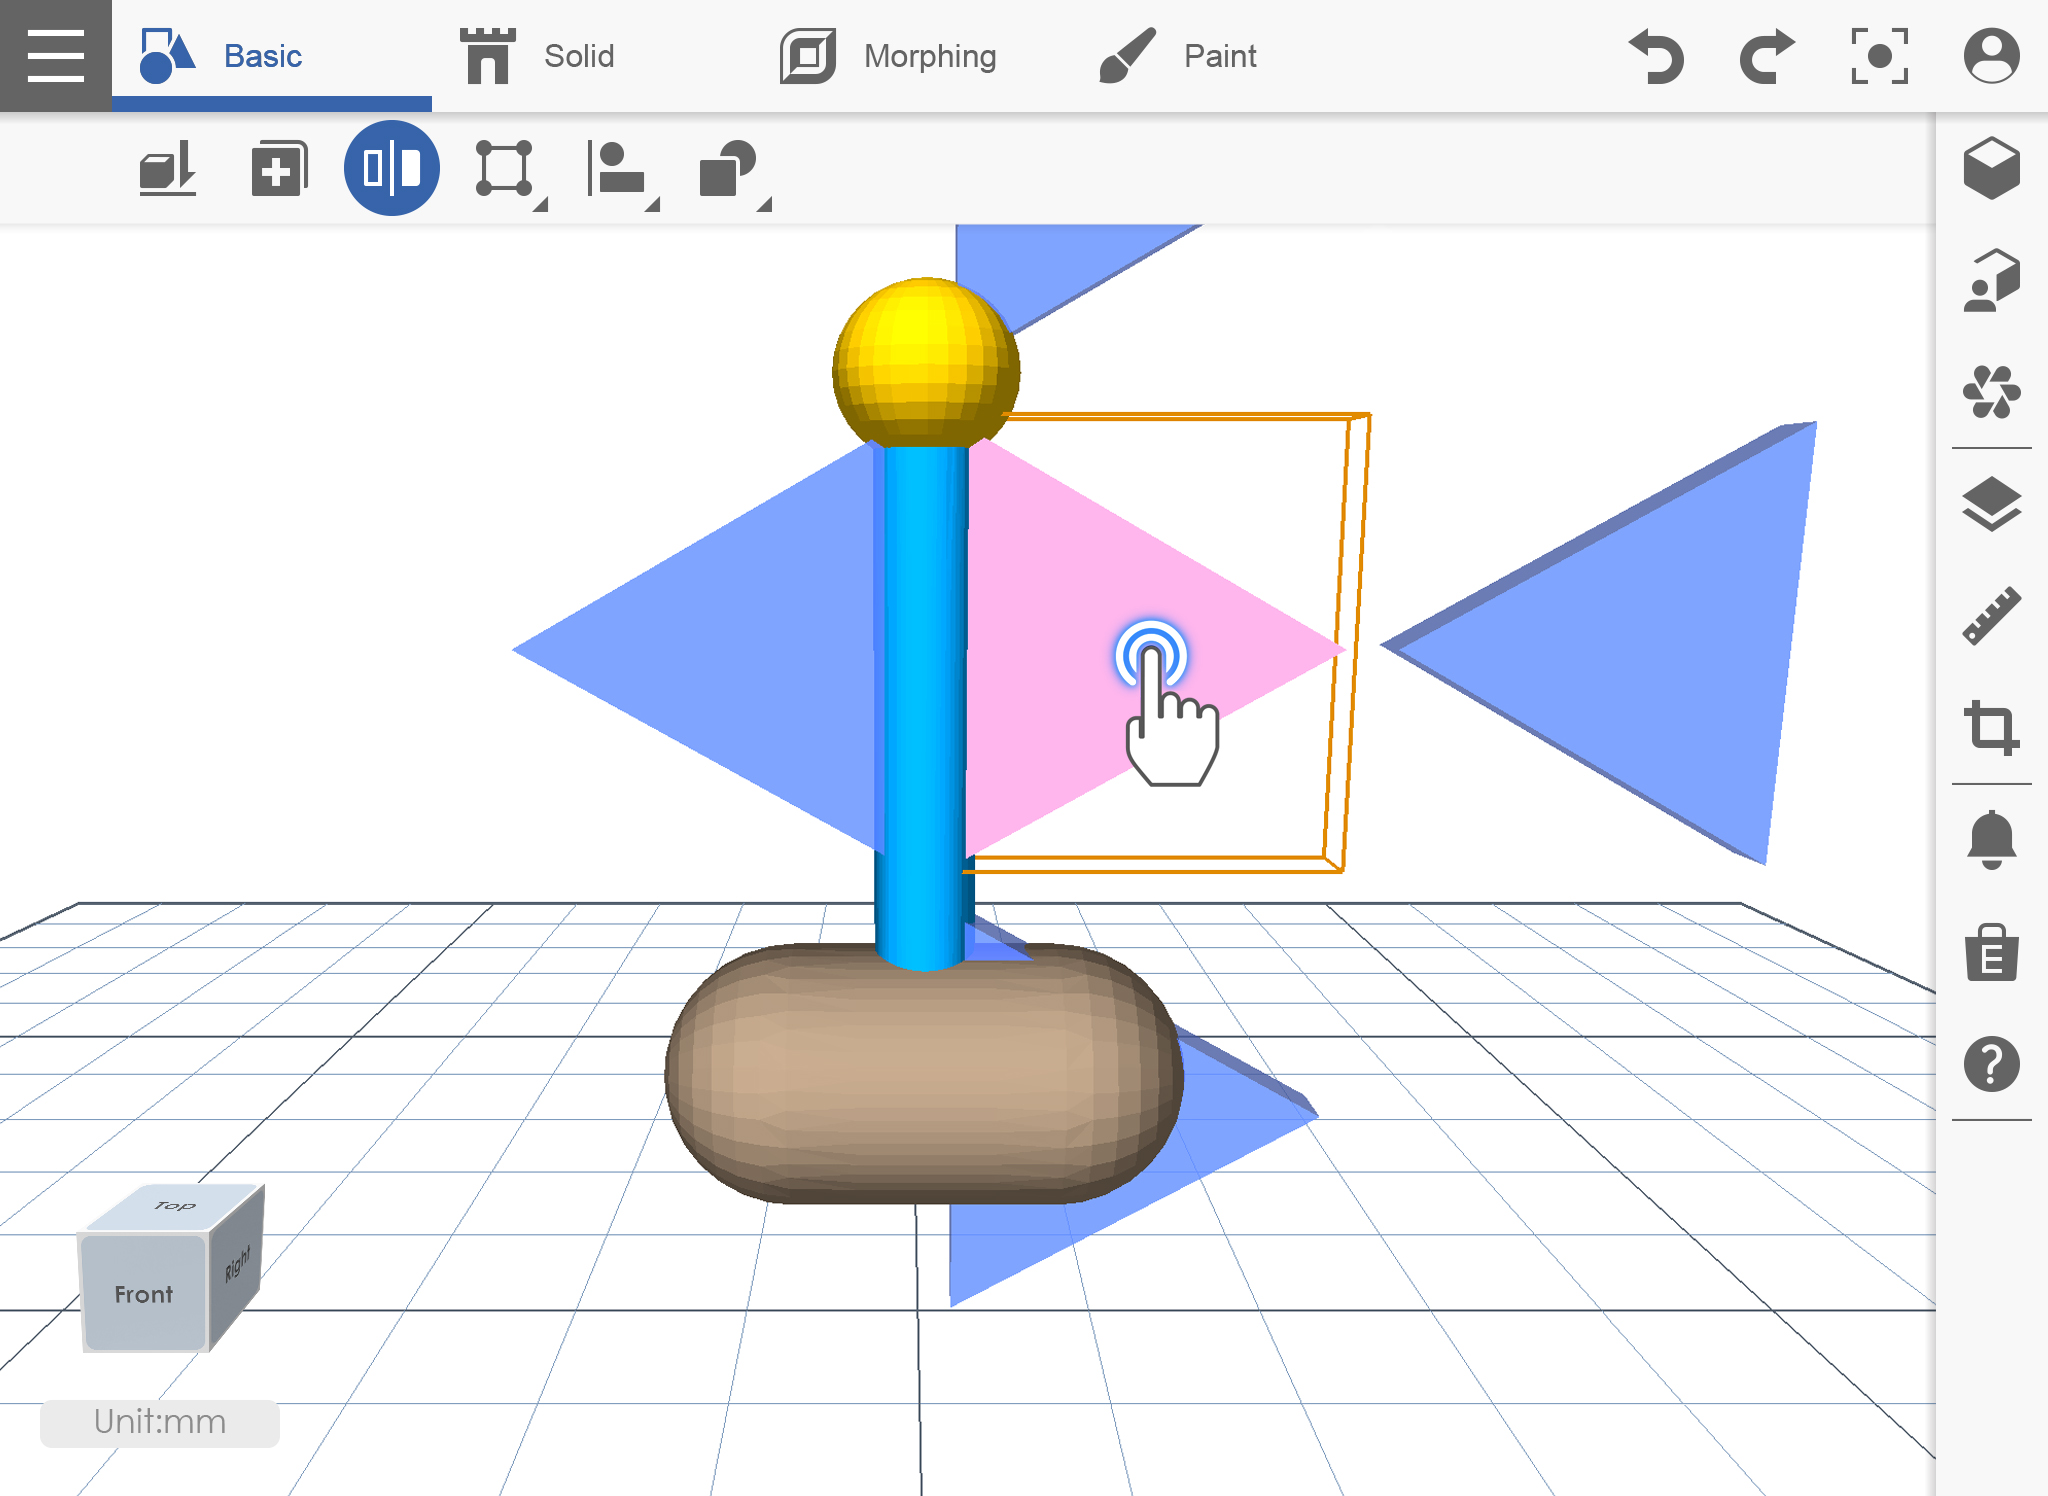
1. 개체를 가져오고 이미지 아이콘을 선택하십시오.
2. 개체를 복사 할 위치를 선택하십시오.
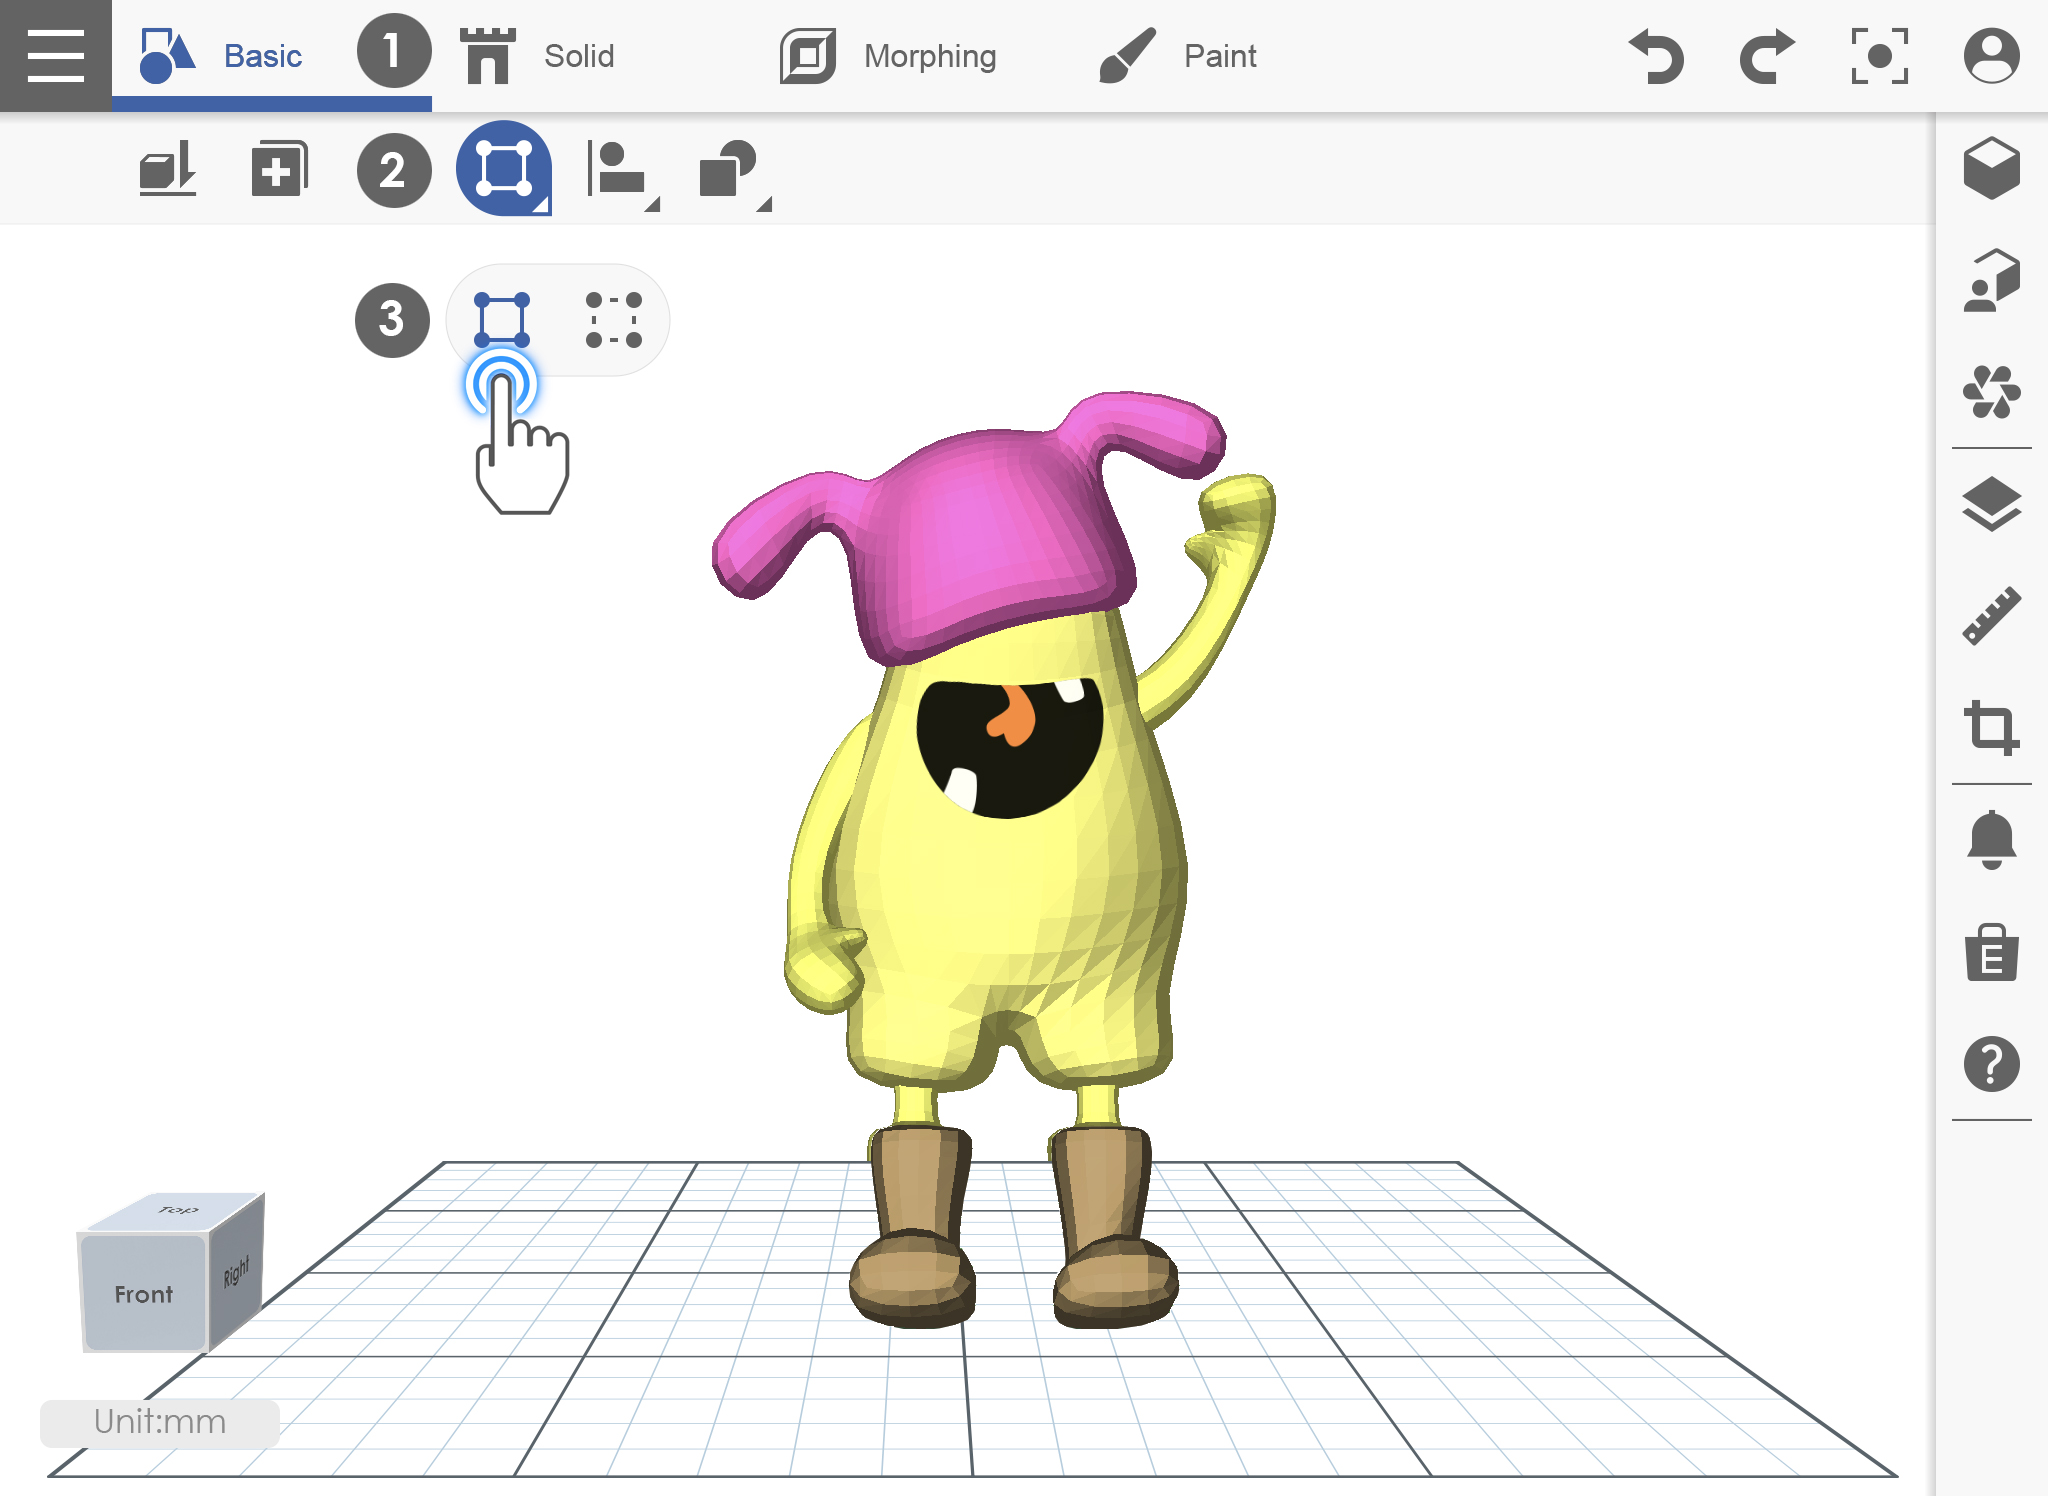
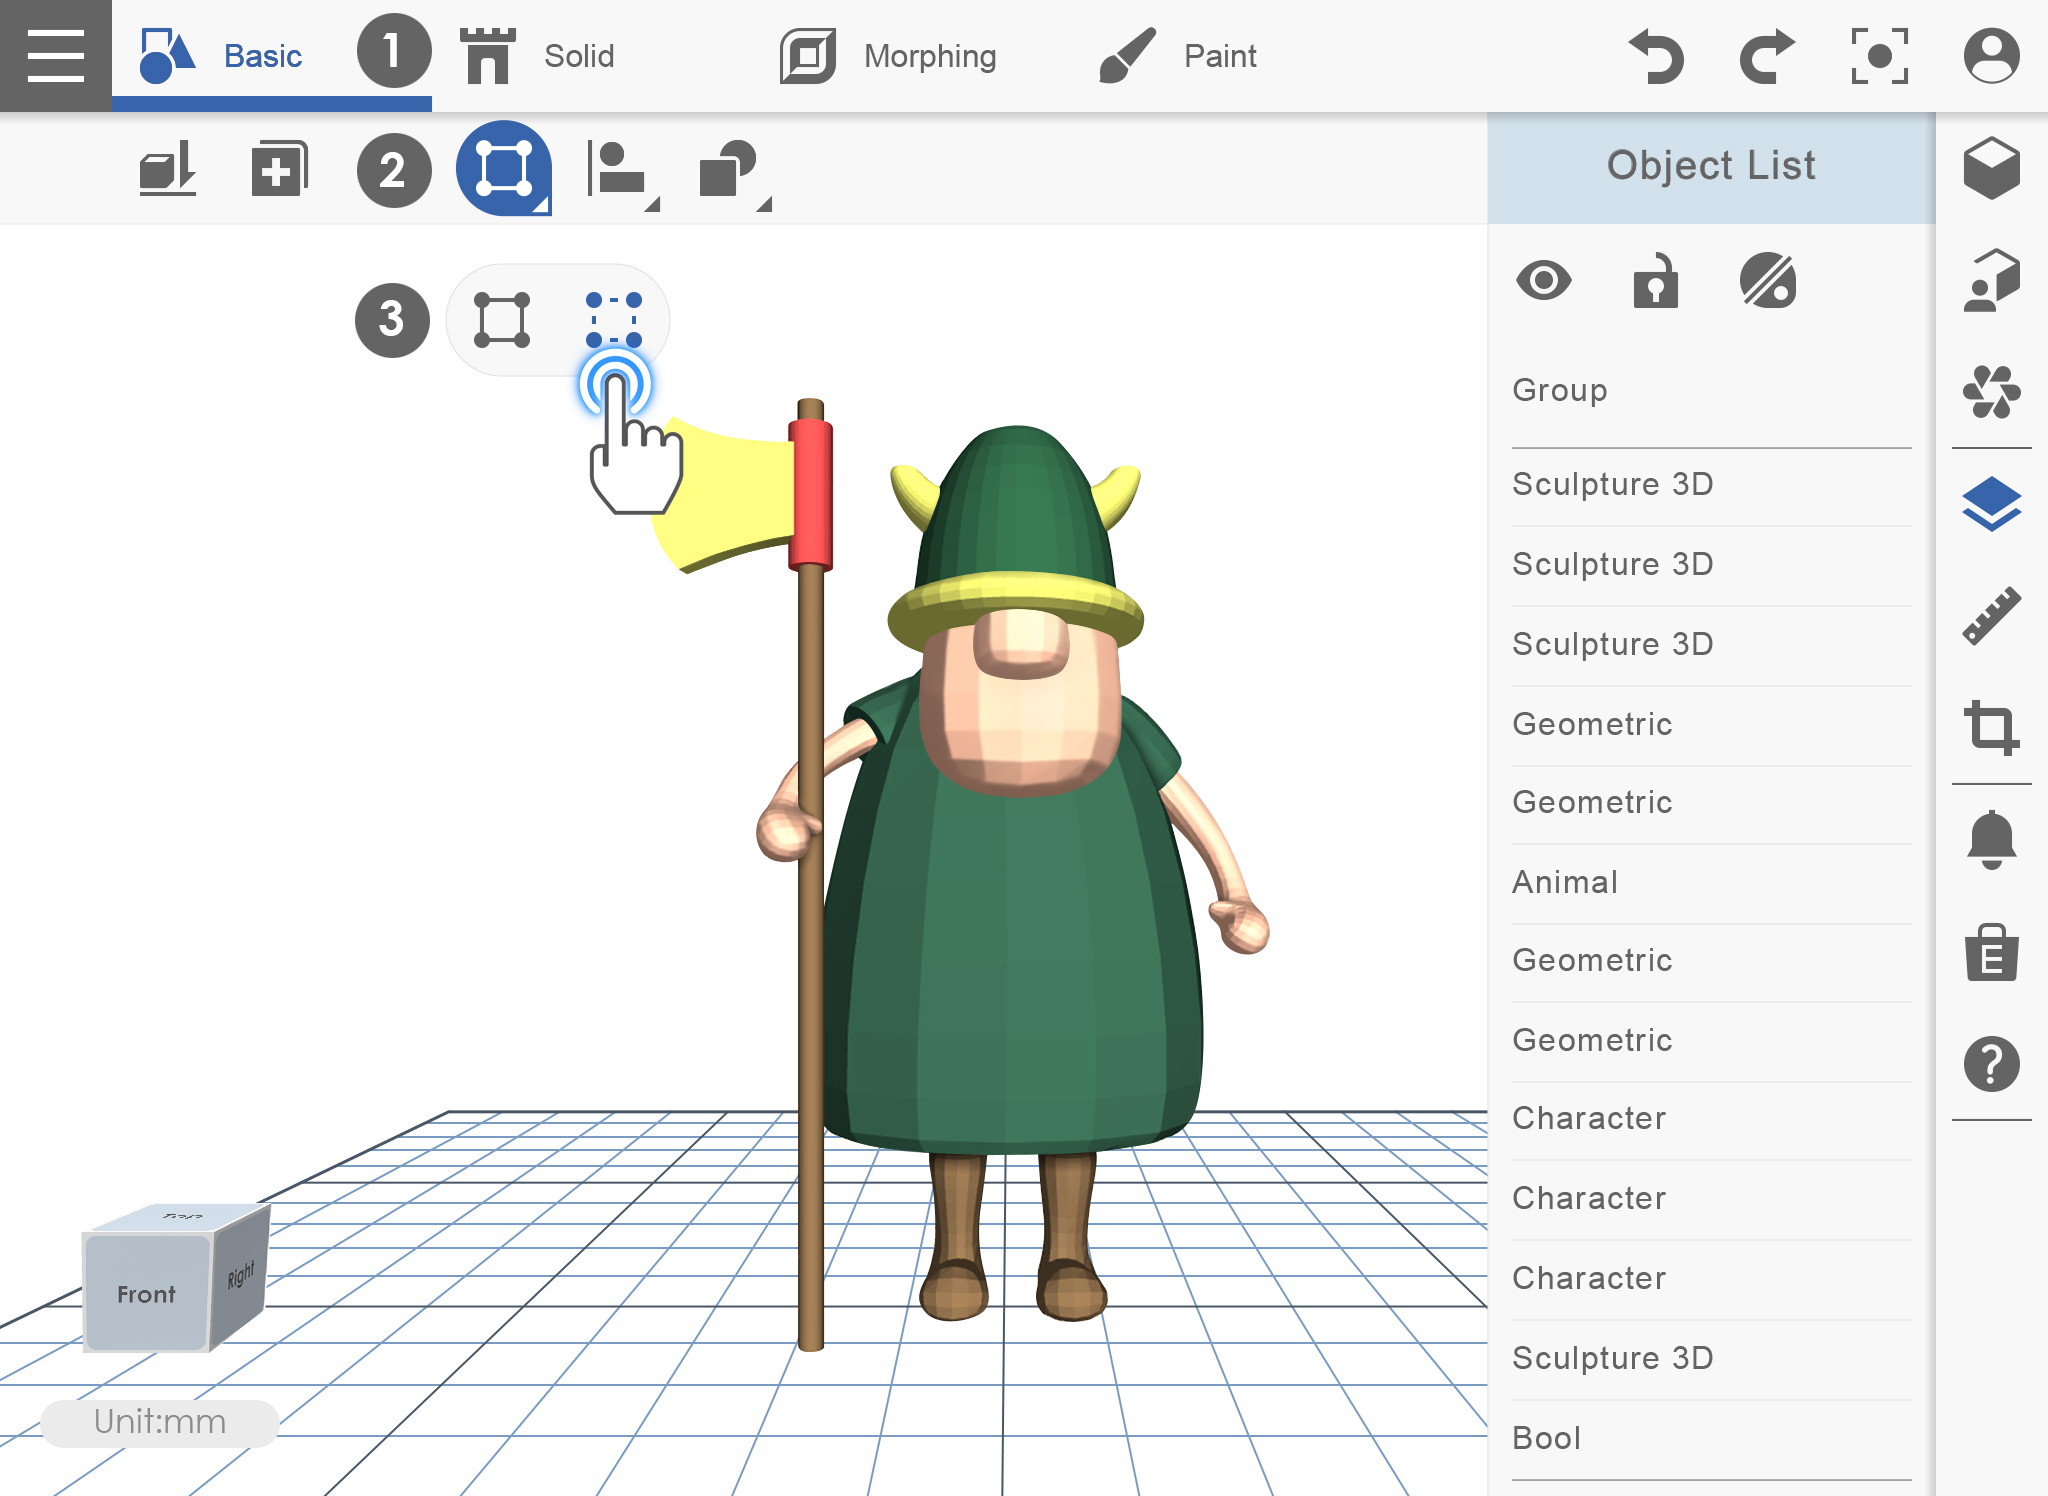
그룹 및 그룹 해제 Group and Ungroup
그룹 기능은 XYZmaker 3DKit 모바일에 두 개 이상의 오브젝트를 단일 오브젝트로 결합하도록 지시 한 다음 단일 오브젝트 이동 오브젝트로 처리 할 수 있습니다.
그룹 GROUP
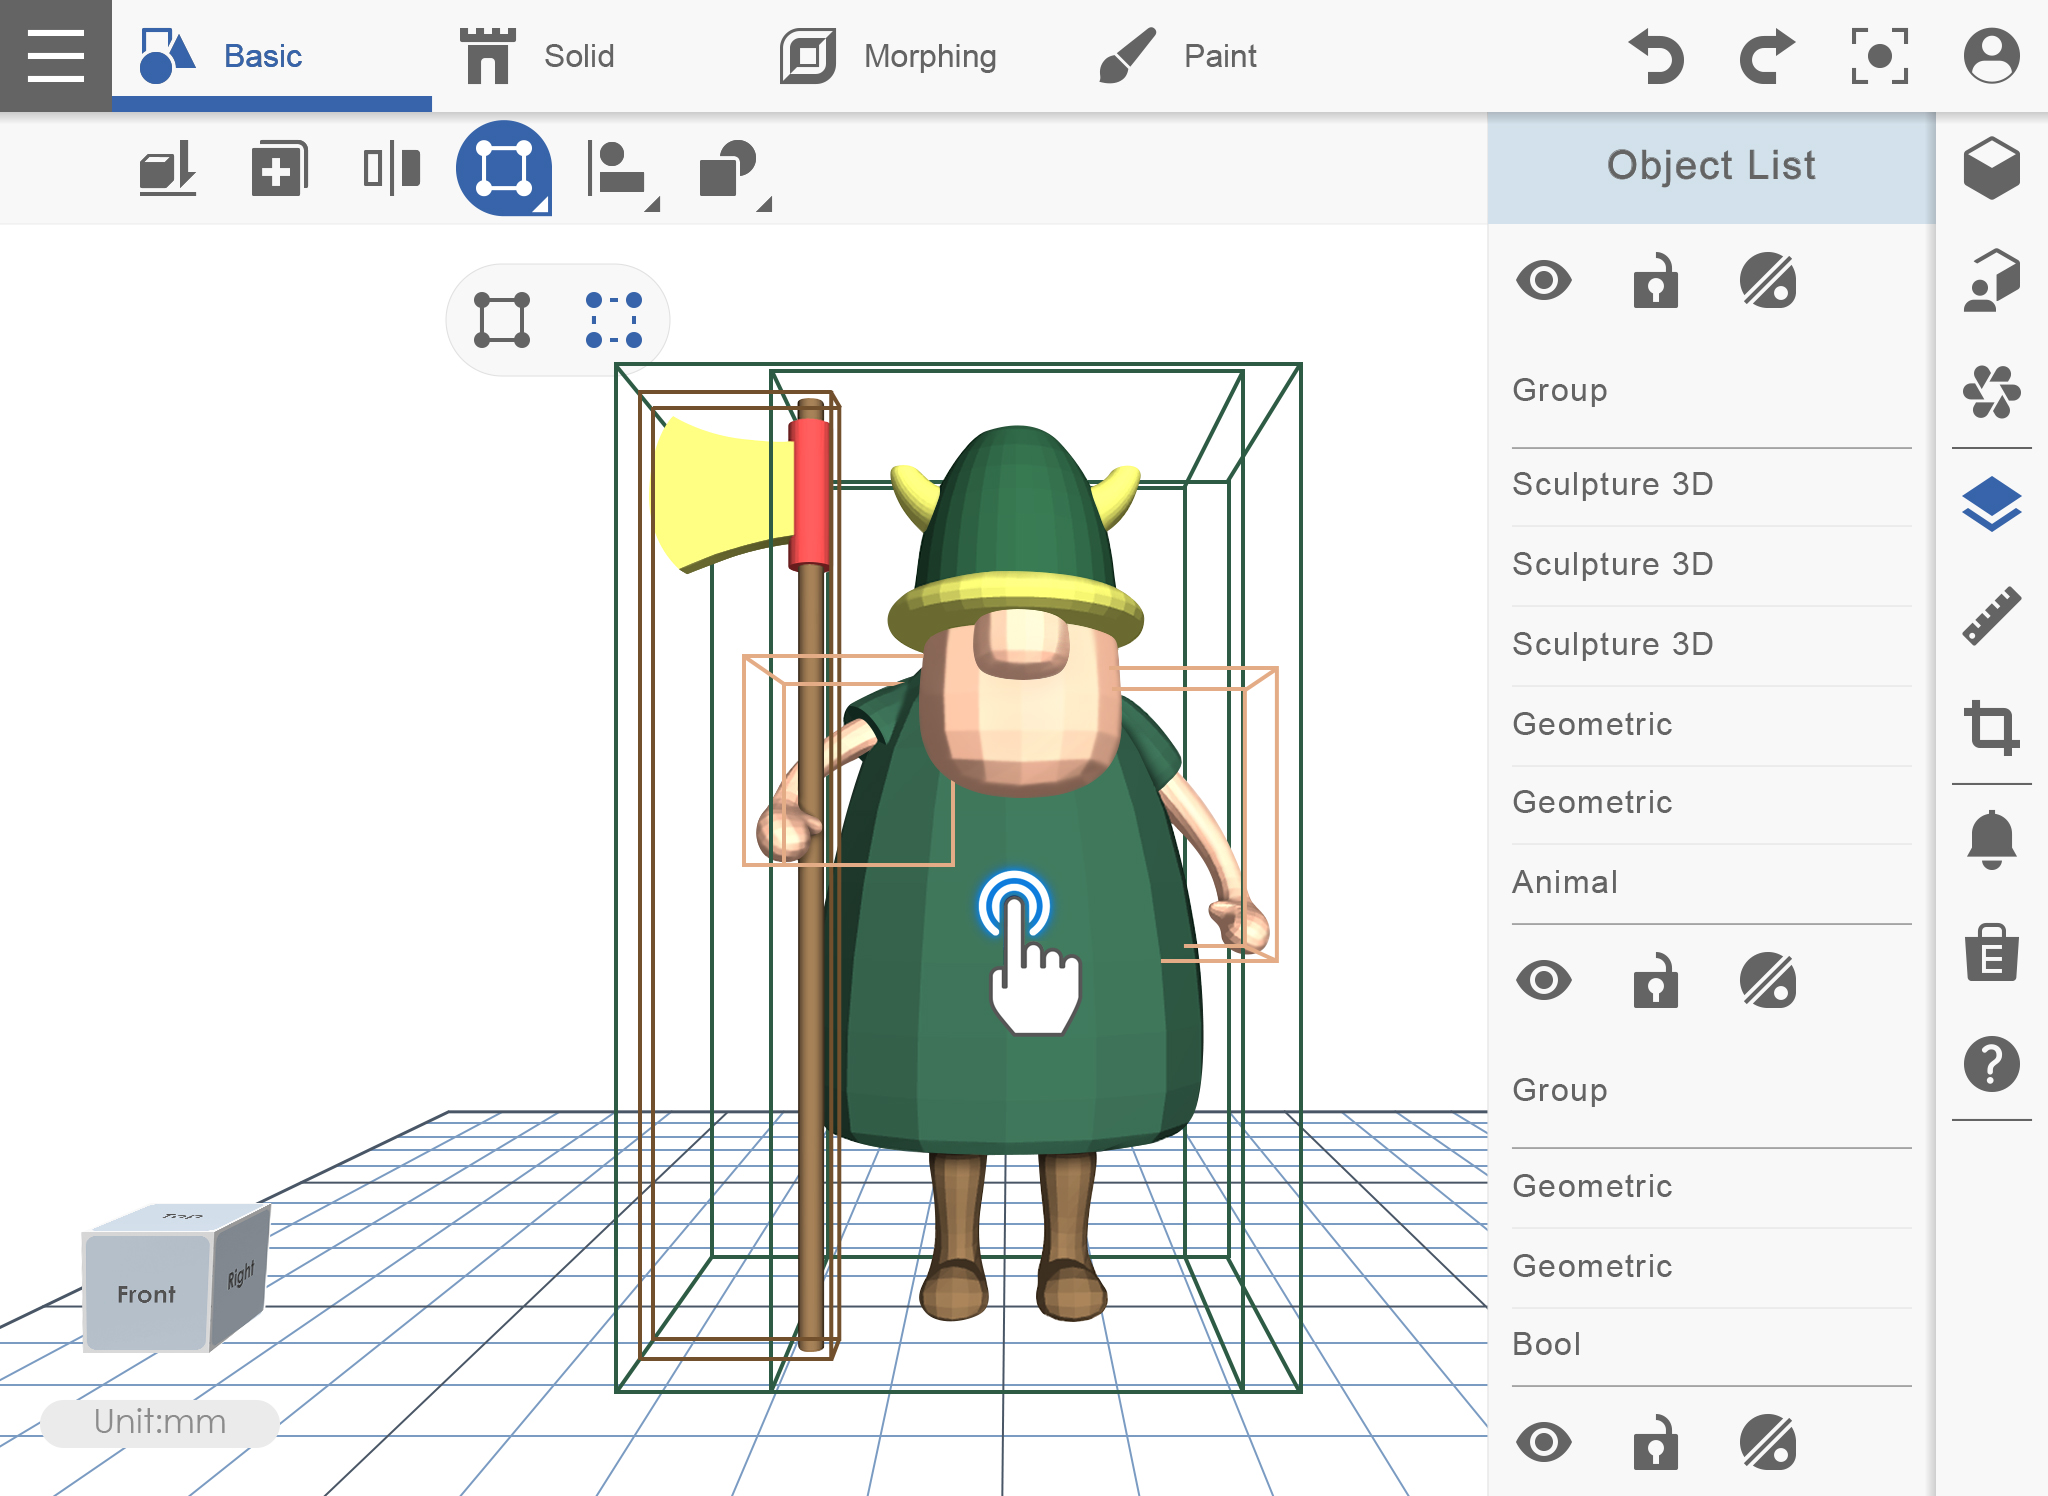
1. 작업 평면에 개체가 있는지 확인하고 그룹 기능을 클릭하십시오.
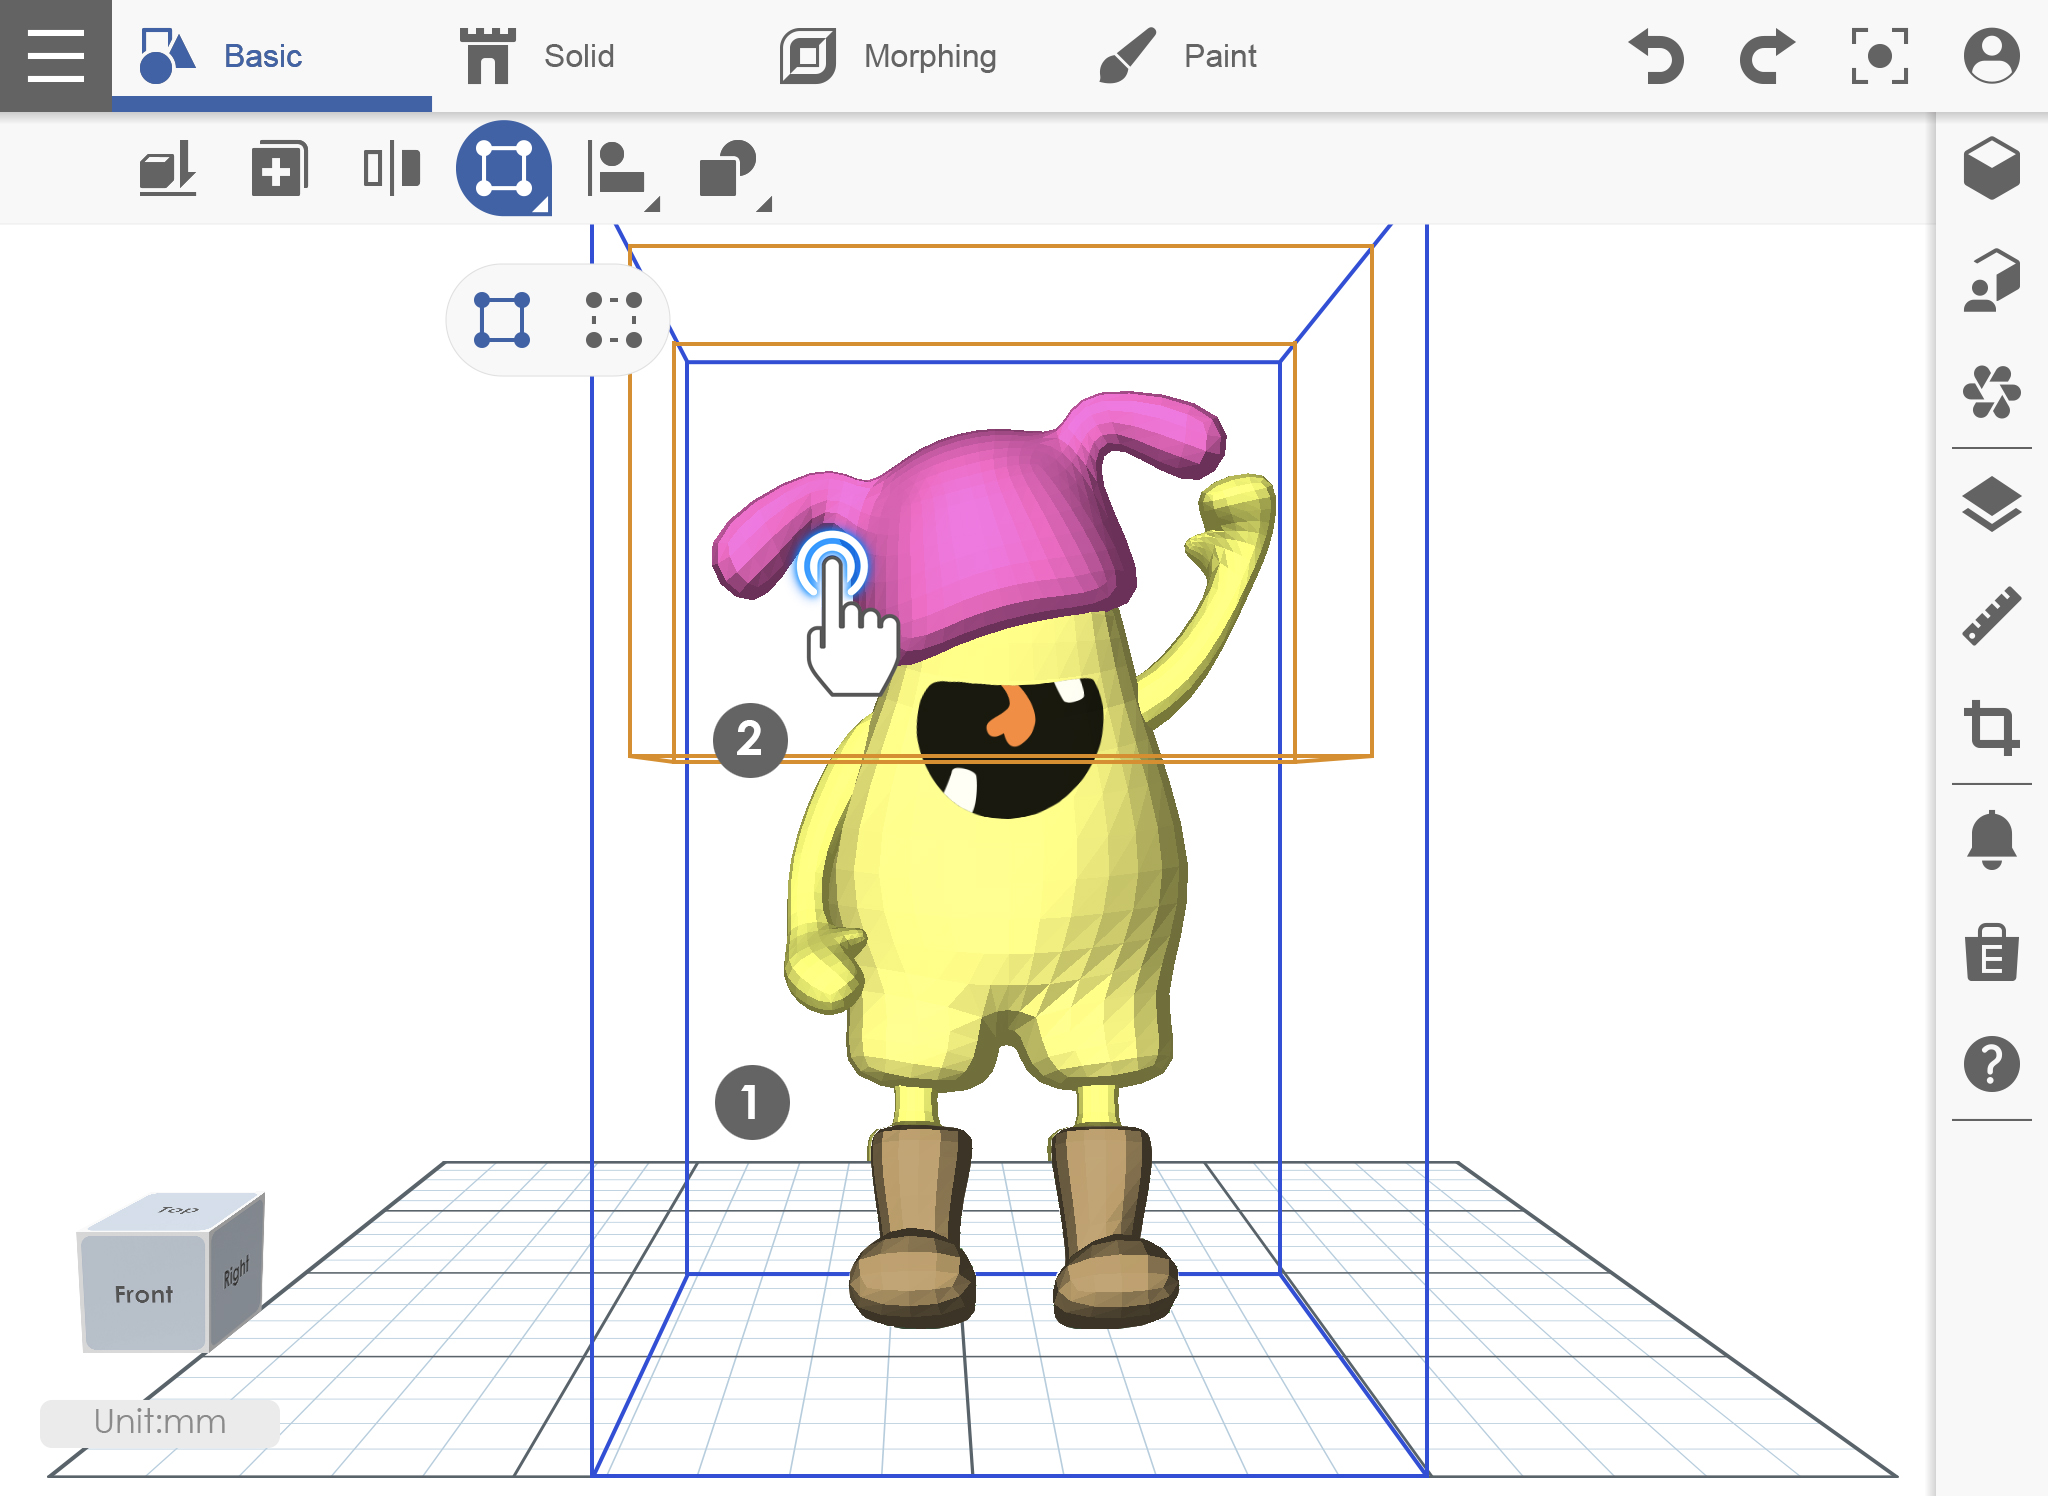
2. 그룹화 할 오브젝트를 선택하십시오.
그룹 해제 UNGROUP
1. 그룹 / 그룹 해제 아이콘을 클릭하십시오.
2. 취소 그룹 아이콘을 선택하고 그룹을 취소 할 그룹 개체를 클릭하십시오.
3. 그룹 개체가 취소되었습니다.
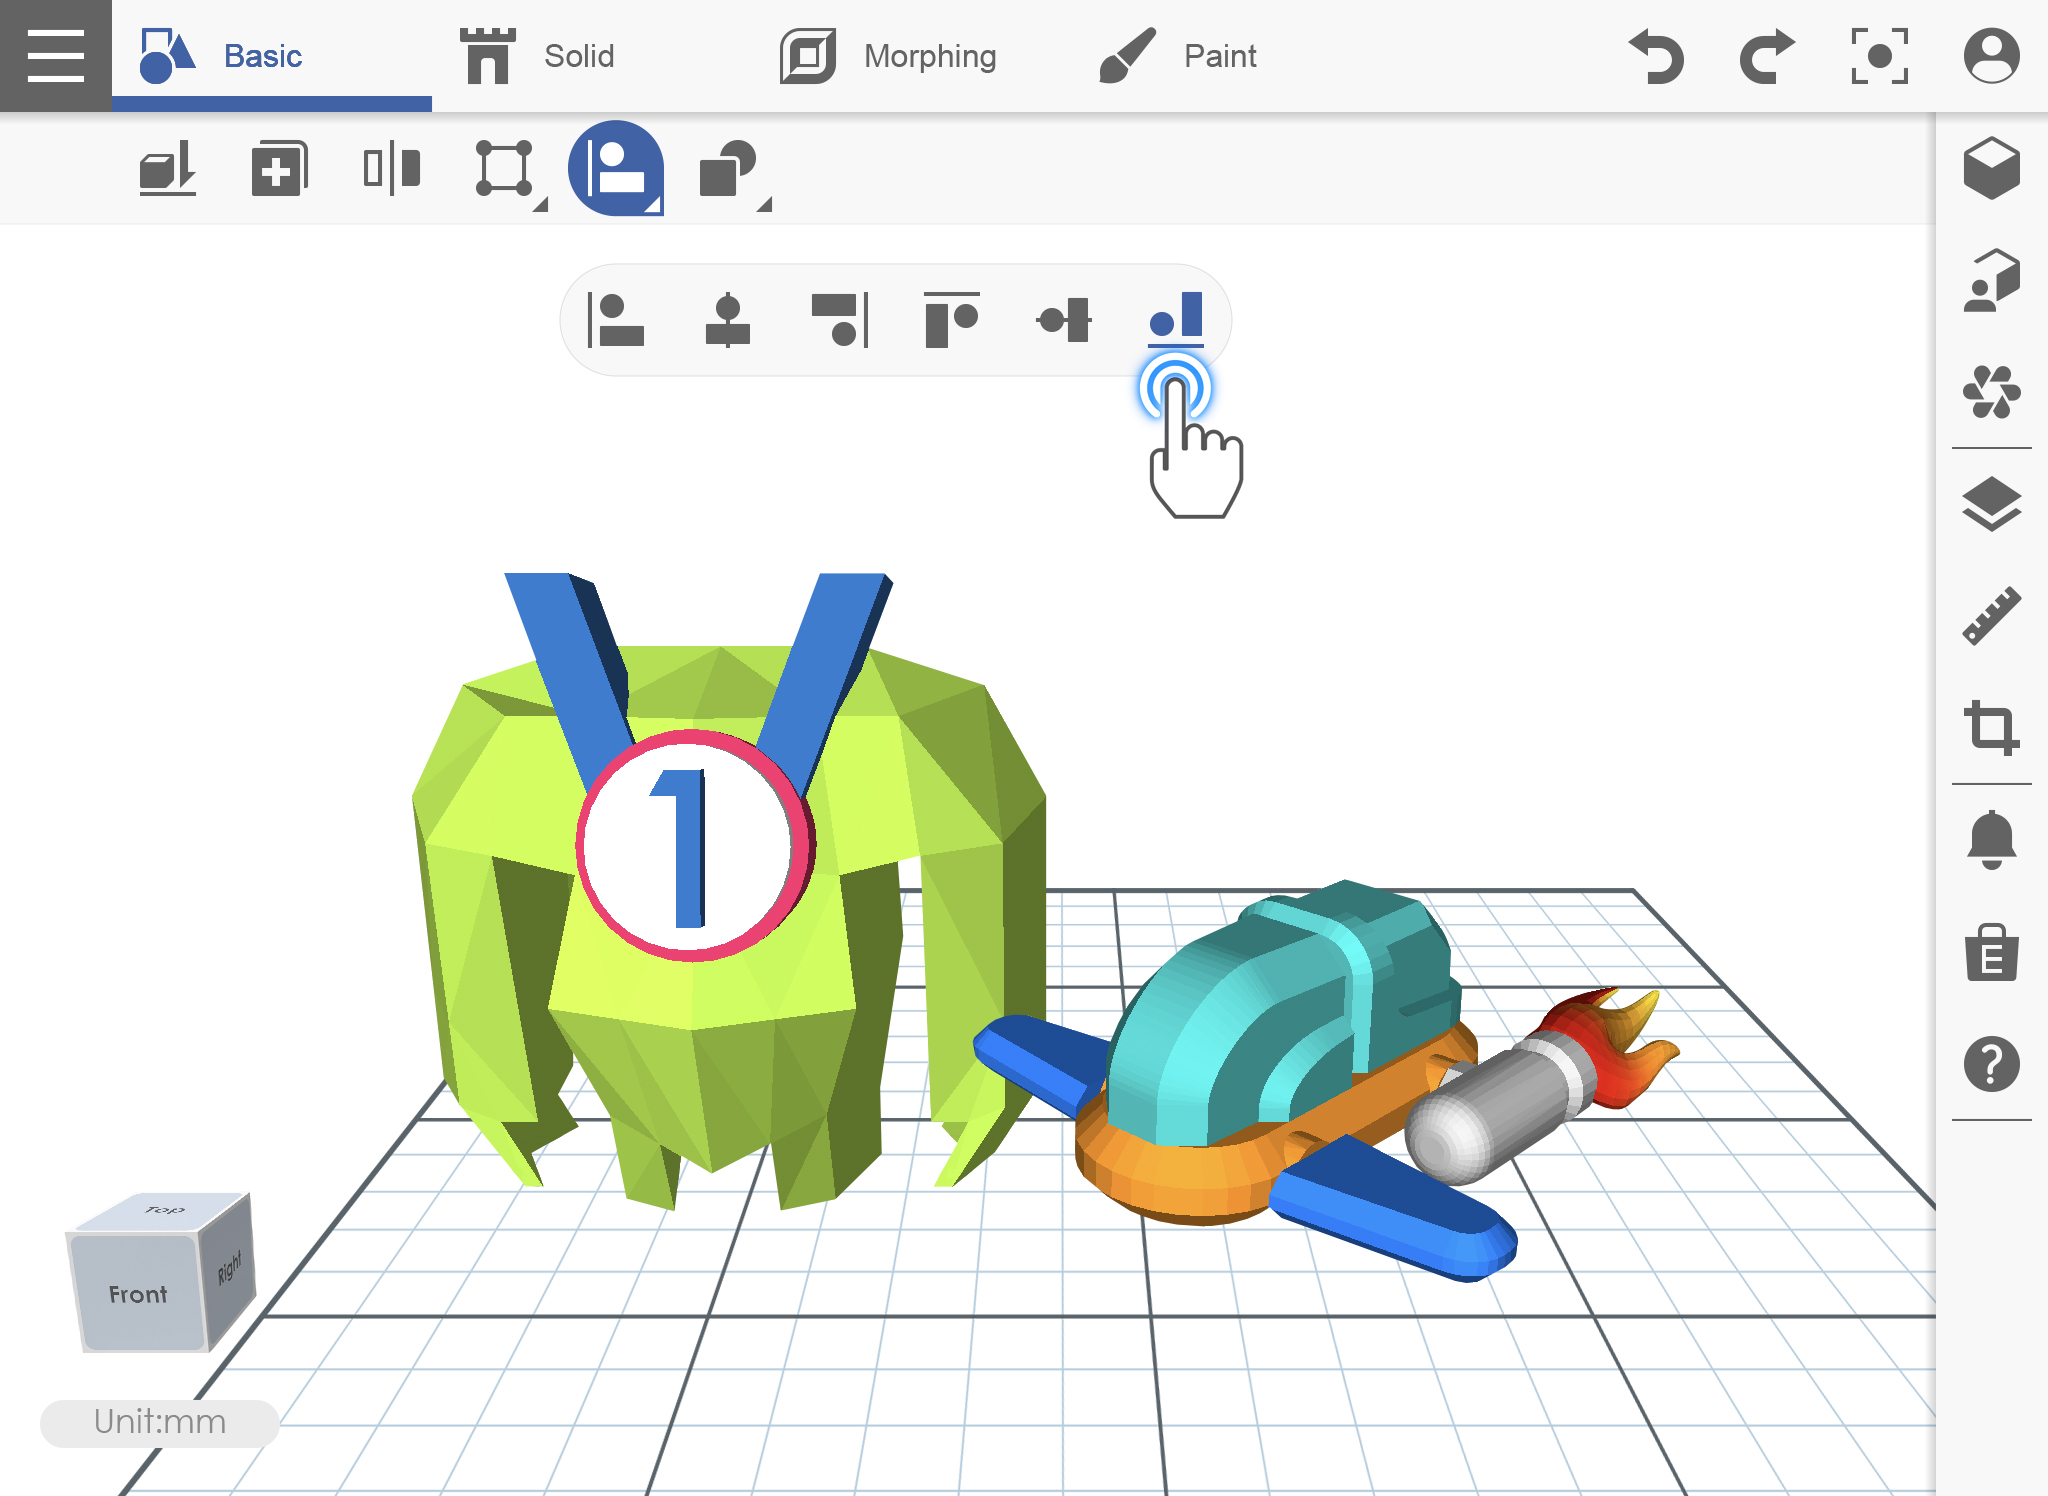
정렬 Align
객체를 하나의 명령으로 이동하고 정렬하는 것에 대해 생각해 본 적이 있다면 정렬 지침은 정확히 수행 할 지침입니다. 정렬 할 객체를 선택하고 원하는 위치를 클릭하십시오.
1. 예를 들어 두 개의 객체가 정렬되지 않은 경우 정렬을 클릭합니다.
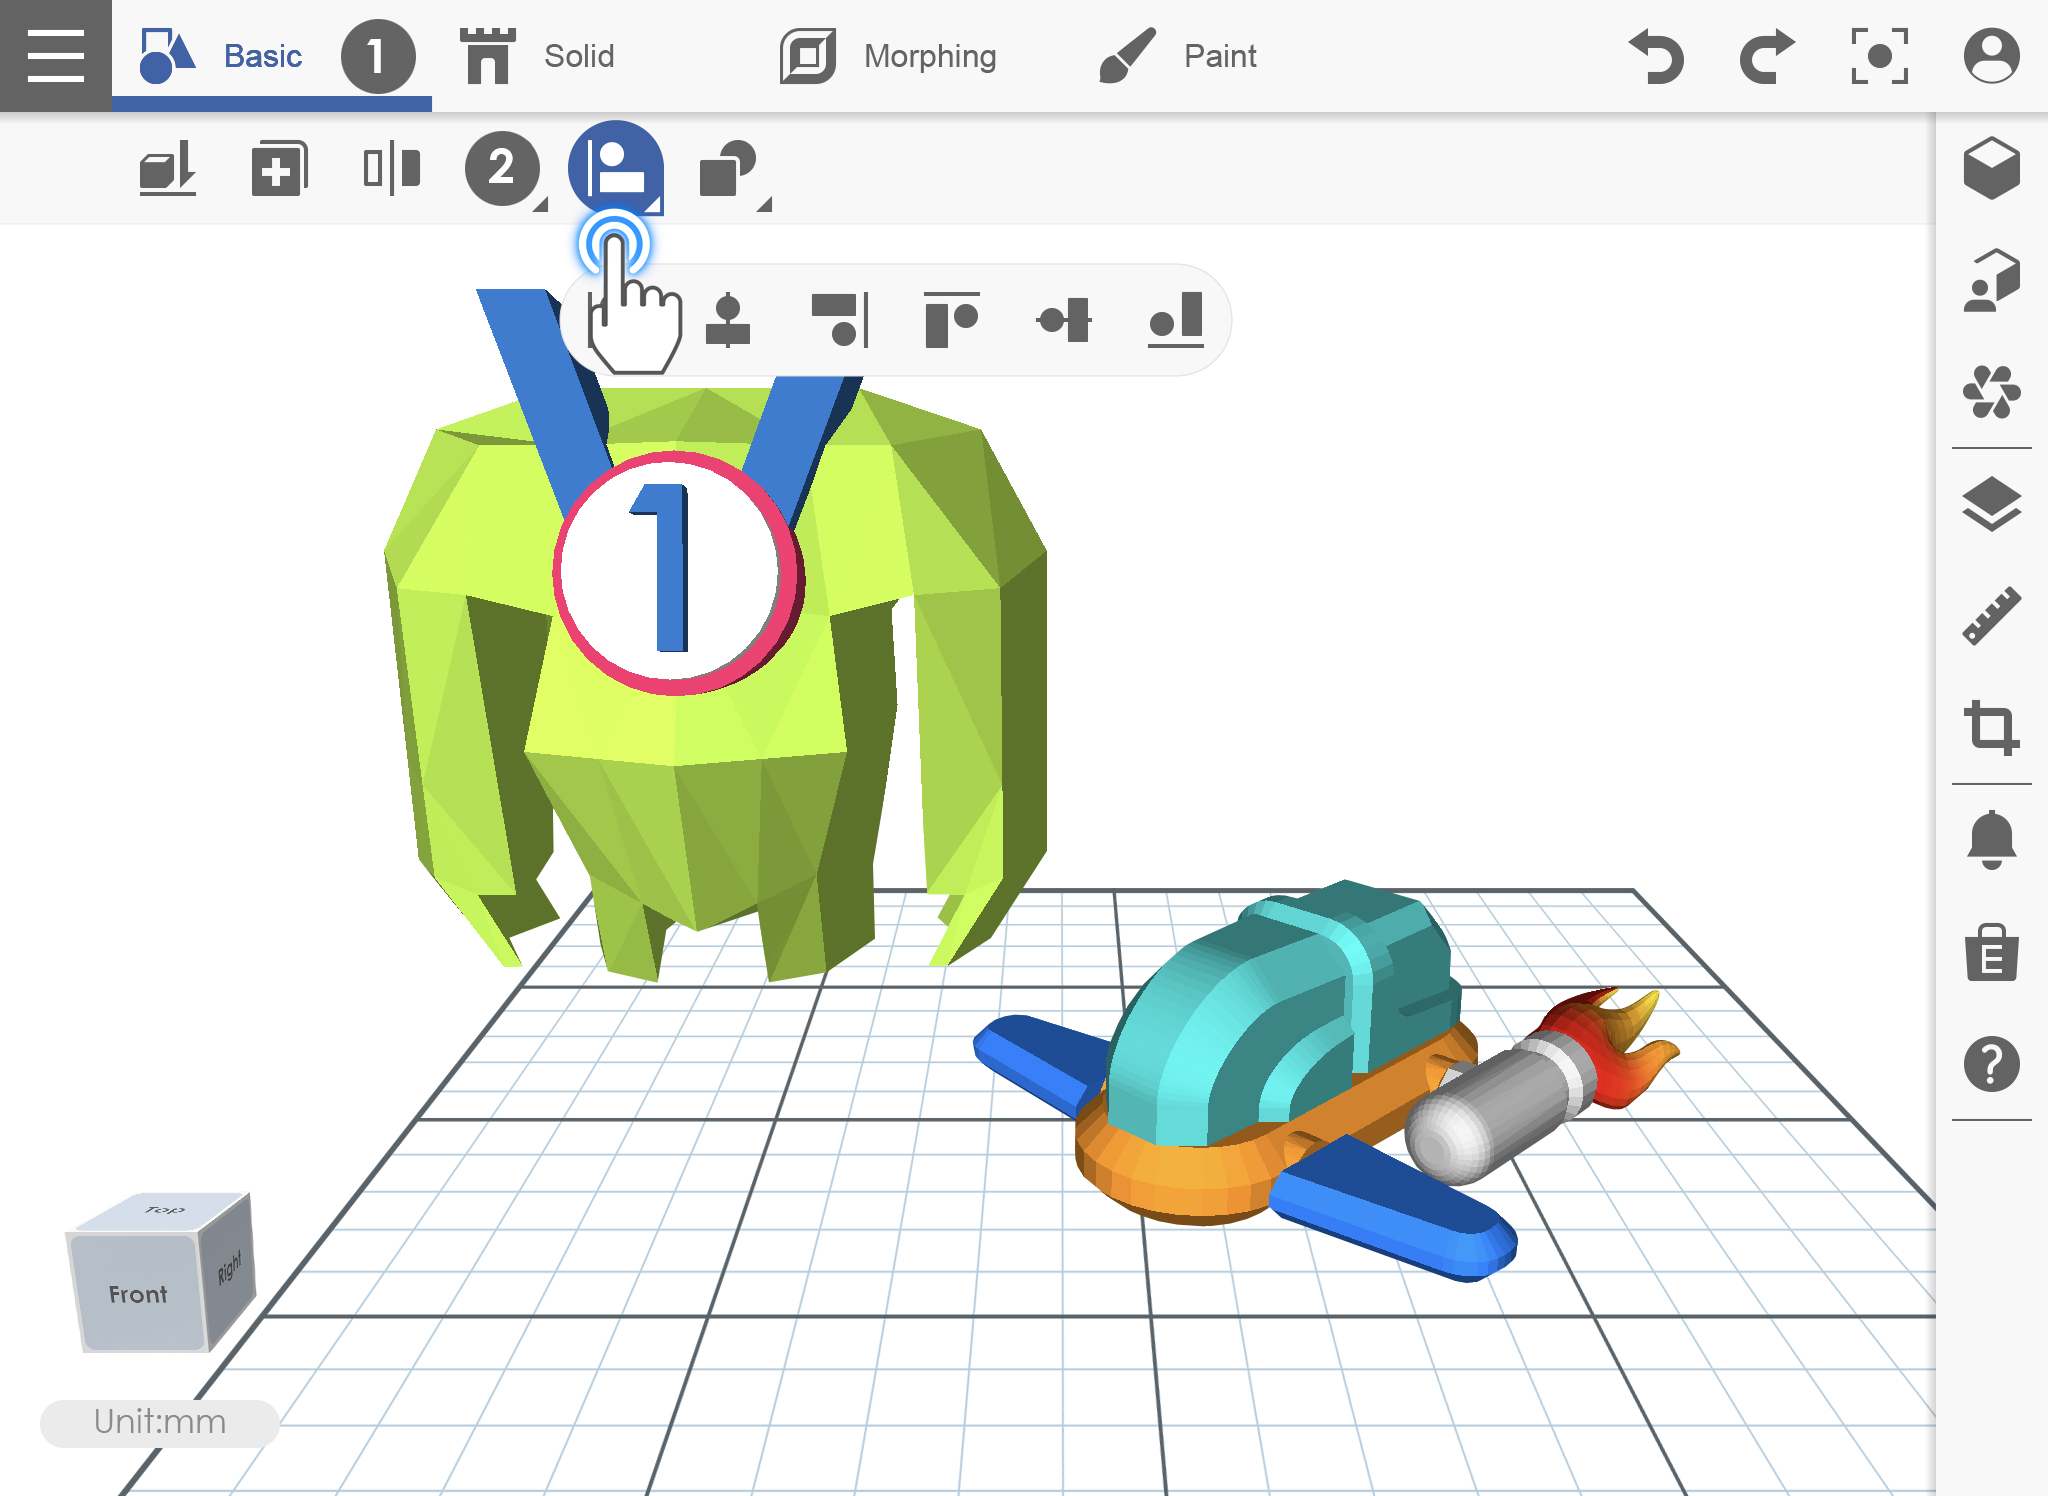
2. 맞춤 아이콘을 클릭 한 후 개체를 선택하고 맞춤 할 위치를 선택하십시오.
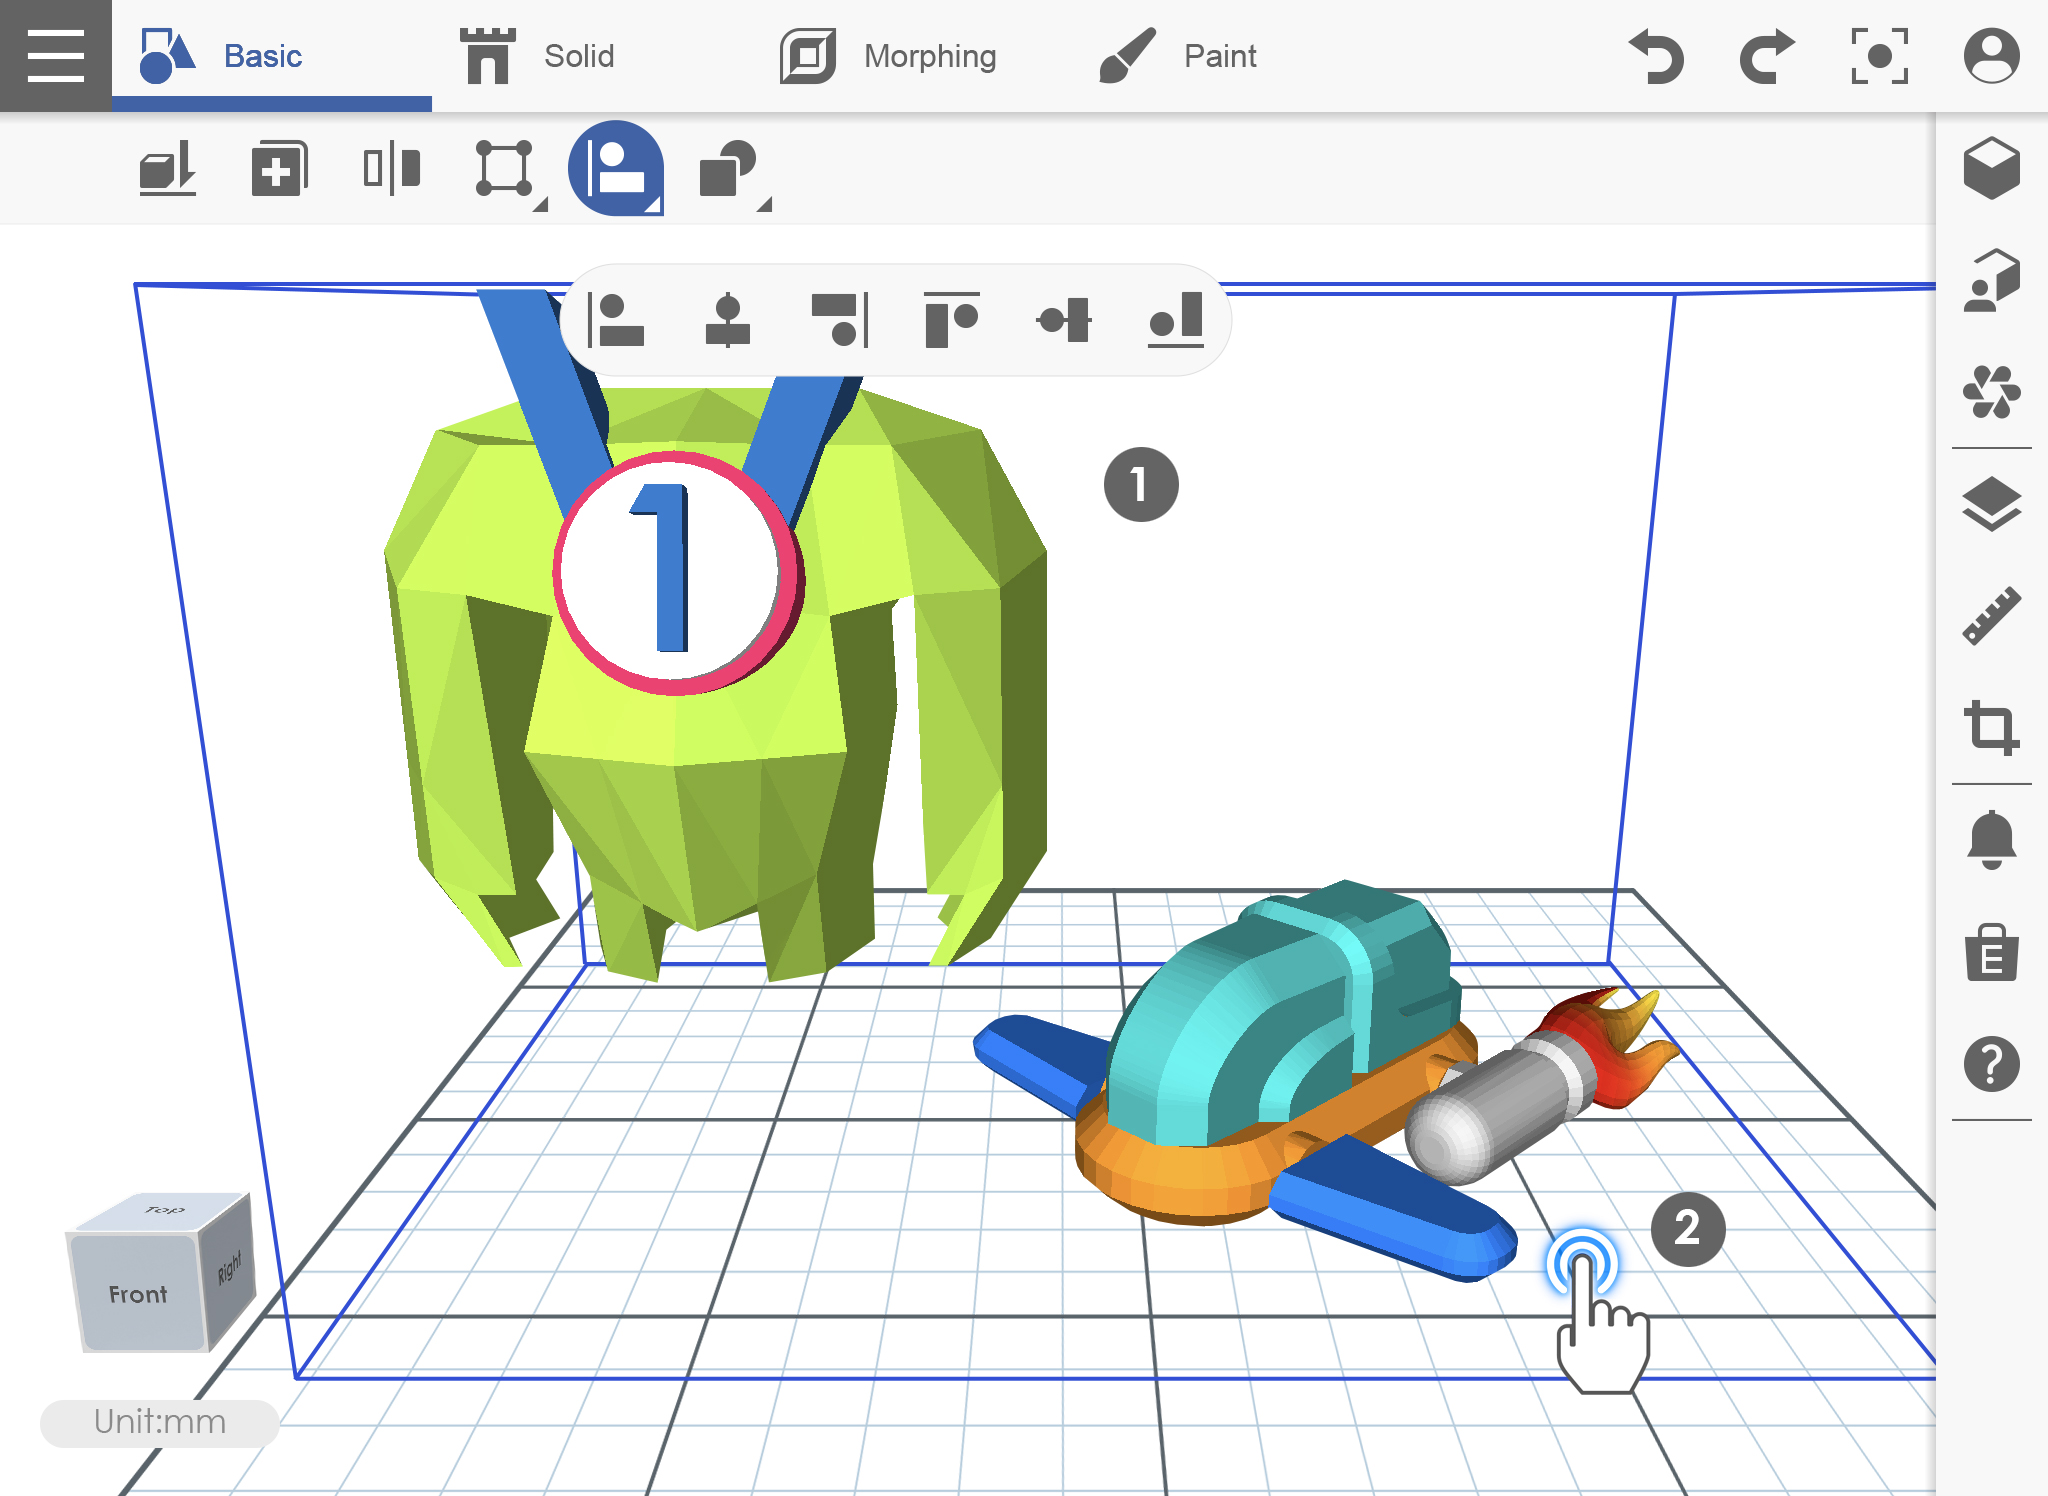
3. 그러면 대상 위치가 정렬됩니다.
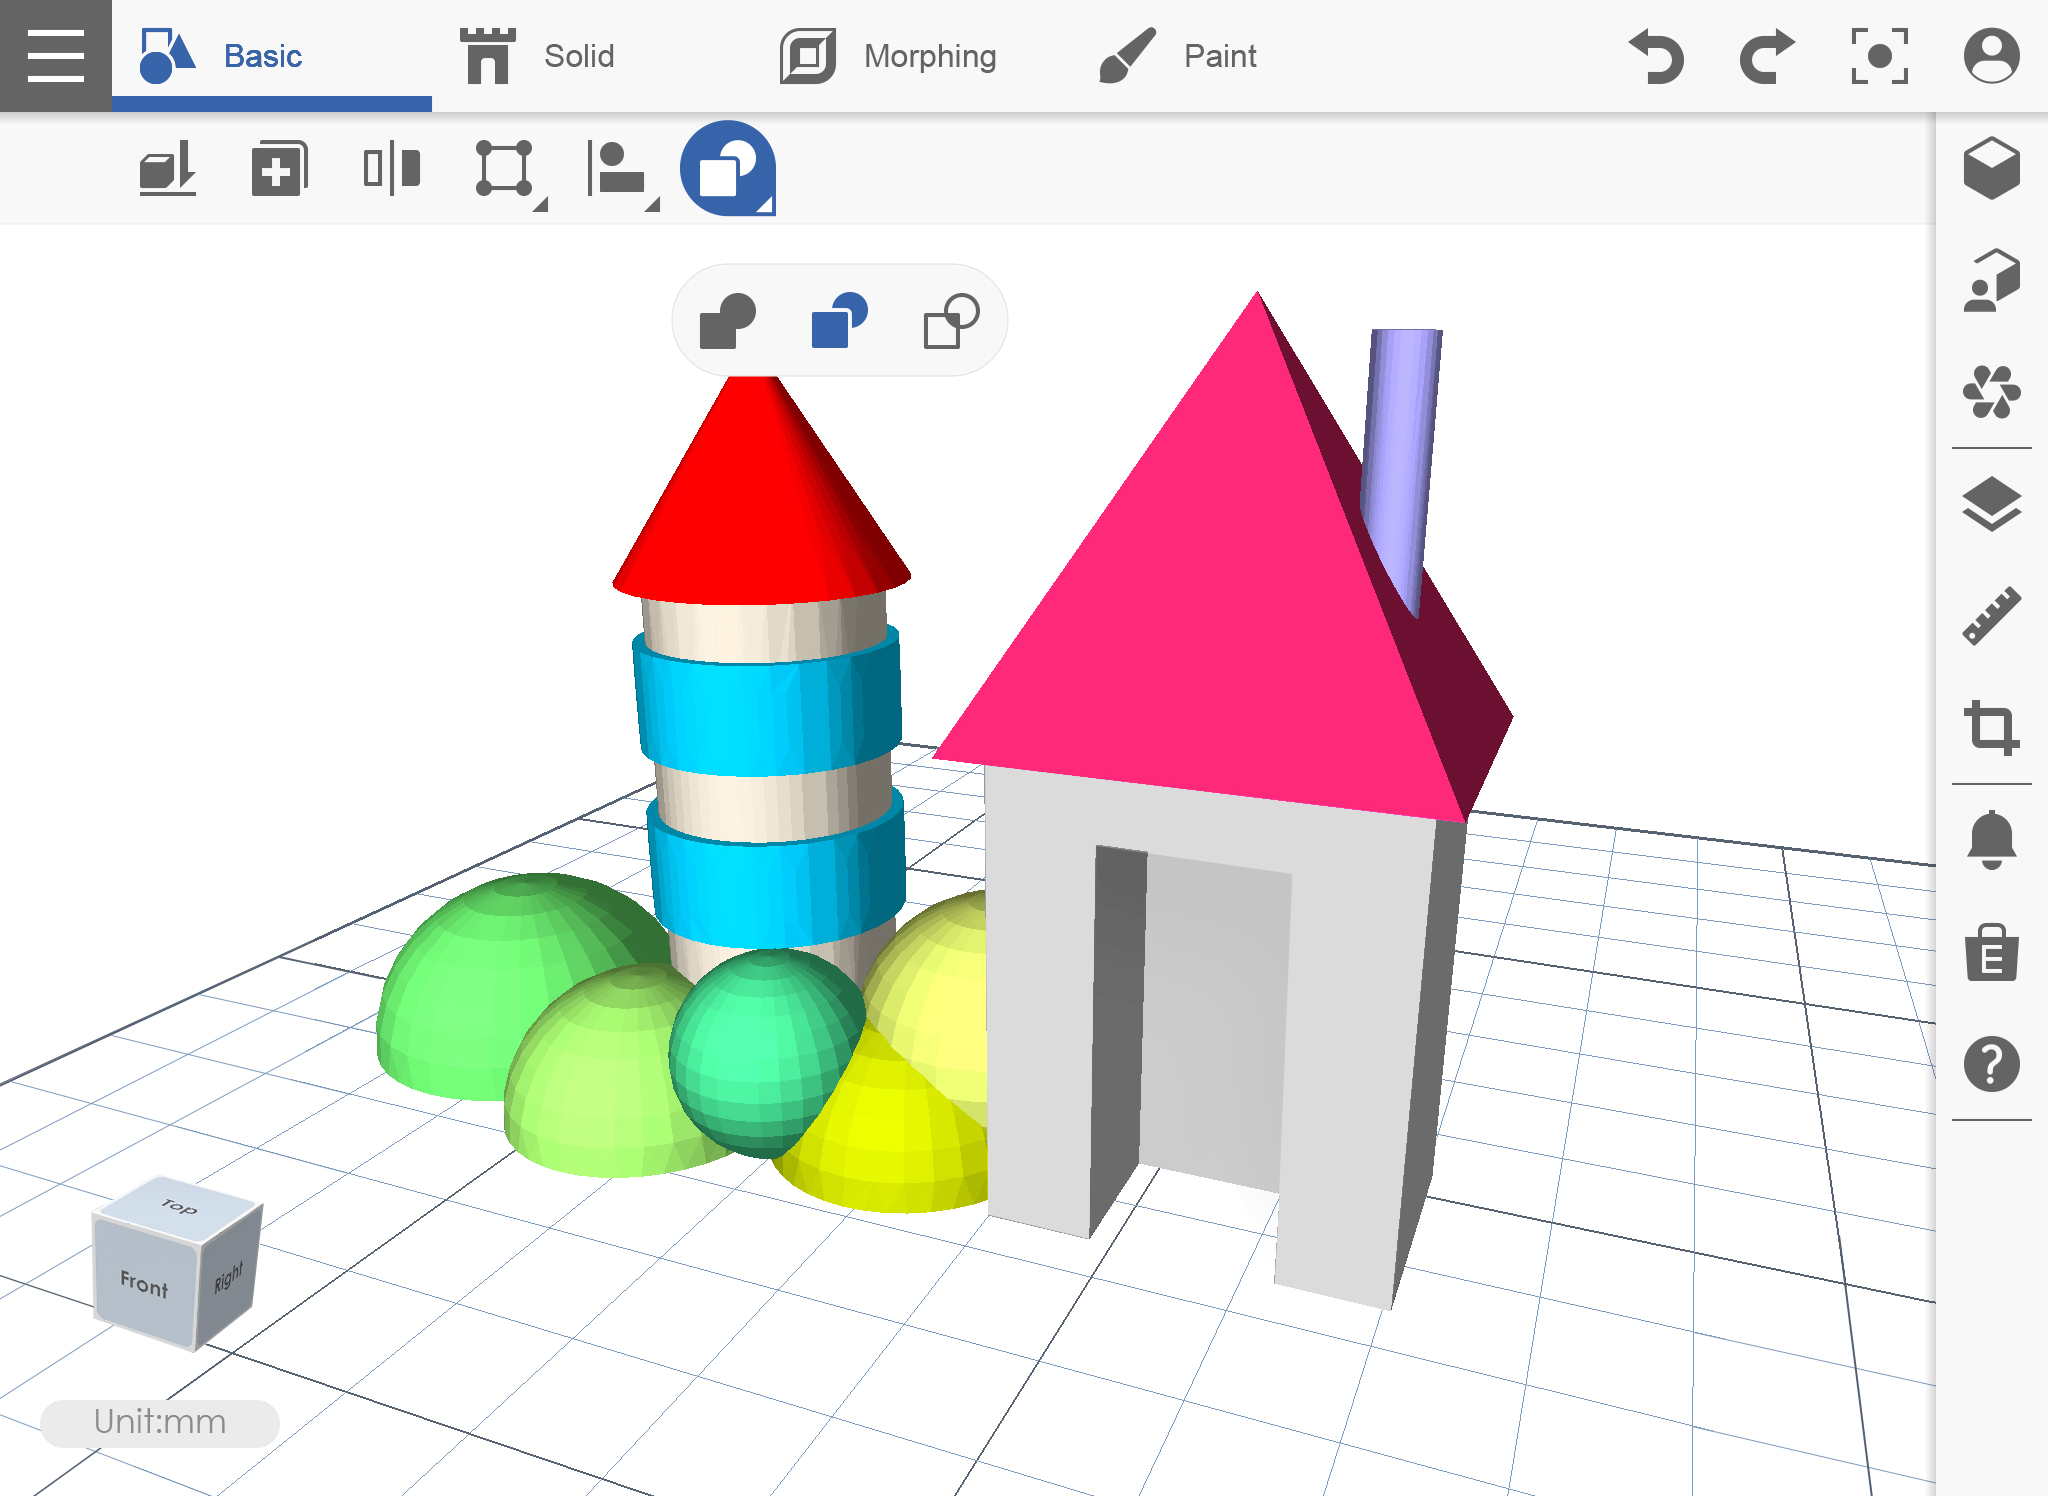
부울 Boolean
이 기능에는 개체 편집에 매우 유용한 세 가지 작업이 포함되어 있습니다. 이들은 조합, 교차점 및 뺄셈입니다.
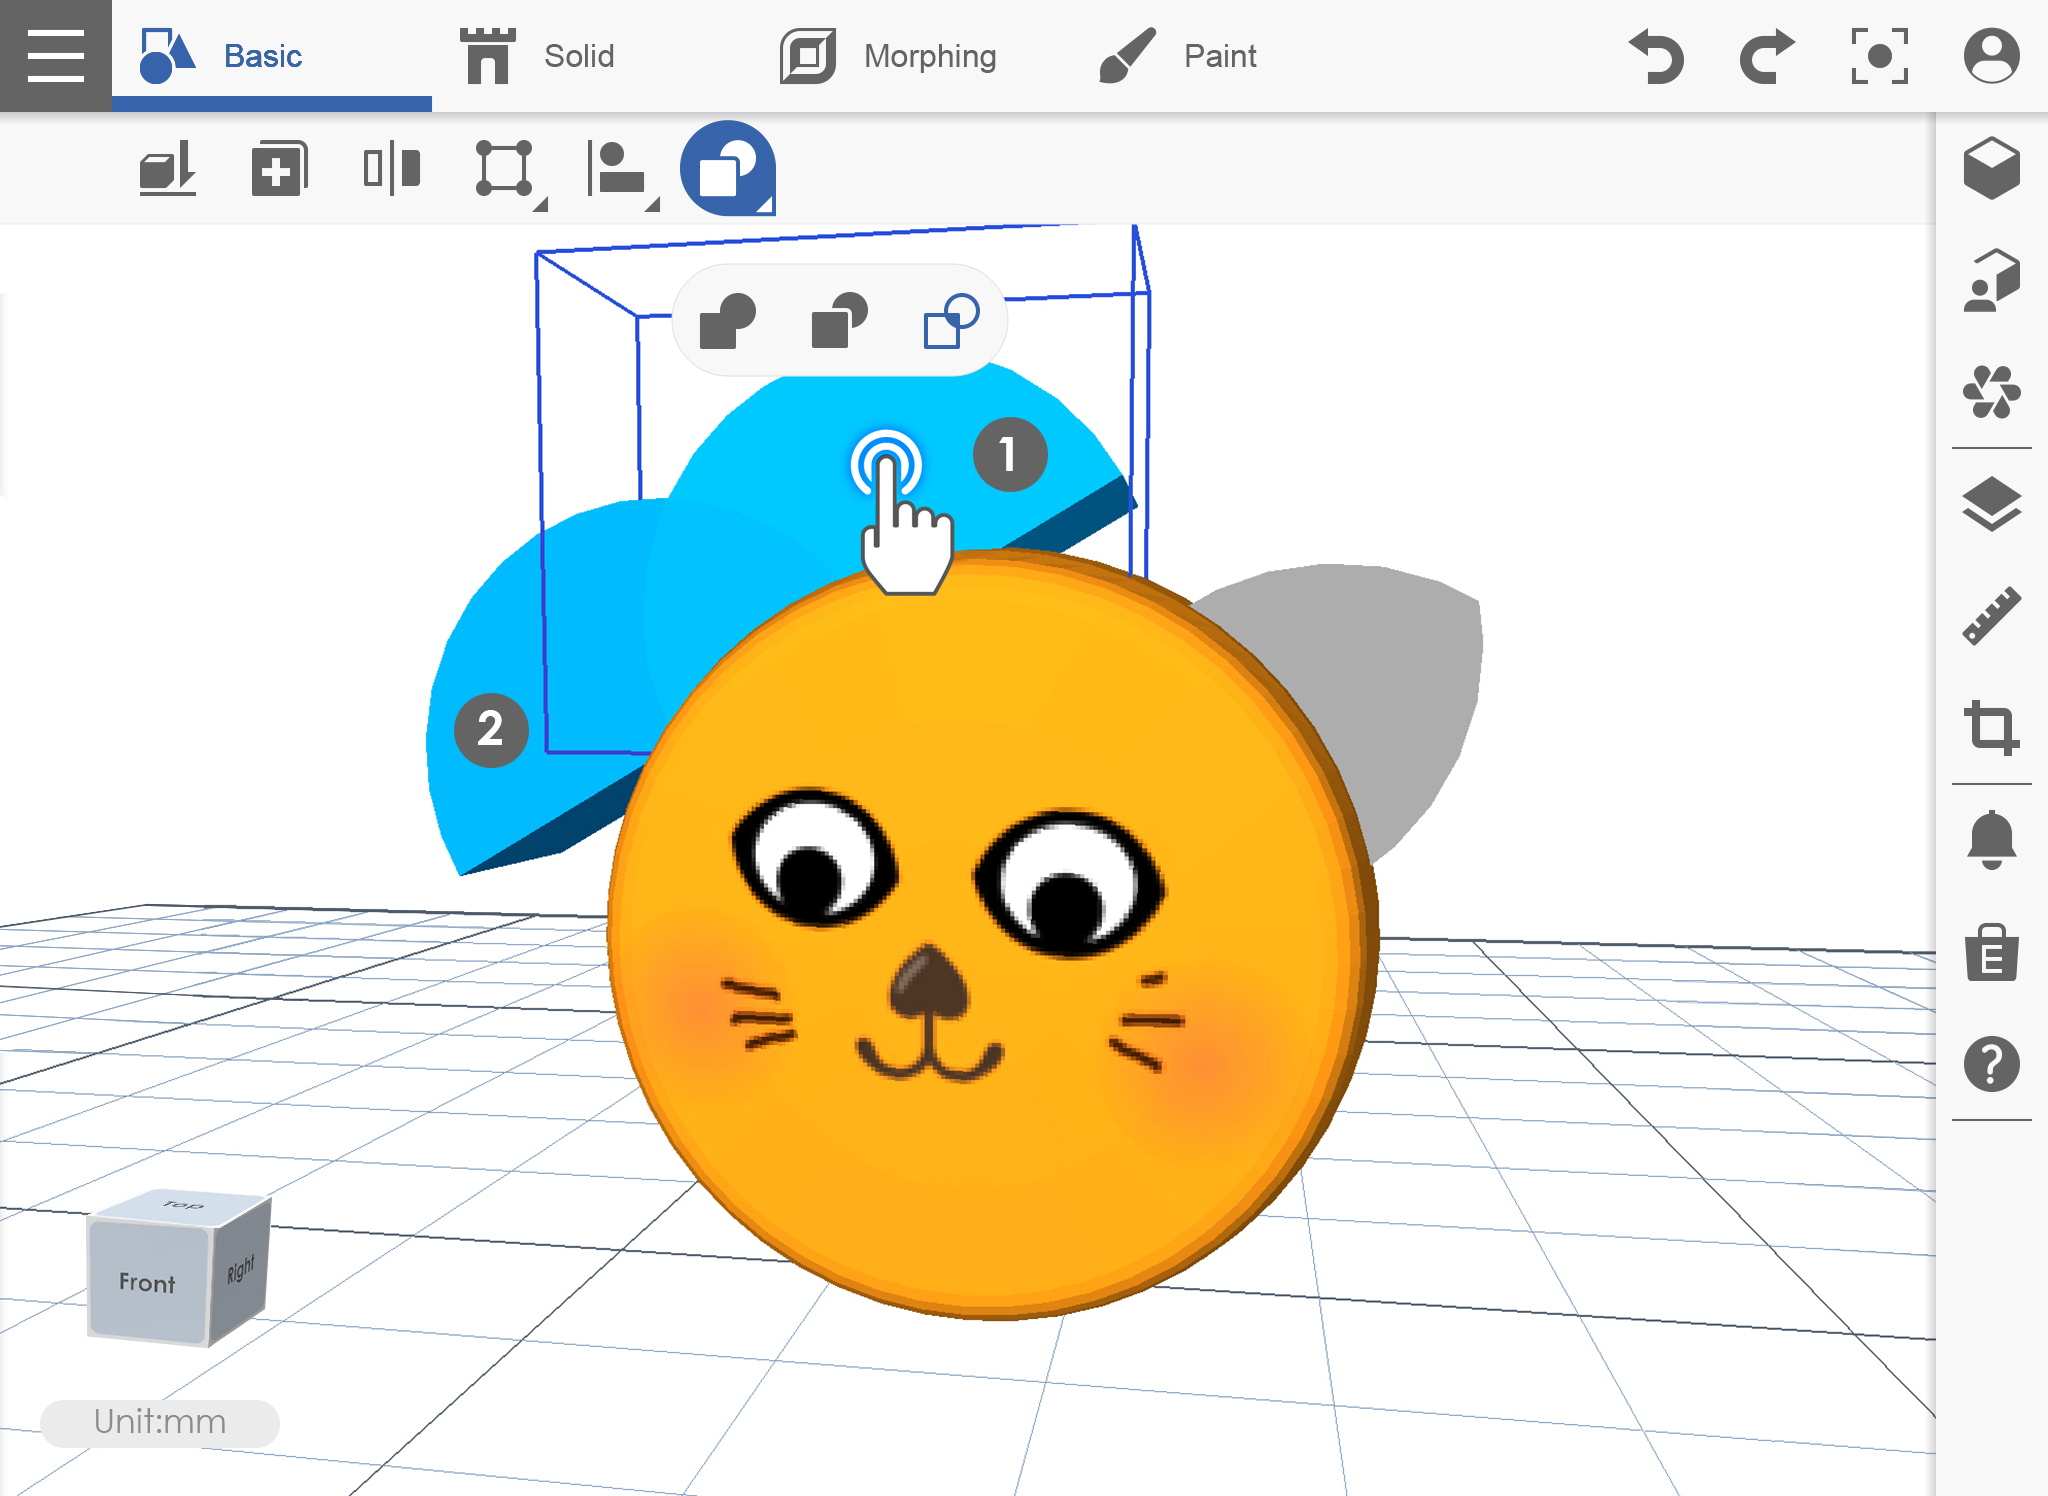
조합 COMBINE
1. 오브젝트가 겹치는 곳에 오브젝트를 놓고 Boolean 아이콘을 클릭 한 다음 Bollinger 아래의 조합 아이콘을 누르십시오.
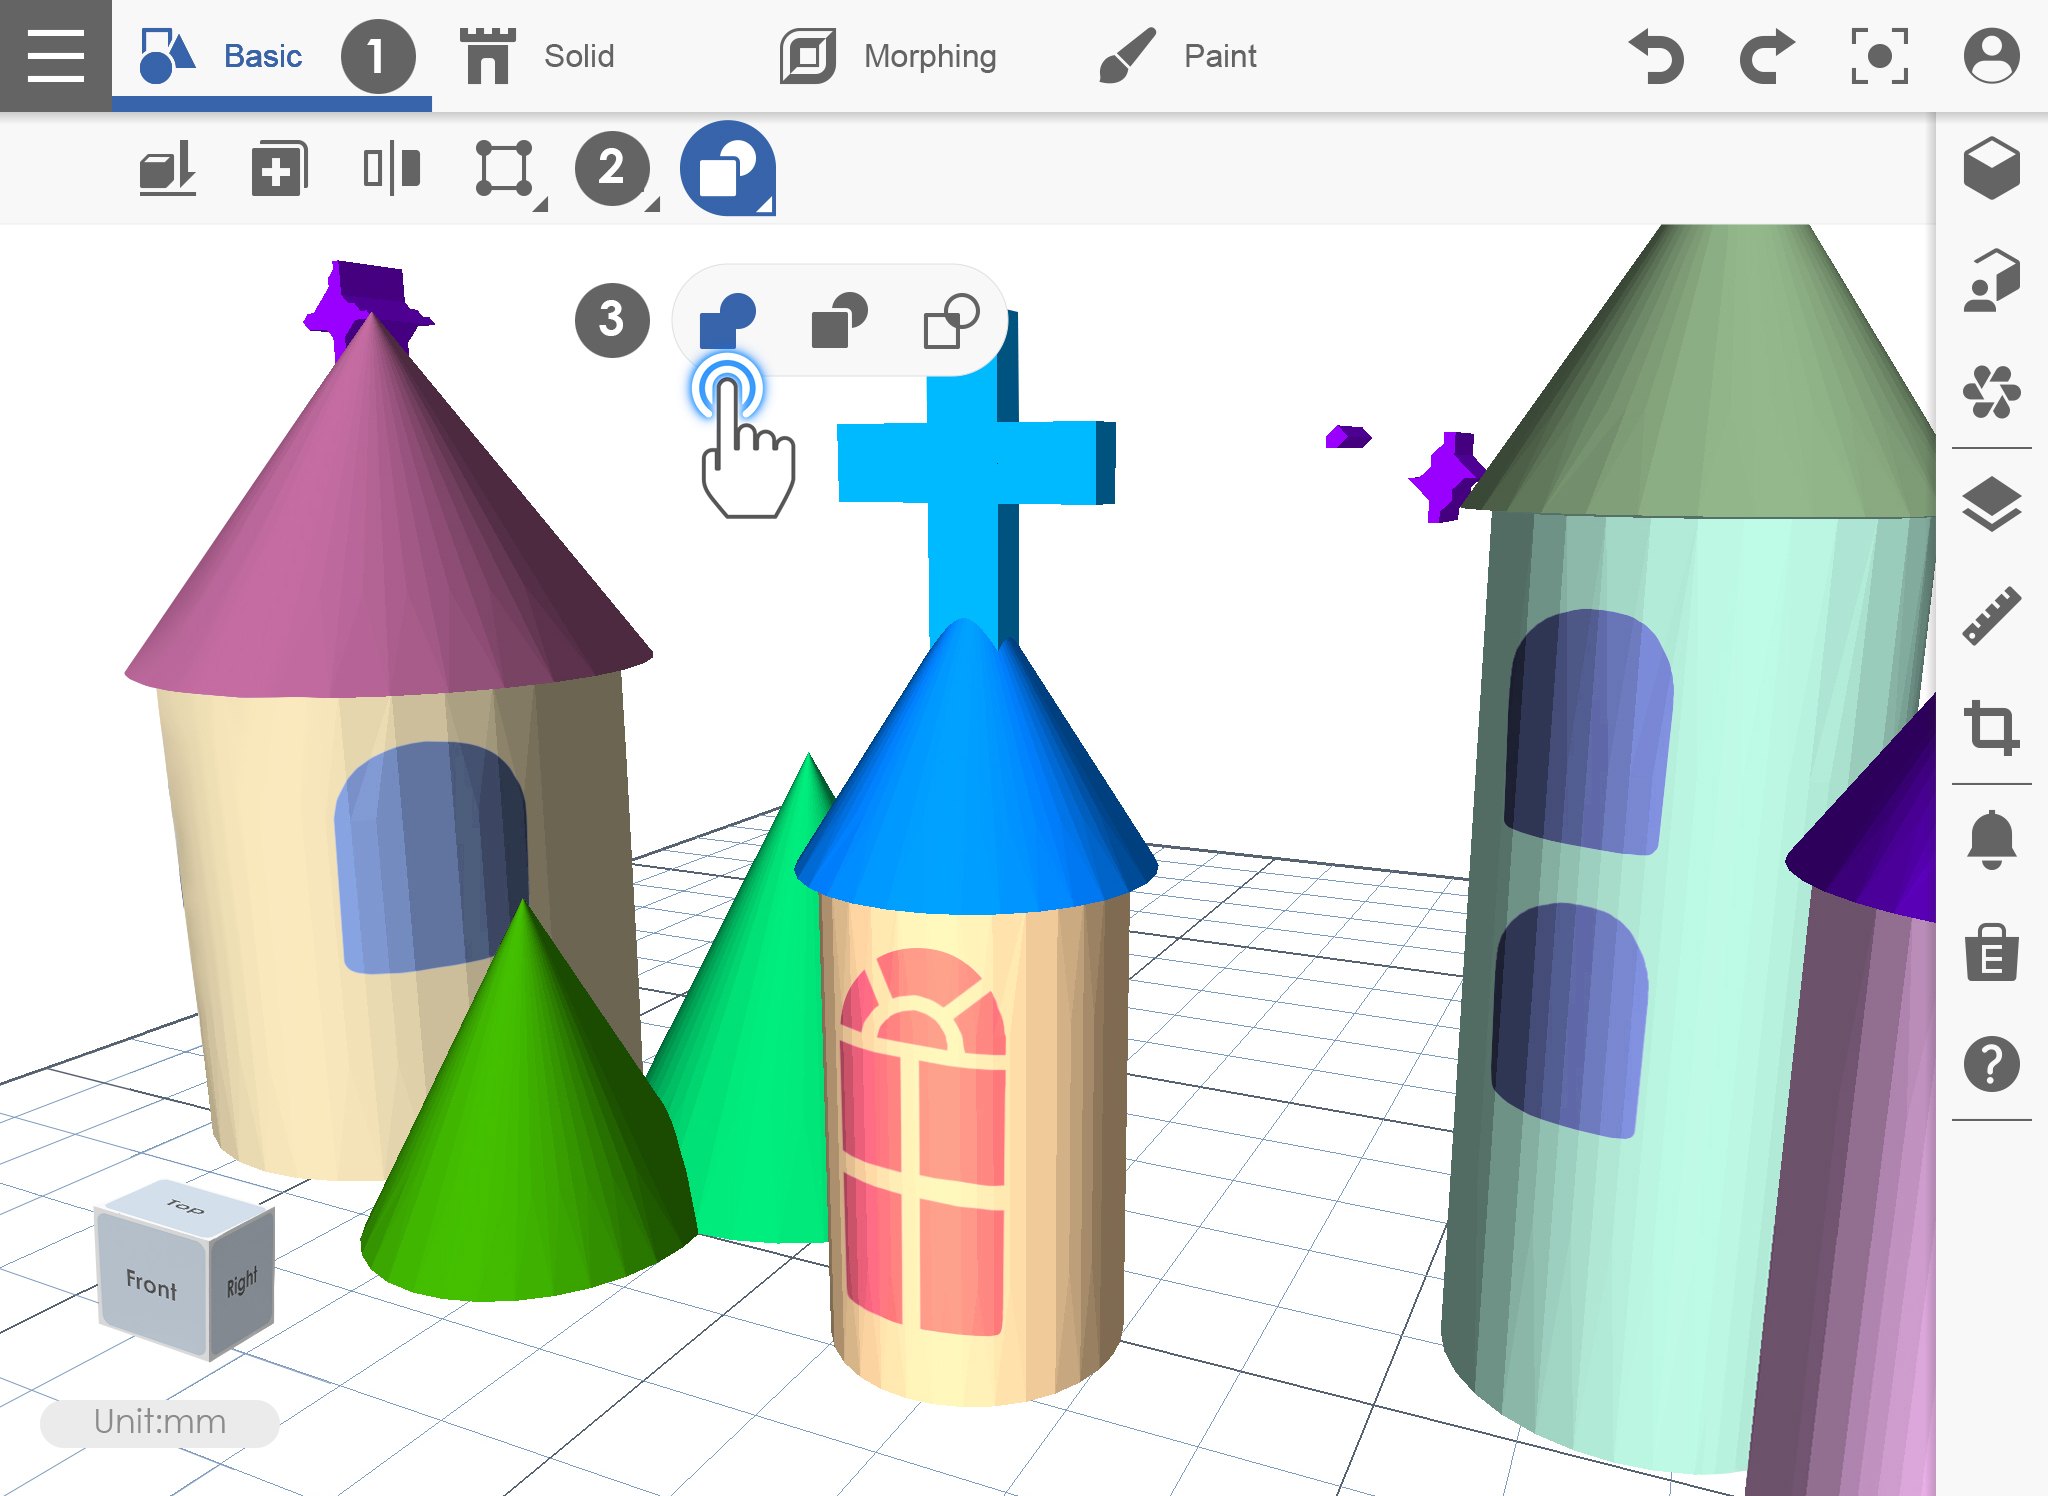
2. 첫 번째 개체를 선택하고 두 번째 개체를 선택하십시오.

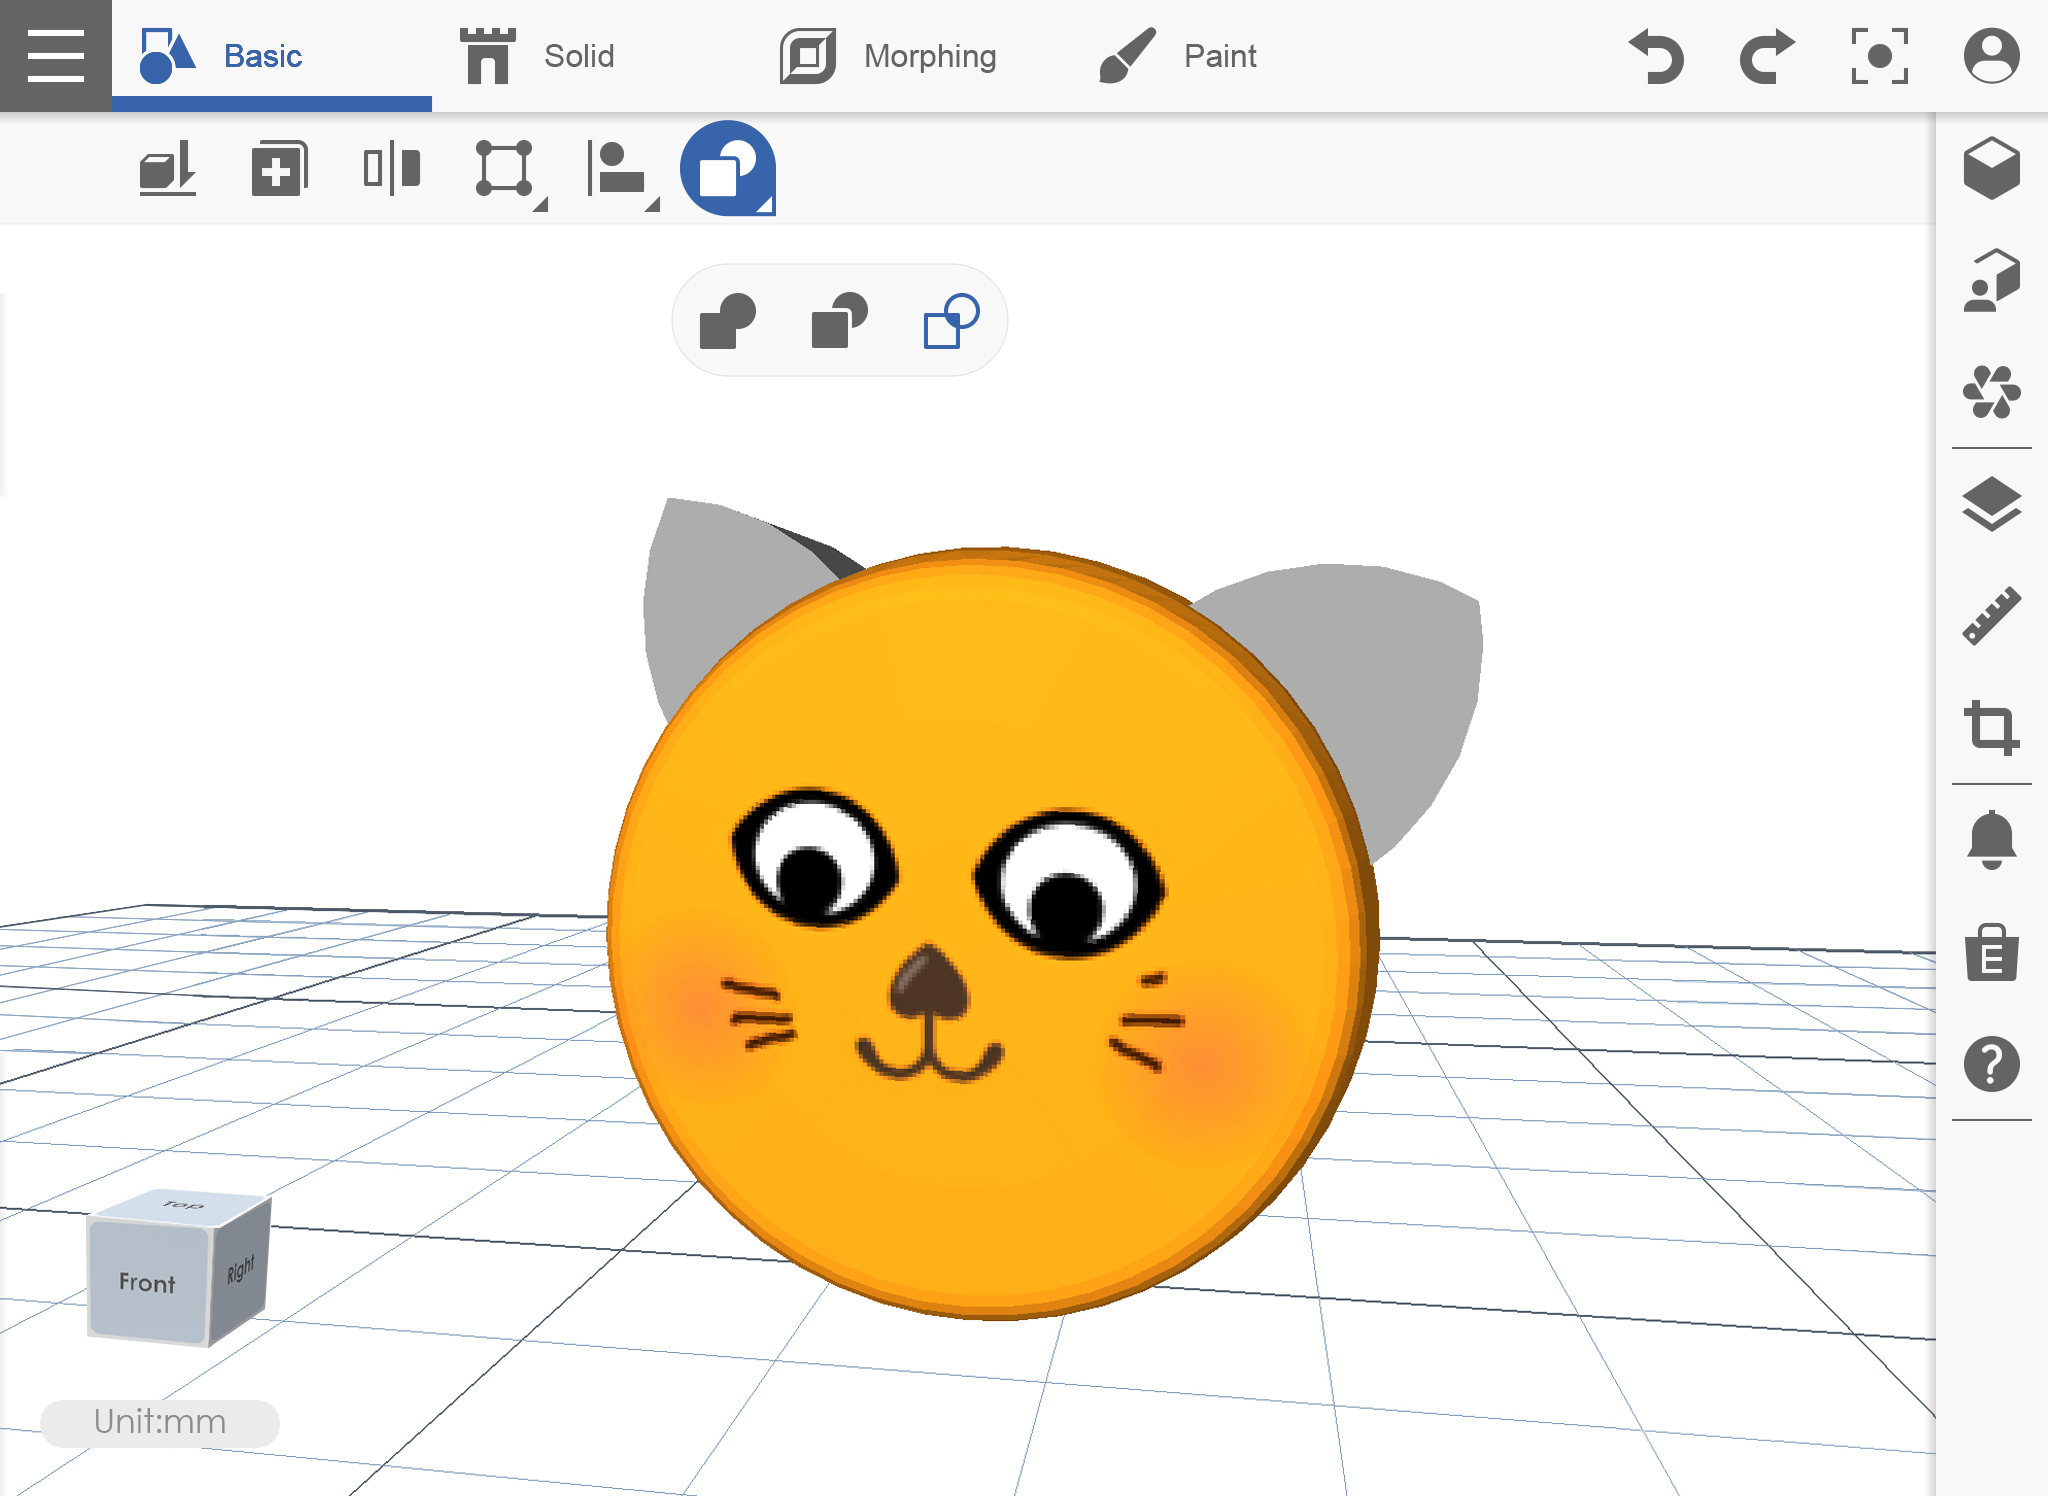
3. 객체가 하나로 결합되었습니다.
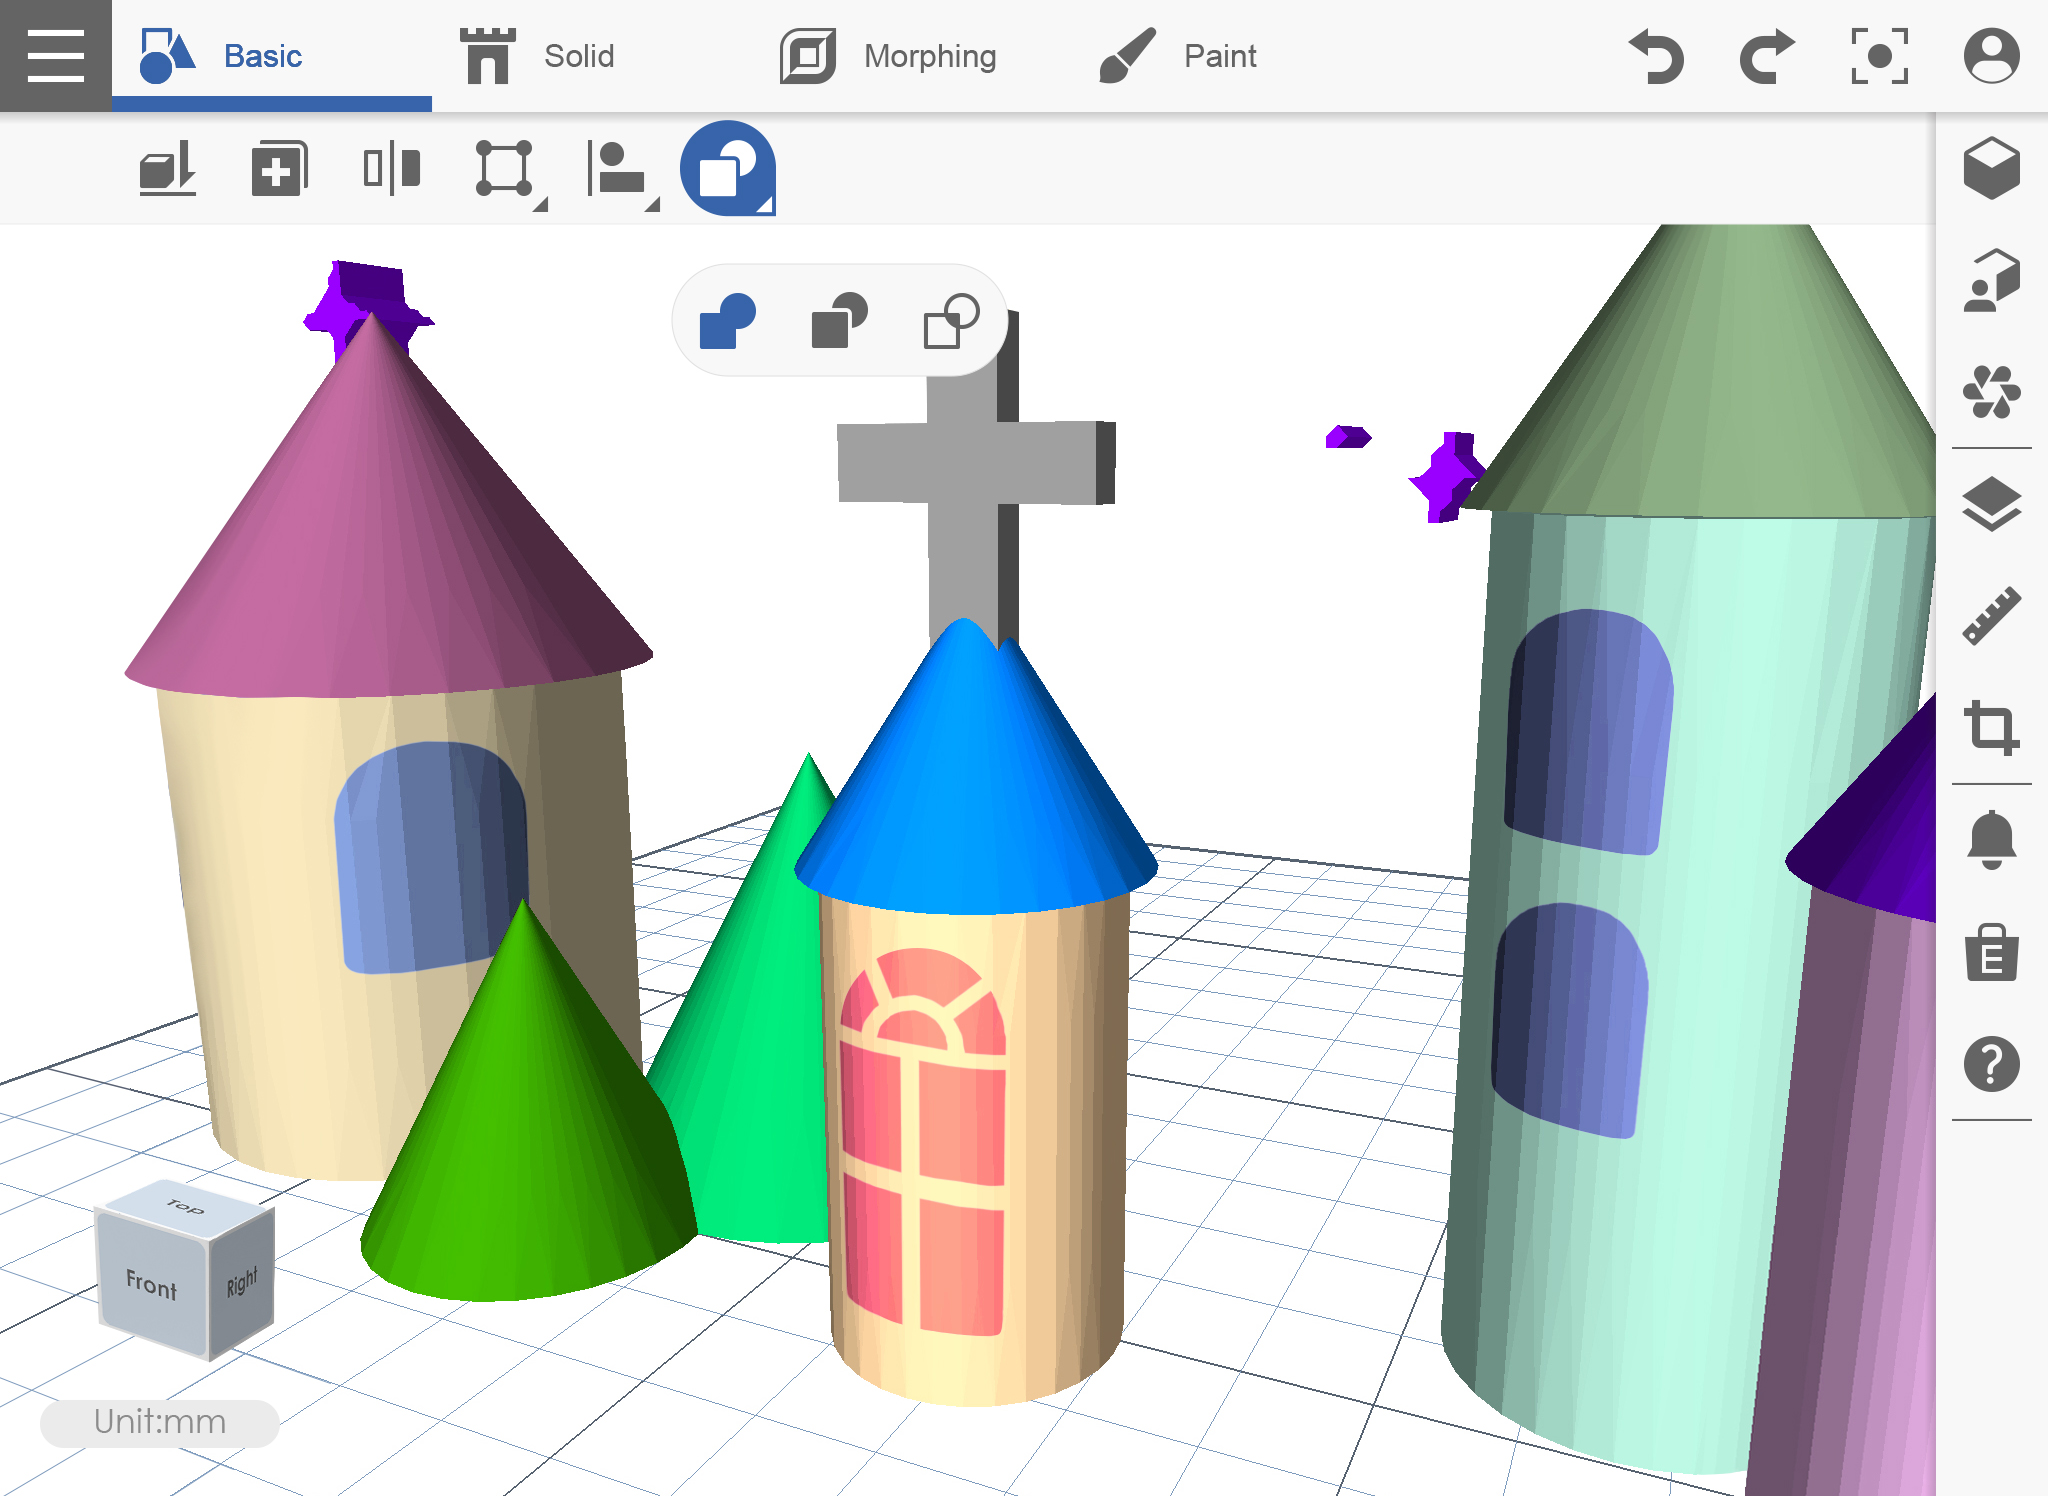
교차로 INTERSECT
1. 객체가 겹칠 위치에 놓은 다음 부울 아이콘을 클릭하고 교차 아이콘을 클릭합니다.
2. 첫 번째 객체를 먼저 클릭 한 다음 두 번째 객체를 누릅니다.
3. 교차로는 유지됩니다.
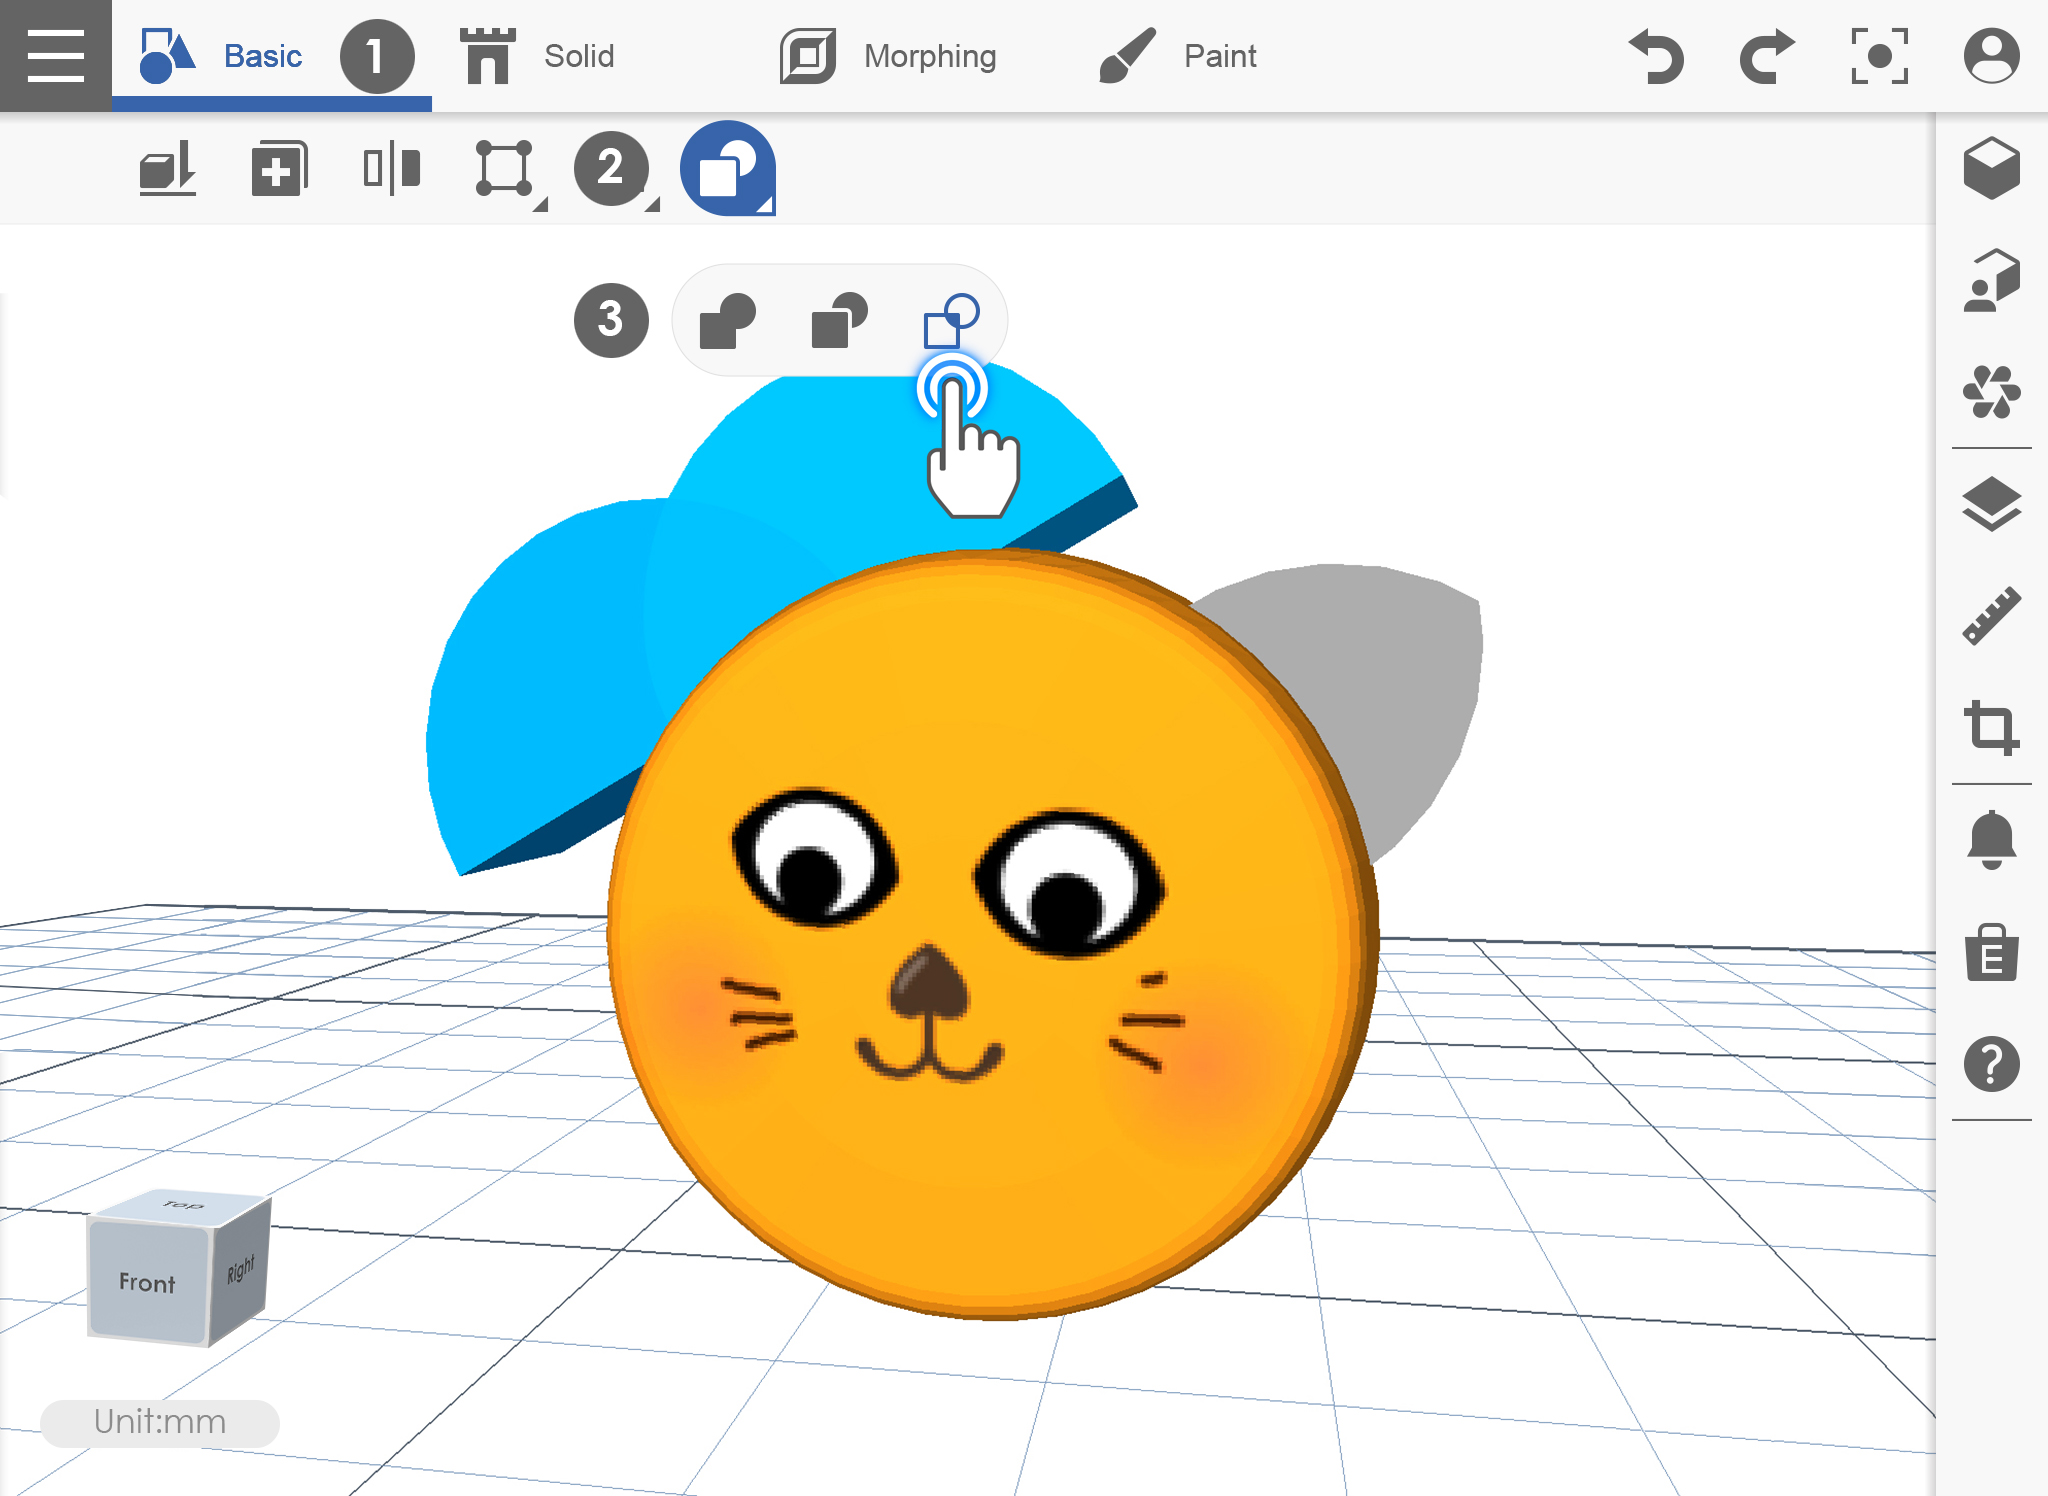
빼기 SUBTRACT
1. 오브젝트가 겹칠 위치에 오브젝트를 놓은 다음 부울 아이콘을 클릭하고 다시 눌러 아이콘을 빼십시오.
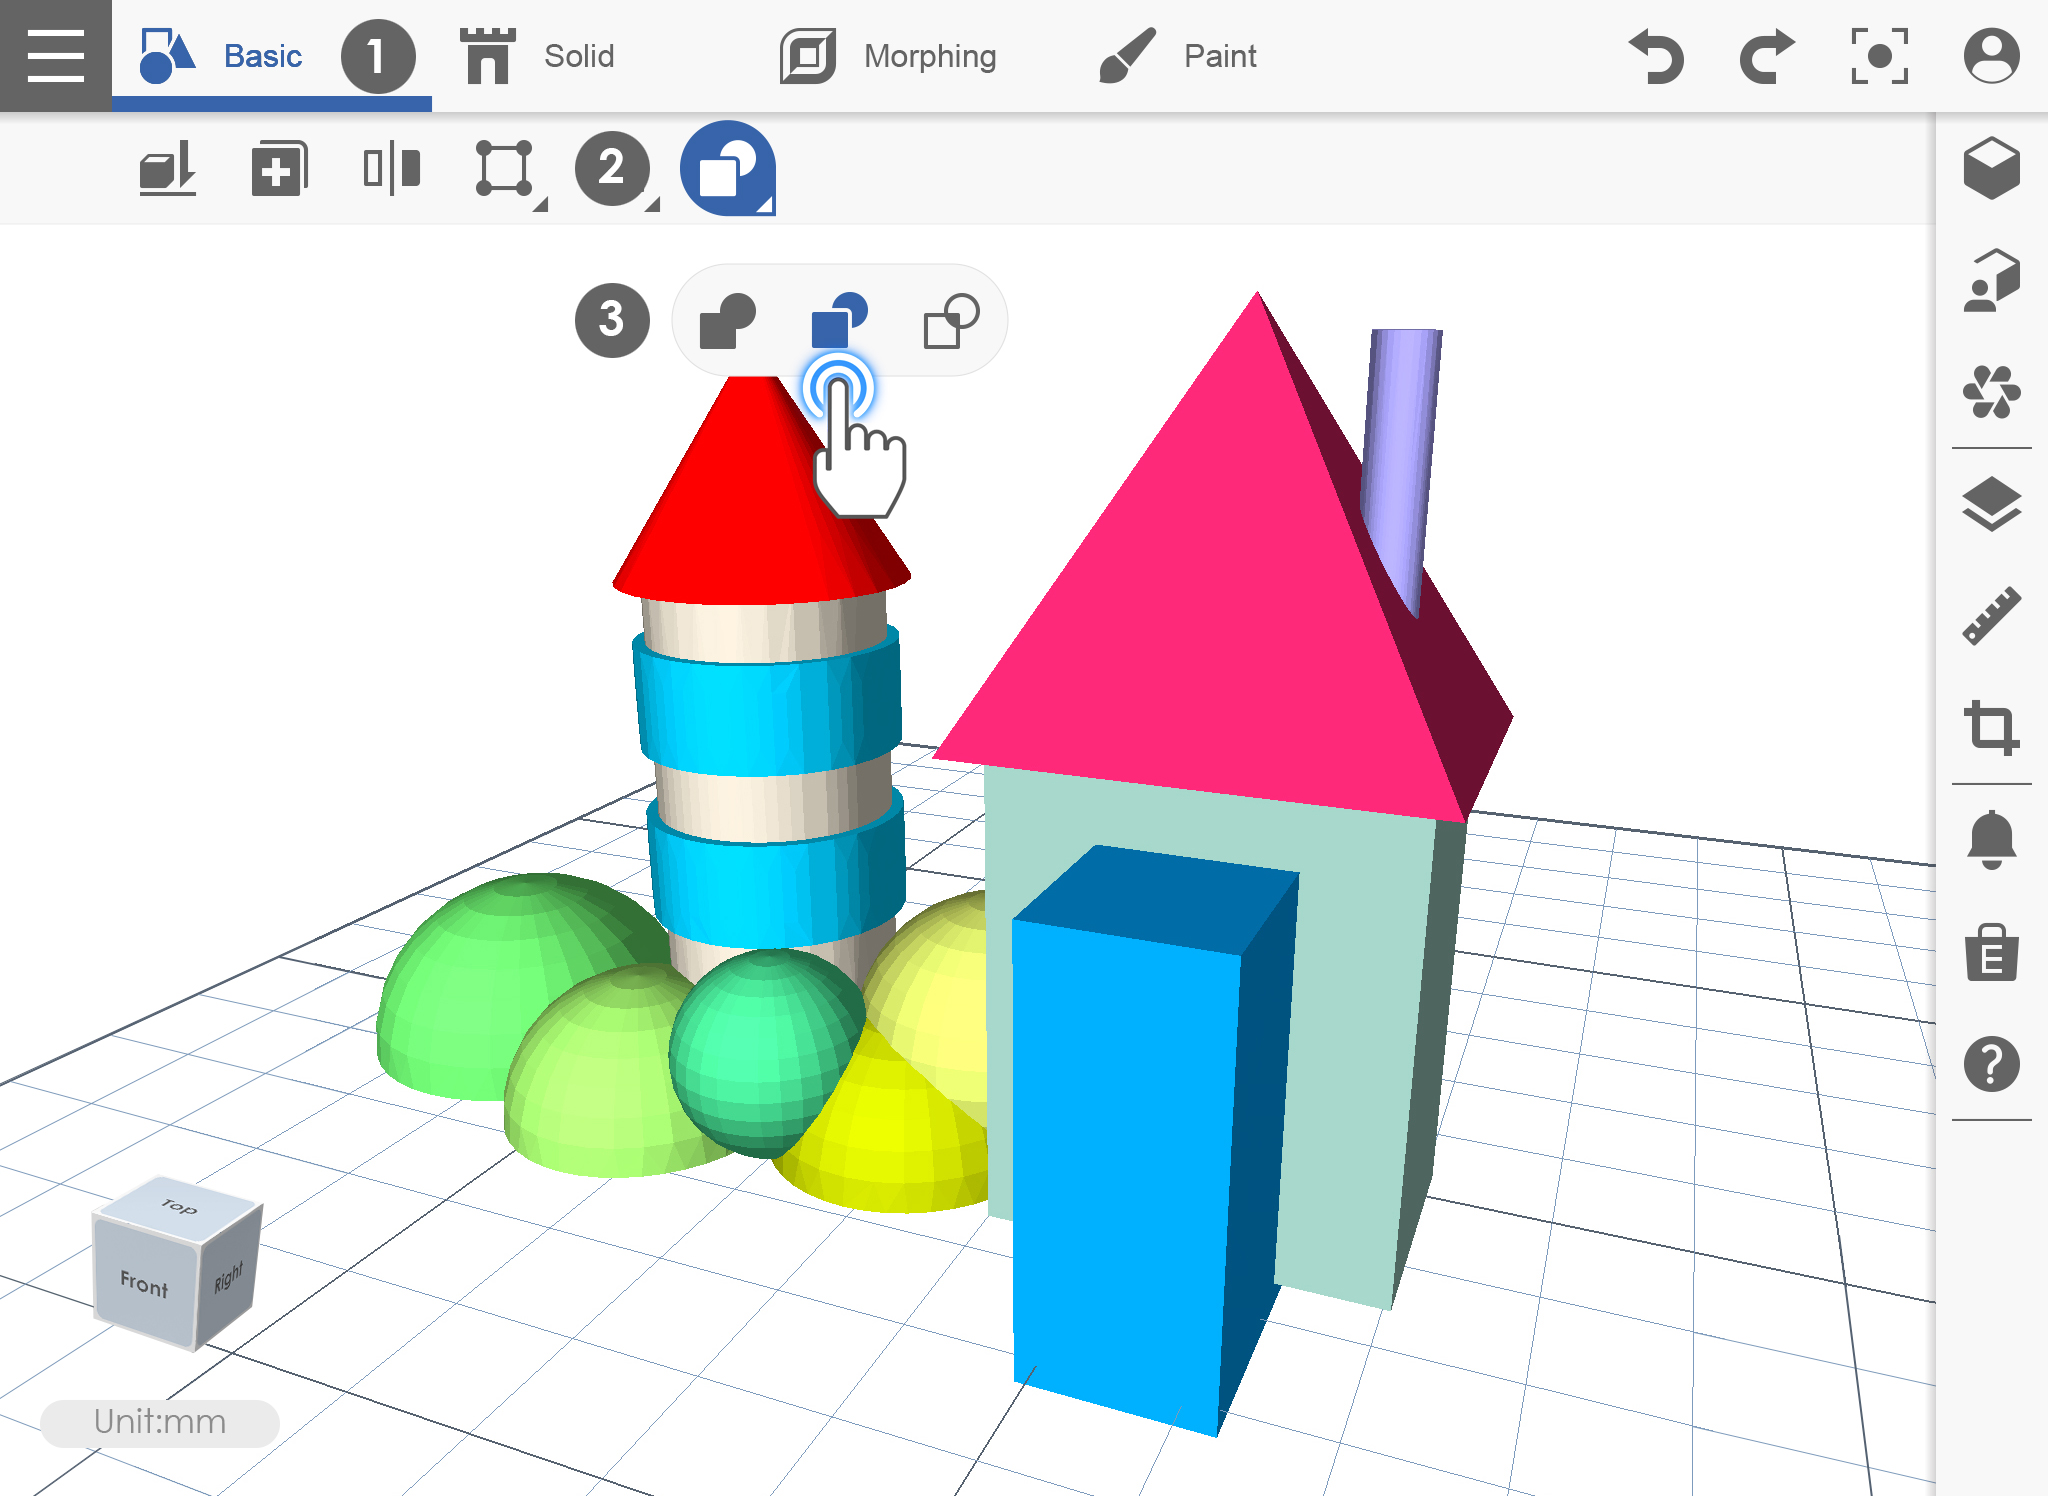
2. 먼저 첫 번째 물체를 선택하고 두 번째 물체를 선택하십시오. 첫 번째 물체는 남은 다음 두 번째 물체와 교차 부분이 차감됩니다.
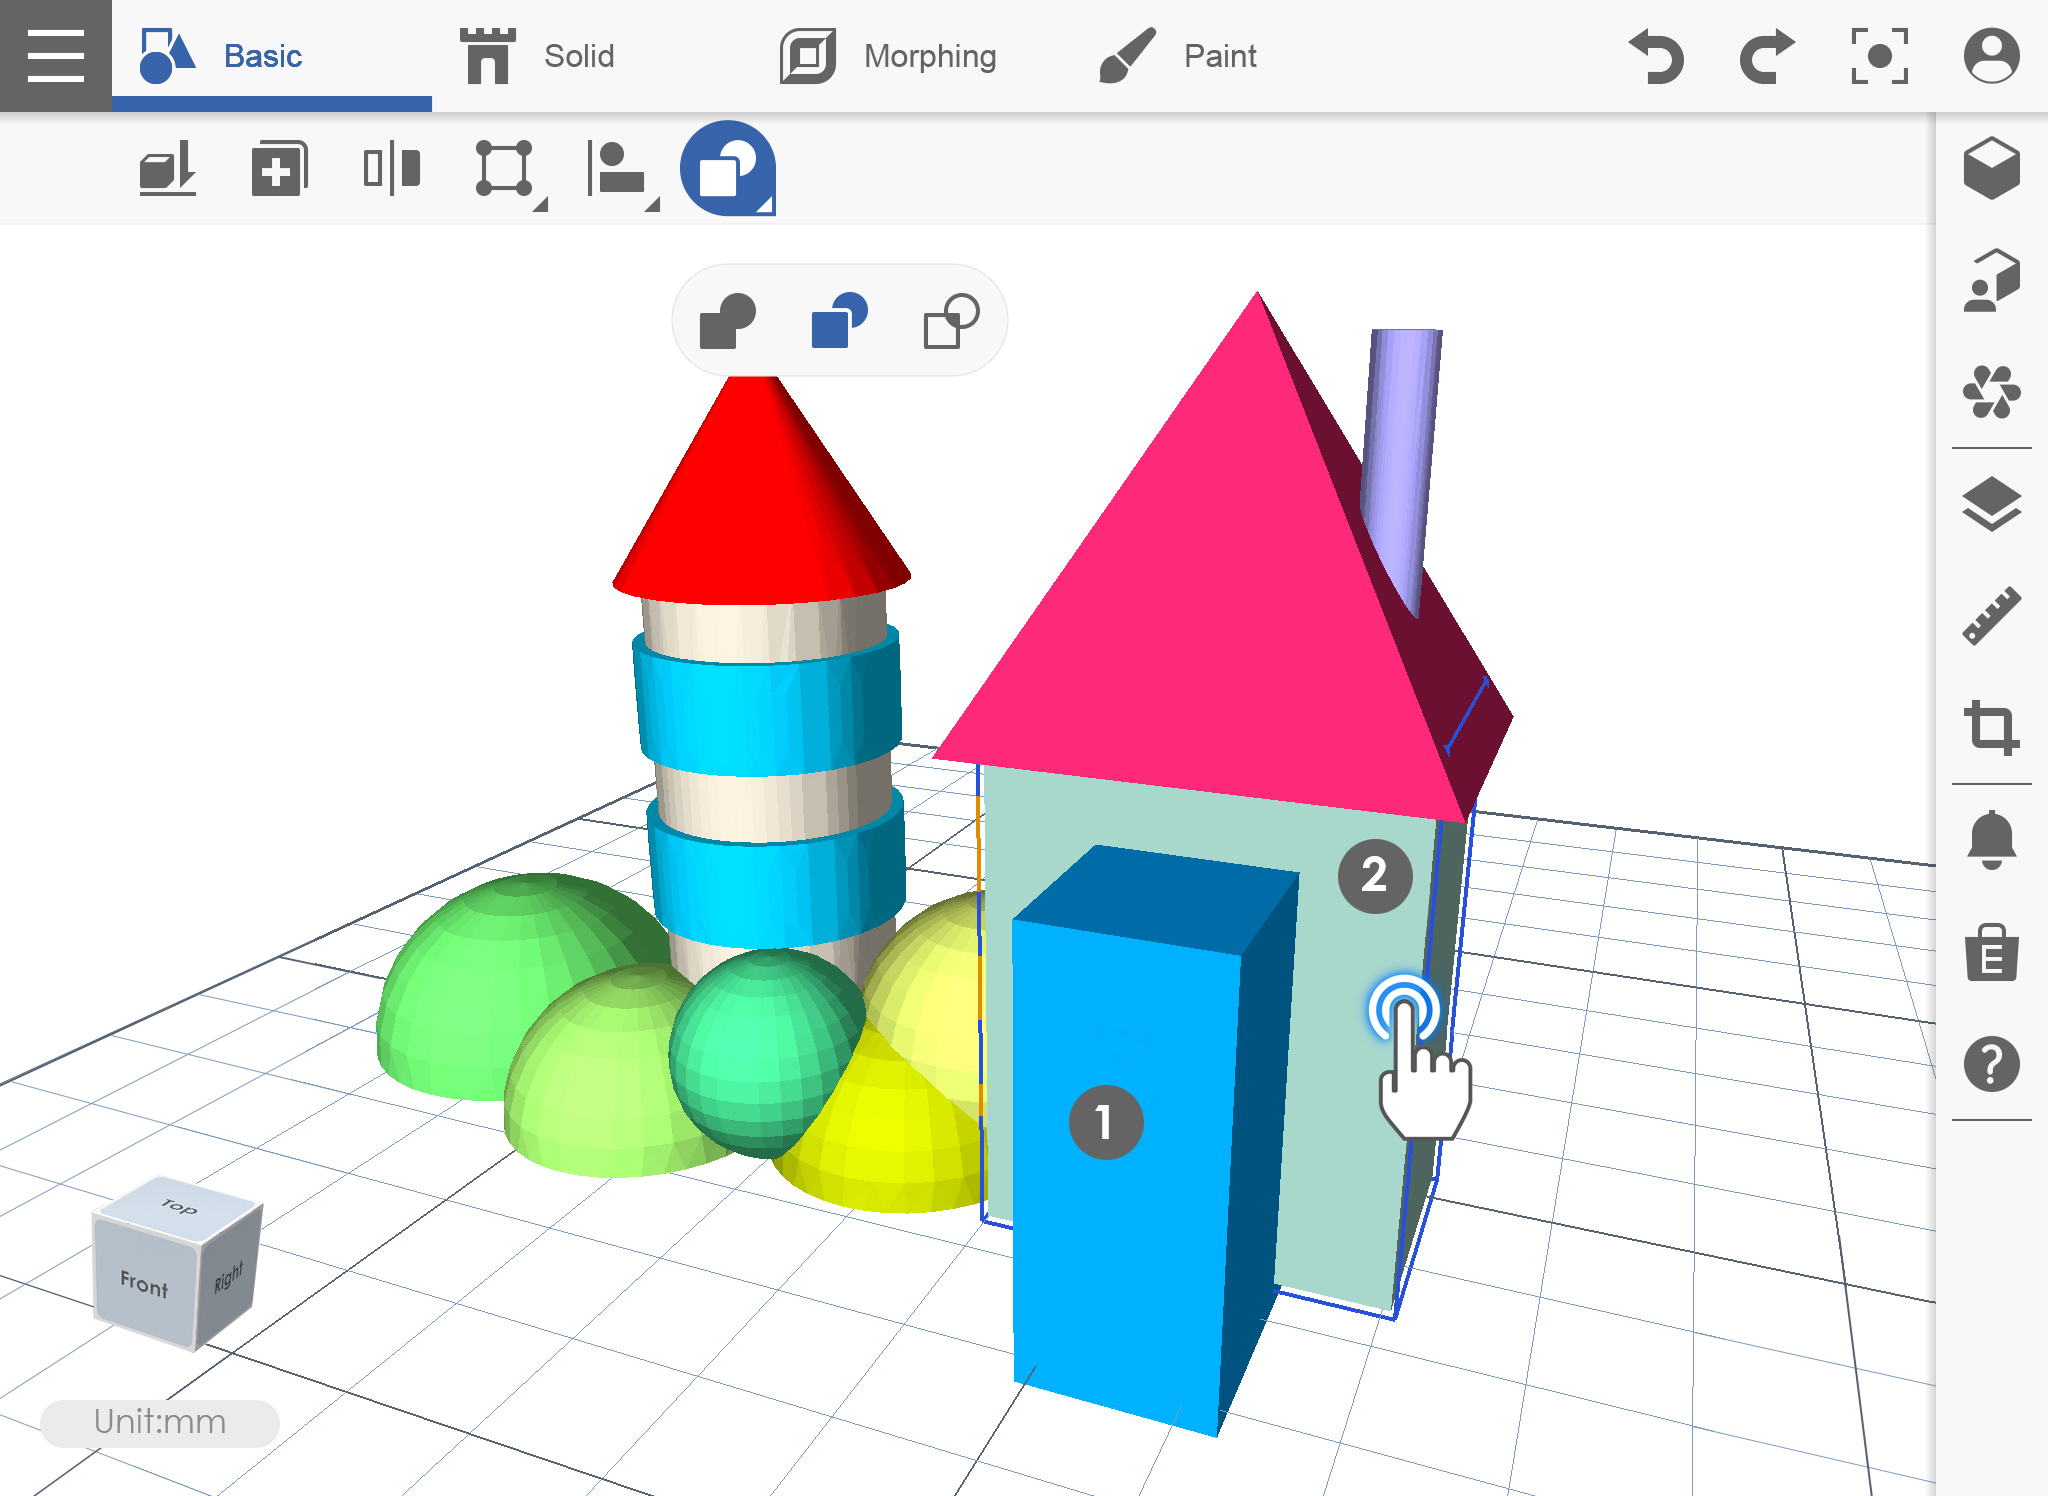
3. 두 번째 객체와의 교차점이 첫 번째 객체에서 뺍니다.


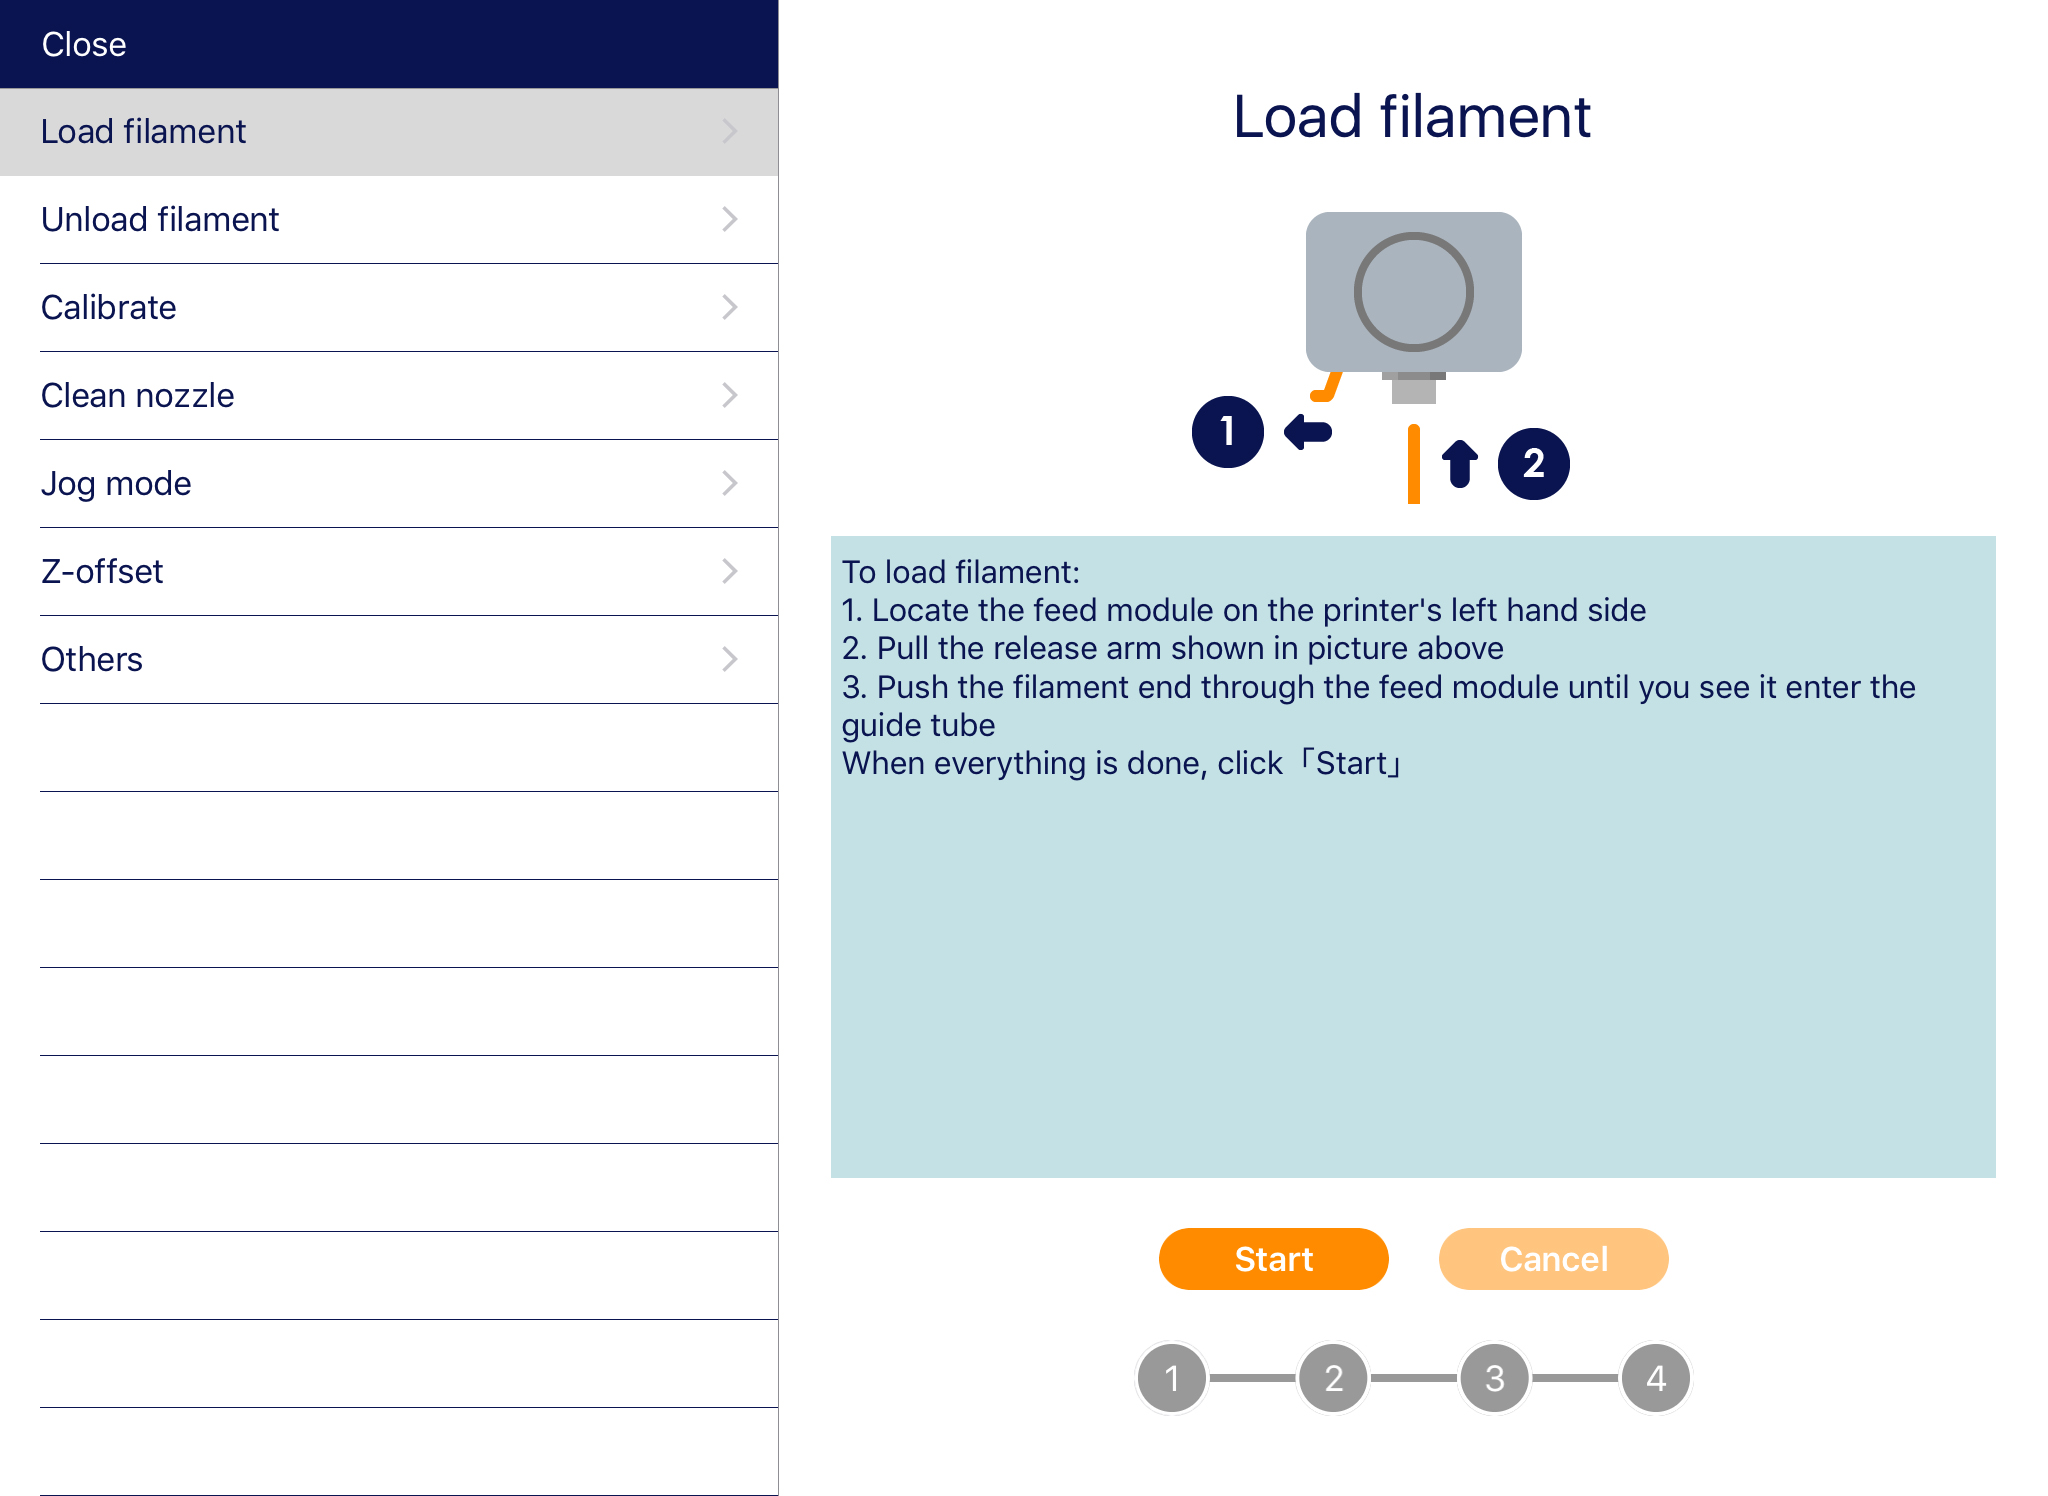
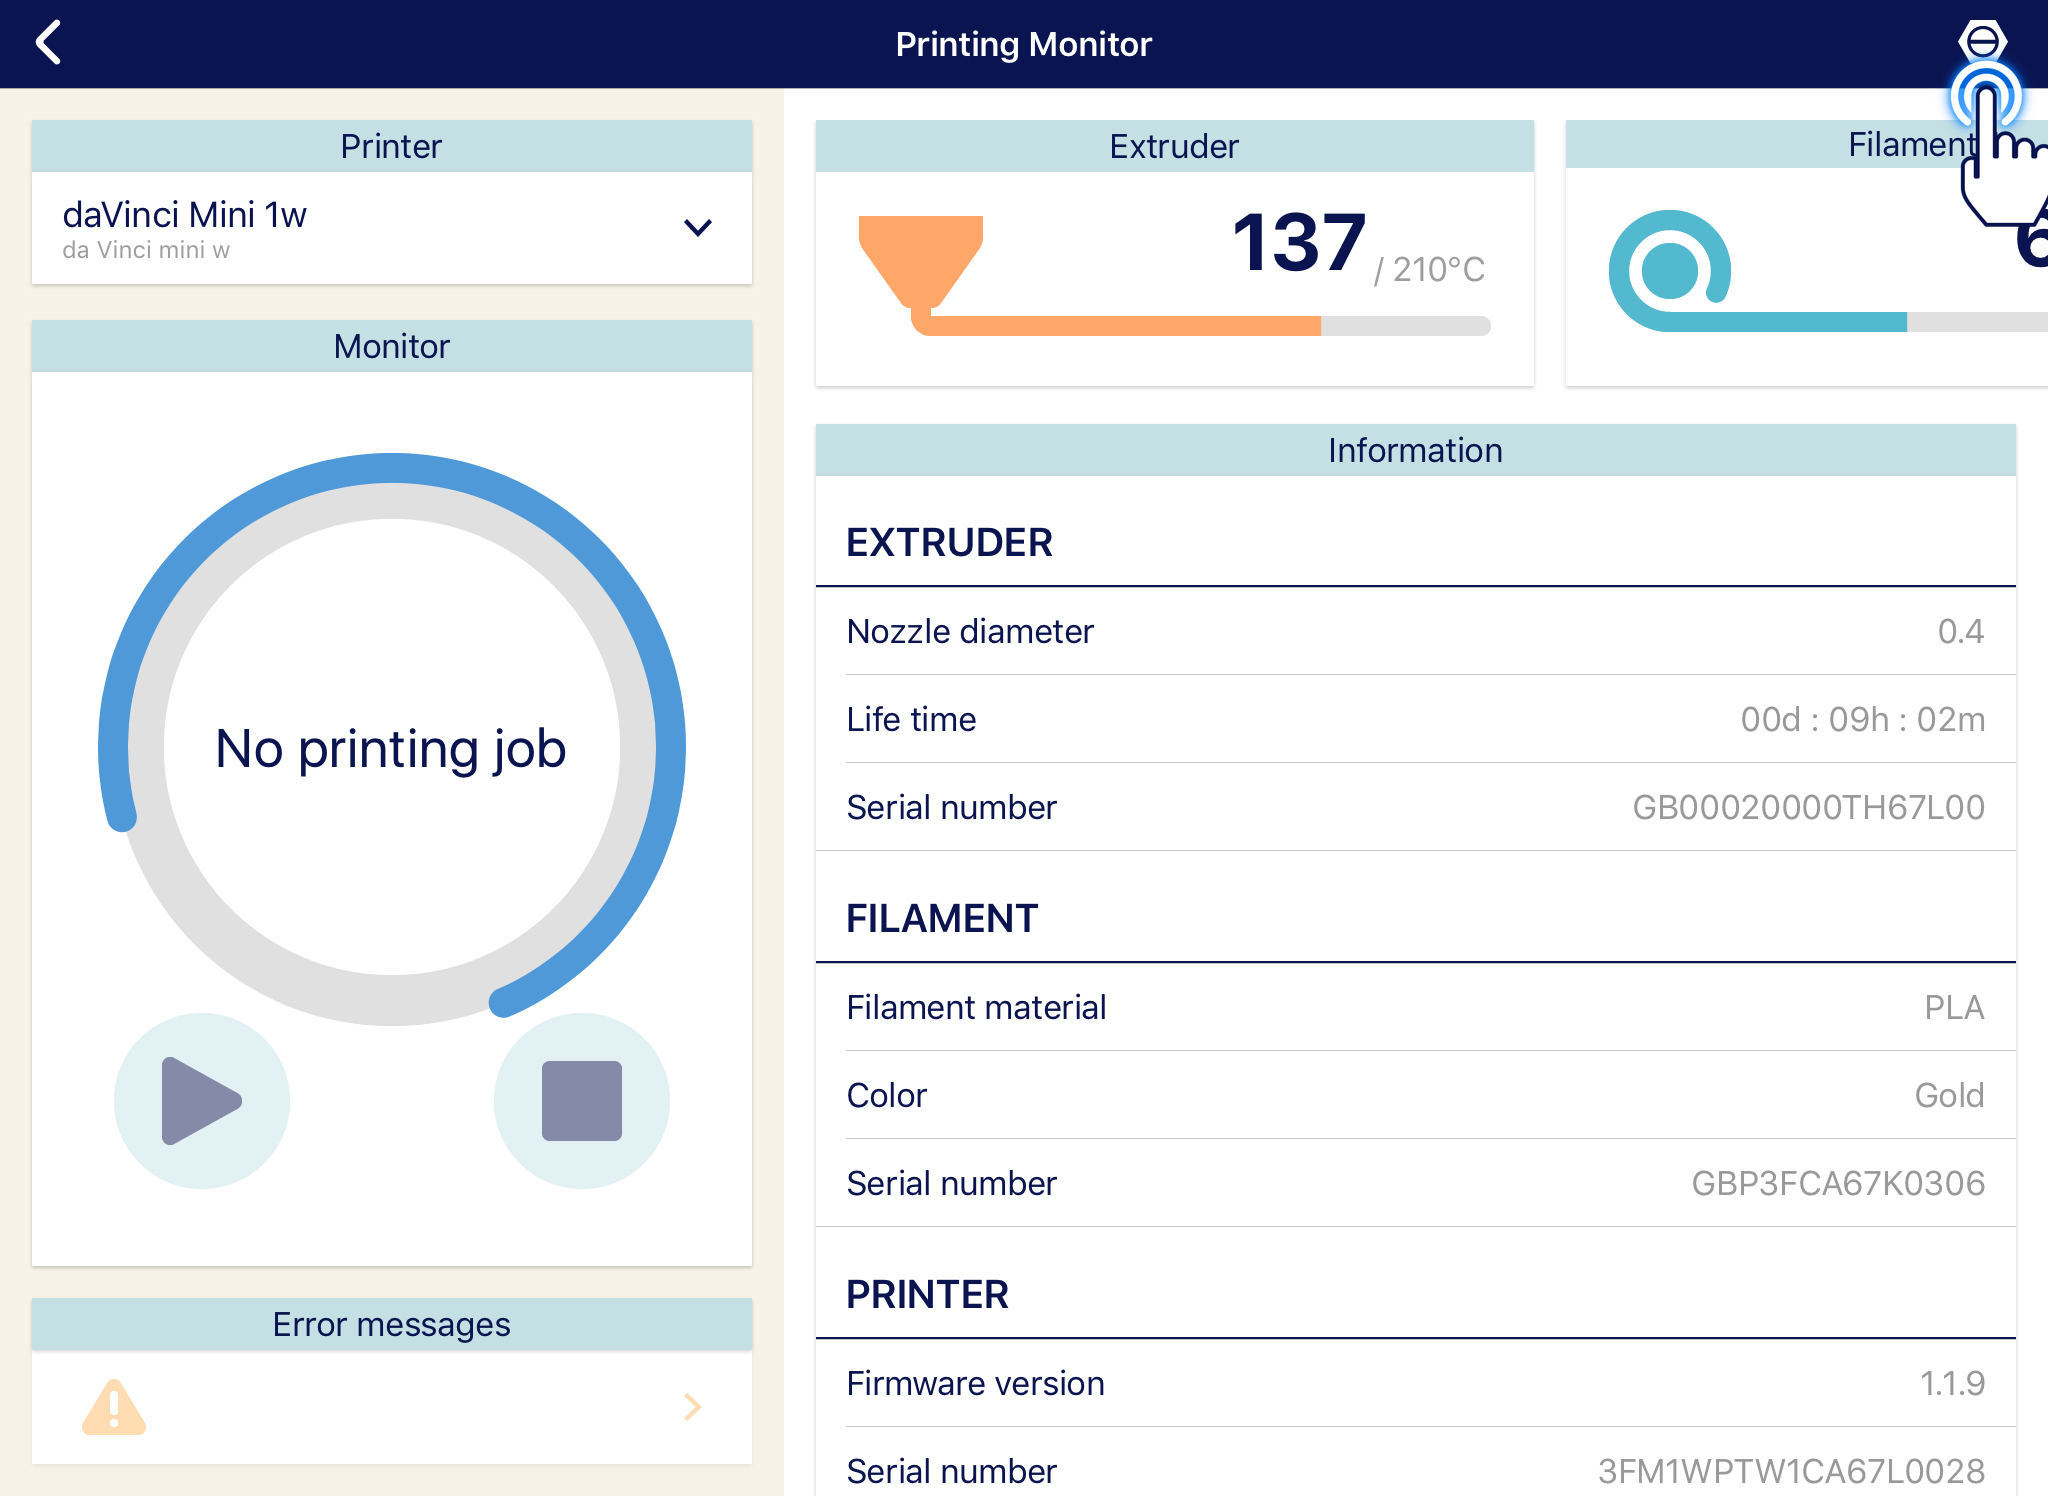 2. Different items will display such as Load/Unload Filament, Clean nozzle, Calibrate, Z-Offset and Jog mode.