호환 프린터: Nobel Superfine
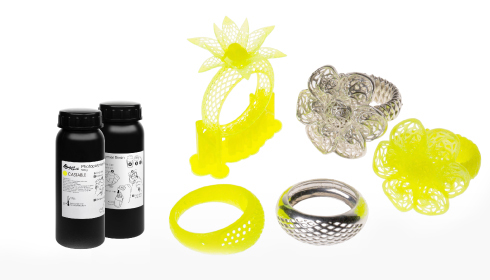
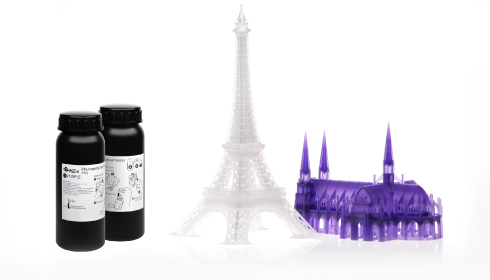
주조용 레진의 속성은 왁스의 속성과 유사합니다. 주조용 레진은 가열하면 재 잔여물이 없고 손실된 왁스 주조에 적합하여 절차, 즉 종전의 제작 과정에 사용된 왁스 카빙을 하지 않아도 됩니다.
모델 디자인 팁
주조용 레진과 왁스는 둘 다 구조적으로 부드럽고 잘 부러진다는 점에서 두 재료의 속성은 유사하며, 프린팅 과정에서 당기는 힘 때문에 출력물이 쉽게 부서질 수 있습니다. 최적의 상태로 인쇄하려면 아래 디자인 팁을 따르십시오.
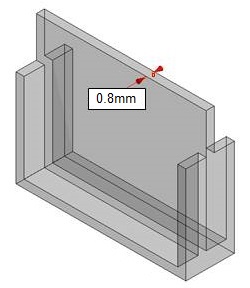
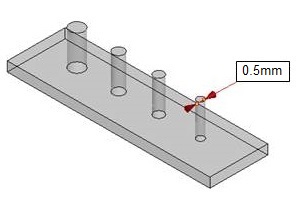
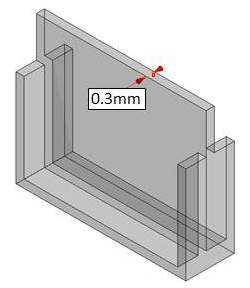
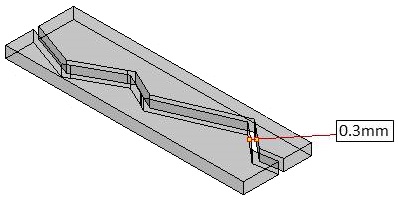
» 벽 두께 ≥ 0.4mm
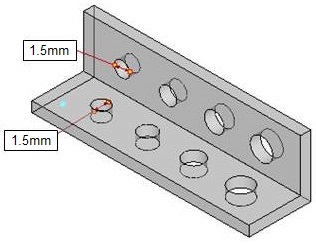
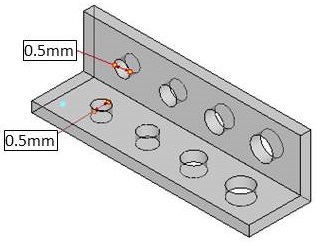
» 구멍 직경 ≥1.0mm
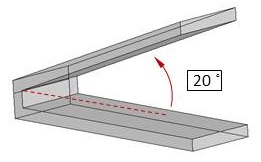
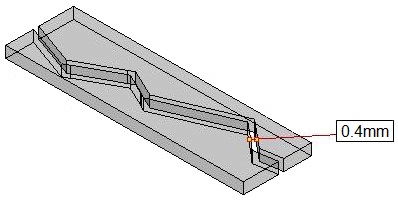
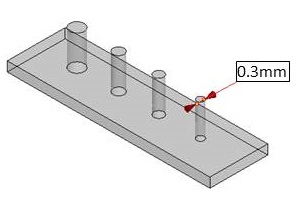
» 간격 ≥0.4mm
» 기타 기능에 대한 사양은 여기에서 일반 디자인 사양을 참조하세요.
참고
» 해당 권장 사항은 레이어 높이 0.025mm의 인쇄 결과를 기반으로 합니다.
» 치수가 40x30x40 mm 이상이거나 무게가 6g을 초과하는 대형 개체의 경우, 플랫폼에 고정하기 위해 지지대가 더 많이 필요할 수 있습니다.
» 날카로운 도구로 탱크 바닥을 긁지 마세요, 코팅이 손상될수 있습니다. 손상된 탱크 표면은 인쇄 품질에 영향을 줄 수 있습니다.
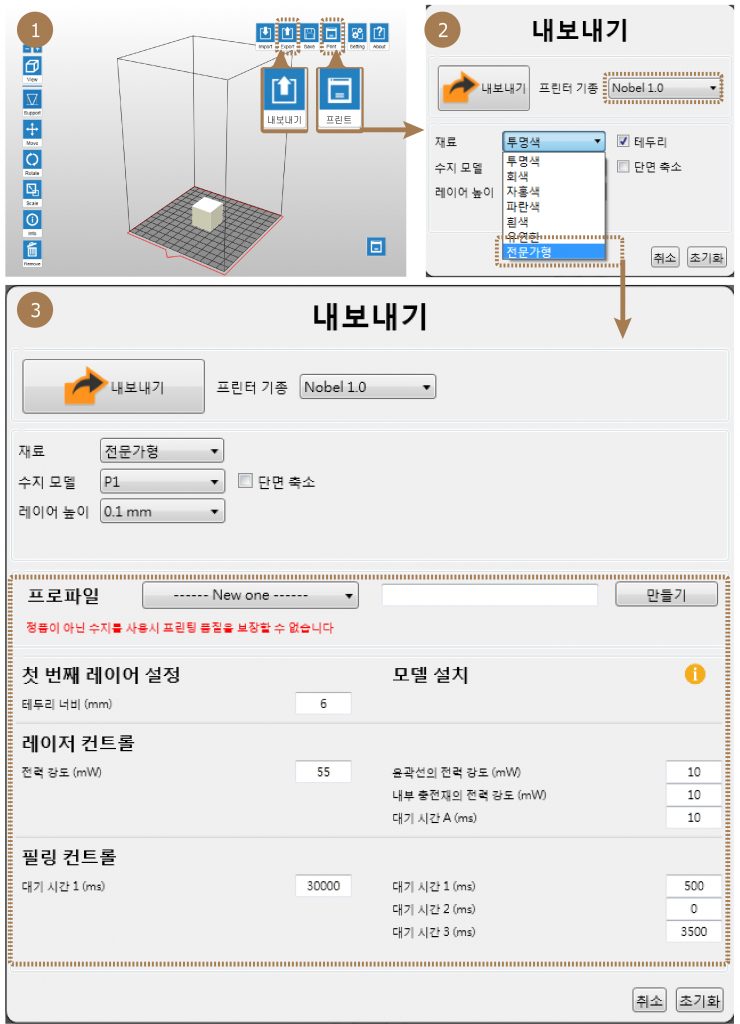
프린팅 설정에 대한 권장 사항
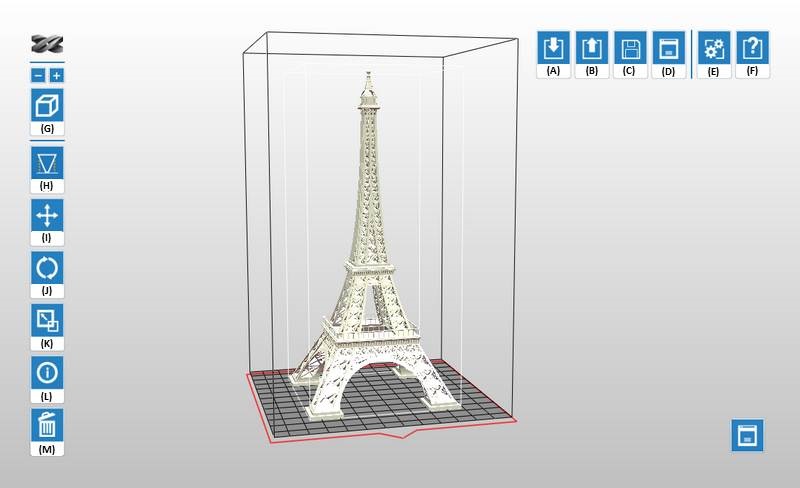
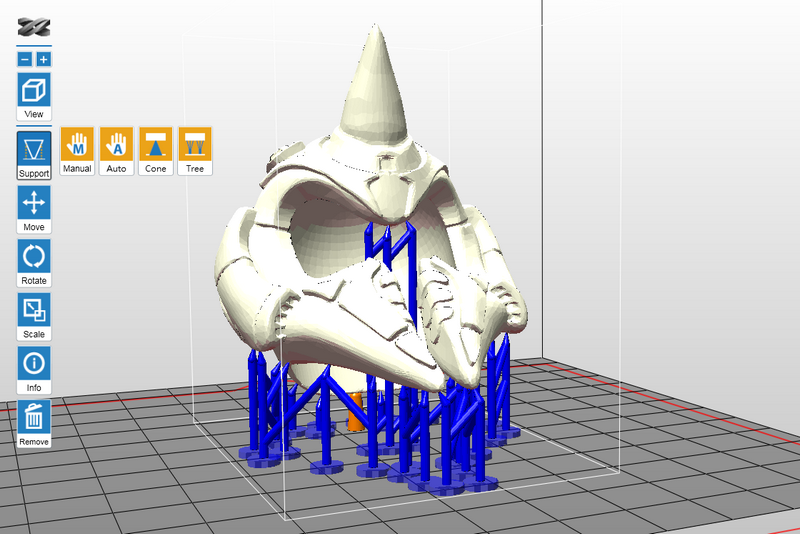
일반용 레진 사용 시와 마찬가지로, 모델에 매달린 부분이 있거나 플랫폼과 접하는 부분이 작은 경우 개체를 완전히 출력할 수 있으려면 지지 구조물이 추가적으로 필요합니다.프린팅 소프트웨어 XYZware_Nobel에는 “자동 지지” 기능이 있으며, 이는 모델의 구조를 분석하고 가새 구조를 자동으로 생성하는 데 사용할 수 있습니다. 종종 “수동” 모드를 사용하여 지지대를 추가하여 개체를 확실하게 고정해야 할 때가 있습니다.프린팅이 실패하면 개체의 위치를 변경하고 각의 설정과 가새 구조를 조정하십시오.
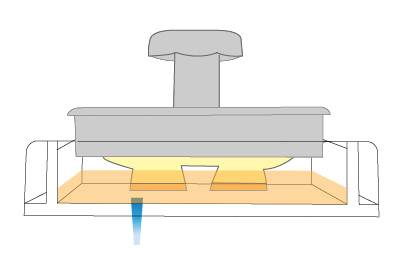
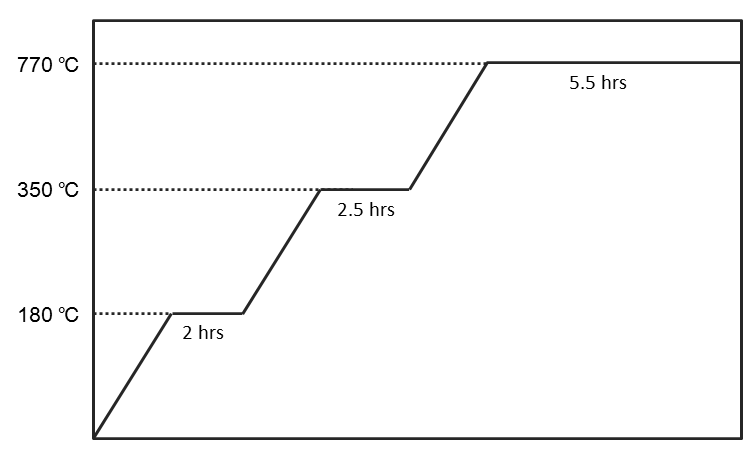
손실된 왁스 주조에 대해 권장되는 번아웃 과정
출력물을 주조할 때, 레진을 완전히 태워 없애고 주조 개체의 표면을 매끄럽고 흠이 없게 만들기 위해 다음 다이어그램에서 설명한 대로 온도 조절 제안에 기초하여 작업할 수 있습니다.
마감에 대한 권장 사항
청소하기
프린팅된 개체를 플랫폼에서 제거한 후, 농도가 95%보다 큰 에틸 알코올로 이를 청소하십시오. 청소 과정에서 뜰채에 프린팅된 아이템을 담고 뜰채를 알코올 속에서 흔들어 프린팅된 아이템에서 레진 잔여물을 닦아낼 것을 권장합니다.
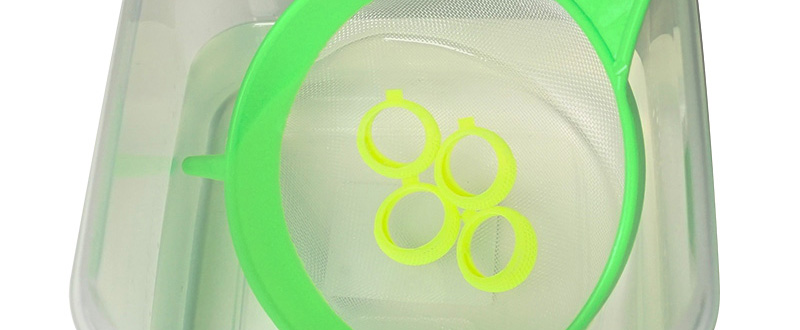
경화되지 않은 수지를 씻어 내기 위해, 스프레이로 세부 구조에 알코올을 뿌립니다.
프린팅된 아이템을 청소한 후 이를 뜰채로 알코올에서 건져낸 후 표면에 묻은 알코올이 증발할 때까지 기다리십시오.
참고
» 이 레진은 잘 부러지기 때문에 브러시를 사용하여 프린팅된 아이템을 문지르지 마십시오. 그럴 경우 프린팅된 아이템의 표면에 긁힌 자국을 낼 수 있습니다.
» 프린팅된 아이템을 10분 이상 알코올에 담그지 마십시오. 그럴 경우 알코올이 아이템의 구조를 부식하여 아이템을 손상시킬 수 있습니다.
» 프린팅된 아이템을 알코올에 담갔다가 꺼내면 색이 바래는데, 이는 정상입니다. 색이 바래더라도 주조 결과에는 영향을 미치지 않습니다.
알코올이 증발할 때까지 프린팅된 아이템의 표면에 묻은 알코올을 공기로 건조하십시오
프린팅된 아이템을 알코올로 씻은 후 아이템의 표면에 알코올 잔여물이 남습니다.프린팅된 아이템을 씻은 후에도 계속 그대로 두고 알코올이 완전히 휘발되었다고 확인할 때까지 후경화를 수행하지 마십시오. 알코올이 공기로 건조된 후, 각 부분에 레진 잔여물이 남아 있는지 주의해서 확인하십시오. 경화되지 않은 레진을 제거하여 이가 원래 모델의 디자인 디테일을 차단하지 않도록 하십시오.
참고
» 프린팅된 아이템의 표면에 알코올 잔여물이 아직 남아 있는 상태에서 경화를 수행하면, 프린팅된 아이템의 표면이 흰색으로 뿌옇게 나타나면서 주조의 결과에 영향을 미칠 것  같습니다.
팁
» 프린팅된 아이템을 알코올에 담갔다 꺼내면 아이템의 색이 약간 바랩니다. 알코올이  공기로 건조되면, 아이템은 원래의 밝은 오렌지색으로 돌아옵
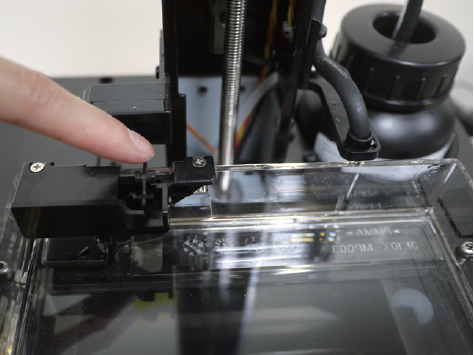
지지대 제거하기
지지대를 직접 당기는 대신 공구를 사용하여 이를 절단하십시오.(당길 경우 아이템의 표면이 쉽게 손상될 수 있습니다.)
후경화
주조용 레진을 재료로 하여 프린팅한 아이템은 손실된 왁스 주조의 경도를 보장하기 위해 자외선으로 후경화해야 합니다.
XYZprinting UV 경화기(모델: 3UD10)용 경화 프로필은 이곳에서 확인할 수 있습니다.
권장 사항
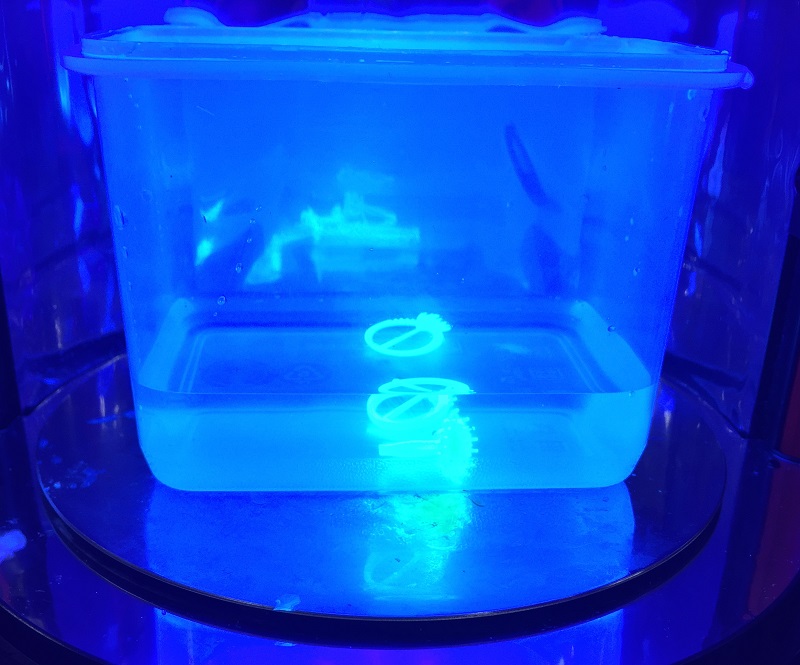
» XYZprinting UV Curing 챔버를 사용할 때, 인쇄물을 물에 5분간 경화합니다.
» UV 파장이 375~405 nm이고 방사선 강도가 14 mW/cm²인 조건에서 개체 구조의 두께가 7 mm를 초과할 경우 개체를 5분 동안 후경화할 것을 권장합니다.
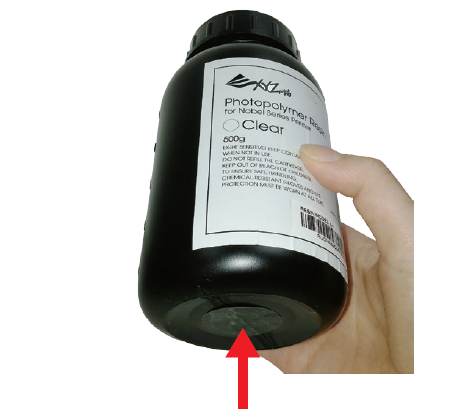
경화되지 않은 레진의 보존
레진 탱크 내의 경화되지 않은 레진을 빛에 노출해서는 안 됩니다. 경화되지 않은 레진은 여과시킨 후 불투명한 용기에 담아 보관할 수 있습니다. 다음에 프린팅하기 전에 레진을 도로 레진 탱크에 부어 넣으십시오.
참고
불투명 폴리프로필렌 컨테이너를 레진 저장용으로 사용하시길 권장드립니다.
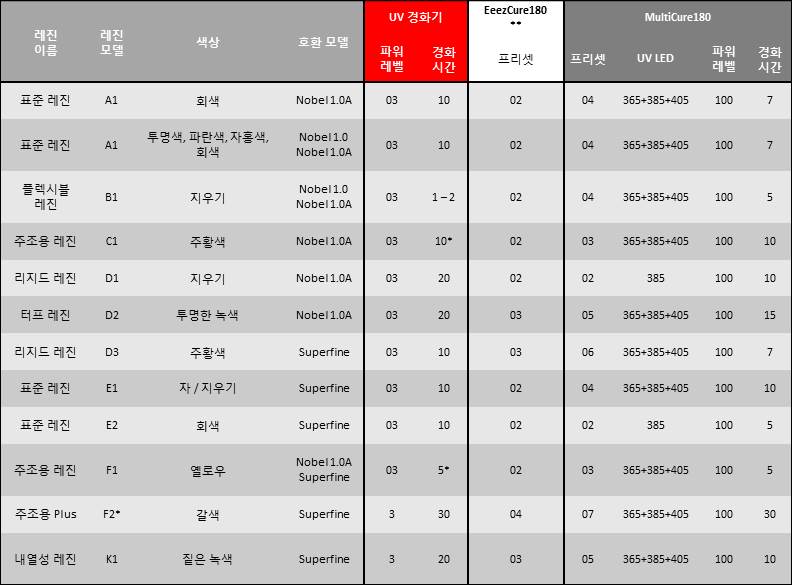
** 경화 매개 변수는 EeezCure180 와 UV 경화기가 동일합니다. EeezCure180을 사용할 때 간단하게 프리셋을 변경하여 제안된 경화 설정을 적용하십시오.
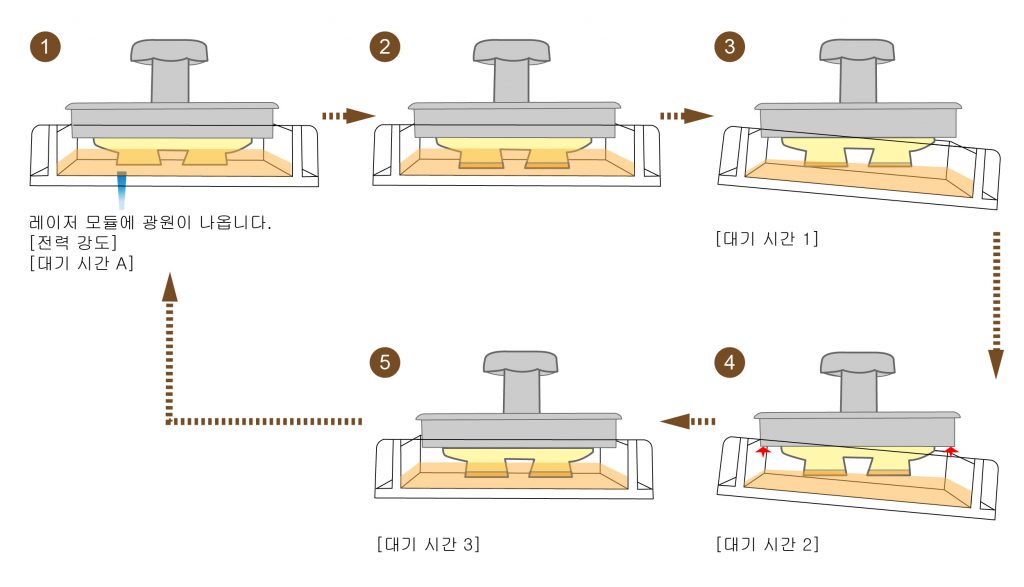
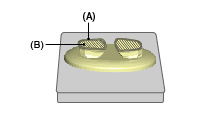 (A) 윤곽선
(B) 내부 충전재
(A) 윤곽선
(B) 내부 충전재