Export / Print

To export your stl file into sliced file or to print, you will need to go through the following setup. Once setting up all items, press “Export” or “Print” to proceed.

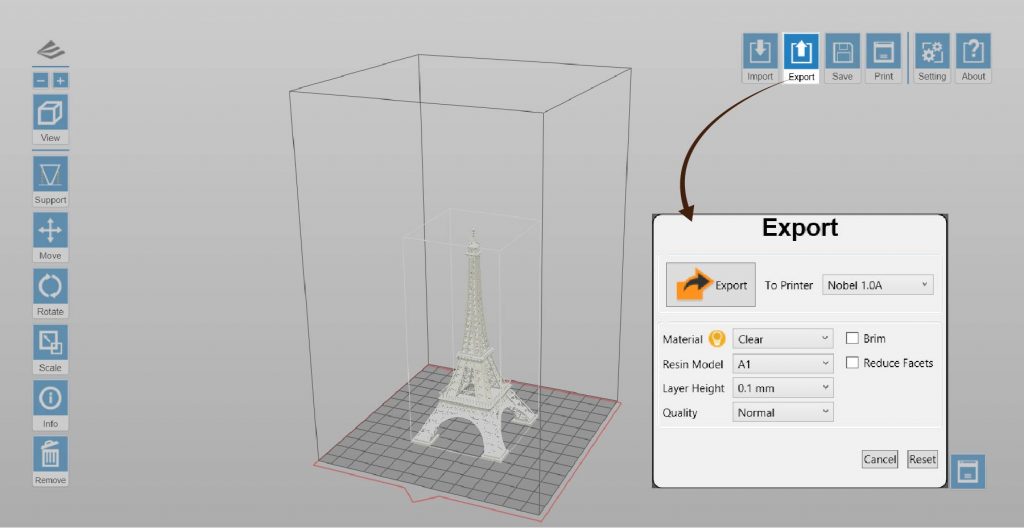
Click on below items to read more information on each setting:

Material

Printing setup varies based on the color and material of the resin. Please set the option based on the resin cartridge installed on the printer before printing.

It is advise to include color setting in filename for instant distinction in the future.

Please note that printing will be stopped if the selected resin type doesn’t match the resin installed.

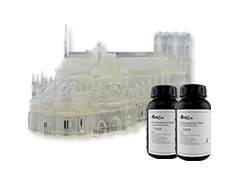
Note 
Detailed instructions on using the resins are available. To read more on the material, click below links or the bulb icon by material. 
» Nobel 1.0/1.0A - Standard resin 
» Nobel 1.0/1.0A - Flexible resin 
» Nobel 1.0A - Castable resin
» Nobel Superfine - Standard resin
» Nobel Superfine - Castable resin 

Resin Model

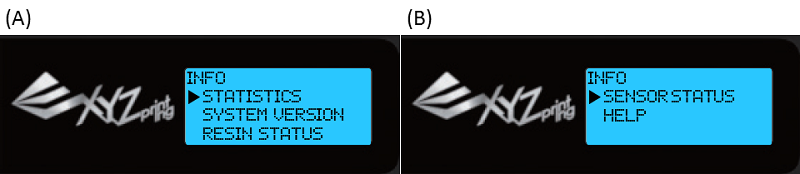
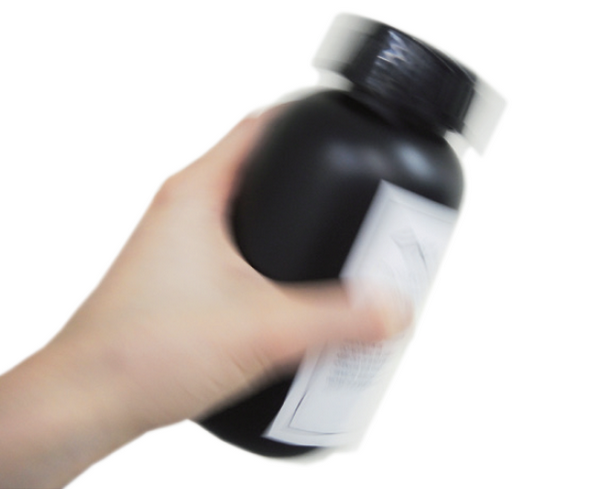
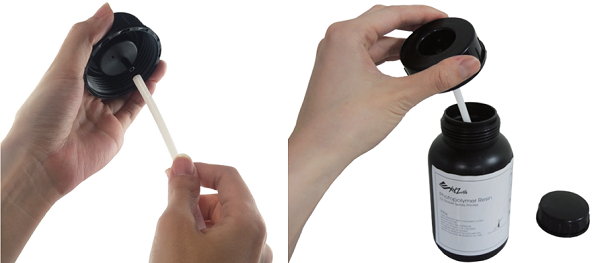
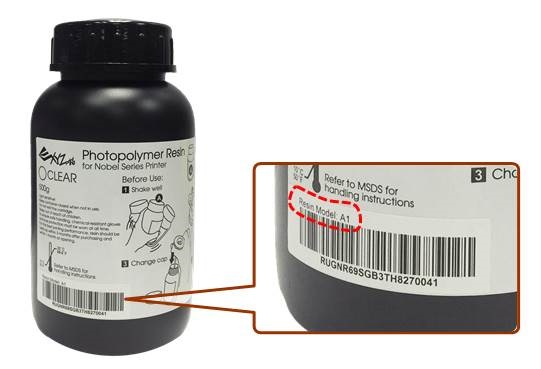
“Resin Model” can be found under “Info”>”Resin status” on the printer and on the serial number label on the resin bottle. For resin bottles without the info of resin model, please select “A1”.

[collapse]
Layer Height

“Layer Height” indicates the resolution of a print at Z axis.

Note
Layer resolution allowed on Nobel 1.0A varies based on the total height of the object.
» 25 microns; maximum allowed height: 50 mm
» 50 microns; maximum allowed height: 100 mm
» 100 microns; maximum allowed height: 200 mm

Quality

The setting of Quality has impact on the smoothness of the surface of the printout. Printing with Good quality will take slightly longer than normal printing.

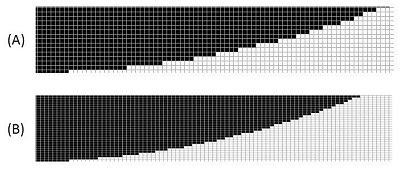
(A)Normal quality; (B) Good quality

To Printer

Printing parameters vary from printer models. Select the printer model you are going to print with.

Note
If the selected printer model is different from the printer connected, print job submission will be canceled.

Brim

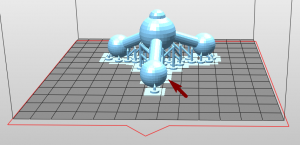
Check “Brim” for the 3D objects that has less contact with the platform to increase adhesion.

Brim will be shown after slicing is finished.

Reduce Facets

Complex 3D models are composed of a large amount of meshes. Enable this function for slicing such models may save the render time as it will reduce the facets to 200 thousand elements. This function can also repair the 3D model when necessary.

Read Before Using

Read the following safety instructions and contents of this manual before use, operation, maintenance, replacement or removal of any parts, components, or materials of the printer.

Safety and Compliance

For the latest information about the Nobel 1.0A 3D Printer and XYZprinting products, please visit XYZprinting website or contact the customer service.
The instructions have been written in order to cover all possible printing scenarios. For scenarios which occur outside the scenarios detailed in the instructions, the user will be held accountable for their own safety.

Important Safety Information

– Do not let children operate this device without adult supervision. Moving parts may cause serious injury.
– Electric shock hazard.
– Do not place the printer on an unlevel or unstable surface. Printer may fall or tumble causing harm and/or injury. Also tank level detection may be inaccurate.
– Do not place any object on top of the printer. Liquid and solid objects that fall into the printer may lead to printer damage or safety risks.
– Please keep the printer, resin, or alcohol away from fire.
– Do not disassemble or replace the printer cover with non-XYZprinting covers.
– Insert and secure the power cord firmly for proper usage and to avoid potential electricity and fire dangers.
– Do not attempt to service the printer beyond the instructions specified in this tutorials. In the case of irrecoverable problem, contact XYZprinting service center or your sales representative.
– Do not place the printer in humid or dusty environments such as bathrooms and high traffic areas.
– Some components of the printer move during operation. Do not attempt to touch or change anything inside before powering off the printer.
– Please keep the lid closed during printing to avoid injury.
– This printer is a Class 1 Laser Product. A Class 3B laser module is used as a light source. Never disassemble the product.
– For optimized printing quality, only use resin supplied by XYZprinting.
– Make sure to set the power switch to the off position and remove the power cord before transporting the device.
– Only use the grounded power adapter and power cord supplied with the printer to prevent possible electrical shocking.
– Please place and use the printer in a well ventilated area. The process of printing will produce a small amount of non-toxic odor. Having a well ventilated area will ensure a more comfortable environment.

Resin Care

– Wear proper protective equipment, avoid raw material contact and vapor inhalation.
– Chemical-resistant gloves should be worn when you make contact with resin.
– Avoid exposing resin to high temperatures, localized heat sources (i.e., drum or band heaters), oxidizing conditions, freezing conditions, direct sunlight, ultraviolet radiation, inert gas blanketing.
– Never pour the waste resin back to the bottle or down the sink, as it may pollute the remaining resin or clog the drain.
– You may pour resin waste into plastic bag and expose it to sunlight or UV light source to cure the resin. The cured resin can then be discarded.
– Avoid dripping resin on anything other than the platform or the resin tank, or the printer may malfunction.
– The stability of printing quality is affected by temperature and humidity. Please ensure that the recommended operating conditions are adhered to (Operating temperature 18-28℃ (64.4-82.4℉)/humidity 40-80% RH; If a different operating temperature is printed on the label on the resin bottle, please adhere to recommended conditions on the label.)

Resin Tank Care

– Due to the nature of the print technology and material, the resin tank may develop cloudy regions overtime where the laser cures the resin frequently and may lead to print fails. Moving the print location around the platform can help prolong the life of the tank.

– Avoid printing over cloudy area in the tank. Laser power may be reduced by the cloud. This may decrease the adhesion between the model and the
platform.
– Change to a new tank when over 2/3 of the surface gets cloudy.
– Use an isolate resin tank when using resin of different colors. Mixing resin of different color may affect printing quality.
– Sift any residue or cured debris from the tank with the scraper, high-density filter or other tools. Resin can be reused after filtering.

Copyright

All other trade names and trademarks are properties of their respective owners.

Basic Info

To print with Nobel printers, please first install XYZware_Nobel on your device. “XYZware_Nobel” Installer can be found in the bundled USB drive in the package of the printer or at XYZprinting website.

Note 
Login in XYZprinting member is required to download the software.

Compatible printer model

XYZprinting Nobel 1.0

XYZprinting Nobel 1.0A

XYZprinting Nobel Superfine

System requirements

Windows version   Mac Version
Supported operating systems:
Windows 7, 8, 10 Mac OS X v10.9, 10.10, 10.11, 10.12, 10.13
Minimum system requirement:
32-bit operating system
System RAM: 4GB
Graphics RAM: 1GB (OpenGL 2.1+ compatible)
Hard disk space: 300MB and more
Recommended system requirement:
64-bit operating system
System RAM: 8GB
Graphics RAM: 4GB (OpenGL 2.1+ compatible)
Hard disk space: 1GB and more
System RAM: 8GB
Graphics RAM: OpenGL 2.1+ compatible
Hard disk space: 1GB and more

Supported file type

File Type Description
.stl The file format is native to 3D CAD software. It is widely used for 3D printing.
.3ws After adding supports to the object in XYZware_Nobel, you can save the file in this format. The support layout can be re-adjusted.
.3wn The XYZware_Nobel proprietary file format contains detailed instructions for the printer to follow for each layer. The file is unadjustable. The file type also contains the data of the targeted printer type. When exporting objects to “3wn” format, be sure to select the corresponding printer model in the settings.

LCM Menus

Most operations of the printer are activated with the LCM menus. Below is the description on the function of each item in the menus.

(A) Page 1

(B) Page 2. Press to go to page 2 on the printer screen.

UTILITIES

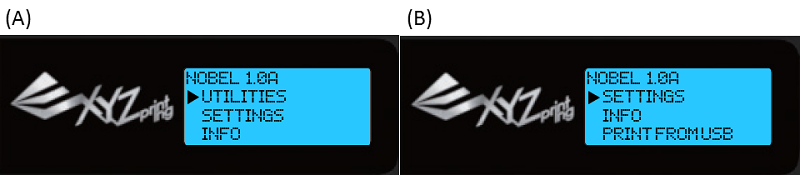
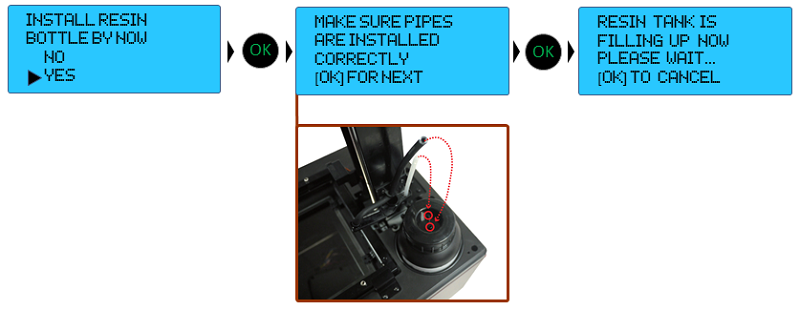
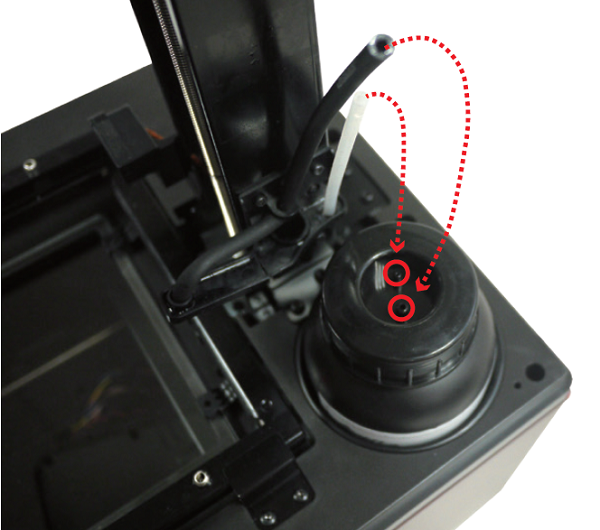
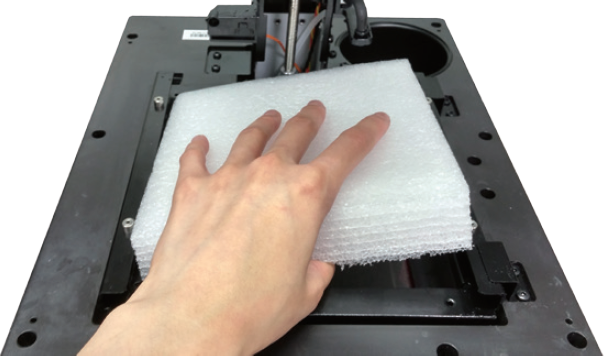
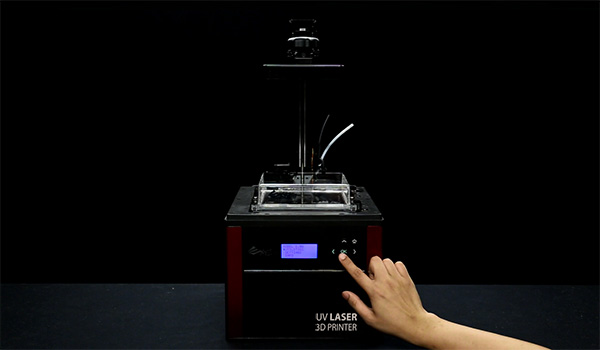
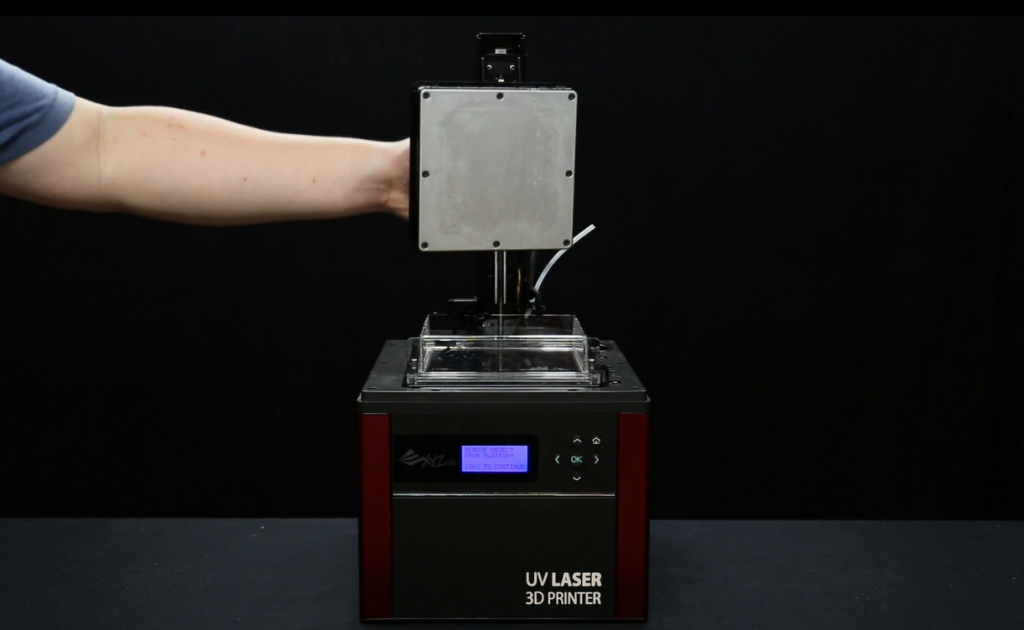
“Utilities” menu provides the control of the printer. You can instruct to fill the resin tank manually, and calibrate the printer when necessary.
Below is the list of functions under the Utilities menu:

INSTALL RESIN

Resin auto filling function is enabled by default. The tank will be refilled automatically when resin level low or empty is detected. You may still activate resin-filling function manually.

Before doing so, make sure the resin bottle, resin tank and the lid are installed correctly.

Select “Yes” and press  to begin:

Note
» “Auto Fill” function is enabled by default. You may skip loading resin manually when auto-fill is enabled.
» Shake the resin bottle well before use to ensure an even color.
» The printer detects the tank level after "Install Resin" is activated. Resin will be filled only when the tank level is low.

HORIZON CALIB

HORIZON CALIBRATION is for calibrate the print platform. Platform calibration ensures the platform is parallel with the resin tank for more stable printing performance. If the platform is not calibrated, objects may fall during printing.

Note
» Click here to read step-by-step instructions on platform calibration. 
» Always calibrate the platform after changing to a new tank or a tank or a platform different the one used for last print.

MOVE PLATFORM

Activate the function when you need to move the platform manually.
Simple select move the platform “to top” or “to bottom” to proceed:

When the platform has moved to the bottom or top as indicated, press  to exit the function.

[collapse]

SETTINGS

The Settings menu allows you to adjust printer settings, including below items:

(A) Page 1

(B) Page 2. Press the down key to go to page 2 on the printer screen.

BUZZER

When the buzzer is turned on, the printer will output an audible signal when a button is pressed. Buzzer is turned on by default.

To switch off the buzzer: Select “OFF” and press to change the setting.

[collapse]
AUTO-FILL

When “Auto Fill” is enabled, the printer will fill the resin tank before printing and when low tank level is detected. With the auto-fill function, you no longer need to manually refill the resin during printing. This is especially useful when printing large objects. “Auto Fill” is enabled by default.

To disable the function: Select “OFF” and press to change the setting.

Note
» Be sure to place the printer on a leveled surface, or tank level detection may be inaccurate. 
» Auto-fill will be switched off when the timeout expires. Timeout may be caused by an empty resin bottle or the tank level sensor soaked by resin. Please replace the resin bottle or clean up the level sensor before enabling the function.

[collapse]
LANGUAGE

You may switch the display language on the printer. The default language is English.

To switch to other language: Select a language and press to change the setting.

[collapse]
ENERGY SAVE

LED back-light of the LCM enhances the readability of the content of the display.

To save energy consumed, the back-light will go off after the printer idles for 3 minutes (shown as 03M on the display) by default. To set a longer time interval: Select “OFF” and press to change the setting.

A. Backlight will never go off.

B. Backlight will go off after the printer idles 3 minutes.

C. Backlight will go off after the printer idles 6 minutes. Select an option, and press to change the setting.

[collapse]
RESTORE DEFAULT

All settings can be reset to factory default with a few clicks.

To reset all settings at once: Simply select “YES” and press to reset.

[collapse]

INFO

Under “Info” menu, you can check the statistics and firmware version of the printer, status of resin bottle installed, and information on XYZprinting.

(A) Page 1

(B) Page 2. Press  to go to page 2 on the printer screen.

STATISTICS

In “Statistics”, you can check the accumulated print time. The accumulated working time for the printer is shown in hours.

[collapse]
SYSTEM VERSION

Firmware version is shown here. To ensure optimal printing performance, it is advised to keep the firmware up to date. To check for firmware updates, please go to XYZware_Nobel.

[collapse]

RESIN STATUS

“Resin Status” provides the information on resin level, and the capacity, color and material of the resin. Press  on the printer to read the second page.

A. Original amount of resin in the cartridge.

B. Resin level in the resin cartridge

C. The color or material type of the resin cartridge installed.

D. Resin Model indicates the resin version. While setting up printing preference in XYZware_Nobel, please select the correct resin model. The info is also printed on the serial number label on the resin bottle. For resin bottles without the info of resin model, the resin model is A1.

[collapse]

SENSOR STATUS

When you encounter exceptional status during the operation of the printer, you may check the status of each sensor here. The information is especially helpful for troubleshooting.

The content may look like this:

How to read the status:

C: 1 – Lid (Top cover) covered; 0 – Lid not covered Z-T: 1 – Platform at top; 0 – Platform away from top Z-B: 1 –Platform at bottom; 0 – Platform away from bottom T: 1- Tank motor in action (Right side of the tank sinks slightly); 0 – Tank motor idling (Tank is leveled) L: 1 – Tank level low; 0 – Tank full or tank not installed Y: 1 – laser engine in action; 0 – laser engine idling

[collapse]

HELP

The URL to XYZprinting website can be found here. You may go to the website for the latest information, product documents, tutorial video and more.

[collapse]


PRINT FROM USB

Insert USB flash drive to the USB drive port at the back of the printer, and select “PRINT FROM USB” on the printer.

Press on the printer to browse the menu, and press to select a file to print.

Note: 
» Please slice the 3D model with XYZware_Nobel and save it in .3wn format. Files in other format or not sliced with XYZware_Nobel will not be shown. (Read more)
» For correct file name display, please name the file with English and Japanese (Katakana preferred) alphabets and numbers.
» Sample files are provided in the bundled USB drive. To print the sample, please slice the stl files with XYZware_Nobel before printing, or selected the sliced .3wn files.

Printer Setup

Tank Installation

Install the resin tank by pushing the tank all the way into its slot.

Calibration

Platform calibration ensures the platform is parallel with the resin tank for more stable printing performance. If the platform is not calibrated, objects may fall during printing.

Note
Click here to read step-by-step instructions on platform calibration.
•Always perform platform calibration after changing to a new tank or a tank or a platform different the one used for last print.

Resin Bottle Installation

Shake the resin cartridge for about 10 seconds.

Assemble the nozzle cap and the inner tube and replace the bottle cap with the assembled nozzle cap.

Insert the resin bottle into the cartridge slot and install the filling tubes by first connecting the black tube to the thick nozzle. Then attach the transparent tube to the thin nozzle and push the tube all the way down.

Note
“AUTO FILL” is enabled by default. The resin tank is auto-filled before printing and when resin low is detected. You don’t need to fill the tank manually.
Before changing the resin bottle, please detach the transparent tube from the cap and then the black tube.

Connect to PC

Connect the printer to your PC via USB wire.

Note
USB wire port is at the back of the printer.

Software Setup

The printing software, XYZware_Nobel, is essential when printing with the Nobel printers.
“XYZware_Nobel” Installer can be found in the bundled USB drive in the package or at XYZprinting website:

Note
Login in XYZprinting member is required to download the software.
Apply printer firmware and XYZware_Nobel updates when prompted by the software for stable printing performance.

Unboxing

Follow the video to unpack your printer.


Note
Keep original packaging material in the event of sending your unit back for repair.

Unlock the printer

Lay down the printer, and release the printing module locker by pushing it to the right.

Accessories

Nobel 1.0A is shipped with the following parts and accessories.

A. User quick guide
B. Warranty card
C. Starter Resin
D. Nozzle cap
E. Inner Tube
F. Scraper
G. Gloves
H. Rinse Basket
I. USB Flash Drive
J. USB Wire
K. Power Cable
L. Power Adapter
M. Resin Tank
Note
After unpacking, please inspect the interior and exterior of the printer and accessories for damage. Please contact support for any missing or defective parts and accessories.

Remove the protective foam under the platform

Connect the power source to the printer and power on the printer.


On the printer, select “UTILITIES” > “MOVE PLATFORM”>“TO TOP”>“YES” to raise the platform.

Remove the protective foam from the tank slot.

Assemble the lid

Assemble the top case by following the instructions in the box and the video below.


Printer overviews

Below is the list of the main components on the printer.

A. Platform The print bed of the printer.
B. Filling Tubes To be attached to the cap of the resin bottle for filling resin to the tank.
C. Cartridge Slot For holding the resin bottle on the printer.
D. Tank Slot For holding the resin tank.
E. Operation Panel For displaying messages and setting up the printer.

Use the operation panel

To control and maintain the printer, you will need to operate certain functions with buttons on the control panel. Here is the map of the buttons:

A. Move up along the menu
B. Back, cancel selection
C. Move down along the menu
D. Confirm selection and settings, save the settings and exit
E. Select and go to the next page
F. Back to home

การปรับระดับฐานพิมพ์

การปรับระดับฐานพิมพ์ช่วยให้แน่ใจว่าฐานพิมพ์อยู่ในตำแหน่งคู่ขนานกับถาดเรซิ่นเพื่อให้ประสิทธิภาพการพิมพ์ที่เสถียรภาพ หากไม่ทำการปรับระดับฐานพิมพ์ก่อน ชิ้นงานพิมพ์จะไม่สามารถติดกับฐานได้ ควรทำการปรับระดับฐานพิมพ์ใหม่ทุกครั้งหากมีการเปลี่ยนถาดเรซิ่น หรือการเปลี่ยนฐานพิมพ์

เพื่อการปรับระดับฐานพิมพ์ที่ถูกต้อง โปรดใช้เครื่องมือพิเศษสำหรับการปรับเทียบ


ข้อมูลการปรับระดับฐานพิมพ์
กดที่นี่ เพื่อดาวน์โหลดไฟล์ STL 
ไฟล์นี้สามารถใช้ได้กับการพิมพ์เรซิ่นทั่วไป

วิธีการปรับระดับฐานพิมพ์

เลือก [UTILITIES] (ยูทิลิตี้) > [HORIZON CALIB] (ปรับระดับแนวนอน) จากนั้นกด [Yes] (ตกลง) เพื่อทำการปรับแก้ไข


เมื่อหน้าจอแสดงผล [REMOVE OBJECT FROM PLATFORM] (นำชิ้นงานออกจากแพลตฟอร์ม) ให้ตรวจสอบและขจัดสิ่งตกค้างออกจากฐานพิมพ์หรือถาดเรซิ่น หลังจากนั้นกด [OK] (ตกลง)


ปรับหัวสกรูทั้ง 4ตัวบนฐานพิมพ์ให้หลวมแล้วกด [OK] (ตกลง) หลังจากนั้นรอจนกว่าฐานพิมพ์เลื่อนระดับลงจนถึงตำแหน่งที่ทำการปรับแก้ไข

ตามรูปภาพที่แสดง นำอุปกรณ์วางไว้ที่ข้างขวาด้านล่างกรอบโลหะ


หากการตั้งค่าอุปกรณ์ถูกต้อง เมื่อกดฐานพิมพ์ ฐานจะอยู่ในตำแหน่งที่ถูกต้อง

ใช้สองมือกดฐานรองรับเบาๆ เพื่อทำการปรับแก้ไขฐานรองรับ

กดฐานพิมพ์ไว้ด้านหนึ่งก่อน จากนั้นอีกด้านหนึ่งให้นำสกรูมาขันให้แน่น แล้วจึงขันสกรูอีกข้างให้แน่น

เทคนิค
เพื่อให้ฐานพิมพ์ได้ระดับที่ถูกต้อง แนะนำให้กดฐานพิมพ์ไว้ด้านหนึ่ง ในขณะที่ขันสกรูด้านตรงข้าม

สุดท้าย กดฐานพิมพ์ไว้และใช้เหรียญหรืออุปกรณ์ล็อกสกรูให้แน่น

นำอุปกรณ์การปรับแก้ไขออก แล้วกด [OK] (ตกลง) สิ้นสุดการปรับแก้ไข


วีดีโอการสอน-การปรับระดับฐานพิมพ์

เทคนิค
หากเปิดวีดีโอแล้วไม่มีคำบรรยาย ให้กดปุ่ม [CC] ที่ด้านล่างเพื่อแสดงคำบรรยาย

디자인 사양

Nobel 1.0A용 모델 디자인 사양

모델을 디자인할 때 이상적인 프린팅 결과와 디자인 디테일의 완벽한 출력을 위해,아래의 디자인 사양을 따르십시오.design spec

프린팅 재료: XYZprinting Nobel 시리즈 프린터용 범용 수지

색인 특징 권장됨
A 벽 두께 벗겨내는 동안 권장 규격보다 얇은 벽은 틀어지거나 부서질 수 있습니다. ≥0.5mm
B 오버행 각도 각이 권장 한계보다 큰 가파른 오버행의 경우 지지 구조물이 필요합니다. 지지 구조물을 사용하지 않을 경우 오버행이 변형되거나 파손될 수 있습니다. ≥20°
C 최소 수직 와이어 직경 벗겨내는 동안 권장 규격보다 얇은 그물이나 벽은 파손되거나 변형될 수 있습니다. ≥0.3mm
D 구멍 직경 프린팅하는 동안 권장 규격보다 작은 구멍은 수지가 개체안에 들어가있게 되거나 막힐 수 있습니다. ≥1.2mm
E 간격 프린팅하는 동안 권장 규격보다 좁은 간격은 붙어버릴 수 있습니다. 따라서 움직이는 부품이 움직이지 못할 수 있습니다. ≥0.3mm
F 양각 디테일 이와 같이 권장된 높이와 두께보다 작은 디테일은 프린트에서 보이지 않을 수 있습니다. ≥0.1mm
G 음각 디테일 이와 같이 권장된 높이와 두께보다 작은 디테일은 프린트에서 보이지 않을 수 있습니다. ≥0.3mm


참고•권장 규격은 XYZprinting 범용 수지를 0.1mm의 레이어 높이에서 사용했을 때의 프린팅 결과를 기초로 산출했습니다.•탁한 수지 탱크를 이용해서 프린팅할 경우 프린팅 품질이 영향을 받을 수 있습니다.•프린팅된 제품의 경도와 내구성을 높이려면 UV 경화기를 이용해서 출력물을 후경화하십시오.

เรซินมาตรฐาน (A1)

เรซินมาตรฐานให้การใช้งานที่หลากหลายและมีความแข็งแรงปานกลางเหมาะสำหรับการออกแบบทั่วไปและการสร้างต้นแบบด้านวิศวกรรม

เคล็ดลับการออกแบบแบบจำลอง

โปรดปฏิบัติตามข้อมูลจำเพาะสำหรับการออกแบบที่นี่ เมื่อออกแบบโมเดล เพื่อให้ได้ผลการพิมพ์ที่ดีที่สุดและให้รายละเอียดการออกแบบที่สมบูรณ์

คำแนะนำเกี่ยวกับการปรับแต่ง

โปรดอ่านคู่มือสำหรับประมวลผลโพสต์ที่นี่

เรซินชนิดหล่อได้ (C1)

Castable resin

เครื่องพิมพ์ที่เข้ากันได้: Nobel 1.0A
Resin Model: C1

คุณสมบัติของเรซินทนไฟคล้ายกับคุณสมบัติของขี้ผึ้ง ไม่มีเศษขี้เถาหลงเหลือหลังจากการทำความร้อนและเหมาะสำหรับการหล่อขี้ผึ้ง ซึ่งจะลดขั้นตอนต่าง ๆ เช่น การแกะสลักขี้ผึ้งที่ใช้ในกระบวนการผลิตแบบเดิม

เคล็ดลับการออกแบบแบบจำลอง

คุณสมบัติของเรซินทนไฟคล้ายคลึงกับคุณสมบัติของขี้ผึ้งที่มีทั้งความอ่อนนุ่มและโครงสร้างที่เปราะบาง และงานพิมพ์สามารถแตกหักได้ง่ายเนื่องจากแรงดึงระหว่างขั้นตอนการพิมพ์ กรุณาทำตามเคล็ดลับการออกแบบด้านล่างเพื่อการพิมพ์ที่ดีที่สุด

» เส้นผ่านศูนย์กลางขั้นต่ำของเส้นแนวตั้ง ≥0.8mm

» โปรดอ่านข้อมูลจำเพาะสำหรับการออกแบบทั่วไปที่นี่ เพื่อศึกษาข้อมูลจำเพาะในคุณสมบัติอื่น ๆ

หมายเหตุ
» คำแนะนำขึ้นอยู่กับผลลัพธ์จากการพิมพ์ที่ชั้นความสูง 0.1 มม
» ขนาดของวัตถุที่ใหญ่กว่า 60x60x120 มม. หรือน้ำหนักมากกว่า 10 ก. อาจต้องใช้ที่ค้ำรองรับเพื่อยึดติดกับแพลตฟอร์ม

คำแนะนำเกี่ยวกับการตั้งค่าการพิมพ์

ด้วยการใช้งานเรซินสำหรับวัตถุประสงค์โดยทั่วไป เมื่อมีส่วนที่แขวนอยู่ในแบบจำลอง หรือเมื่อพื้นที่สัมผัสกับแพลตฟอร์มน้อย จำเป็นต้องใช้โครงสร้างที่ค้ำรองรับเพิ่มเติมเพื่อให้แน่ใจได้ว่างานพิมพ์จะพิมพ์ออกมาอย่างสมบูรณ์

ซอฟต์แวร์การพิมพ์ XYZware_Nobel มีฟังก์ชัน “ที่ค้ำรองรับอัตโนมัติ” ซึ่งสามารถนำมาใช้เพื่อวิเคราะห์โครงสร้างของแบบจำลอง และสร้างโครงสร้างการค้ำยันโดยอัตโนมัติ บางครั้งคุณอาจต้องใช้โหมด “กำหนดเอง” สำหรับเพิ่มที่ค้ำรองรับเพิ่มเติมเพื่อสร้างความมั่นใจในการยึดติดของวัตถุ

คลิกที่นี่เพื่ออ่านคำแนะนำเรื่องฟังก์ชั่นสนับสนุน

หากการพิมพ์ล้มเหลว กรุณาเปลี่ยนตำแหน่งของวัตถุและปรับการตั้งค่ามุมและโครงสร้างการค้ำยัน

กระบวนการเผาไหม้โดยสมบูรณ์ที่แนะนำสำหรับการหล่อขี้ผึ้ง

เมื่อทำการหล่องานพิมพ์ คุณสามารถยึดถือตามคำแนะนำการควบคุมอุณหภูมิที่อธิบายไว้ในแผนภาพต่อไปนี้ เพื่อให้แน่ใจในการเผาไหม้เรซินที่สมบูรณ์และพื้นผิวที่ไม่มีรอยด่างและราบเรียบ

burnout profile

คำแนะนำเกี่ยวกับการปรับแต่ง

การทำความสะอาด

หลังจากแกะวัตถุพิมพ์ออกจากแพลตฟอร์ม กรุณาทำความสะอาดด้วยเอทิลแอลกอฮอล์ที่มีความเข้มข้นมากกว่า 75% ในระหว่างกระบวนการทำความสะอาด ขอแนะนำให้ใช้ตาข่ายห่อหุ้มวัตถุพิมพ์ และแกว่งตาข่ายไปมาในแอลกอฮอล์เพื่อทำความสะอาดเศษชิ้นส่วนเรซินออกจากพื้นผิวของวัตถุพิมพ์

filter

ตักวัตถุพิมพ์ขึ้นจากแอลกอฮอล์หลังจากทำความสะอาดเสร็จแล้ว และรอจนกระทั่งแอลกอฮอล์บนพื้นผิวของวัตถุระเหยออกไป

หมายเหตุ
» ด้วยความเปราะบางของเรซินนี้ ห้ามใช้แปรงขัดถูวัตถุพิมพ์ การกระทำเช่นนั้นอาจทำให้เกิดรอยขีดข่วนบนวัตถุพิมพ์
» ห้ามแช่วัตถุพิมพ์ในแอลกอฮอล์นานกว่า 10 นาที หรือแอลกอฮอล์อาจกัดกร่อนโครงสร้างของวัตถุและทำให้วัตถุได้รับความเสียหาย
» เป็นเรื่องปกติที่จะมีสีซีดจางหลังจากแช่วัตถุพิมพ์ในแอลกอฮอล์ สีซีดจางจะไม่มีผลต่อผลลัพธ์การหล่อ

ผึ่งลมแอลกอฮอล์บนพื้นผิวของวัตถุพิมพ์ให้แห้งจนกระทั่งแอลกอฮอล์ระเหยออกไป

จะมีแอลกอฮอล์ตกค้างอยู่บนพื้นผิวของวัตถุพิมพ์หลังจากการทำความสะอาด
กรุณาตั้งวัตถุพิมพ์ทิ้งไว้หลังจากการล้างและห้ามดำเนินการบ่มจนกว่าคุณจะแน่ใจได้ว่าแอลกอฮอล์ระเหยหมดแล้ว  หลังจากผึ่งลมจนแอลกอฮอล์แห้งแล้ว กรุณาตรวจสอบอย่างละเอียดว่ามีเศษเรซินหลงเหลืออยู่ในคุณสมบัติต่าง ๆ หรือไม่ กรุณาตรวจสอบให้แน่ใจว่าได้ขจัดเรซินที่ยังไม่แข็งตัวออกจนหมดแล้ว เพื่อป้องกันมิให้ปิดกั้นรายละเอียดการออกแบบของแบบจำลองต้นฉบับ

หมายเหตุ
» หากยังคงเกิดปฏิกิริยาการแข็งตัวเมื่อมีแอลกอฮอล์หลงเหลืออยู่บนพื้นผิวของวัตถุพิมพ์ พื้นผิวของวัตถุพิมพ์จะปรากฏเป็นสีขาวและพร่ามัว ซึ่งอาจส่งผลต่อผลลัพธ์การหล่อ

เคล็ดลับ
» สีของวัตถุพิมพ์จะซีดจางเล็กน้อยหลังจากแช่ในแอลกอฮอล์ หลังจากผึ่งลมจนแอลกอฮอล์แห้งแล้ว วัตถุจะเปลี่ยนเป็นสีส้มอ่อนตามเดิม ดังนั้นคุณสามารถใช้สีของวัตถุพิมพ์เพื่อดูว่าแอลกอฮอล์แห้งหมดแล้ว

การถอดที่ค้ำรองรับออก

กรุณาใช้เครื่องมือสำหรับตัดที่ค้ำรองรับออกแทนที่การดึงโดยตรง (การดึงสามารถสร้างความเสียหายต่อพื้นผิวของวัตถุได้ง่าย)

การบ่มภายหลัง

วัตถุพิมพ์ที่ผลิตจากเรซินทนไฟต้องผ่านกระบวนการบ่มภายหลังโดยใช้แสงยูวีเพื่อเพิ่มความแข็งสำหรับการหล่อขี้ผึ้ง

คลิกที่นี่เพื่ออ่านโปรไฟล์การอบโดยใช้ห้องอบ UV ของ XYZprinting (รุ่น: 3UD10)

คำแนะนำ
» ขอแนะนำให้ทำการบ่มวัตถุประมาณ 10 นาที ภายใต้เงื่อนไขความยาวคลื่นแสงยูวี 375~405 nm และความหนาแน่นของการแผ่รังสี 0.9-1.8 J/cm² เมื่อความหนาของโครงสร้างวัตถุเกินกว่า 7 มม.


การเก็บรักษาเรซินที่ยังไม่แข็งตัว

ไม่ควรให้เรซินในถังที่ยังไม่แข็งตัวสัมผัสกับแสง เรซินที่ยังไม่แข็งตัวสามารถจัดเก็บไว้ในภาชนะทึบแสงหลังจากที่ผ่านการกรองแล้ว เทเรซินกลับเข้าไปในถังเรซินก่อนที่จะมีการพิมพ์ต่อไป