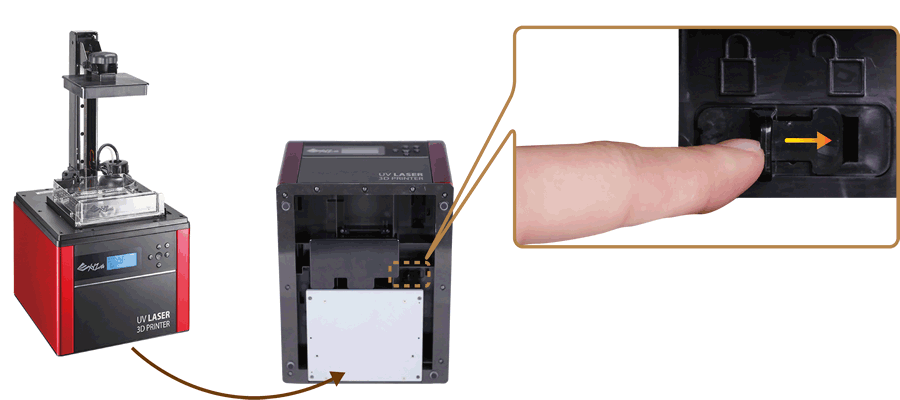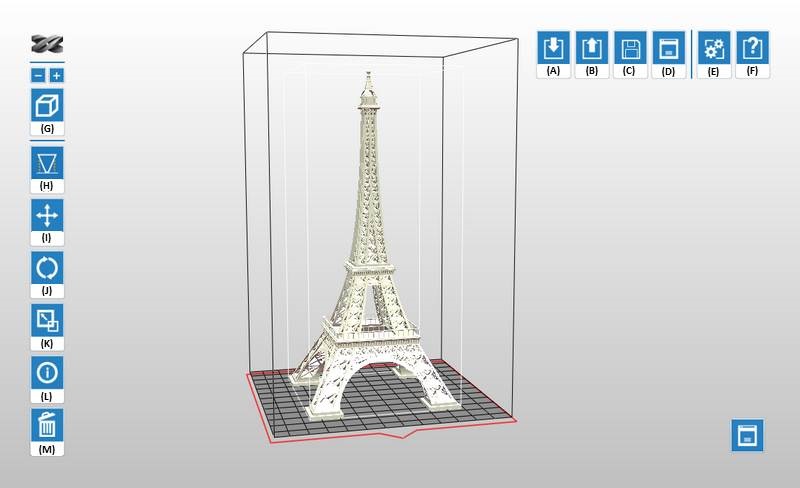
เครื่องพิมพ์ที่เข้ากันได้: Nobel Superfine
Resin Model: F1
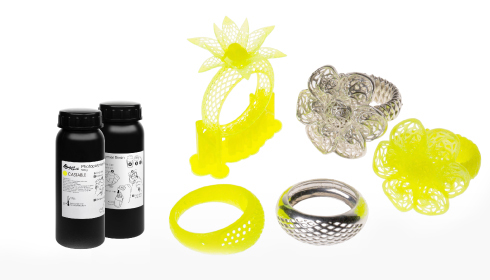
คุณสมบัติของเรซินทนไฟคล้ายกับคุณสมบัติของขี้ผึ้ง ไม่มีเศษขี้เถาหลงเหลือหลังจากการทำความร้อนและเหมาะสำหรับการหล่อขี้ผึ้ง ซึ่งจะลดขั้นตอนต่าง ๆ เช่น การแกะสลักขี้ผึ้งที่ใช้ในกระบวนการผลิตแบบเดิม
เคล็ดลับการออกแบบแบบจำลอง
คุณสมบัติของเรซินทนไฟคล้ายคลึงกับคุณสมบัติของขี้ผึ้งที่มีทั้งความอ่อนนุ่มและโครงสร้างที่เปราะบาง และงานพิมพ์สามารถแตกหักได้ง่ายเนื่องจากแรงดึงระหว่างขั้นตอนการพิมพ์ กรุณาทำตามเคล็ดลับการออกแบบด้านล่างเพื่อการพิมพ์ที่ดีที่สุด
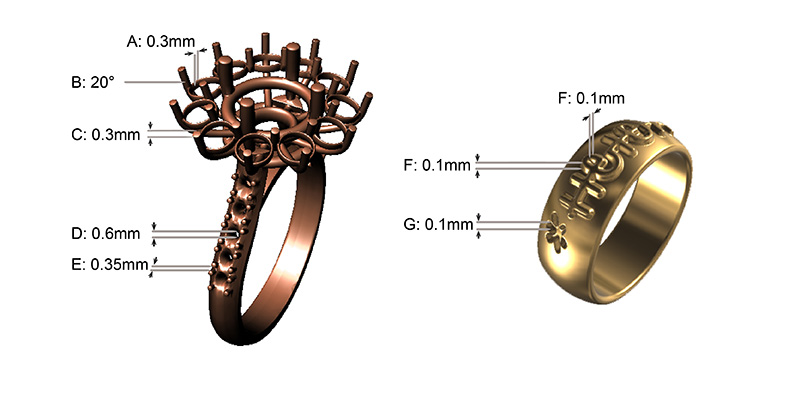
| # |
คุณสมบัติ |
แนะนำ |
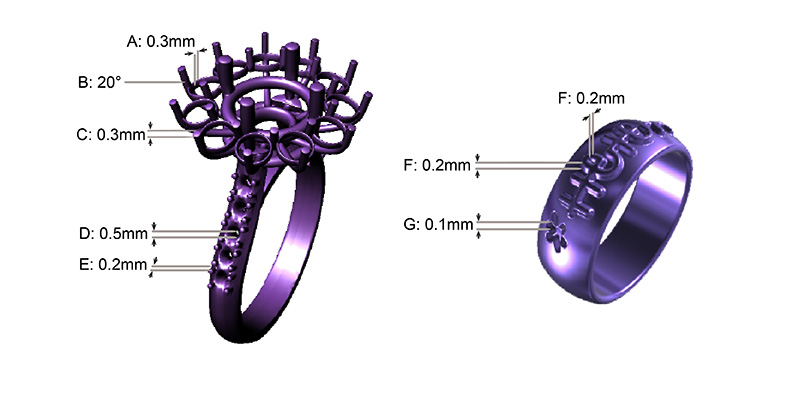
| A |
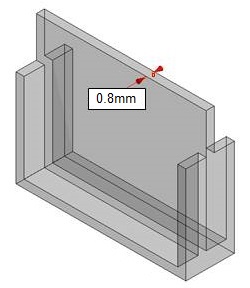
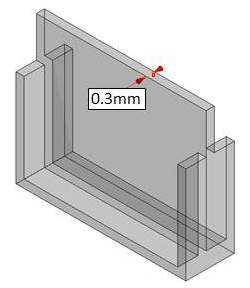
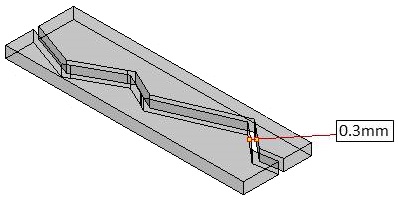
ความหนาของผนัง |
ผนังที่มีขนาดบางกว่าที่แนะนำอาจบิดงอและเสียหายได้ระหว่างขั้นตอนการดึงลอก |
≥0.3mm |
| B |
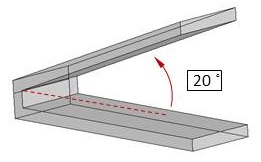
มุมสำหรับส่วนที่ยื่นออกมา |
จำเป็นต้องใช้โครงสร้างรองรับสำหรับส่วนยื่นที่สูงชันซึ่งมีความกว้างมากกว่าขีดจำกัดที่แนะนำ ไม่เช่นนั้น ส่วนที่ยื่นออกมาอาจผิดรูปและเสียหายได้ |
≥20° |
| C |
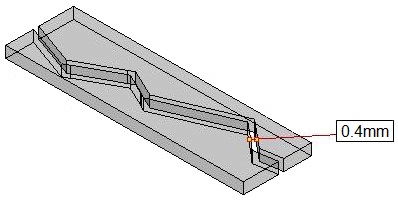
เส้นผ่านศูนย์กลางขั้นต่ำของเส้นแนวตั้ง |
ตาข่ายและเส้นที่มีขนาดบางกว่าที่แนะนำอาจเสียหายและผิดรูปได้ระหว่างขั้นตอนการดึงลอก |
≥0.3mm |
| D |
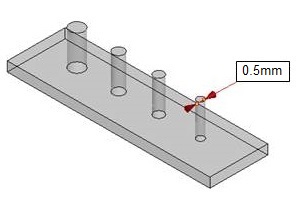
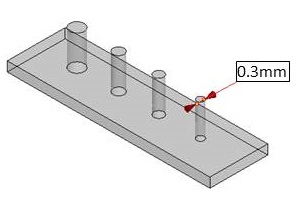
เส้นผ่านศูนย์กลางรู |
รูที่มีขนาดเล็กกว่าที่แนะนำอาจเต็มไปด้วยเรซินหรืออาจอุดตันระหว่างการพิมพ์ |
≥0.6mm |
| E |
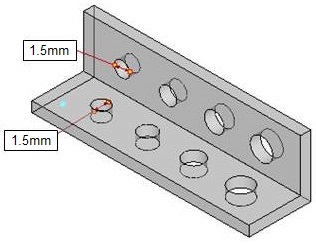
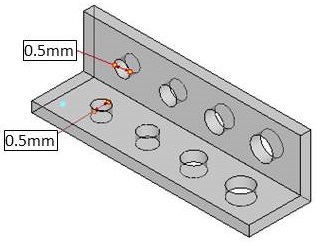
ระยะห่าง |
ระยะห่างที่มีขนาดเล็กกว่าที่แนะนำอาจเชื่อมติดกันระหว่างการพิมพ์ ส่งผลให้ชิ้นส่วนที่เคลื่อนที่ได้อาจไม่ทำงาน |
≥0.35mm |
| F |
รายละเอียดเกี่ยวกับลายนูน |
รายละเอียดต่าง ๆ ที่มีความสูงและความหนาเล็กกว่าที่แนะนำอาจไม่สามารถมองเห็นได้ในการพิมพ์ |
≥0.1mm |
| G |
รายละเอียดเกี่ยวกับการแกะสลัก |
รายละเอียดต่าง ๆ ที่มีความสูงและความหนาเล็กกว่าที่แนะนำอาจไม่สามารถมองเห็นได้ในการพิมพ์ |
≥0.1mm |
หมายเหตุ
» คำแนะนำขึ้นอยู่กับผลลัพธ์จากการพิมพ์ที่ชั้นความสูง 0.025 มม
» ขนาดของวัตถุที่ใหญ่กว่า 40x30x40 มม. หรือน้ำหนักมากกว่า 6 ก. อาจต้องใช้ที่ค้ำรองรับเพื่อยึดติดกับแพลตฟอร์ม
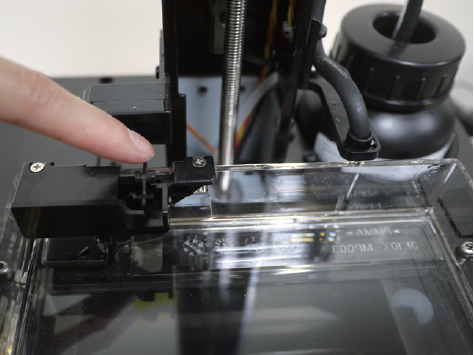
» หลีกเลี่ยงการกระทบที่ด้านล่างของถาดเรซินด้วยวัตถุมีคมเพื่อมิให้เกิดความเสียหายกับพื้นผิวที่อาจส่งผลต่อคุณภาพงานพิมพ์
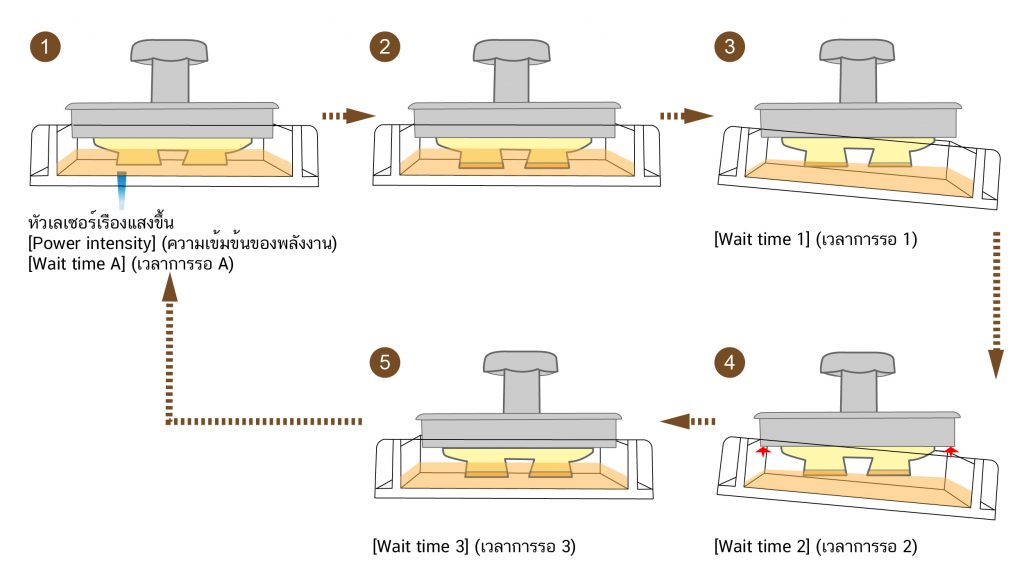
คำแนะนำเกี่ยวกับการตั้งค่าการพิมพ์
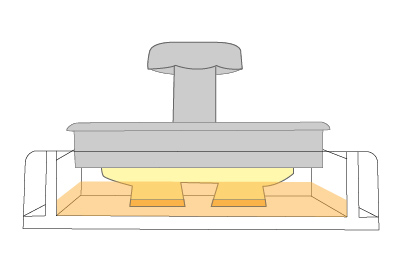
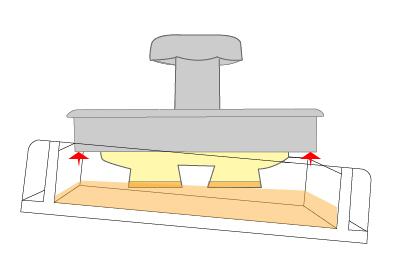
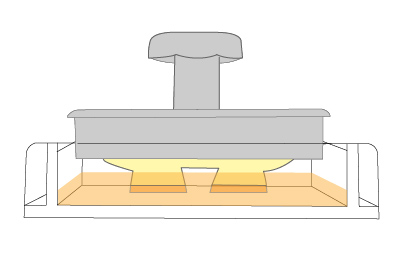
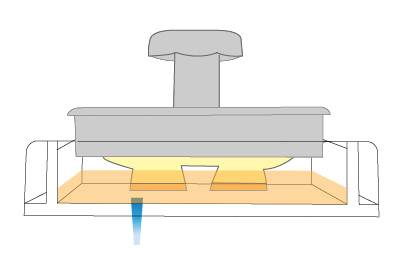
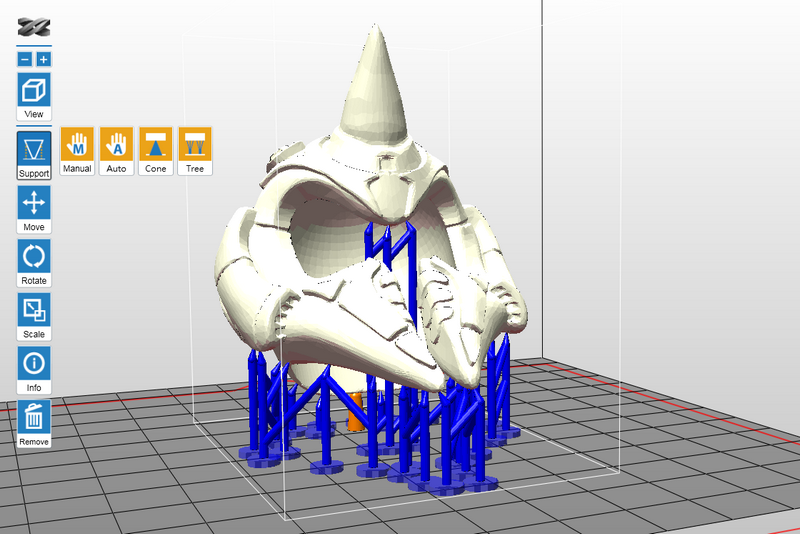
ด้วยการใช้งานเรซินสำหรับวัตถุประสงค์โดยทั่วไป เมื่อมีส่วนที่แขวนอยู่ในแบบจำลอง หรือเมื่อพื้นที่สัมผัสกับแพลตฟอร์มน้อย จำเป็นต้องใช้โครงสร้างที่ค้ำรองรับเพิ่มเติมเพื่อให้แน่ใจได้ว่างานพิมพ์จะพิมพ์ออกมาอย่างสมบูรณ์
ซอฟต์แวร์การพิมพ์ XYZware_Nobel มีฟังก์ชัน “ที่ค้ำรองรับอัตโนมัติ” ซึ่งสามารถนำมาใช้เพื่อวิเคราะห์โครงสร้างของแบบจำลอง และสร้างโครงสร้างการค้ำยันโดยอัตโนมัติ บางครั้งคุณอาจต้องใช้โหมด “กำหนดเอง” สำหรับเพิ่มที่ค้ำรองรับเพิ่มเติมเพื่อสร้างความมั่นใจในการยึดติดของวัตถุ
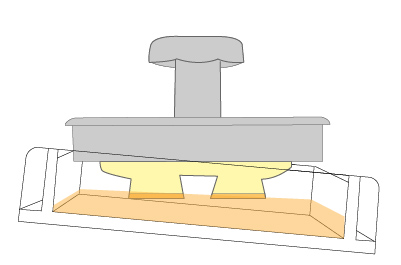
หากการพิมพ์ล้มเหลว กรุณาเปลี่ยนตำแหน่งของวัตถุและปรับการตั้งค่ามุมและโครงสร้างการค้ำยัน
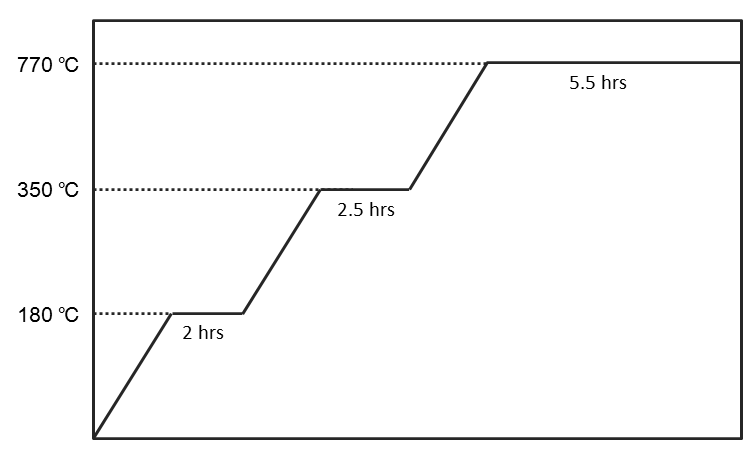
กระบวนการเผาไหม้โดยสมบูรณ์ที่แนะนำสำหรับการหล่อขี้ผึ้ง
เมื่อทำการหล่องานพิมพ์ คุณสามารถยึดถือตามคำแนะนำการควบคุมอุณหภูมิที่อธิบายไว้ในแผนภาพต่อไปนี้ เพื่อให้แน่ใจในการเผาไหม้เรซินที่สมบูรณ์และพื้นผิวที่ไม่มีรอยด่างและราบเรียบ
คำแนะนำเกี่ยวกับการปรับแต่ง
การทำความสะอาด
หลังจากแกะวัตถุพิมพ์ออกจากแพลตฟอร์ม กรุณาทำความสะอาดด้วยเอทิลแอลกอฮอล์ที่มีความเข้มข้นมากกว่า 75% ในระหว่างกระบวนการทำความสะอาด ขอแนะนำให้ใช้ตาข่ายห่อหุ้มวัตถุพิมพ์ และแกว่งตาข่ายไปมาในแอลกอฮอล์เพื่อทำความสะอาดเศษชิ้นส่วนเรซินออกจากพื้นผิวของวัตถุพิมพ์
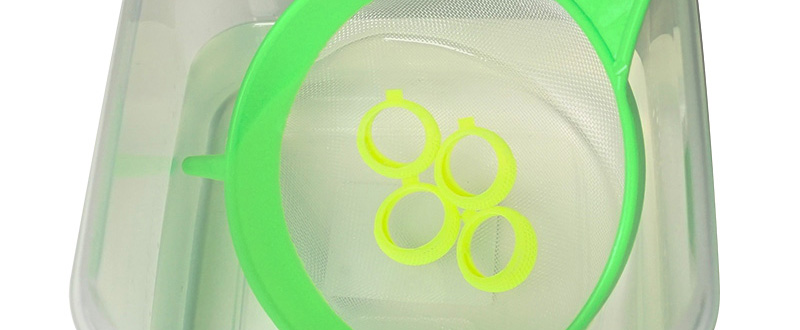
สำหรับบริเวณที่มีรายละเอียด แนะนำให้ใช้ขวดพ่นเพื่อพ่นแอลกอฮอล์ชำระล้างเรซินที่ไม่แข็งตัวออก
ตักวัตถุพิมพ์ขึ้นจากแอลกอฮอล์หลังจากทำความสะอาดเสร็จแล้ว และรอจนกระทั่งแอลกอฮอล์บนพื้นผิวของวัตถุระเหยออกไป
หมายเหตุ
» ด้วยความเปราะบางของเรซินนี้ ห้ามใช้แปรงขัดถูวัตถุพิมพ์ การกระทำเช่นนั้นอาจทำให้เกิดรอยขีดข่วนบนวัตถุพิมพ์
» ห้ามแช่วัตถุพิมพ์ในแอลกอฮอล์นานกว่า 10 นาที หรือแอลกอฮอล์อาจกัดกร่อนโครงสร้างของวัตถุและทำให้วัตถุได้รับความเสียหาย
» เป็นเรื่องปกติที่จะมีสีซีดจางหลังจากแช่วัตถุพิมพ์ในแอลกอฮอล์ สีซีดจางจะไม่มีผลต่อผลลัพธ์การหล่อ
ผึ่งลมแอลกอฮอล์บนพื้นผิวของวัตถุพิมพ์ให้แห้งจนกระทั่งแอลกอฮอล์ระเหยออกไป
จะมีแอลกอฮอล์ตกค้างอยู่บนพื้นผิวของวัตถุพิมพ์หลังจากการทำความสะอาด
กรุณาตั้งวัตถุพิมพ์ทิ้งไว้หลังจากการล้างและห้ามดำเนินการบ่มจนกว่าคุณจะแน่ใจได้ว่าแอลกอฮอล์ระเหยหมดแล้ว หลังจากผึ่งลมจนแอลกอฮอล์แห้งแล้ว กรุณาตรวจสอบอย่างละเอียดว่ามีเศษเรซินหลงเหลืออยู่ในคุณสมบัติต่าง ๆ หรือไม่ กรุณาตรวจสอบให้แน่ใจว่าได้ขจัดเรซินที่ยังไม่แข็งตัวออกจนหมดแล้ว เพื่อป้องกันมิให้ปิดกั้นรายละเอียดการออกแบบของแบบจำลองต้นฉบับ
หมายเหตุ
» หากยังคงเกิดปฏิกิริยาการแข็งตัวเมื่อมีแอลกอฮอล์หลงเหลืออยู่บนพื้นผิวของวัตถุพิมพ์ พื้นผิวของวัตถุพิมพ์จะปรากฏเป็นสีขาวและพร่ามัว ซึ่งอาจส่งผลต่อผลลัพธ์การหล่อ
เคล็ดลับ
» สีของวัตถุพิมพ์จะซีดจางเล็กน้อยหลังจากแช่ในแอลกอฮอล์ หลังจากผึ่งลมจนแอลกอฮอล์แห้งแล้ว วัตถุจะเปลี่ยนเป็นสีส้มอ่อนตามเดิม ดังนั้นคุณสามารถใช้สีของวัตถุพิมพ์เพื่อดูว่าแอลกอฮอล์แห้งหมดแล้ว
การบ่มภายหลัง
วัตถุพิมพ์ที่ผลิตจากเรซินทนไฟต้องผ่านกระบวนการบ่มภายหลังโดยใช้แสงยูวีเพื่อเพิ่มความแข็งสำหรับการหล่อขี้ผึ้ง
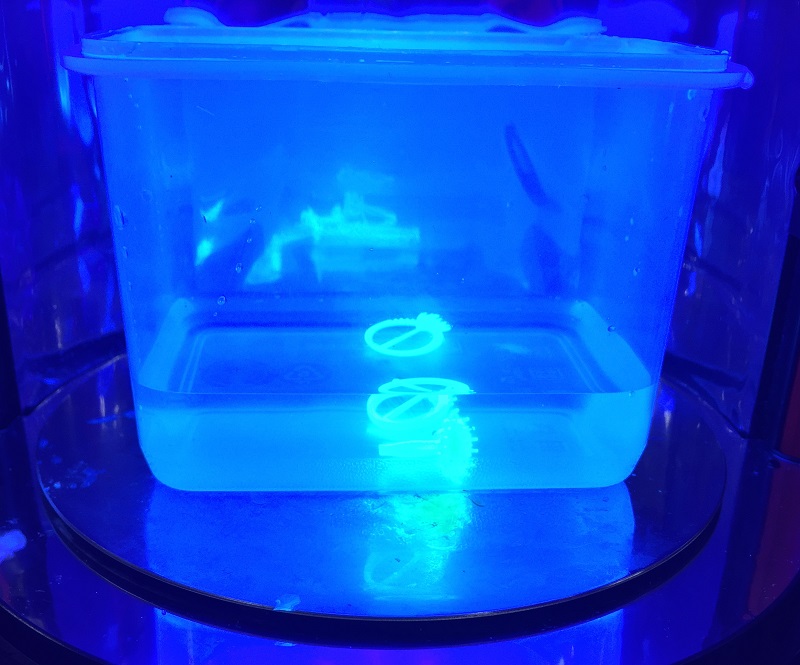
ก่อนการอบชิ้นงานพิมพ์ด้วยเครื่อง UV Curing Chamber แนะนำให้นำชิ้นงานแช่น้ำก่อน 5นาทีในภาชนะที่โปร่งใสเพื่อให้ชิ้นงานแข็งตัว
คำแนะนำ
» หลังจากนั้น นำภาชนะโปร่งใสใส่เข้าไปในเครื่องอบ UV Curing Chamber เพื่อฉายแสงอีก 5 นาที
» ขอแนะนำให้ทำการบ่มวัตถุประมาณ 5 นาที ภายใต้เงื่อนไขความยาวคลื่นแสงยูวี 385 nm และความหนาแน่นของการแผ่รังสี 0.9-1.8 J/cm² เมื่อความหนาของโครงสร้างวัตถุเกินกว่า 7 มม.
การถอดที่ค้ำรองรับออก
กรุณาใช้เครื่องมือสำหรับตัดที่ค้ำรองรับออกแทนที่การดึงโดยตรง (การดึงสามารถสร้างความเสียหายต่อพื้นผิวของวัตถุได้ง่าย)
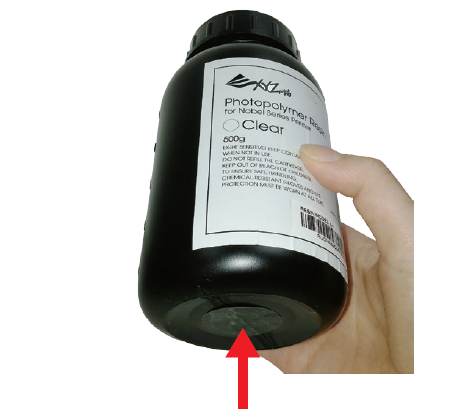
การเก็บรักษาเรซินที่ยังไม่แข็งตัว
ไม่ควรให้เรซินในถังที่ยังไม่แข็งตัวสัมผัสกับแสง เรซินที่ยังไม่แข็งตัวสามารถจัดเก็บไว้ในภาชนะทึบแสงหลังจากที่ผ่านการกรองแล้ว เทเรซินกลับเข้าไปในถังเรซินก่อนที่จะมีการพิมพ์ต่อไป
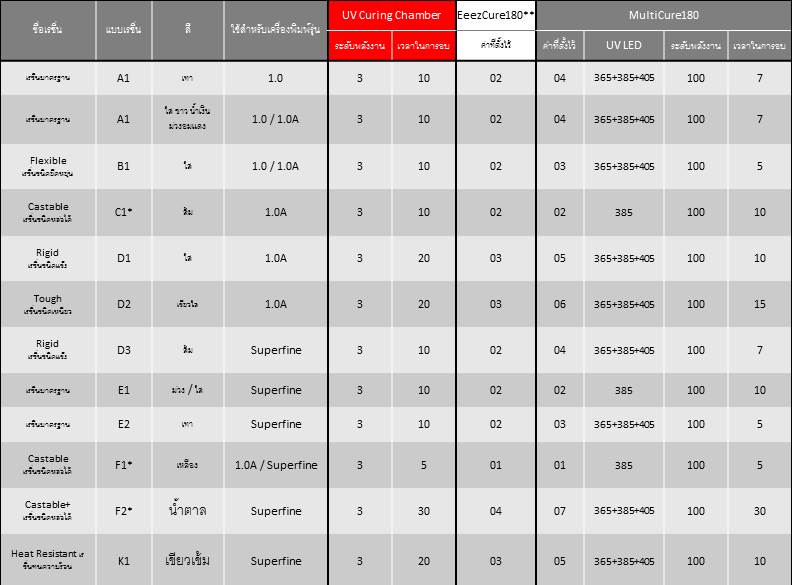
** พารามิเตอร์การอบนั้นเหมือนกันกับ EeezCure180 และเครื่องอบ UV Curing Chamber เมื่อใช้ EeezCure180 เพียงสลับระหว่างค่าที่กำหนดล่วงหน้าที่แตกต่างกันเพื่อใช้การตั้งค่าการอบที่แนะนำ
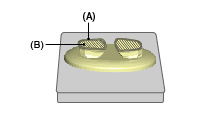 (A) ด้านนอก
(B) ด้านใน
(A) ด้านนอก
(B) ด้านใน