XYZmaker tutorial - Fish bone card holder part 3
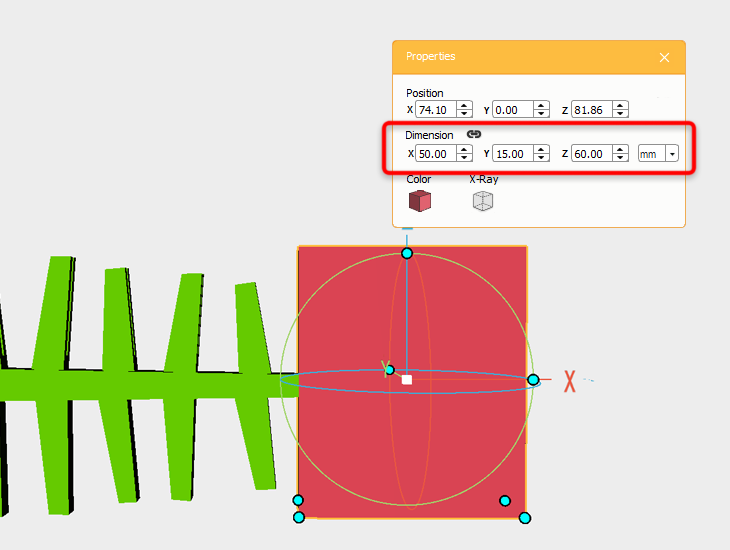
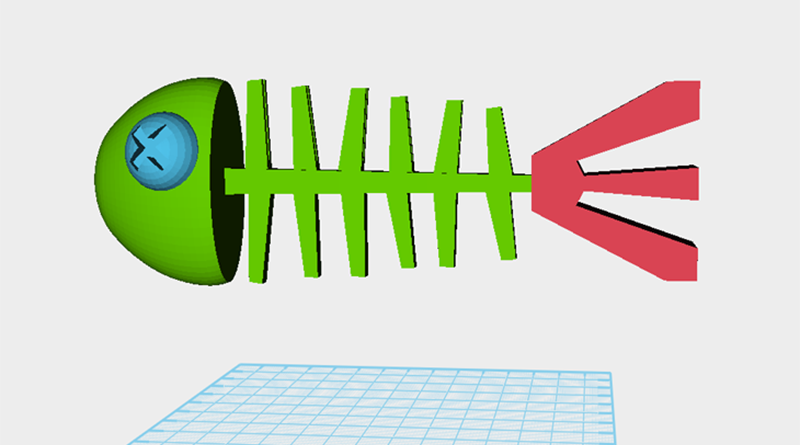
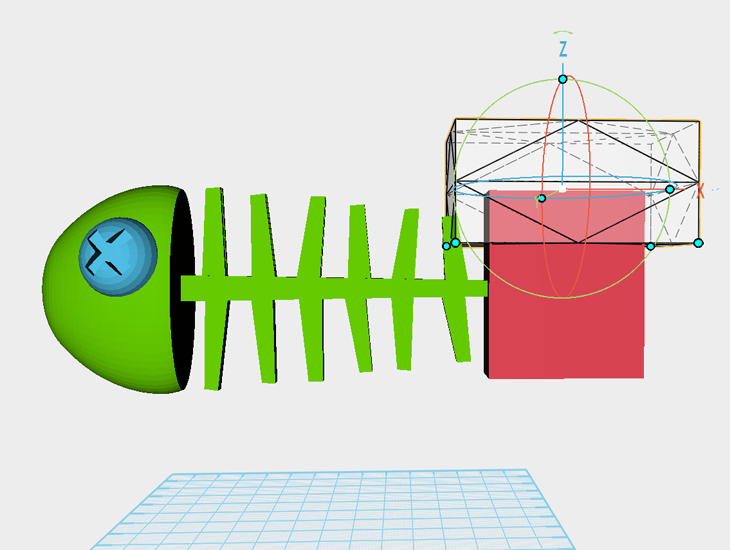
Next, create the fish tail; make a cube and change its dimensions to X: 50,Y: 15,Z: 60 mm, position it similar to the image above
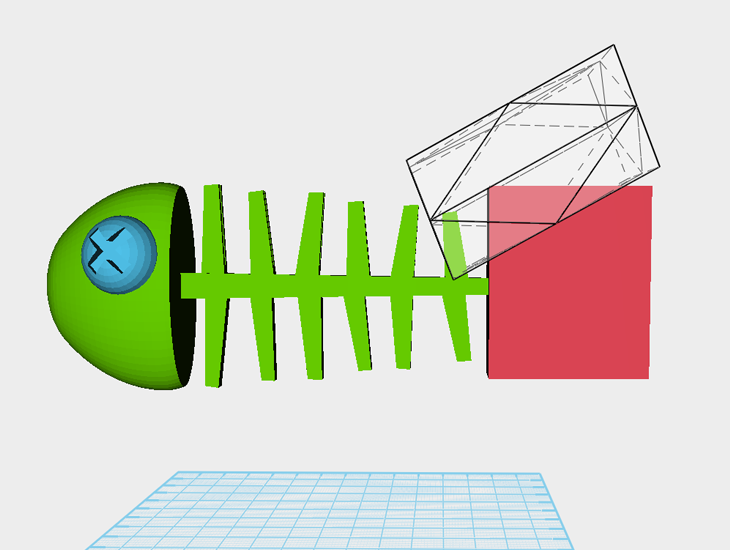
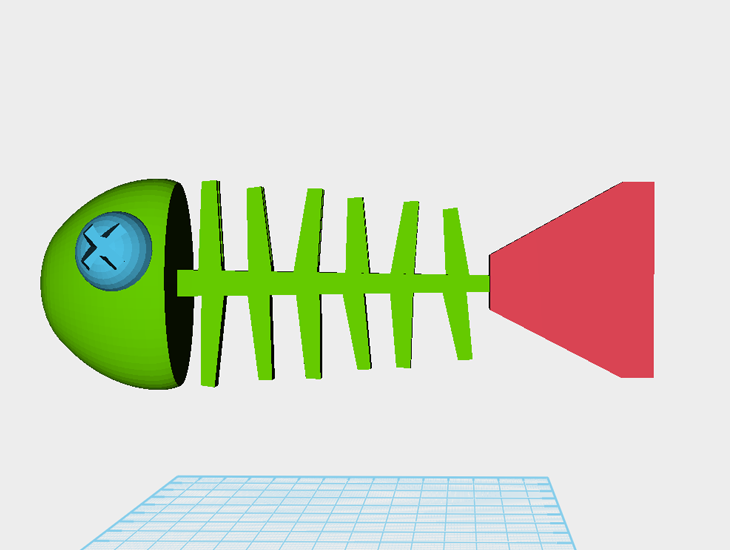
Clone the cube, change its color, then enlarge, move, and rotate it to cut away the outline as previously done in this tutorial. This part will now be called the fish tail.

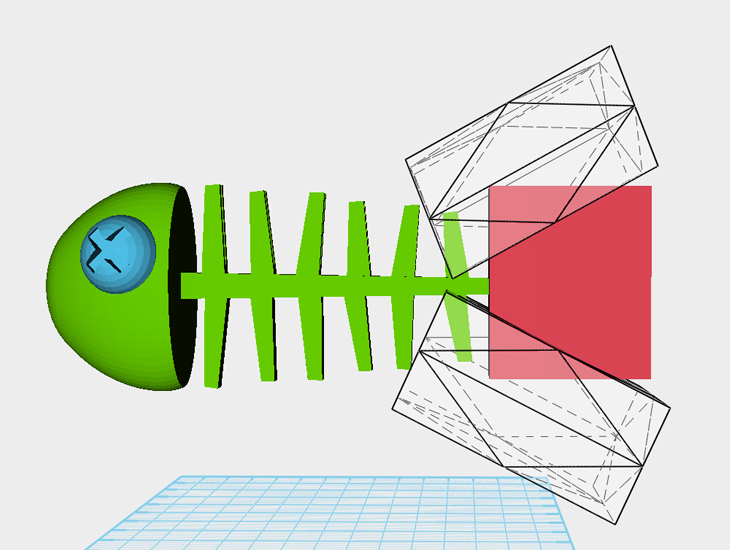
Clone the fish tail, shrink it, rotate it, and move it to the same position as the image above. This will be called the tail wedge.
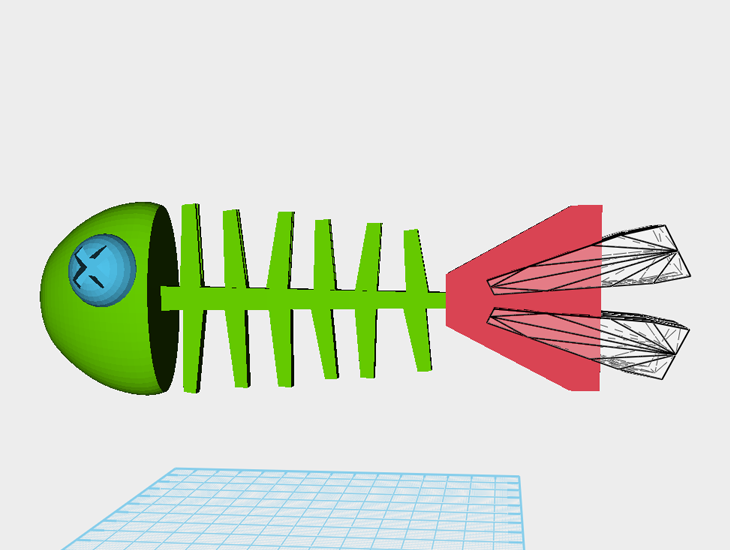
The same as before, use the mirror function to copy the tail wedge, shrink it , rotate it, and move it to the same position as above.
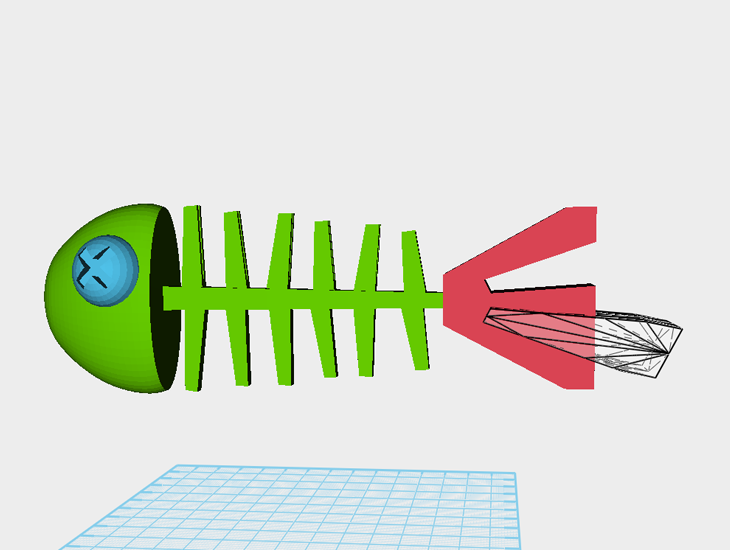
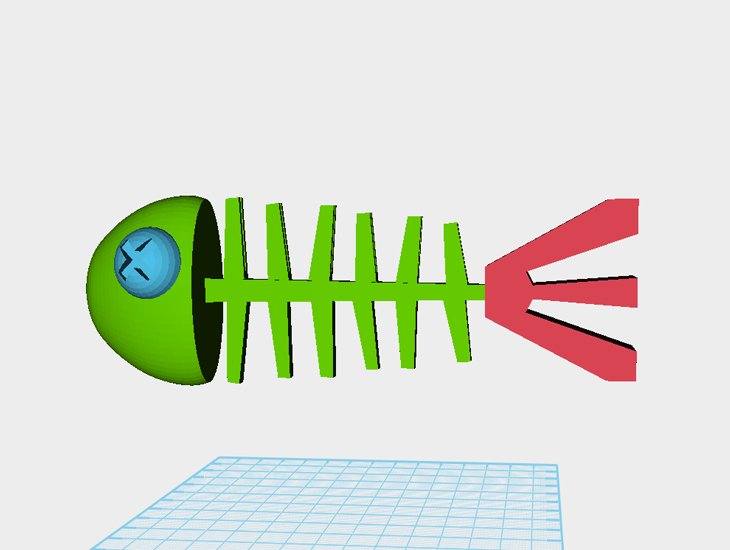
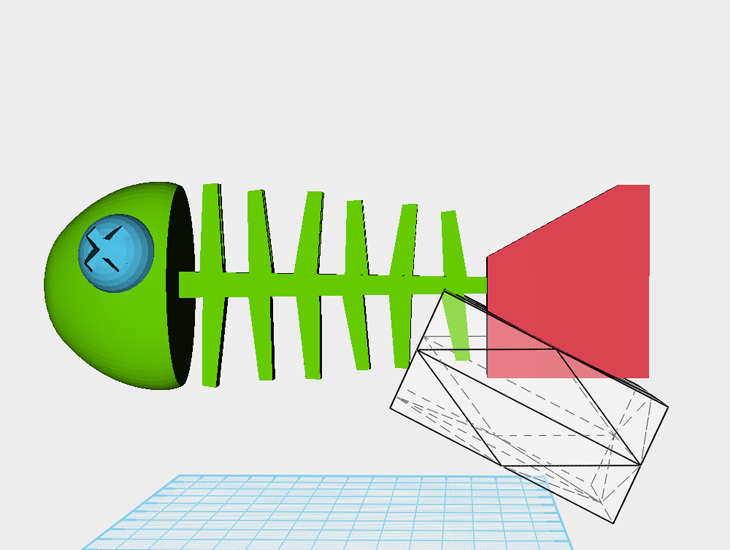
Use the adjusted tail wedges to cut into the fish tail using the hole function. The fish tail is complete.
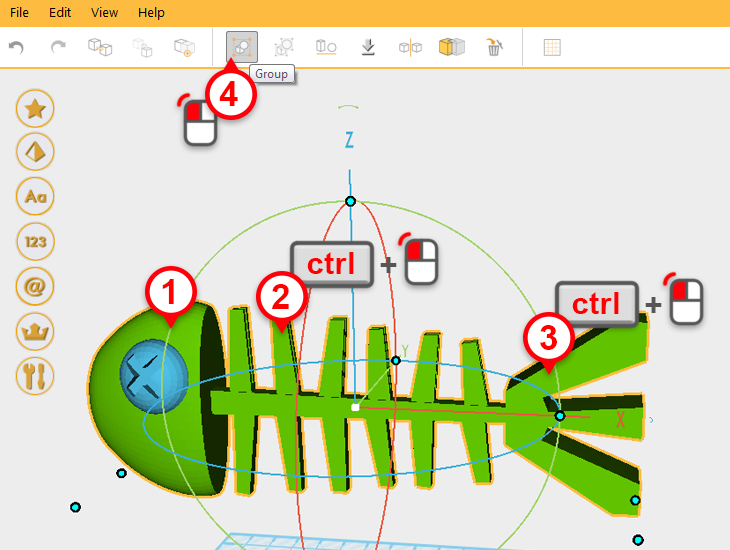
Separately adjust the fish head, fish body, and fish tail to ensure they are in the right positions.
Take the fish head, fish body and fish tail, and group them together(1-4). The fish bone is complete.
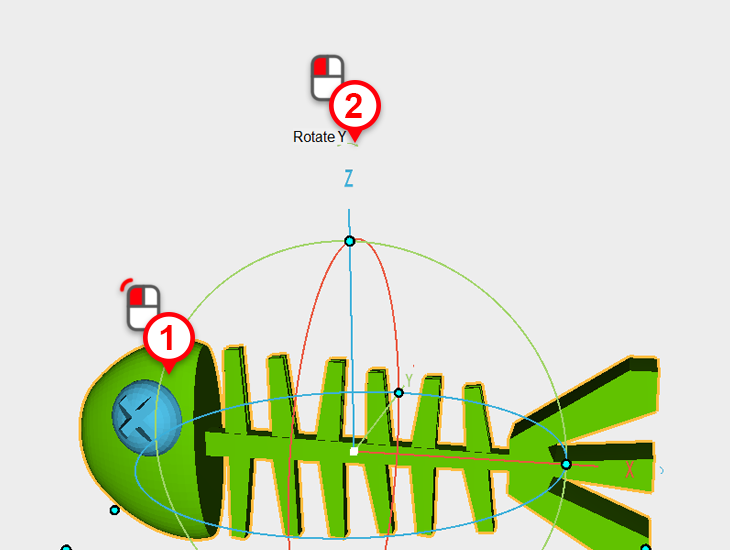
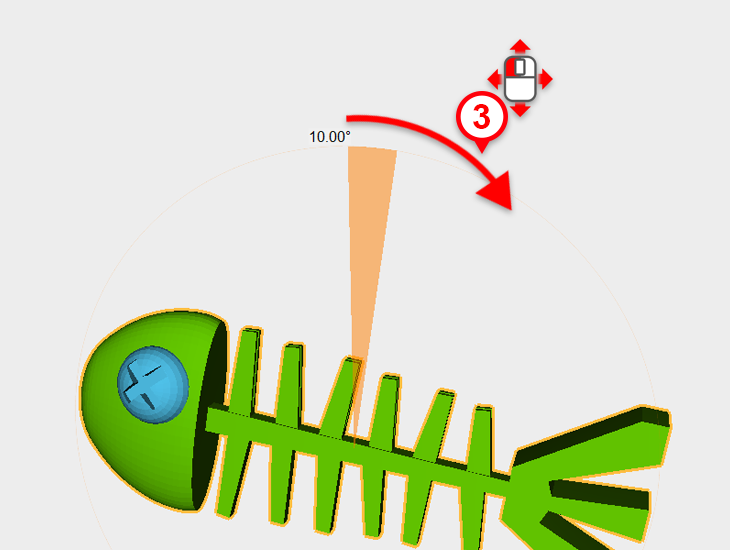
Select the fish bone, click and hold the arrow above the Z axis and drag/rotate it 10 degrees.