You can build the supports from scratch with the manual mode, or use it to adjust the supports generated in the Auto mode.
In Auto Mode, all supports are in the same size at the contact points. However, the size of the contact can be set to different based on the features of the object.
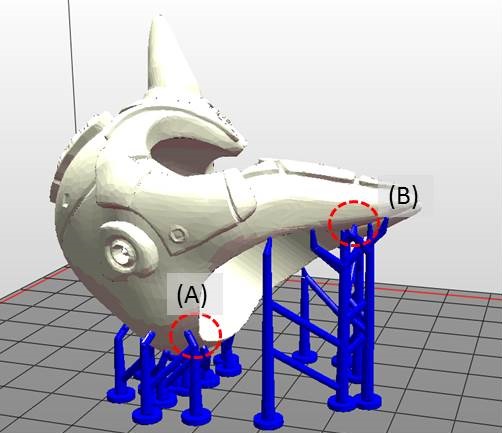
(A) Larger contact may be required for heavy part.
(B) Smaller contact is good enough for holding lighter structure. Also it is easier for post-processing.
To Edit Supports Manually
Step 1: Resize, rotate and/or move the object as the way you want to print it.
However, if you have already generate supports with the Auto Mode, you can only move the object horizontally. Other adjustments to the object will lead to the reset of supports.
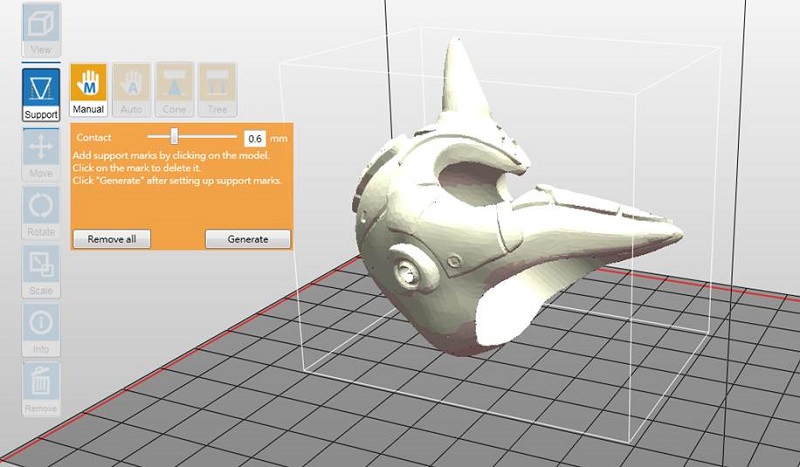
Step 2: Setup below settings based on the features of your object.
If supports were added in the Auto Mode, they will be shown as blue dots in the manual editing mode.
To add support, simply select a proper size of the contact point and then click on the model at the overhangs.
To delete support, just click on the support mark (the blue dot).
Step 2: Click “Generate” to finish editing.
Note
» When there is more than one object on the platform, you will need to select one of the model before you can launch the support options.
» If the object is resized, rotated, or moved vertically, the support structure will be reset. Please set up the supports again.
 PDF Download