Last updated on November 29th, 2018 at 11:14 am
Applicable printer: CastPro100 xP
Resin Model: F1
EeezCast material is a castable resin. The properties of the castable resin are similar to those of wax. There is no ash residue after it is heated and it is suitable for lost wax casting, saving procedures, i.e. wax carving used in the conventional production process.
Model Design Tips
The properties of EeezCast resin are similar to those of wax in that both are structurally soft and brittle and the printout can be easily broken due to pulling force during the printing process. Please follow the design tips below for optimized printing.
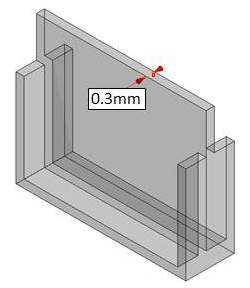
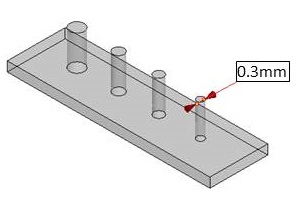
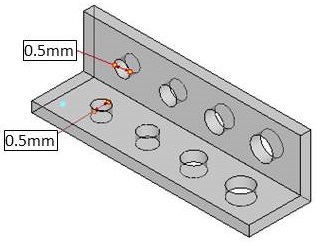
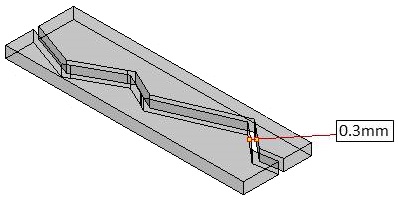
» Wall thickness ≥ 0.4mm
» Hole Diameter ≥1.0mm
» Clearance ≥0.4mm
» For the specs for other features, please follow the general design specs here.
Note
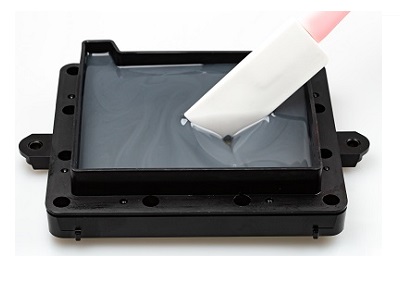
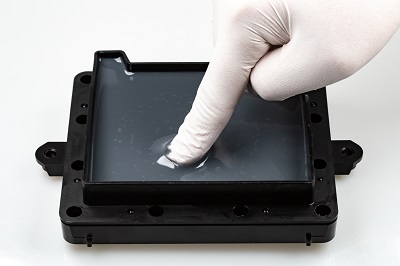
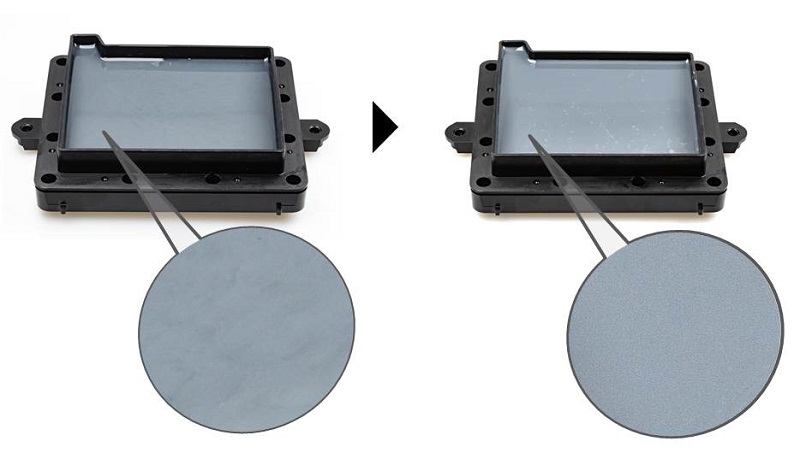
» Avoid scratching the bottom of the tank with any sharp tool, or the coating may be damaged. Damaged tank surface may affect the printing quality.
Recommendations on Printing Setup
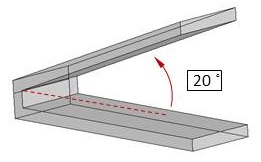
As with the use of the resin for general purpose, when there are overhangs in the model, or when the area of contact with the platform is small, additional support structures are required to ensure that the object can be printed out completely. The printing software XYZware_VPD has an “automatic support” function, which can be used to analyze the structure of the model and automatically generate bracing structures. Sometimes you may need to use the “manual” mode to add more supports to ensure the adhesion of the object.
If printing fails, please change the object’s position and adjust the setup of the angle and the bracing structures.
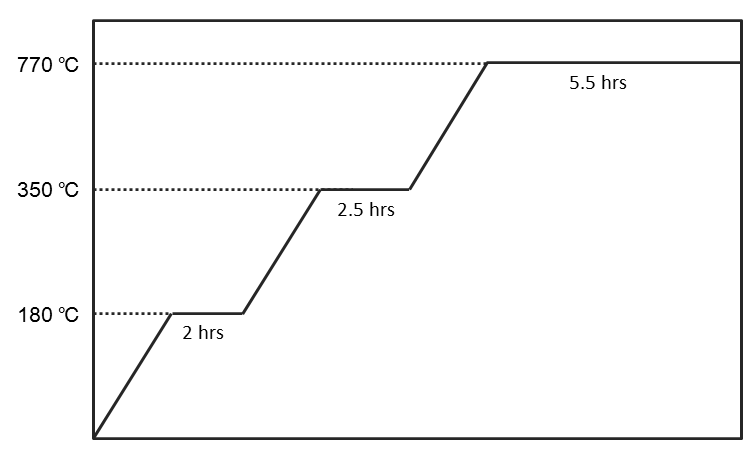
Recommended Burnout Process
When casting the printouts, you can work based on the temperature control suggestion as described in the following diagram, in order to ensure the complete burning away of the resin and a smooth and unblemished surface of the casting object.
Recommendation on Finishing
Cleaning
After removing the printed object from the platform, please clean it with ethyl alcohol of concentration greater than 95%. During the cleaning process, you are recommended to use a scoop net to hold the printed item and to sway the scoop net in the alcohol in order to clean the resin residue from the surface of the printed item.
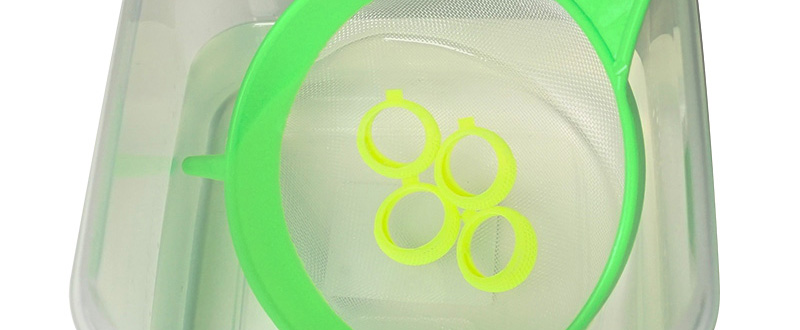
Spritz alcohol on the detailed structures with a spray bottle to wash away the uncured resin.
Scoop up the printed item from the alcohol after it is cleaned and wait for the alcohol on its surface to evaporate away.
Note
» Because of the brittleness of this resin, do not use a brush to scrub the printed item. Doing so may scratch the surface of the printed item.
» Do not immerse the printed item in alcohol for longer than over 10 minutes, or the alcohol may erode the item's structure and damage the item.
Air-Dry the Alcohol on the Surface
Alcohol may reside on the surface of the printed item after it is washed. Please keep the printed item still after it is washed and do not perform post-curing until the alcohol on the surface has completely volatilized. After the alcohol has air-dried, please check carefully whether there is any resin residue in the features. Please make sure to remove the uncured resin to prevent it from blocking the design details of the original model.
Note
» If curing is performed when alcohol residue is still present on the surface of the printed item, the surface of the printed item will appear white and misty, possibly affecting the result of casting.
Removing the Support
Please use tools to cut off the support instead of pulling directly (pulling can easily damage the item’s surface).
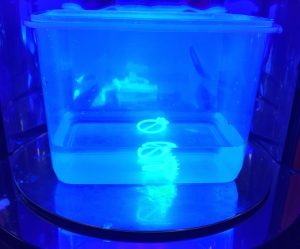
Post-curing
The printed item produced from EeezCure resin must post cured using UV light to ensure the hardness for the lost wax casting.

For the best material properties, UV post-curing the printed parts in water for 5 minutes.
Recommendation
» When using XYZprinting UV Curing Chamber, post cure the printed parts in water for 5 minutes.
» Under conditions of UV wavelength 375~405 nm and radiation intensity of 14 mW/cm², when the thickness of the object's structure exceeds 7 mm, it is recommended to post cure the object for 5 minutes.
Preservation of the Uncured Resin
Uncured resin inside of the resin tank should not be exposed to light. The uncured resin can be stored in an opaque container after it is filtered. Pour the resin back into the resin tank prior to the next printing.
Note
» Opaque polypropylene containers are recommended for storing the resins.
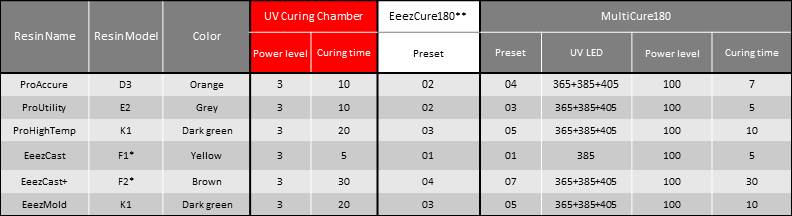
 ** Curing parameters are the same for EeezCure180 and the UV curing chamber. When using EeezCure180, simply switch between different presets to apply the suggested curing settings.
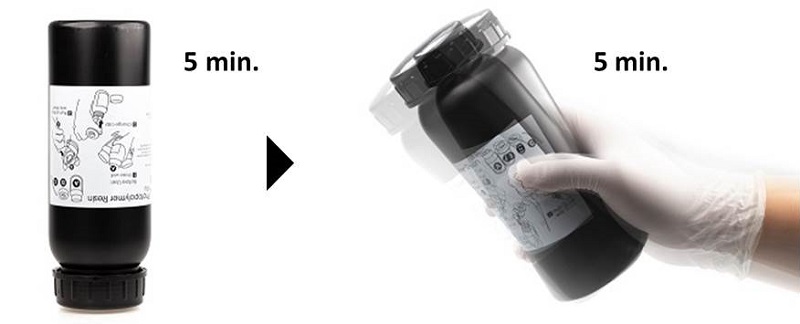
 » If the resin in the bottle has been left used for more than 24 hours, please change to the original cap and overturn the bottle and shake the bottle for approx. 5 minutes respectively before printing.