XYZmaker tutorial – Airplane part 3
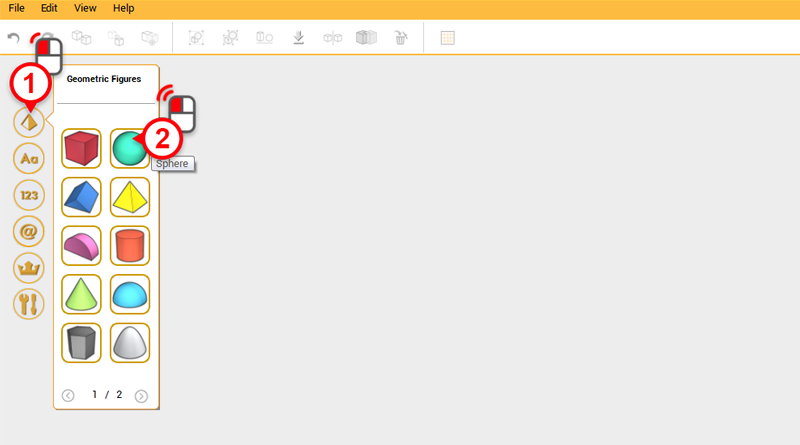
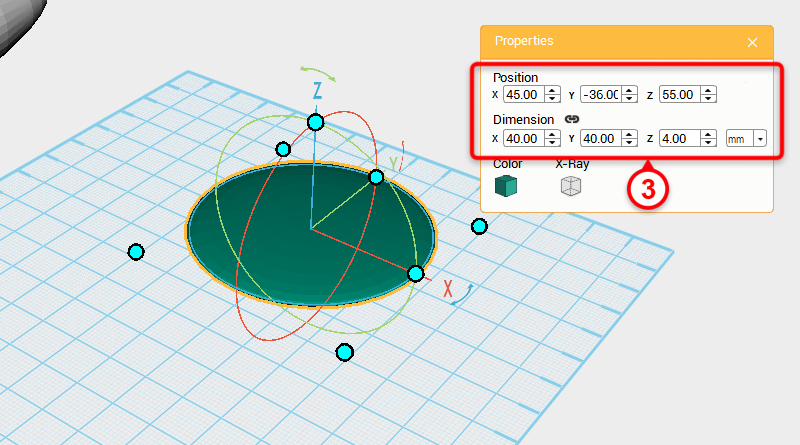
To create an airfoil, first make a sphere, then in the Properties window change its dimensions to X: 40,Y: 40,Z: 4 mm and position to X: 0,Y: -36,Z: 55.
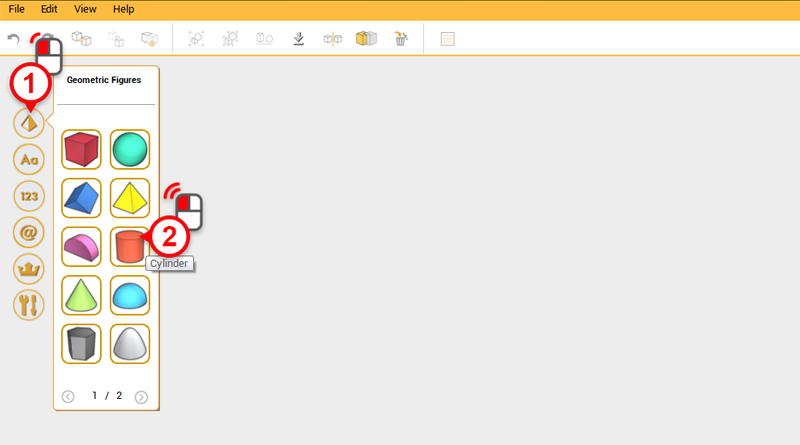
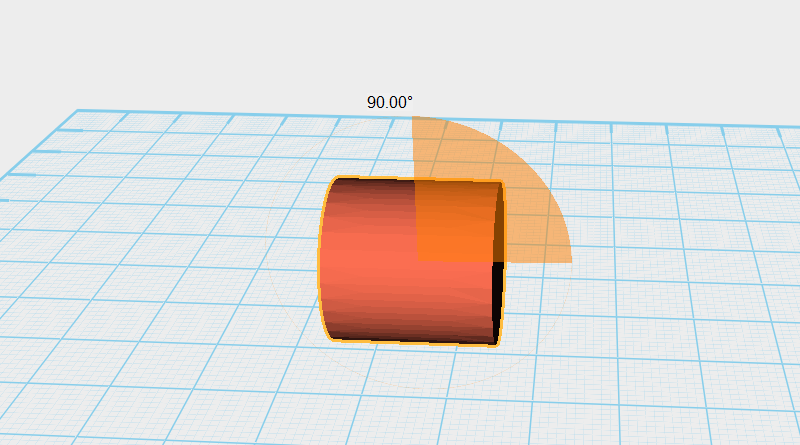
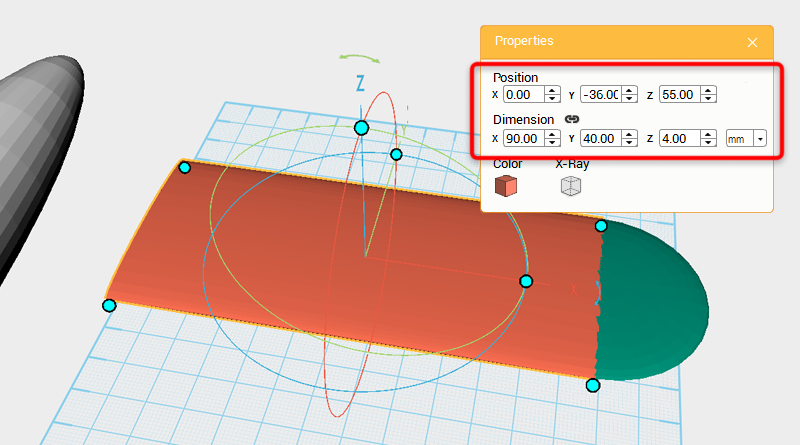
Create a Cylinder and rotate it 90° along the Y axis, in the Properties window change the dimensions to X: 90,Y: 40,Z: 4 mm and position to X: 0,Y: -36,Z: 55
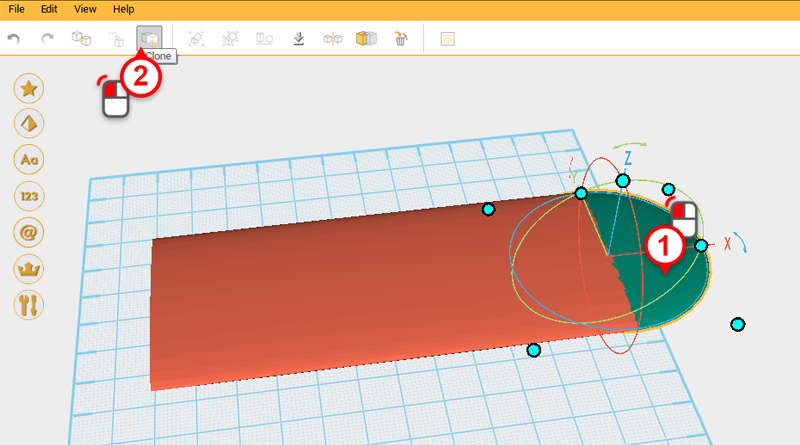
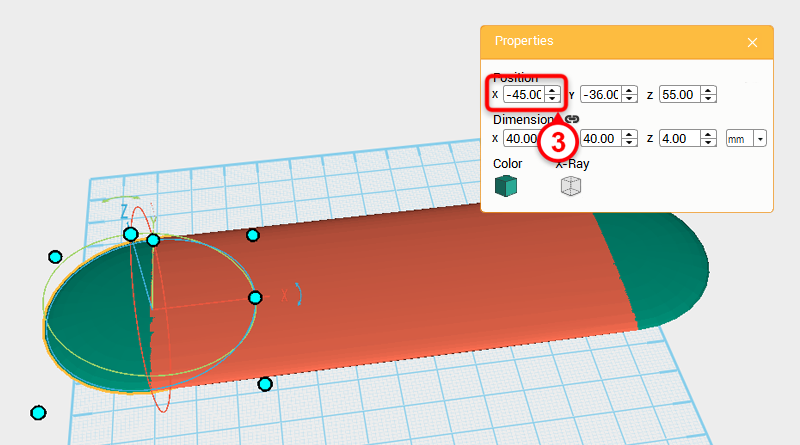
Select the Sphere you just created and click on the Clone button, change this new part’s X axis position to -45.
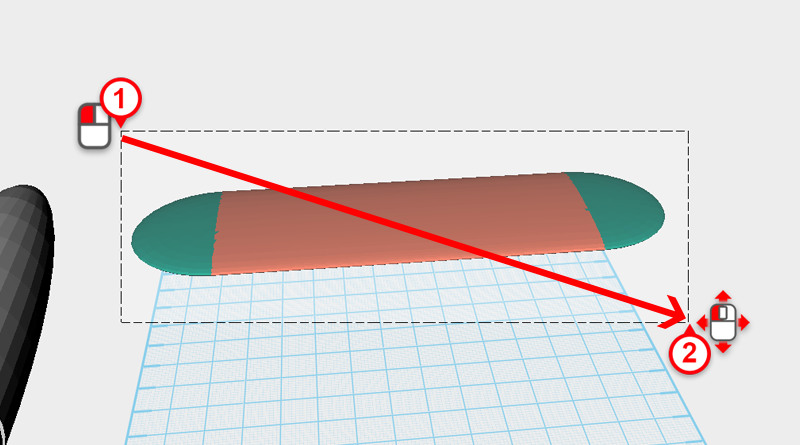
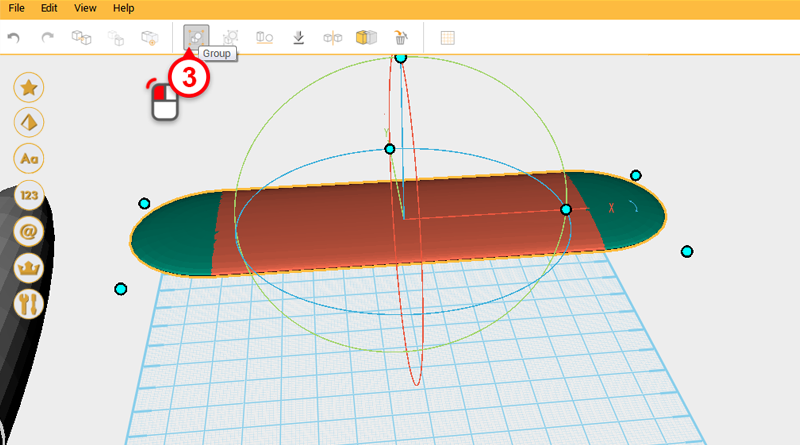
Drag select all parts and click on the Group button, to finish the upper wing part.
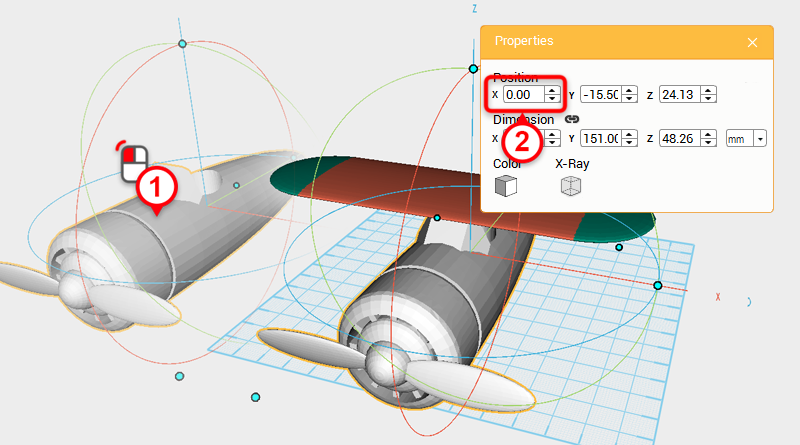
Select the plane body you just moved to the side and to return it to the center, change its X axis position to 0 .
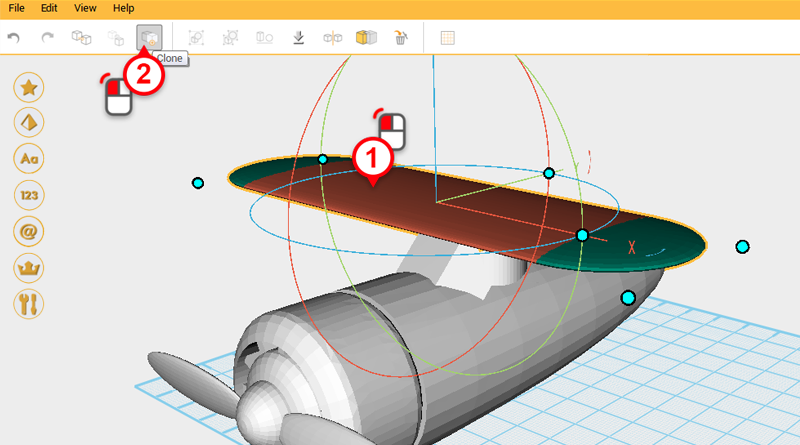
Select the upper wing and click the Clone button.
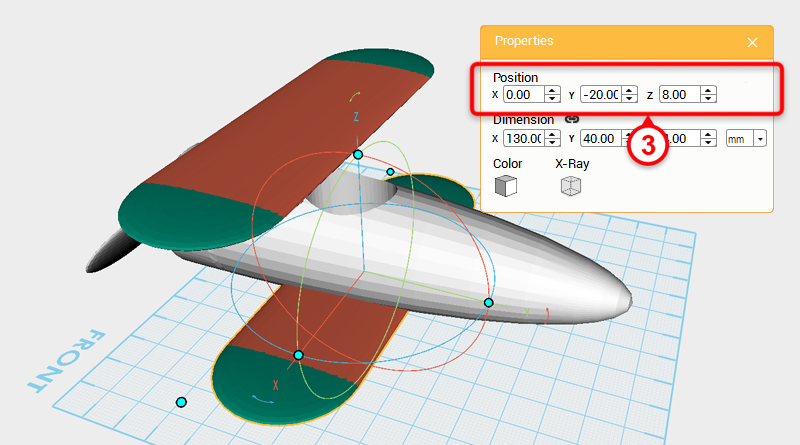
In the Properties window adjust the new part’s position to X: 0,Y: -20,Z: 8. This completes the lower wing.
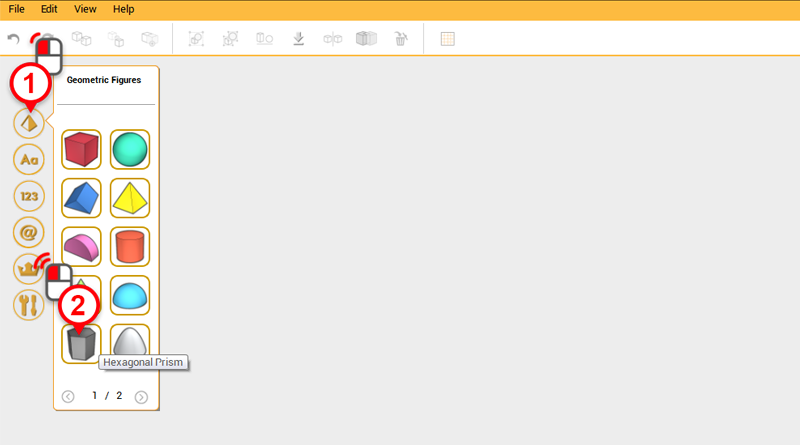
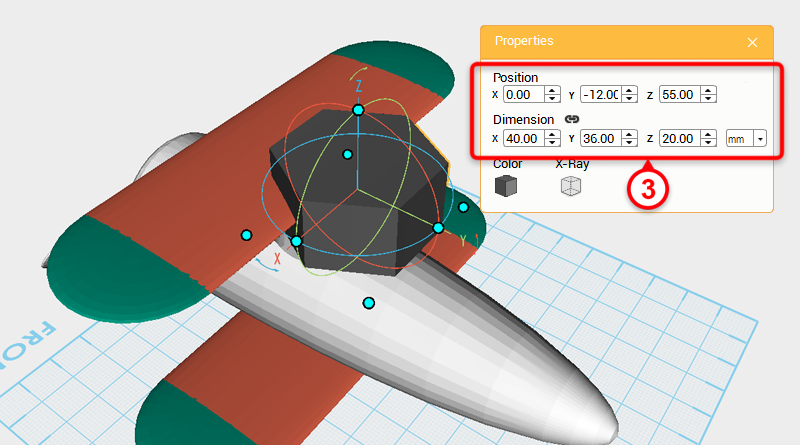
Create a Hexagonal Prism and in the Properties window, change its dimensions to X: 40,Y: 36,Z: 20 mm and position to X: 0,Y: -12,Z: 55. Call this the cutting part.
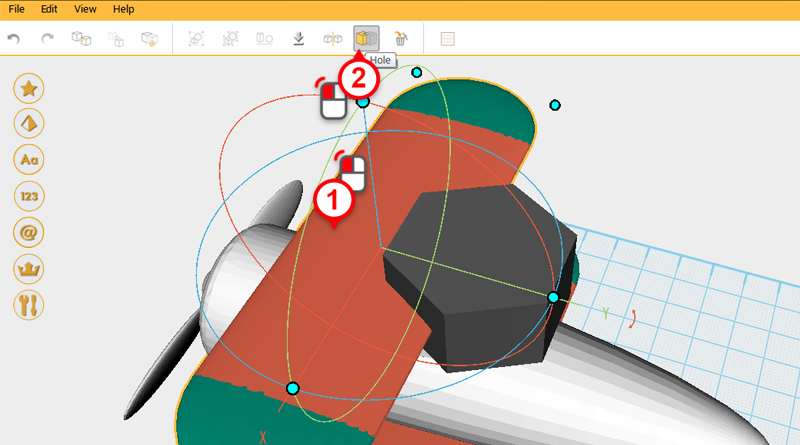
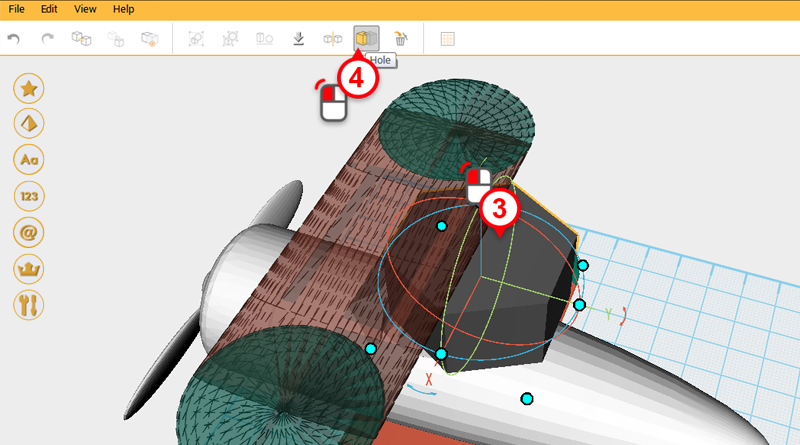
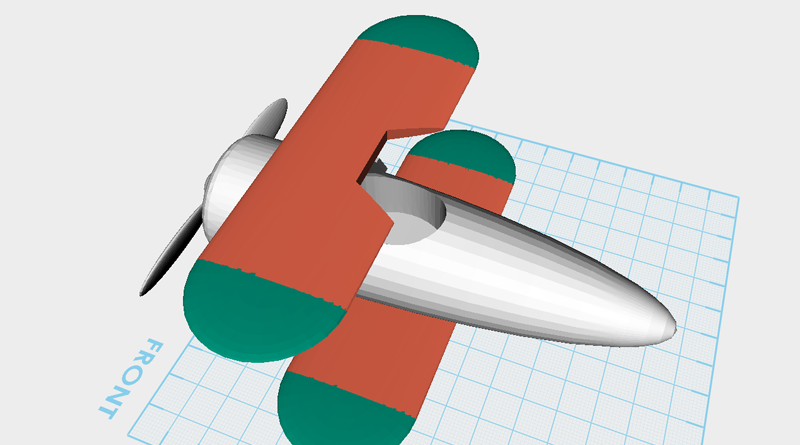
Select the upper wing and click on the Hole button, then select the cutting part and click the on the Hole button again.
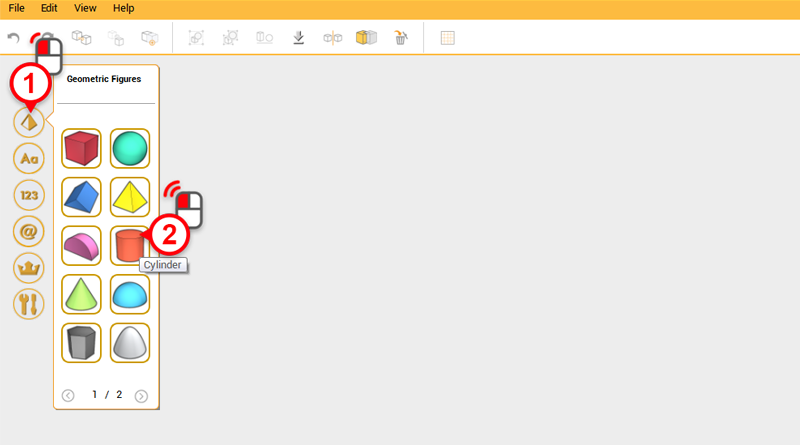
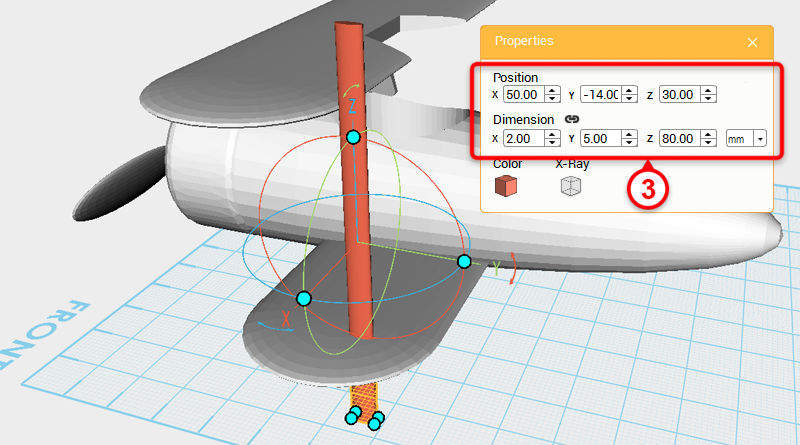
Next start to make the wing supports, create a cylinder and in the Properties window, change its dimensions to X: 2,Y: 5,Z: 80 mm and position to X: 50,Y: -14,Z: 30. Call this part support.
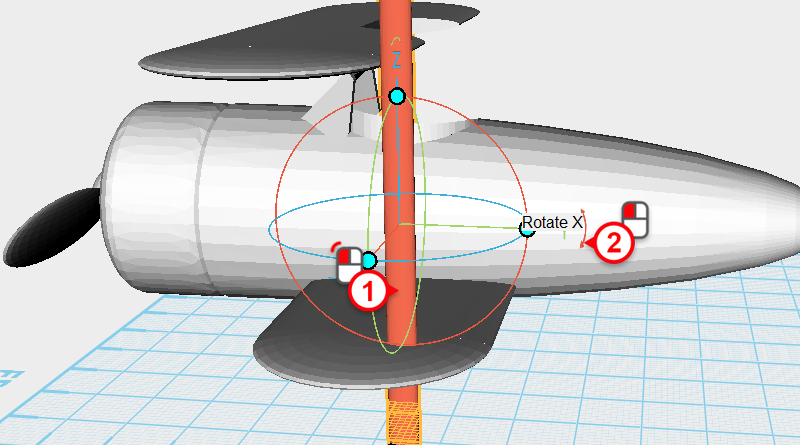
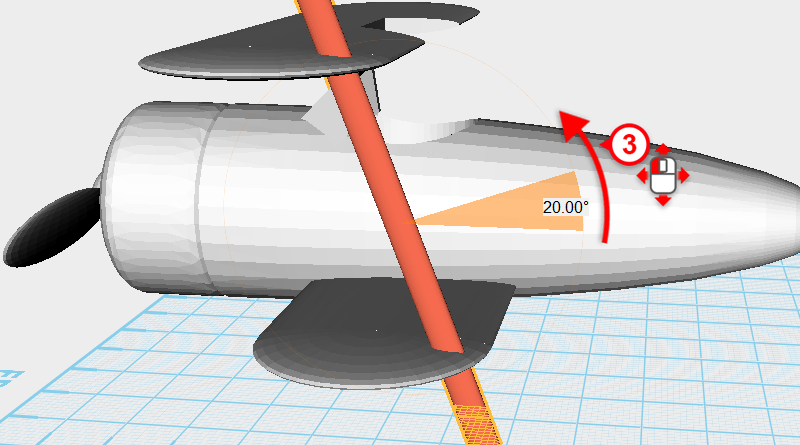
Select support and rotate it 20° along the X axis.
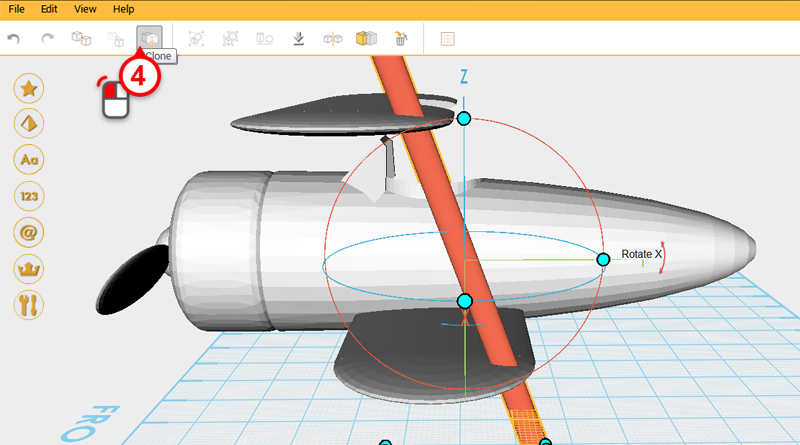
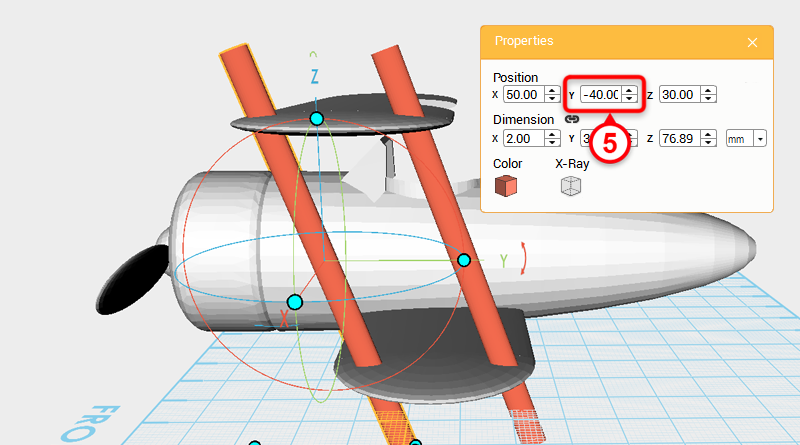
Click the Clone button, and duplicate another support, change this duplicate support’s Y axis position to -40
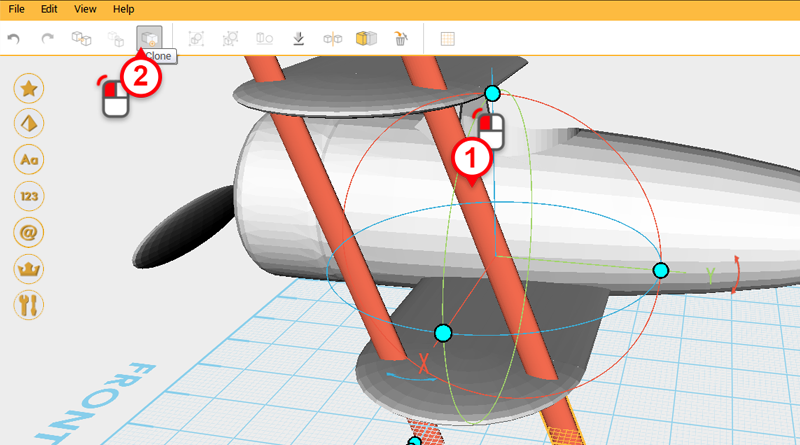
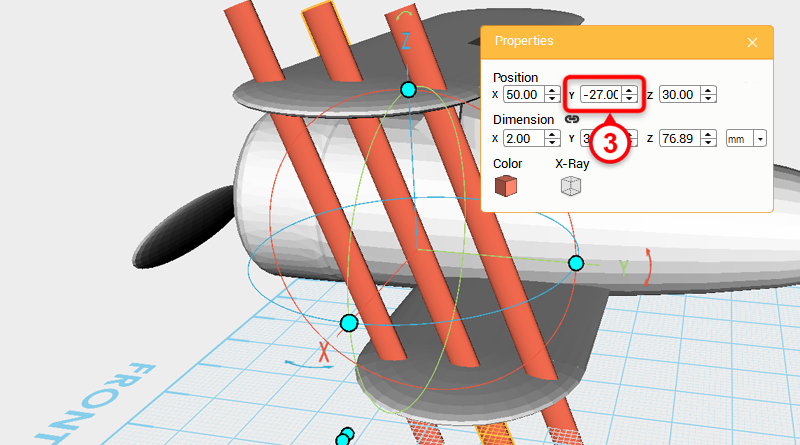
Select either support and click on the Clone button again to create a third support. Next, change that part’s Y axis position to -27°. Now you should have 3 supports equally spaced out across the wing.
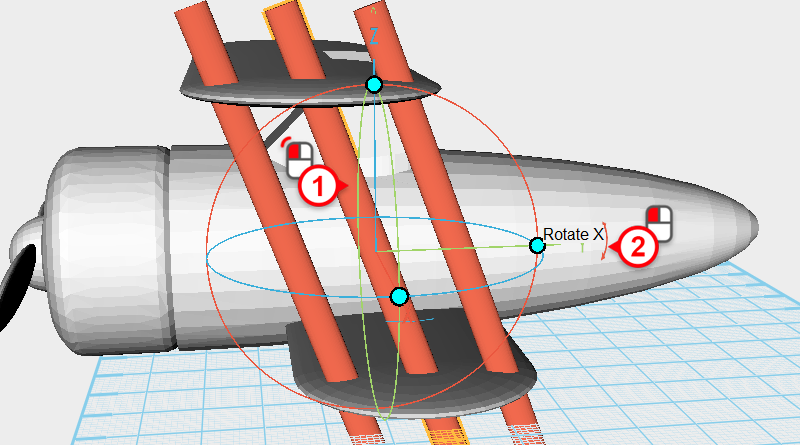
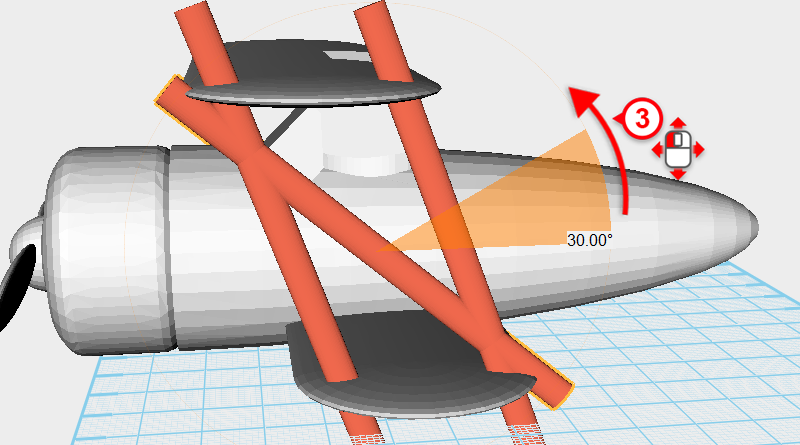
Select the support in the middle and rotate it 30° degrees along the X axis.
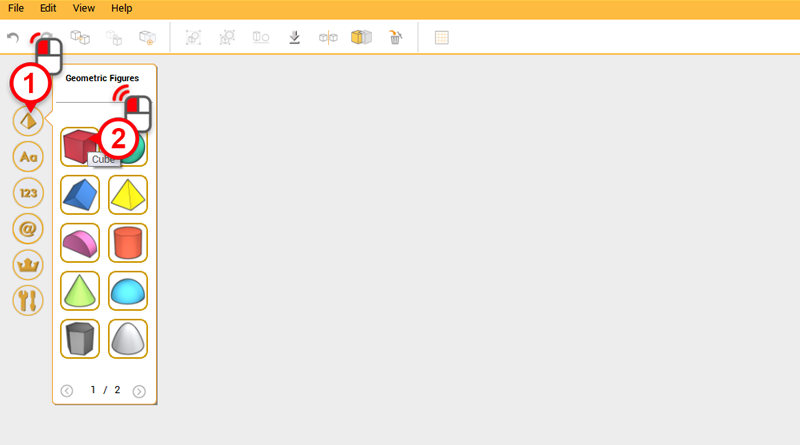
After all the supports are together, the ends that are overhanging the upper and lower wings need to be slowly cut away.
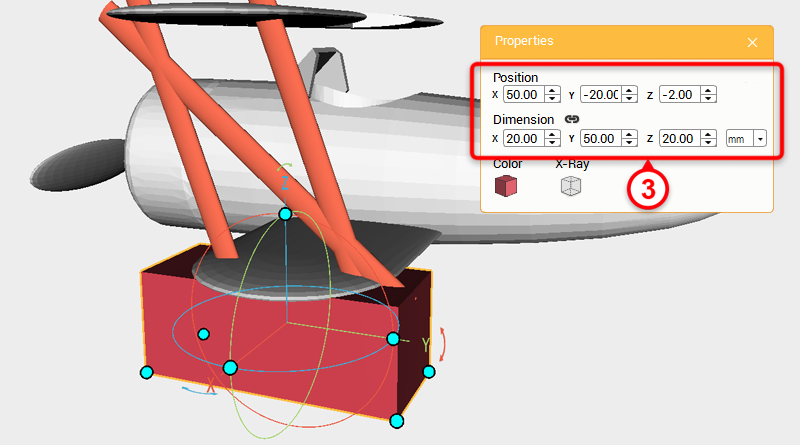
Create a Cube and in the Properties window change the dimensions to X: 20,Y: 50,Z: 20 mm and position to X: 50,Y: -20,Z: -2. Call this part the cutting part.
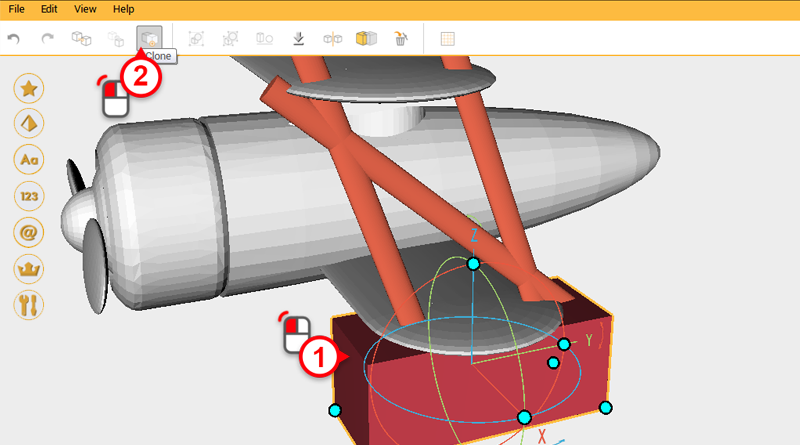
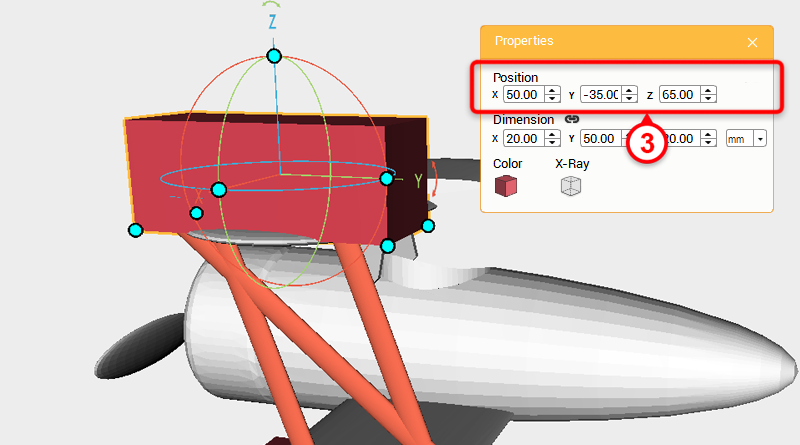
Select the cutting part and click on the Clone button, in the Properties window change the new part’s position to X: 50,Y: -35,Z: 65.
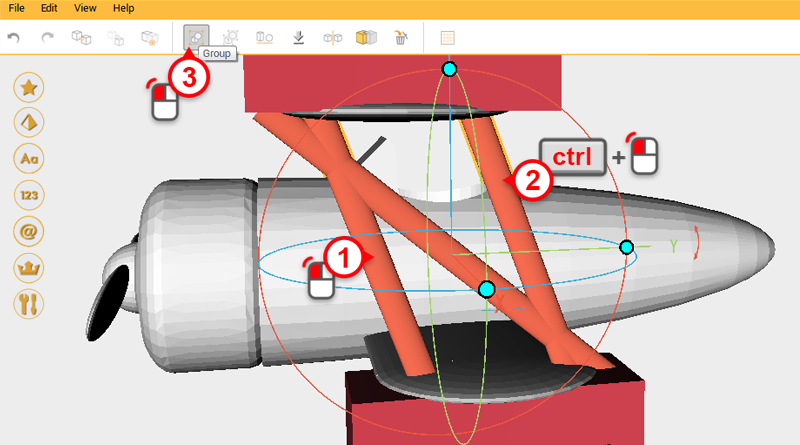
Select the left support and hold down the Ctrl key while you select the right support, click on Group to group these parts together. Parts in the same group can all be cut at the same time.
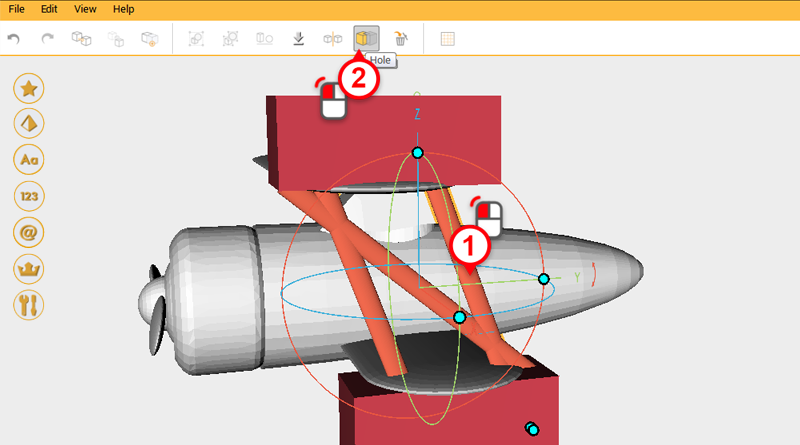
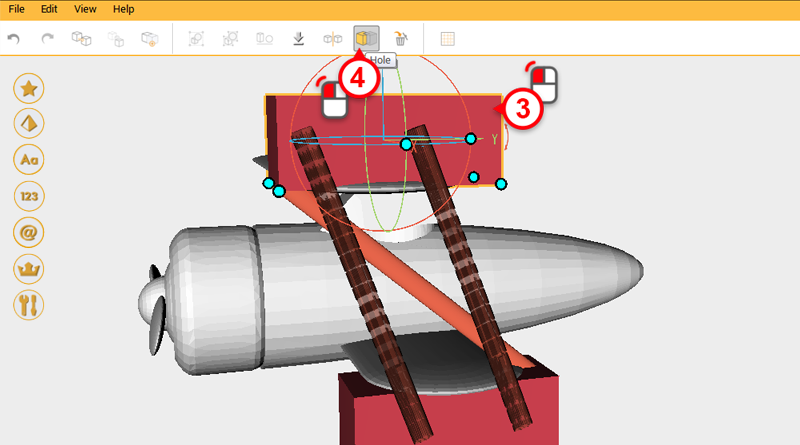
Click the two supports that are grouped together and click on the hole button. Next, select the cutting part above and click the hole button again to cut away the part of the support that is overhanging.
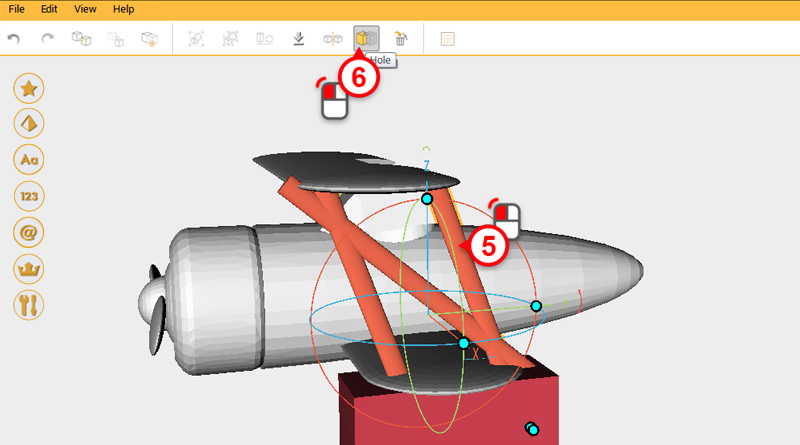
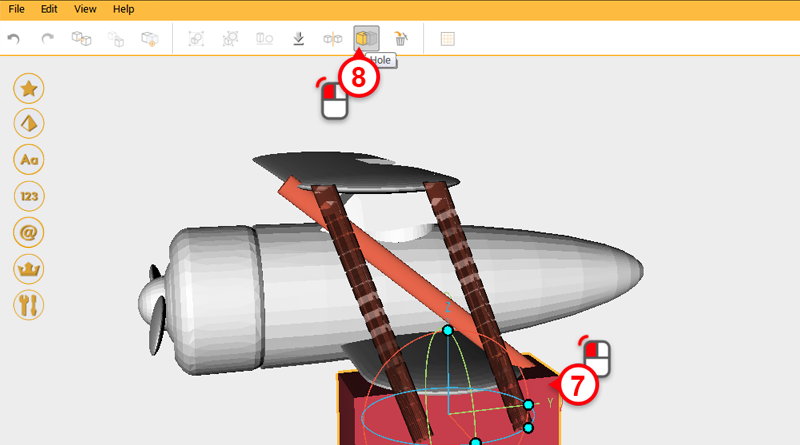
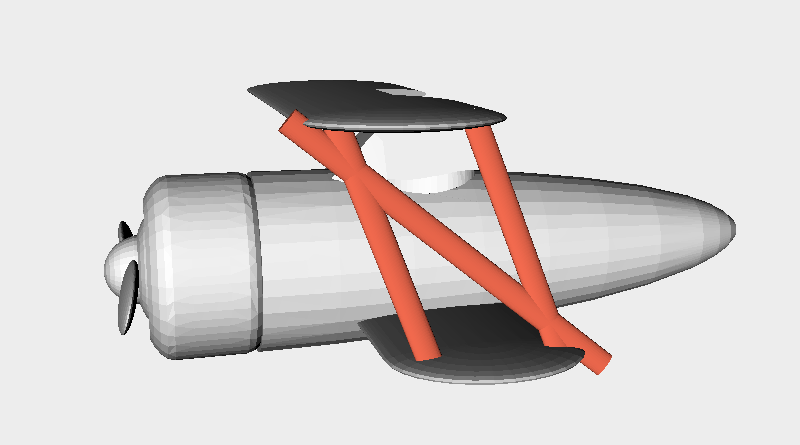
Use the same method to trim the overhanging parts below before continuing.

An impressive share! I’ve just forwarded this onto a coworker who has been doing a
little homework on this. And he actually ordered me breakfast due
to the fact that I discovered it for him… lol. So allow me to reword this….
Thanks for the meal!! But yeah, thanx for spending the time to talk about this matter here on your site.