XYZmaker tutorial – Robot Hand part 5
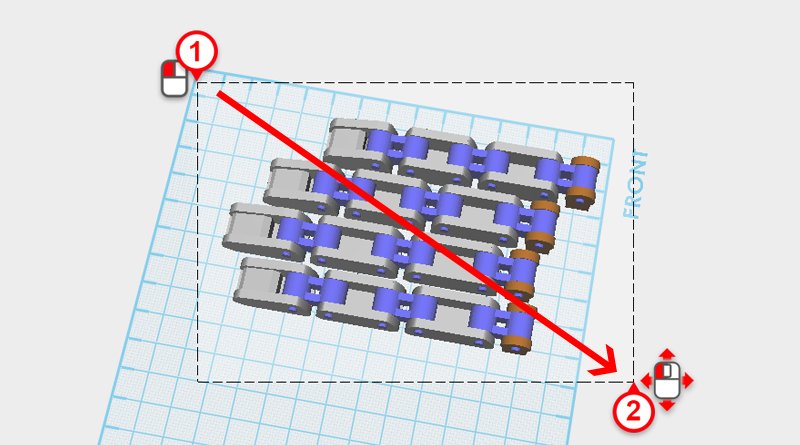
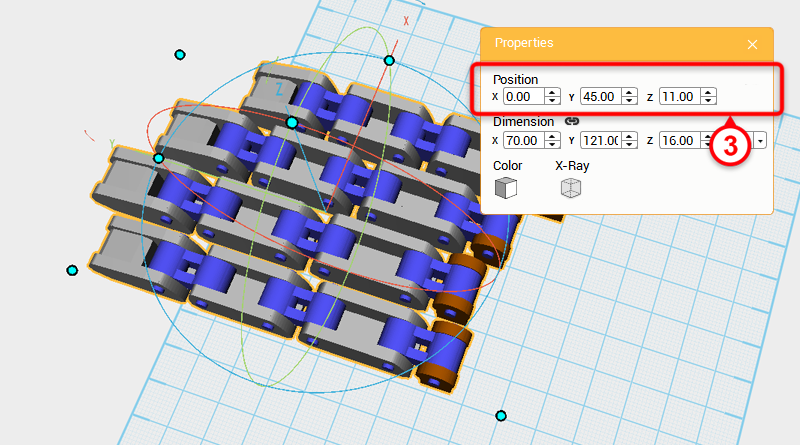
Next, start making the palm, drag select all the finger parts and change their position to:X: 0,Y: 45,Z: 11.
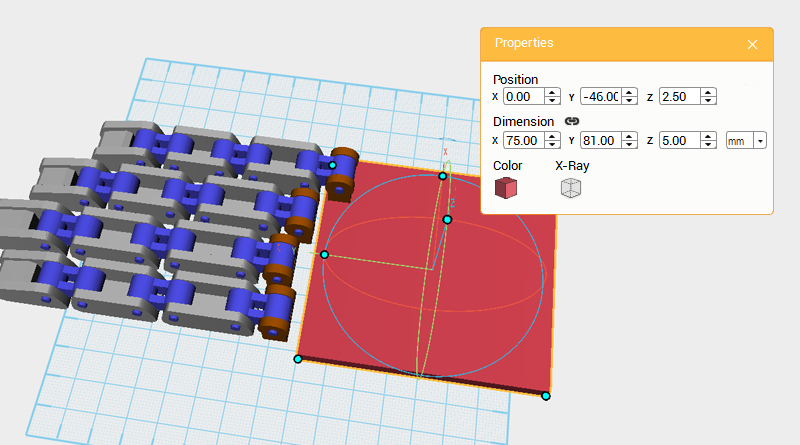
Create a Cube and change its dimensions to X: 75,Y: 81,Z: 5 mm and position to X: 0,Y: -46,Z: 2.5.
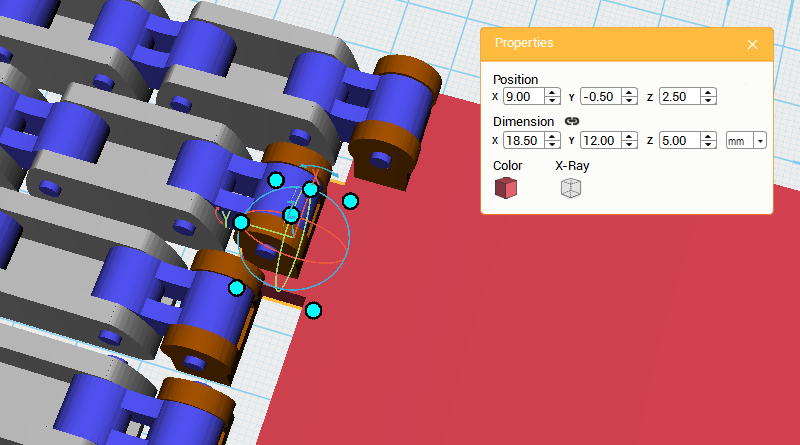
Create another Cube and change its dimensions to X: 18.5,Y: 12,Z: 5 mm and position to X: 9,Y: -0.5,Z: 2.5. This will extend the palm area to connect with the Ring finger.
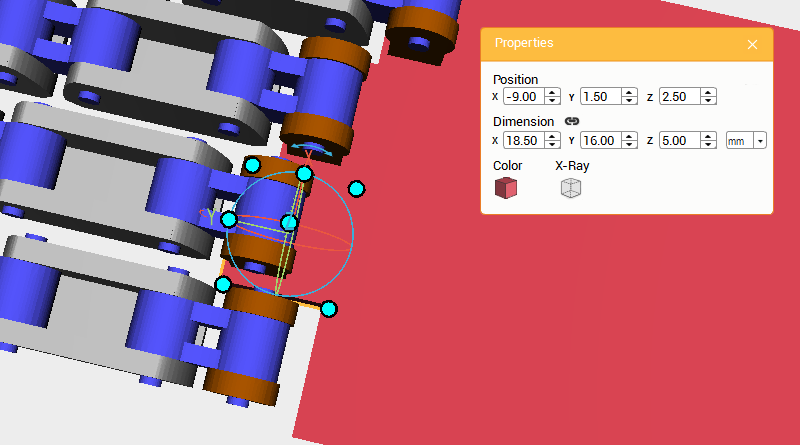
Create a Cube and change its dimensions to X: 18.5,Y: 16,Z: 5 mm and position to X: -9,Y: 1.5,Z: 2.5. This will extend the palm area to connect with the Middle finger.

Create a Cube and change its dimensions to X: 20,Y: 14,Z: 5 mm and position to X: -27.5,Y: 0.5,Z: 2.5. This will extend the palm area to connect with the Index finger.
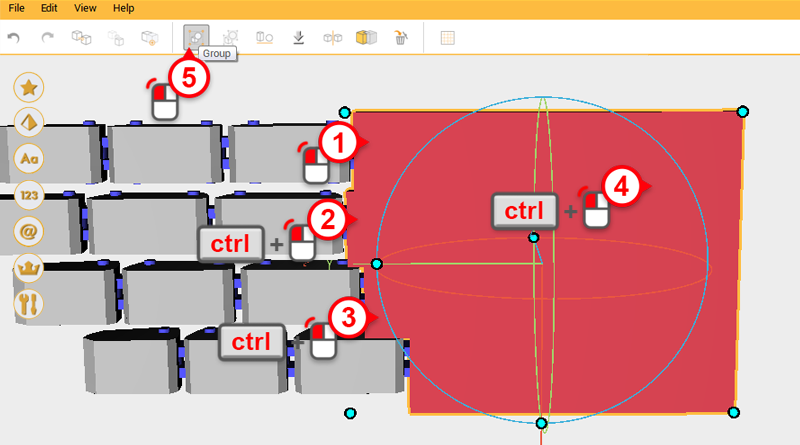
Change viewing angle so that you are viewing the parts from above. Select all the Palm parts as shown in the image above and click Group to finish the Palm plane.
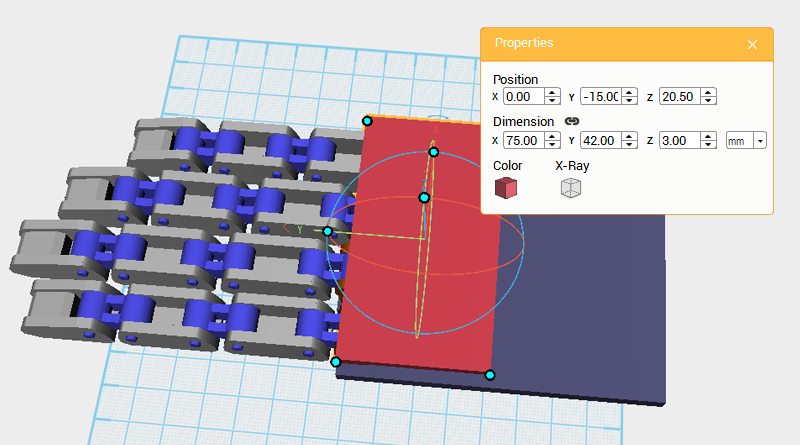
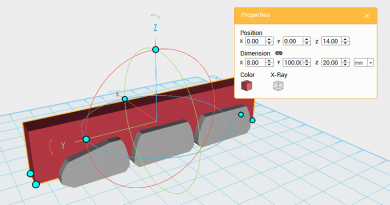
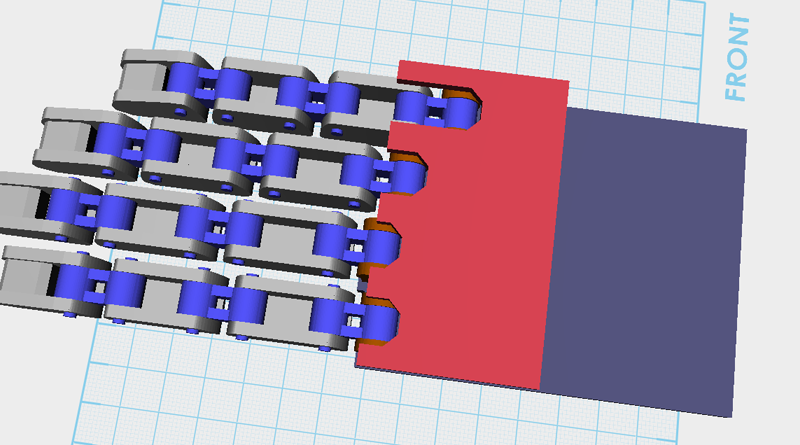
Create a Cube and change its dimensions to X: 75,Y: 42,Z: 3 mm and position to X: 0,Y: -15,Z: 20.5. Call this part the Palm cover.
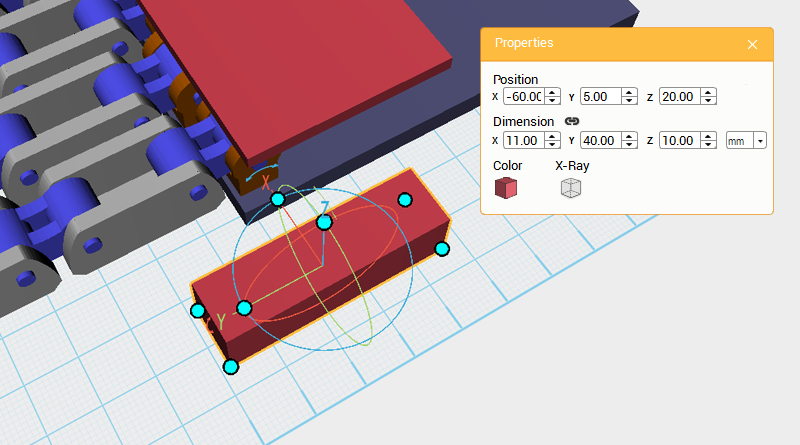
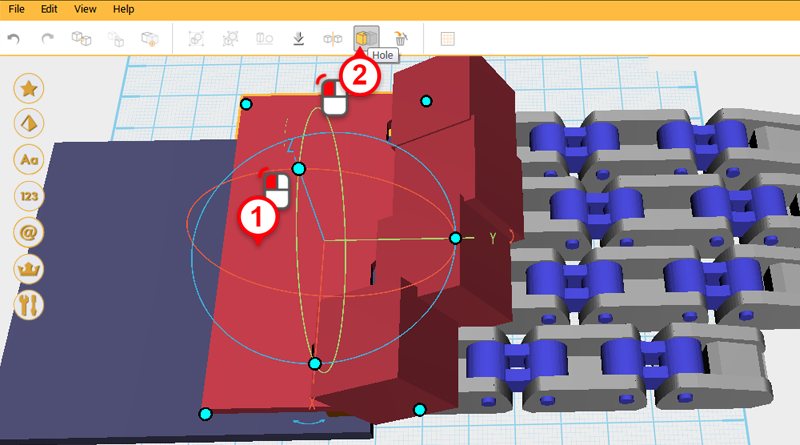
Next, make a tool for beveling edges and cutting out a structure in the Palm cover for the joints to move. Create a Cube and change its dimension to X: 11,Y: 40,Z: 10 mm and position to X: -60,Y: 5,Z: 20.
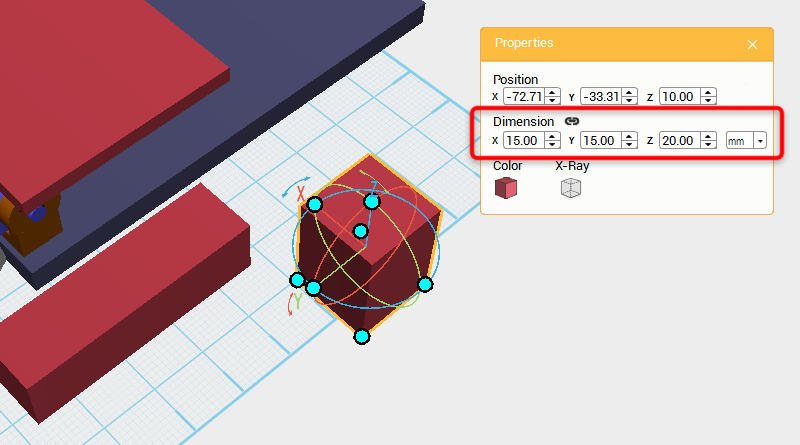
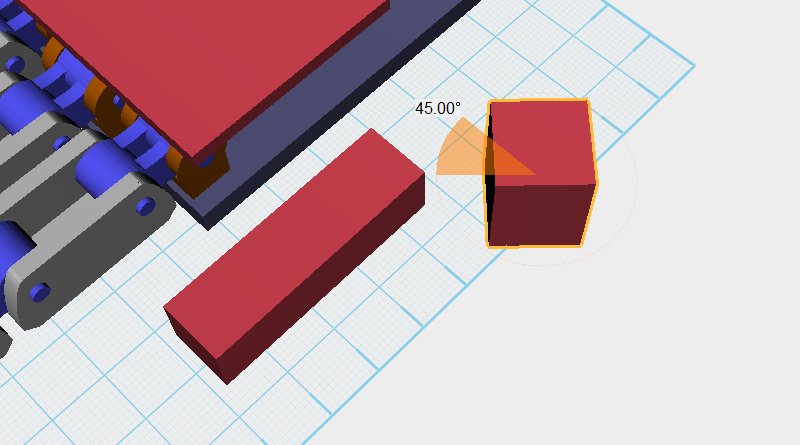
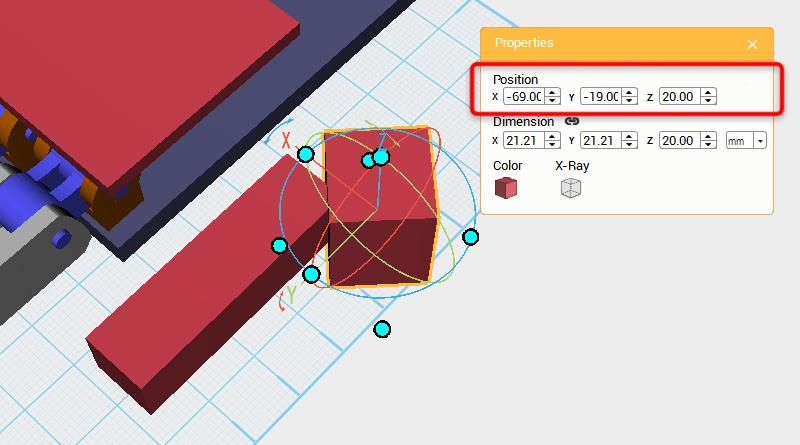
Create a Cube and change its dimensions to X: 15,Y: 15,Z: 20 mm. Next, rotate the part 45° along the Z-axis and change its position to X: -69,Y: -19,Z: 20.
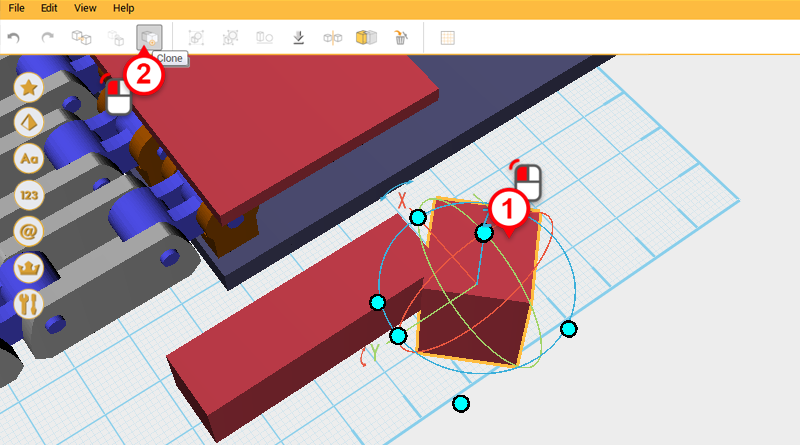
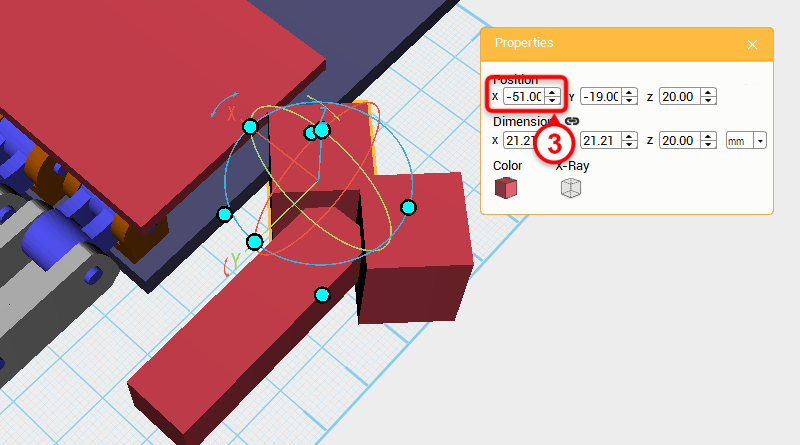
Select the Cube you just created, click Clone, and change the part’s X-axis position to -51.
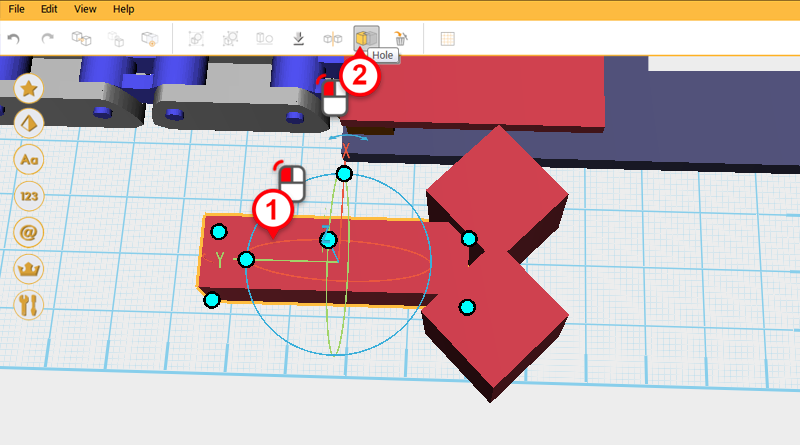
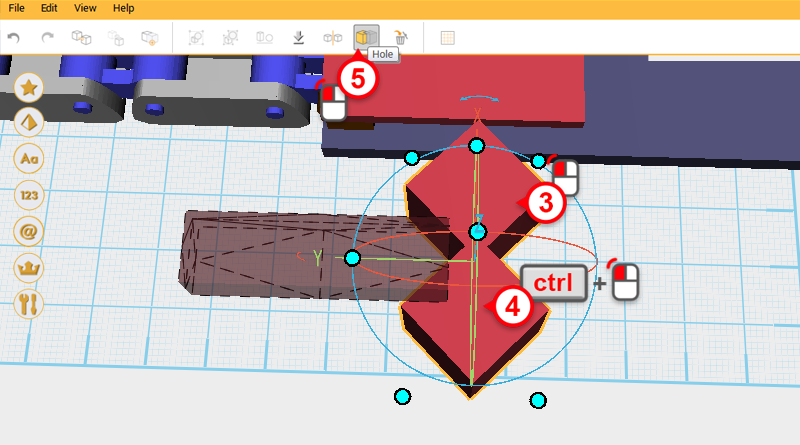
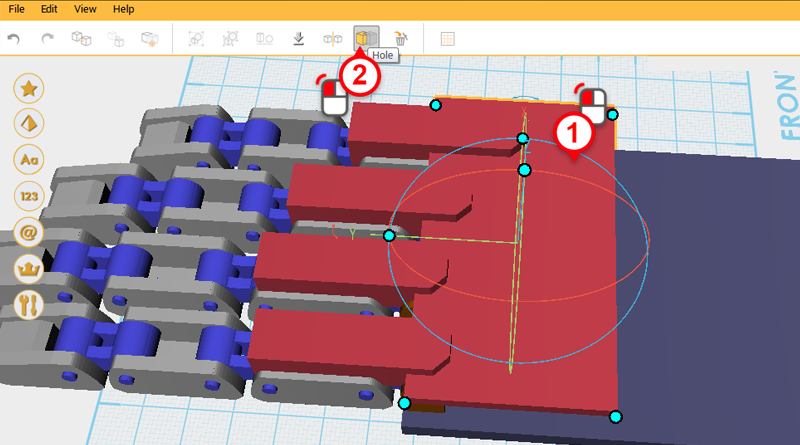
As shown in the image above, use the Hole function to finish the Bevel cutting tool.
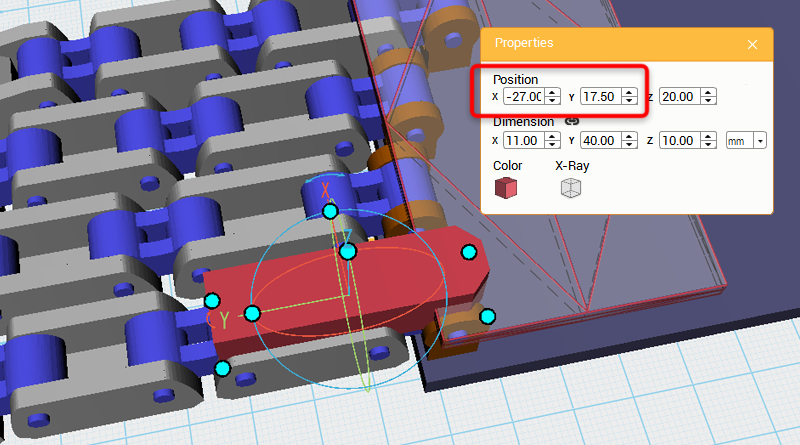
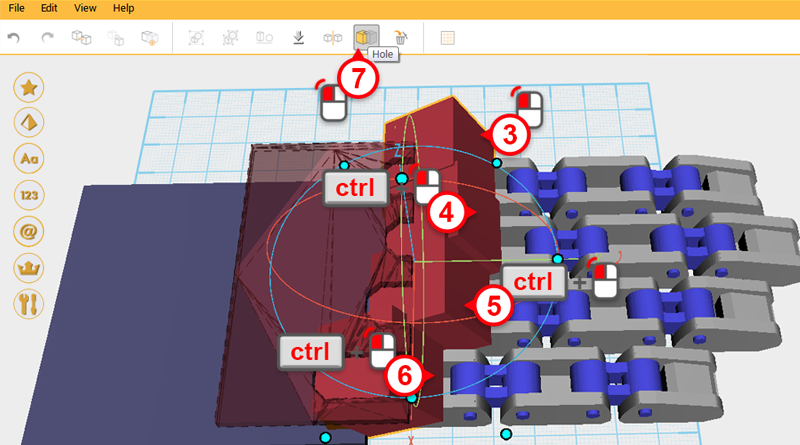
Select the Bevel cutting tool and change its X-axis position to -27 and Y-axis position to 17.5.
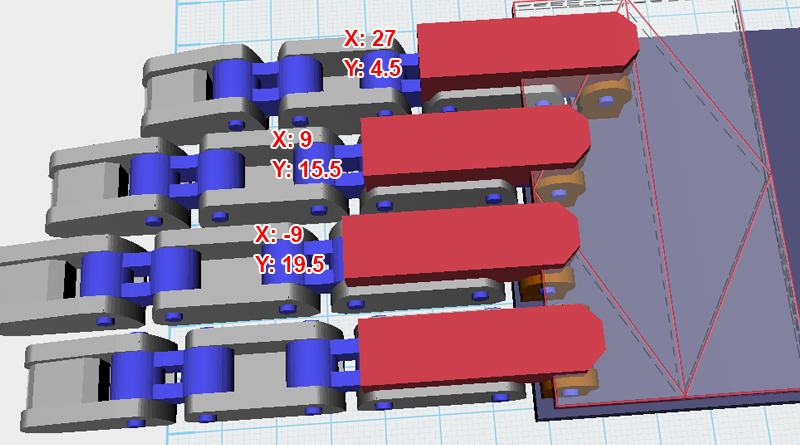
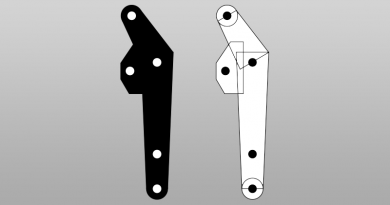
Clone three more Bevel cutting tools and change their X and Y-axis positions to the dimensions shown in the drawing above.
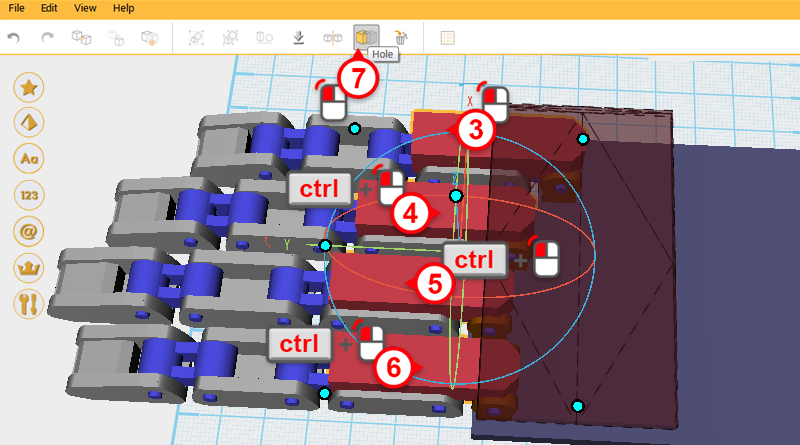
Use the four Bevel cutting tools and the Hole function to cut out a structure in the Palm cover for the joints to move.
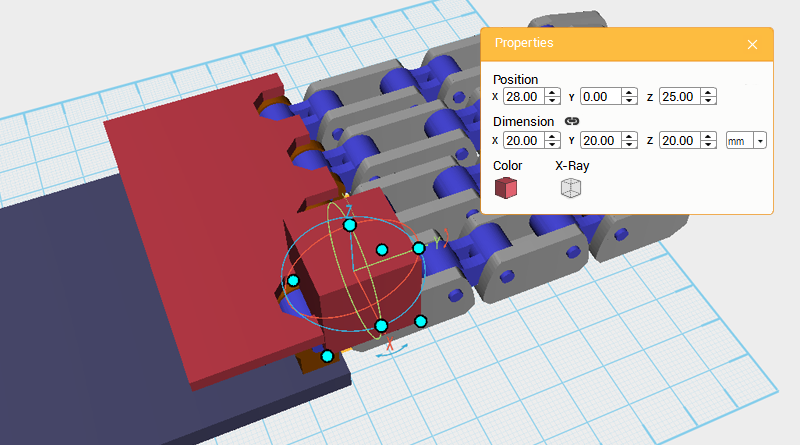
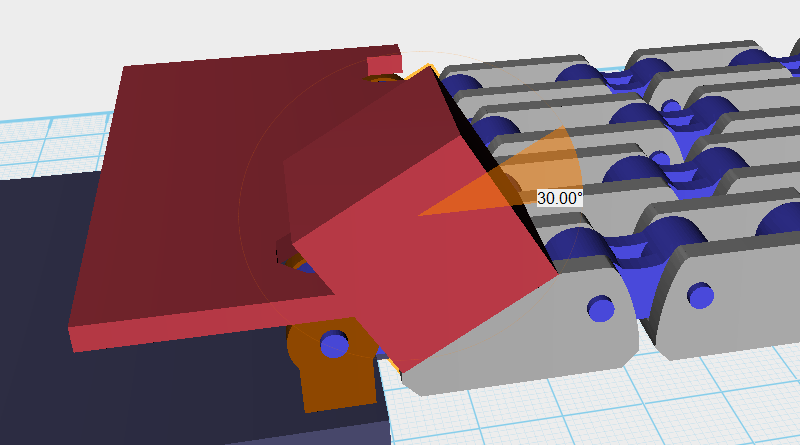
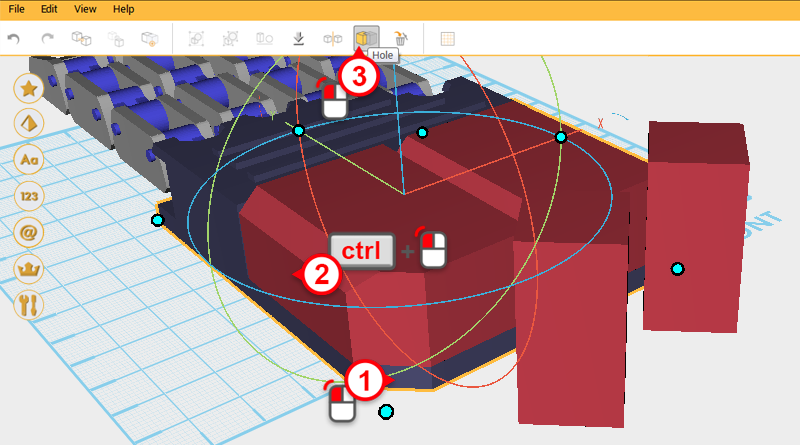
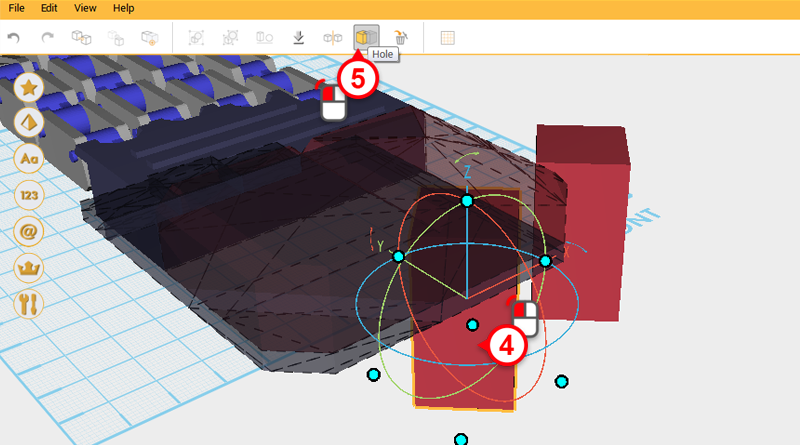
Create a Cube, change its position to X: 28,Y: 0,Z: 25, and rotate it 30° along the X-axis. Call this a Cutting part.
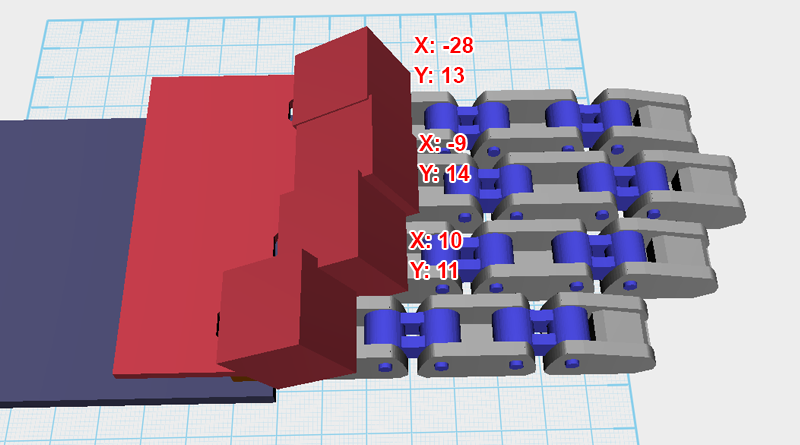
Similar to before, Clone the Cutting part 3 more times, then change the parts X-axis and Y-axis positions to the values shown in the image above.
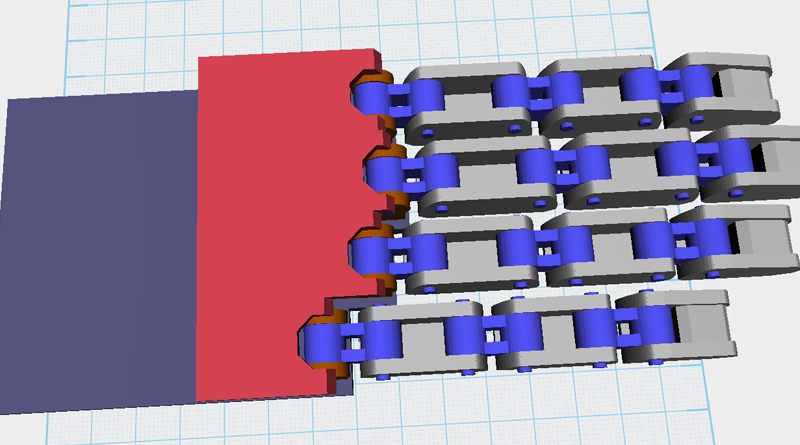
Use the four Cutting parts and the Hole function to keep cutting away form the Palm cover.
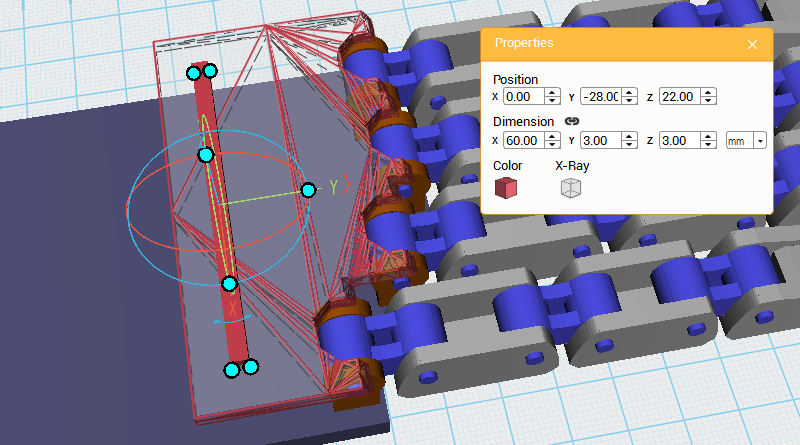
Create a Cube, then change its dimensions to X: 60,Y: 3,Z: 3 mm and position to X: 0,Y: -28,Z: 22.
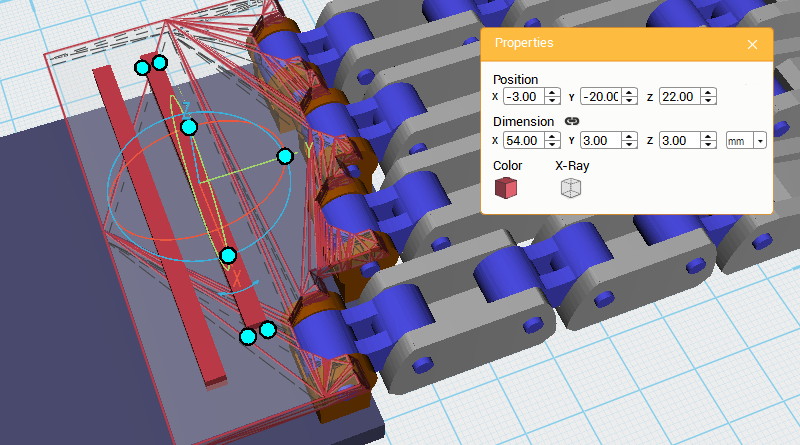
Clone the same Cube and change its X-axis dimension to 54mm, X-axis position to -3, and Y-axis to -20.
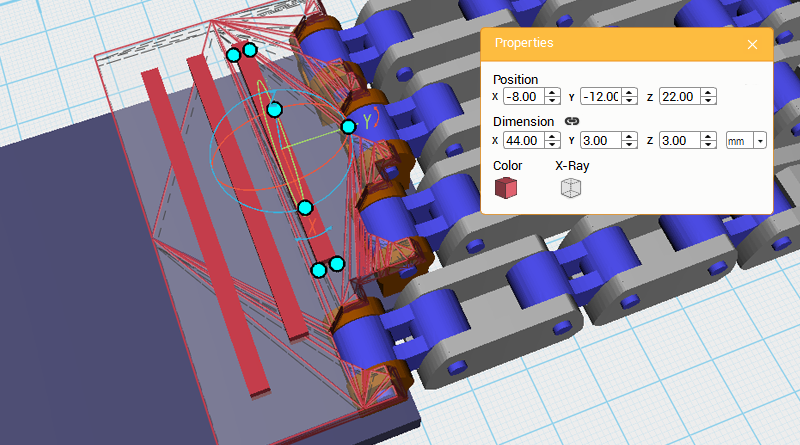
Clone the Cube again, change its X-axis dimension to 44mm, X-axis position to -8, and Y-axis position to -12.
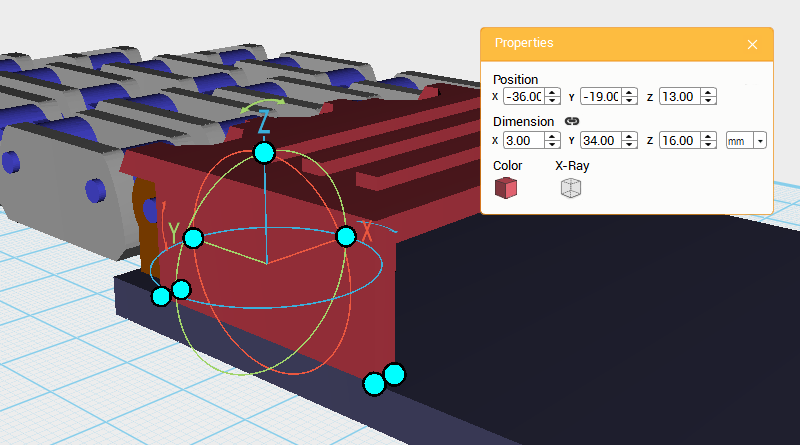
Next, keep adding to the Palm cover structure. Create a Cube and change its dimensions to X: 3,Y: 34,Z: 16 mm, and position to X: -36,Y: -19,Z: 13.
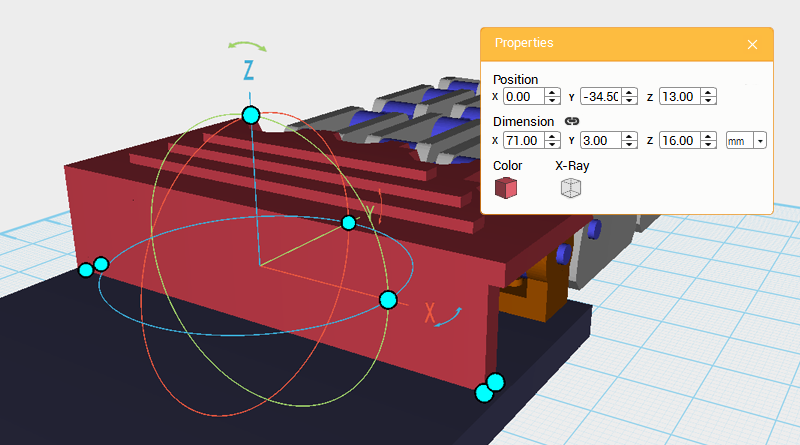
Create a Cube and change its dimensions to X: 71,Y: 3,Z: 16 mm, and position to X: 0,Y: -34.5,Z: 13.
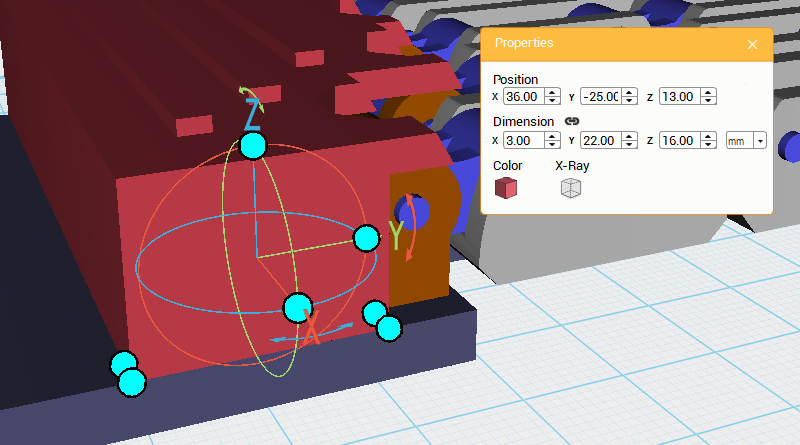
Create a Cube and change its dimensions to X: 3,Y: 22,Z: 16 mm, and position to X: 36,Y: -25,Z: 13.
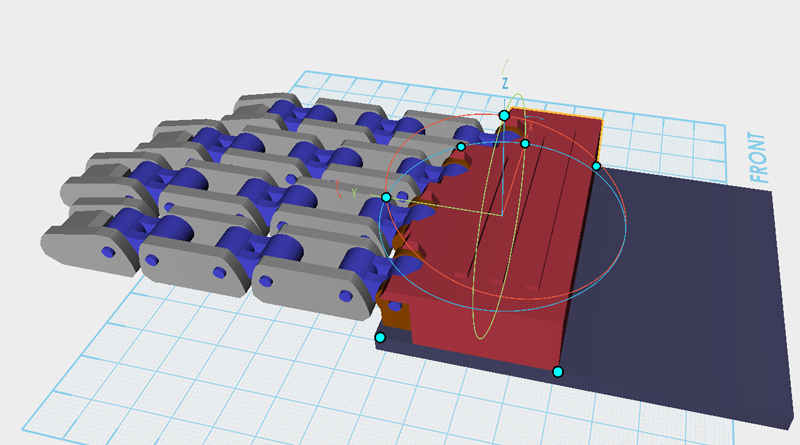
Lastly, select all the red Cubes in the drawing above, and click Group to finish the Palm cover.
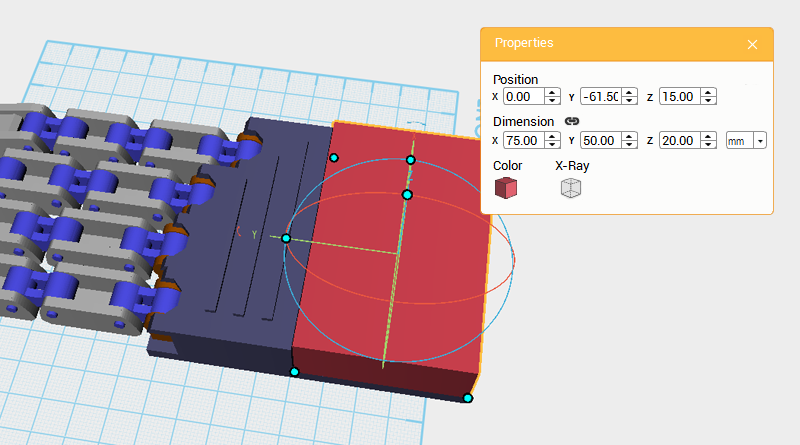
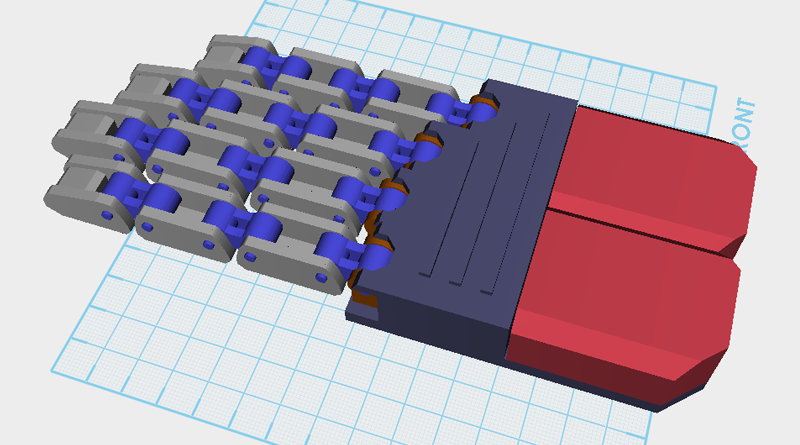
Next, we’re going to make the rest of the hand’s parts. Create a Cube, change its dimensions to X: 75,Y: 50,Z: 20 mm, and position to X: 0,Y: -61.5,Z: 15. Call this part the Palm center.

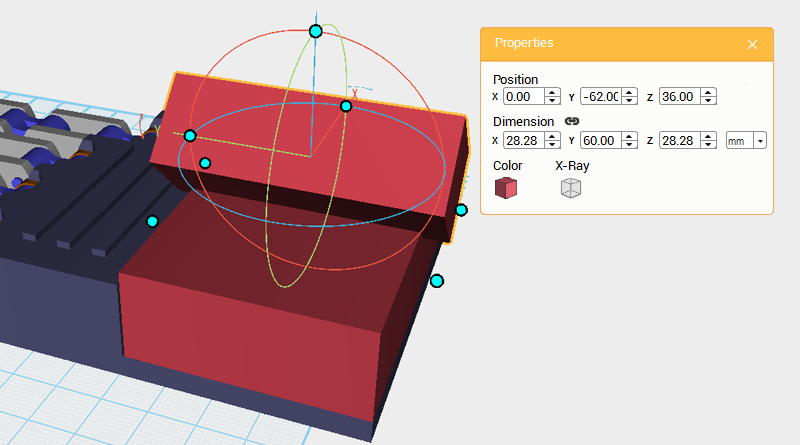
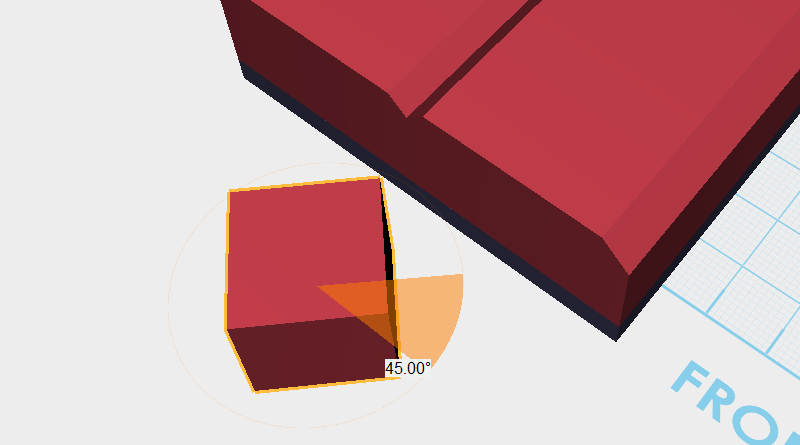
Create a Cube and rotate it 45° along the Y-axis, then change its Y-axis dimension to 60mm and position to X: 0,Y: -62,Z: 36. Call this part the Cutting part.
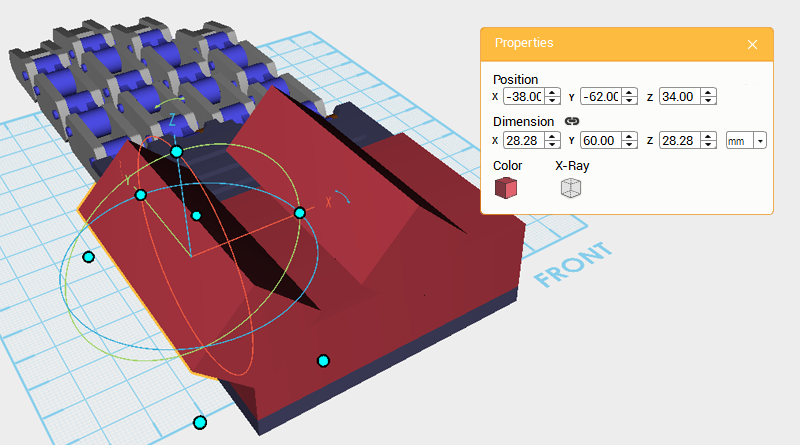
Clone the Cutting part and change its X-axis position to -38, and Z-axis position to 34.
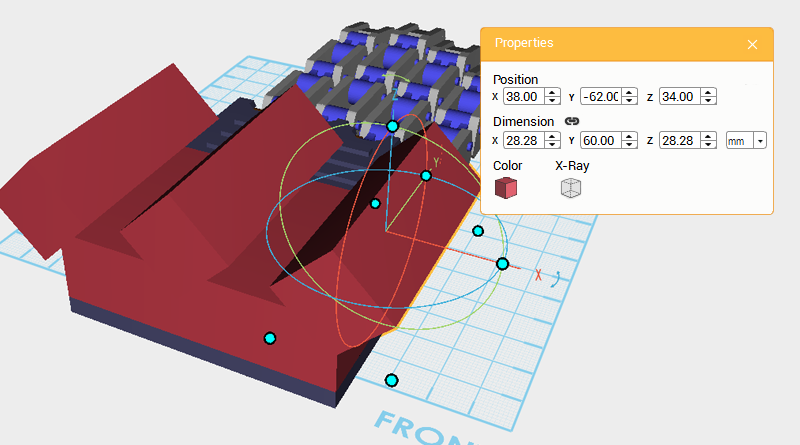
Clone the Cutting part again and adjust the part’s X-axis position to 38, and Z-axis position to 34.
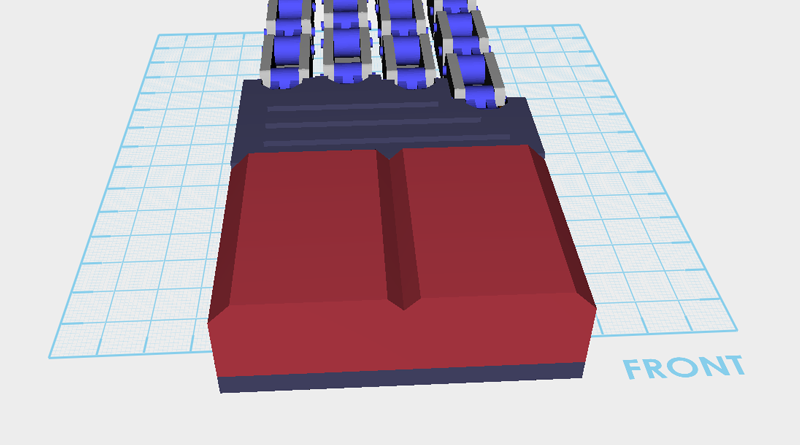
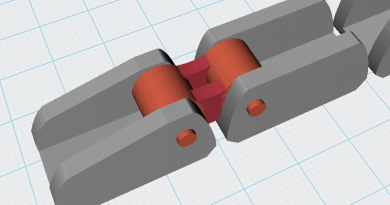
Next, use the three Cutting parts and the Hole function to detail the surface of the Palm center as shown above.
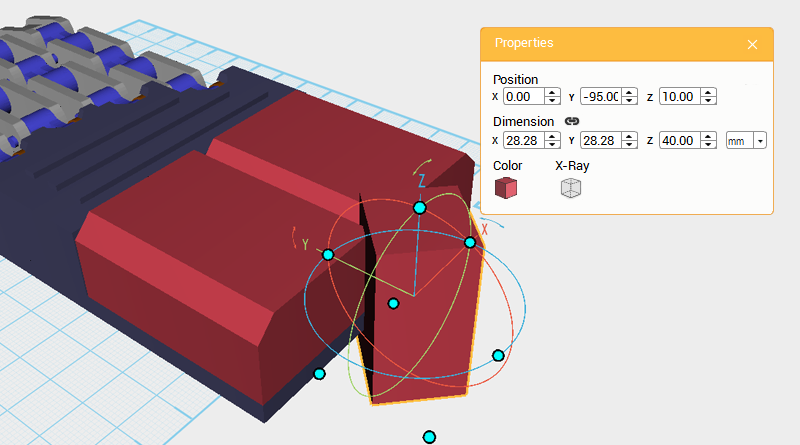
Create a Cube, rotate it 45° along the Z-axis, and change its Z-axis dimension to 40mm and position to X: 0,Y: -95,Z: 10. Call this part the Cutting part.
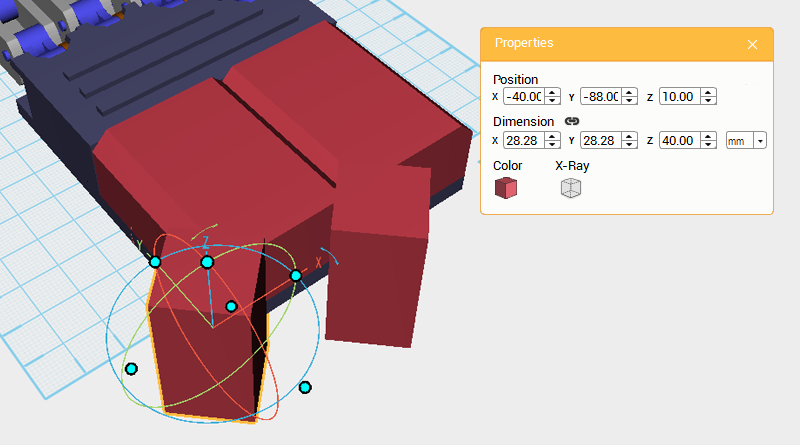
Clone the Cutting part and change its X-axis dimension to -40 and Y-axis to -88.
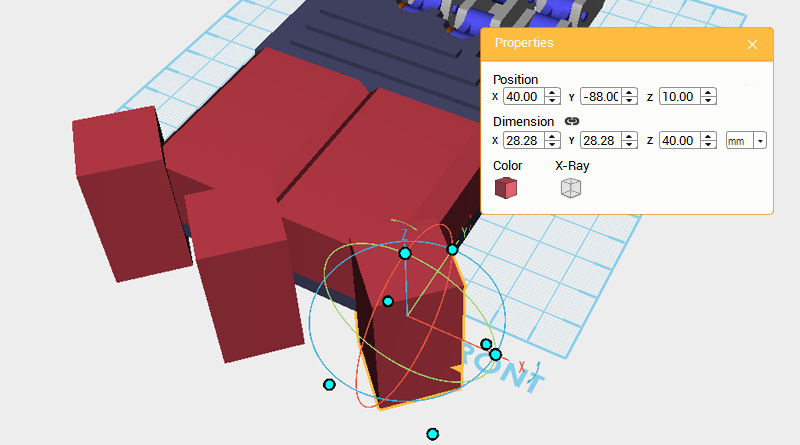
Clone the Cutting part again and change the new part’s X-axis dimension to 40 and Y-axis dimension to -88.

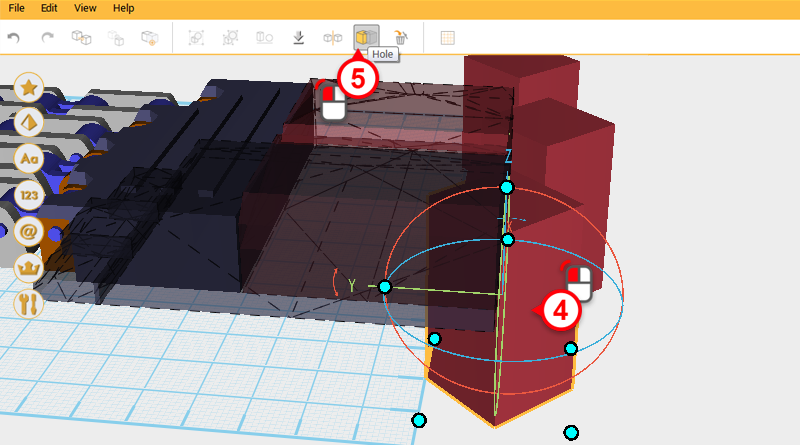
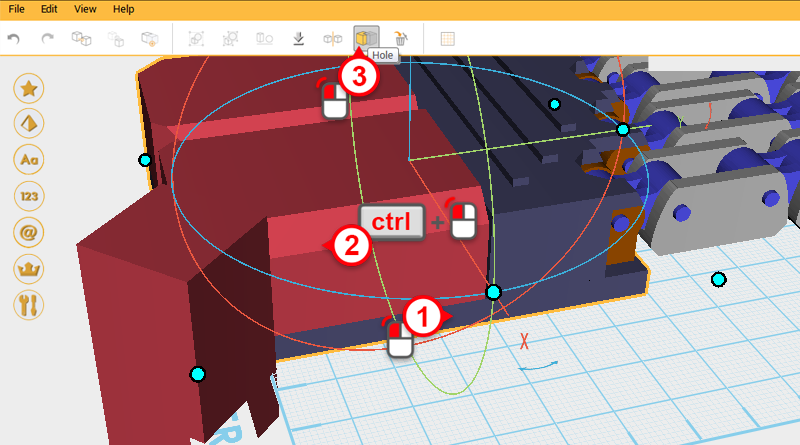
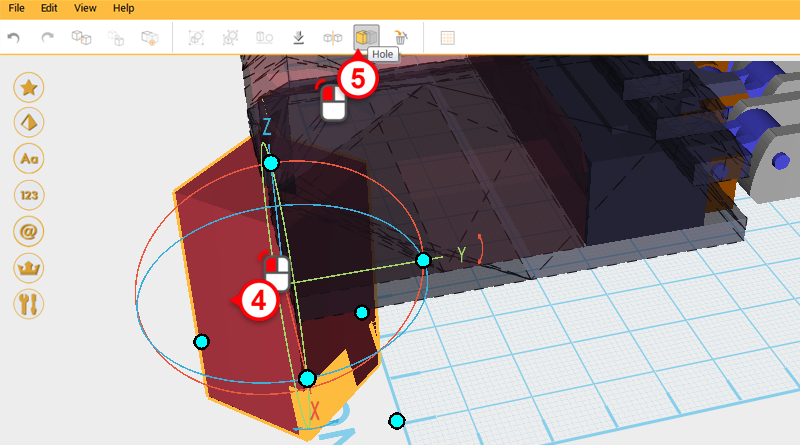

Next, use the three Cutting parts and the Hole Function to cut into the Palm plane and Palm center as shown in the image above.