XYZmaker tutorial – Robot Hand part 4
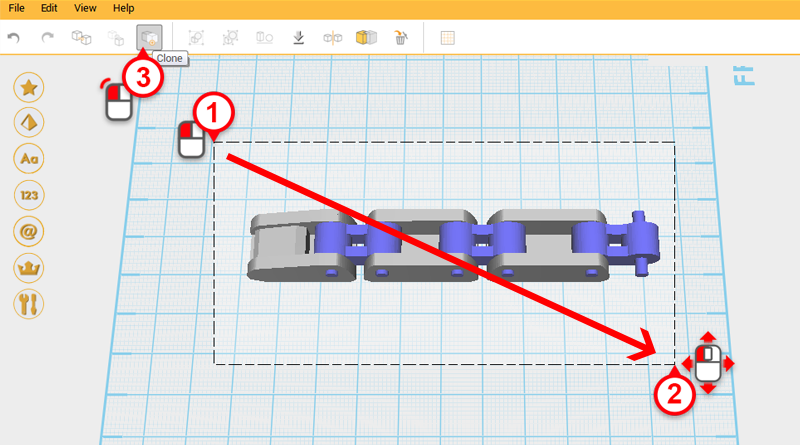
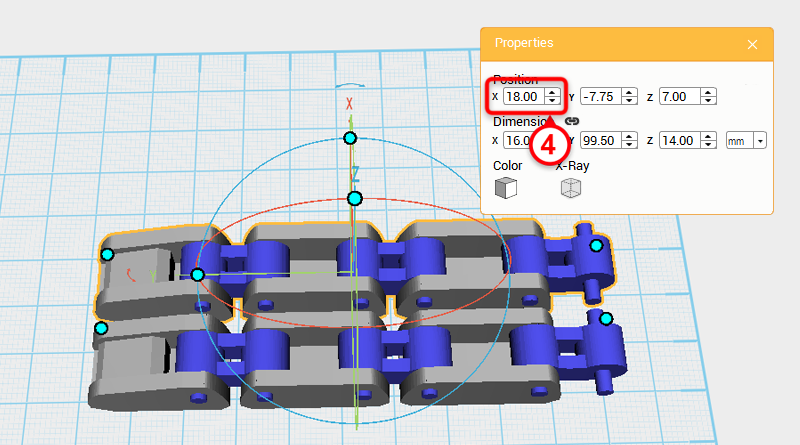
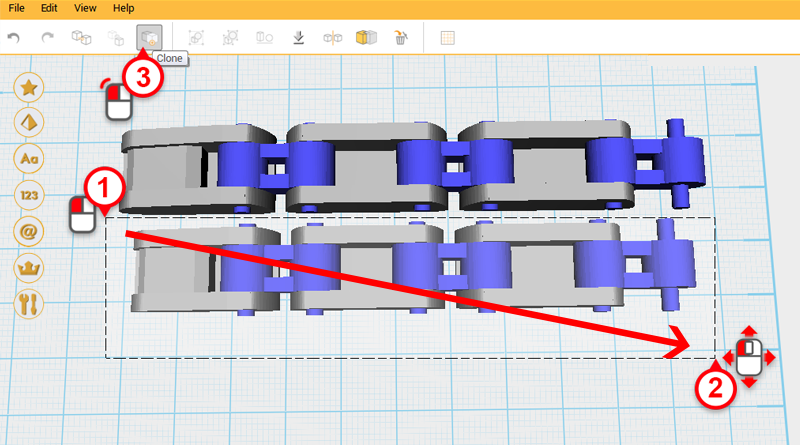
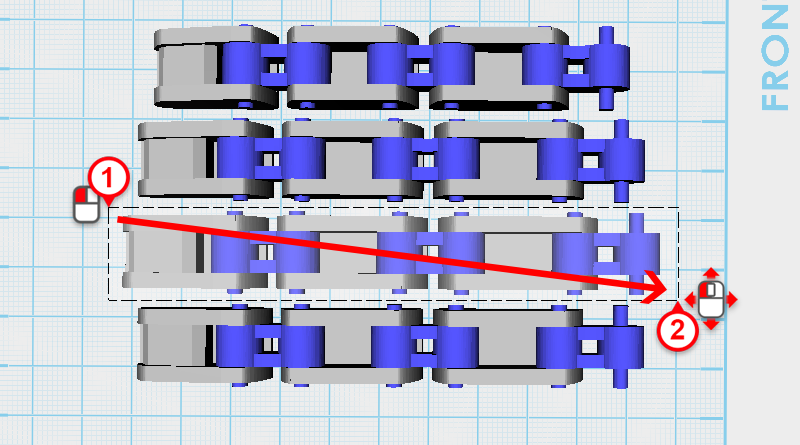
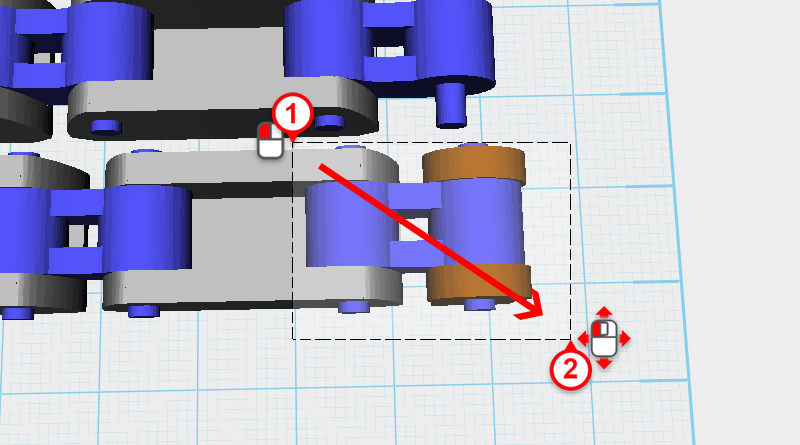
Drag select all the parts and click Clone. Change the X-axis position of the cloned finger to 18. Call this the Middle finger.
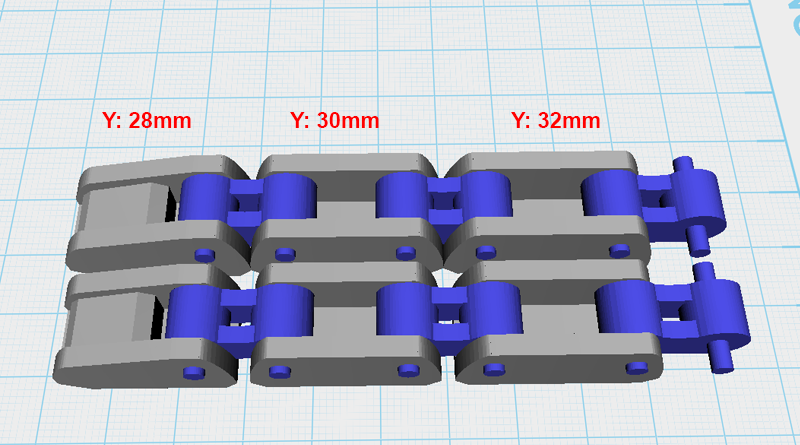
Because the Middle finger needs to be longer than the Index finger, elongate the new part. Change the Y-axis dimensions of the fingertip and finger links to the dimensions shown above.
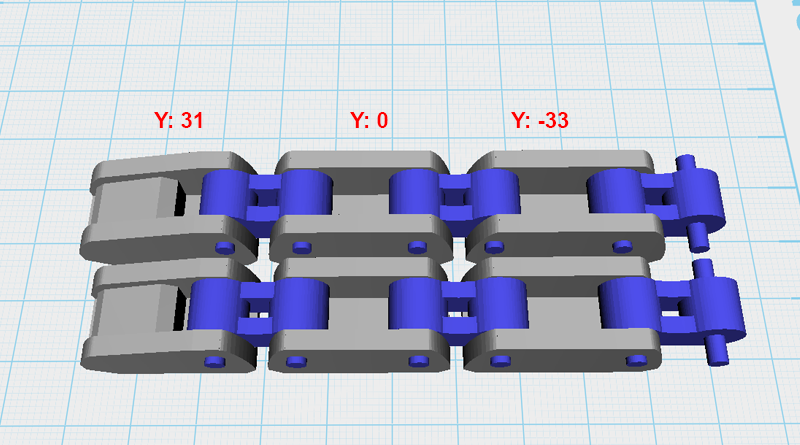
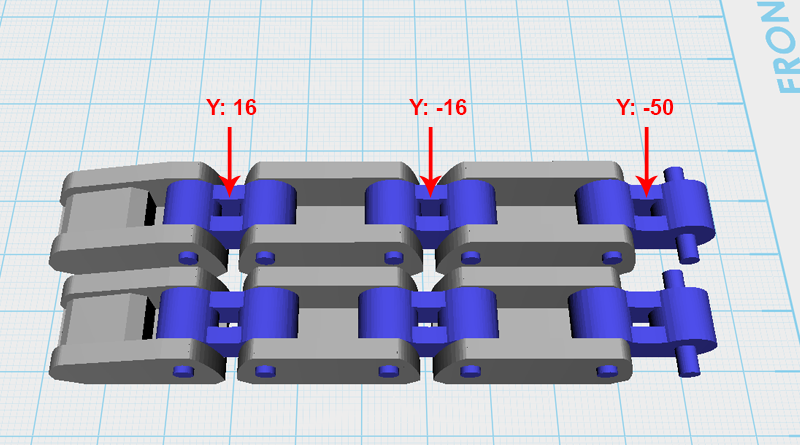
After arranging the dimensions, change the Y-axis position of the three parts as shown above to keep the spacing consistent.
Lastly, adjust the Knuckles’s Y-axis as shown above.
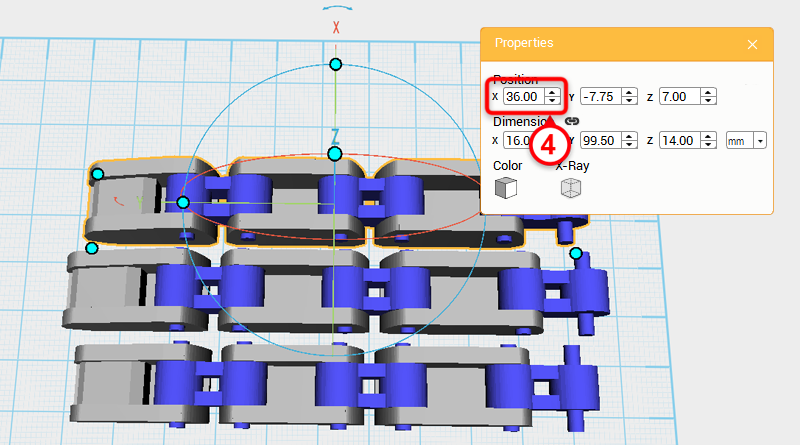
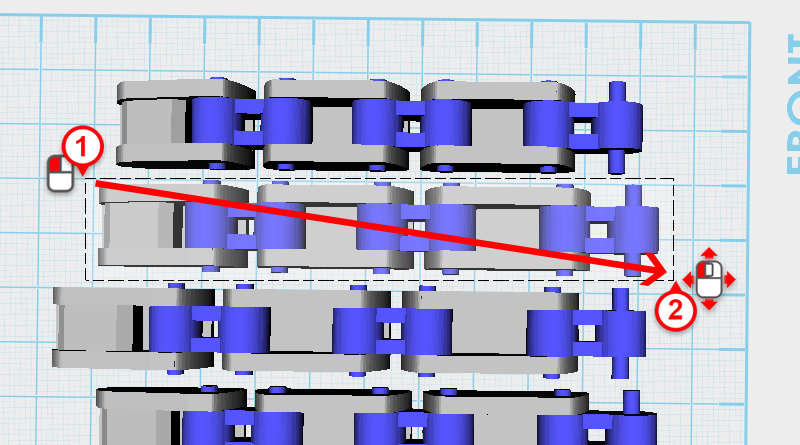
As above, drag select the Index finger parts and click Clone. Next, change the part’s X-axis position to 36. This new part is the Ring finger, because it is the same length as the Index finger, its length doesn’t need to be adjusted.
Tip: If you accidentally drag selected the wrong part, hold down ctrl and click on that part to deselect it.
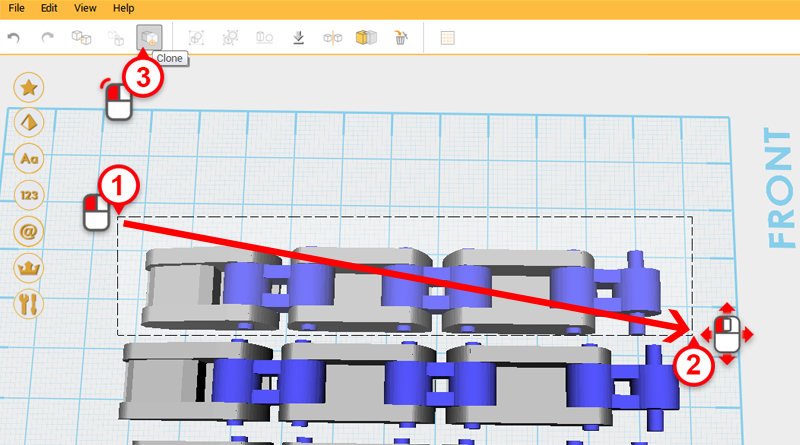
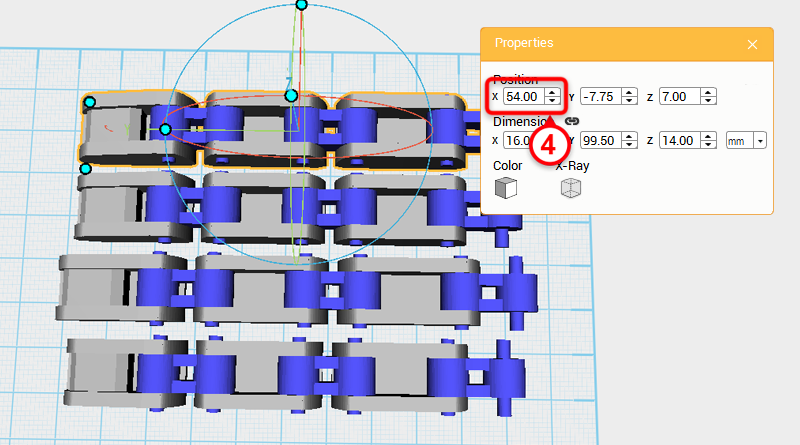
Drag select the Ring finger, click Clone, and change the part’s X-axis position to 54. This will be the Little finger.
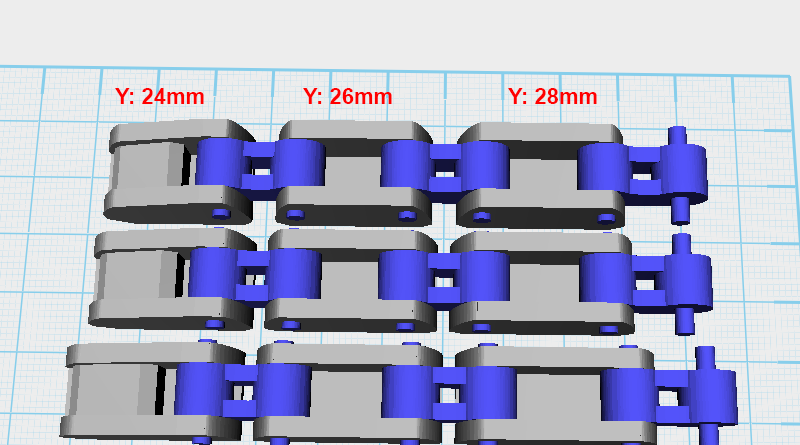
Because the Little finger is shorter than the other fingers, change its Fingertip, Finger joint A & B parts’ Y axis dimension as shown above.
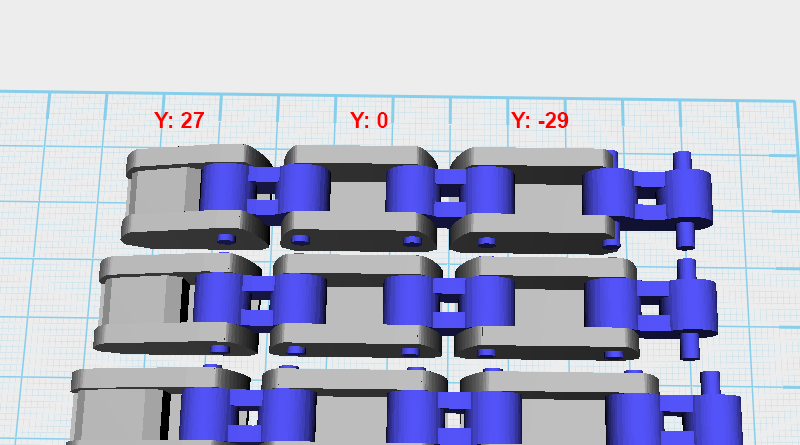
Adjust the parts’ Y-axis position so that they are all at an equal distance.
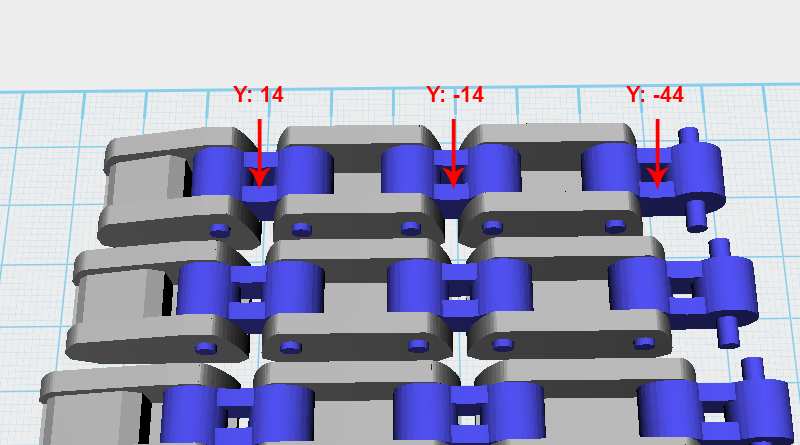
Lastly, adjust the Knuckle’s Y-axis as shown above.
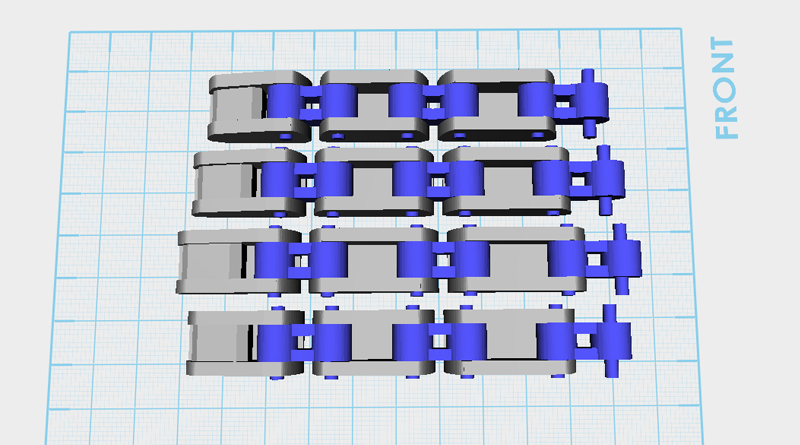
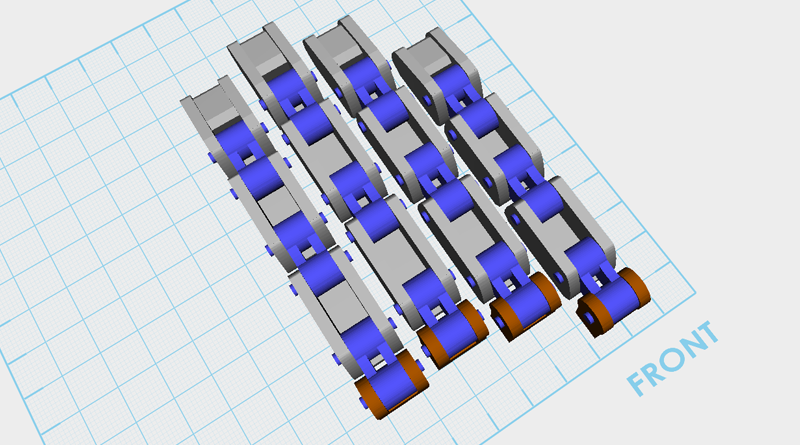
So far the the model should look like the image above, from top to bottom the parts are: Little finger, Ring finger, Middle finger, and Index finger.
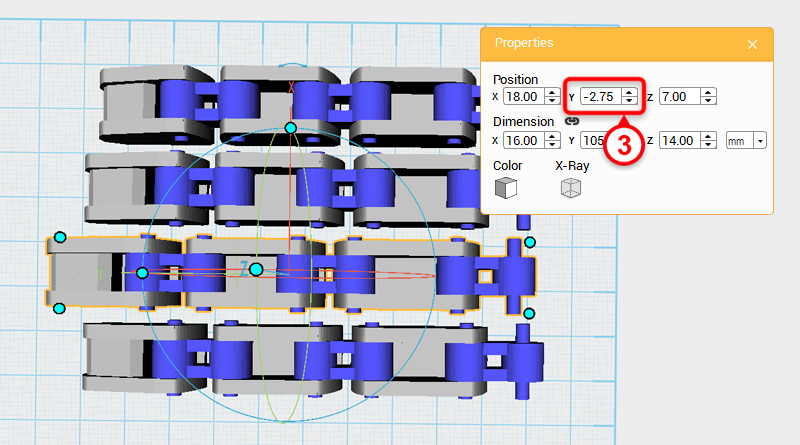
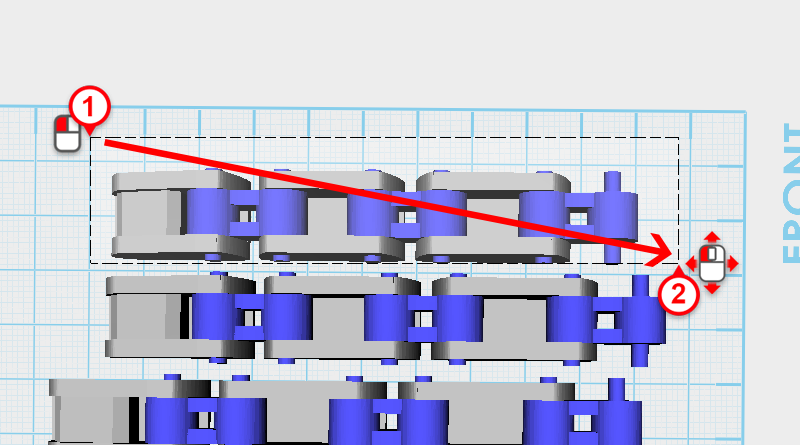
Next, adjust every finger’s position; drag select the Middle finger and change its Y-axis position to -2.75.
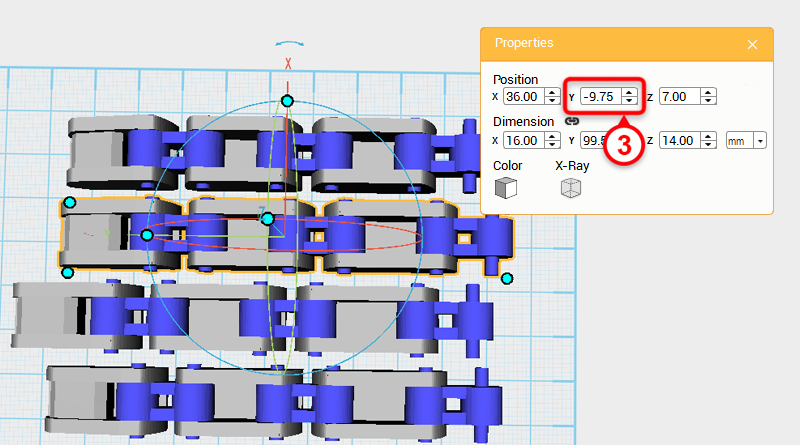
Drag select the Ring finger and change its Y-axis position to -9.75.
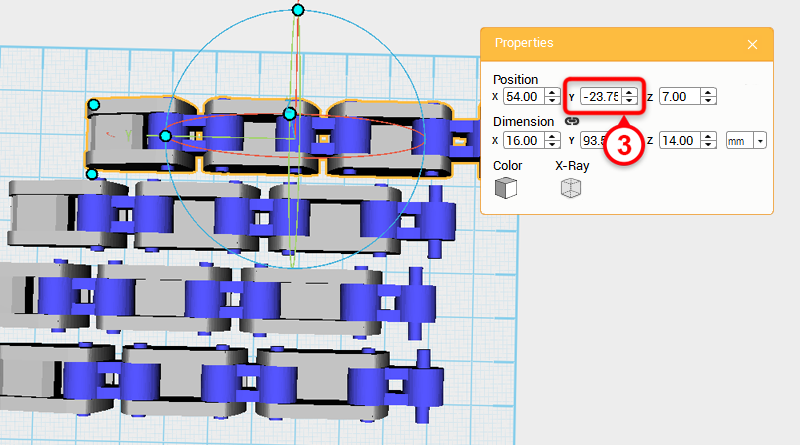
Drag select the Little finger and change its Y-axis position to -23.75.
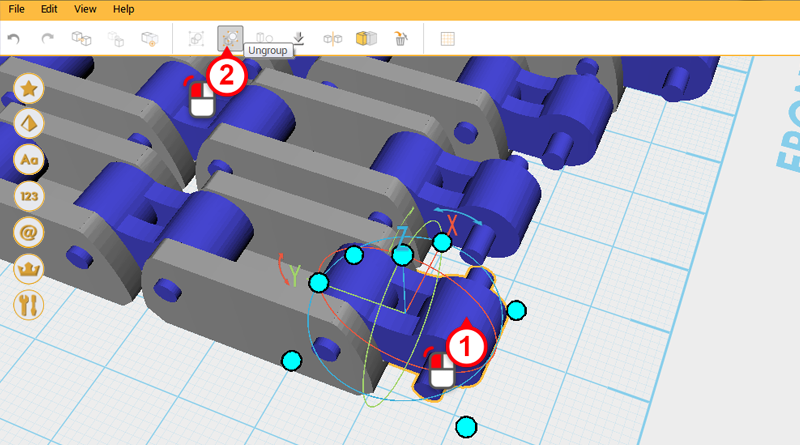
Next, create the finger and palm connector. First select the Finger link shown in the image above and click Ungroup.
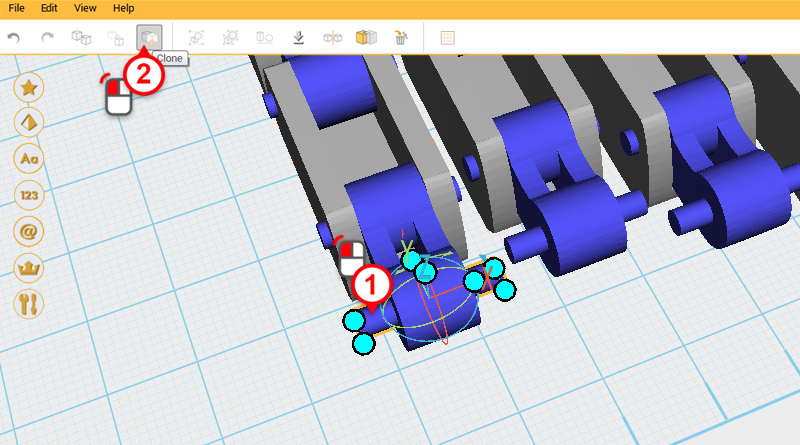
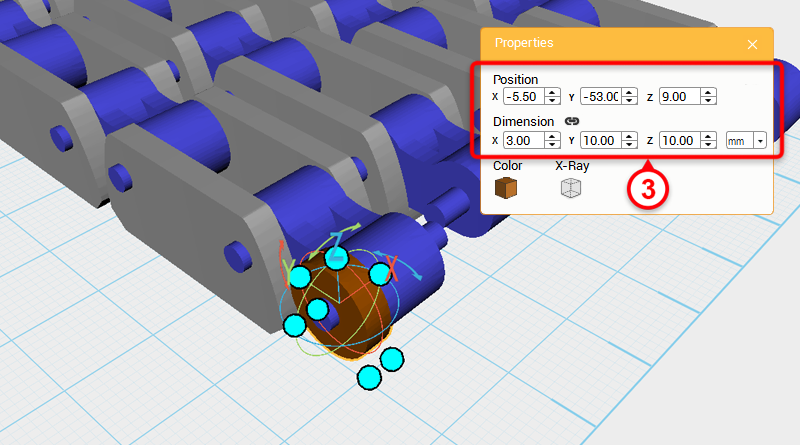
Select the Cylinder in the image above, and click Clone. Next, change its dimensions to X: 3,Y: 10,Z: 10 mm and position to X: -5.5,Y: -53,Z: 9. You can also change its color so that its easier to inspect.

Select the brown Cylinder shown in the image above and click Clone. Change the new part’s X-axis dimension to 5.5.
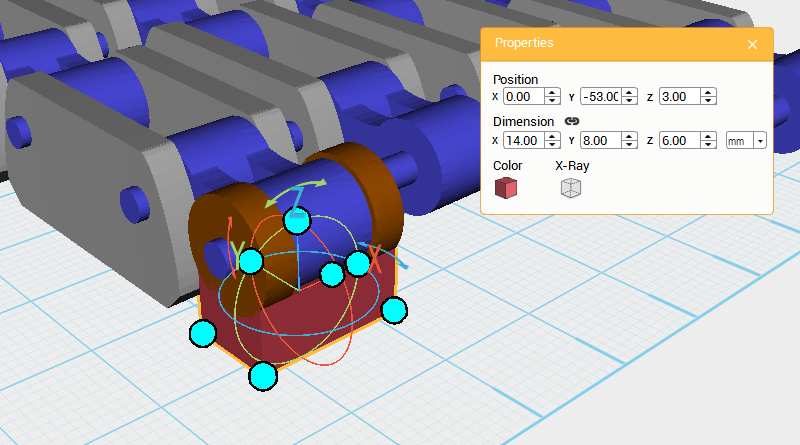
Create a Cube and change its dimensions to X: 14,Y: 8,Z: 6 mm and position to X: 0,Y: -53,Z: 3.
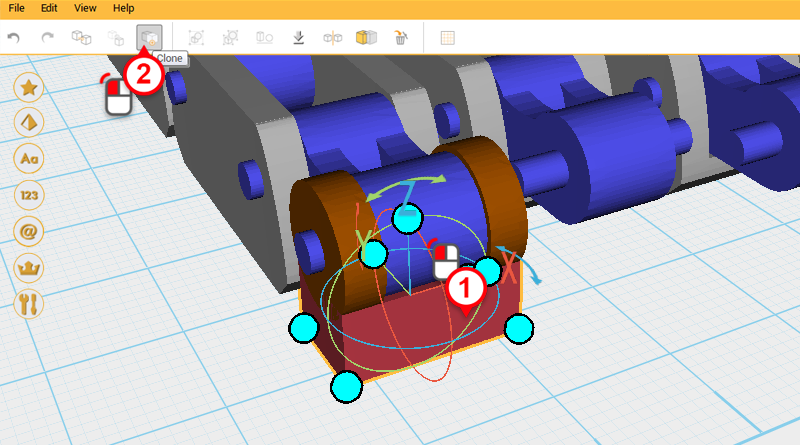

Select the Cube you just created and click Clone. Change the new parts dimension’s to X: 8,Y: 10,Z: 8 mm and position to X: 0,Y: -53,Z: 7. Call this part the Cutting part.
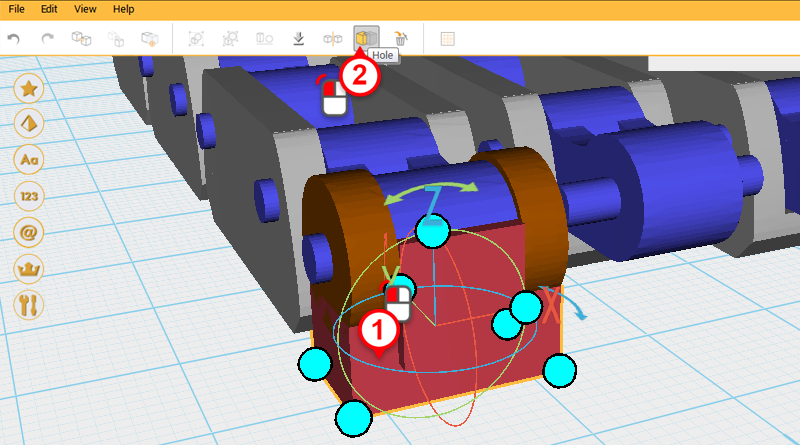
Select the lower Cube and click Hole.
Select the Cutting part and click on Hole again to cut away an area that the link can rotate in.
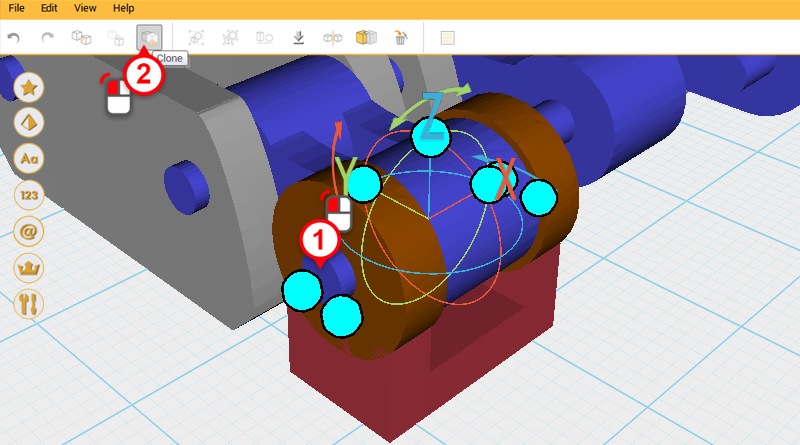
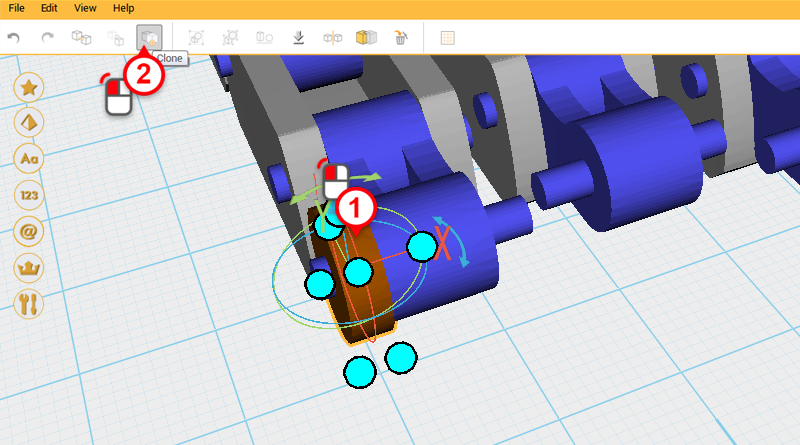
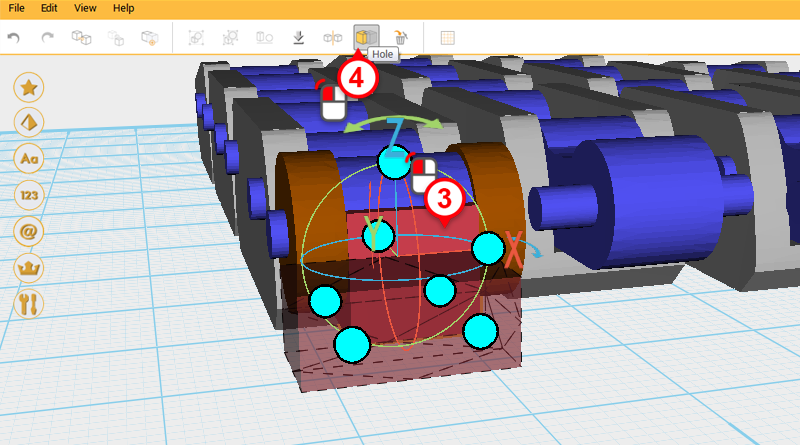
Select the blue Cylinder shown in the image above and click Clone.
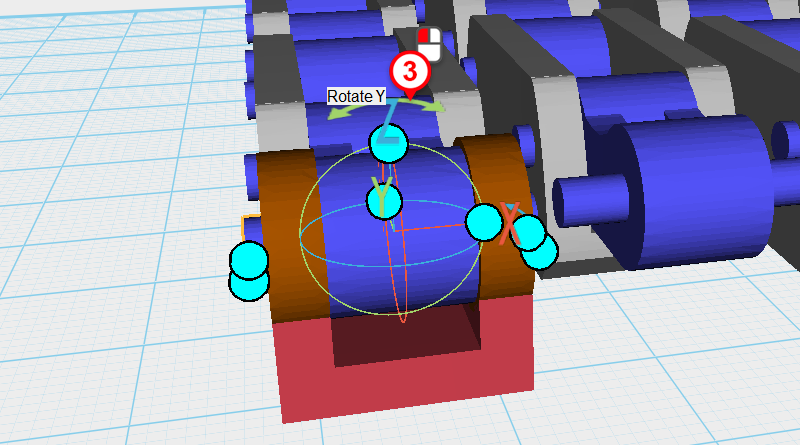
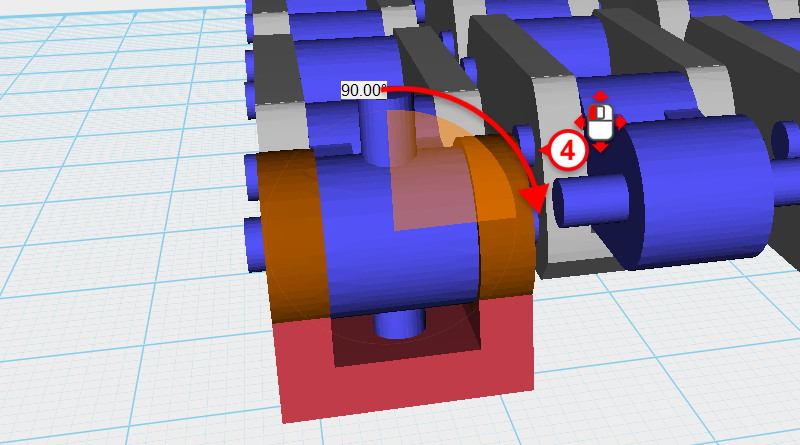
Next, click and drag the arrow above the Z-axis in the bounding box and rotate the part 90°.

Lastly change the rotated part’s Z-axis dimension to 6mm and Z-axis position to 1. This new part will be a rotation point.
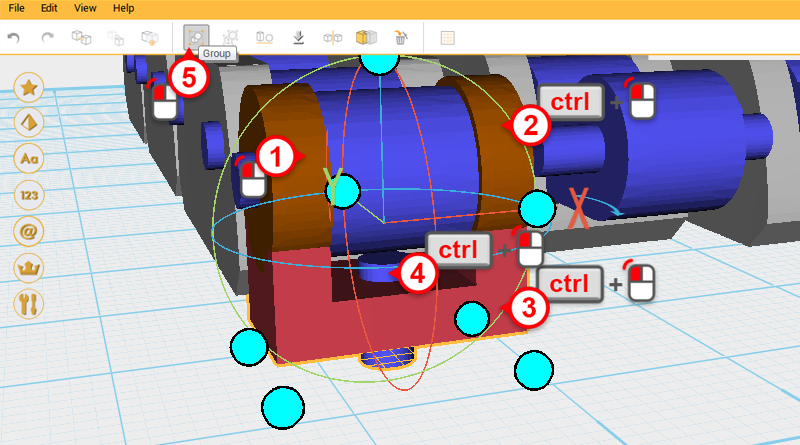
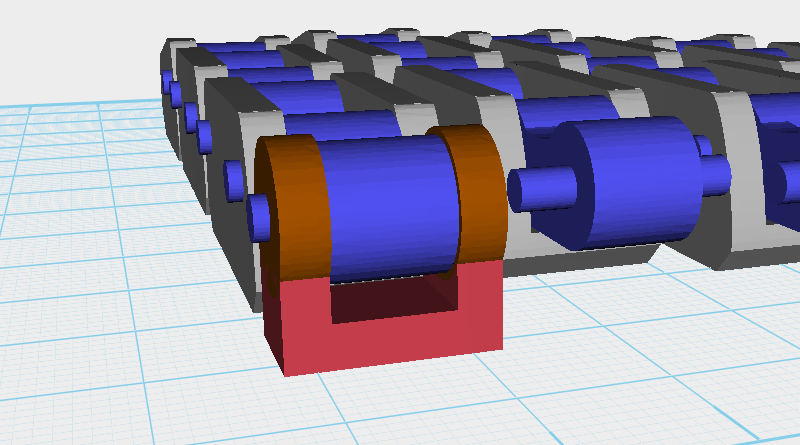
Select the four parts shown in the image and click Group. This completes the Finger joint base.
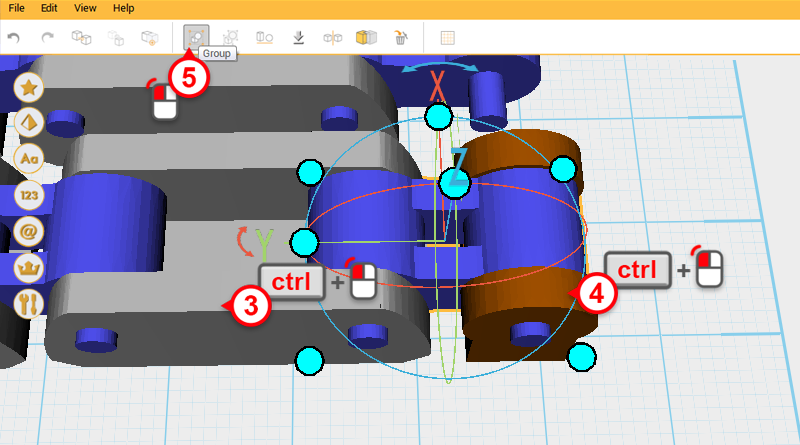
Drag select the part in the image, then while holding ctrl, click on Finger joint B and the Finger joint base to deselect them. Lastly click Group to turn the parts back into a group.
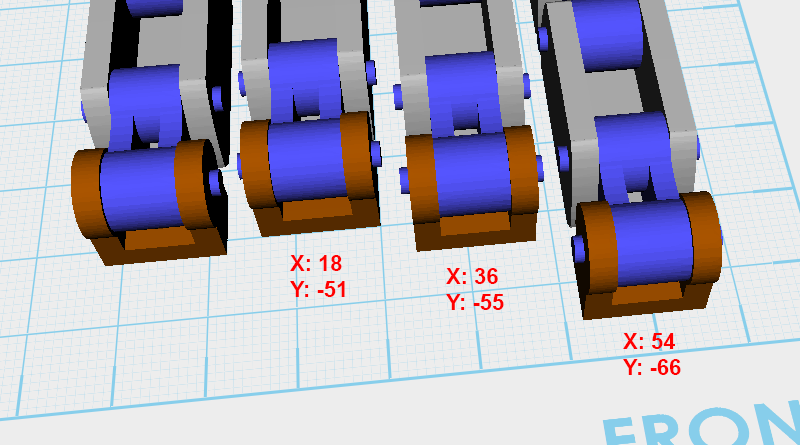
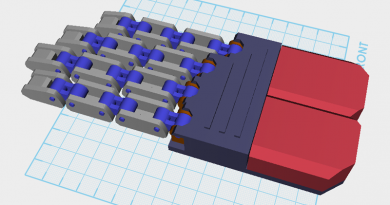
Clone the Finger joint base three times and change its X and Y-axis position to the positions shown above.

So far your model should resemble the image above.