XYZmaker tutorial – Robot Hand part 2
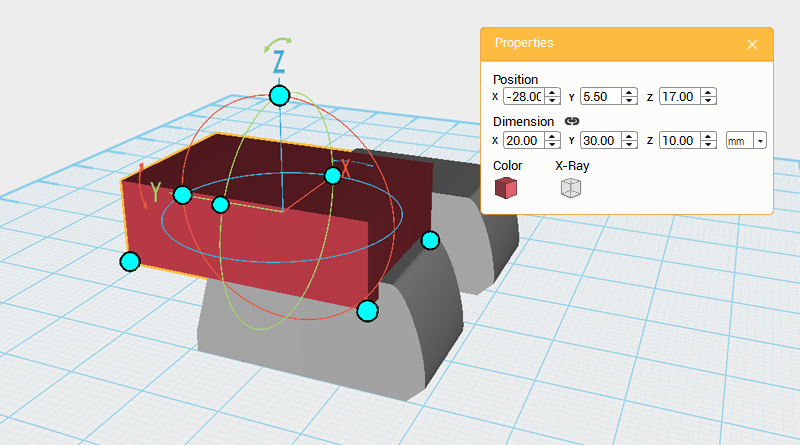
Next cut out the shape of the front end of the fingertip, create a Cube and change its dimensions to X: 20,Y: 30,Z: 10 mm and position to X: -28,Y: 5.5,Z: 17. Call this Cutting part.
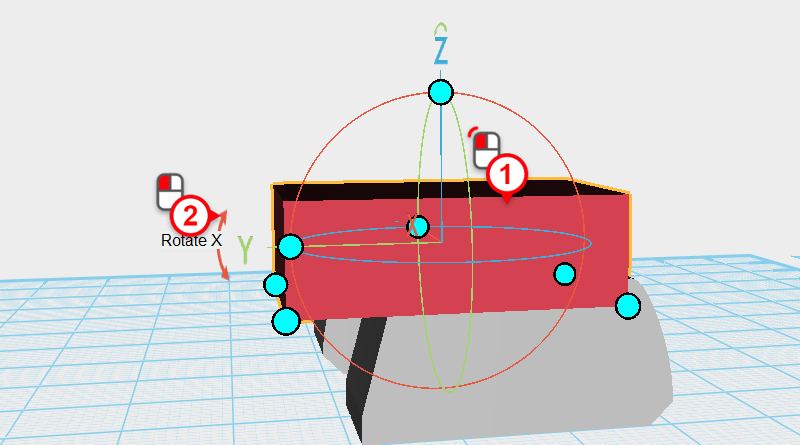
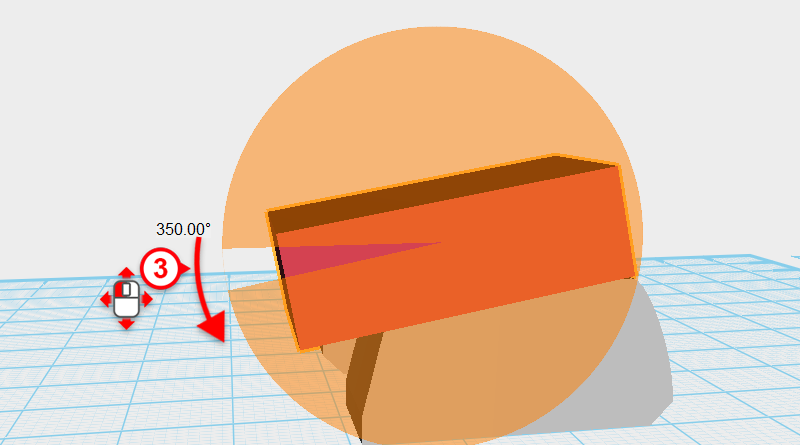
Select the Cutting part, click and drag on the rotation arrow next to the Y-axis, rotating the part 350°.
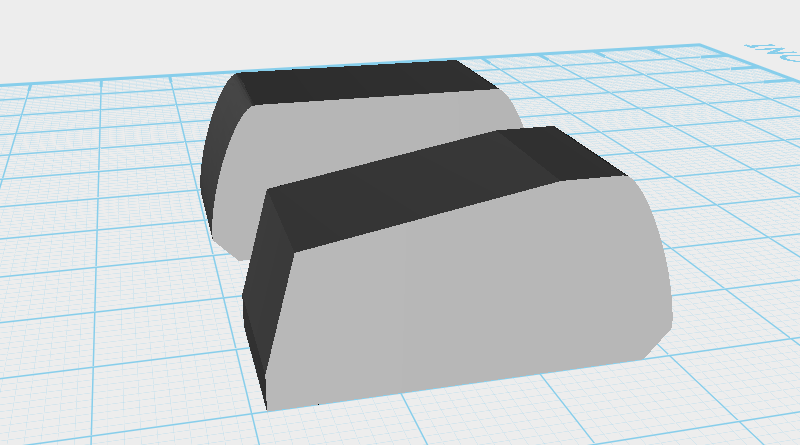
Next, use the Cutting part and the Hole function to cut the top of the fingertip as shown in the image above.
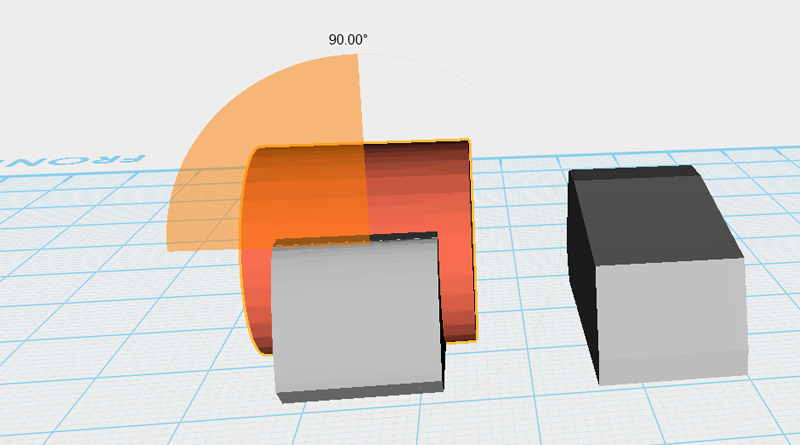
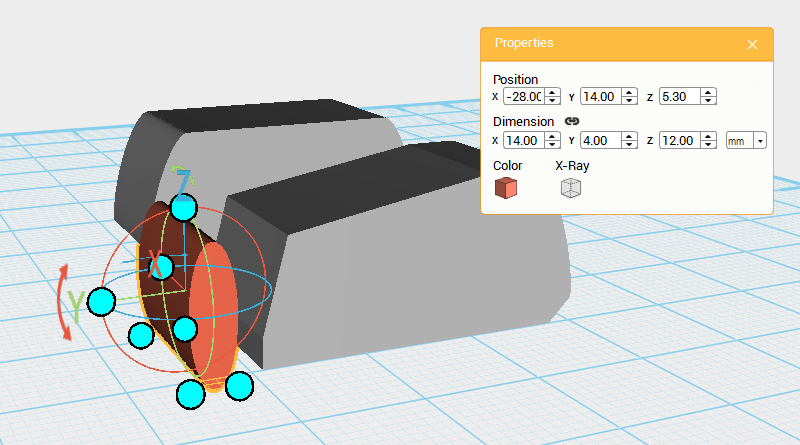
Create a Cylinder and rotate it 90° along the Y-axis, then change its dimensions to X: 14,Y: 4,Z: 12 mm and position to X: -28,Y: 18,Z: 5.3.
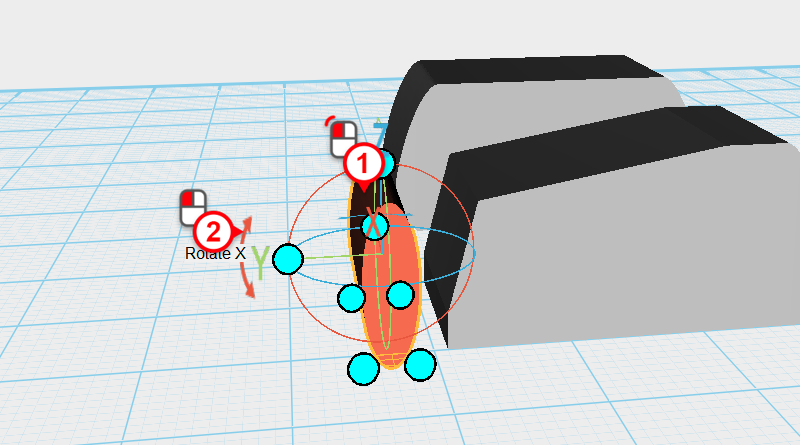
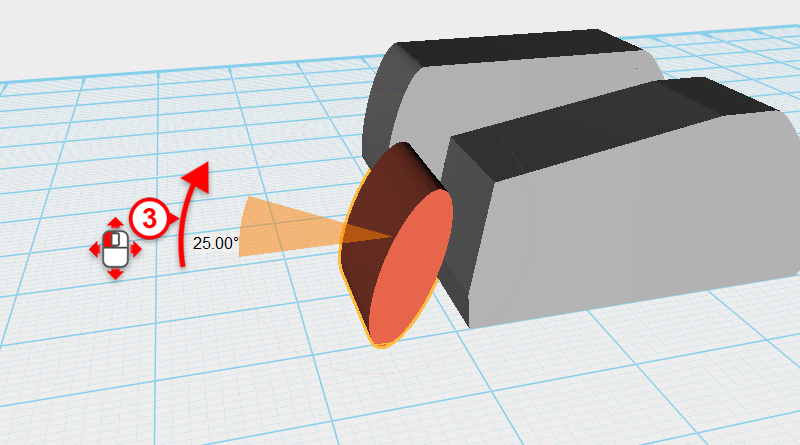
Select the Cylinder, click and hold the arrow next to the Y-axis in the bounding box, then drag the part, rotating it 25°.
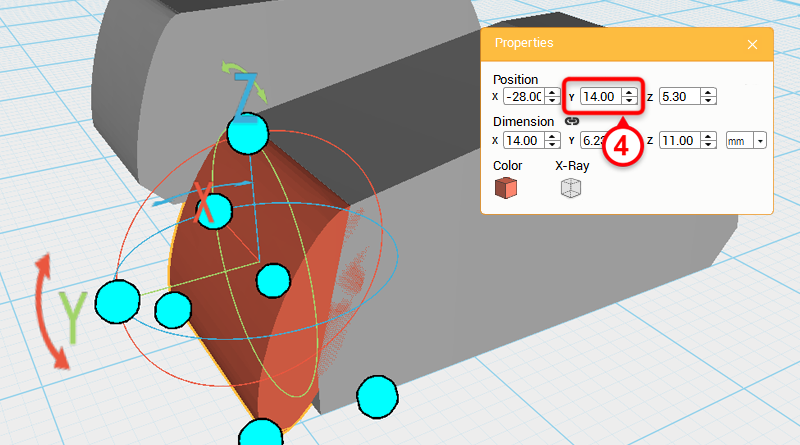
Next change its Y-axis position to 14.
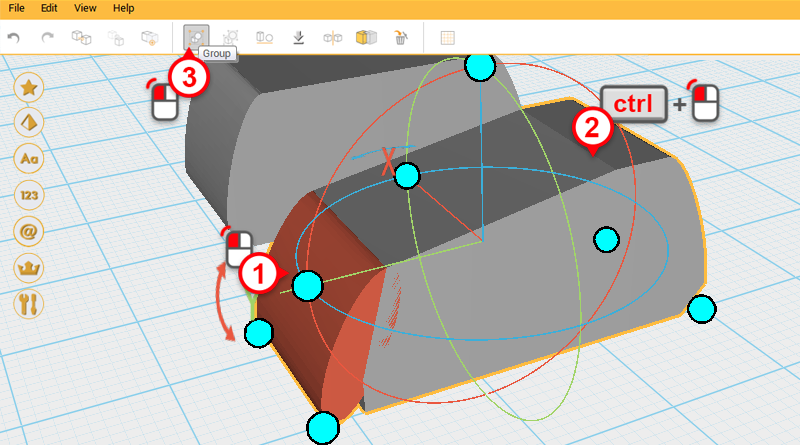
Select the Cylinder, then press and hold ctrl and click on the Fingertip to select the two parts. Next, click on Group to group them.
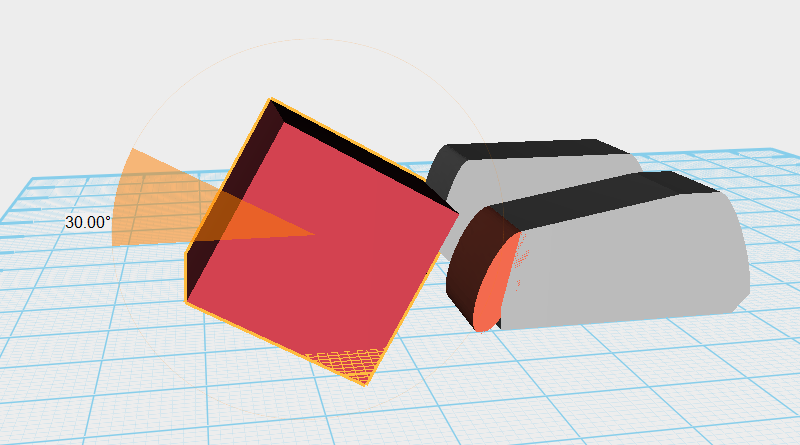
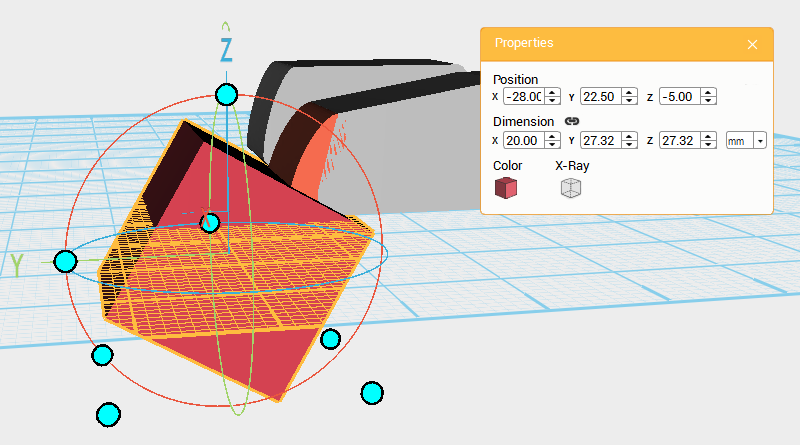
Create a Cube and rotate it 30° along the X-axis, then change its position to X: -28,Y: 22.5,Z: -5.
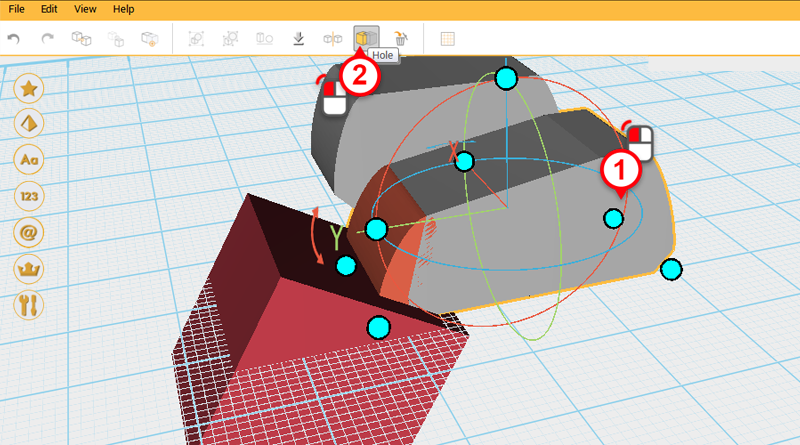
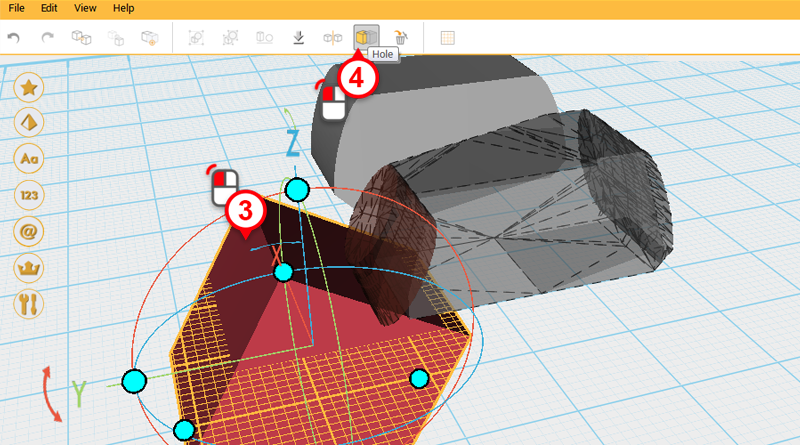
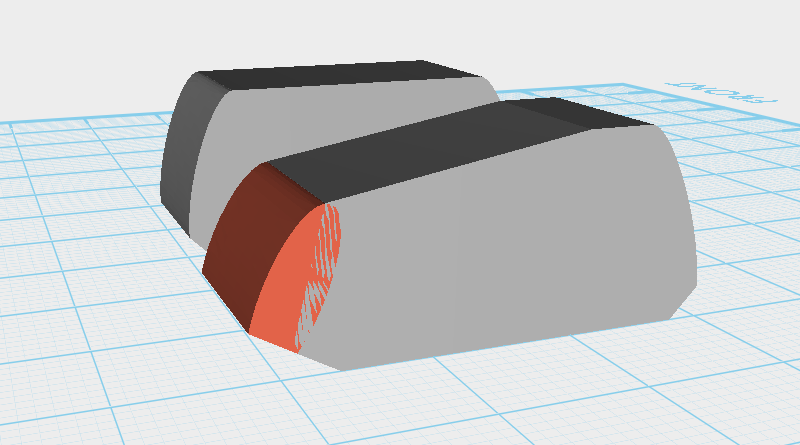
Use the Cube you just created and the Hole function to cut away from the Fingertip as shown above.
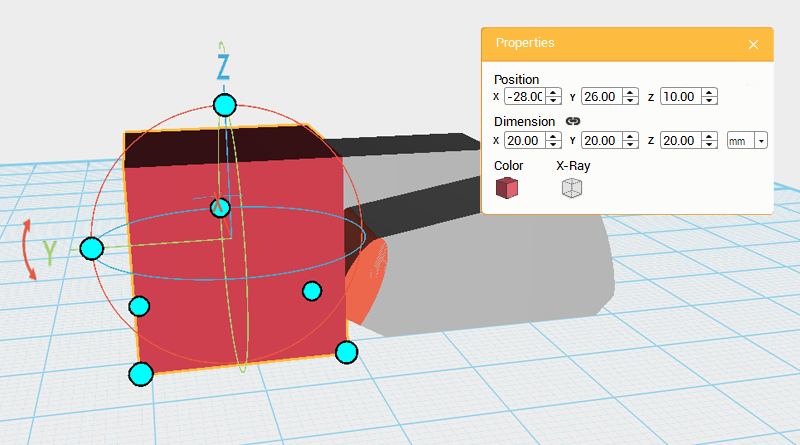
Create another Cube and change its position to X: -28,Y: 26,Z: 10.
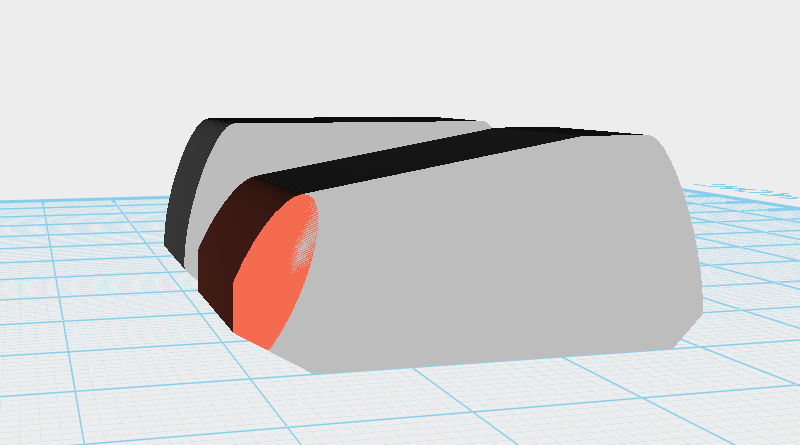
Use the Cube you just created and the Hole function to cut more detail into the Fingertip.
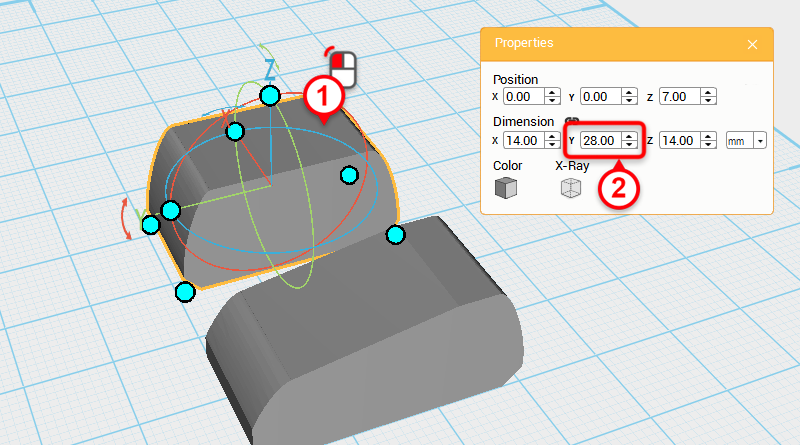
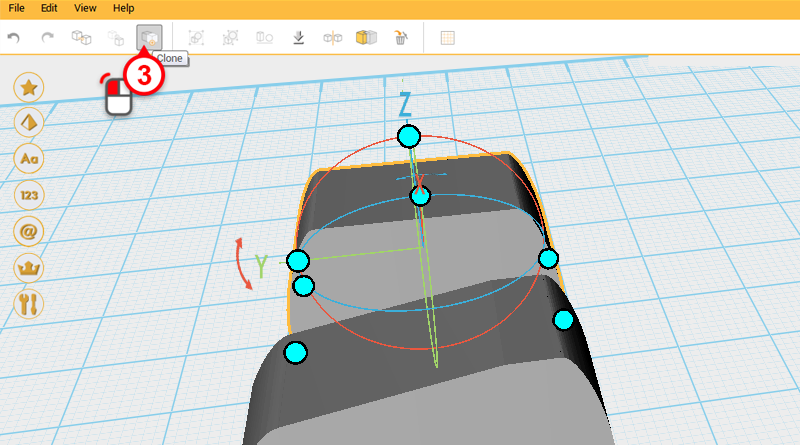
Select Finger joint A and change its Y axis dimension to 28mm. Next, click on Clone to duplicate a new part called Finger joint B.
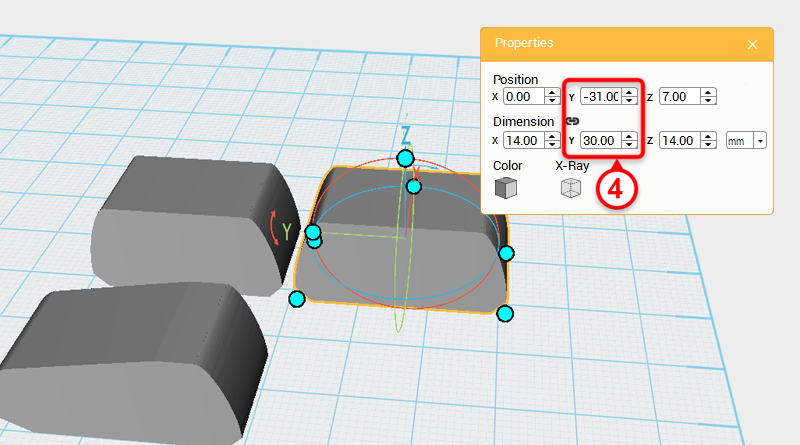
With Finger joint B selected, change its Y-axis dimension to 30mm, and Y-axis position to -31.
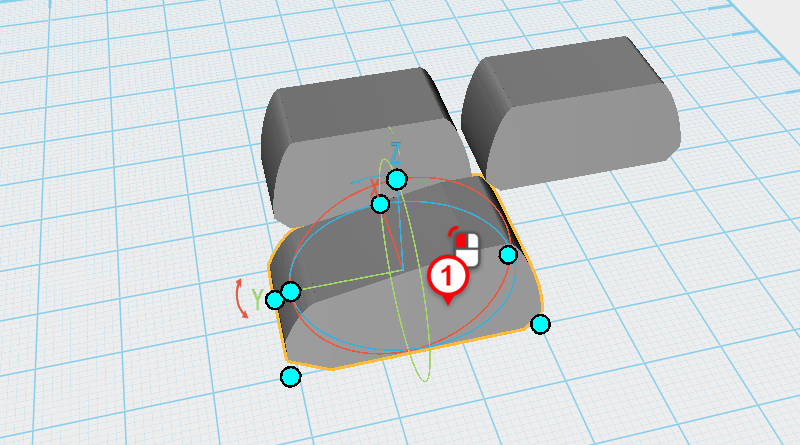
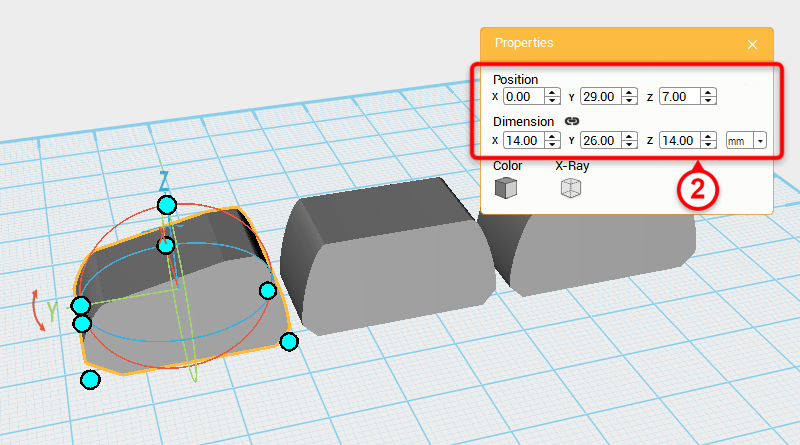
Select Fingertip and change its dimensions to X: 14,Y: 26,Z: 14 mm and position to X: 0,Y: 29,Z: 7.
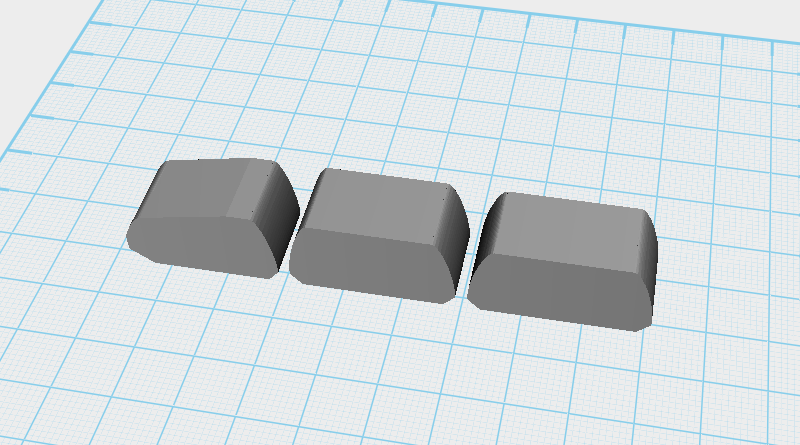
So far the Finger should look as above.
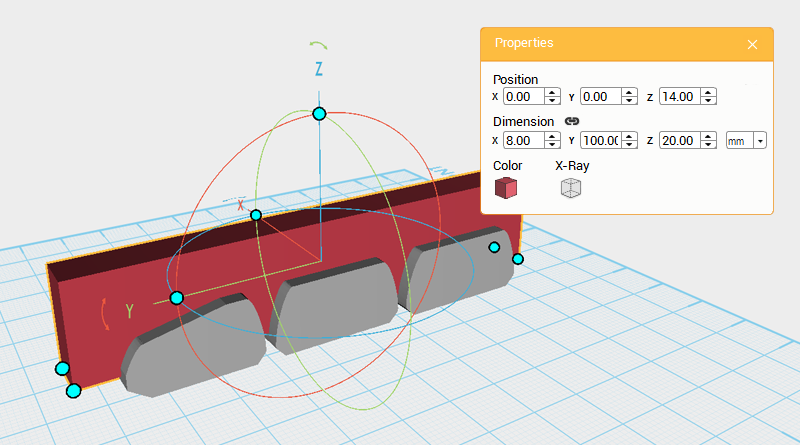
Next, take the Finger and cut away space to place the joints. Create a Cube and change its dimensions to X: 8,Y: 100,Z: 20 mm and X-axis position to 14. Call this part the Cutting part.
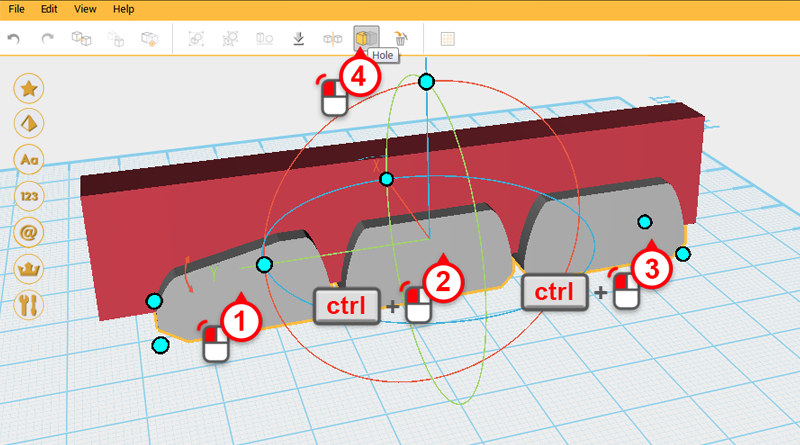
Select the Fingertip, Finger joint A, and Finger joint B, then click Hole.
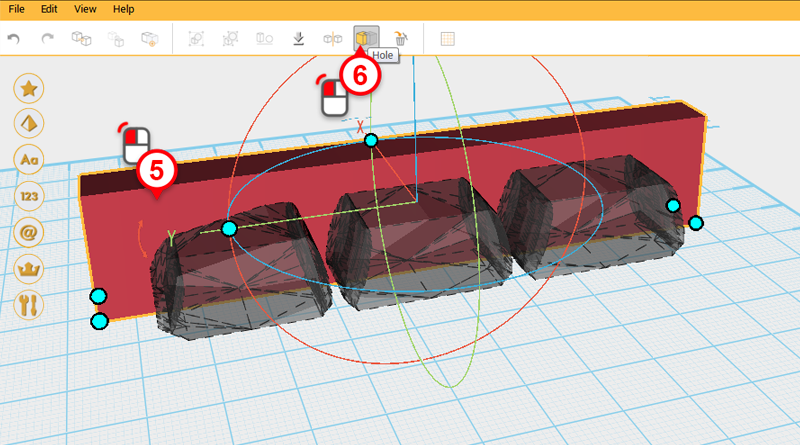
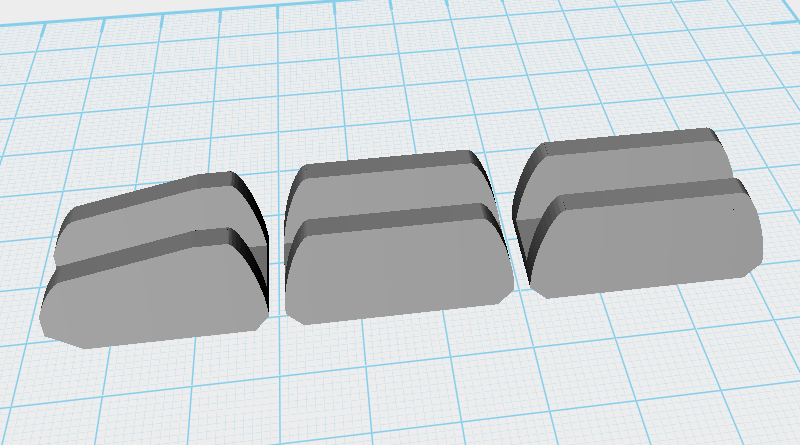
Select the Cutting part and click Hole again to cut a groove into the three parts.

