XYZmaker tutorial – Fish bone card holder part 2
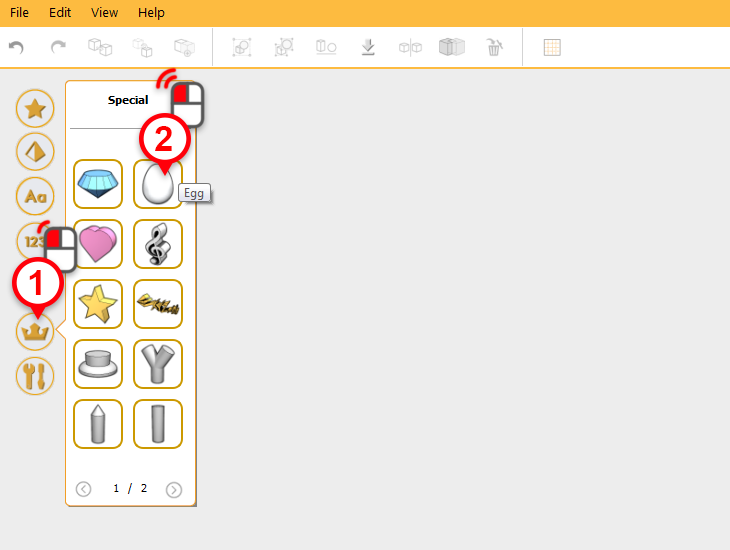
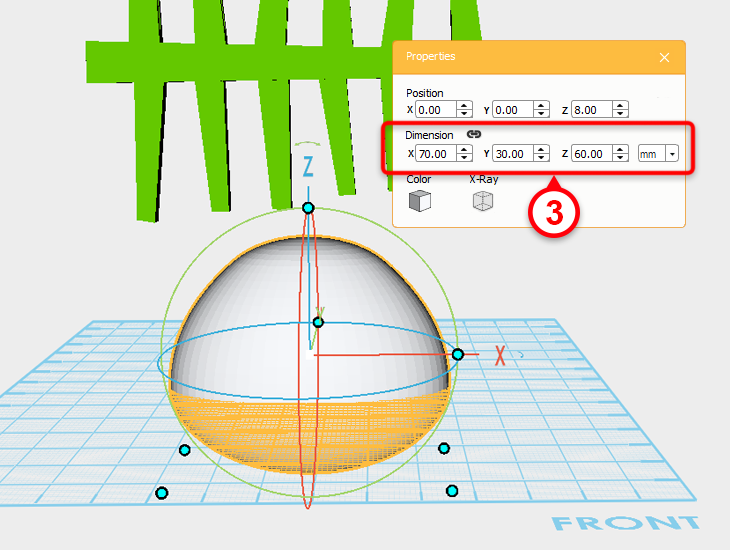
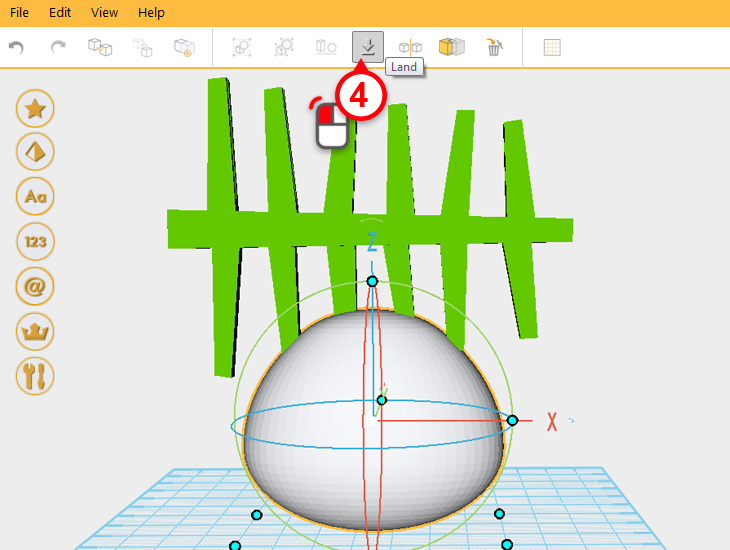
In the special gallery select the egg model to create an egg (1,2) . Edit its dimensions to X: 70,Y: 30,Z: 60 mm(3), and press the land (4) to make the egg stick to the work plane.
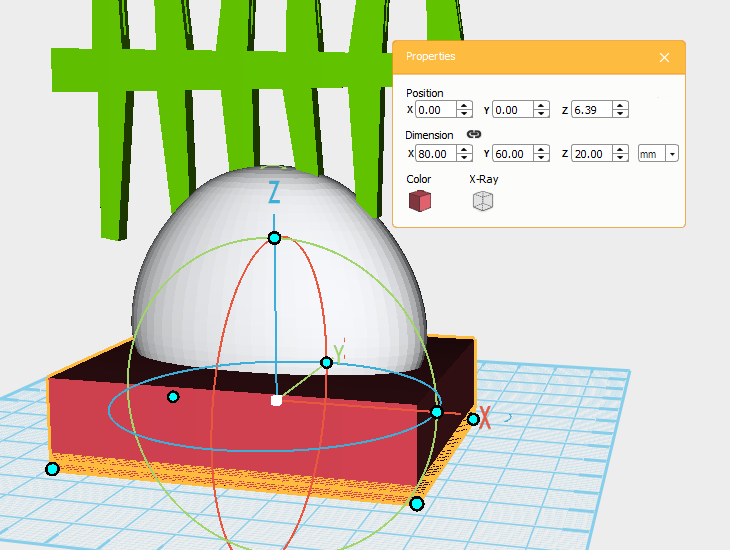
Create a cube called the cutting part and adjust its dimensions to X: 80,Y: 60,Z: 20 mm, adjust the part’s position as the image above.
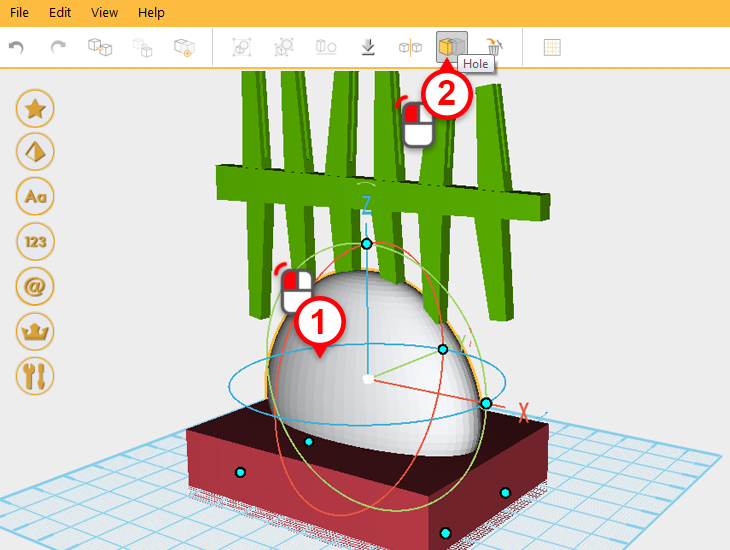
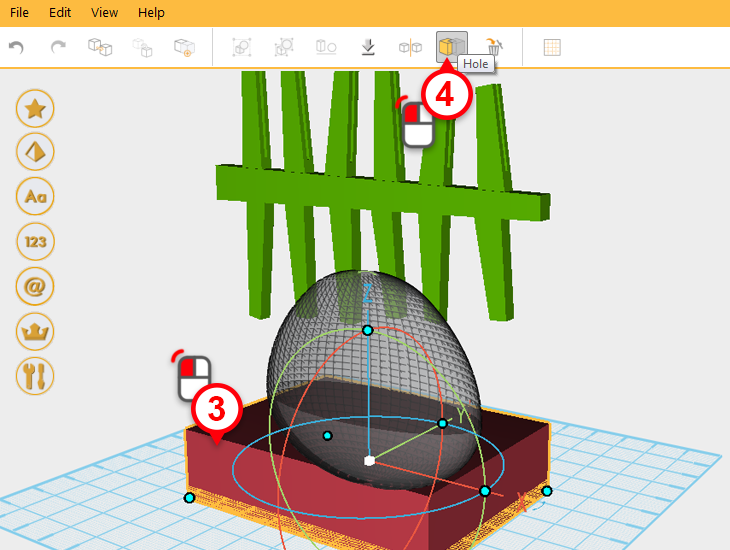
Use the hole function to trim the egg (1-4). This part will be called the fish head.
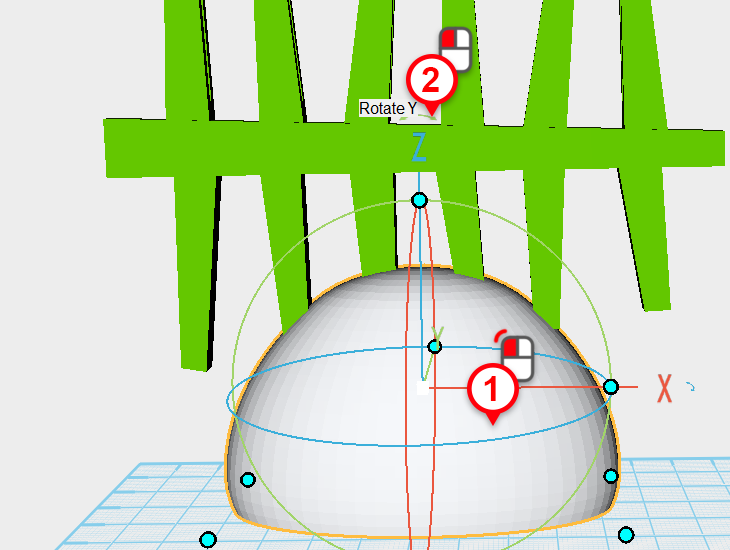
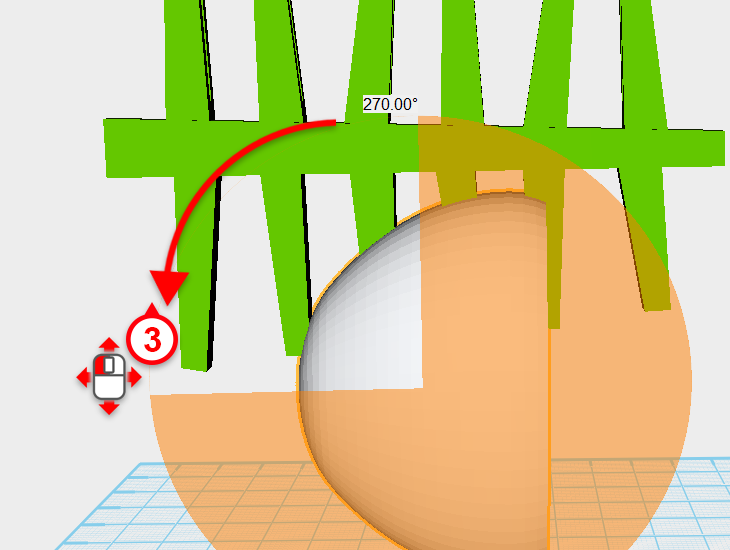
Select the fish head (1), click and hold the arrow above the X axis(2), then drag the mouse and rotate the part 270 degrees(3).
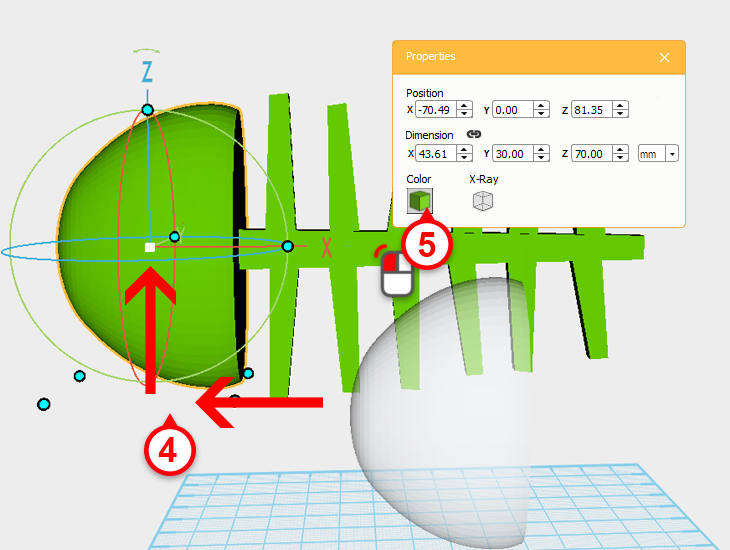
Move the fish head to the fish body so that the two are combined(4). Then change the fish head’s color to the same as the fish body(5).
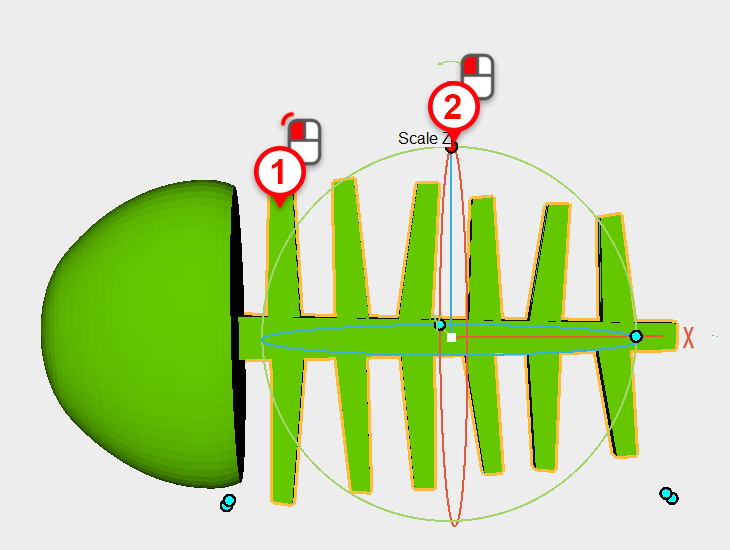
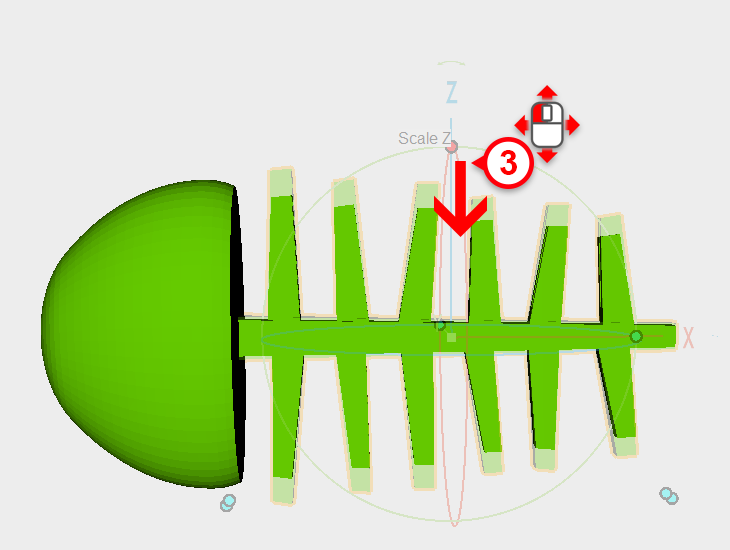
Looking at the two parts together, it seems like the fish body is a little bit too big. Select and shrink the fish body using the Z axis control point (1-3).
Tip: When modeling, it helps to often inspect and adjust the model.
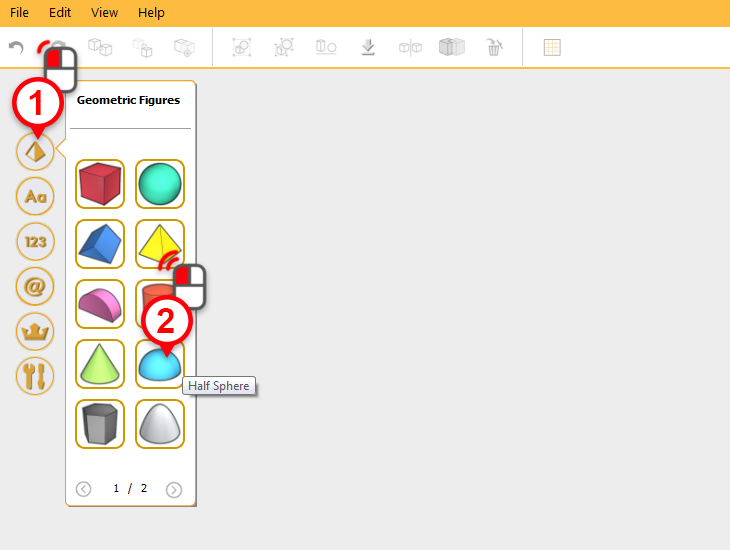
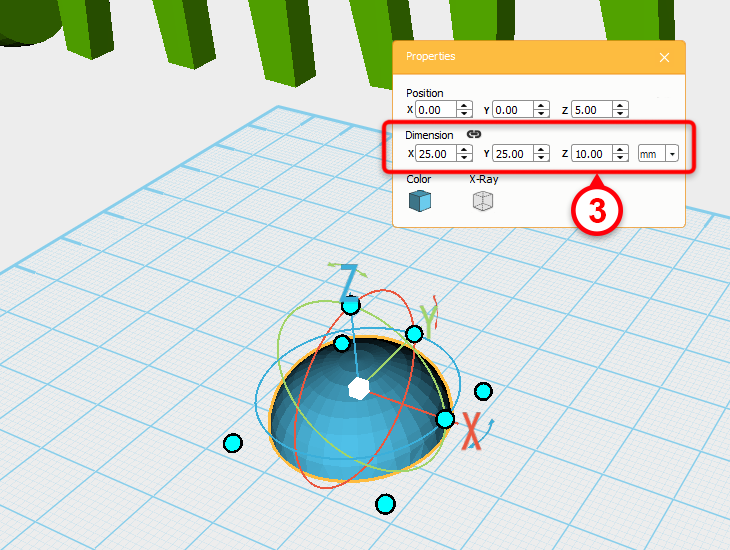
Next create a fish eye; in the geometric figures gallery create a half sphere(1,2) and change its dimensions to X: 25,Y: 25,Z: 10 mm (3).
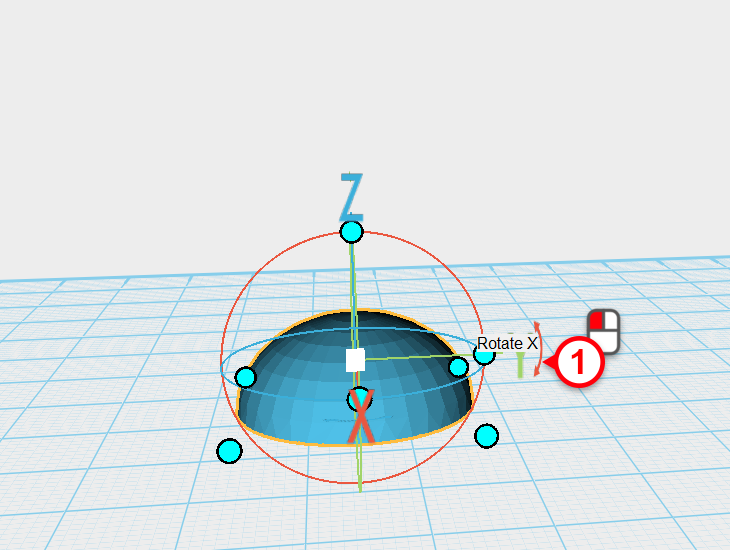
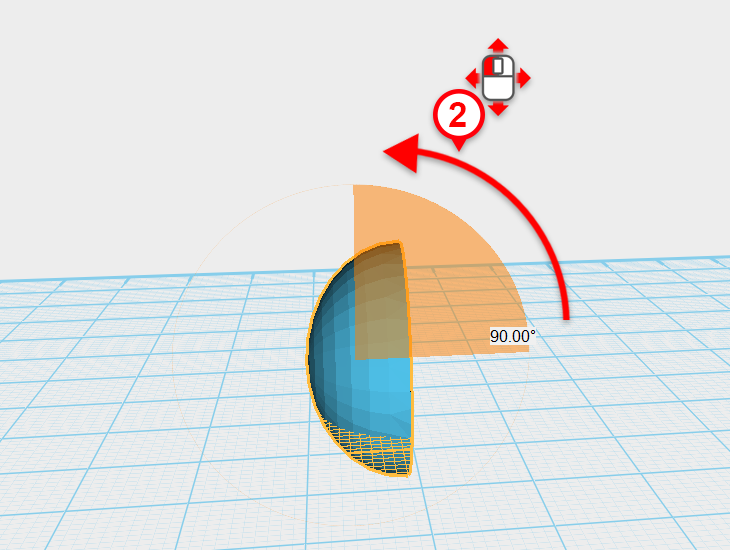
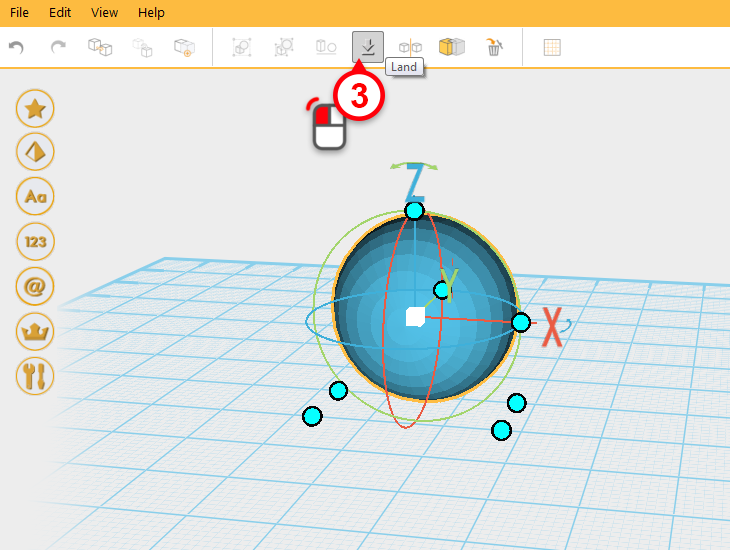
Select the half sphere you just created, click and hold down the arrow above the Y axis, then drag the mouse to rotate the part 90 degrees. Finally click on the Land button to sit the part in the work plane.
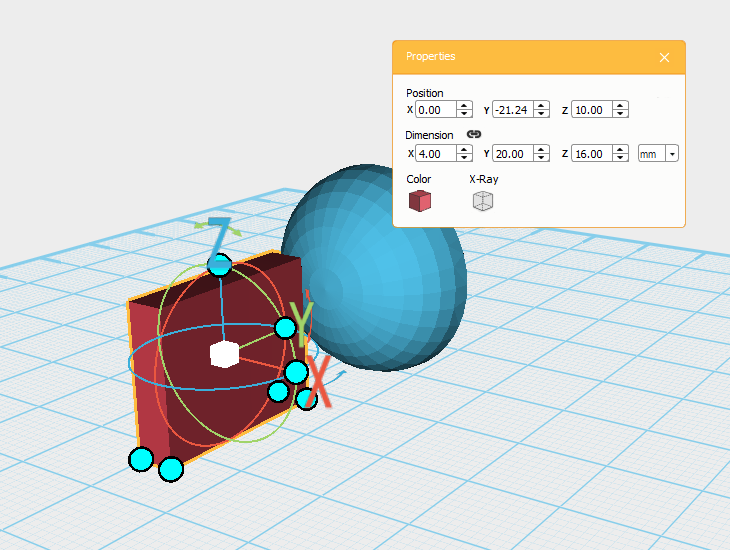
Create a cube from the model gallery, and change the dimensions to X: 4,Y: 20,Z: 16 mm, move it to a similar position as the image above.
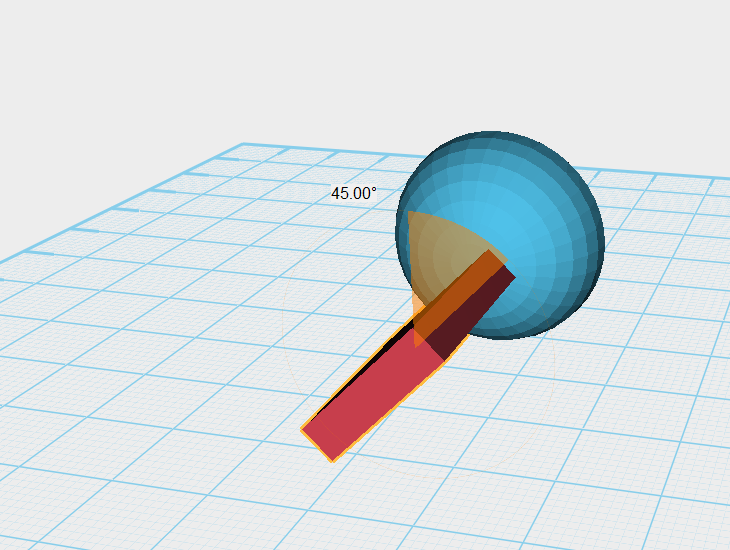
As above, take the recently created cube and using the arrow above the Y axis, rotate the part 45 degrees.
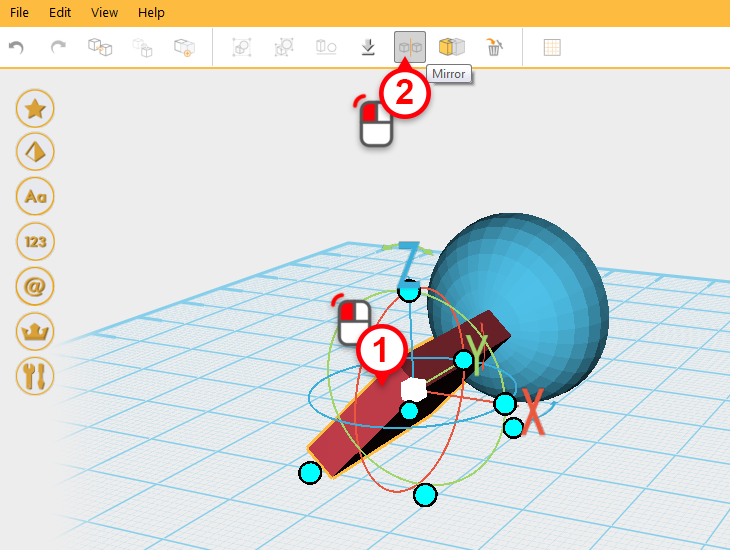
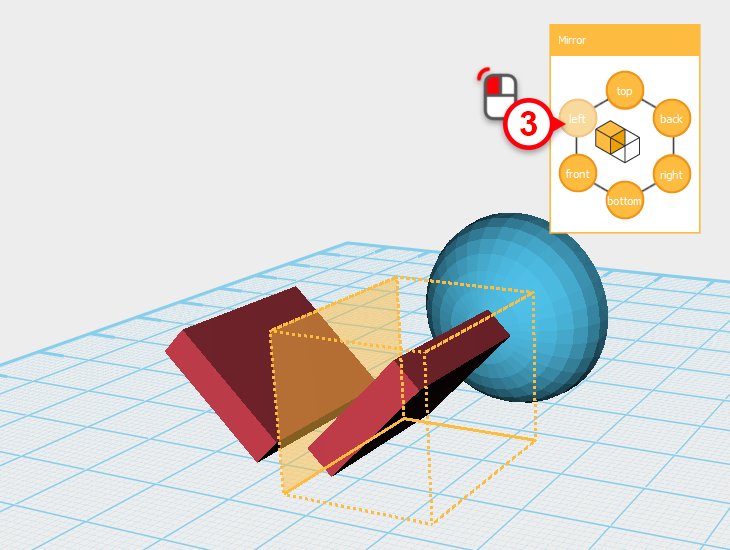
Using the mirror function mentioned earlier, click on the left button in the mirror properties window to mirror the cube.(1-3)
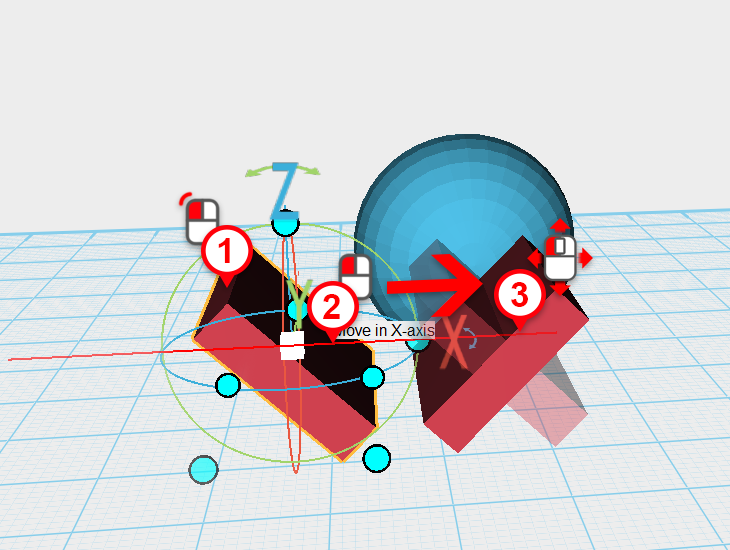
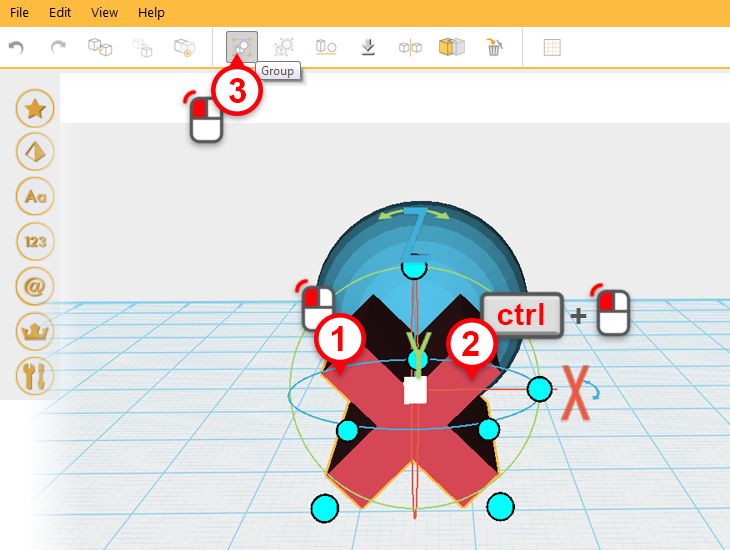
Click on the mirrored cube(1) and drag it along the x axis(2) so that it makes an X shape with the original cube(3).
Tip: You can also use the letter gallery to model the letter X and see what it looks like.
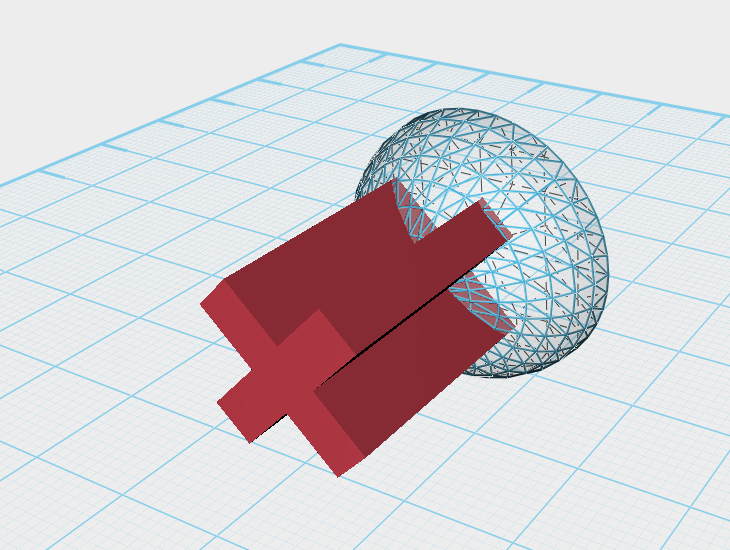
Group the two cubes and move them so that they intersect with the half sphere, adjust the intersection depth as shown in the image above.
Tip: You can make the half sphere transparent to better see the intersection depth for the two parts by clicking X-ray in the properties window.
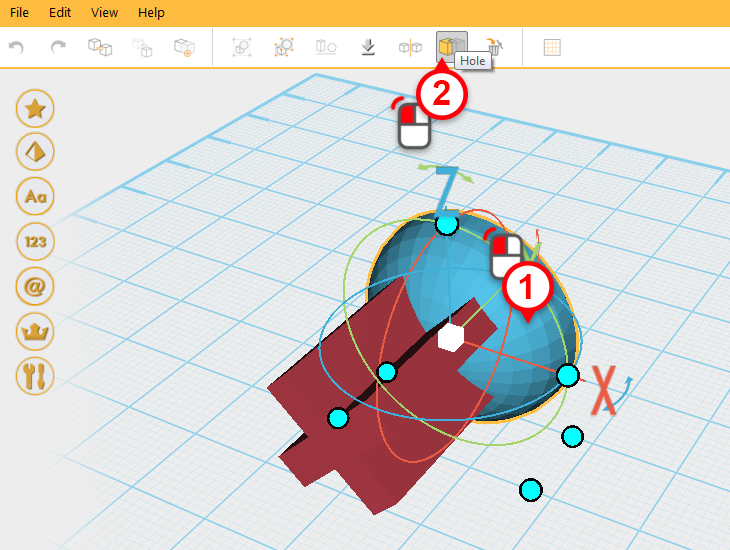
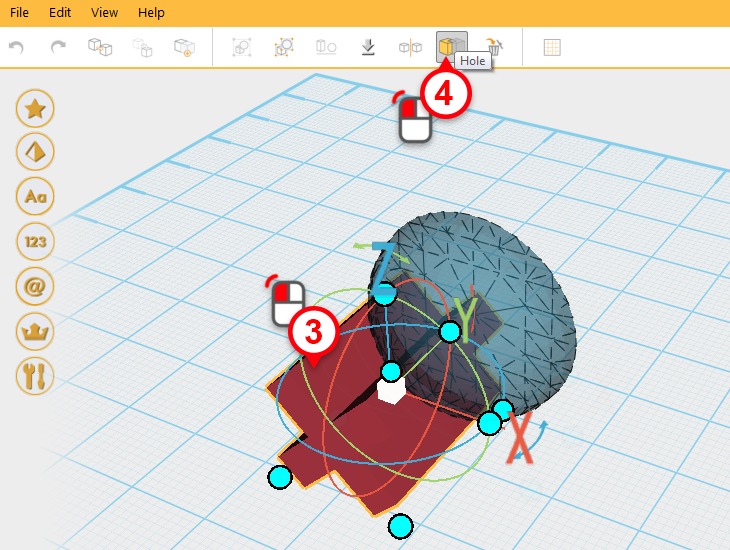
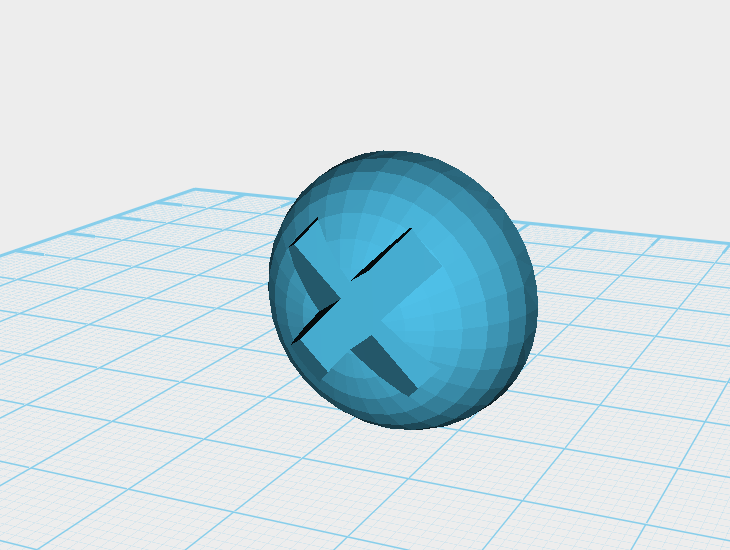
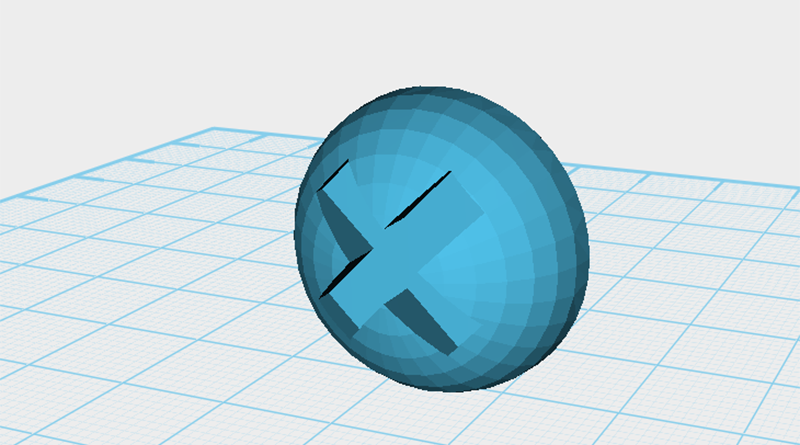
To finish the fish eye, select the half sphere (1), then use the hole feature to cut an x shape out of it (2-4).
Tip: You can use other shapes, characters, symbols to make any impression you want in the fish eye.
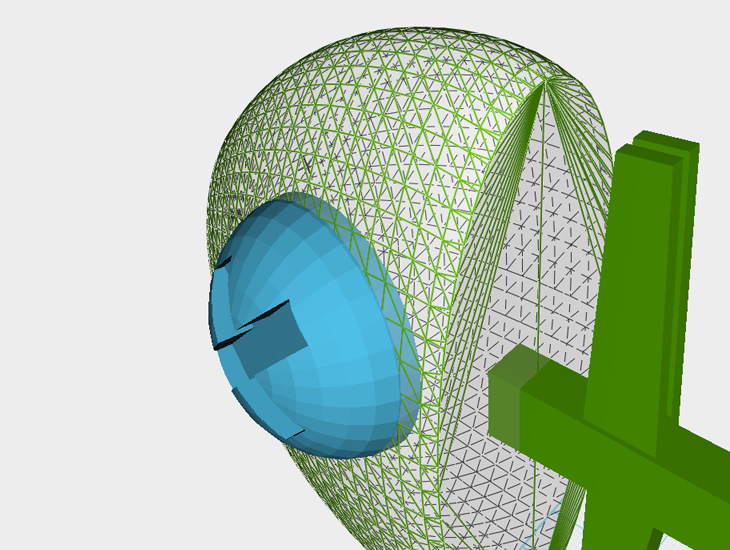
Manually adjust the fish eye’s position and angle so that it is recessed into the face of the fish head.
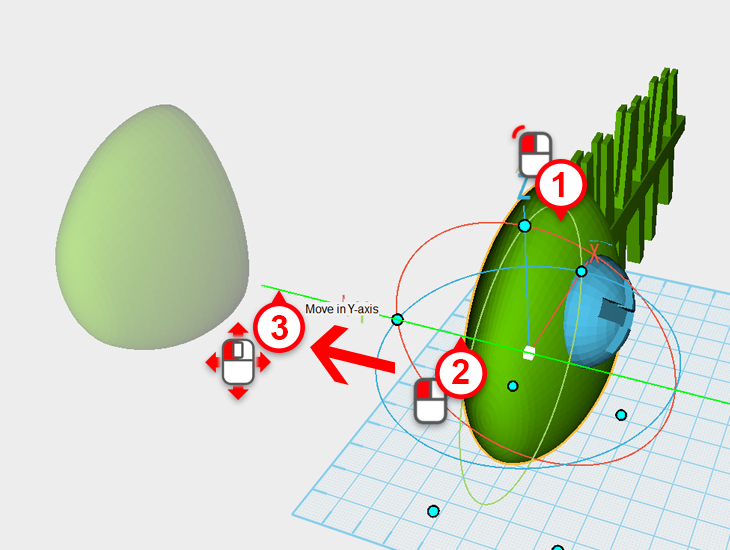
Next, to prepare to make the other eye, first take the fish head and move it along the Y axis so it won’t interfere with modeling. Select the fish head and move it as above (1-3) .
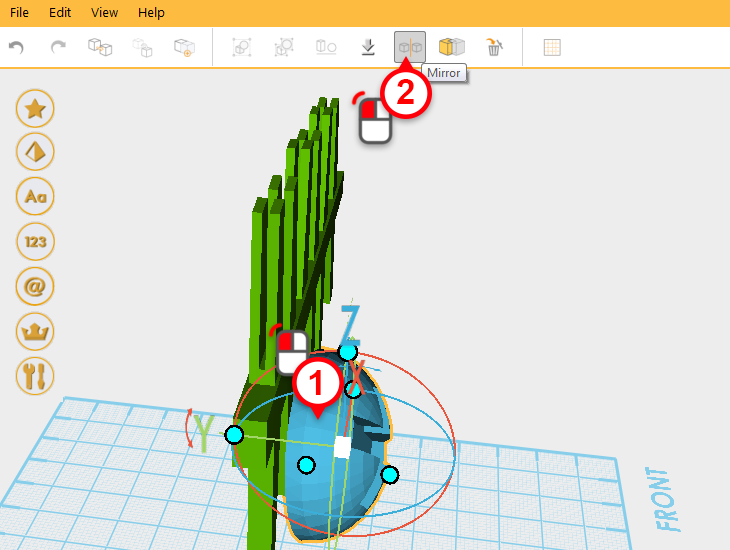
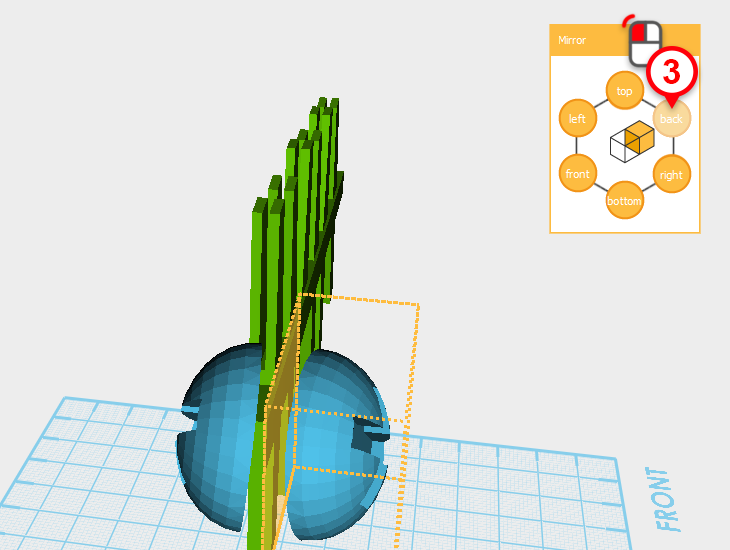
Select the fish eye(1) and using the mirror tool(2), click on the back button in the mirror window to duplicate the eye(3).
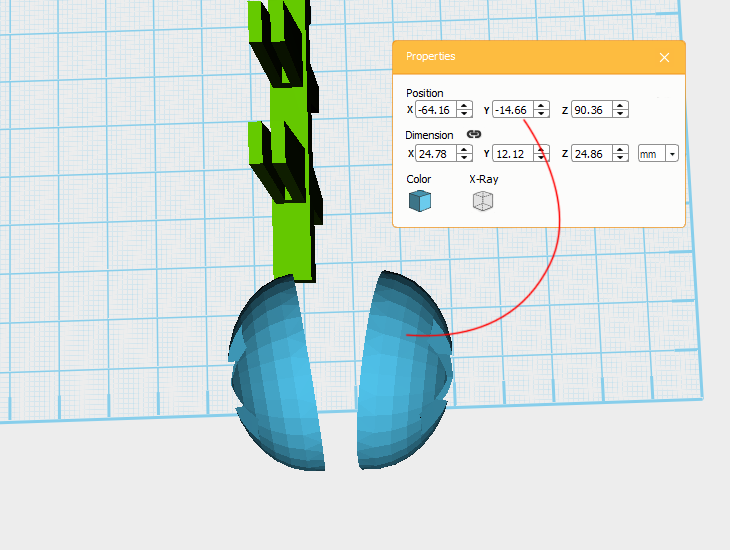
Take note of what the original fish eye’s Y coordinate is, multiply it by -1, and assign the new value to the mirrored fish eye. For example, if the original fish eye’s Y coordinate is -14.66, then the mirrored fish eye Y coordinate will be-14.66*-1= 14.66.
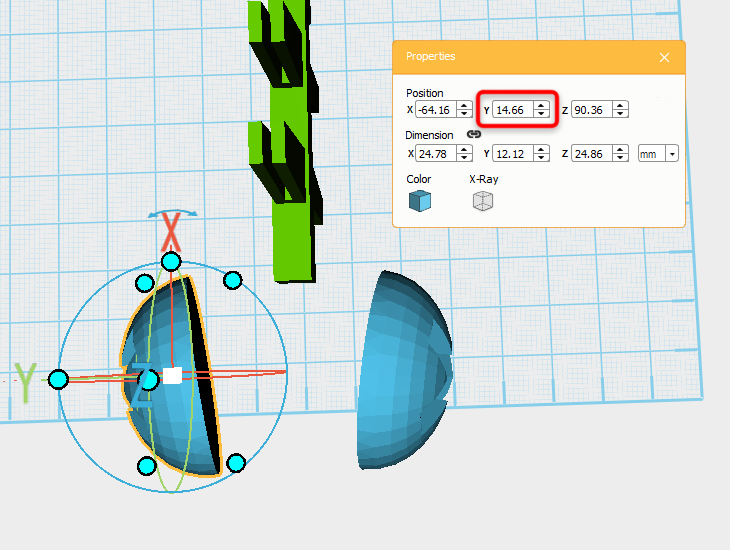
Select the mirrored fish eye and change its Y axis position to 14.66.
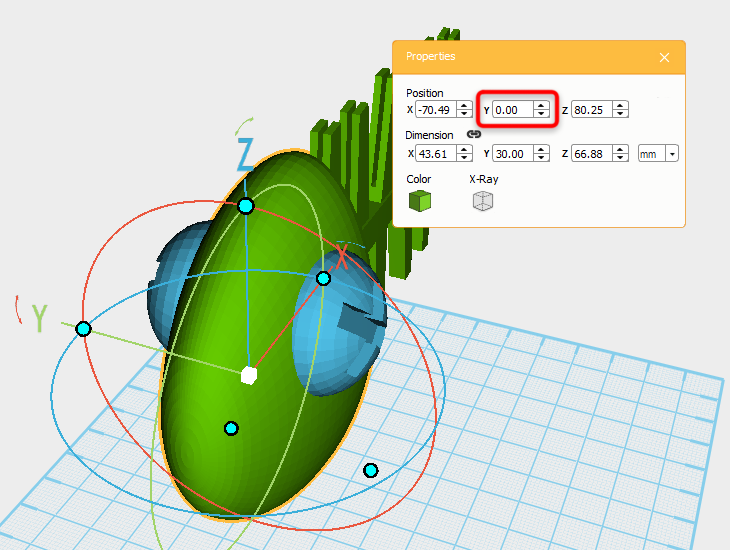
Select the fish head you moved out of way earlier and change its Y position to 0.
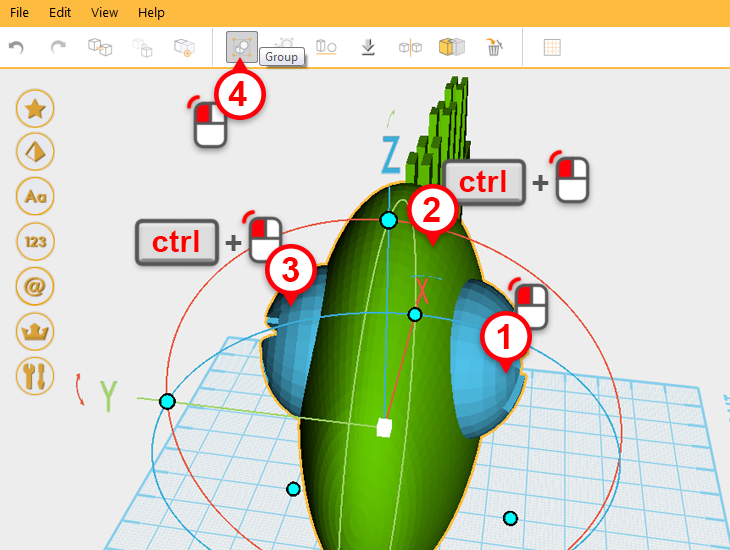
Select the fish head and the two fish eyes (1-3) , then group them together using group (4).
