XYZmaker tutorial – Pen holder part 2
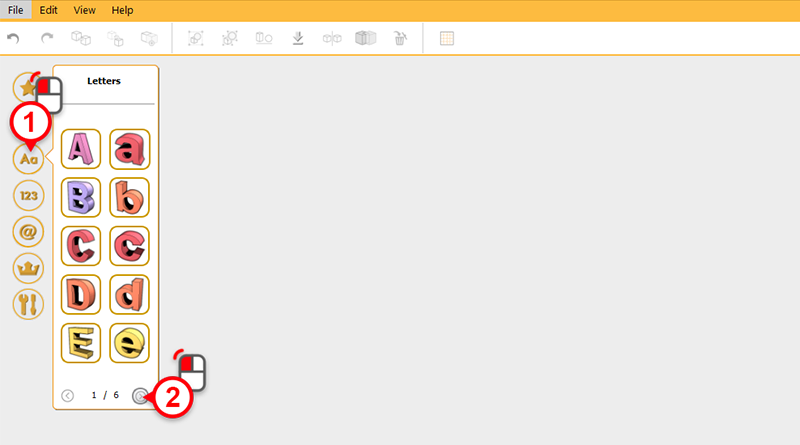
Use the software’s various 3D libraries to decorate the pen holder. In the left-hand model toolbar, click on Letters, then click on the “next page” icon.
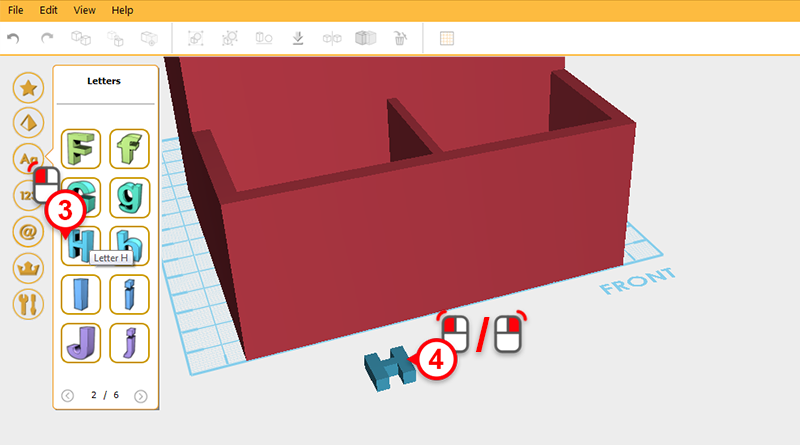
Single click on H and the character “H” will follow your cursor on the screen. Move the cursor to the front of the pen holder and click again on either the left or right mouse button to place the “H” character.
Tip: If you accidentally select an object from the 3D library, click in the modeling grid to place the object and then press delete or undo.
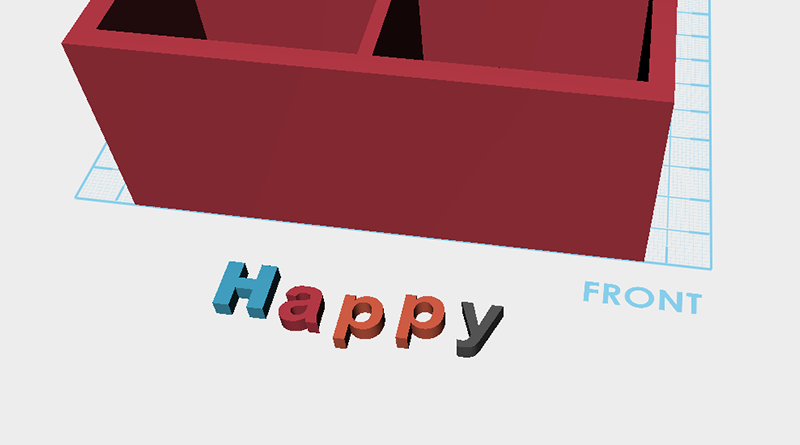
Repeat the steps above to make H, a, p, p, y on the modeling grid.

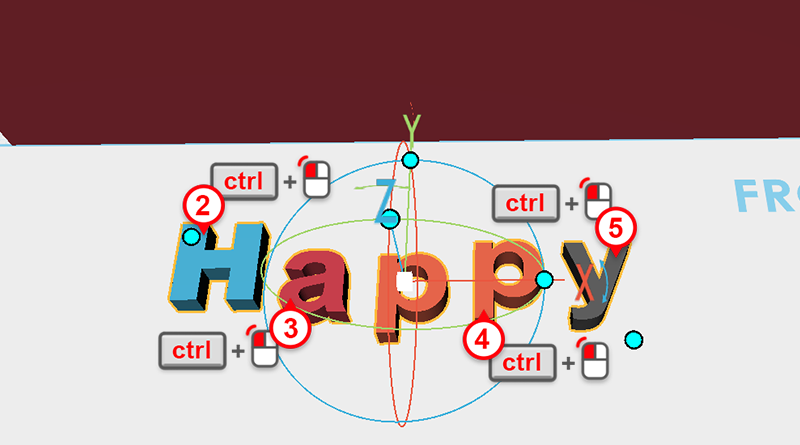
Select any character, then hold down the (ctrl) key and select the remaining four characters.
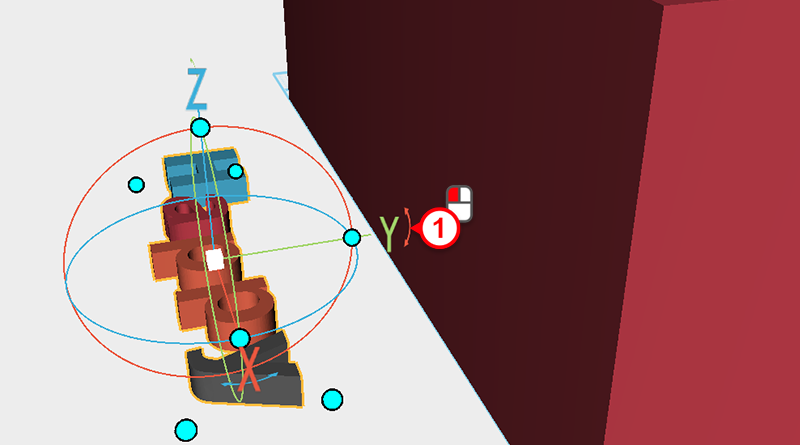
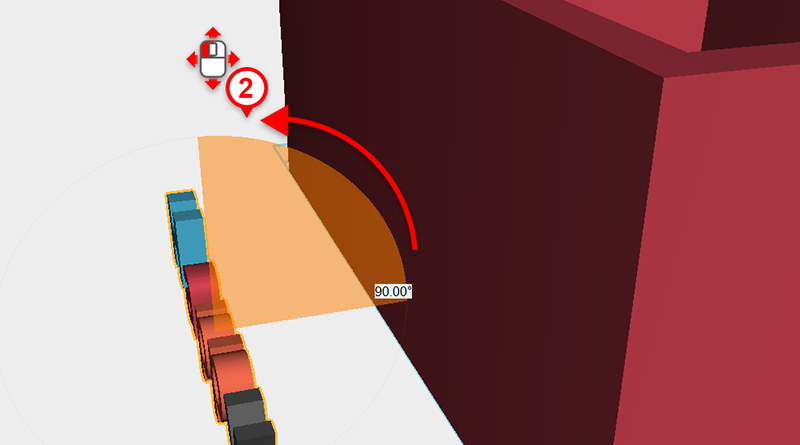
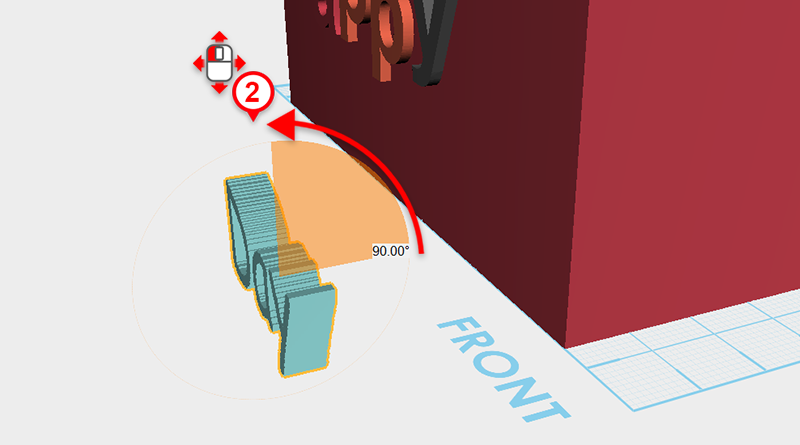
Change your viewing angle as shown above. Click and hold the rotation arrow above the Y axis, then with the mouse button still held down, drag the mouse down to rotate the part 90 degrees.
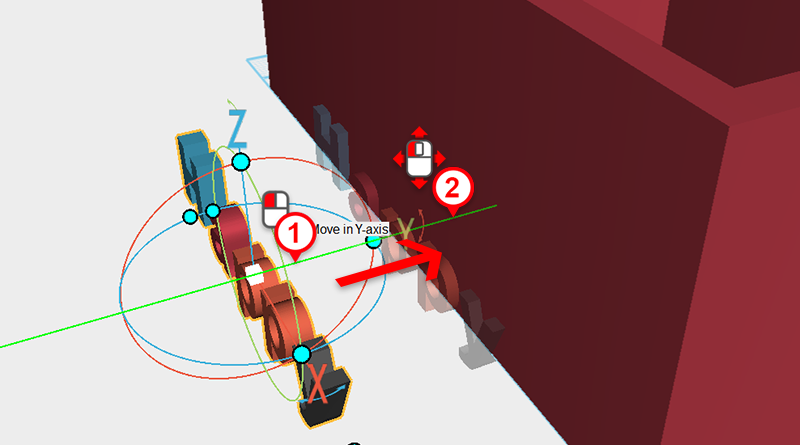
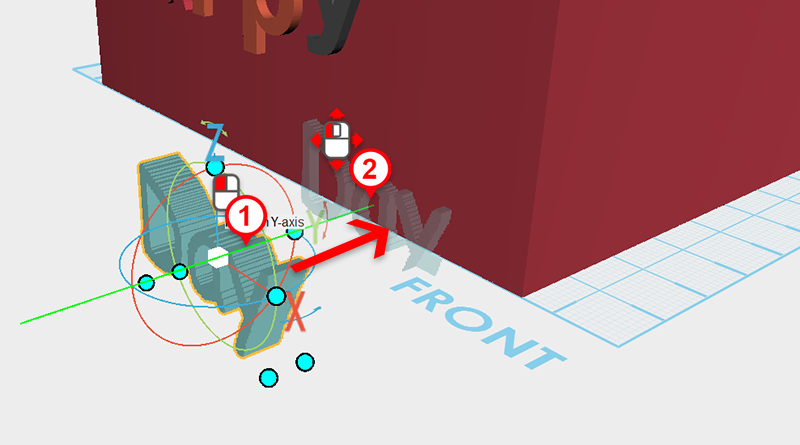
With all the characters selected, make them part of the pen holder by clicking on the axis lines and moving the parts along the Y and Z axis.
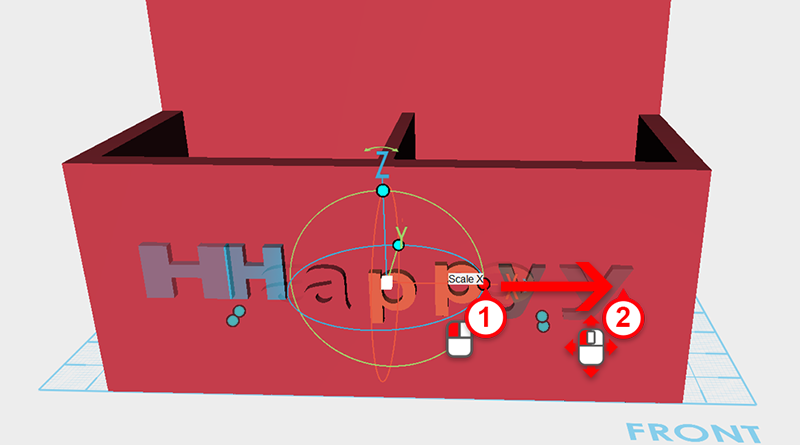
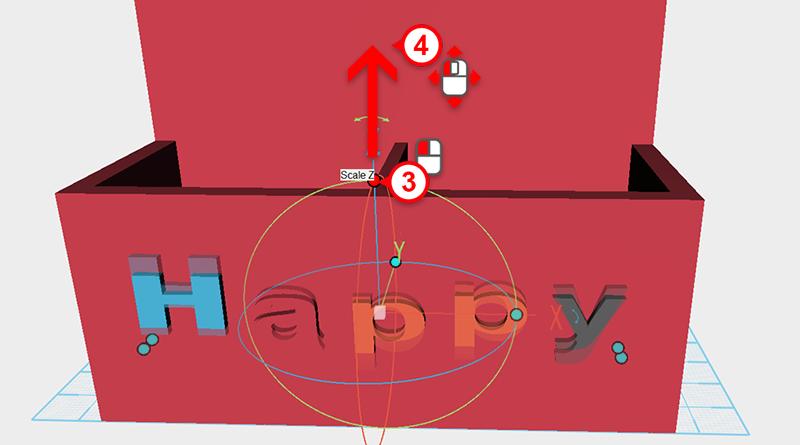

Separately click on the control orb’s X and Y control points, and drag the mouse to enlarge the characters.
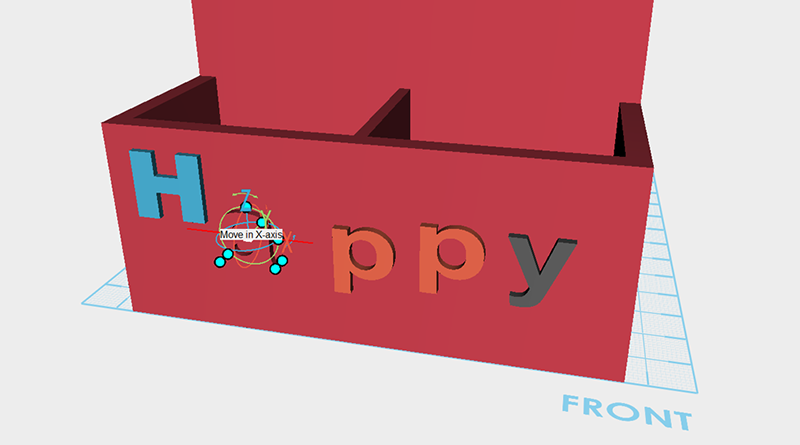
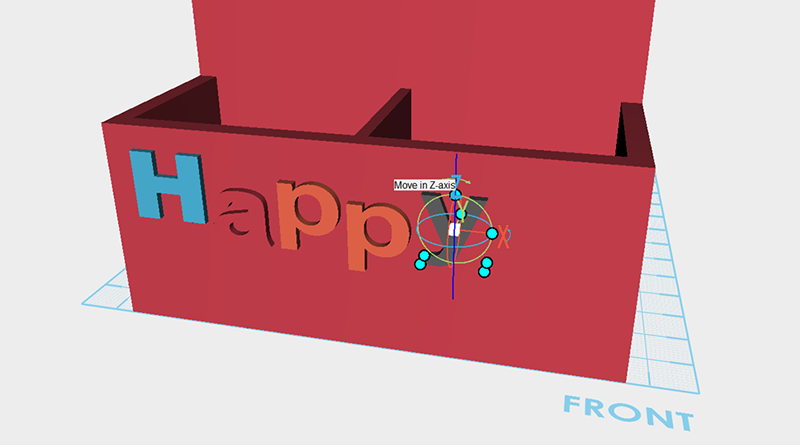
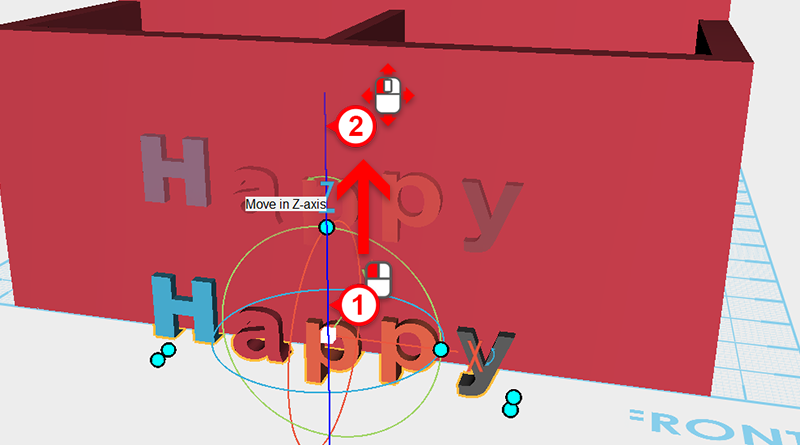
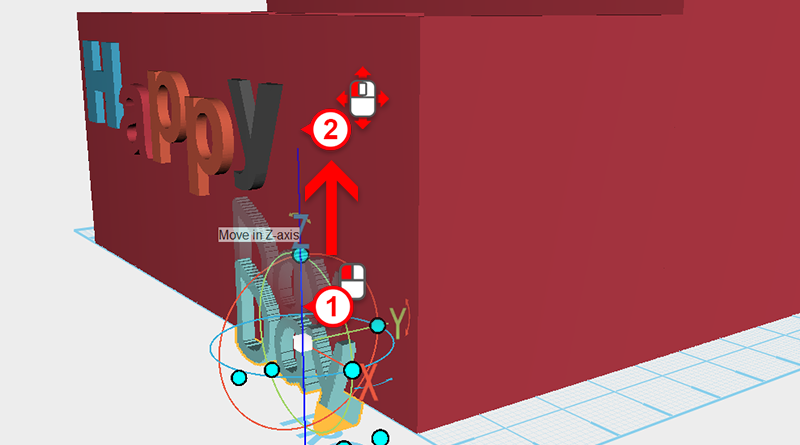
Separately select every character, and move it along the X and Z axis to where you want it.
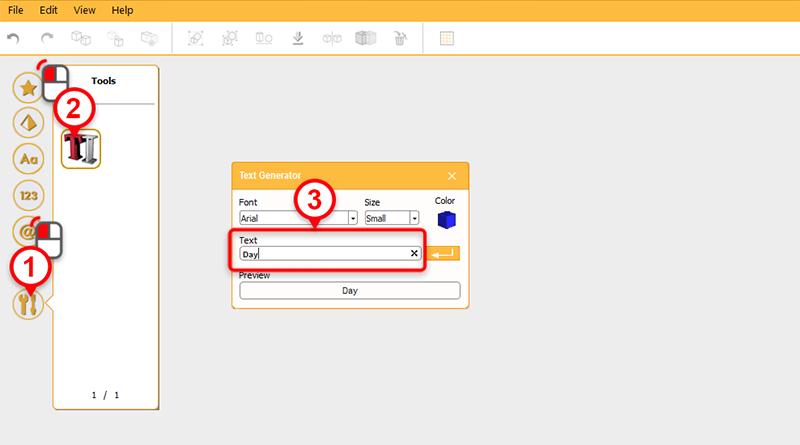
XYZmaker has an inbuilt 3D text generator. In the left-hand model toolbar click on the Tools library, then click on Text. In the Text Generator window type any word you wish to create it in 3D.

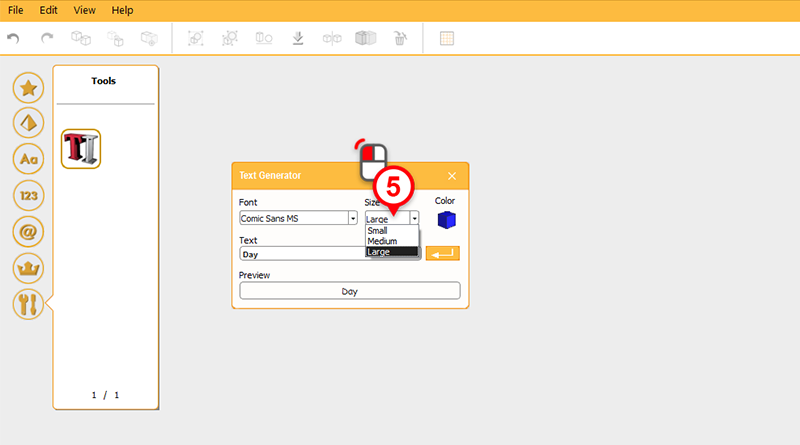
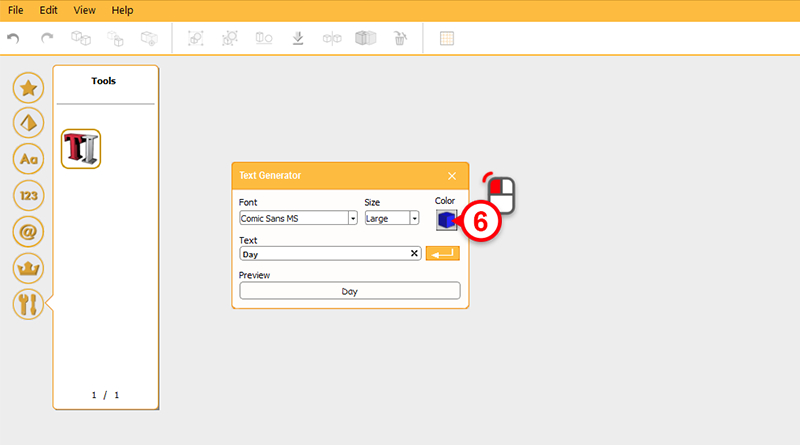
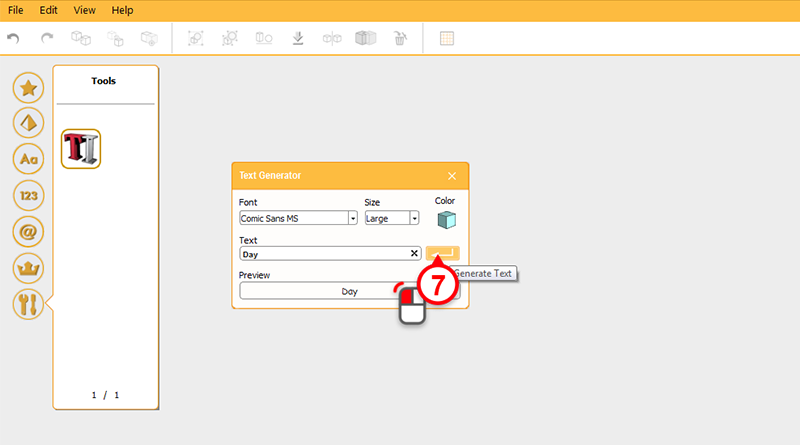
Separately adjust the font, size, and color then click on the yellow arrow Generate text.
The generated text will follow your cursor, move it to the front for the pen holder, then left-click or right-click to place the parts.

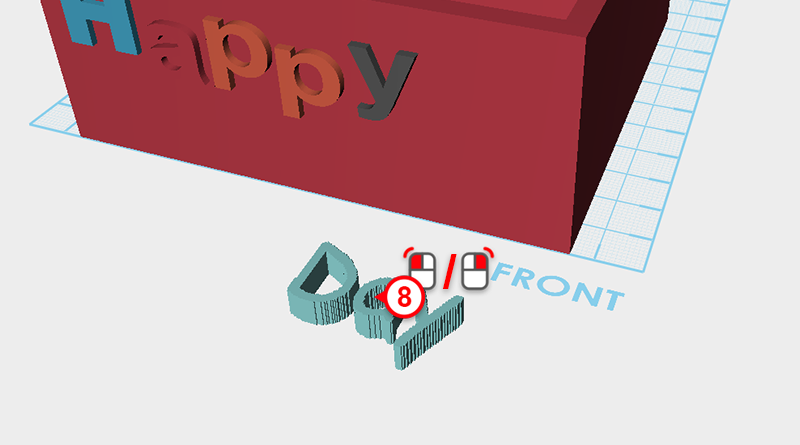
Select the part you just created, left-click on the Y axis control arrow and drag the mouse to rotate the part 90 degrees.
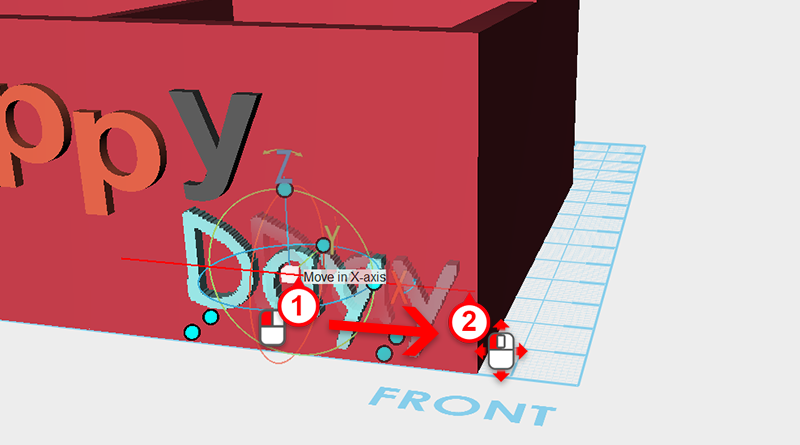

Move the part along the X,Y, and Z axis to merge it with the pen holder.