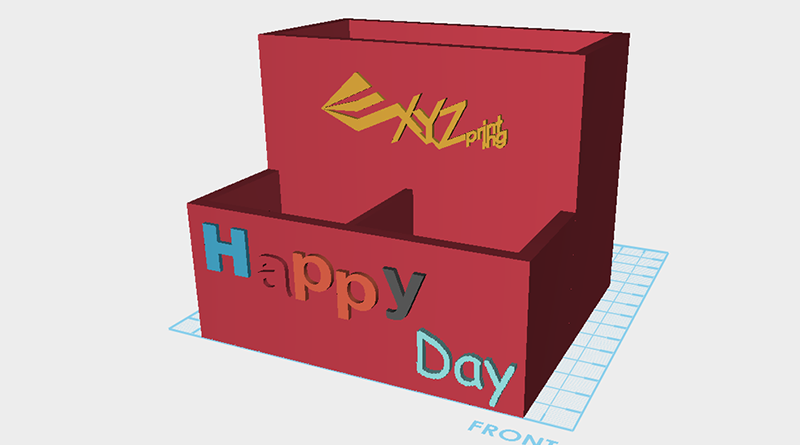
XYZmaker tutorial – Pen holder part 3
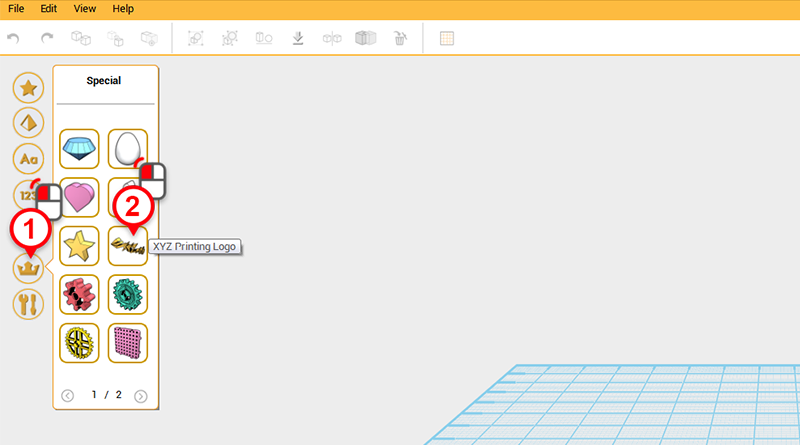
In the model toolbar, click on the crown icon (Special), and select the XYZprinting logo.
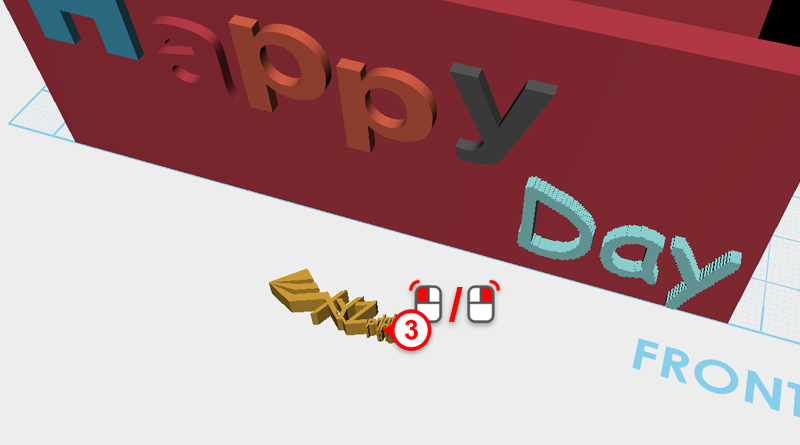
When you single click on the XYZprinting logo, the part will follow your cursor in the modeling grid. Left/right mouse click to place the logo in front of the pen holder.
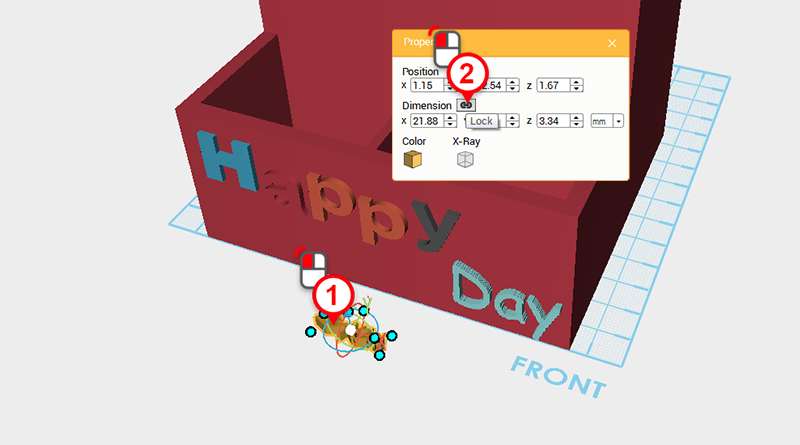
If the part is too small and it’s hard to edit the control points, you can use the Properties window to enlarge the part’s dimensions first. Select the XYZprinting logo and in the Properties window click on the Lock icon.
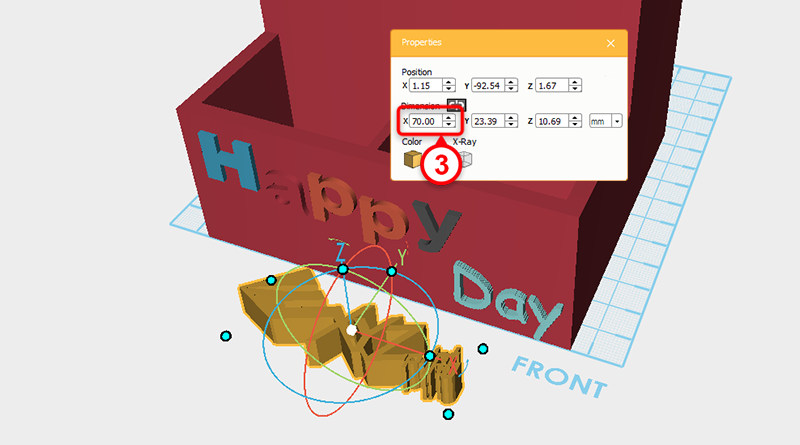
In the properties window, change the X axis dimension to 70mm, all other axis will scale accordingly.

Take the XYZprinting logo and move it to the same position as above.
Inspect the model to any modeling errors. In this example the XYZprinting logo has passed through the other side of the pen holder.
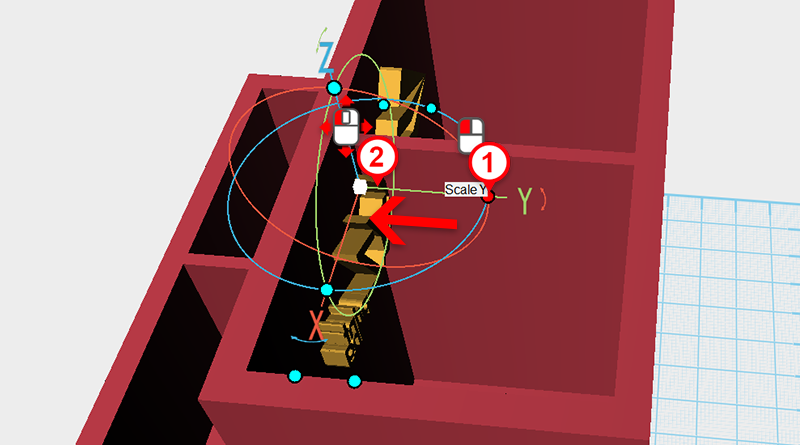
Click on the control orb’s Y axis control point and make the Y axis smaller.
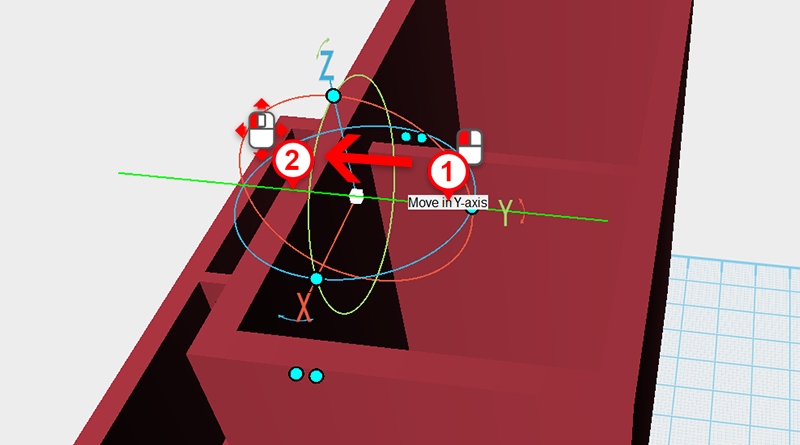
Click on the Y axis and slide the XYZprinting logo so that it sits just off the outside surface.
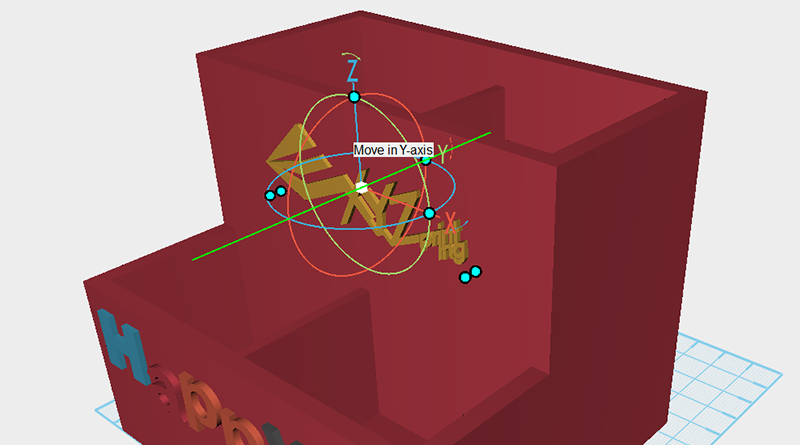
You can keep using parts from the Special and Symbols galleries and place them where you like on the model. Place them in the modeling grid, rotate, change their size, and move them onto the pen holder to make your very own unique personalized pen holder.