Applicable printer: Nobel Superfine
Developed with special formula, the Castable+ Resin has a very clean burn-out with no residues, increasing the efficiency of jewelry designing and creation. The material shows off precise details and smooth surface, making it suitable for the manufacturing of fine jewelry pieces.
Model Design Tips
The properties of the castable resin are similar to those of wax in that both are structurally soft and brittle and the printout can be easily broken due to pulling force during the printing process. Please follow the design tips below for optimized printing.
» » Hole Diameter ≥0.5mm
» For the specs for other features, please follow the general design specs here.
Note
» Avoid scratching the bottom of the tank with any sharp tool, or the coating may be damaged. Damaged tank surface may affect the printing quality.
Instructions for Use
To ensure the performance of the resin, a homogeneous mixture of the resin is required before starting every print job. Please follow below steps closely before start printing.
Before Installing a New Bottle
Follow below instruction to ensure the color uniformity of the resin material:
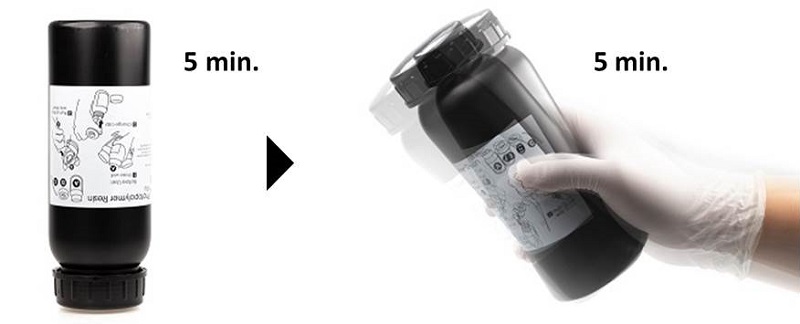
Tighten the original cap closely, place the bottle upside down for 5 minutes, and shake the bottles for around 5 minutes.

Before Every Print Job
Stir the resin left in the tank before starting every print.
Please note that the surface coating on the bottom of the resin tank may be damaged when contacting with sharp or hard tools. Follow below methods to stir the resin.
Check the Color of the Resin
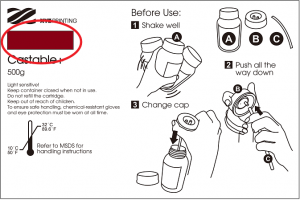
Compare the color of the resin with the color block on the label on the resin bottle. If the color of the resin looks translucent or lighter than the color block, this is possibly caused by uneven distribution of the components. Printing quality may be affected using the uneven distributed material.

Software Settings
Settings for Printing
As with the use of the resin for general purpose, when there are overhangs in the model, or when the area of contact with the platform is small, additional support structures are required to ensure that the object can be printed out completely.
The printing software has an “automatic support” function, which can be used to analyze the structure of the model and automatically generate bracing structures. Sometimes you may need to use the “manual” mode to add more supports to ensure the adhesion of the object.
When printing jewelry pieces, you may want to use the cone and tree support. The cone structure is usually added to the lowest part of the object, and can be left for casting as the sprues. Tree supports connect to your objects with very small contact. It is suitable for holding the details on jewelry designs.
Click here for the instructions for support functions.
If printing fails, you may consider changing the object’s position and adjust the orientation and the support structures.
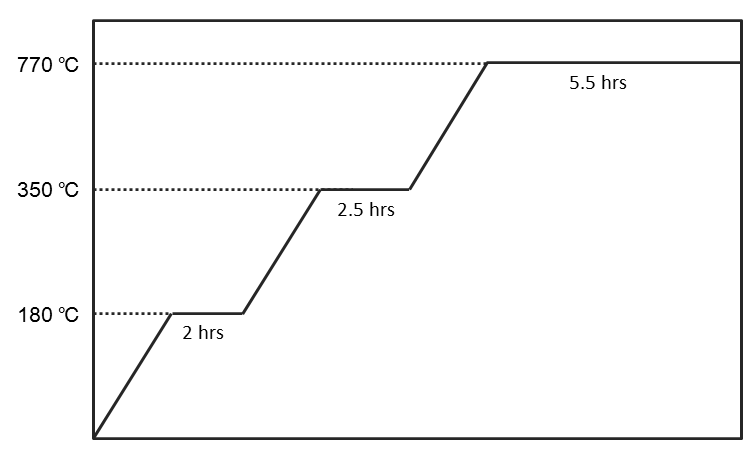
Recommended Burnout Process
When casting the printouts, you can work based on the temperature control suggestion as described in the following diagram, in order to ensure the complete burning away of the resin and a smooth and unblemished surface of the casting object.

Recommendation on Finishing
Cleaning
As the material is soft, the suggestion on cleaning is slightly different from the instructions for other resins. Avoid brushing or rubbing the objects during cleaning. Doing so may scratch the surface of the printed parts.
After removing the printed objects from the platform, soak the objects in Eta Cohol (95% alcohol + 5% IPA) and rinse about 2 to 3 minutes. When rinsing, you may hold the supports of the objects with tweezers.
Next, wash away the uncured resin trapped in the fine features on the objects by spraying Eta Cohol on the parts.

After cleaning, wait until the liquid on the surface to dry out.
Note
» Because of the brittleness of this resin, do not use a brush to scrub the printed item. Doing so may scratch the surface of the printed item.
» Do not immerse the printed item in Eta Cohol for longer than over 5 minutes, or the liquid may erode the item's structure and damage the item.
Air-Dry the Alcohol on the Surface
There will be alcohol residue on the surface of the printed item after it is washed. Do not post cure the parts until the liquid on the surface has dried out. After the alcohol has air-dried, please check carefully whether there is any resin residue in the features. Please make sure to remove the uncured resin to prevent it from blocking the design details of the original model.
Note
If curing is performed when alcohol residue is still present on the surface of the printed item, the surface of the printed item will appear white and misty, possibly affecting the result of casting.
Removing the Support
Please use tools to cut off the support instead of pulling directly (pulling can easily damage the item’s surface).
Post-Curing
The printed item produced from the Castable+ Resin must post cured using UV light to ensure the hardness for the lost wax casting.

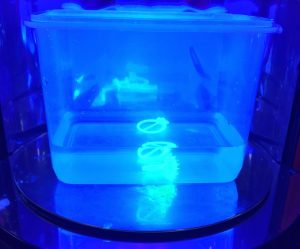
For the best material properties, UV post-curing the printed parts in water for 30 minutes.
Recommendation
» Read the complete curing profiles for XYZprinting resins on our curing units.
Preservation of the Uncured Resin
Uncured resin inside of the resin tank should not be exposed to light. The uncured resin can be stored in an opaque container after it is filtered. Pour the resin back into the resin tank prior to the next printing.
Note
» Opaque polypropylene containers are recommended for storing the resins.
