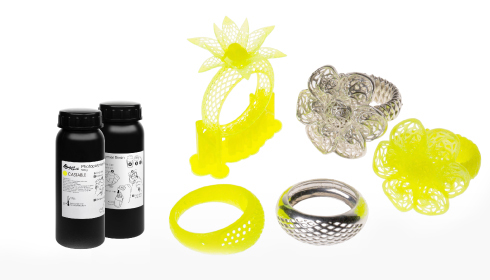
Post Curing Profile

Resin-printed object should be post cured to ensure the material is completely polymerized to achieve the best material properties. This is especially important for functional resins such as castable resins and engineering resins.

When using XYZprinting UV Curing Chamber for XYZprinting resins, follow the below curing profile for post-processing:

Resin Name Resin Model Color Compatible Nobel Printer UV Curing Chamber EeezCure180** MultiCure180
Power Level Curing Time Preset Preset UV LED Power Level Curing Time
Standard A1 Grey 1.0 3 10 02 04 365+385+405 100 7
Standard A1 Clear/White/Blue/Magenta 1.0 / 1.0A 3 10 02 04 365+385+405 100 7
Flexible B1 Clear 1.0 / 1.0A 3 10 02 03 365+385+405 100 5
Castable C1* Orange 1.0A 3 10 02 02 385 100 10
Rigid D1 Clear 1.0A 3 20 03 05 365+385+405 100 10
Tough D2 Clear green 1.0A 3 20 03 06 365+385+405 100 15
Rigid D3 Orange Superfine 3 10 02 04 365+385+405 100 7
Standard E1 Purple Superfine 3 10 02 02 385 100 10
Standard E1 Clear Superfine 3 10 02 02 385 100 10
Standard E2 Grey Superfine 3 10 02 03 365+385+405 100 5
Castable F1* Yellow 1.0A / Superfine 3 5 01 01 385 100 5
Castable+ F2* Brown Superfine 3 30 04 07 365+385+405 100 30
Heat Resistant K1 Dark green Superfine 3 20 03 05 365+385+405 100 10
Note
*Post cure castable resin prints in water for best performance.

** Curing parameters are the same for EeezCure180 and the UV curing chamber. When using EeezCure180, simply switch between different presets to apply the suggested curing settings.

General Design Specs

Applicable printer: Nobel 1.0A

For the ideal printing result and the complete output of design details, please follow below design specifications when designing the models:

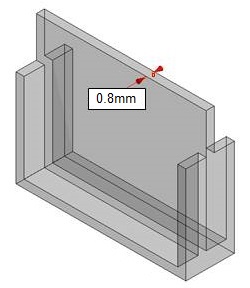
Wall thickness ≥ 0.8mm

Walls thinner than recommended may warp or break during the peel process.

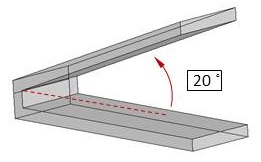
Overhang angle ≥20°

Support structures are required for steep overhangs with an angle larger than recommended limits. Otherwise the overhangs may deform or break.

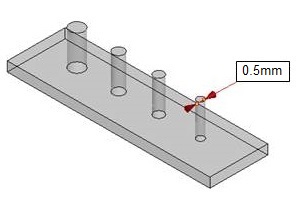
Vertical-Wire Diameter ≥0.5mm

Nets or wires thinner than recommended may break or deform during the peel process.

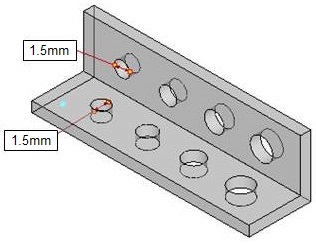
Hole Diameter ≥1.5mm

Holes smaller than recommended may trap resin in the object or may close off during printing.

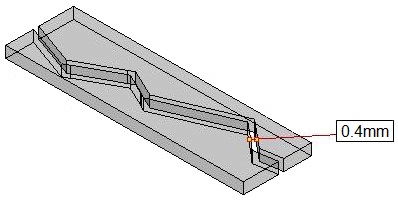
Clearance ≥0.4mm

Clearance smaller than recommended may fuse during printing. Moving parts may thus become non-functioning.

Note 
» The recommendation is based on the printing result at layer height of 0.1mm. 
» Print quality may be affected when printing with a damaged or cloudy resin tank.
» The specs for some features are different for certain resins. Please also follow the design specs in the wiki page for each resin, if available.

General Design Specs

Applicable printer: Nobel Superfine

For the ideal printing result and the complete output of design details, please follow below design specifications when designing the models:

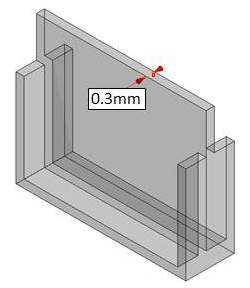
Wall thickness ≥ 0.3mm

Walls thinner than recommended may warp or break during the peel process.

Overhang angle ≥20°

Support structures are required for steep overhangs with an angle larger than recommended limits. Otherwise the overhangs may deform or break.

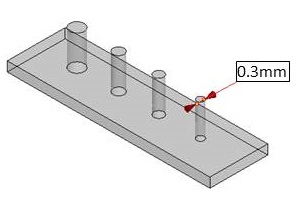
Vertical-Wire Diameter ≥0.3mm

Nets or wires thinner than recommended may break or deform during the peel process.

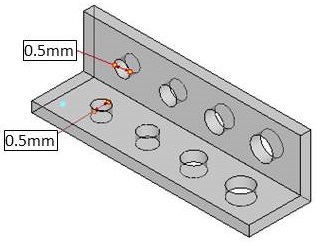
Hole Diameter ≥0.5mm

Holes smaller than recommended may trap resin in the object or may close off during printing.

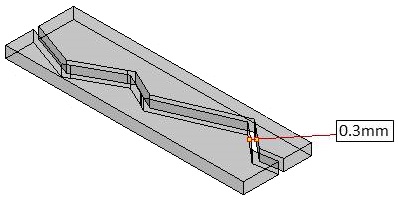
Clearance ≥0.3mm

Clearance smaller than recommended may fuse during printing. Moving parts may thus become non-functioning.

Note
» The recommendation is based on the printing result at layer height of 0.025mm. 
» Print quality may be affected when printing with a damaged or cloudy resin tank.
» The specs for some features are different for certain resins. Please also follow the design specs in the wiki page for each resin, if available.

Standard Resin (E1)

Applicable printer: Nobel Superfine

Standard resin provides a wide range of applications and moderate rigidity, making it suitable for general design outputs and engineering design prototyping.

Model Design Tips

For the ideal printing result and the complete output of design details, please consider the design specifications when designing the models.

» Hole Diameter ≥1.0mm

» For the specs for other features, please follow the general design specs here.

Recommendation on Finishing

Please refer to the complete guide here for post-processing.

Castable Resin (F1)

Applicable printer: Nobel Superfine

The properties of the castable resin are similar to those of wax. There is no ash residue after it is heated and it is suitable for lost wax casting, saving procedures, i.e. wax carving used in the conventional production process.

Model Design Tips

The properties of the castable resin are similar to those of wax in that both are structurally soft and brittle and the printout can be easily broken due to pulling force during the printing process. Please follow the design tips below for optimized printing.

» Wall thickness ≥ 0.4mm

» Hole Diameter ≥1.0mm

» Clearance ≥0.4mm

» For the specs for other features, please follow the general design specs here.

Note
» Avoid scratching the bottom of the tank with any sharp tool, or the coating may be damaged. Damaged tank surface may affect the printing quality.

Recommendations on Printing Setup

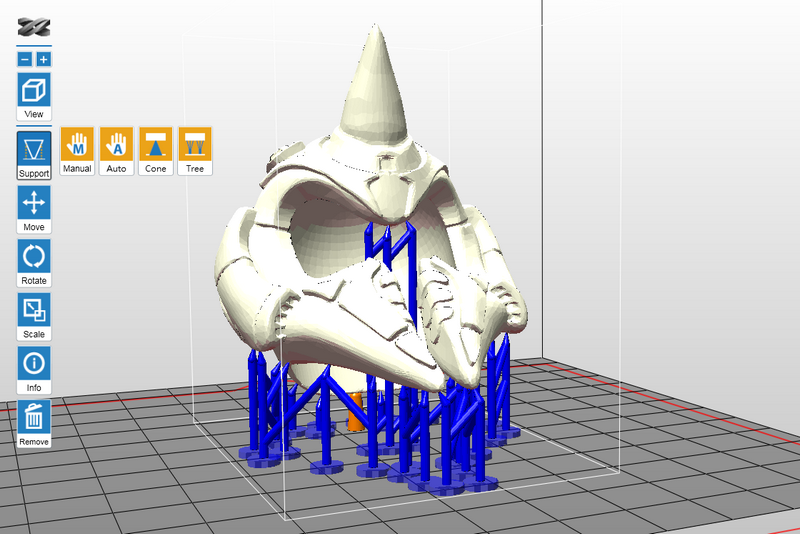
As with the use of the resin for general purpose, when there are overhangs in the model, or when the area of contact with the platform is small, additional support structures are required to ensure that the object can be printed out completely. The printing software XYZware_Nobel has an “automatic support” function, which can be used to analyze the structure of the model and automatically generate bracing structures. Sometimes you may need to use the “manual” mode to add more supports to ensure the adhesion of the object.

Click here for the instructions for support functions.

If printing fails, please change the object’s position and adjust the setup of the angle and the bracing structures.

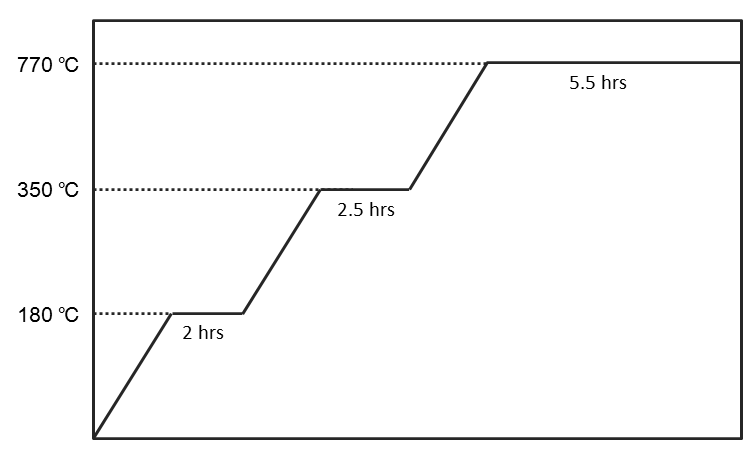
Recommended Burnout Process

When casting the printouts, you can work based on the temperature control suggestion as described in the following diagram, in order to ensure the complete burning away of the resin and a smooth and unblemished surface of the casting object.
Recommendation on Finishing

Cleaning

After removing the printed object from the platform, please clean it with ethyl alcohol of concentration greater than 95%. During the cleaning process, you are recommended to use a scoop net to hold the printed item and to sway the scoop net in the alcohol in order to clean the resin residue from the surface of the printed item.
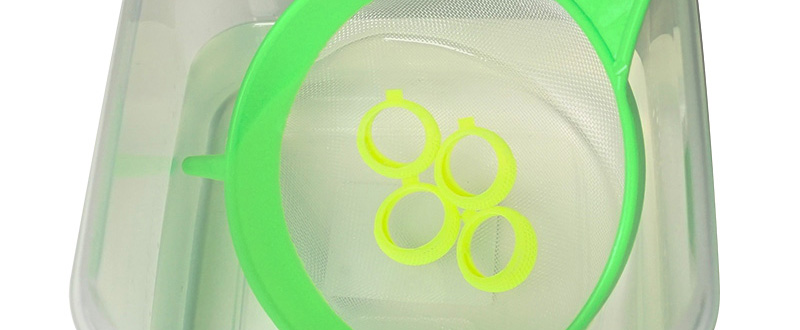
Spritz alcohol on the detailed structures with a spray bottle to wash away the uncured resin.

Scoop up the printed item from the alcohol after it is cleaned and wait for the alcohol on its surface to evaporate away.

Note
» Because of the brittleness of this resin, do not use a brush to scrub the printed item. Doing so may scratch the surface of the printed item.
» Do not immerse the printed item in alcohol for longer than over 10 minutes, or the alcohol may erode the item's structure and damage the item.

Air-Dry the Alcohol on the Surface

Alcohol may reside on the surface of the printed item after it is washed. Please keep the printed item still after it is washed and do not perform post-curing until the alcohol on the surface has completely volatilized. After the alcohol has air-dried, please check carefully whether there is any resin residue in the features. Please make sure to remove the uncured resin to prevent it from blocking the design details of the original model.

Note
» If curing is performed when alcohol residue is still present on the surface of the printed item, the surface of the printed item will appear white and misty, possibly affecting the result of casting.

Removing the Support

Please use tools to cut off the support instead of pulling directly (pulling can easily damage the item’s surface).

Post-curing

The printed item produced from the castable resin must post cured using UV light to ensure the hardness for the lost wax casting.
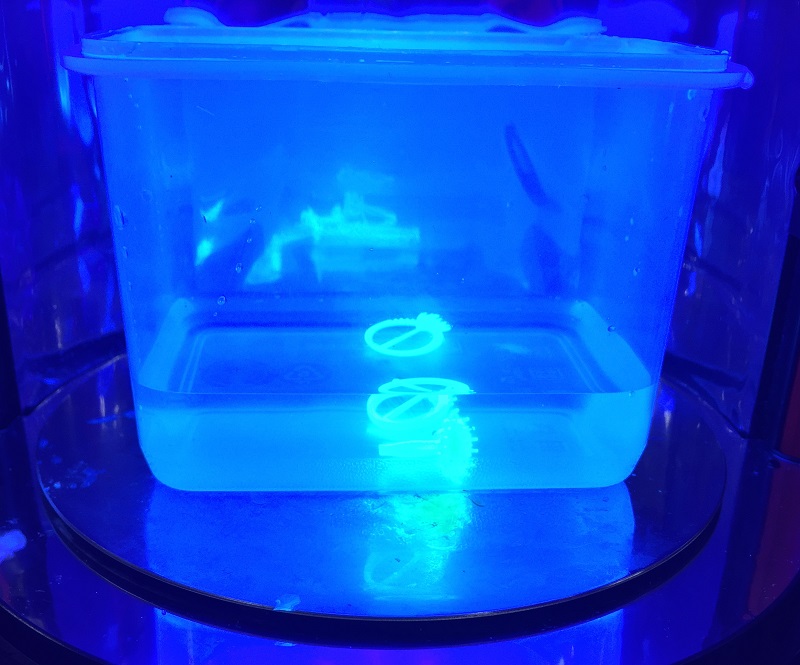
For the best material properties, UV post-curing the printed parts in water for 5 minutes.

Recommendation
» When using XYZprinting UV Curing Chamber, post cure the printed parts in water for 5 minutes.
» Under conditions of UV wavelength 375~405 nm and radiation intensity of 14 mW/cm², when the thickness of the object's structure exceeds 7 mm, it is recommended to post cure the object for 5 minutes.

Preservation of the Uncured Resin

Uncured resin inside of the resin tank should not be exposed to light. The uncured resin can be stored in an opaque container after it is filtered. Pour the resin back into the resin tank prior to the next printing.

Note
» Opaque polypropylene containers are recommended for storing the resins.

Nobel 1.0 Open Mode

Open Mode Setup

To enter to Open Mode:

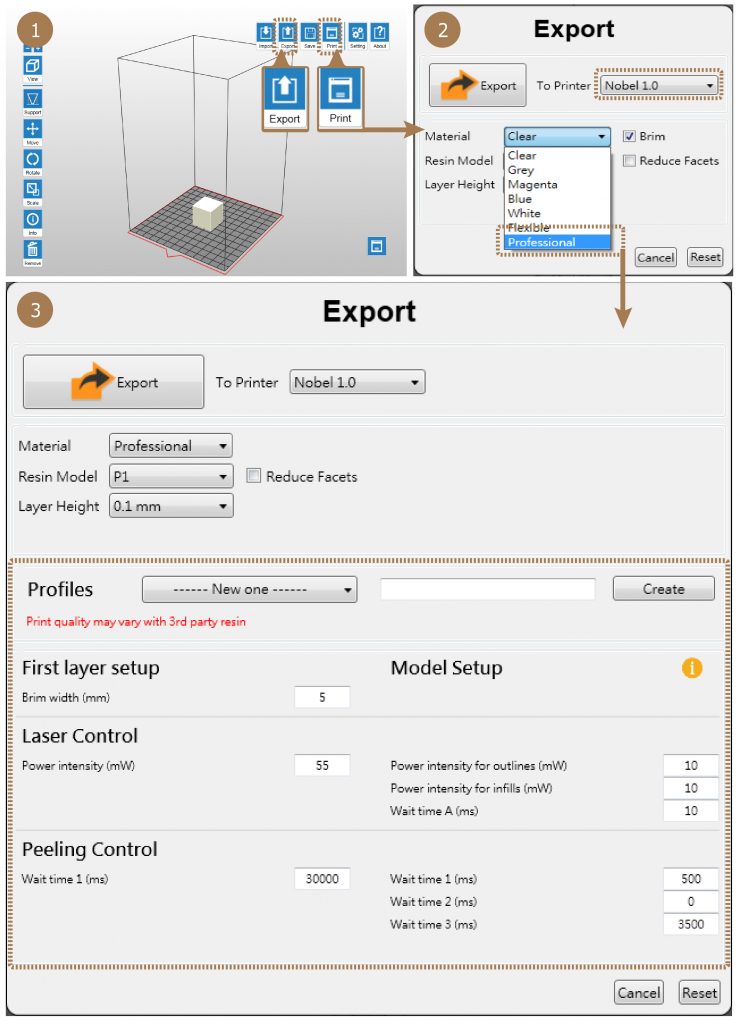
Select “Export” or “Print”, and select “Professional” “under “Material”.

Note
Print quality may vary with 3rd party resin.
Auto-filling function will be disabled when using 3rd party resin. If you are using XYZprinting resin, please select the appropriate options for XYZprinting materials.

Printing Process

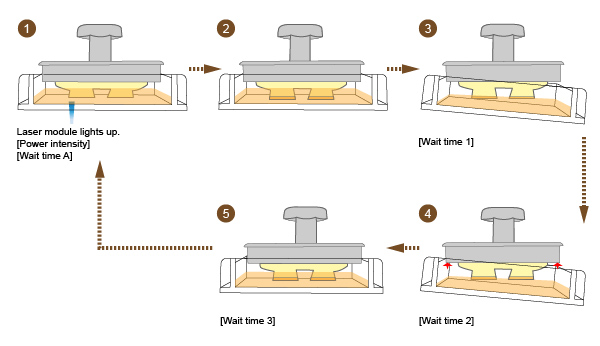
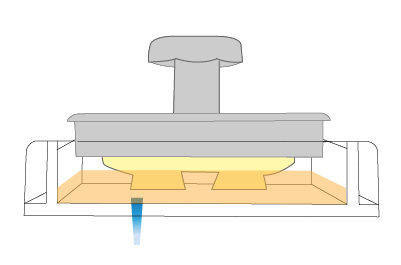
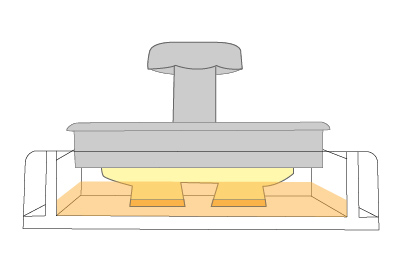
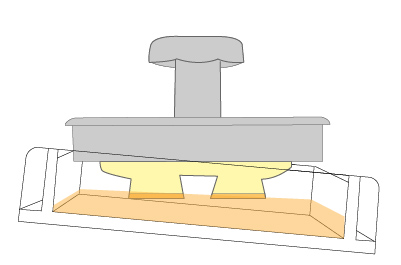
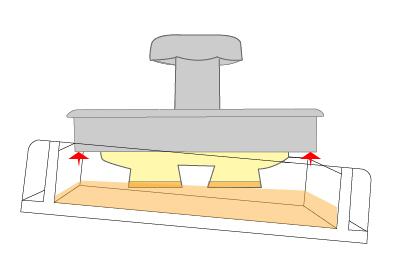
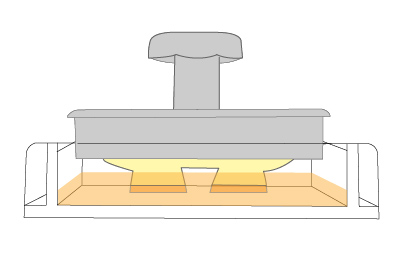
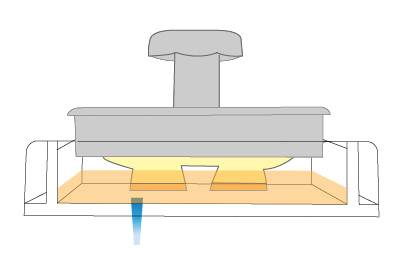
The printing process of Nobel 1.0 works as illustrated. Below is the list of the adjustable parameters for printing with third party resin in each stage.

Adjustable Parameters in Each Stage

1. The laser module lights up, based on the settings of Laser Control:

Power intensity

The item controls the power intensity of the laser beam.
Range: 0 – 72 mW

Note
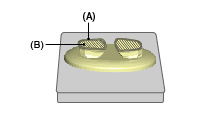
You can set up different power intensity for curing the outlines and infills of the model.

(A) Outlines
(B) Infills

Wait time A

The laser beam goes out per the specified period of time when moving from a section to another section on the same layer.
Range: 10 – 15 ms

2. The laser beam goes out after tracing the whole layer.

3. The tank tilts to peel the cured layer off from the surface of the coating and wait.

Wait time 1

The tank tilts and the printer waits for the specified time until the resin is completely polymerized.
Range: 0 – 65535 ms

4. The platform moves up per the setting up layer height and wait.

Wait time 2

The platform moves up and the printer waits for the specified time until the resin is cooled down.
Range: 0 – 65535 ms

5. The tank resets and wait.

Wait time 3

The tank resets and the printer waits for the specified time until the resin has stopped flowing.
Range: 0 – 65535 ms

6. Laser module lights up to cure the next layer.

Best Practice

To ensure the printing quality, check the following items before printing.

Filter the resin in tank

Sift any residue or cured debris from the platform and tank with the scraper, high-density filter or other tools. Resin can be reused after filtering.

Note
Filter the resin after every prints may ensure the stability of printing. 
Resin resided in the black filling tube may drip on the printer case. Please cover the opening of the tube with paper towel before removing the tank.

Clean the tank bottom

Mop the fingerprint or resin under the tank or on the glass with with lint-free cloth dampened with alcohol.

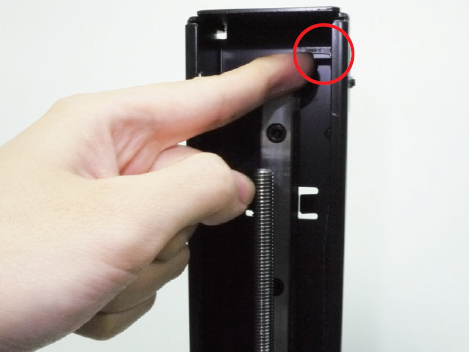
Clean the level sensor

Brush the level sensor with alcohol if it gets stuck.
Level sensor should return to the original position after a soft push. When the tank is full or the resin gets sticky, the sensor’s movement may be hindered greatly. Normally, it may take 1 minute for sensor to return. If stuck, remove the remaining resin from tank before cleaning. If resin in tank is cured, please replace the tank.

Platform calibration

Re-calibrate the platform after changing the platform or the tank. Make sure that the platform is paralleled with the tank.
Please note that platform calibration should be done with an empty tank.

Avoid cloudy area

Check if the tank is cloudy at where you place the model. Move the model away from the cloudy area in the software with the “Move” function. Replace the tank if the overall surface is cloudy.

Note
The placement on the virtual platform in the software is opposite to the actual placement in the tank. For models placed at the right side of the virtual
platform, they will be built on the left side of the tank.
Printing at the left side of the tank (right side on the virtual platform) will be less affected by the peeling force during build process.

Check for optimized setup

Optimize the placement and the support structure of the model with the ”Rotate”, “Support” and “Brim”functions in the software.

Rotate

For models of top-heavy structure, with less contact with the platform, or with any larger solid layer, please rotate the model to reduce the effect of peeling force during build process.

Support

For models of top-heavy structure, with overhanging parts or with less contact with the platform after rotated, please add support structures.

Tips
For larger overhanging parts, please choose the support structure with higher density and larger contact point.

Brim

One of the keys to successful printing on the bottom up type SL printer is to ensure the adhesion of the model to the platform. If rotating the model doesn’t increase the contact between the models and the platform greatly, please check “Brim” while exporting or printing the file. Also add “support” if necessary.

Avoid non-manifold geometry

For models with non-manifold geometry (black-highlighted in the software), please repair the models before printing.

Post-Processing

Post processing to printouts may be required

Remove Support Structure

Use pliers or other tools to remove the support structure from the cleaned prints to ensure perfect finish.

Empty Uncured Resin Inside the Prints

Hollow prints with uncured resin inside may break as time passes. To ensure the durability of hollow prints, leave a weep hole at the bottom of your 3D design, so you can empty the uncured resin easily.

Post-cure Prints for Optimal Results

The post-curing process maximizes the mechanical properties of resin-printed objects. It ensures the stable performance of functional resins and successful burnout of castable material. It’s essential for professionals such as dentists or jewelers. Post-cure with XYZprinting UV Curing Chamber is easy. Refer to the curing profile here.

Troubleshooting

When an error occurs, please refer to the service code on the printer and/or in the software, and check the suggestion below for troubleshooting.

If any error persists, please contact customer service center for support.


Error Code 1000

Cause: Vibration generator movement abnormalities or tank sensor malfunctioned.

Suggestion:

Contact customer service center directly

[collapse]
Error Code 1001

Cause: Z axis motor upward movement abnormalities or Z axis top sensor malfunctioned.

Suggestion:

Select “INFO”>”SENSOR STATUS” on the printer, touch Z axis top sensor, and see if the status of “Z-T” switches from 0 to 1.

If the value doesn’t switch accordingly, then the sensor is malfunctioning. Then select “UTILITIES”>”MOVE PLATFORM”>”TO TOP” to raise the . If the platform doesn’t rise accordingly, then the motor is malfunctioning.
Contact the service center after you have checked the status of the printer.

[collapse]
Error Code 1002

Cause: Z axis motor downward movement abnormalities or Z axis bottom sensor malfunctioned.

Suggestion:

Select “INFO”>”SENSOR STATUS” on the printer, touch Z axis bottom sensor, and see if the status of “Z-B” switches from 0 to 1.

If the value doesn’t switch accordingly, then the sensor is malfunctioning. Then select “UTILITIES”>”MOVE PLATFORM”>”TO BOTTOM” to descend the platform. If the platform doesn’t descend accordingly, then the motor is malfunctioning.

Contact the service center after you have checked the status of the printer.

[collapse]
Error Code 1003

Cause: NFC tag reader malfunctioned.

Suggestion:

Contact customer service center directly.

[collapse]
Error Code 1004, 1006, 1007, 1008

Cause: Engine board malfunctioned.

Suggestion:

Contact customer service center directly.

[collapse]
Error Code 1005

Cause: Y axis movement problem.

Suggestion:

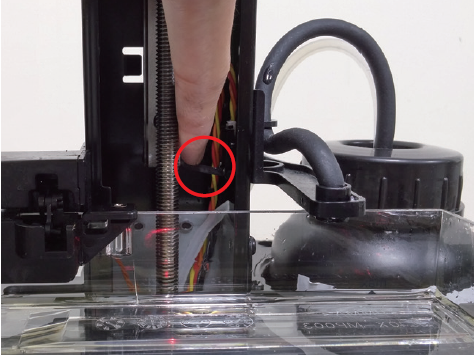
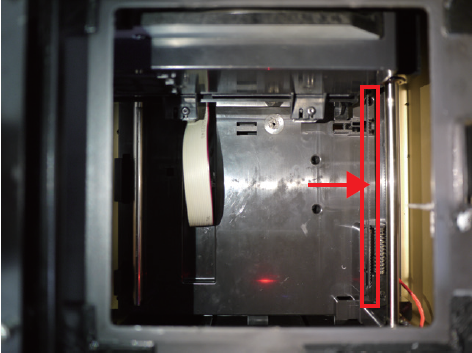
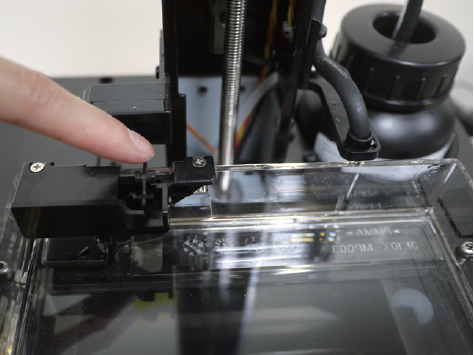
Remove the resin tank, release 3 latches by the glass and remove the glass. If you find any object falls inside the printing chamber and blocks the movement of the printing module, please remove it. If you find the belt is broken, please contact the service center.

Y-axis belt

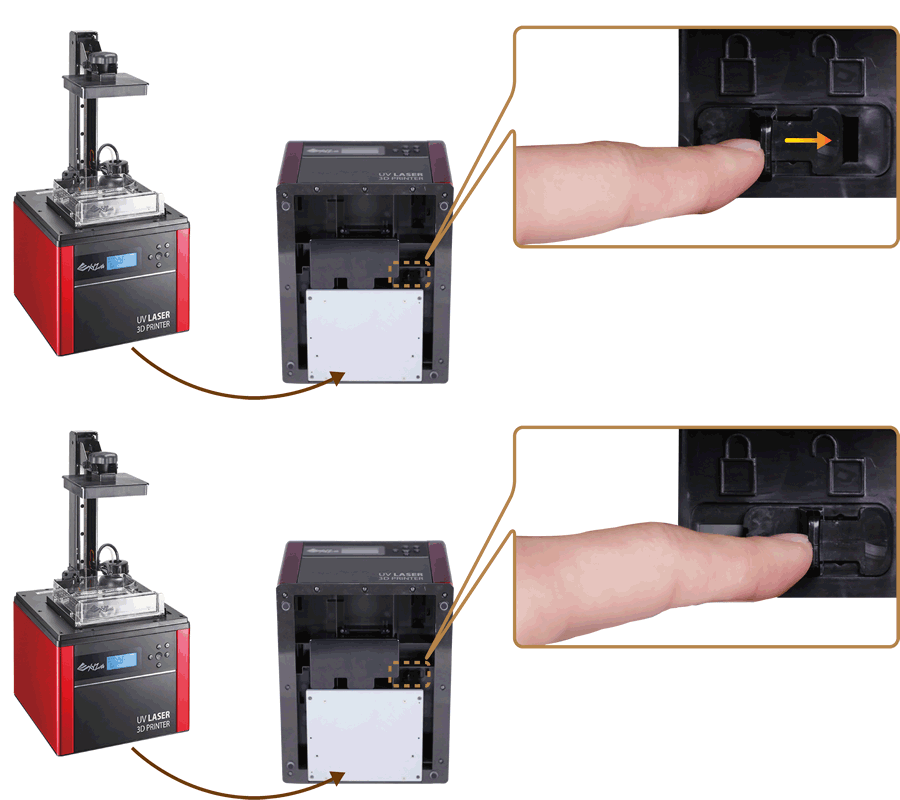
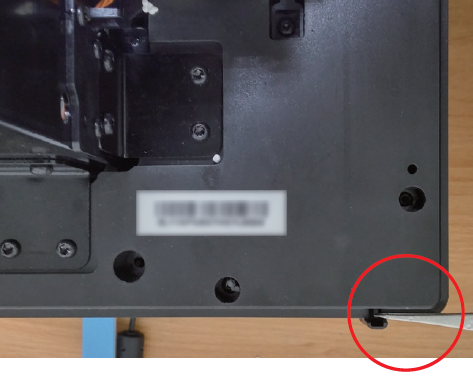
Please also check if the printing module lock at the bottom of the printer has been released.

[collapse]
Error Code 1009

Cause: WIFI module malfunctioned.

Suggestion:

Contact customer service center directly.

[collapse]
Error Code 100A

Cause: Z axis motor malfunctioned.

Suggestion:

Turn off the printer and confirm if the printing platform and the resin tank are installed correctly. If the error still occurs, contact customer service center.

[collapse]
Error Code 100C, 100D, 100C

Cause: Internal error.

Suggestion:

Contact customer service center directly.

[collapse]
Error Code 1020

Cause: Printer not found.

Suggestion:

Make sure printer is powered on, and connected to PC correctly. If the error persists, please try to restart your PC or refer to FAQ on XYZprinting website.

[collapse]
Error Code 1021

Cause: XYZware_Nobel slicer not found.

Suggestion:

Reinstall XYZware_Nobel.

[collapse]
Error Code 1022

Cause: Transmission failed.

Suggestion:

Make sure the USB wire is securely connected to the printer. Do not remove the wire before data transmission is completed.

[collapse]
Error Code 1023

Cause: Insufficient memory to load file(s).

Suggestion:

Increase system memory to 4G RAM and 1G graphics RAM or above. Leave some prints for next task if you are printing several models.
For better performance, it is recommended to run the program on 64-bit operating system.

[collapse]
Error Code 1024

Cause: XYZware_Nobel runtime error.

Suggestion:

Restart XYZware_Nobel.

[collapse]
Error Code 1025

Cause: Unable to save the file.

Suggestion:

Please check if there is enough space on the selected disk/device. Delete some files and try again. If you are saving the file to external device, make sure that the device is securely connected.

[collapse]
Error Code 1026

Cause: Non-manifold issue is found in the file.

Suggestion:

Repair the file with 3D model repairing software (such as netfabb or MakePrintable) and slice the model with XYZware_Nobel again.

[collapse]
Error Code 2000

Cause: Resin filling timeout.

Suggestion:

If the resin bottle is not empty, and the NFC tag matches the cartridge, first check if the nozzle cap is securely closed. Then check if the tank level sensor is functioning. Select “INFO”>”SENSOR STATUS”, and touch the tank level sensor. If the value doesn’t switch from 1 to 0 after “L”, the sensor is not working.


Then tap the floater to see if it moves smoothly.
If the sensor gets stuck, clean the sensor by following the cleanup procedure.
Also check the status of the filling pump. Disconnect the transparent filling tube, and select “UTILITIES”>”INSTALL RESIN”. If you don’t feel air releasing from the tube, then the pump is malfunctioning.
Contact the service center after you have checked the status of the printer.

[collapse]
Error Code 2001

Cause: Resin bottle not found.

Suggestion:

Make sure resin bottle is placed correctly and NFC tag is in place under the bottle.

If the NFC label is missing, please contact customer service center.

[collapse]
Error Code 2002

Cause: UV laser module not calibrated.

Suggestion:

Contact customer service center directly.

[collapse]
Error Code 2003

Cause: Resin bottle empty.

Suggestion:

Resin bottle is empty is based on the the reading from the NFC tag. Select “INFO”>”RESIN STATUS” to check resin level. When “REMAINING” is shown as “0%”, then the resin bottle should be empty. Please install another XYZprinting resin bottle before printing.

[collapse]
Error Code 2004

Cause: Lid not covered during printing.

Suggestion:

Place the lid on the printer before printing. If the lid is placed correctly, please remove the lid, select “INFO”>”SENSOR STATUS”, tap the lid sensor and see if the status of “C” switches from 0 to 1.

If the value doesn’t switch accordingly, then the sensor is malfunctioning.

Contact the service center after you have checked the status of the printer.

[collapse]
Error Code 2005

Cause: Unrecognized resin tag.

Suggestion:

Check the record of the resin bottle by selecting “INFO”>”RESIN STATUS”. If the display shows “UNIDENTIFIED TAG”, please change to XYZprinting resin bottle.

[collapse]
Error Code 2006

Cause: Unable to resolve the file.

Suggestion:

Slice the file again with XYZware_Nobel. Be sure to select the “Printer Type” according to the printer model used while slicing the file.

[collapse]
Error Code 2007

Cause: File too large.

Suggestion:

Please select a .3wn file, size no more than 200MB.

[collapse]
Error Code 2008

Cause: Non-manifold issue is found in the file.

Suggestion:

Repair the file with 3D model repairing software (such as netfabb, MakePrintable, or 3D Builder) and slice the model with XYZware_Nobel again.

[collapse]
Error Code 2009

Cause: Resin tank is not installed correctly.

Suggestion:

Confirm if the resin tank is installed correctly. If the resin tank is placed correctly, remove the tank, select “INFO”>”SENSOR STATUS” on the printer, touch the resin tank sensor, and see if the status of “T” switches from 0 to 1. If the value doesn’t switch accordingly, then the sensor is malfunctioning. Contact the service center after you have checked the status of the printer.

[collapse]
Error Code 2020

Cause: Printer is busy.

Suggestion:

Wait until the printer finishes current task. If the error persists when the printer is idle, please try to restart the printer.

[collapse]

User Interface

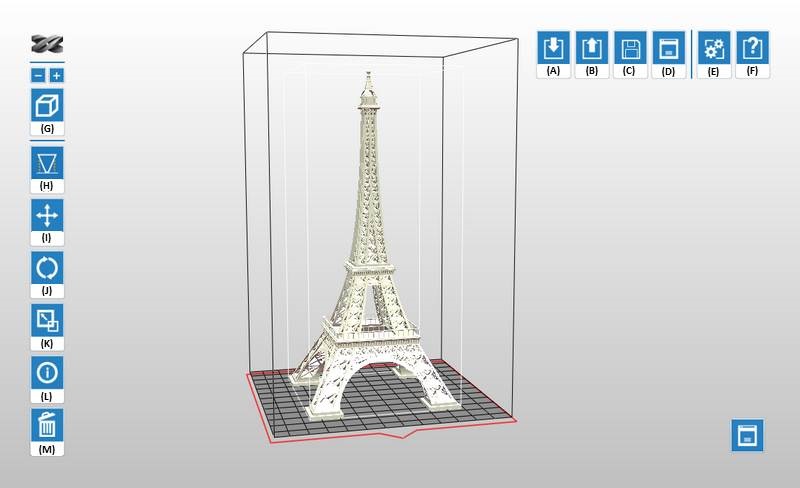
XYZware_Nobel is not only for printing, it also enables basic edits and printer setups. Below is the descriptions of all functions.

(A) Import

Import objects in .stl/.3ws/.3wn format.

Open the file browser and select the files to print.

Note
Only one 3ws or 3wn file is allowed on the workspace.
Tip 
You may also drag the files from a folder into XYZware_Nobel. To load more than one file, press Shift key while selecting the files and drag them into XYZware_Nobel.

(B) Export

Export the objects on the workspace to sliced file in 3wn format. Click here to read the description on each options.

(C) Save

Save as .stl or .3ws file.

Save all objects on the platform to a single stl/3ws file. Any adjustment to the size or placement of the objects will apply to the file.

(D) Print

Setup printing preference and send the objects for printing.

The options are the same as for the Export function. Click here to read the description on each options.

(E) Setting

Setup interface language, display units, printer type, printout scaling, light strength tuning and sign in as XYZprinting member. Click here to read the description on each options.

(F) About

Software and firmware version are displayed here.

To update software or printer firmware, please click in the update/upgrade button in this window. In this section, you can also find the contact information of XYZprinting in different regions.

Tip 
Apply printer firmware and XYZware_Nobel updates when prompt by the software for stable printing performance.

(G) Zoom

Zoom in/out the view.

Zoom in or out the platform to view the details of objects.

Tip
You can also zoom with the scroll wheel on the mouse.

(H) View

Switch views.

Switch views with a click to view objects from different angle.

Tip
You can also drag the mouse to rotate the view.

(I) Support

Add supports to overhangs on the models.

Support structure is required under overhangs. It prevents the falling for gravity and the deforming due to the peeling force during printing, and increases adhesion of the model to the platform. Click here to read more.

(J) Move

Move the object along the x, y, or z axis.

You can move the object by dragging the slider or inputting a value in the field by the slider.

Keyboard shortcut
Press and hold ALT key and drag the mouse to move the object horizontally.

(K) Rotate

Adjust the angle of the object around the x, y, or z axis.

Orientation is one of the keys to a successful print. For models of top-heavy structure, with less contact with the platform, or with any larger solid layer, please rotate the model to reduce the effect of peeling force during build process.

To rotate the model, drag the mouse over the circular slider or input the desired angle in center of the circular slider.

(L) Scale

Scale the object as you desire. The adjustment to the object on the platform will not affect the size of your original file.

To scale up or down the model, input the desired size on X, Y or Z axis, drag on the slider bar, or input the scale ratio directly.

Tip
To resize the whole model, be sure to check "Uniform". Unselect "Uniform" if you wish to make non-uniform scaling.

(M) Info

View info of the object.

You can check the dimension and location of the object in this function. For sliced objects, the info window also shows printing related data, including selected printer type, estimated print time and resin volume.

(N) Remove

Remove the object from the platform.

Select an object and click the option to delete it from the platform.

Keyboard shortcut
You can also press Delete key to remove the selected object from the platform.

(O) Printer Monitor

View printer status, including printing progress and the resin level in the resin cartridge.

“My Printer” window shows the information on the connected printer(s). However, only one connection is allowed. To switch to another printer, click “Connect” button below the target printer.

Note
"Wireless Setting" is only compatible with printer model Nobel Superfine.