How to scan: Head Mode
Learn the tips on measuring the scan area of Head Mode and reduce the factors that may affect the scan result, you can make the digitized replicas easily.
Note:
The person being scanned should hold as still as possible throughout the scanning process to achieve a good scan.
Tip:
In a limited space environment, the person being scanned may stand on the center of an turntable to allowing scanning from a fixed location.
Scanning steps:
1. Measure the minimum scanning distance
Scan area for the Head Mode is 80 x 50 x 80 cm (width x depth x height). As the scanning area is fixed once the scan started, it is advised to start scan from the closest scanning distance to acquire a complete 3D head image.You don’t need a ruler to measure the distance between the scanner and the scanned person. Simply refer to the preview image displayed on screen and adjust your scanner position accordingly.Please hold the scanner with your left hand and move it towards the most protruding feature of the target’s head. Refer to the preview screen and move the scanner by using the scanned person’s head as the point of origin.When the most protruded feature is clearly shown on the preview screen, click “Start Scan” or click the button on the scanner.
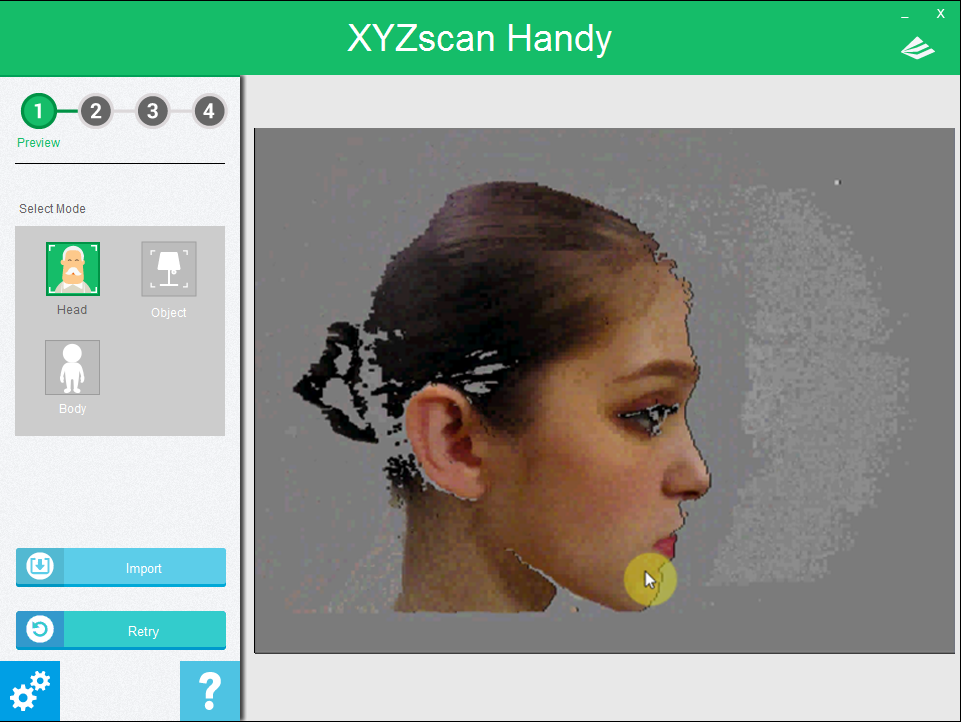
This preview image clearly displays the most protruded part (the ears) on the side of the head, indicating that the scanner has been placed in an optimal scanning location and is capable of capturing a complete scan.
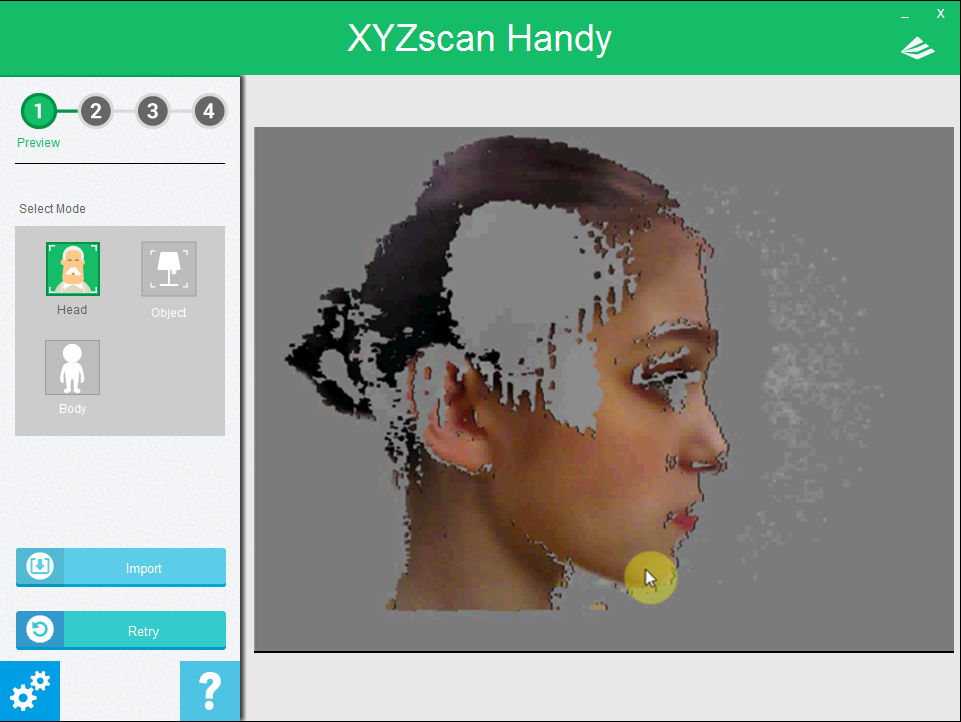
Gray patches are seen on this image, showing that the scanner is located too close to the scanned target. The user must move the scanner away from the target slightly to get a complete image.
The nose and ears are usually the most protruding features on the front and the side of the head. Or sometimes hairs may be the most protruding part of the starting point. You can start scan from any side of the face. As long as you can start the process from minimum scanning distance first, you will get a better and more complete scan.
Demonstration video:
Tips for the complete scan:
1. Start from the side of the face, using the ears as the reference point.
2. If you start from the front of the face, use the nose as the reference point instead.
3. Once the preview image displays the entire head, you are ready to start scanning (make sure that the top of the head and chin are shown in the preview screen)
2. Watch the screen and move the scanner to the uncovered area
Constantly monitor the real-time image shown on the right half of the scanning program throughout the scanning process and steadily move the scanner according to the mesh image generated by the scanner.

Scanning process
In the illustration above, the purple-shaded area (section A) are where no data is captured. The yellow-shaded area (section B) indicates the scanned part. At this point, the user should move the scanner towards section A to cover up the holes.
Demonstration video:
You may move the scanner in any direction. If you’re missing the chin in the image, then move the scanner towards the chin. Scanned areas can be re-scanned so long as the scanned target remains still. Repeated scanning of the same location can help make up for any missing details.
Tip:
Move the scanner a full circle around the person's head. Go slowly when scanning the face so that the scanner can acquire better facial details and generate a higher quality scan.
The scanner utilizes changes in surface depths to orient itself during the scanning process, and might become disoriented if there are no distinctive features in the hairstyle of the person being scanned. Please read more about finding the locating features for better orientation.
3. Complete the scan
When a complete 3D image has been generated, click “Stop” or gently click the button on the scanner to complete the scan.
Demonstration video:
