Scan Tip: Improve the Orientation of the Scanner
After initiating the scan, the scanner will take serial images, align the features in the 2D pictures, and stitch them into scanned geometry immediately.To get a complete scan, the orientation of the scanner is the key. The 3D scanner orients itself by recognizing the features on the surface.The noticeable features are using as the reference points for joining the depth image together.However, the scanner may not orient correctly when scanning the targets with plain surface. And thus will result in “losing tracking“, and may lead to incomplete scan.Nevertheless, it’s still possible to achieve a good scan even when scanning the target with plain surface. Read the following tips on how to deal with the targets with less features for orientation.
Tip 1: Add features to a plain surface
Demonstration Video: Head Mode
To the 3D scanner, plain straight hair is challenging to orient itself. In this case, it is recommended to put some accessories on the head for better orientation detection.
Plain straight hair can be scanned successfully with accessories.
Plain hair style with accessory is easier for scanning.
Hint: Having the hair tied up may also improve the orientation.
Demonstration Video: Object Mode
The exemplary object has a featureless surface when scanning it from a parallel angle. For better orientation of the scanner, it is recommended to put other objects over the target as the referencing points.
Hint: Adjust the placement of the scan target, like lay down the cylinder-shaped object, may improve the locating accuracy of the scanner.
Tip 2: Put other objects around the scan target
Demonstration Video: Head Mode
Rather plain hairstyle is challenging for scanning. In this case, you can scan the object around the head, such as collar and shoulder, to imrpove the orientation of the scanning.
Demonstration Video: Object Mode
When scanning objects with plain surface or without significantly embossed features, additional objects around can be used as the referencing points to improve the locating accuracy of the scanner.
Hint: The additional objects added as referencing points for scanner can be erased by using the 3D mesh-editing software.
Tip 3: Use the scanned area as the feature points for smoothly undulating surface
Demonstration Video: Head Mode
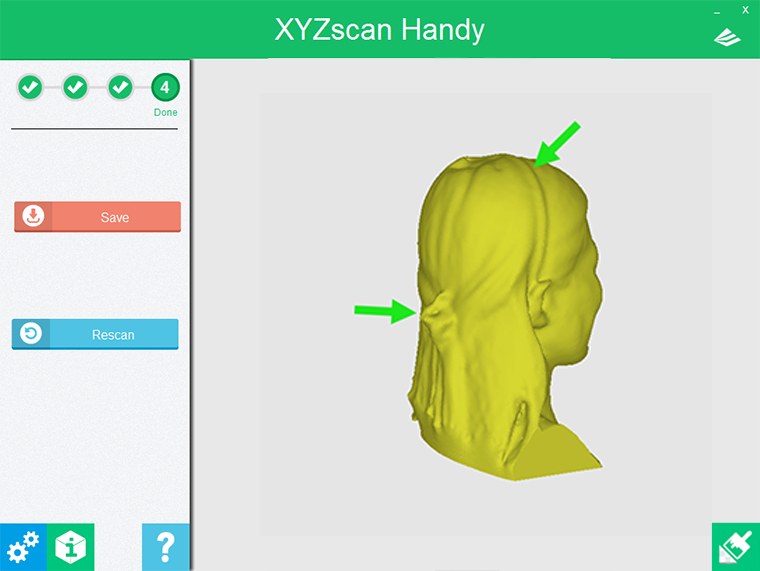
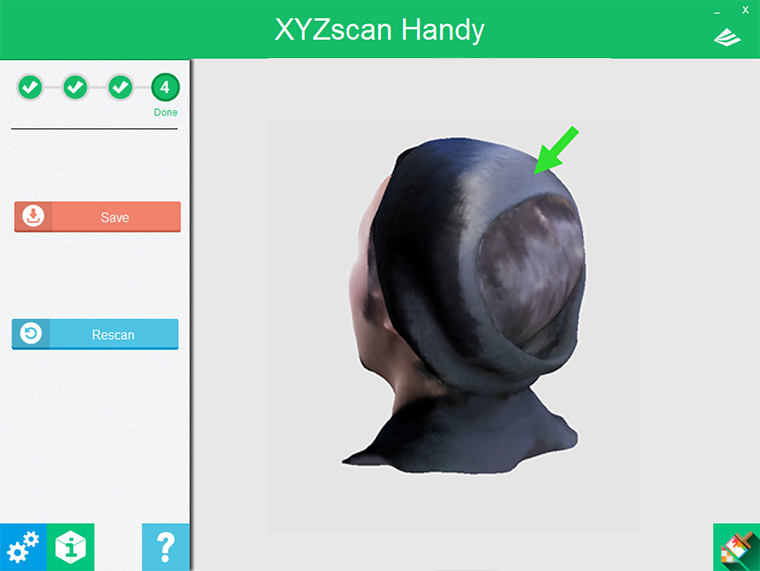
In scanning darker-colored objects or targets with featureless surface in some area, the scanner may lost tracking due to missing of orientation.
In this case, it is recommended to scan the areas with more noticeable features as which are easy for scan. And use the scanned area as the referencing points for scanning the featureless area.
Note: Color or texture on the surface will not work as the referencing point for scanning. For a colorful object with featureless surface, it is still difficult for the orientation of the scanner. The 3D scanner works better on the target with more features.
Tip 4: Alter the view angle of the scanner for an acute angle on the edge of the plain surface
Demonstration Video: Object Mode
The real-time image shows upright only when the scanner is held horizontally. So for an more intuitive scanning process, it will be better to hold the scanner horizontally.
However, altering the view angle of the scanner to scan from a parallel view is necessary for scanning some features. This is especially useful for scanning the acute angle on the edge of the plain surface, as it may prevent the scanner from disorientating.
Note: In object mode, the scanner should be held horizontally in order to focus and start scan. The direction of the scanner can be changed as need after starting the scan.
