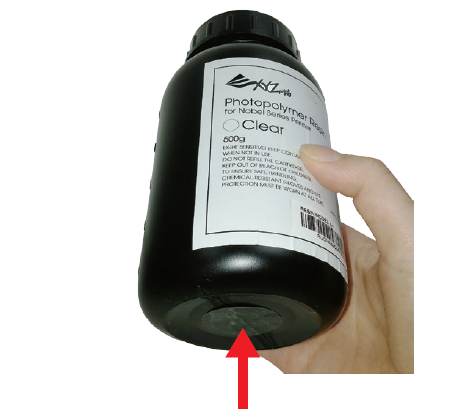
Совместимый Принтер: Nobel Superfine
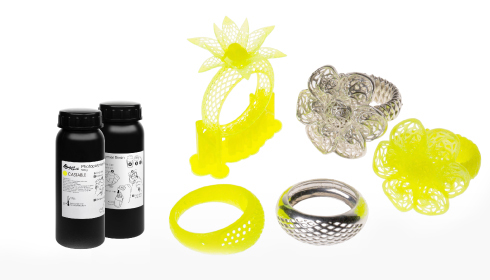
Модель смолы: F1
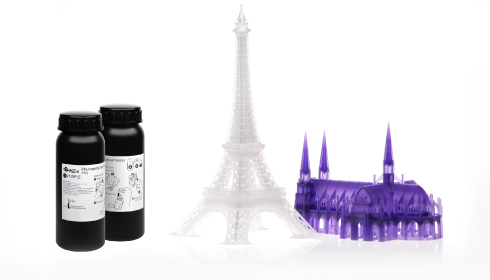
Литьевая смола схожа по свойствам с воском. После выплавки она не оставляет пепла и подходит для литья по выплавляемым моделям, что позволяет сократить количество операций, например, исключив вырезание моделей из воска, используемое в традиционной технологии.
Советы по созданию моделей
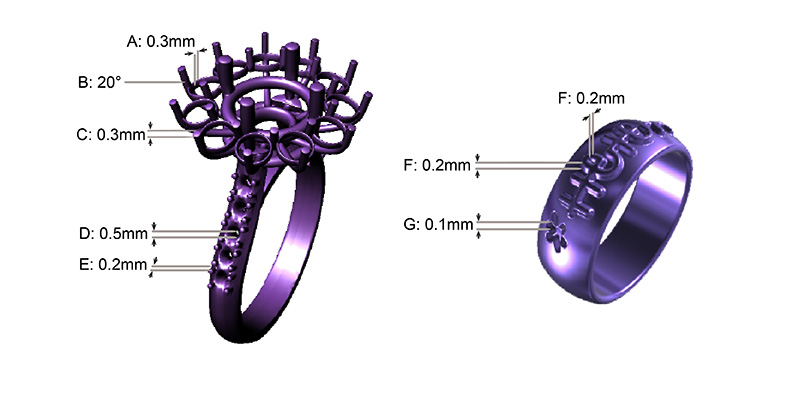
По свойствам литьевая смола схожа с воском: оба материала мягкие и ломкие, то есть распечатанный предмет может легко сломаться под воздействием растяжений, возникающих в процессе печати. Для достижения оптимальных результатов печати следуйте приведенным ниже рекомендациям по созданию моделей.
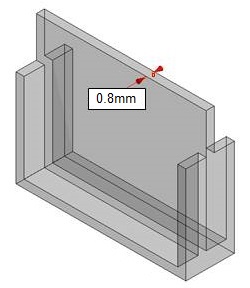
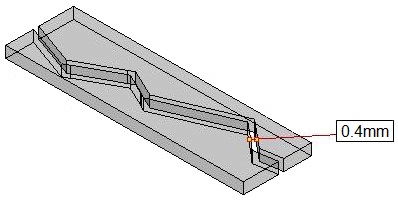
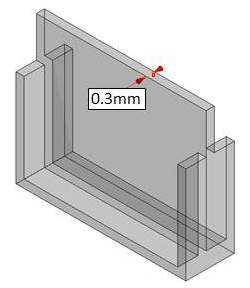
» Толщина стенки ≥0,4mm
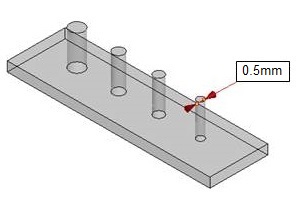
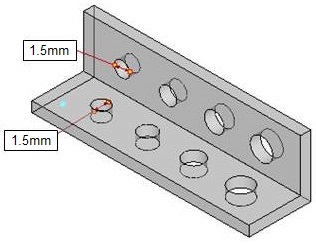
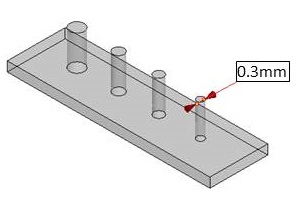
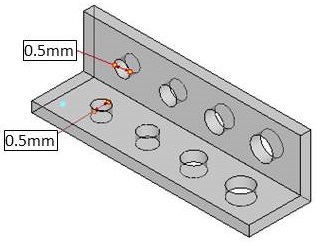
» Диаметр отверстия ≥1,0mm
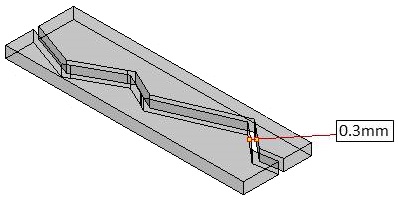
» Зазор ≥0,4mm
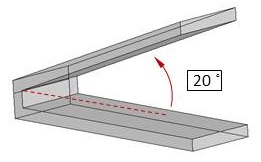
» Параметры других функций перечислены в общем руководстве по проектированию.
Примечание
» Рекомендация основывается на результате печати с использованием Литьевой Смолы и высотой слоя 0,025 мм.
» Для удержания на платформе предметов крупнее 40x30x40 мм или тяжелее 6 г может потребоваться больше опор.
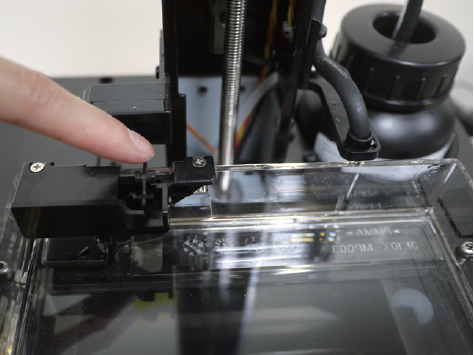
» Старайтесь не царапать острыми предметами дно кюветы, чтобы не повредить покрытие. В случае повреждения поверхности кюветы может снизиться качество печати.
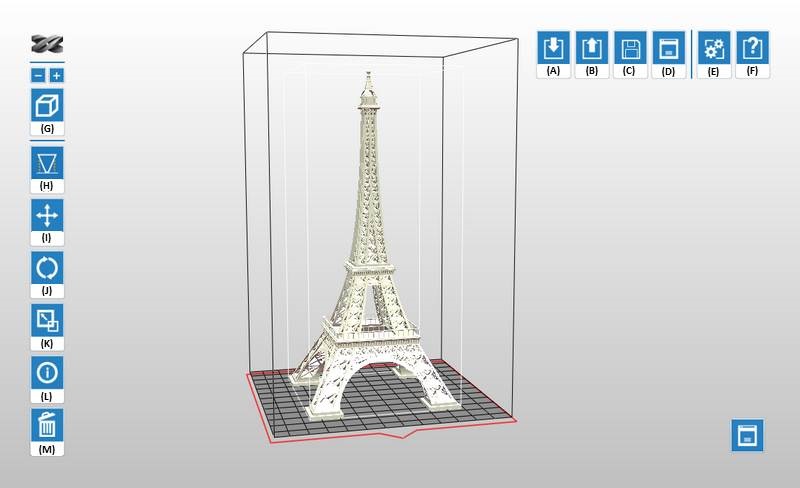
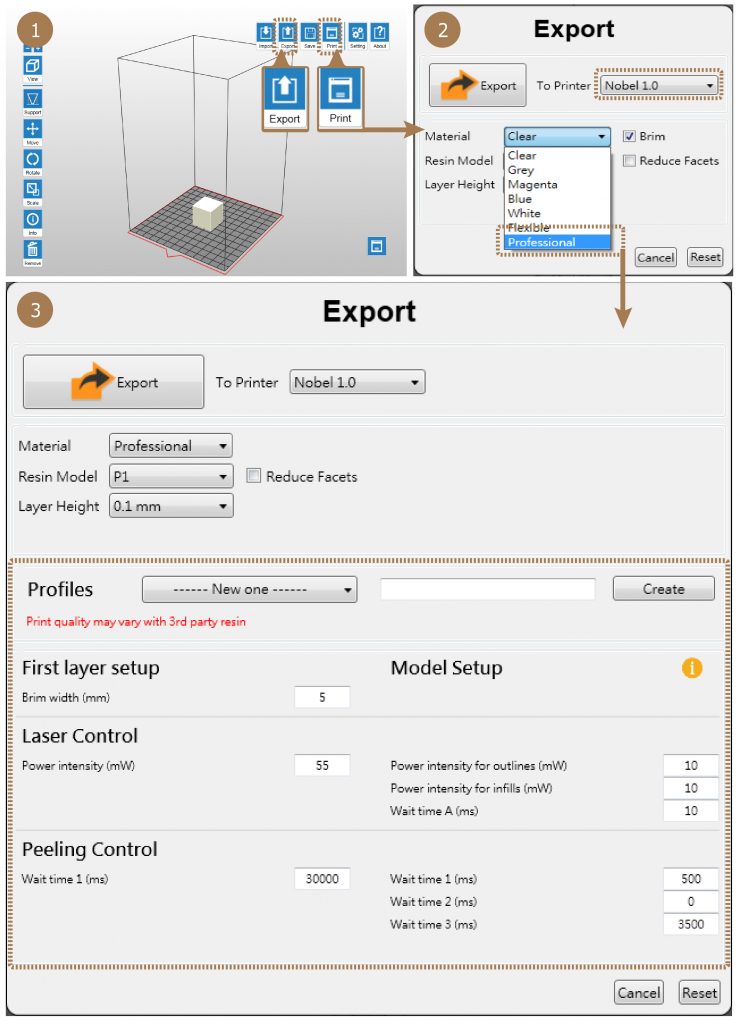
Рекомендации по конфигурации печати
Как и при печати обычной смолой, если у модели имеются нависающие элементы или у нее маленькая площадь контакта с платформой, для полной печати предмета требуются дополнительные опоры.
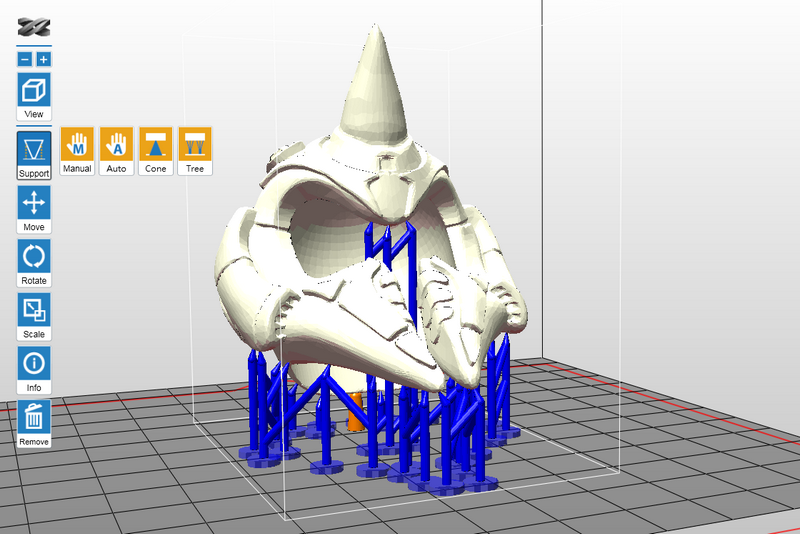
В программе XYZware_Nobel предусмотрена функция автоматического построения опор, которая анализирует модель и автоматически формирует поддерживающие опоры. Иногда может потребоваться в ручном режиме добавить дополнительные опоры, чтобы обеспечить адгезию предмета к платформе.
Нажмите здесь, чтобы ознакомиться с инструкциями по применению опор и описанием их функций.
Если печать не удается, измените расположение предмета, измените угол его разворота и конфигурацию поддерживающих опор.
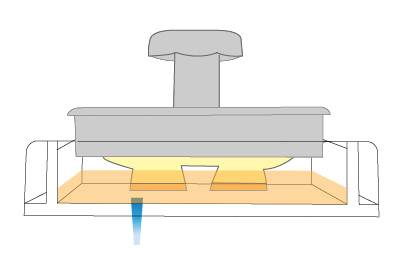
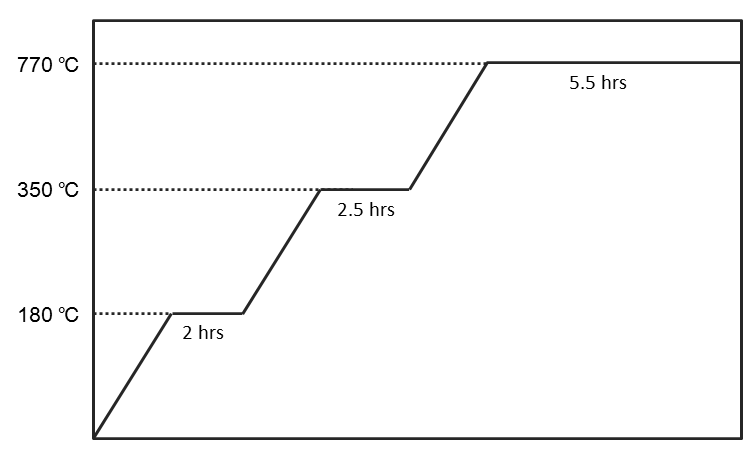
Рекомендованный процесс выплавки
При литье по распечатанным моделям руководствуйтесь температурными показателями, приведенными на следующем графике, чтобы обеспечить полную выплавку смолы и получить литой предмет с безупречно гладкой поверхностью.
Рекомендации по финишной обработке
Чистка
После удаления распечатанного предмета с платформы очистите его этиловым спиртом концентрацией не менее 75%. В процессе чистки рекомендуется с помощью сита полоскать распечатанный предмет в спирте, чтобы удалить остатки смолы с его поверхности.
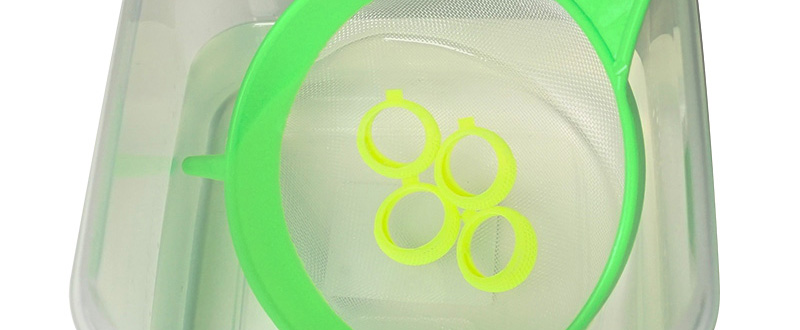
Смочите спиртом из пульверизатора мелкие детали, чтобы удалить незастывшую смолу.
После чистки с помощью сита извлеките распечатанный предмет из спирта и дождитесь испарения спирта с поверхности предмета.
Примечание
» Так как эта смола хрупкая, не чистите распечатанный предмет с помощью щетки. Так можно поцарапать поверхность предмета.
» Не погружайте распечатанный предмет в спирт дольше чем на 10 минут, так как спирт может разъесть поверхность предмета и повредить его. » После погружения распечатанного предмета в спирт он может потускнеть, это нормально. Выцветание не повлияет на результат литья.
Высушите спирт на поверхности распечатанного предмета естественным способом, оставив его до тех пор, пока спирт не испарится
После промывки распечатанного предмета на его поверхности останется спирт.
После промывки не перемещайте распечатанный предмет и не выполняйте финальное отверждение до тех пор, пока с его поверхности полностью не испарится спирт. После испарения спирта, внимательно отыщите любые остатки смолы на распечатанном предмете. Обязательно удалите неотвердевшую смолу, чтобы она не испортила элементы исходной модели.
Примечание
» Если выполнить отверждение при наличии остатков спирта на поверхности распечатанного предмета, его поверхность станет белой и мутной, что может ухудшить результат литья.
Удаление опор
Отрежьте опоры с помощью инструментов, но не тяните за них (потянув за опору, можно повредить поверхность объекта).
Финальное отверждение
Распечатанный предмет из литьевой резины должен пройти финальное отверждение с помощью УФ-излучения, что придаст ему необходимую твердость для литья по выплавляемой модели.
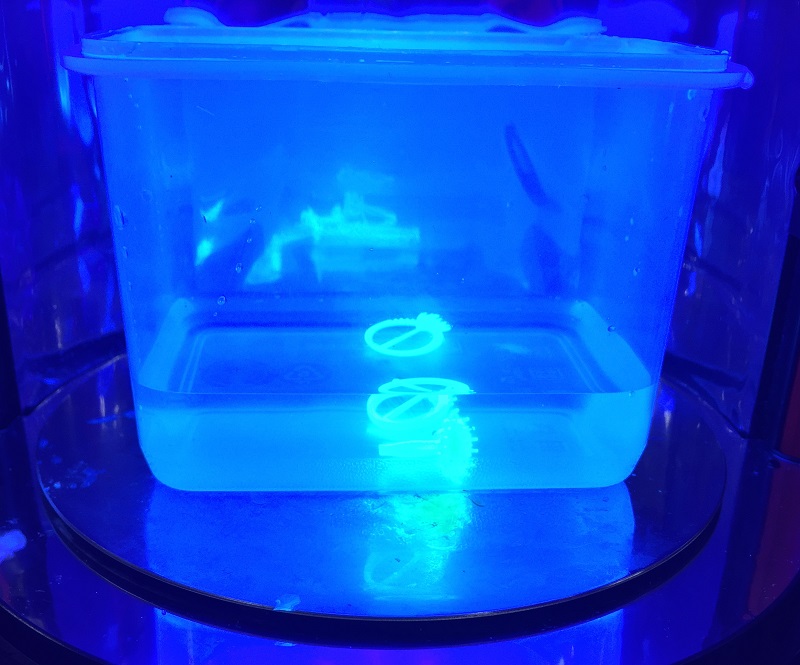
Для достижения наилучших свойств материала необходимо провести финальное УФ-отверждение погруженного в воду изделия в течение 5 минут.
Рекомендация
» При использовании камеры для УФ-отверждения XYZprinting применяйте финальное отверждение погруженного в воду изделия в течение 5 минут.
» При длине волны УФ-излучения 375~405 нм, интенсивности излучения 0,9–1,8 Дж/см² и толщине элементов предмета более 7 мм рекомендуемая длительность финального отверждения составляет 5 минут.
Хранение неотвержденной смолы
Неотвержденную смолу в кювете для смолы не следует подвергать воздействию света. Неотвержденную смолу можно хранить в непрозрачном контейнере, предварительно отфильтровав. Пред следующей печатью снова вылейте эту смолу в кювету для смолы.
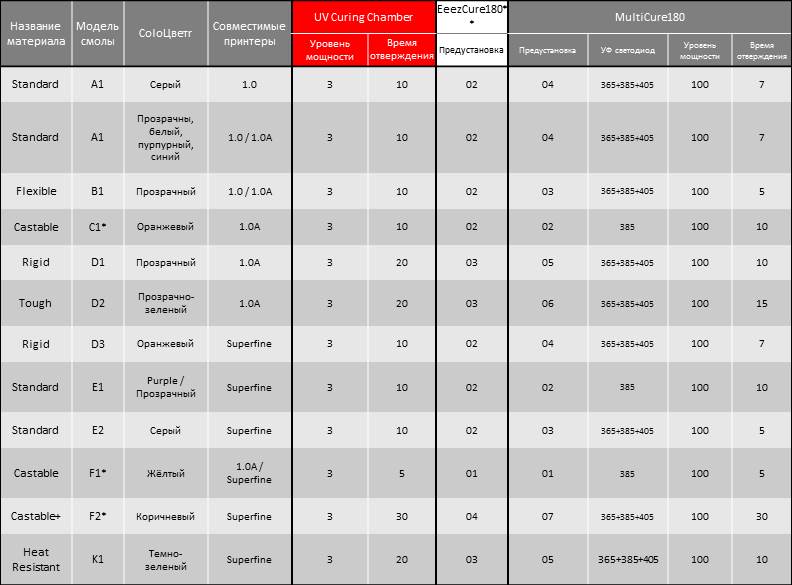
** Параметры отверждения одинаковы для EeezCure180 и камеры УФ-отверждения. При использовании EeezCure180 просто переключитесь между разными настройками для применения рекомендуемых настроек отверждения.
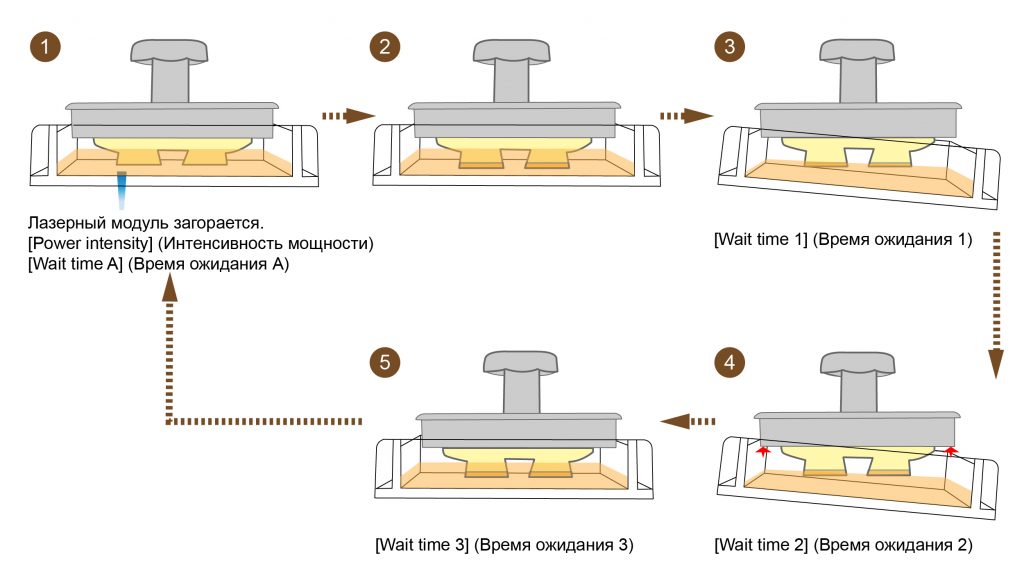
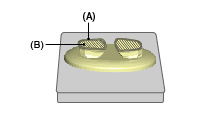 (A) Контуры
(B) Заполнение
(A) Контуры
(B) Заполнение