Getting familiar with the da Vinci Mini
Congratulations on purchasing the da Vinci Mini.
Click on the links below to get started.
Quick setup videos

Download XYZware

Documentation

Troubleshooting

Congratulations on purchasing the da Vinci Mini.
Click on the links below to get started.
Check and make sure the Extruder module has returned to its home position.


Unloosen the 4 screws manually, but do not take them off completely.

Repeat the above steps until the X-axis support and the leveling tool are flush.


Make sure the extruder module has returned to the home position.

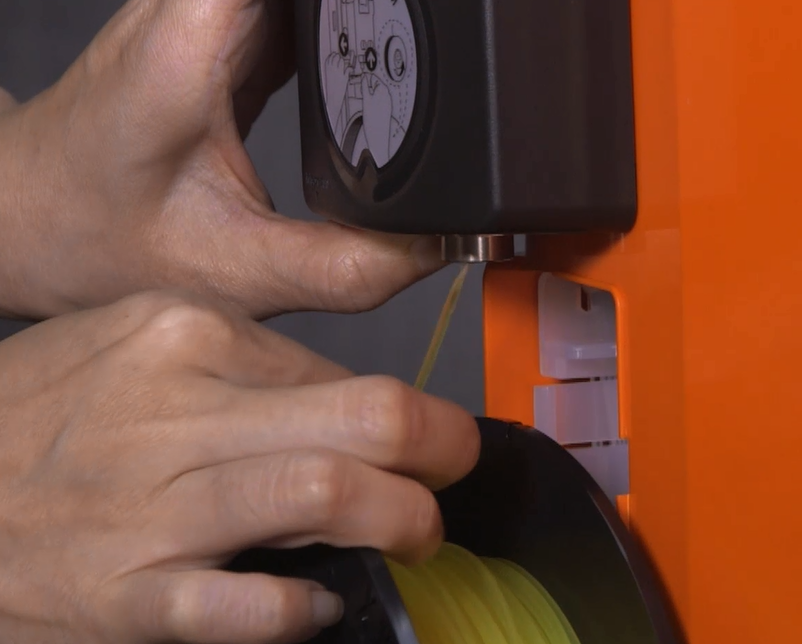
Push down on the black ring on the feed tube grip and pull out the feed tube.


Remove the guide tube from the extruder module.
Push down on the black ring on the feed tube grip and pull out the feed tube.


Note: If the guide tube is under 50cm, we recommend that you replace it.

Push down on the black ring in guide tube connector and remove the guide tube from the feed module.


Note: do not remove them entirely from their sockets – you will be tightening them back up shortly.


Before cleaning the nozzle of the da Vinci Mini, you need to unload the filament. Instructions for this can be found in the link below:


To remove the guide tube, push down on the black ring around the guide tube connector. This will release the teeth that hold the tube in place.
After removing the tube-end, place the tube to one-side.


Insert the cleaning wire at different angles to make sure that the nozzle is clean.


Jog mode enables you to freely move the extruder module along the X, Y and Z-axis. This is useful for maintenance and repair.
Click Home Axes.
In order to move the extruder module, you need to home it first. This gives the machine a reference so that it knows the exact position of the extruder.


Calibration is important to ensure the quality of your prints. If you notice the first few layers of your print are different from the rest of your model, or the filament is having trouble sticking to the print bed, it is good first calibrate your printer and see if the quality improves.


This will extend a sensor that is used to measure the distance between the extruder module and print bed.

This will put the sensor back in its housing so it does not interfere during printing.


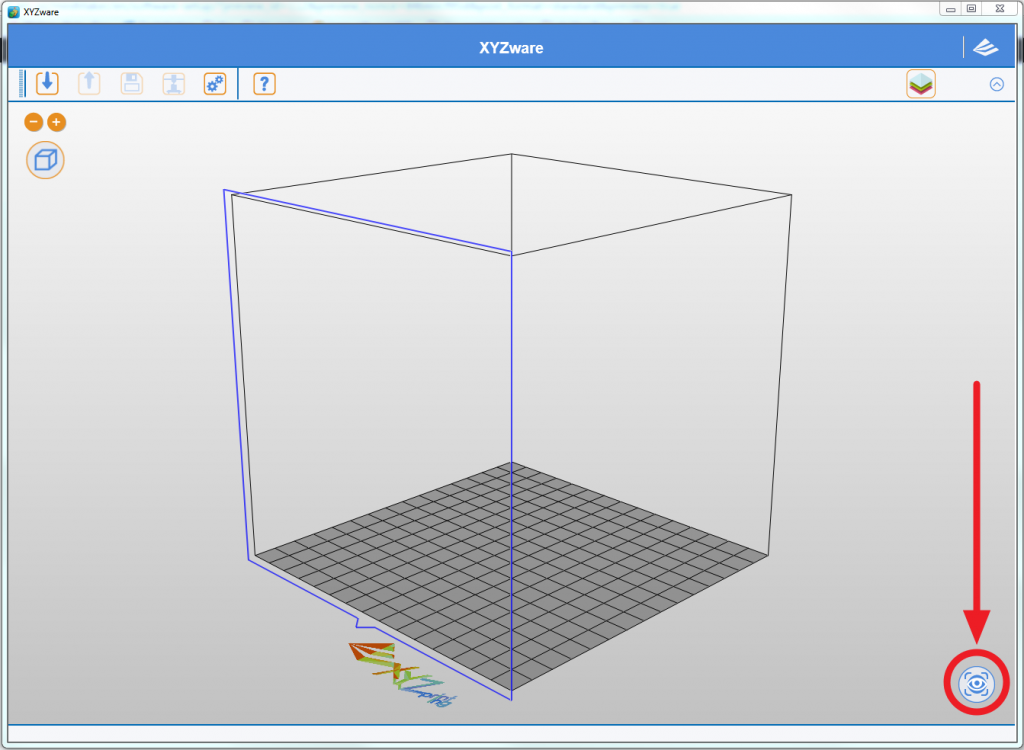
This is located in the bottom-right of your screen.


Note: If your computer did not automatically connect to the da Vinci Mini, click Scan, select the da Vinci Mini, then click Connect.


Enter your network password and click Start wireless connection.


Click Yes to connect the da Vinci Mini to your wireless network.


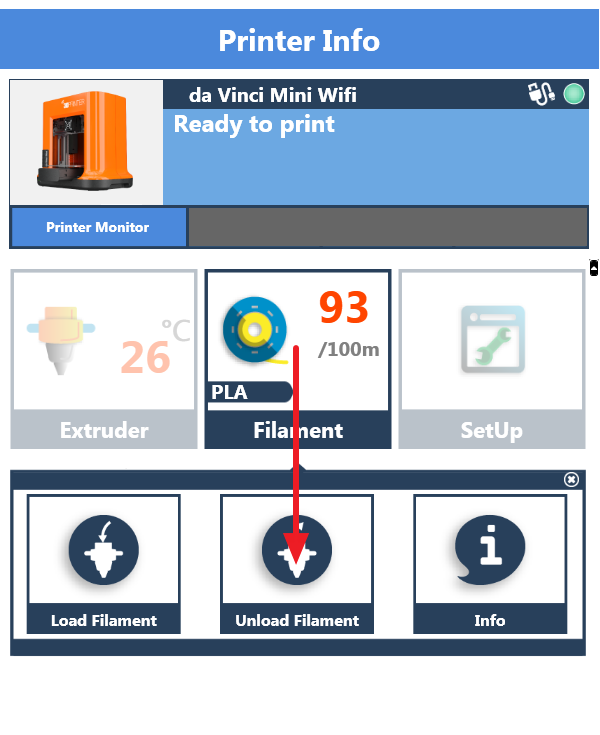
Click on the Printer monitor icon in the bottom-right of the screen.
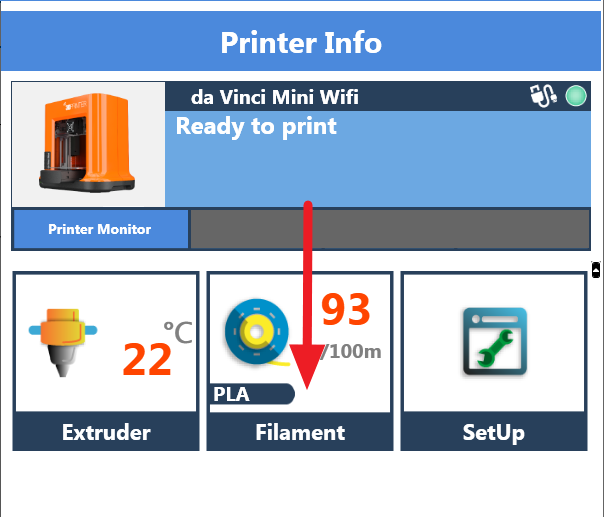
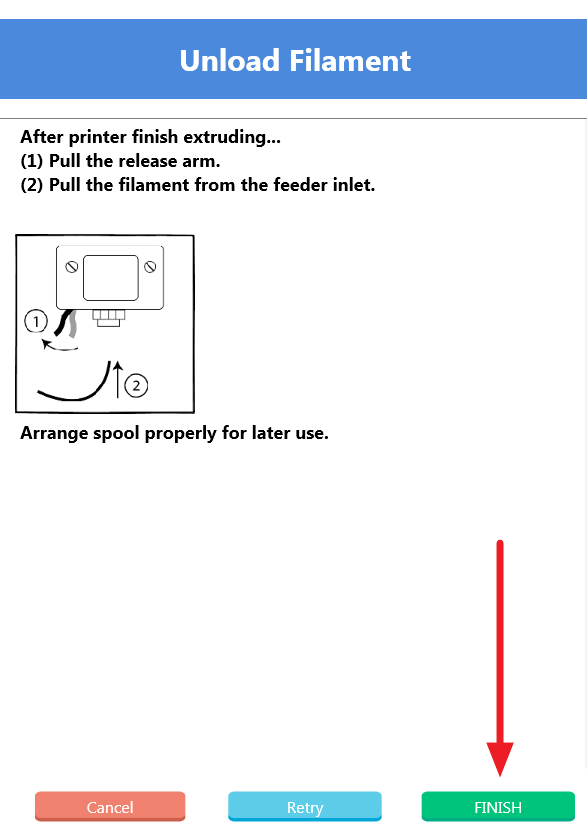
Click Unload filament
First pull the release arm, then pull the filament from the feeder module.