Clean Nozzle


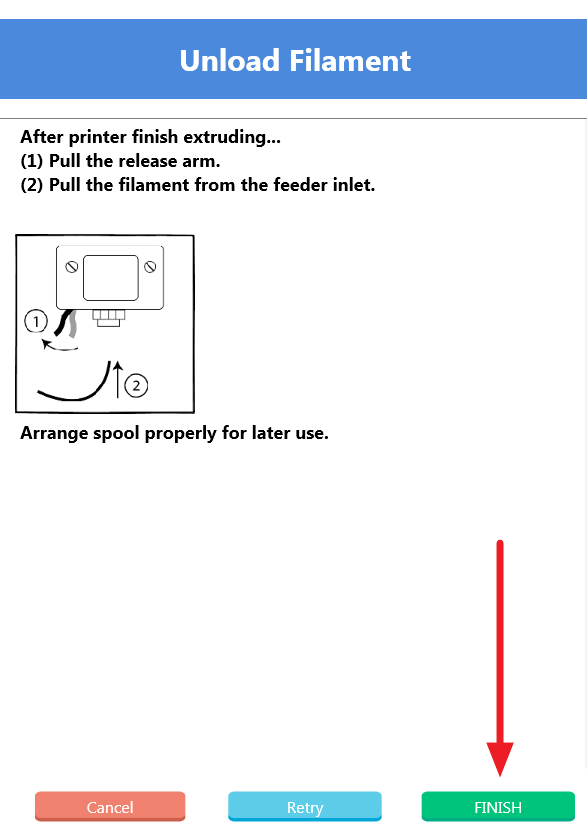
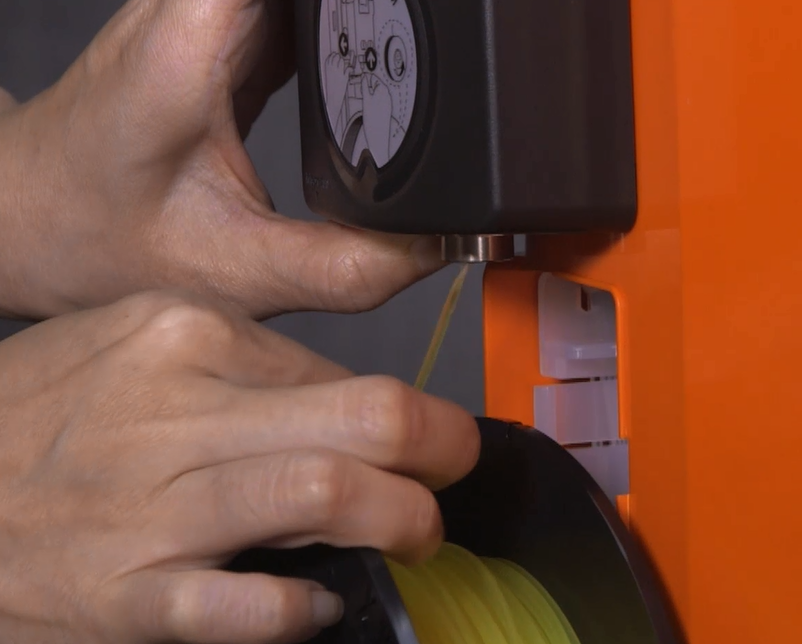
Before cleaning the nozzle of the da Vinci Mini, you need to unload the filament. Instructions for this can be found in the link below:

Unload filament 


In the printer monitor panel, click Extruder > Clean Nozzle.

Image 11


Click Start to begin the cleaning process.

Image 12


After the extruder module has moved to the center of the print area, remove the guide tube from the extruder module.

To remove the guide tube, push down on the black ring around the guide tube connector. This will release the teeth that hold the tube in place.

After removing the tube-end, place the tube to one-side.

Image 15

Image 16


Insert the cleaning path feeding wire deep into the extruder – any remaining molten plastic should come out of the nozzle head.

Image 17


Using needle nose pliers, hold the cleaning wire and insert it into the nozzle head.

Insert the cleaning wire at different angles to make sure that the nozzle is clean.

Caution: The nozzle head is hot, be careful when handling the extruder module.

Image 20


Holding the extruder module with one hand, insert the cleaning path feeding wire again to remove any excess filament.

Image 17


Reinsert the guide tube into the extruder module.

Image 22


In XYZware, click Finish to complete Nozzle cleaning.

Jog mode

Jog mode enables you to freely move the extruder module along the X, Y and Z-axis. This is useful for maintenance and repair.


Click Home Axes. 

In order to move the extruder module, you need to home it first. This gives the machine a reference so that it knows the exact position of the extruder.

Image 8


Click the buttons to the left and right of the increment number to control the direction of the extruder module.
Image 10


To adjust the increments that the module will move by, click on the arrows above and below the increment number.
Image 11


After you have moved the extruder module, click Finish to exit.


Calibration

Calibration is important to ensure the quality of your prints. If you notice the first few layers of your print are different from the rest of your model, or the filament is having trouble sticking to the print bed, it is good first calibrate your printer and see if the quality improves.

Click on the Printer monitor icon in the bottom-right of the screen.

Software_007


Click Setup, then Calibrate to start the calibration steps

Image 2


Click Start and follow the onscreen instructions

Image 3


Press Button 1 on the extruder module, then click Next.

This will extend a sensor that is used to measure the distance between the extruder module and print bed.

Image 4


Calibration is complete, press Button 2 on the extruder module, then click Next.

This will put the sensor back in its housing so it does not interfere during printing.

Image 6


Click Finish to complete calibration.

Image 7

WiFi Setup

Note:
Before connecting to the da Vinci Mini via wireless, first ensure:

1. The da Vinci Mini is connected to your computer via USB (after you have connected via wireless, you can remove the USB cable). 

2. The computer you are operating XYZware with is connected to the network that you wish to connect the da Vinci Mini to.


Click on the “eye” icon 

This is located in the bottom-right of your screen.

Software_007


Click on Printer monitor

Wifi_01


Click on My printer

Wifi_02

Note: If your computer did not automatically connect to the da Vinci Mini, click Scan, select the da Vinci Minithen click Connect.

Wifi_031Wifi_032


Click Wireless setting

Wifi_04


Scan for wireless networks close by and select the network your computer is connected to.

Wifi_05

Wifi_06


Enter your network password and click Start wireless connection.


Wifi_07

Wifi_08


Click Yes to connect the da Vinci Mini to your wireless network.


Wifi_09

Wifi_10

Wifi_11

Unload Filament

Open Printer monitor 

Click on the Printer monitor icon in the bottom-right of the screen.

Software_007


Click Filament to access all the filament options

Load_filament_01


Click Unload filament

Unload_filament_05


Click Finish and remove the filament

First pull the release arm, then pull the filament from the feeder module.
Unload_filament_04


Unload_filament_03

Load Filament

Open Printer monitor 

Click on the Printer monitor icon in the bottom-right of the screen.

Software_007


Click Filament to access all the filament options

Load_filament_01


Click Load filament

Load_filament_02


Click Start and follow the onscreen instructions

Load_filament_03


When a constant stream of PLA is coming out of the extruder module, click FINISH.

Load_filament_04

Overview

product_overview-01-01

Getting to know your printer

  1. Guide tube
  2. Feed module
  3. Filament
  4. Power connector
  5. USB port
  6. Power switch
  7. LED button
  8. Extruder module
  9. Print bed
  10. Maintenance cover

LED button and indicator

product_overview-01-02

Solid green: Ready to print.
Flashing green: Receiving data.

Solid red: General error, press to cancel the print and refer to instructions in the software to fix the issue.
Flashing red: Critical error, refer to instructions in the software to solve the issue or reboot the Mini.

Solid orange: Printing, press the button to pause. To cancel, press and hold for 5 seconds.
Flashing orange: Paused, press the button once to resume.
Pulsing orange: Print complete, remove the object and press the button once to return to green status.


Specifications

Dimensions: 400 x 336 x 362mm

Weight: 8 kg

Print technology: Fuse Filament Fabrication (FFF)

Print material: PLA

Filament diameter: 1.75mm

Nozzle diameter: 0.4mm

Print dimension: 150 x 150 x 150mm

Print resolution: 0.1/0.2/0.3/0.4mm

Connectivity: USB 2.0 / Wi-Fi

Print software: XYZware

File format: STL/3W

Printing

Warning: There are 4 orange clips attached to the Mini’s Z-axis shaft that support the X-axis and extruder mount. These need to be removed before operating the machine or it will be unable to print.

unboxing 7-01


Import a 3D model into XYZware

Open XYZware, click Import and select a .stl file.

Printing_01


Click Print

Depending on what filament you have loaded the da Vinci Mini will use its default settings. Click Advanced to adjust the different printing parameters.

Printing_02


Congratulations!

After the print is complete, use the supplied scraper to remove the 3D model.

Printing_03

Load Filament

Open Printer monitor 

Click on the Printer monitor icon in the bottom-right of the screen.

Software_007


Click Filament to access all the filament options

Load_filament_01


Click Load filament

Load_filament_02


Click Start and follow the onscreen instructions

Load_filament_03


When a constant stream of PLA is coming out of the extruder module, click FINISH.

Load_filament_04

Software Setup

To control the da Vinci Mini, you need to be connected it to a computer with XYZware installed.

Download XYZware software

Click here to download the software or go to XYZprinting.com to download the latest version of XYZware.

Software_001


Install XYZware

Open XYZware and install it on your computer

Software_002


Connect USB cable

Connect the da Vinci Mini to your computer via USB

Software_003


Power on

Turn on the da Vinci Mini

Software_004


Open XYZware and check that you’re connected to the da Vinci Mini

Click on Printer monitor and wait for the da Vinci Mini to connect
Software_005Software_007Software_008