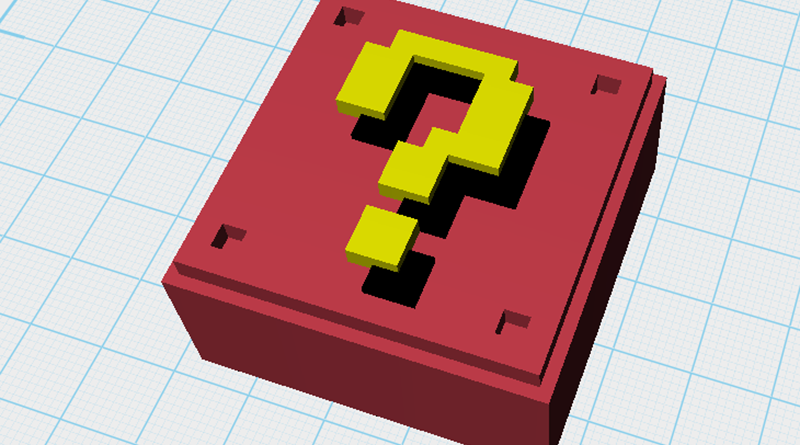
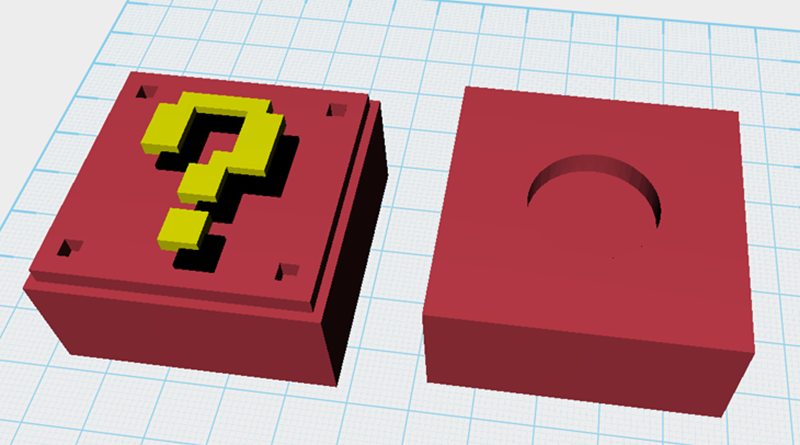
XYZmaker tutorial – the Brick part 1

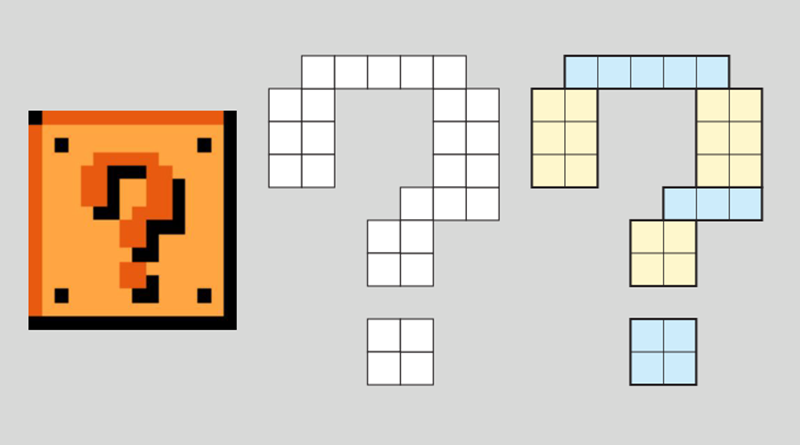
On the left hand side you will find the model bar; in this menu, locate and click the on the Geometric figures library(1), then double click on the cube icon(2). A cube should drop into the center of the plane. Tip: If you just click on the icon once, you can drag the 3D object and place it in the plane manually.   The newly placed cube will be outlined in orange, indicating it is currently selected, and a properties window will be displayed on the righthand side of the screen. Click on this new properties window and enter the following dimensions: X: 45mm,Y: 45mm, and Z: 17mm, to dimension the “Base”. Tip: If you accidentally click on the plane and deselect the “base”, you can reselect the object by using the left mouse button.   Select the”base” object (1) and in the toolbar, click Clone (2) and an identical replica of the

Read more

XYZmaker tutorial – the Brick part 2

Next, we will make a question mark that will go in the center of the block. Please use the image below as a reference, the smallest part is a cube, we will use this component to subdivide the modeling work.   Using the step method, in the center of the plane create a new block, then change the block’s position to X: 0,Y: 0,Z: 24, and dimensions to X:8, Y12, and Z:4mm. This block will be for the left-hand side of question mark.   Select the block you just modified and in the quick access menu press clone, another block will be created in the same position as the original block.   Select the cloned block and change the position to X:10, Y:8 and Z:24mm, and dimensions to X: 20,Y: 4,Z: 4mm, to complete the top part of the question mark.   Repeat the cloning process and adjust the position and dimensions as pictured below, to complete the rest

Read more

XYZmaker tutorial – the Brick part 3

Select the base component and change its position to X: 0,Y: 0,Z: 11.5mm   Select the question mark component(1) and change its position to X: -1.5,Y: 0,Z: 24mm(2)   It looks like the question mark is a little too big! Select the lock button in the properties window, when you press this and change one of the X,Y, or Z values, the question mark component will scale all three values together. Change the X dimension value to 21mm, the Y and Z value will change in automatically.   We’re going to create the shade part of the question mark. Select the question mark component(1), and from the toolbar, press the clone button (2). Next, change the position to X: 1.5,Y: -3,Z: 22.5mm(3), we’ll call this part the shadow.   Select the shadow part(1) and from the properties window(2), click the color button.   In the Select Color window, choose black followed by the (ok) button; the shadow part will turn

Read more