XYZmaker tutorial – Robot Hand part 8
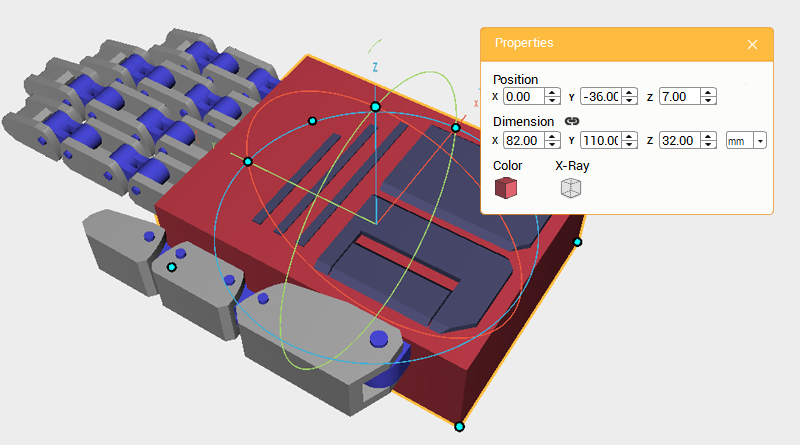 Next create a cover for the back of the hand. First, hide the work plane grid to make viewing the model easier. Create a Cube and change its dimensions to X: 82,Y: 110,Z: 32 mm and position to X: 0,Y: -36,Z: 7. Call this part the Back hand cover.
 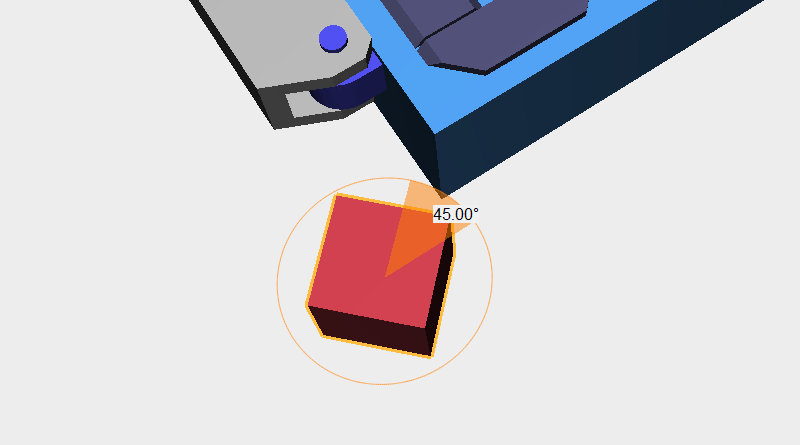 To accommodate the Palm center’s shape, cut away material from the Back hand cover. Create a Cube and place it beside the Back hand cover, then rotate the part 45° along the Z-axis. Call this the Cutting part.
  Change the Cutting part’s Z-axis dimension to 40mm and position to X: -42,Y: -92,Z: 7.
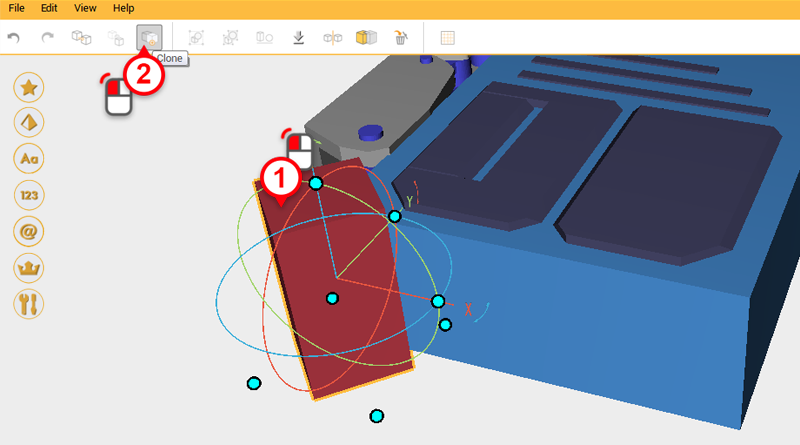
 Select the Cutting part and click Clone; change the new part’s X-axis dimension to 42.
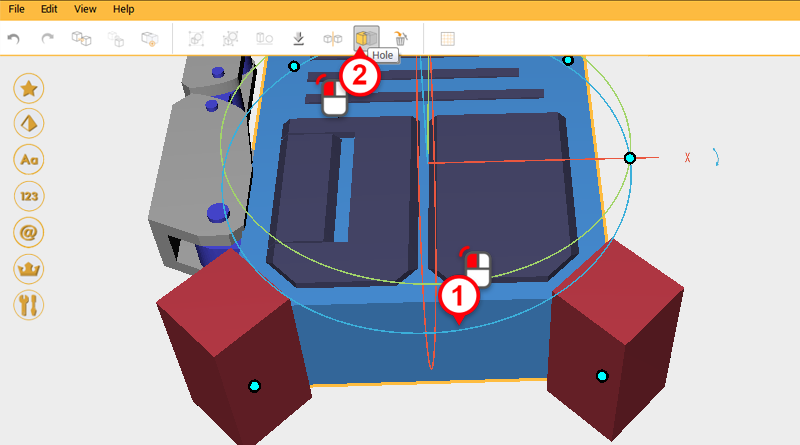
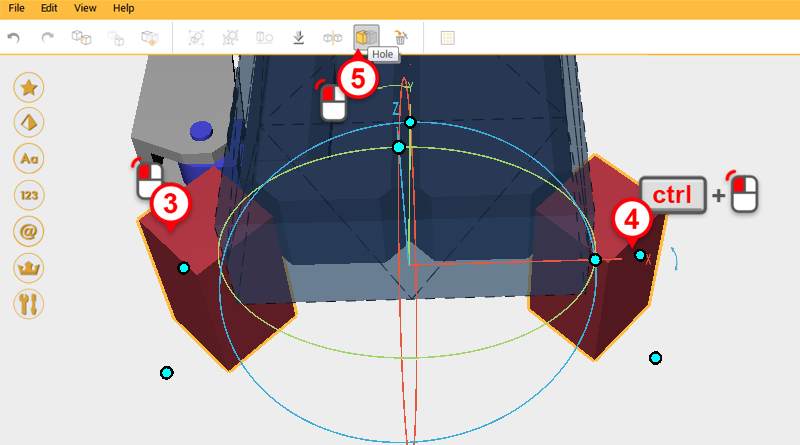
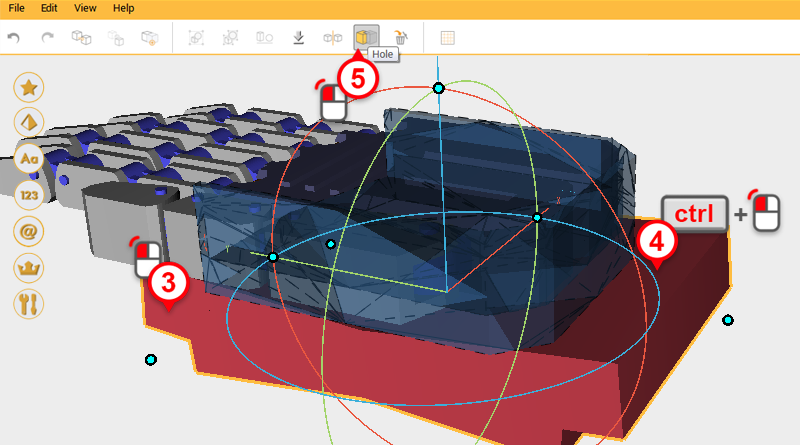
 Use the two Cutting parts and the Hole function to cut away material from the Back hand cover.
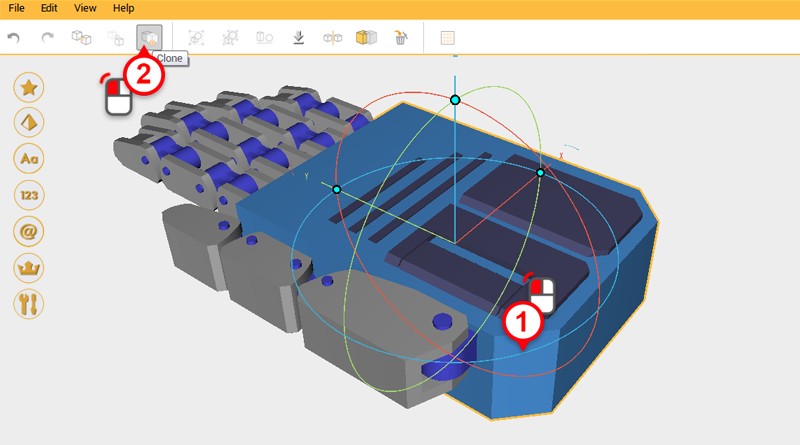
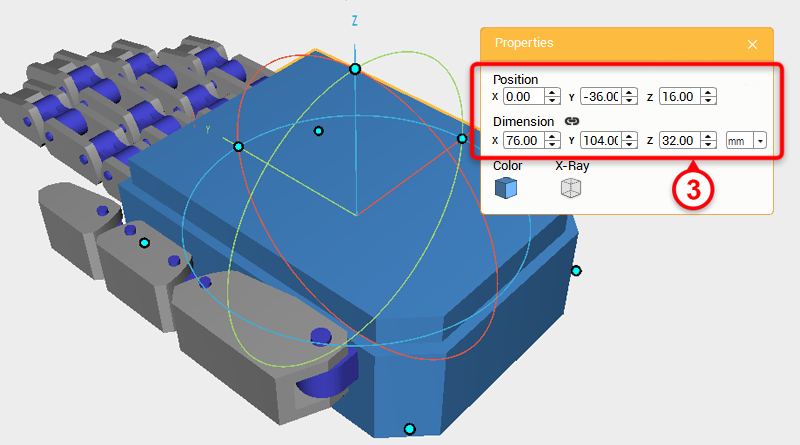 Select the Back hand cover and click Clone. Next, change the part’s dimensions to X: 76,Y: 104,Z: 32 mm, and Z-axis position to 16. Call this the Cutting part.
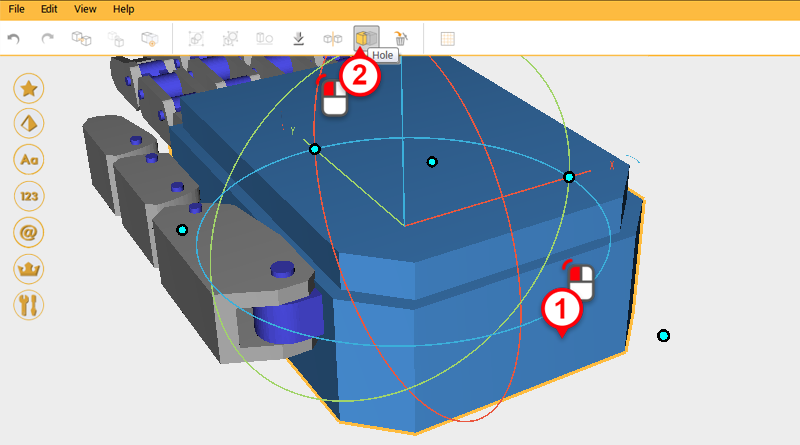
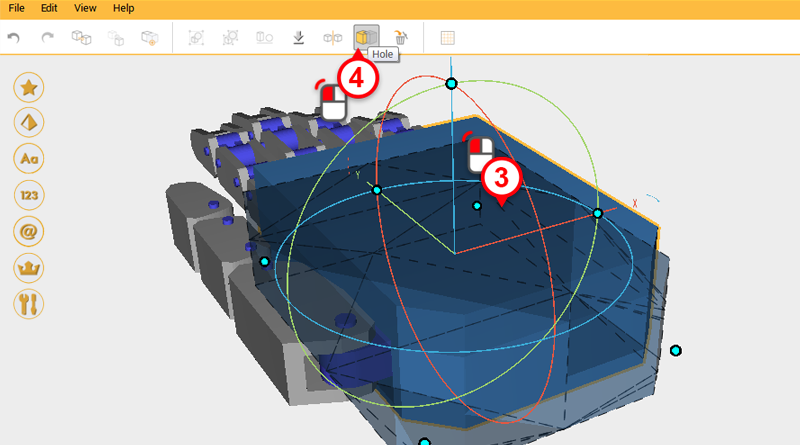
 Use the new Cutting part and the Hole function to cut away material from the inside of the Back hand cover.
 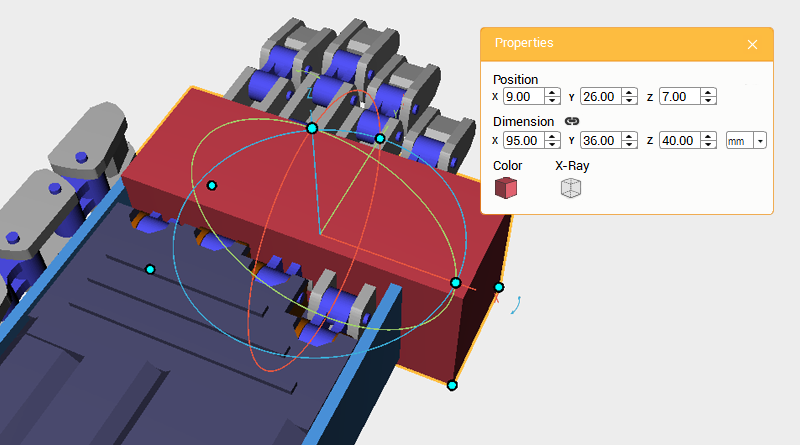 The front of the Back hand cover needs to be cut again to make space for the Fingers to extend. . Create a Cube and change its dimensions to X: 95,Y: 36,Z: 40 mm and position to X: 9,Y: 26,Z: 7. Call this the Cutting part.
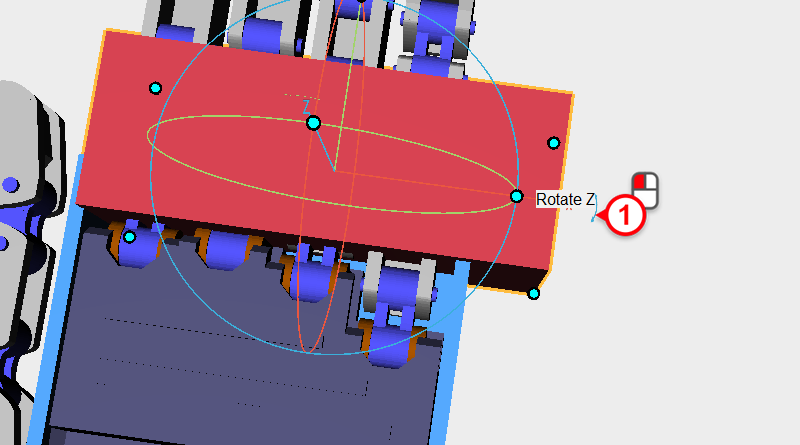
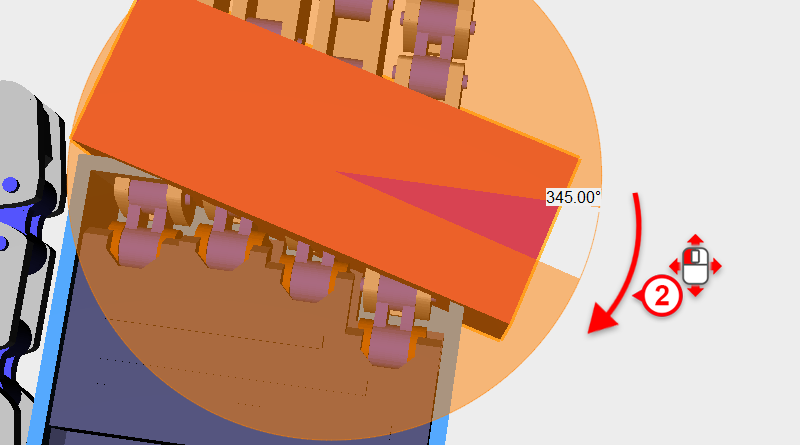 Select the Cutting part, then click and drag the arrow next to the X-axis in the bounding box and rotate the part 345°.
 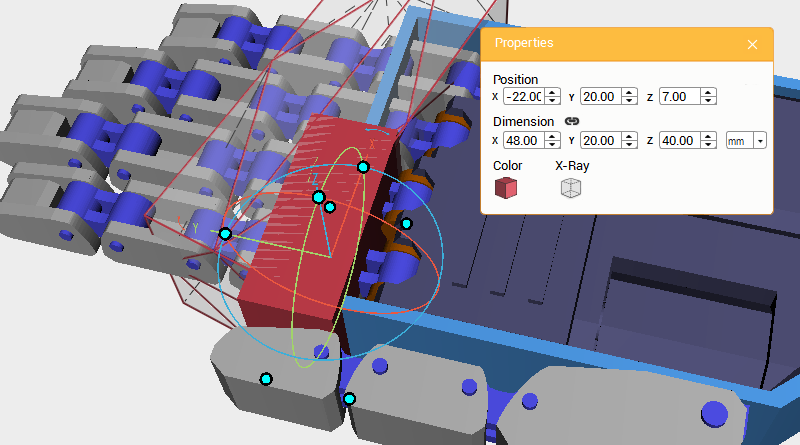 Create another Cube and change its dimensions to X: 48,Y: 20,Z: 40 mm, and position to X: -22,Y: 20,Z: 7. Call this part the Cutting part.
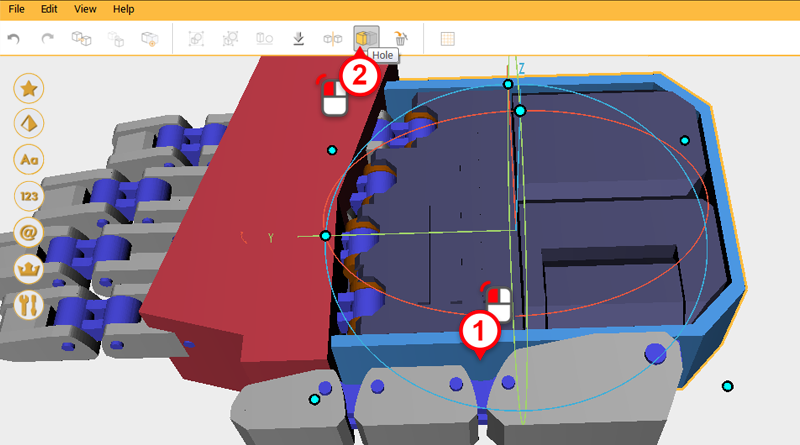
 Use the two Cutting parts and the Hole function to cut an angle into the Back hand cover.
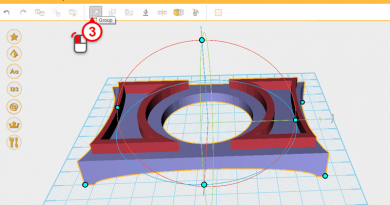
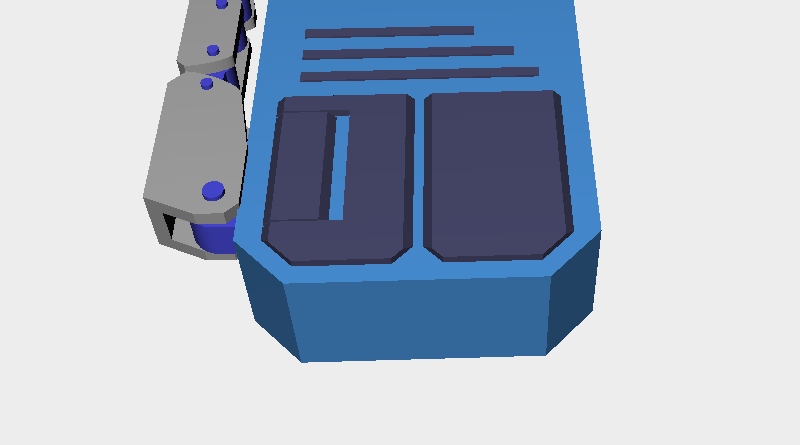
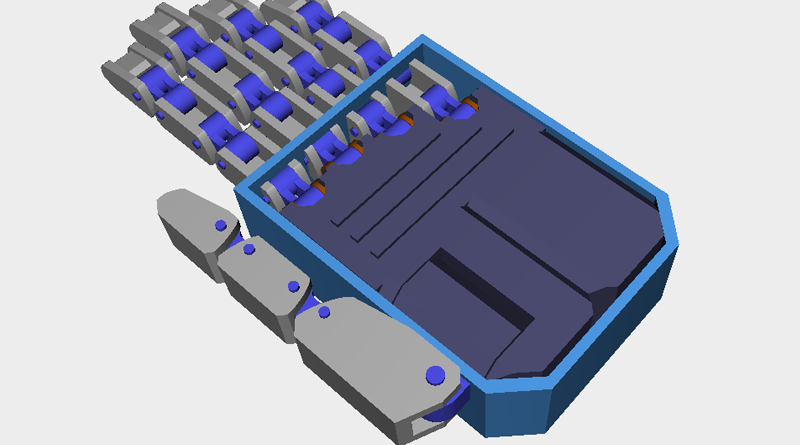
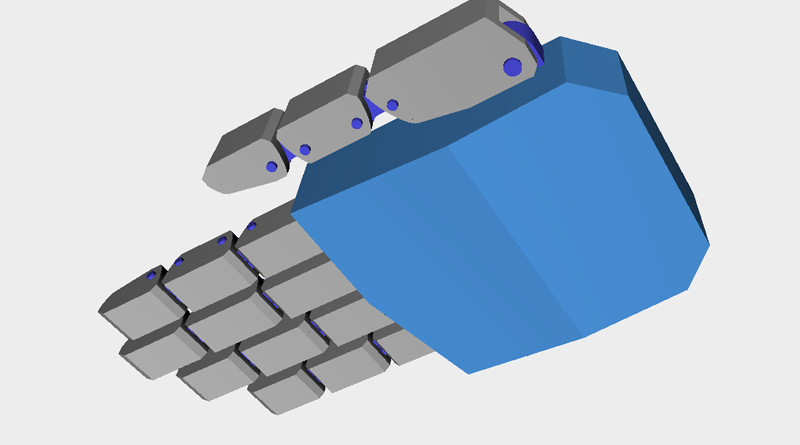
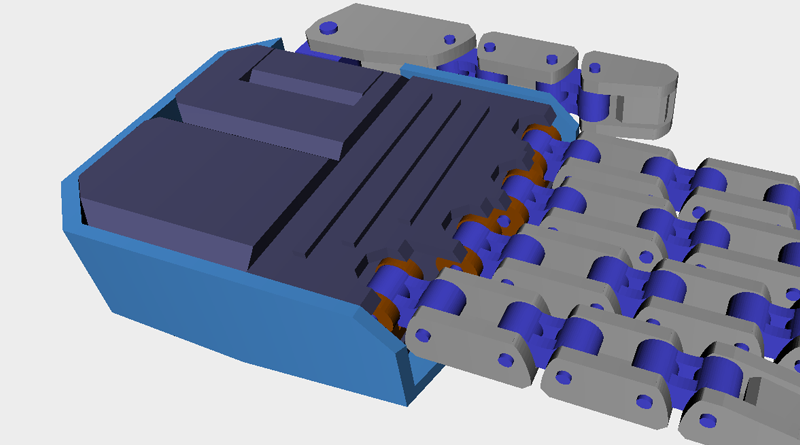
 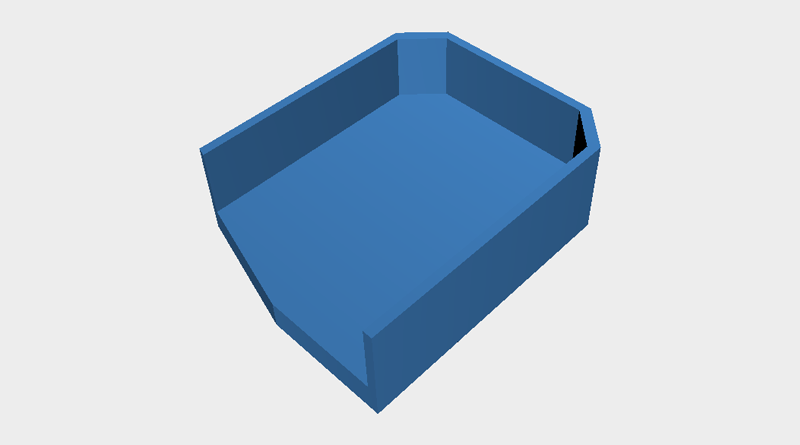 At this stage, if you individually inspect the Back hand cover, it should look like this.
 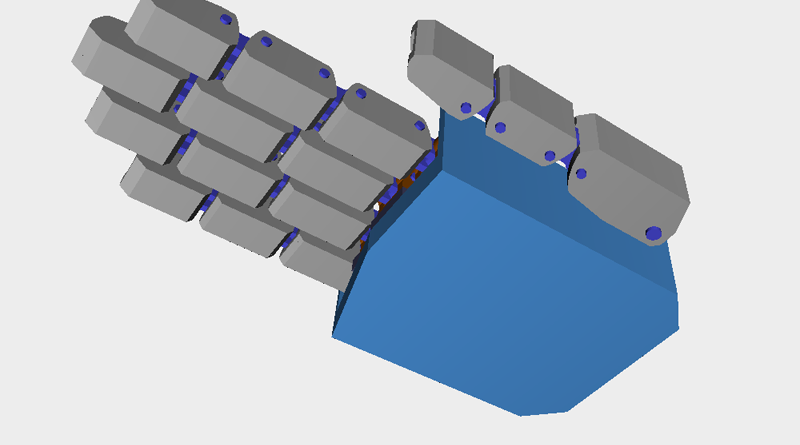 All the parts are almost complete but when you look at the back of the hand you will see that it looks too flat. Therefore, we need to change the exterior slightly.
 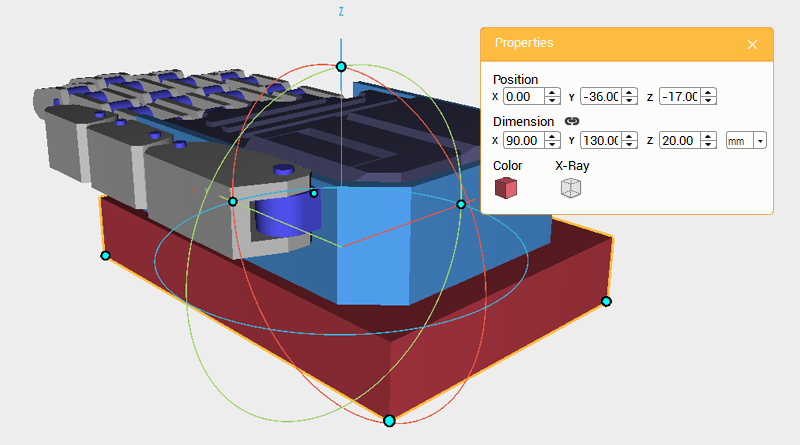 Create a Cube, change its dimensions to X: 90,Y: 130,Z: 20 mm, and position to X: 0,Y: -36,Z: -17. Call this the Cutting part.
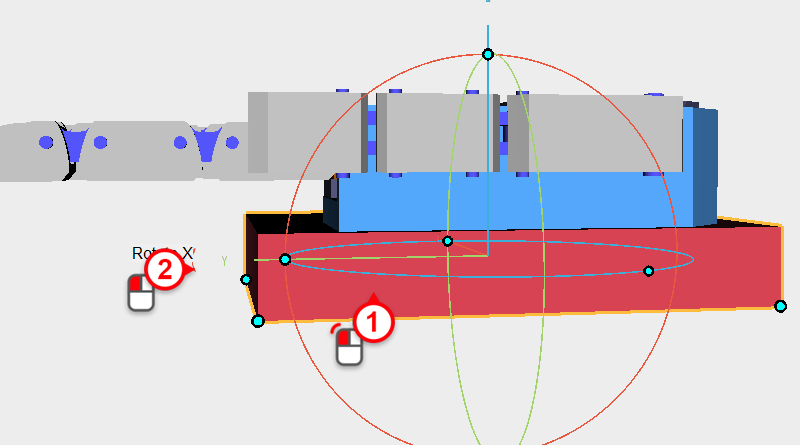
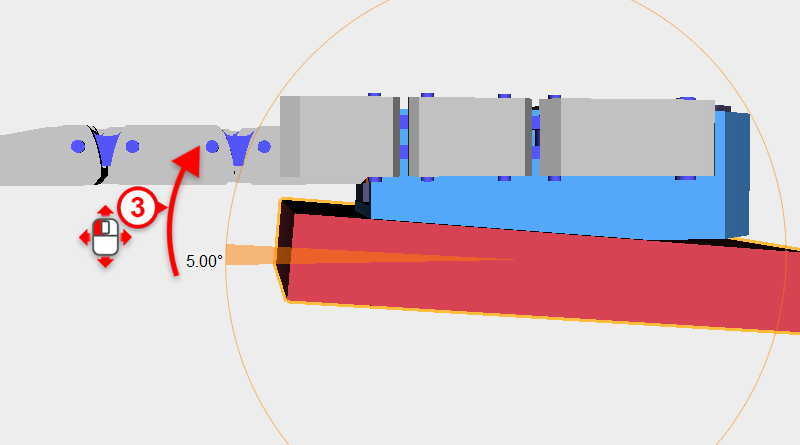 Select the Cutting part you just created, click and drag the arrow next to the Y-axis in the bounding box, rotating the part 5°.
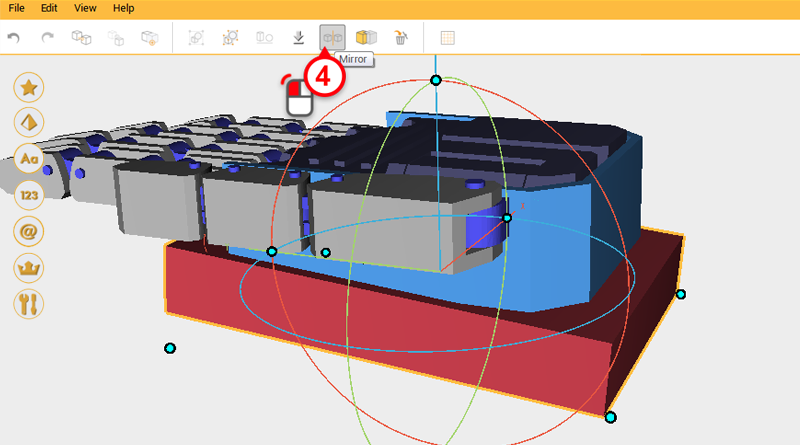
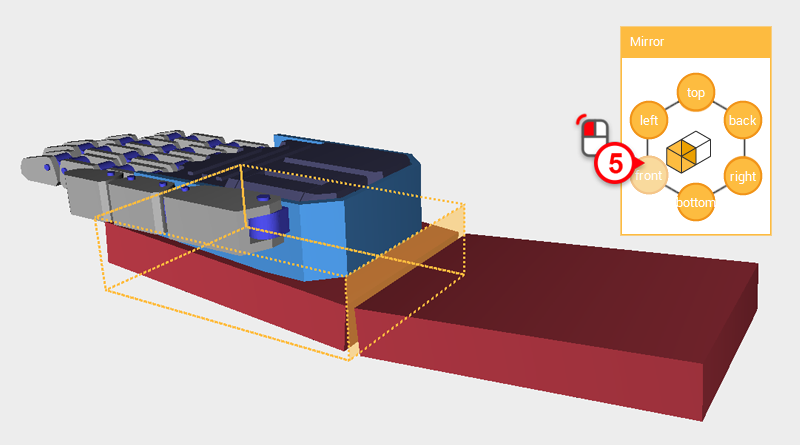 Next click Mirror and in the Mirror properties window, click front to reflect the Cutting part.
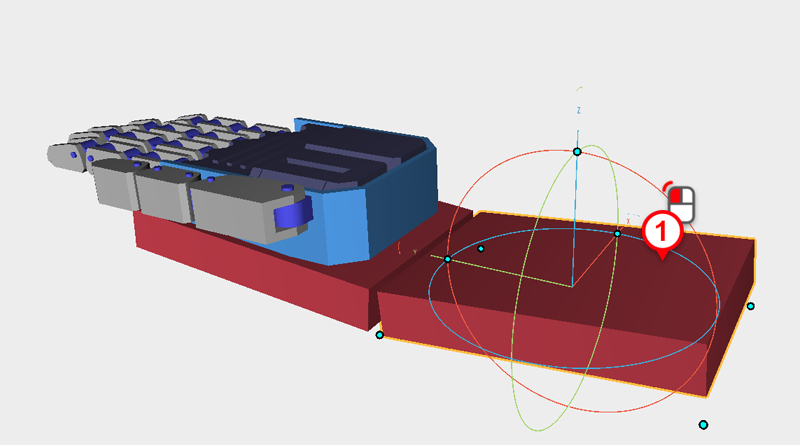
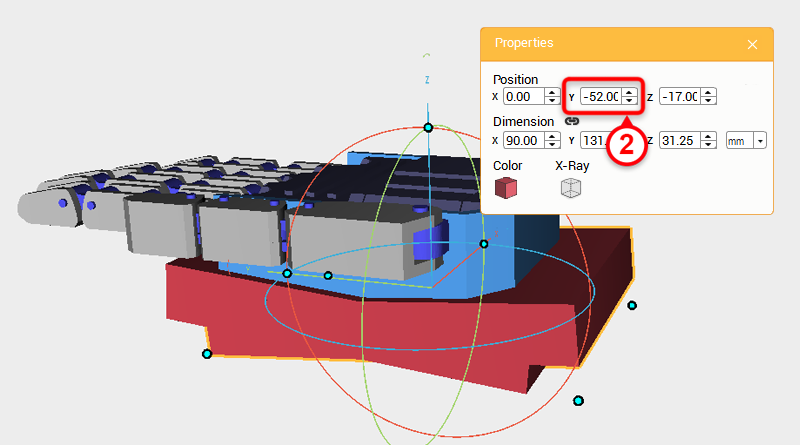 Select the Cutting part you just reflected and change its Y-axis position to -52.
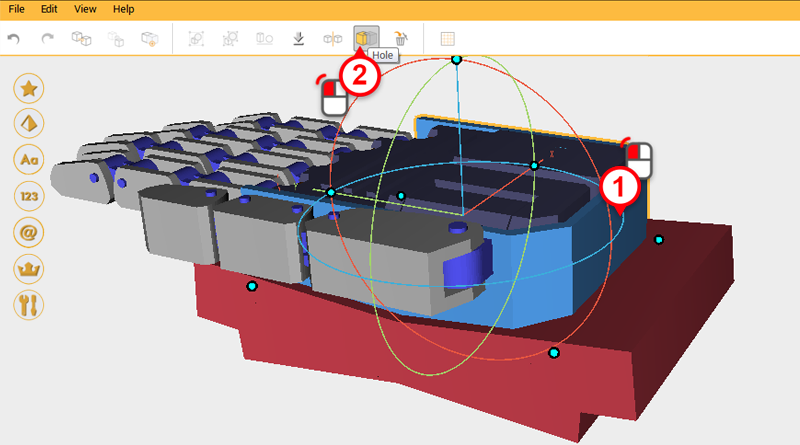
 Use the two Cutting parts and Hole to cut away material from the Back hand cover.
  Next, cut more material away from the Thumb and Palm connector. Create a Cube, change its dimensions to X: 20,Y: 39,Z: 20 mm and position to X: -40,Y: -59.5,Z: 15. Call this part the Cutting part.
 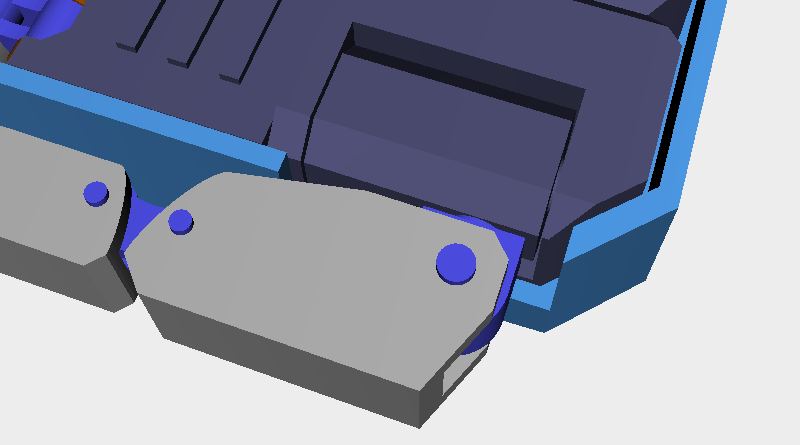 Use the Cutting part and Hole function to cut away material from the Back hand cover. This will give the Thumb connector space.
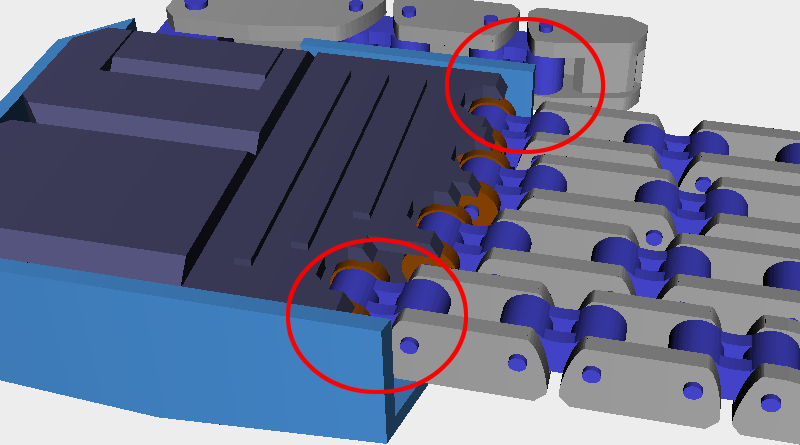
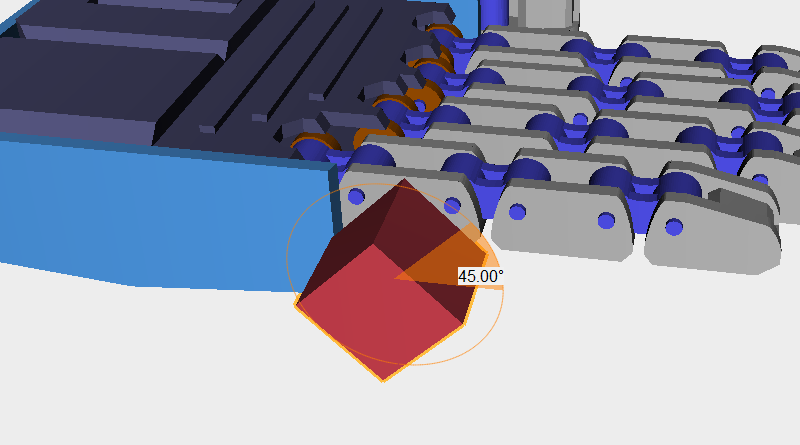
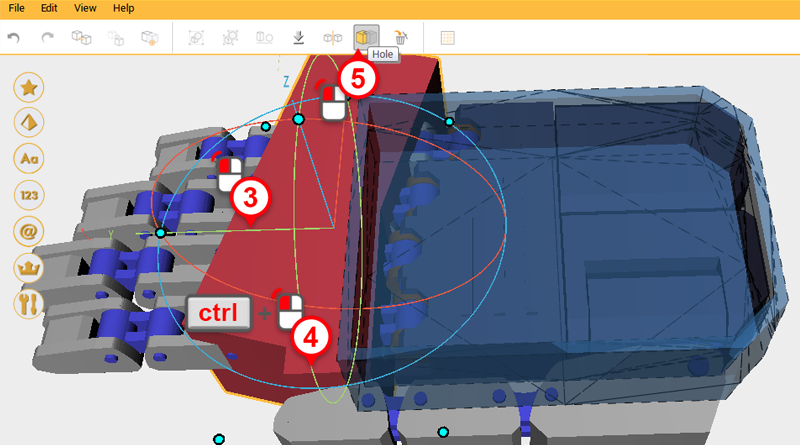
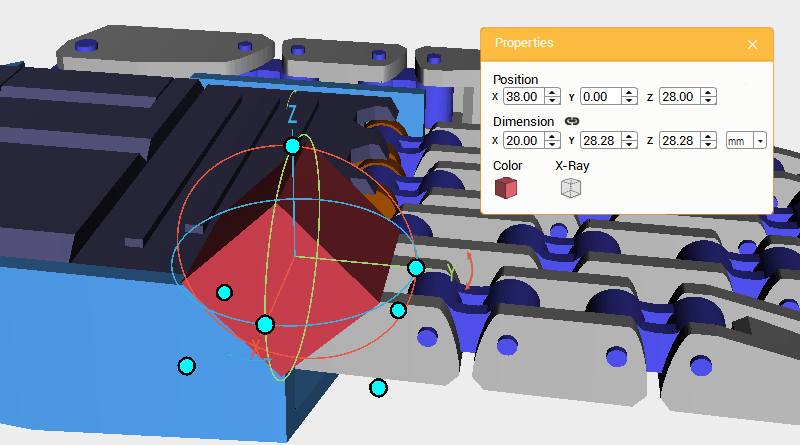 Lastly, the areas circled in red need to have material cut away. Create a Cube and move it near the Thumb base, rotate it 45° along the X-axis and change its position to X: 38,Y: 0,Z: 28. Call this part the Cutting part.
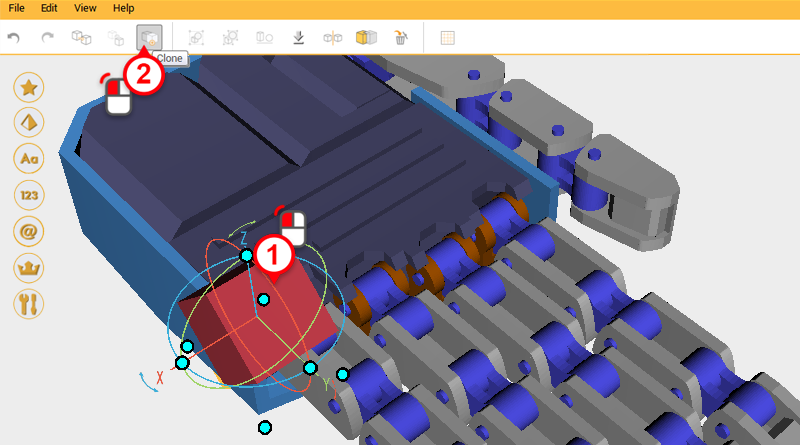
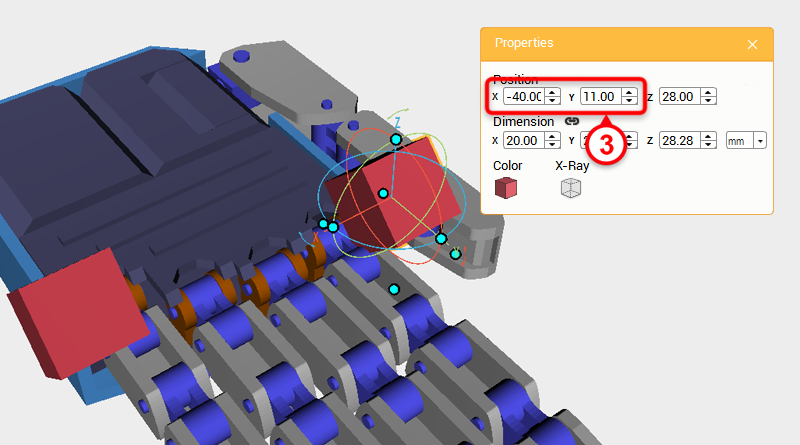 Select the Cutting part and click Clone; change the new part’s X-axis position to -40 and Y-axis position to 11.
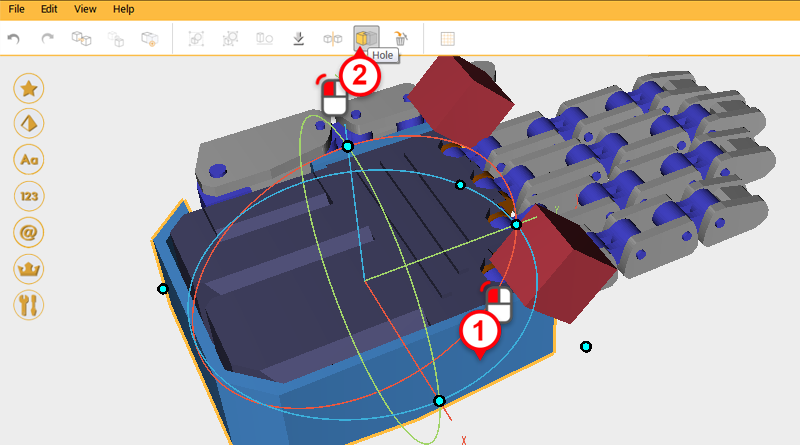
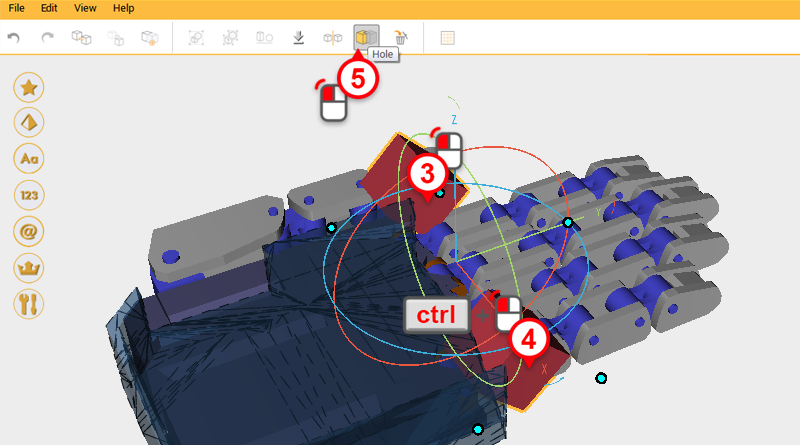
 Use the two Cutting parts and the Hole function to cut away material from the Back hand cover.
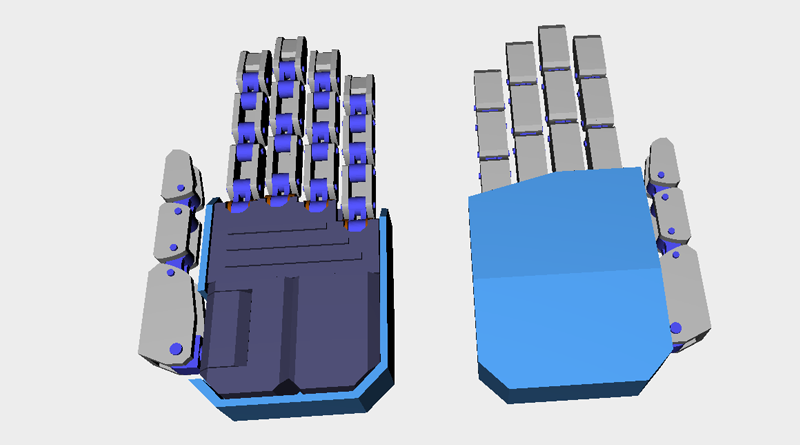
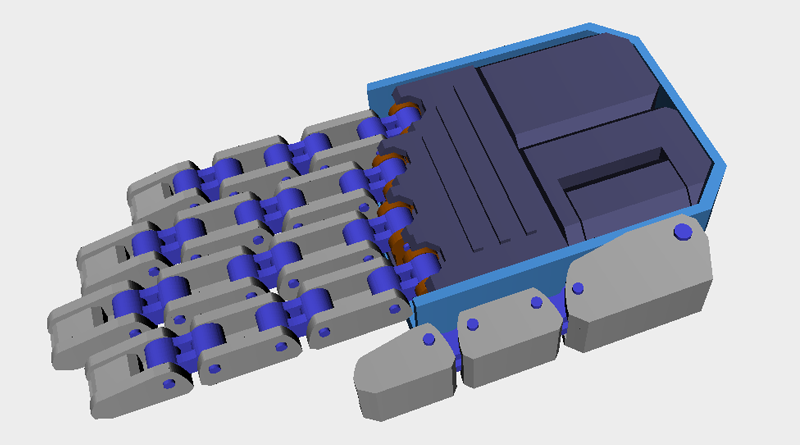
  The Robot hand is finished, now you can get it ready for printing!