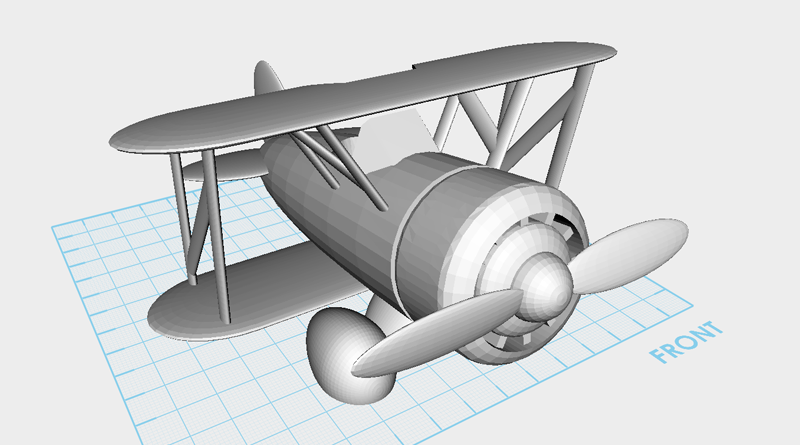
XYZmaker tutorial – Airplane part 1
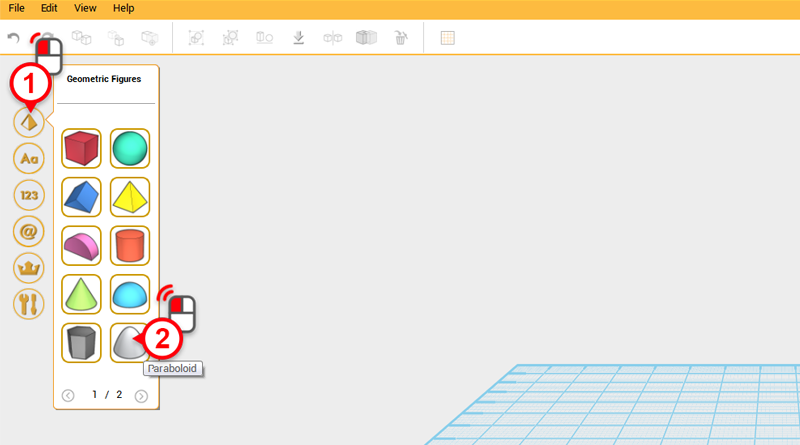
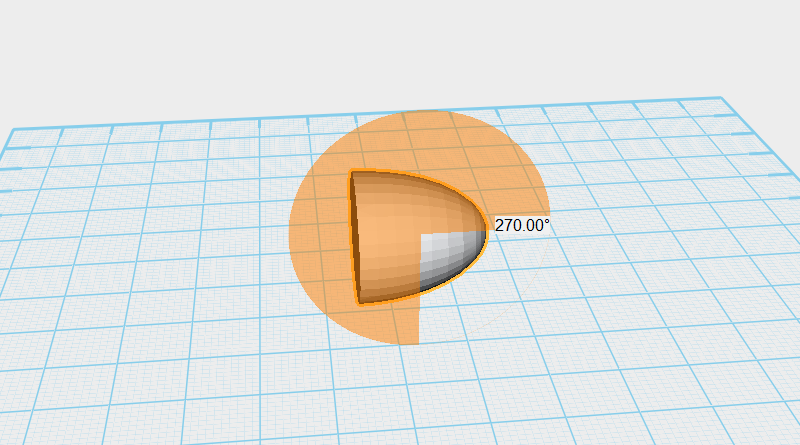
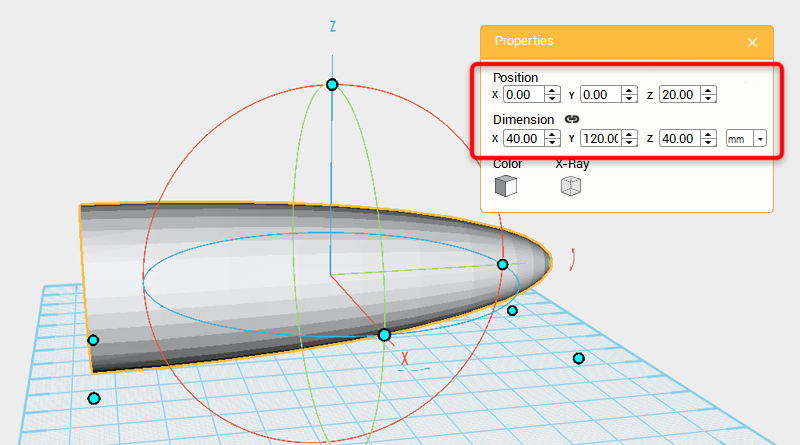 Go to the Geometric figures library and create a paraboloid. Rotate the part 270 ° along the X-axis, and in the Properties window change the dimensions to X: 40,Y: 120,Z: 40 mm and position to X: 0,Y: 0,Z: 20. This part will be called the plane body.
Tip: For instructions on rotating objects refer to the beginner tutorials.
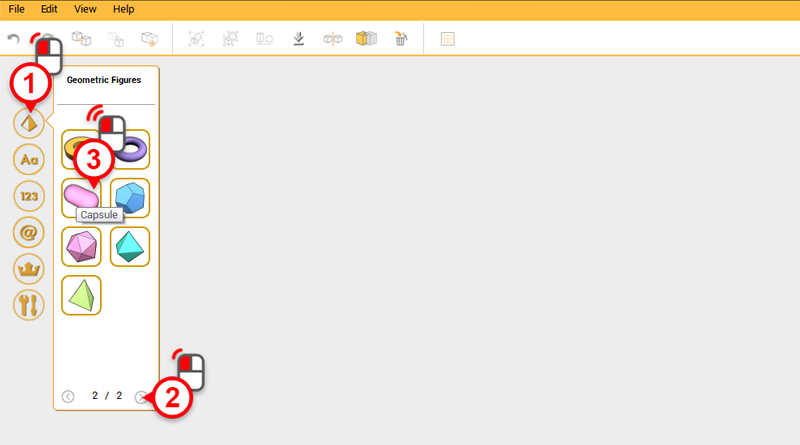
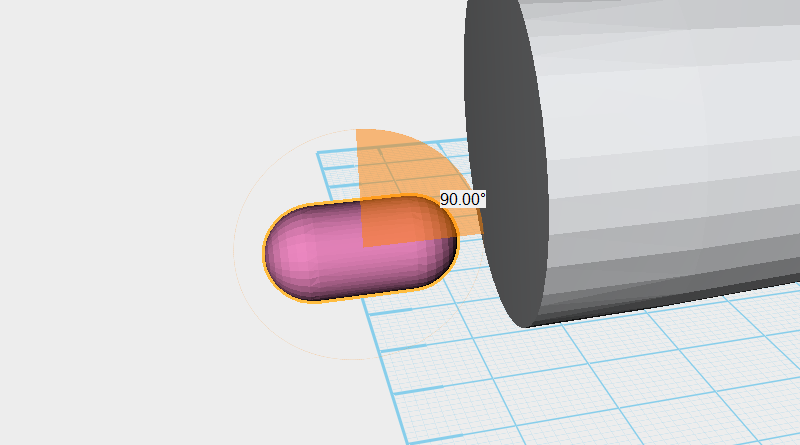
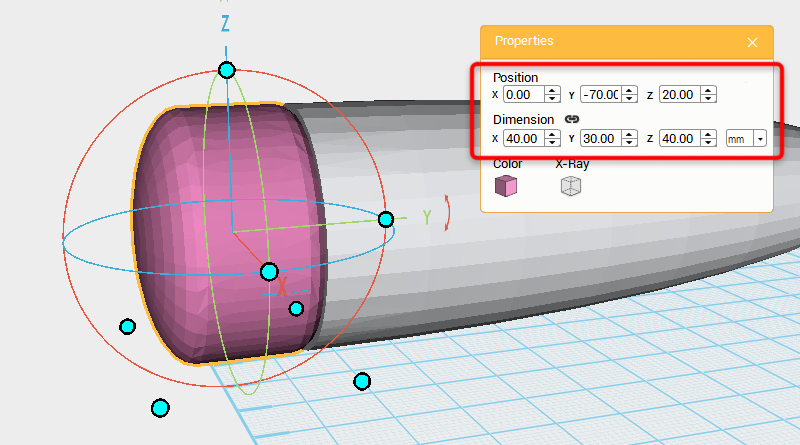 Make a Capsule from the Geometric figures library, and rotate it 90° along the X-axis. In the Properties window change its dimensions to X: 40,Y: 30,Z: 40 mm and position to X: 0,Y: -70,Z: 20. This will be called the engine.
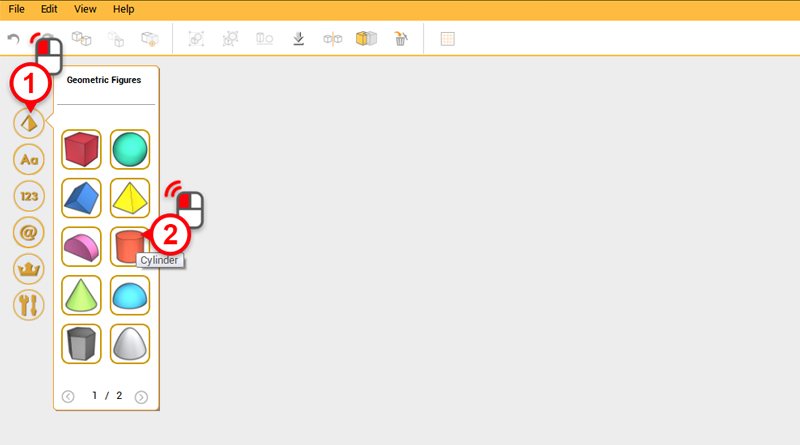
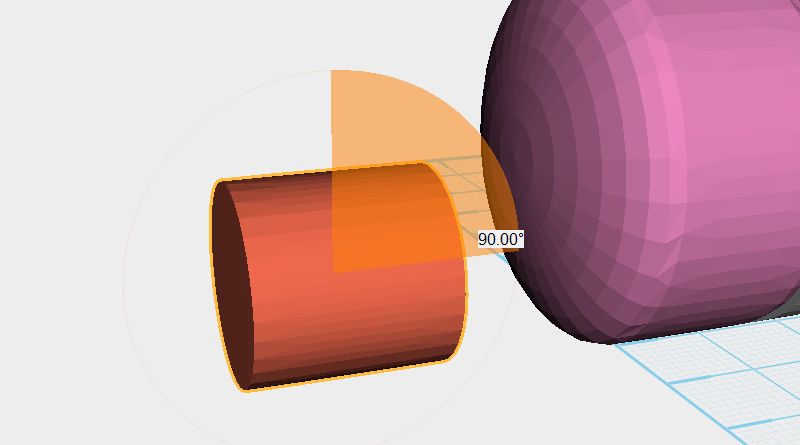
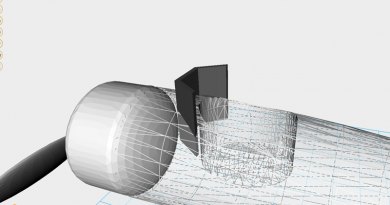
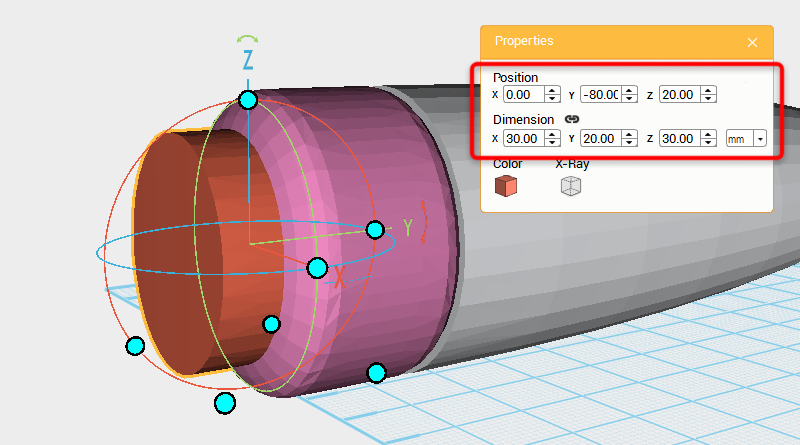 Create a Cylinder and rotate it 90° along the X-axis. In the Properties window change the dimensions to X: 30,Y: 20,Z: 30 mm and adjust the position to X: 0,Y: -80,Z: 20. This will be called the cutting part.
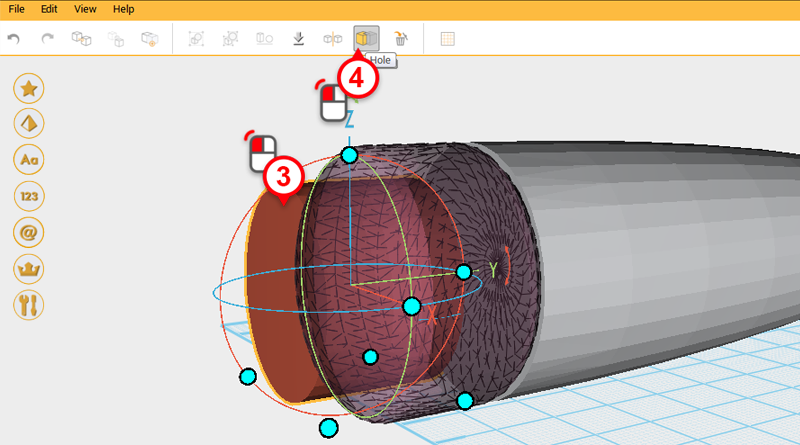
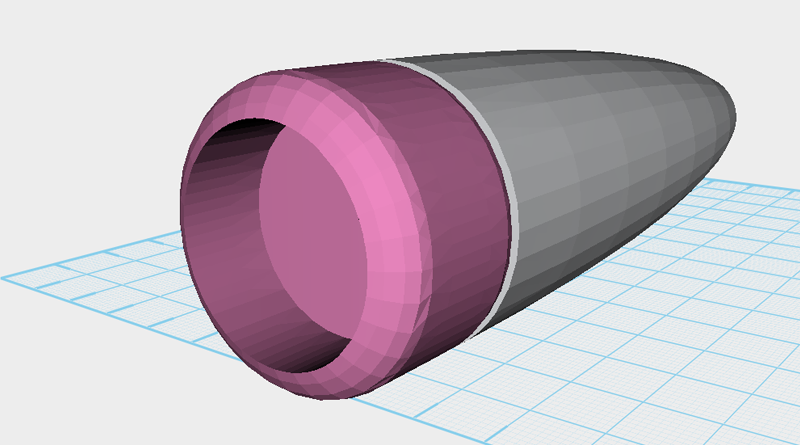 Select the engine and click on Hole, then click on the cutting part and click Hole again to cut a hole in the engine.
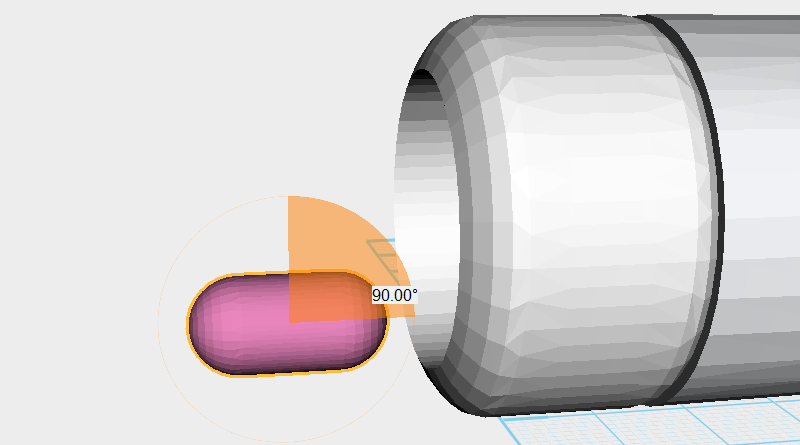
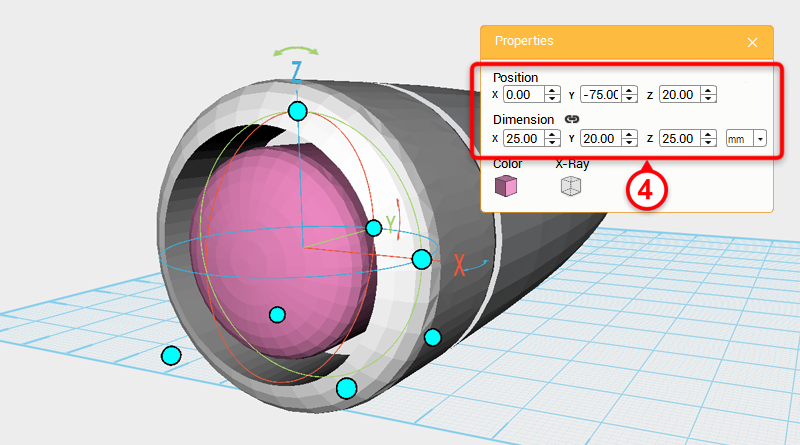 Create a Capsule and rotate it 90° along the X-axis. In the Properties window change the part dimensions to X: 25,Y: 20,Z: 50 mm and adjust its position to X: 0,Y: -75,Z: 20. This part will be called the engine structure.
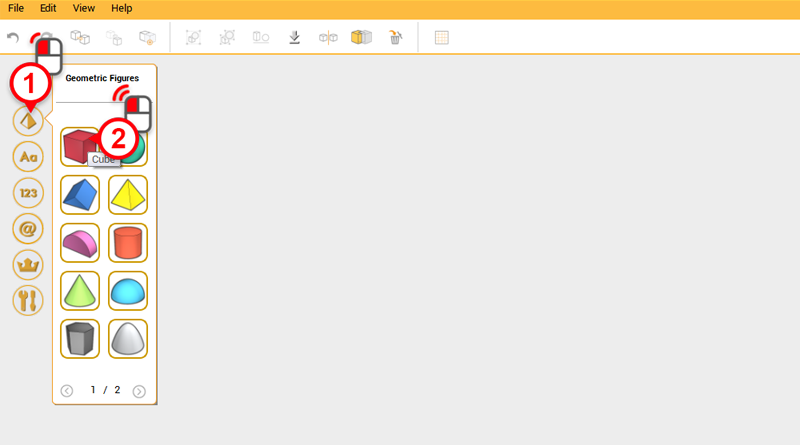
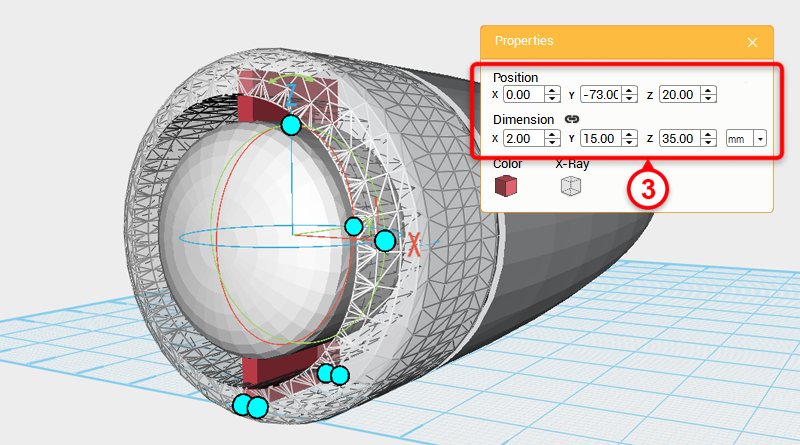 Create a Cube and in the Properties window change the dimensions to X: 2,Y: 15,Z: 35 mm and the position to X: 0,Y: -73,Z: 20. This is in preparation for adding more details to the engine.
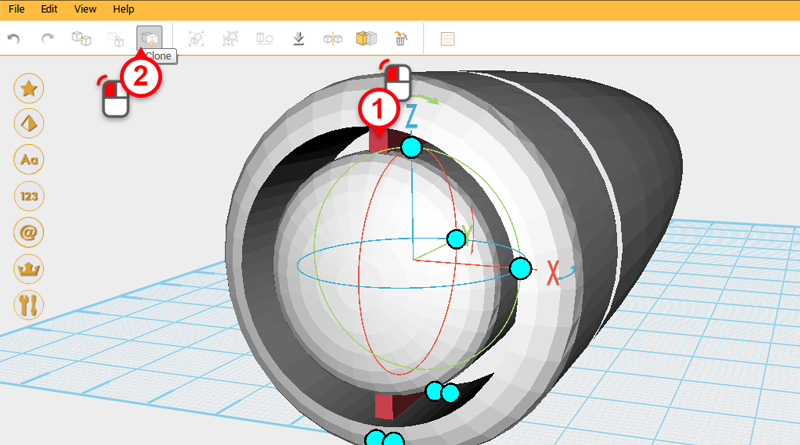
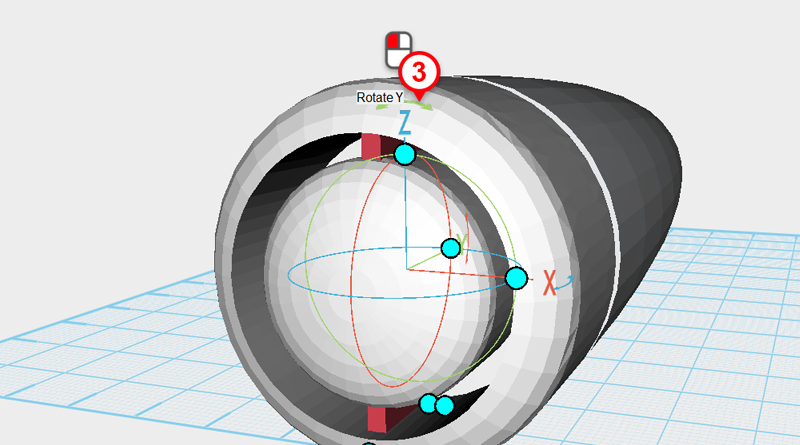
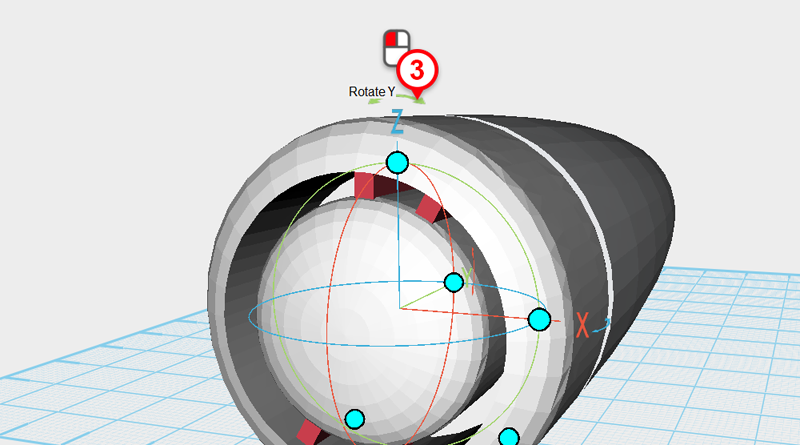
 Select the cube you just created and click on the Clone button to duplicate the part. Next, click on the arrow above the Z-axis and move the mouse down to rotate the cube 30° along the Y-axis.
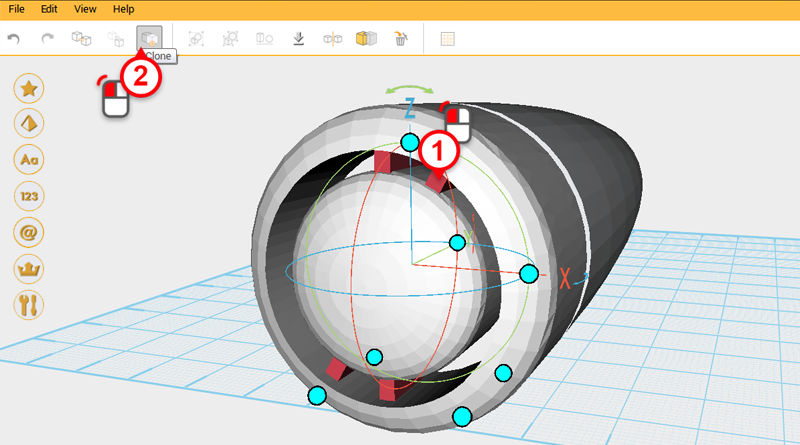
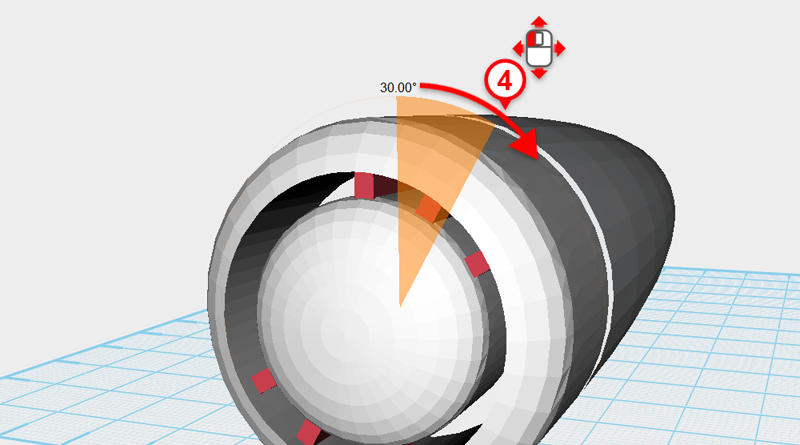
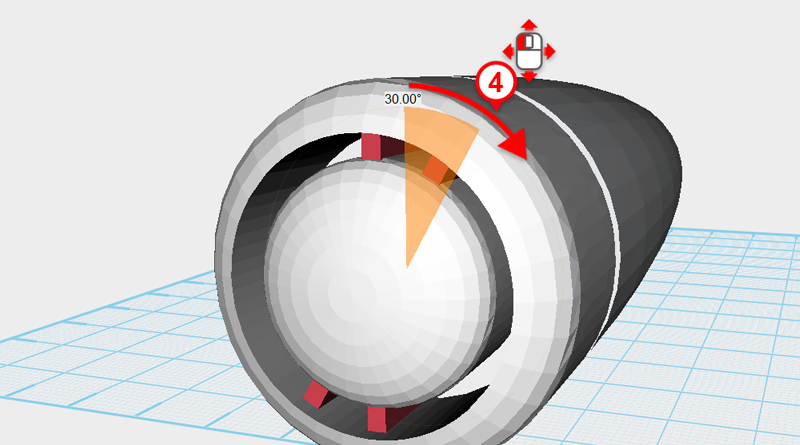
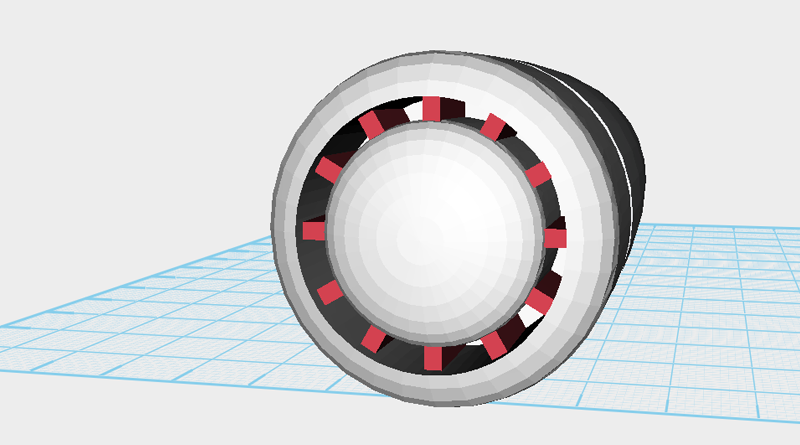 Continue cloning the cube and rotate each new part by 30° each time until you have a ring of parts around the engine.
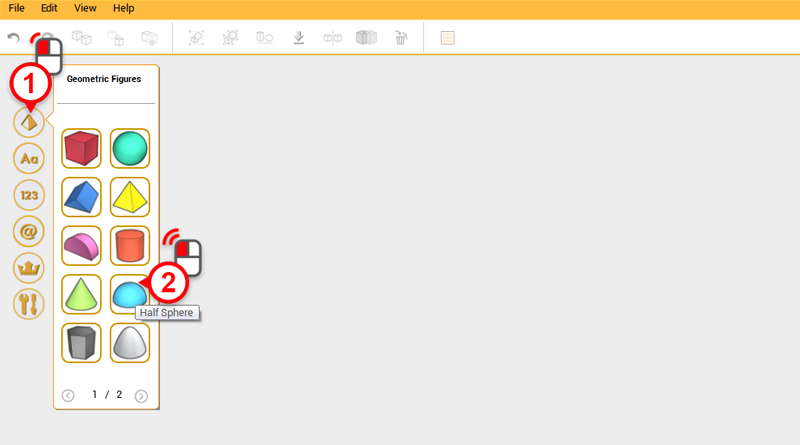

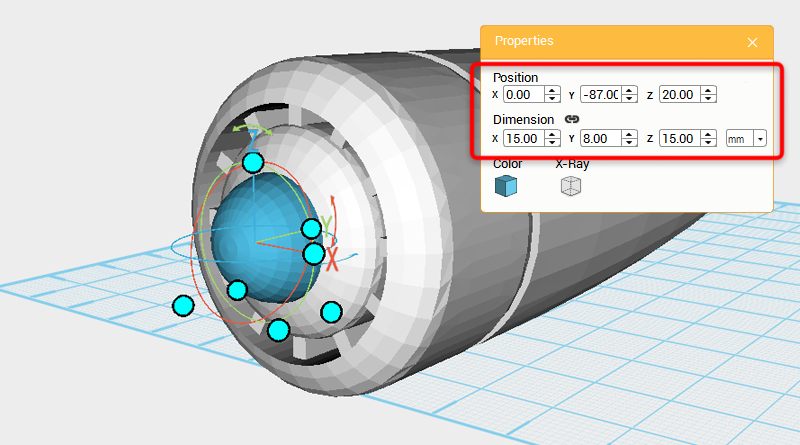 Create a half sphere, and rotate it 90° along the X-axis, in the Properties window change the dimensions to X: 15,Y: 8,Z: 15 mm and its position to X: 0,Y: -87,Z: 20. This part will be called the propeller center.
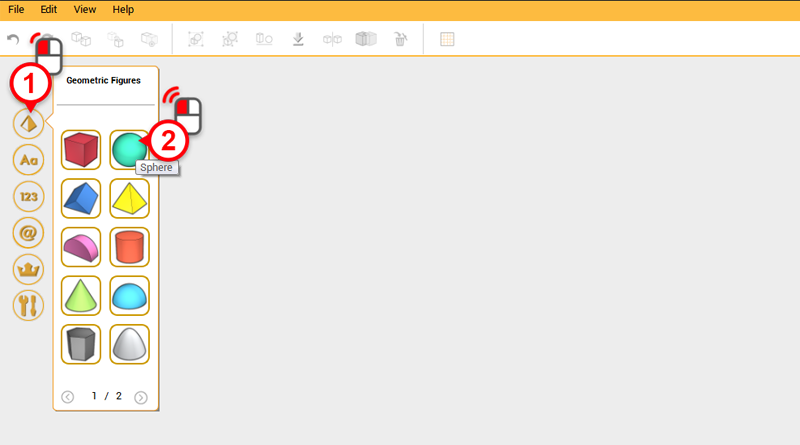
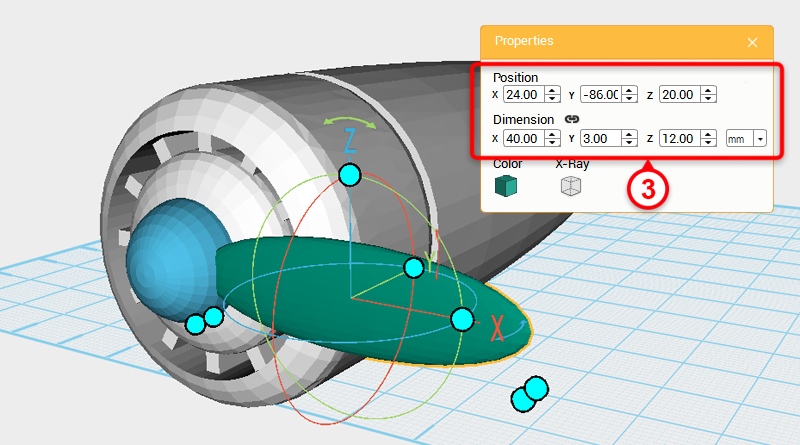 Create a sphere and in the Properties window change the dimensions to X: 40,Y: 3,Z: 12 mm and its position to X: 24,Y: -86,Z: 20. This part will be called the right propeller blade.
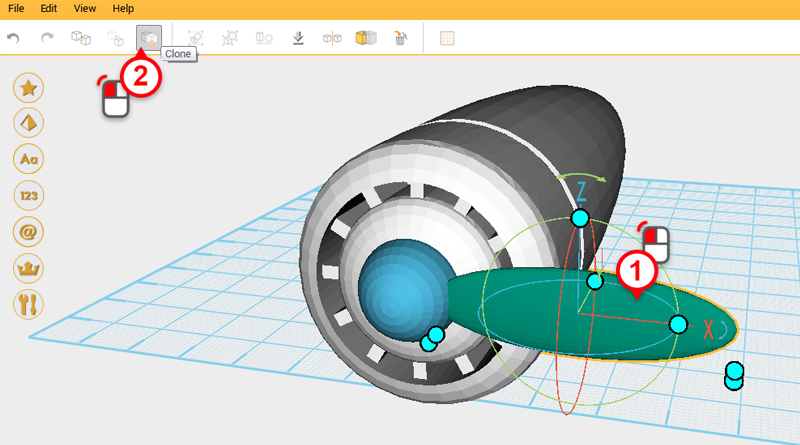
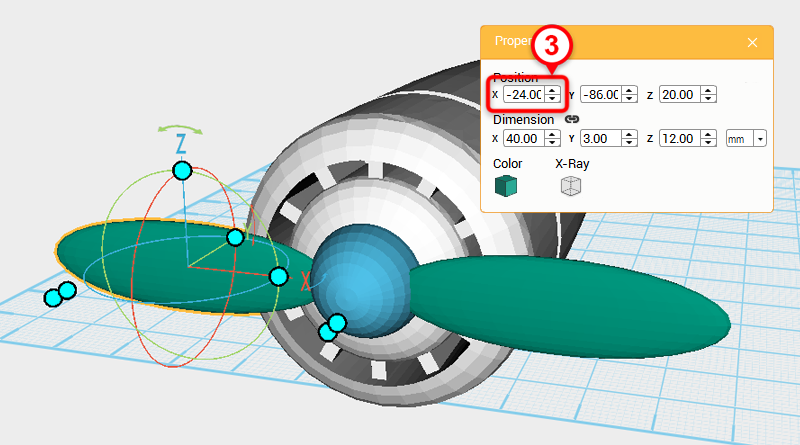 Select the right propeller blade then click the Clone button, and adjust the new part’s X position to -24.
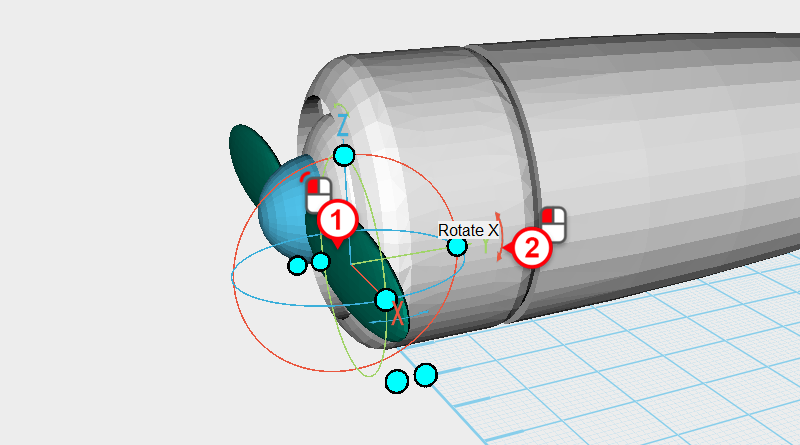
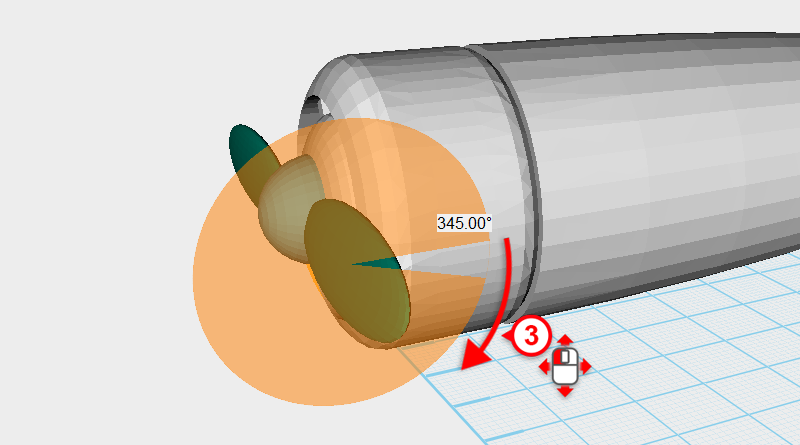 Select the right propeller blade, click on the arrow above the Y axis, and move the mouse to rotate the part 345°.
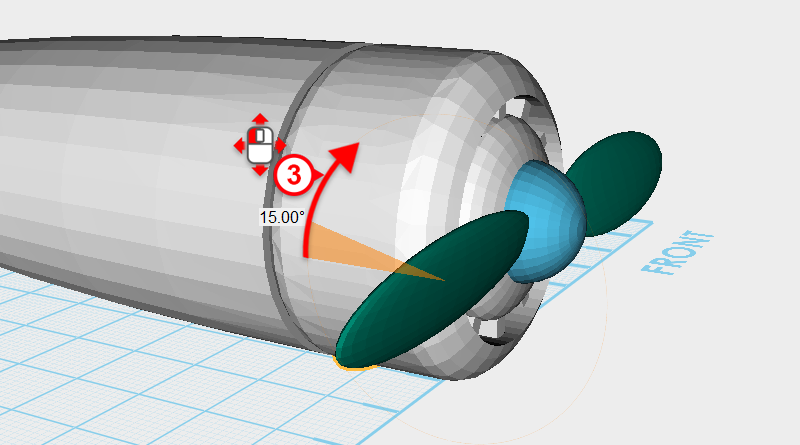 Select the left propeller blade, click on the arrow above the Y axis, and move the mouse to rotate the part 15°.
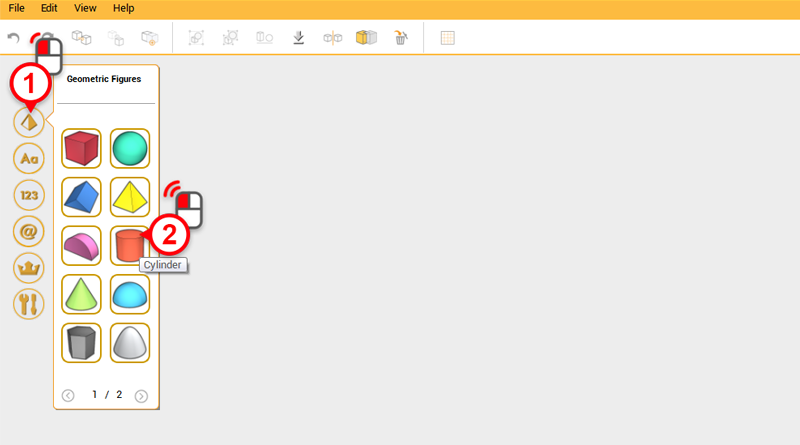
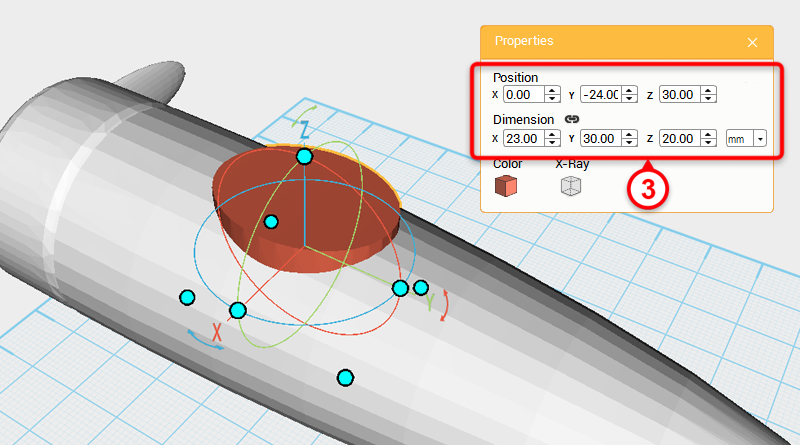 Create a cylinder and in the Properties window, change its dimensions to X: 23,Y: 30,Z: 20 mm, and position to X: 0,Y: -24,Z: 30.
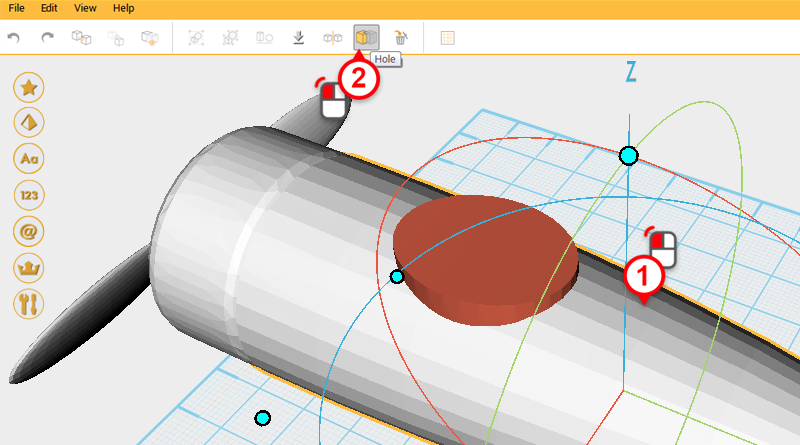
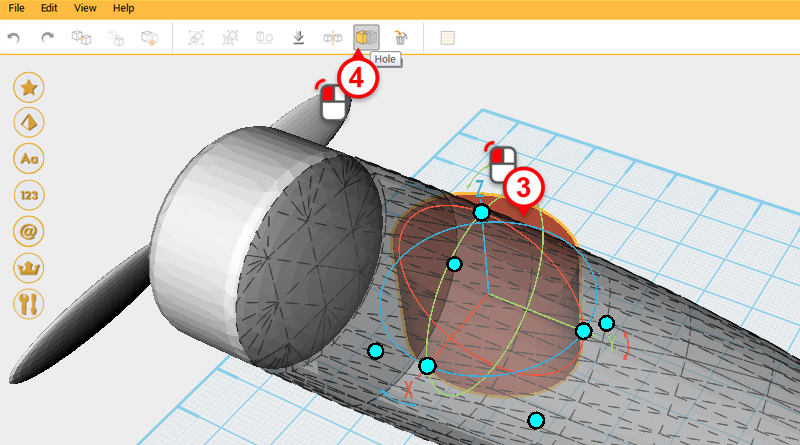
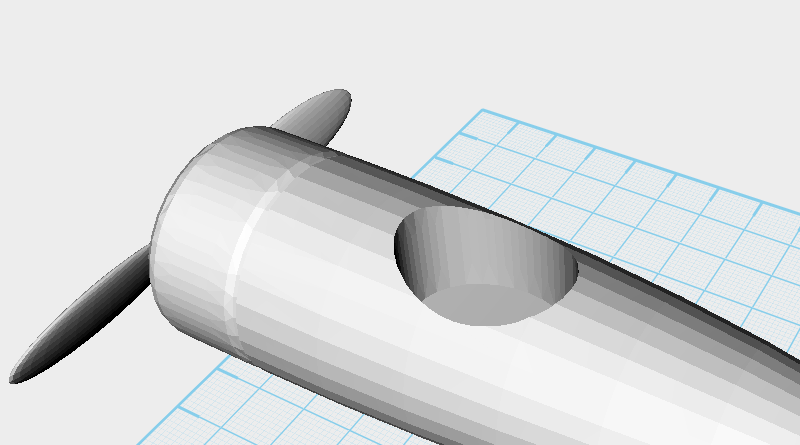 To create a cockpit, select the plane body and click on the Hole button, then select the cylinder you just created and click the Hole button again.