XYZmaker tutorial – Pen holder part 1
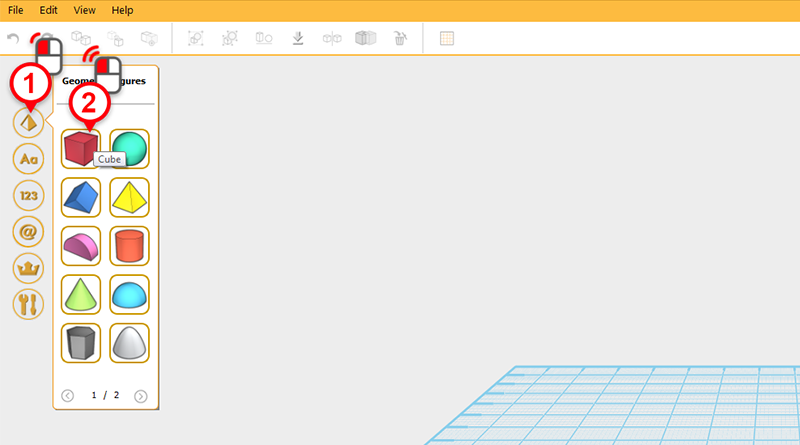
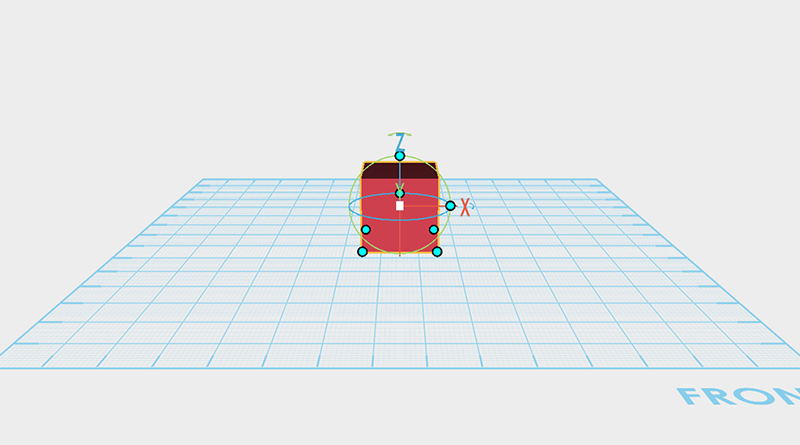 On the left hand side you will find the model bar; in this menu, locate and click on the pyramid icon labeled Geometric figures library(1), then double click on the cube icon(2). A cube that is selected will drop into the center of the grid.
Tip: If you just click on the icon once, you can drag the 3D object and place it in the grid manually.
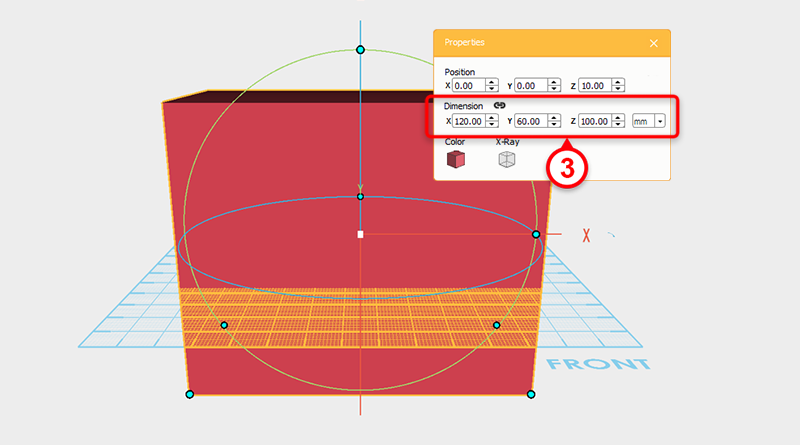 In the Properties window change the cube’s dimensions to X: 120,Y: 60,Z: 100 mm.
 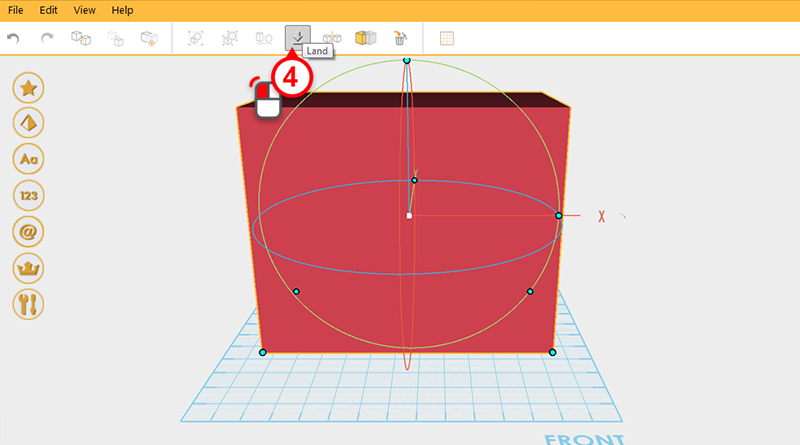 Because the cube’s height increased, the bottom half is now obscured by the modeling grid. Press the Land button to stick the base of the cube to the modeling grid.
 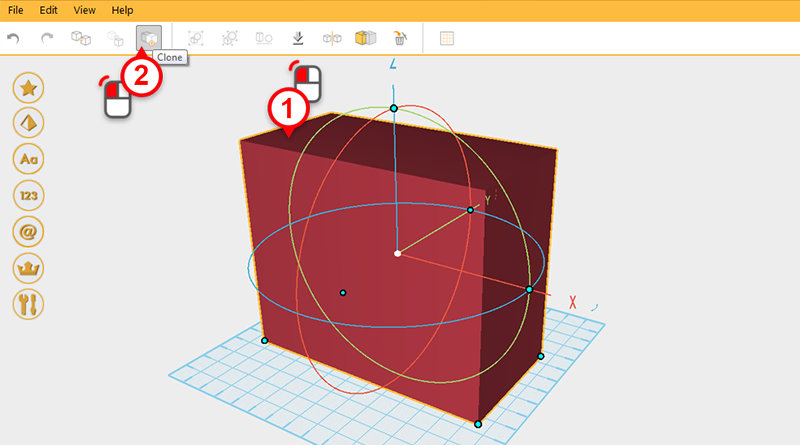 Select the cube and press the Clone button, this will create a duplicate cube in the same position.
 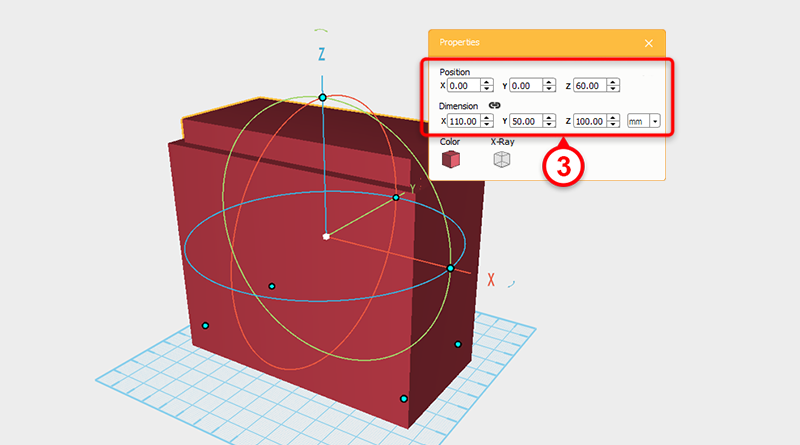 In the Properties window of the duplicate cube, change its dimensions to X: 110,Y: 50,Z: 100 mm and position to X: 0,Y: 0,Z: 60. This will now be called the outer cube.
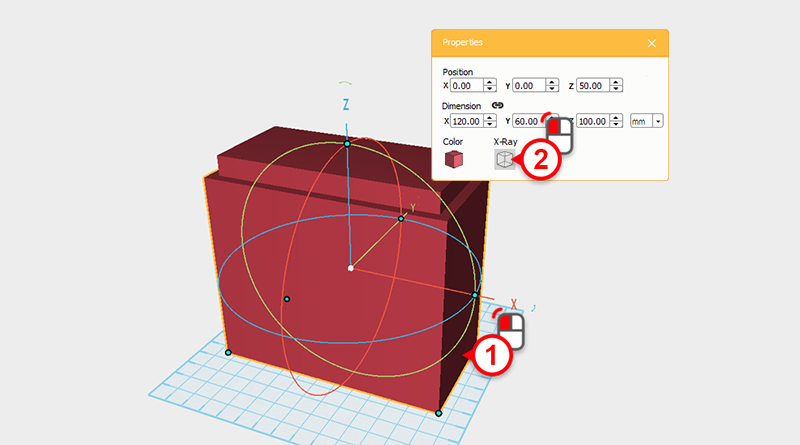
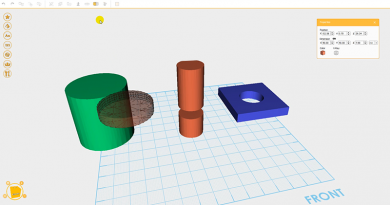
 Select the outer cube and click the X-ray button in the Properties window. When you do this, the part will become transparent so that you can see the overlapping parts of the two cubes clearly. Now use the inner cube to create a hole in outer cube.
 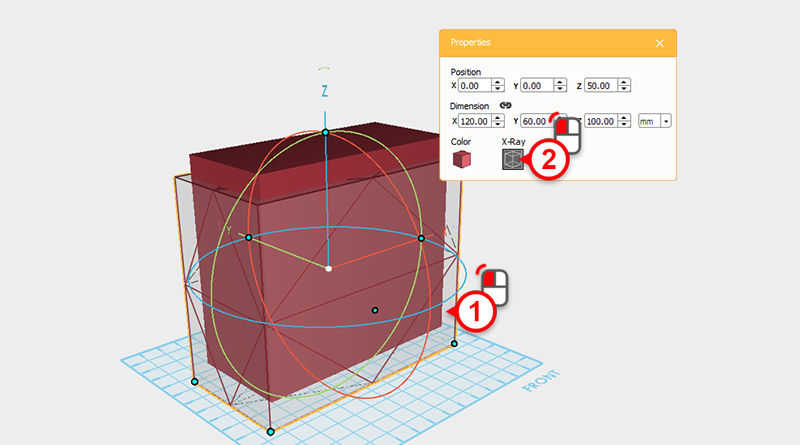 Select the outer cube and click on the X-ray button again to turn off the part transparency.
Tip: When the part is transparent you can still activate all of the editing actions.
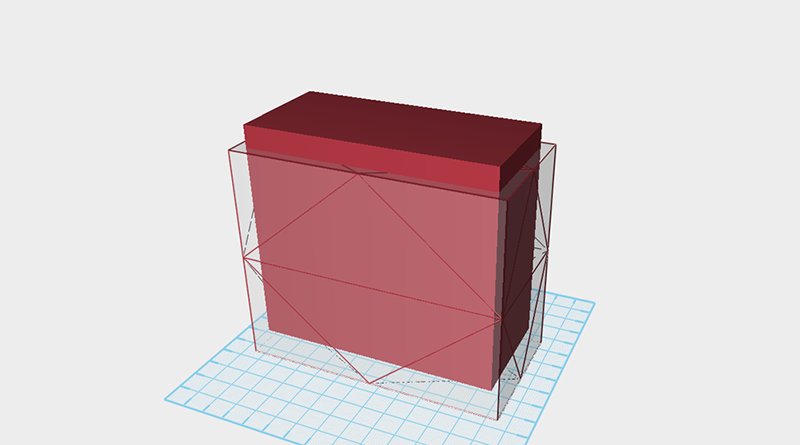
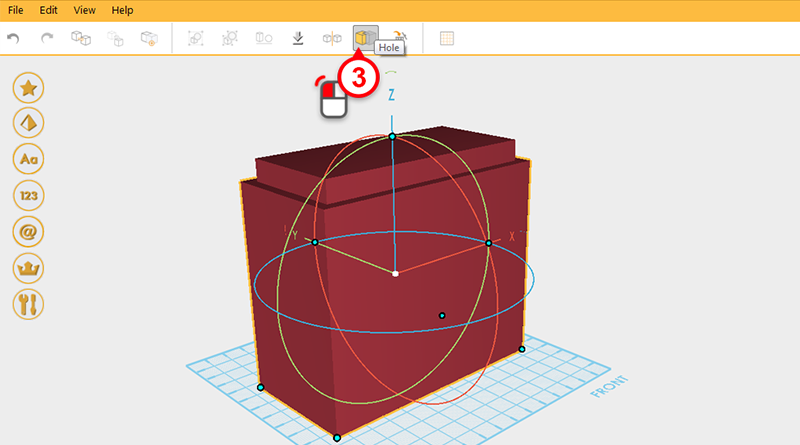 Check to see if the outer cube is still selected and then press the Hole button.
 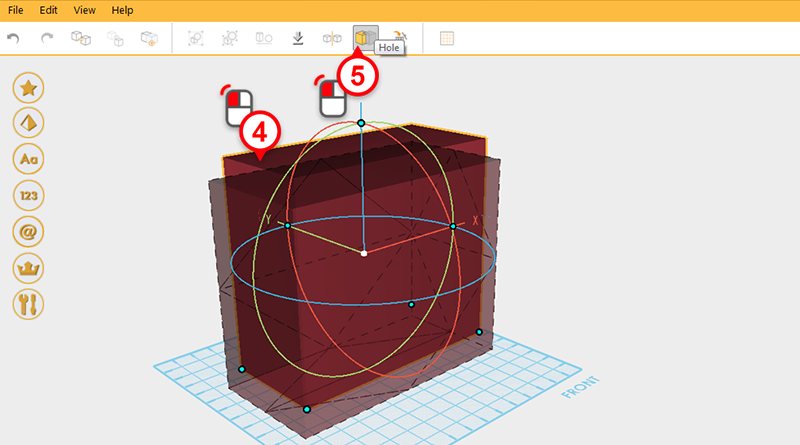 Select the inner cube and click on the Hole button again.
 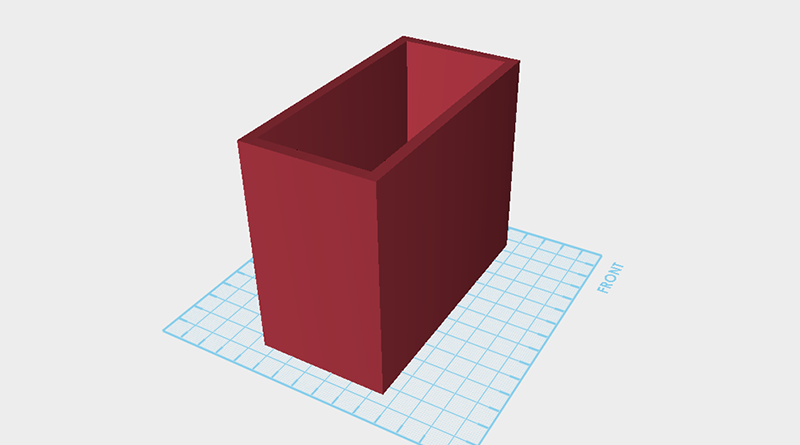 You can see the outside cube’s inside has been dug out by the inner cube. This part will now be called the pen case.
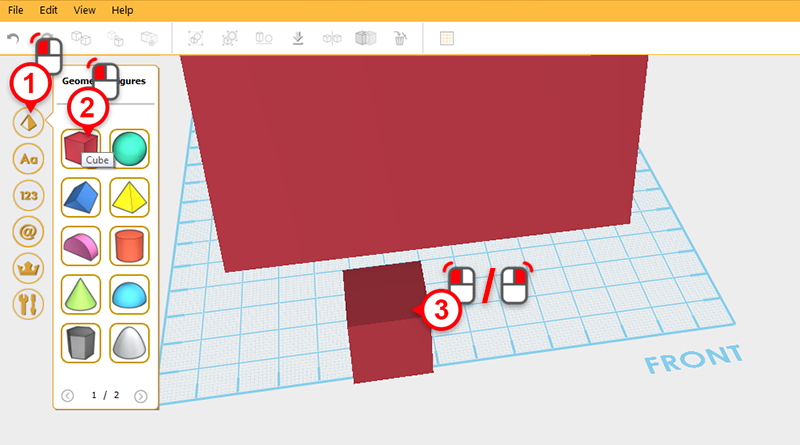
 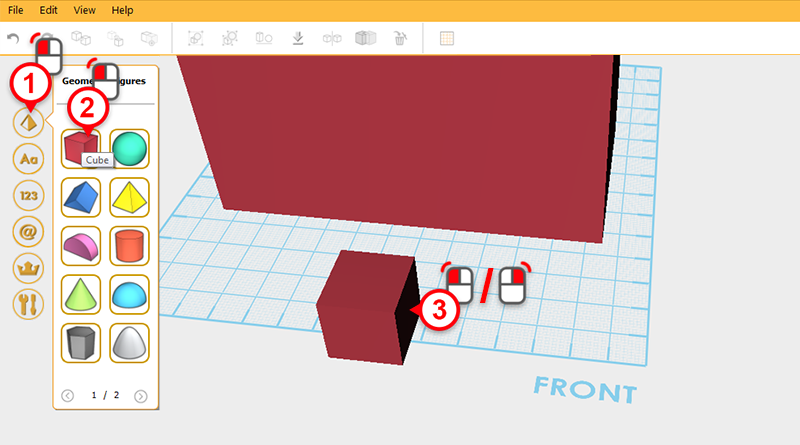 To give the pen case a partition, in the left-hand model toolbar, click on the cube icon. The cube will follow your mouse until you click on the modeling grid. Left or right click in the front of the pen case to place the cube.
Tip: Right clicking the mouse will drop a part in the modeling grid, first select your desired spot, then click the mouse button to place the part.
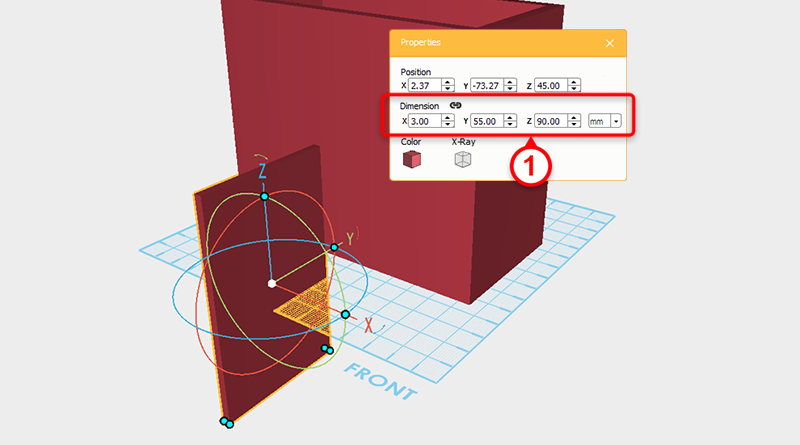 With the cube selected, in the Properties window adjust the dimensions to X: 3,Y: 55,Z: 90 mm.
 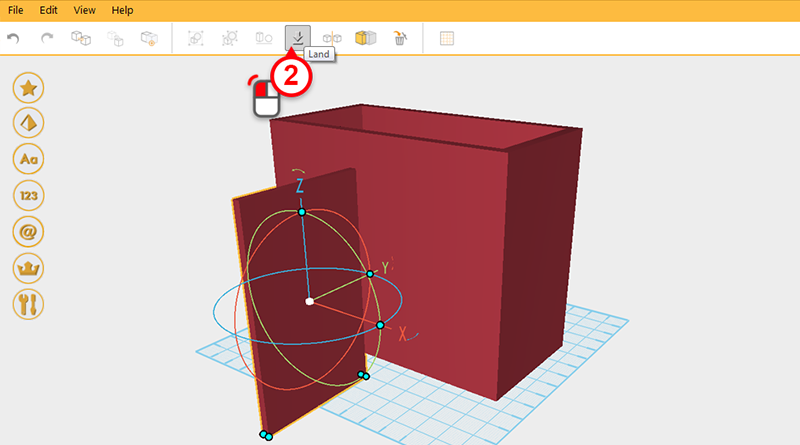 Click Land to make the underside of the cube level with the modeling grid.
 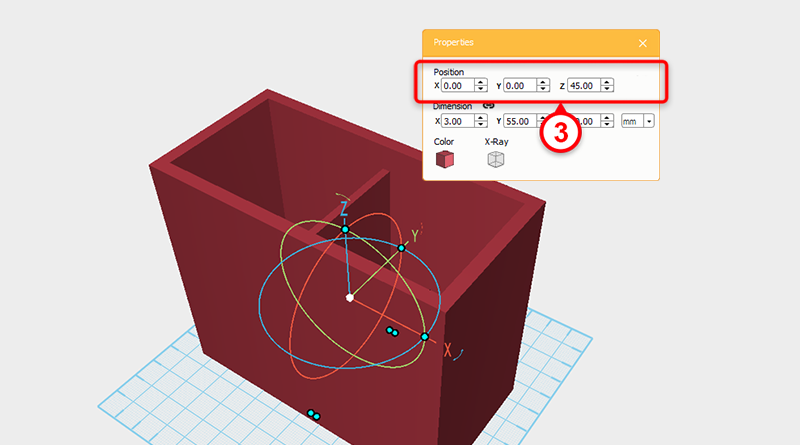 Finally, in the Properties menu, set the X and Y position to 0 to finish the partition.
Tip: You can skip adjusting the partition's X axis value and adjust the two side's internal dimensions.
 To make storage space at the front of the pen holder, in the model toolbar click on the Cube icon. This will create a cube that will follow the mouse cursor. Move your cursor to the front of the model and left or right click to place the cube.
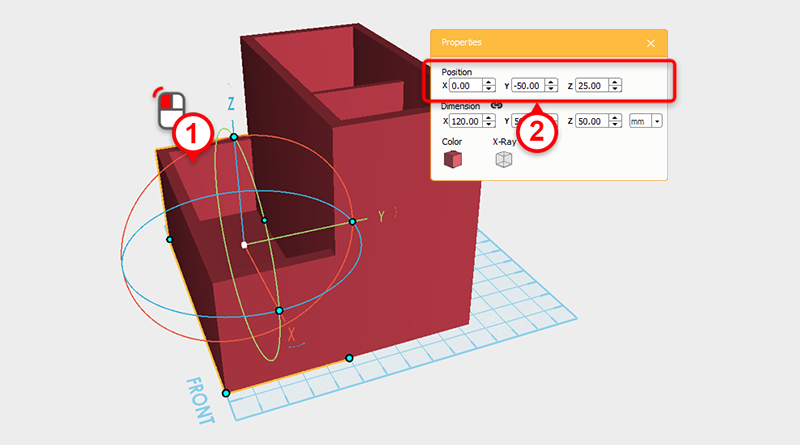
  In the Properties window of the cube you just created, adjust its dimensions to X: 120,Y: 50,Z: 50 mm and position to X: 0,Y: -80,Z: 25.
 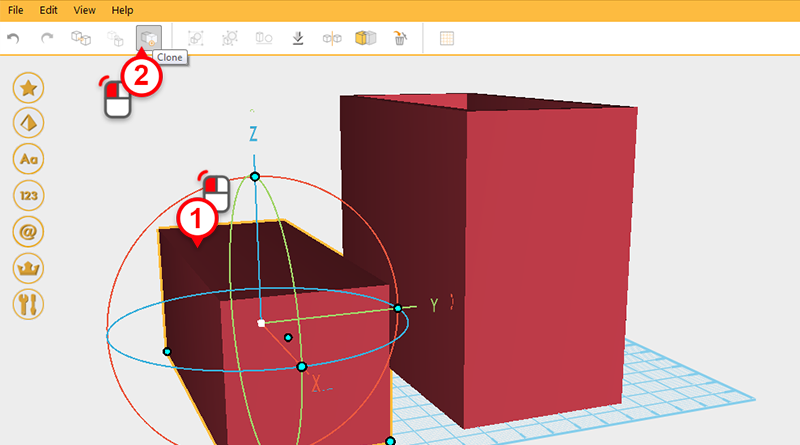 Select the cube and press the Clone button, this will create a duplicate cube in the same spot as the cube.
 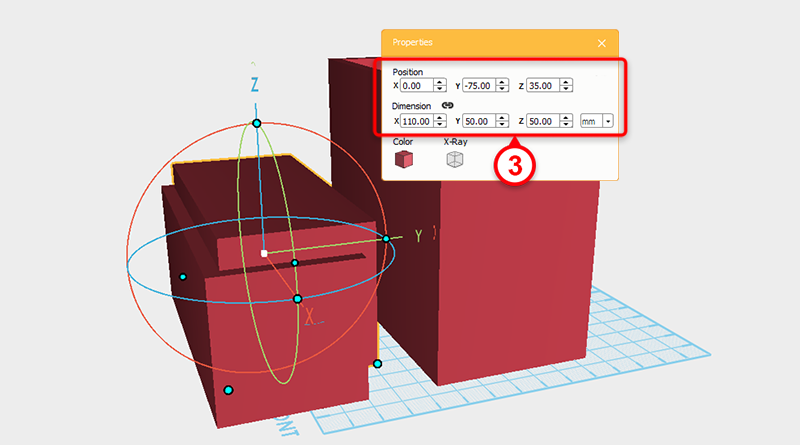 In the duplicated cube’s Properties window, adjust the dimensions to X: 110,Y: 50,Z: 50 mm and position to X: 0,Y: -75,Z: 35.
 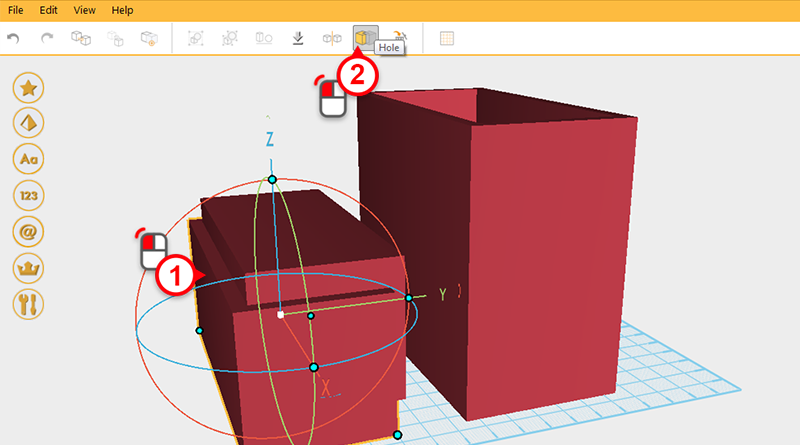 Click on the outer cube then click Hole.
 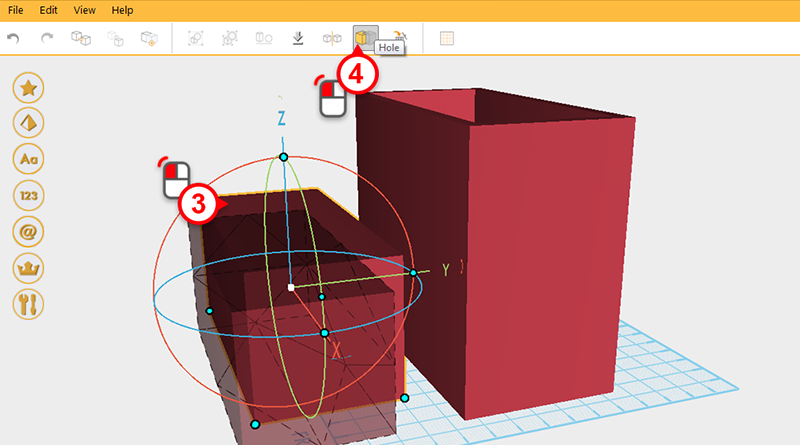 Click on the inner cube and click Hole again to create a shelf.
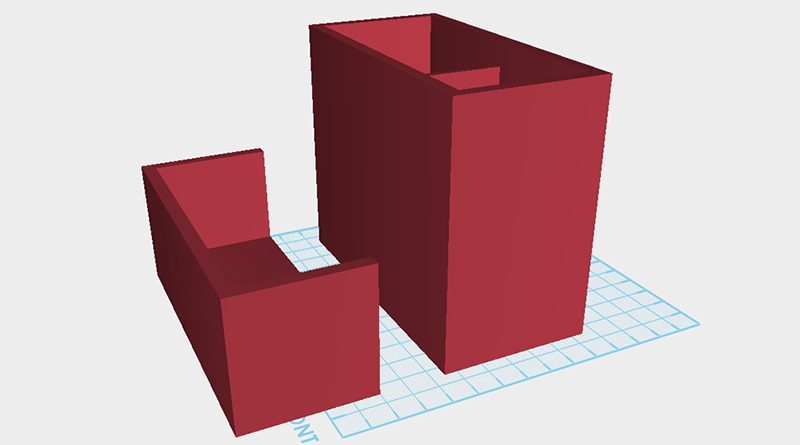
 Click on the cube you just cut away from, and adjust its dimensions to X: 0,Y: -50,Z: 25 to combine it with the parts you created earlier.
 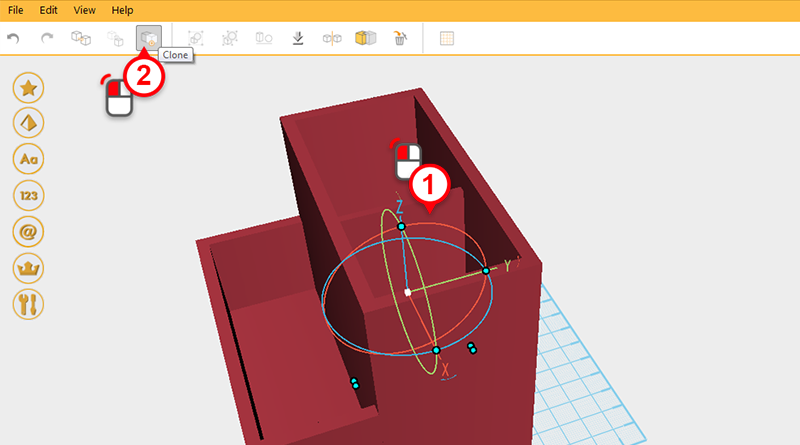 Select the partition and click on Clone to create a duplicate part.
 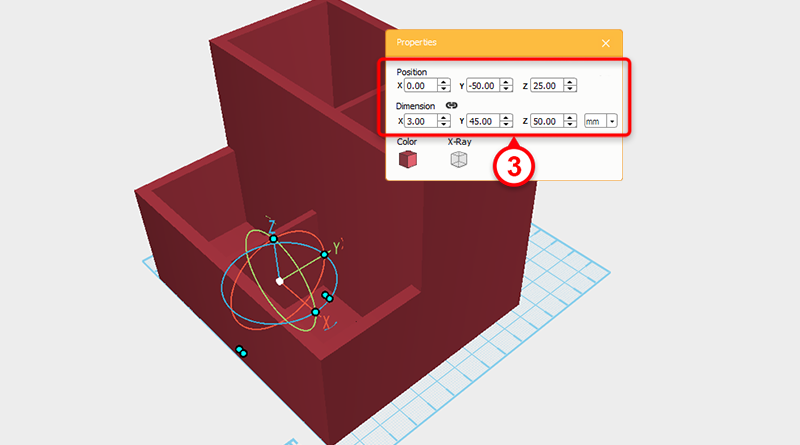 Take the duplicate partition and adjust its dimensions to X: 3,Y: 45,Z: 50 mm and position to X: 0,Y: -50,Z: 25.