XYZmaker tutorial – Airplane part 5
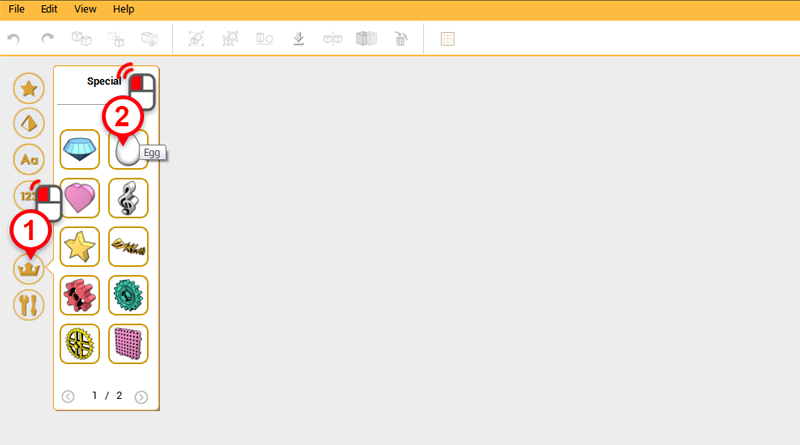
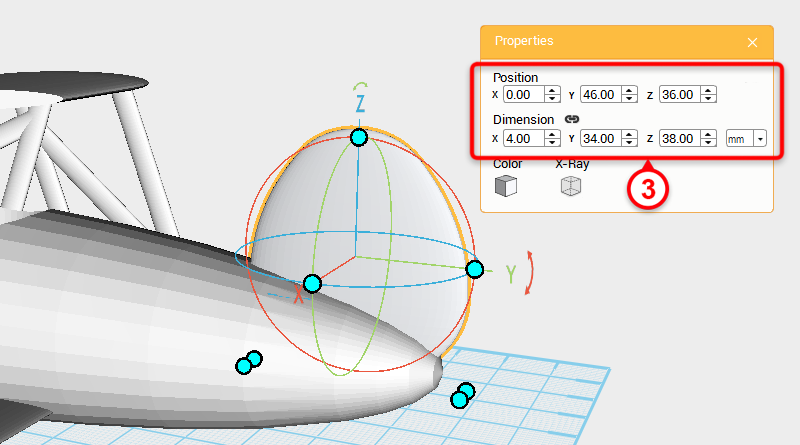 Next to make a tail wing, create an Egg and in the Properties window change the dimensions to X: 4,Y: 34,Z: 38mm and position to X: 0,Y: 46,Z: 36. This part will be called the vertical tail wing.
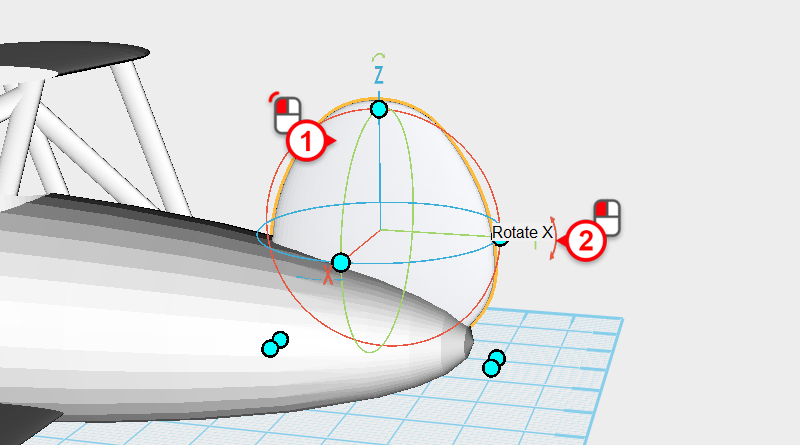
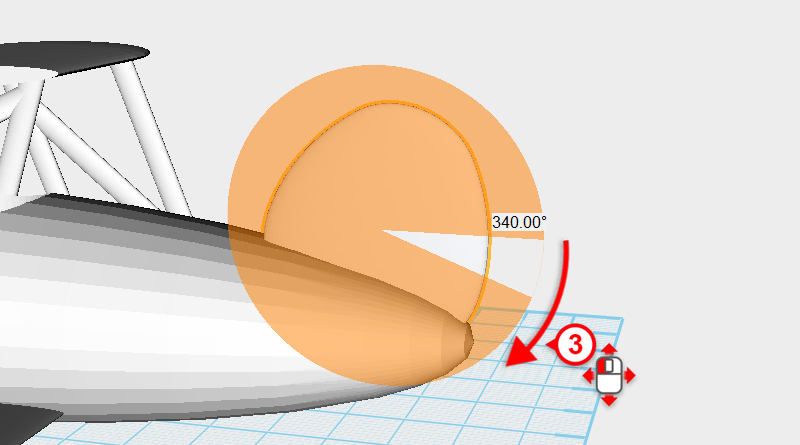 Select the vertical tail wing then click and drag the arrow above the Y axis until you rotate the part 340°.
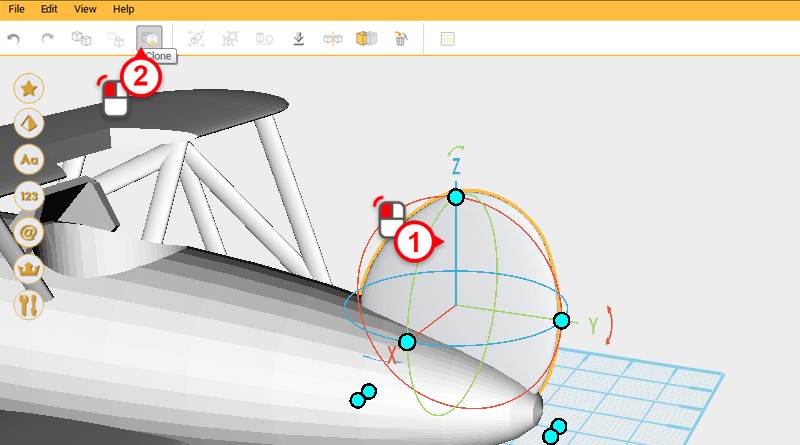
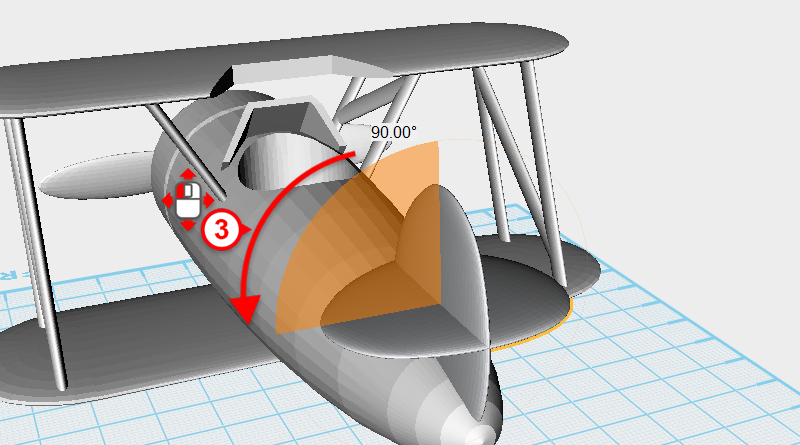 You can use the vertical tail wing to create the horizontal tail wing. Select the vertical tail wing and click on the Clone button, then click and drag the arrow above the Z axis and rotate the part 90°. This will be called horizontal tail wing.
 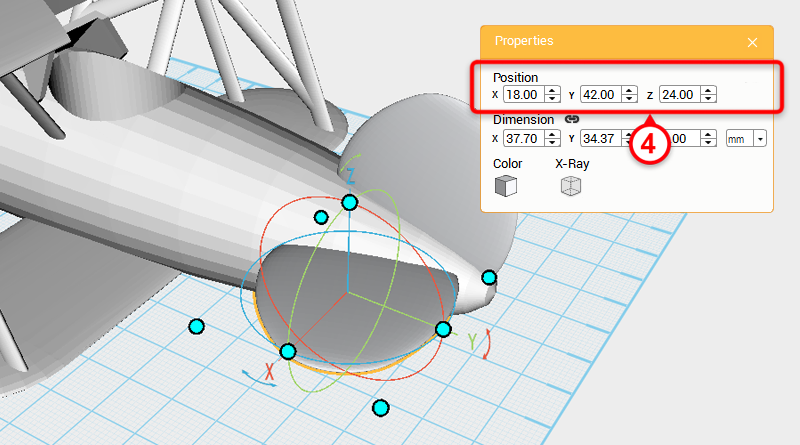 With the horizontal tail wing selected, change the position to X: 18,Y: 42,Z: 24 in the Properties window.
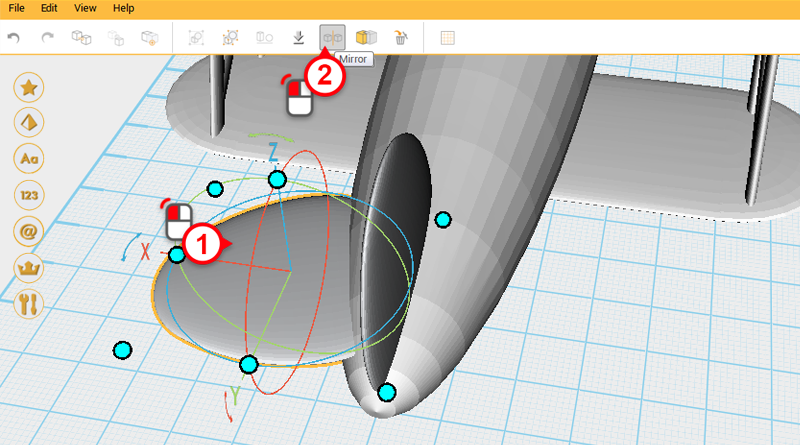
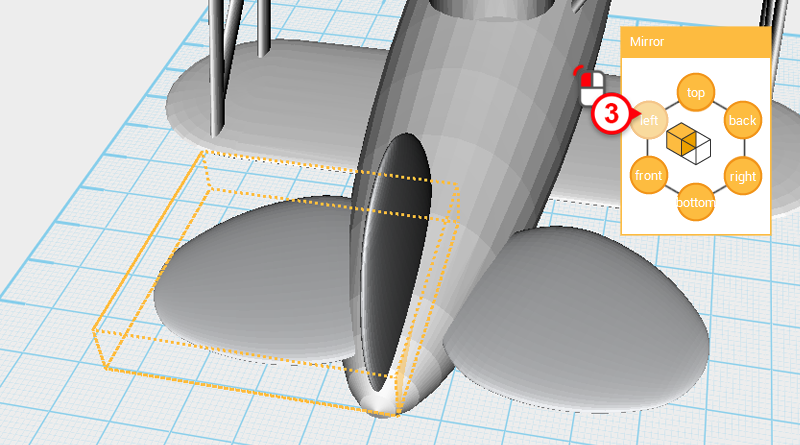 Select the horizontal tail wing and click on the Mirror button. In the Mirror Properties window click on the left button to mirror the other side of the horizontal tail wing.
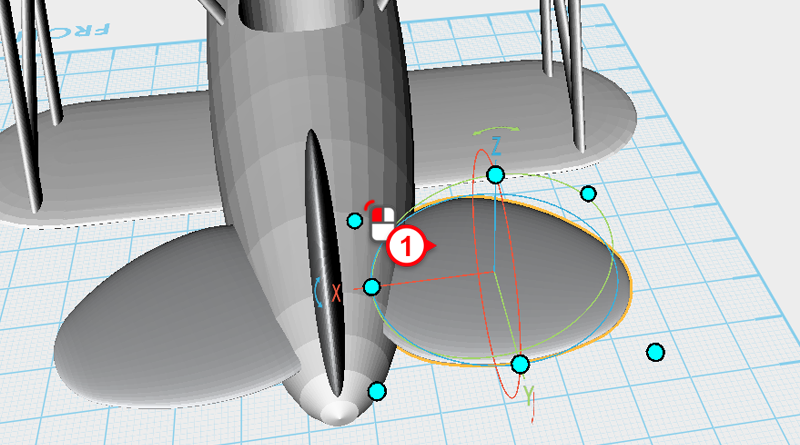
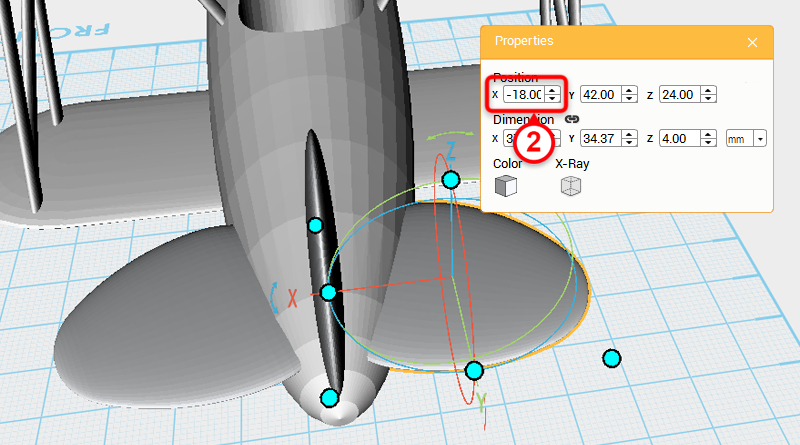 Select the mirrored horizontal tail wing and change its X position to -18.
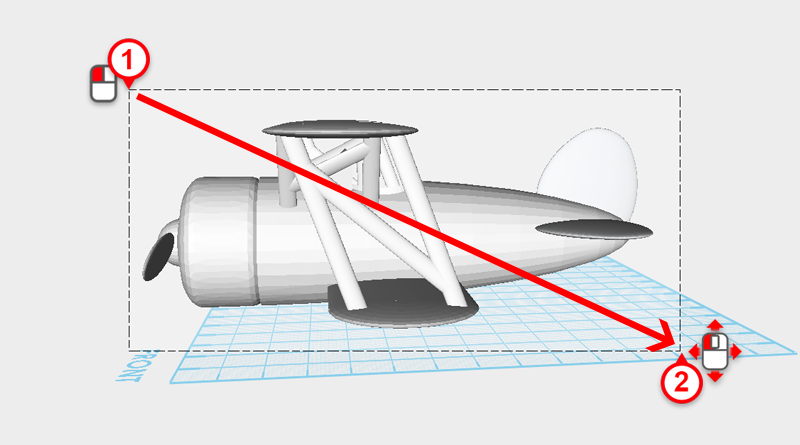
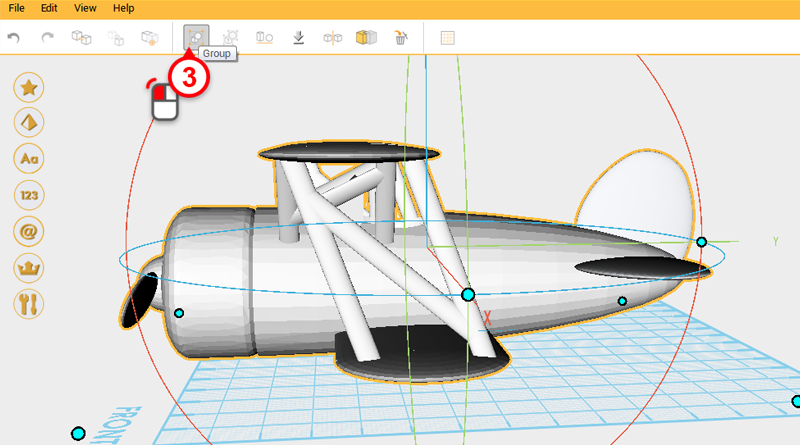 Drag select all the parts you have made so far and click on the Group button. Call this the plane main body.
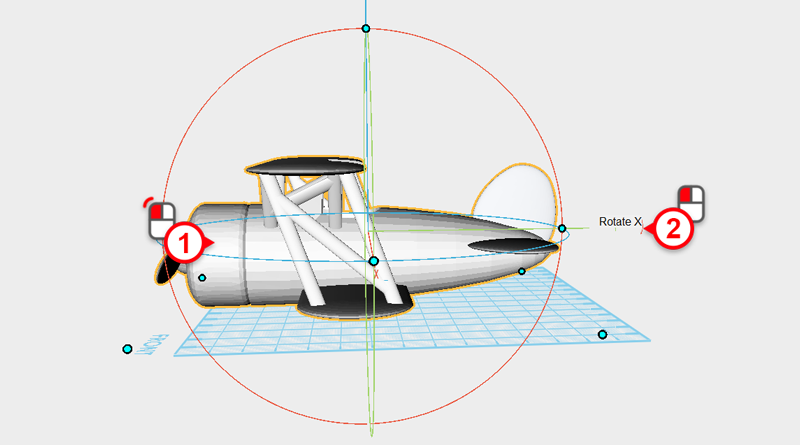
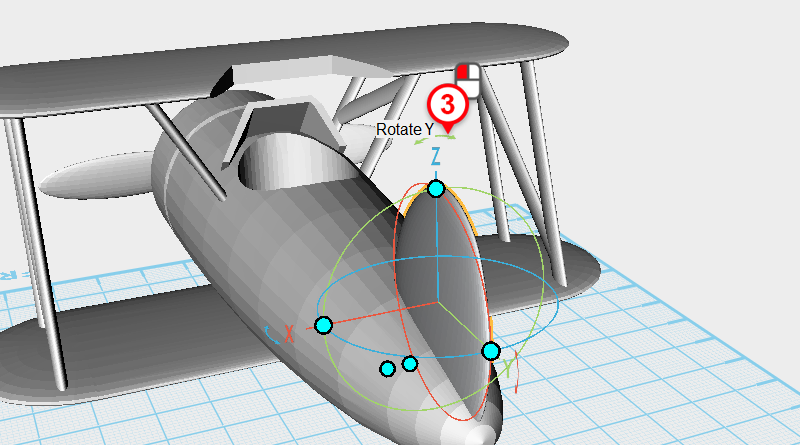
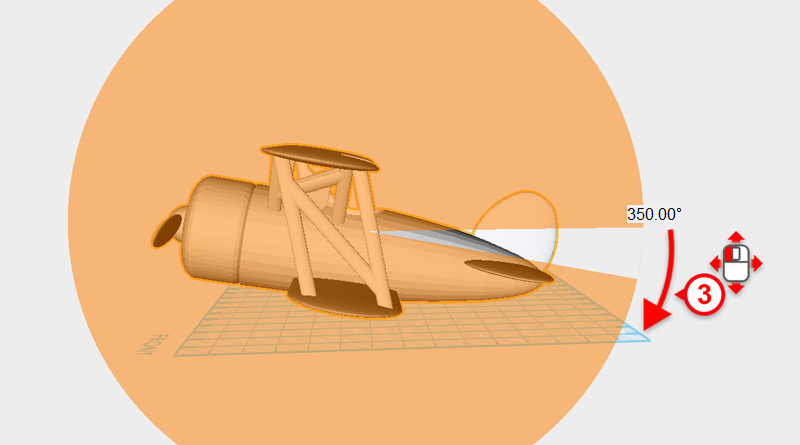 Select plane main body and click and drag the arrow above the Y axis to rotate the part 350°.
 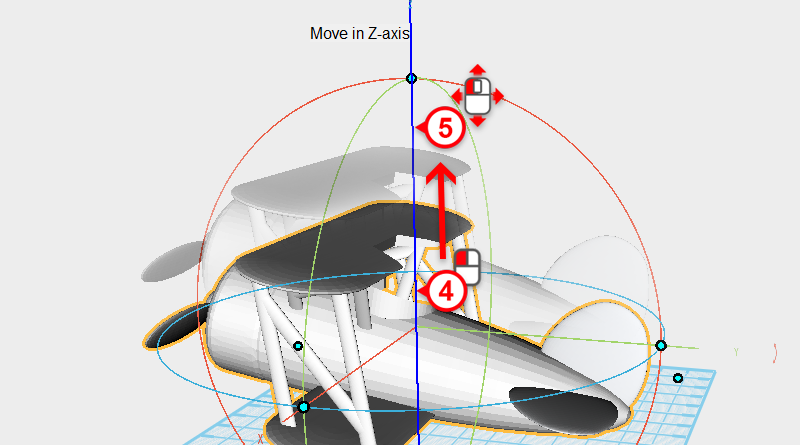 Next, select the Z axis line in the center of the control orb and move the plan main body up out of the way.
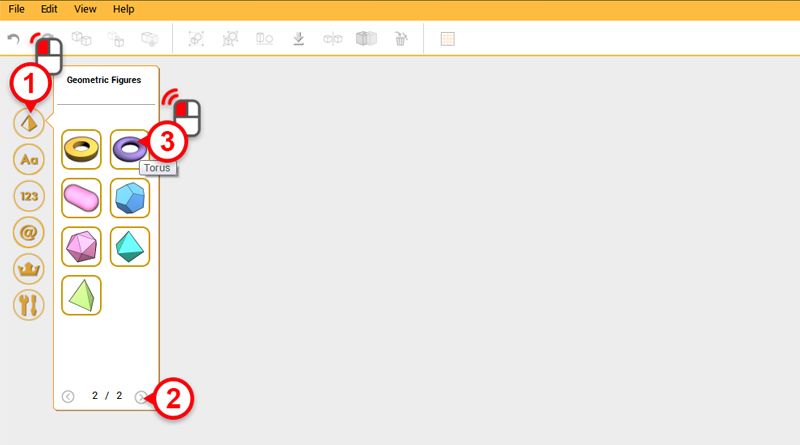
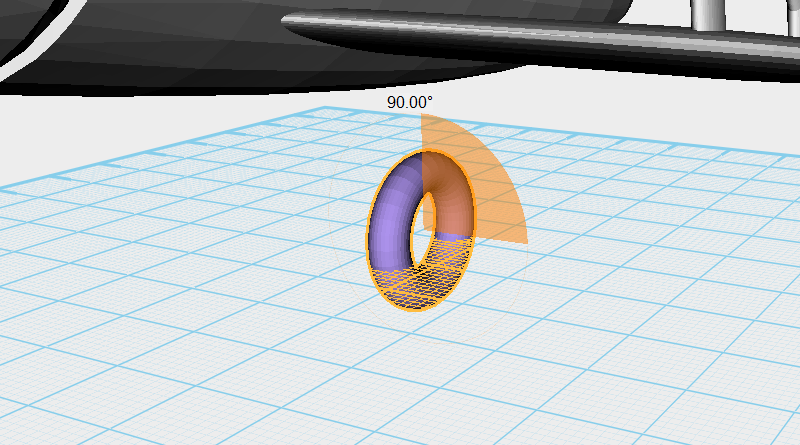
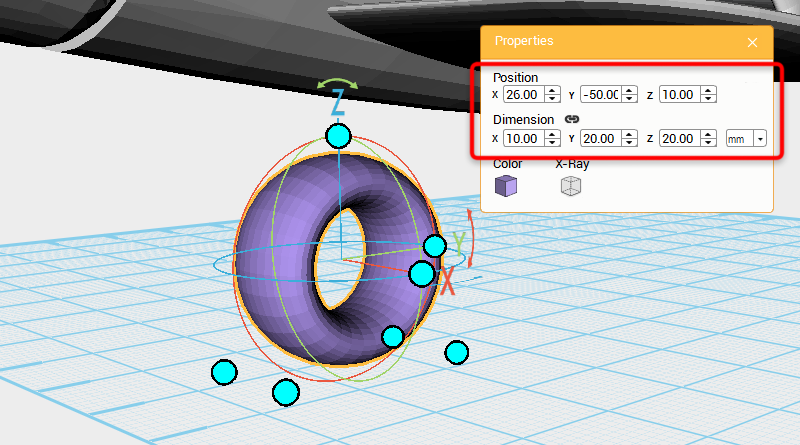 Prepare to make the plane’s wheels, create a Torus from the quick access menu and rotate it 90° along the Y axis. In the Properties window change the dimensions to X: 10,Y: 20,Z: 20 mm and position to X: 26,Y: -50,Z: 10. Call this part the wheel.
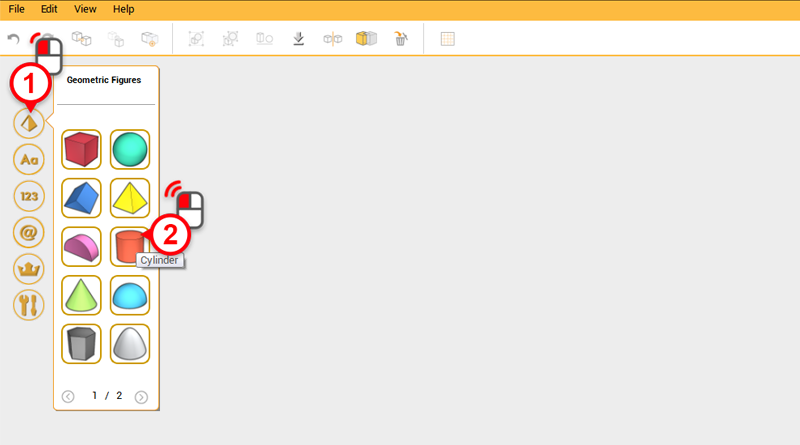
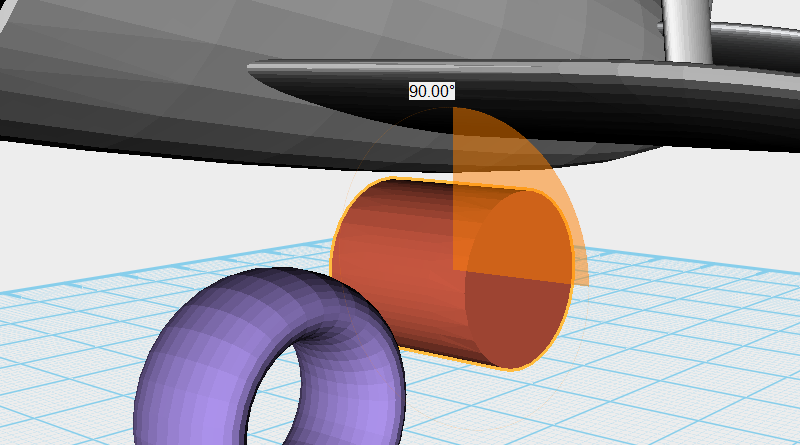
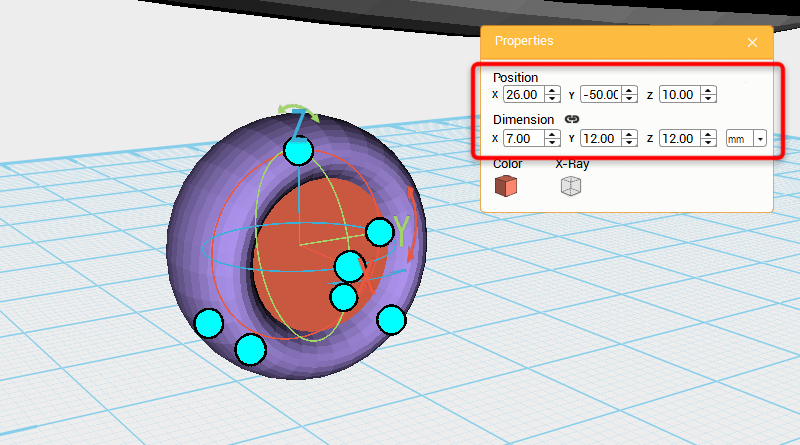 Create a Cylinder and rotate it 90° along the Y axis. In the Properties window change the dimensions to X: 7,Y: 12,Z: 12 mm and position to X: 26,Y: -50,Z: 10. This part will be called the wheel rim.
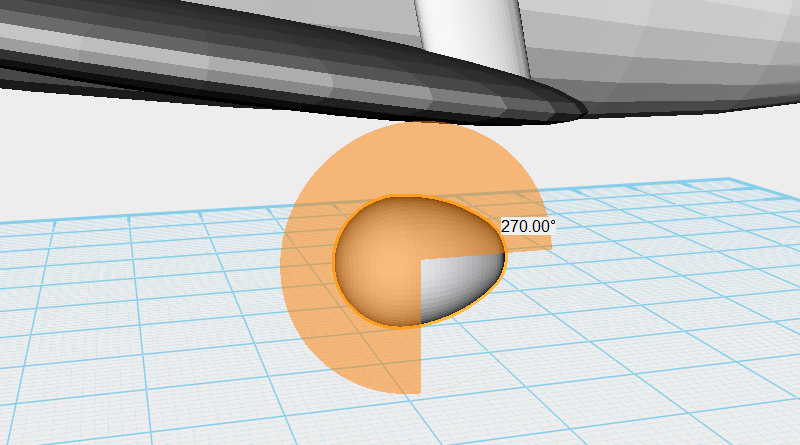
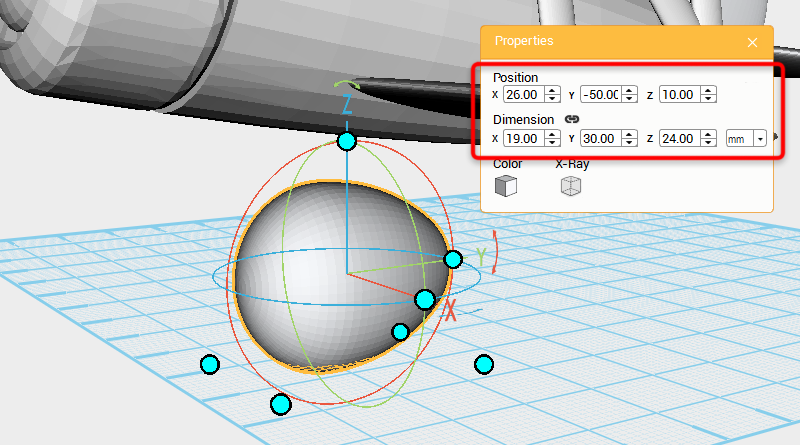 Create an Egg and rotate it 270° along the X axis, in the Properties window change the dimensions to X: 19,Y: 30,Z: 24 mm and position to X: 26,Y: -50,Z: 10. Call this part the wheel cover.
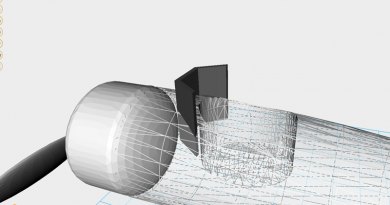
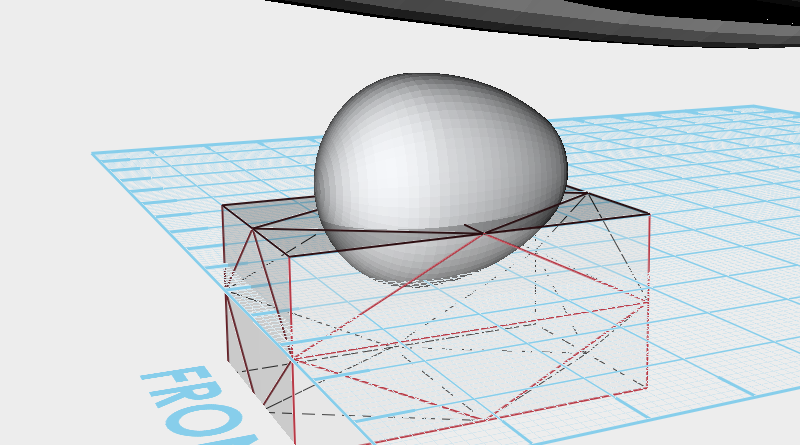 Create a Cube and adjust the dimensions and move it so it is sitting below the wheel cover, check that both parts are sitting as displayed in the image above. The area where these two parts overlap is where they will be cut.
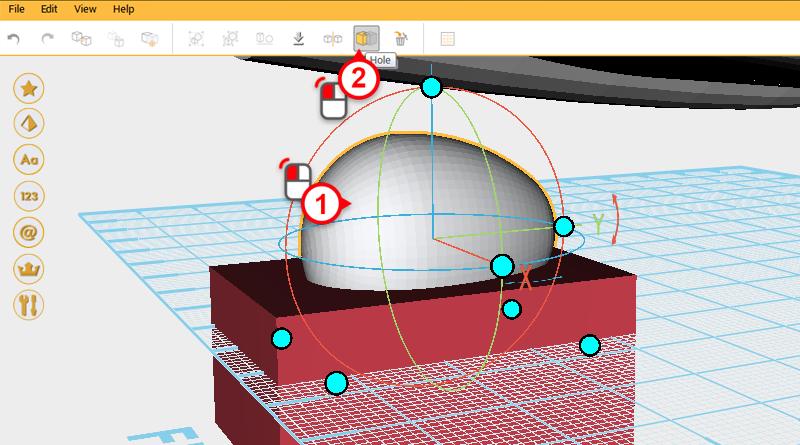
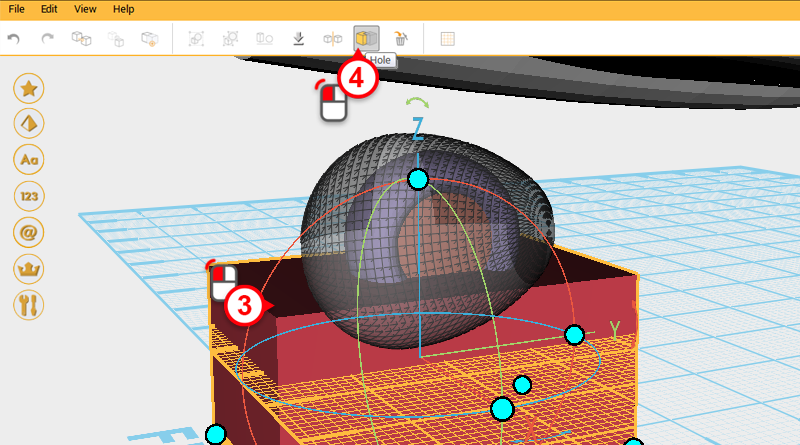
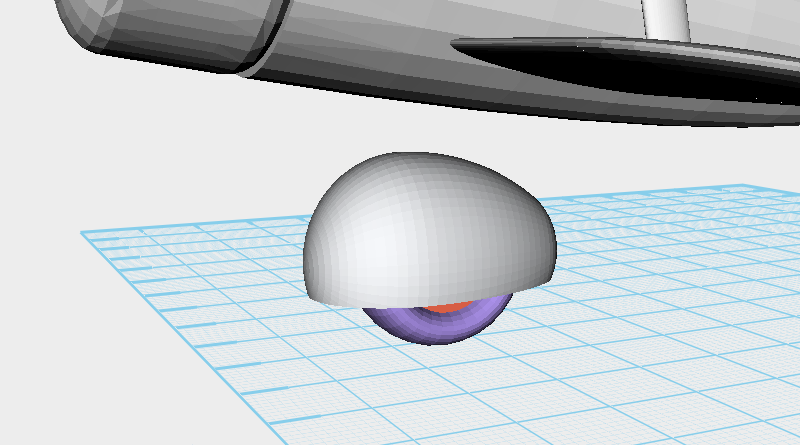 Select the wheel cover, click on the Hole button, select the cube and then click on the Hole button again. After cutting is complete the wheel cover should look like the image above.
 Create an Egg and in the Properties window change its dimensions to X: 8,Y: 18,Z: 24 mm and position to X: 5,Y: -52,Z: 15. Call this part the landing gear.
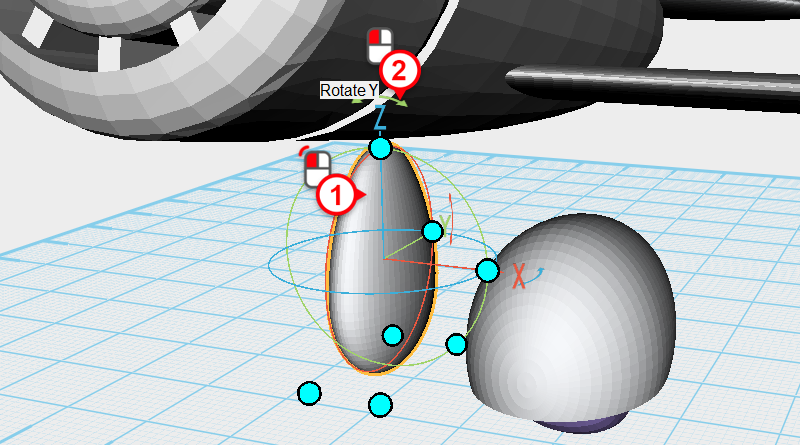
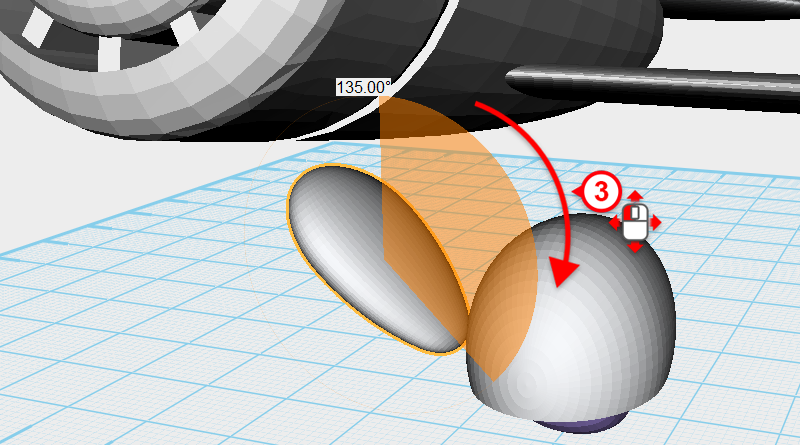 Select the landing gear and click and drag the arrow above the Z axis to rotate the part 135°.
 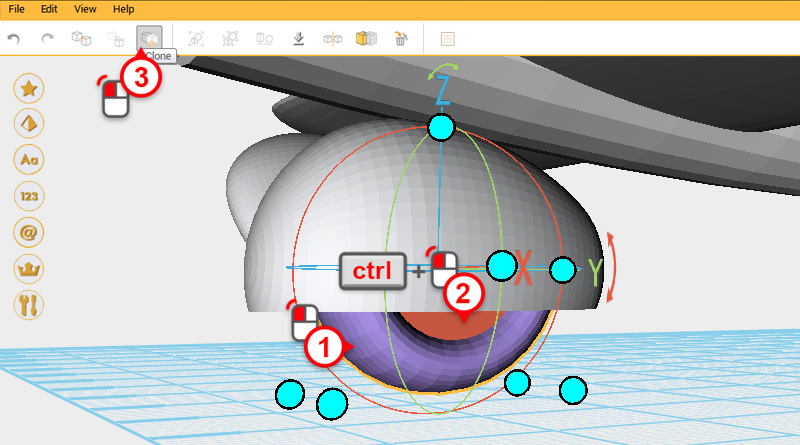 Next create the rear wheel, select the wheel and press and hold ctrl then click on the wheel rim. With the two parts selected, click the Clone button to duplicate them.
 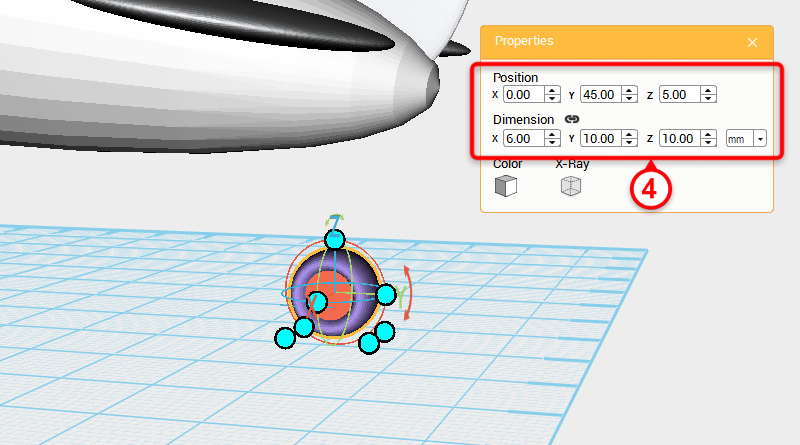 In the Properties window change the duplicated part’s dimensions to X: 6,Y: 10,Z: 10 mm and change its position to X: 0,Y: 45,Z: 5. Call this new part the rear wheel.
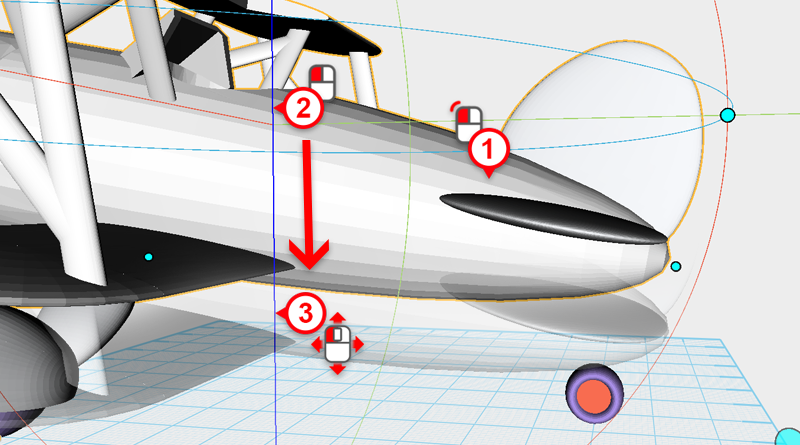
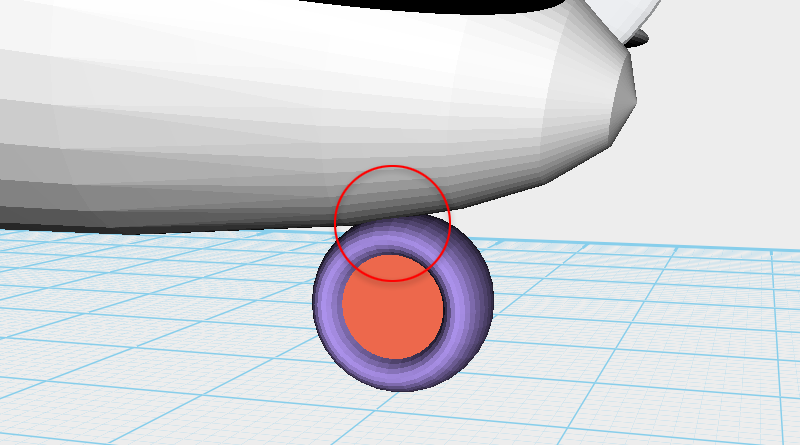 Select the plane body, click on the controller orb’s Z axis line and move the rear wheel so that the plane body and rear wheel just intersect.
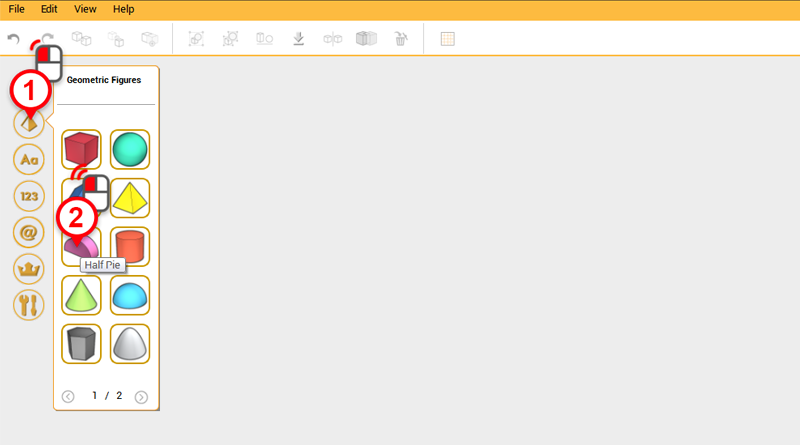
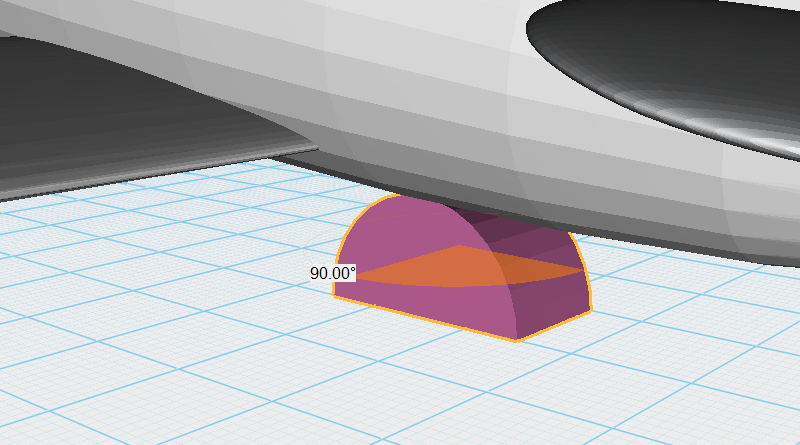
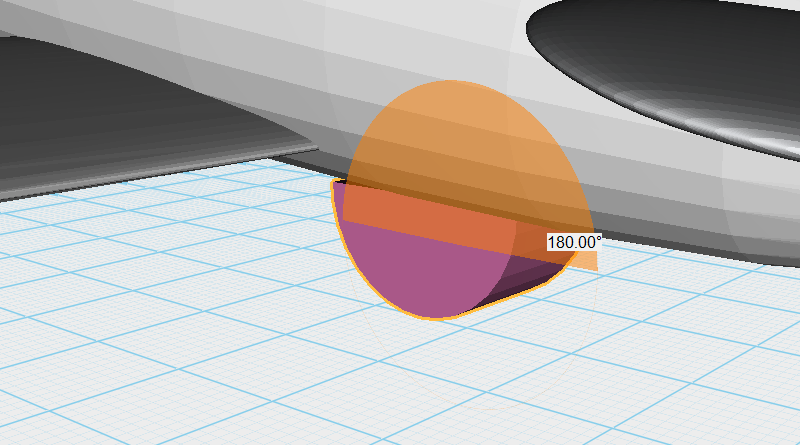 Make a Half pie and rotate it 90 ° along the Z axis, then 180° along the X axis.
 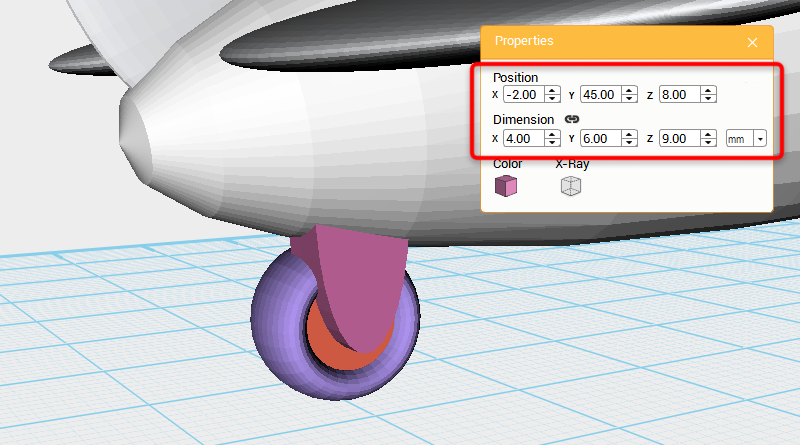 In the Properties window change the dimensions to X: 4,Y: 6,Z: 9 mm and position to X: -2,Y: 45,Z: 8.
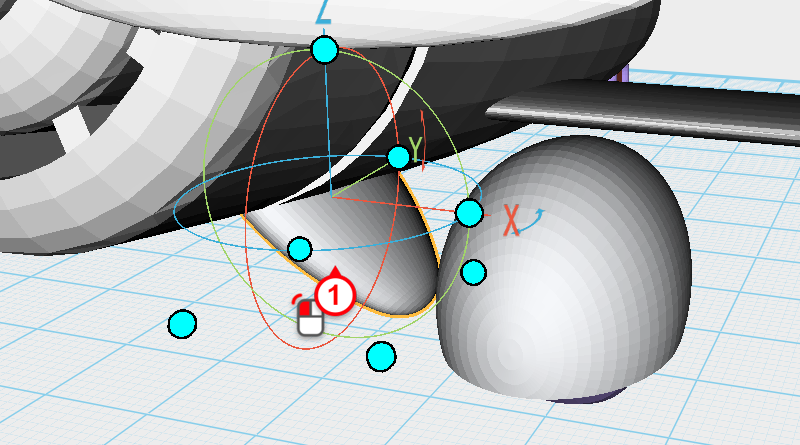
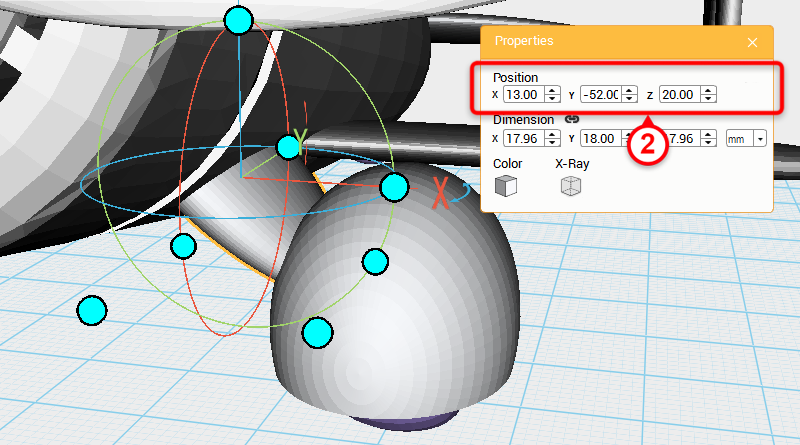 Rotate your screen view so to the front of the plane and select the landing gear, in the Properties window change the position to X: 13,Y: -52,Z: 20.
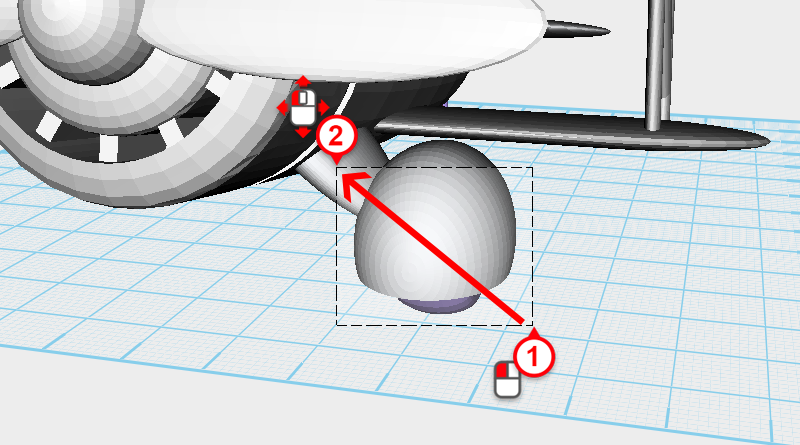
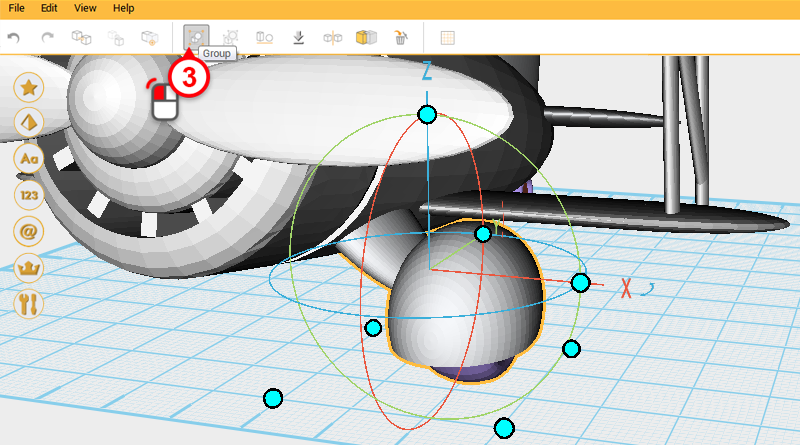 Drag select all of the front right wheel parts including the landing gear, and click the group button to complete the front right wheel.
Tip: When drag selecting parts, to avoid accidentally moving a part, you need to start dragging the mouse from an empty part of the screen.
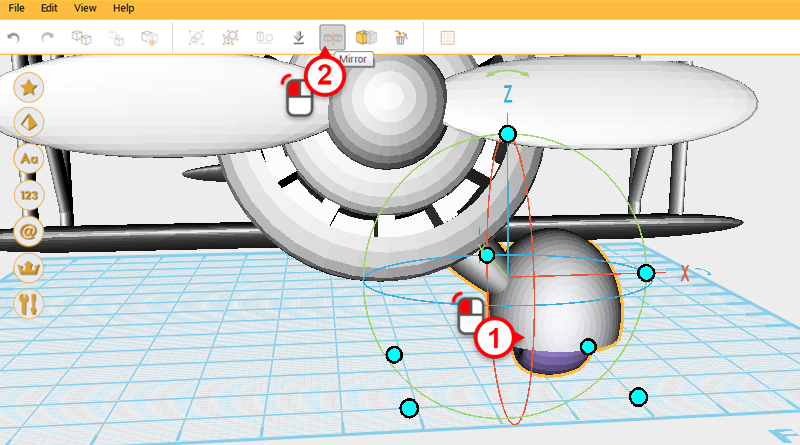
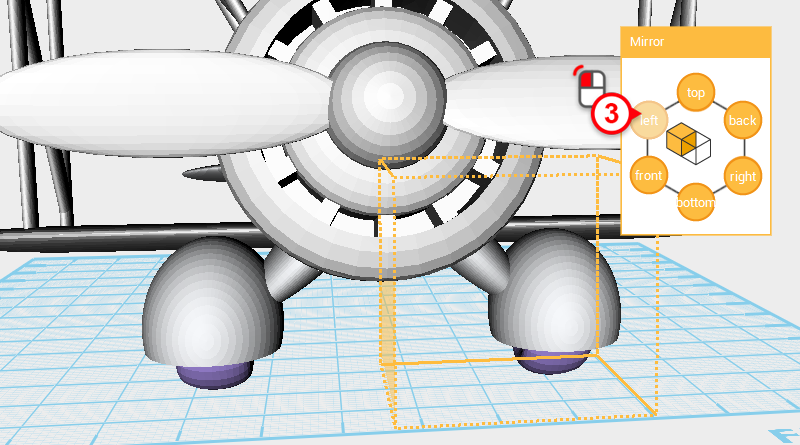 Select the front right wheel and click on the Mirror button, in the Mirror Properties window click on the Left button to mirror the wheel.
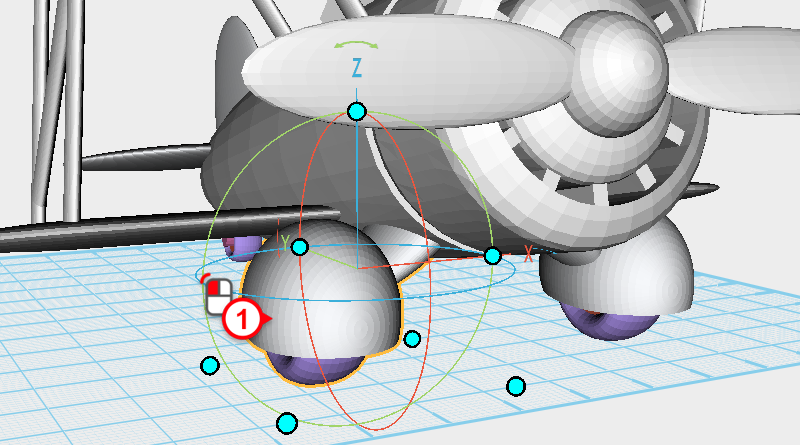
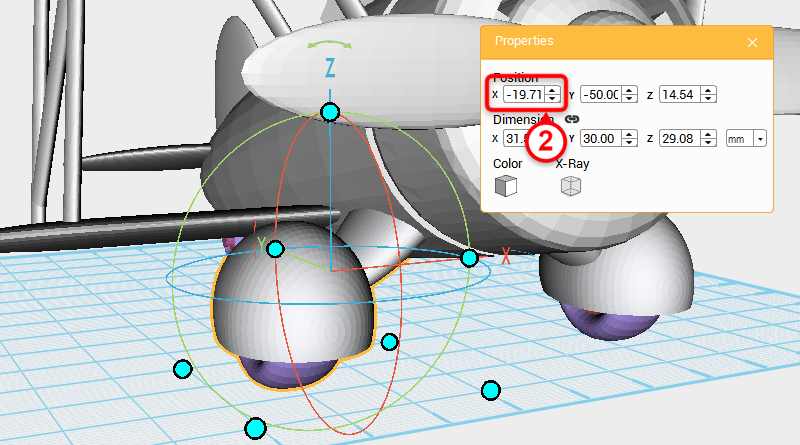 Select the Front left wheel and adjust its X position to -19.71.
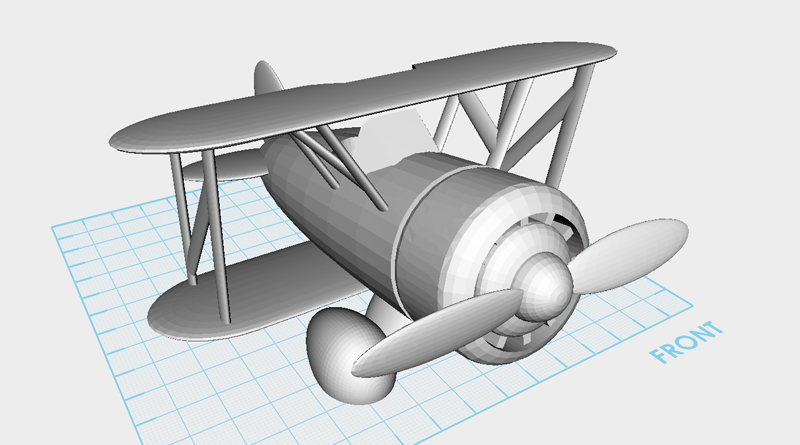
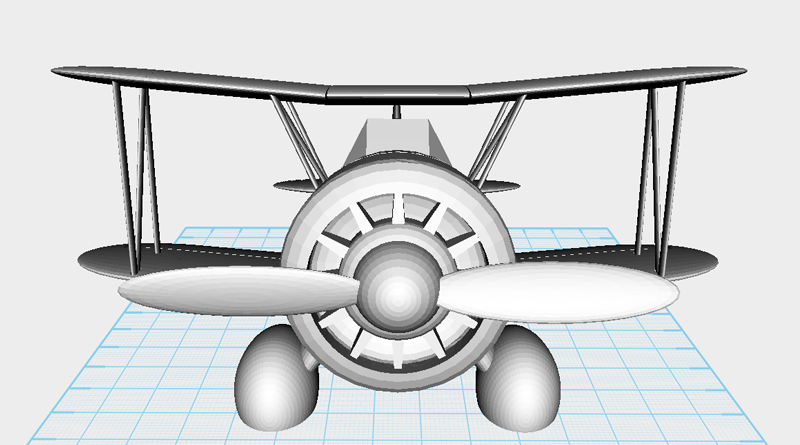
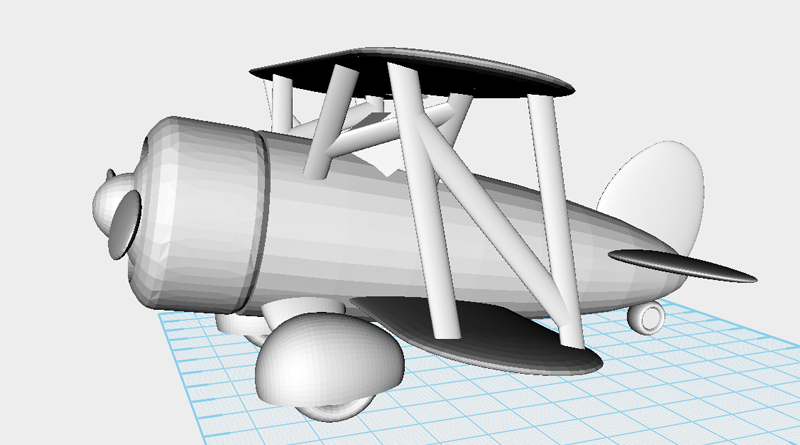 You have finished modeling the byplane, now you can get it ready to print!
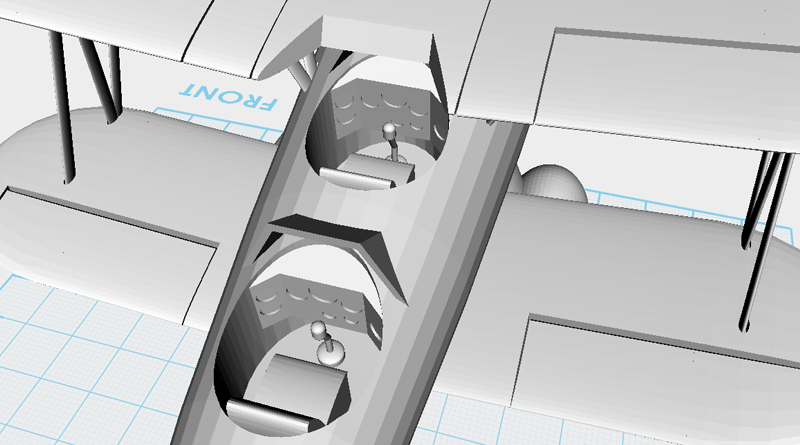
 Once you’re familiar with XYZmaker’s tools and modeling techniques you can try and add more details to your model. For example, you could add more detail to the cockpit and make it look more like a real-life byplane.