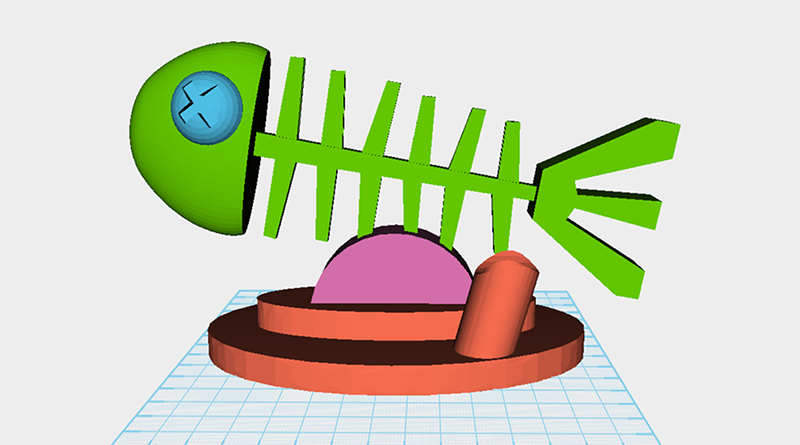
XYZmaker tutorial – Fish bone card holder part 1
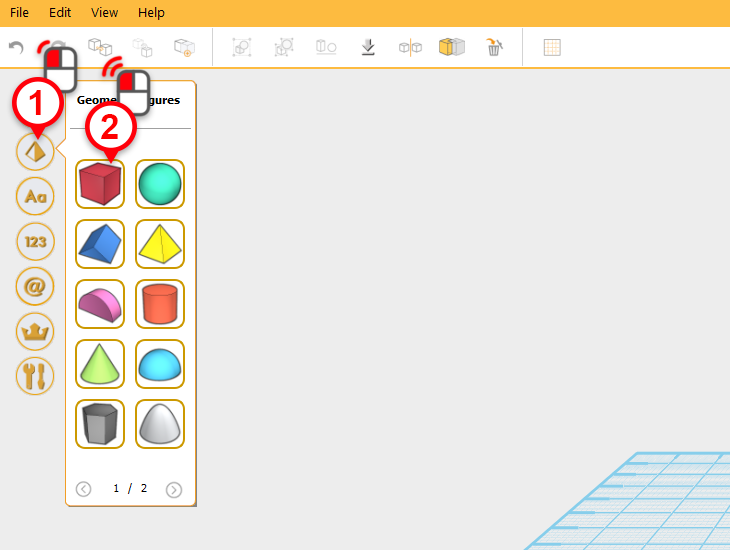
 In the center of the work plane, create a cube and choose a color in the properties window. From the properties window set the dimensions to X: 105, Y: 5, Z: 20 mm. This part will be called backbone.
 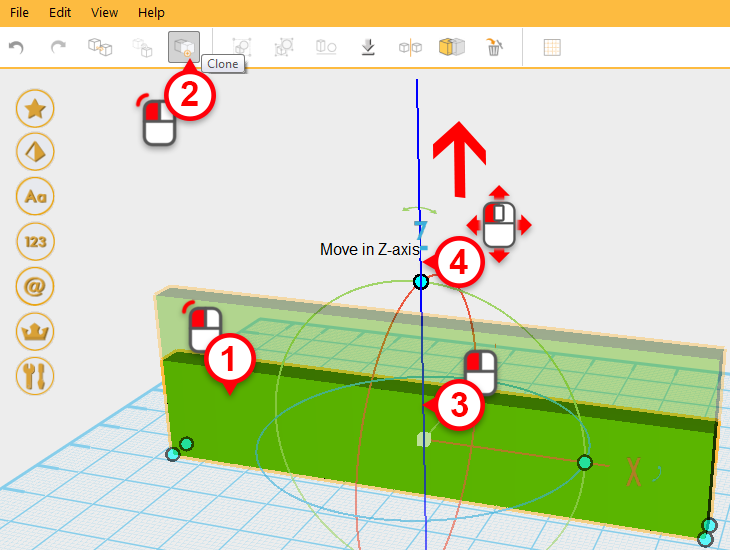 Clone backbone (1&2) using the clone tool, then use the mouse button to click and hold the blue Z axis line(3). As shown, drag the model up slightly (4) along this Z axis line.
 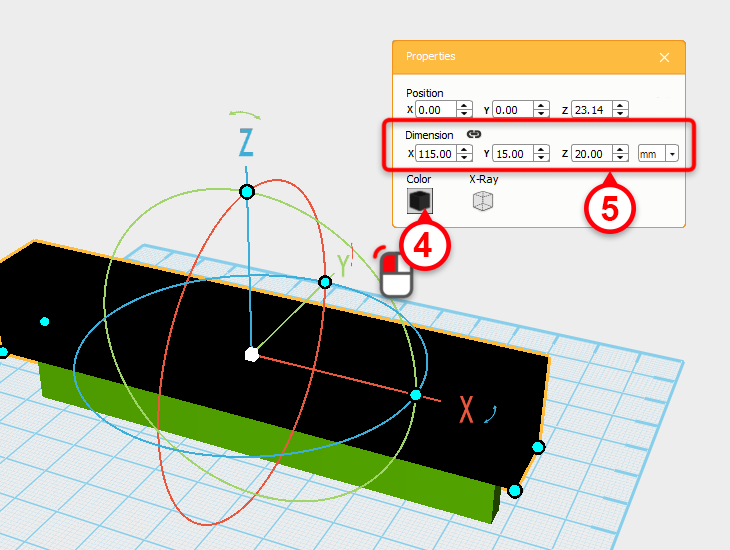 Take the cloned backbone, and in the properties window, change its dimensions to X: 115,Y: 15,Z: 20 mm, and color to black (4&5). Call this the cutting part.
Tip: You can also use the controller orb to freely adjust the part’s X and Y dimensions, you just need to make the cloned part slightly larger than the origin.
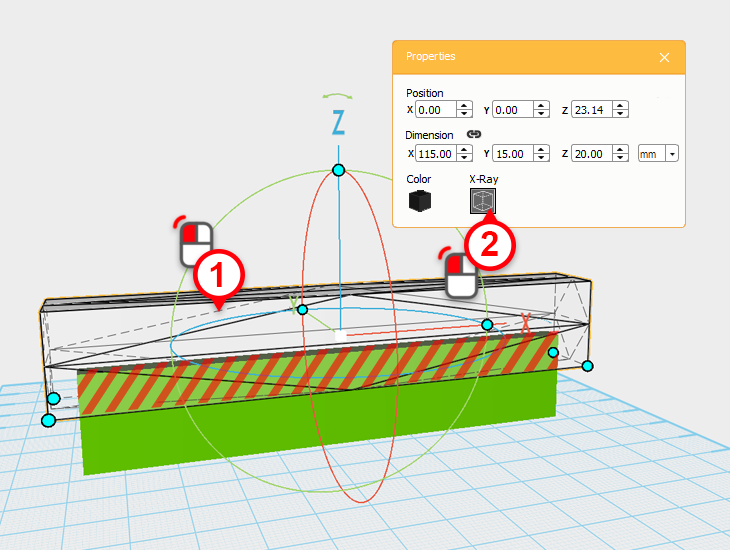 Select cutting part (1) and click on X-Ray in the Properties window (2). Now you can clearly see where the backbone and cutting part are overlapping.
 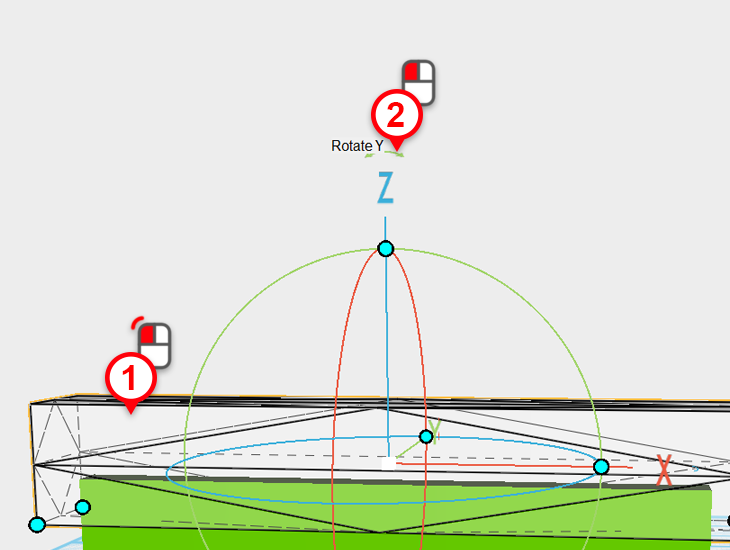 Select cutting part (1), then click and hold the arrow above the Z(2), drag the cursor down to rotate the part.
 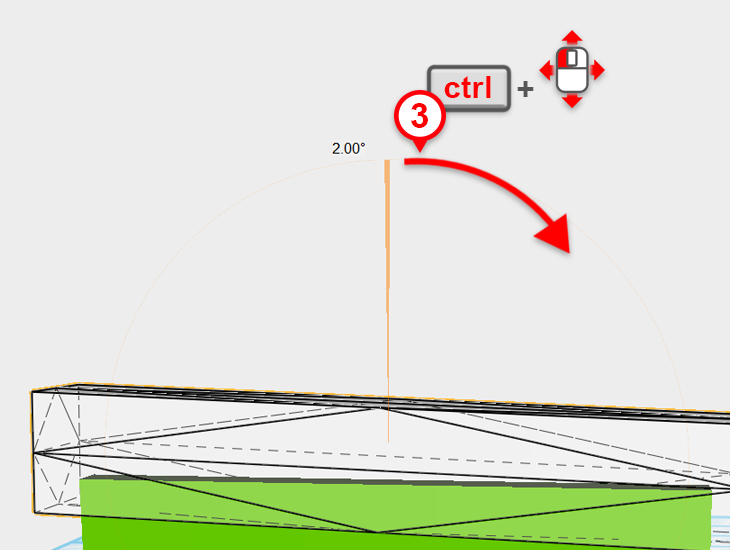 When you start dragging the cursor down, the object will begin to rotate. At the same time, press and hold the ctrl button on your keyboard to rotate the object in 1 degree increments(3). Rotate the cutting part a total of 2 degrees.
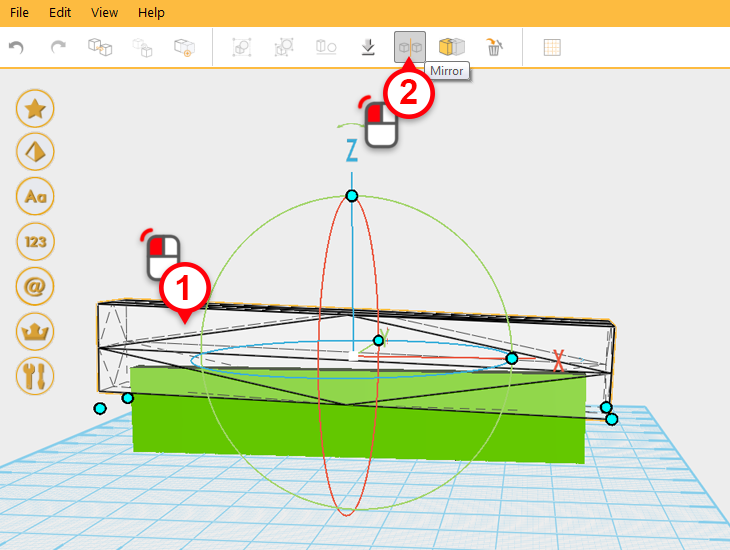
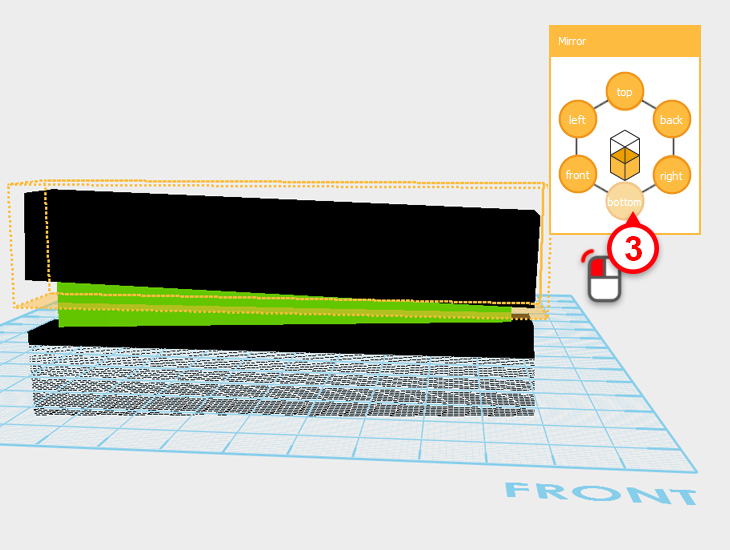 Select the cutting part(1) and click on the mirror button(2). When you do this a mirror window will be displayed. In the mirror window, click on the bottom button, this will create another cutting part mirrored downwards.
 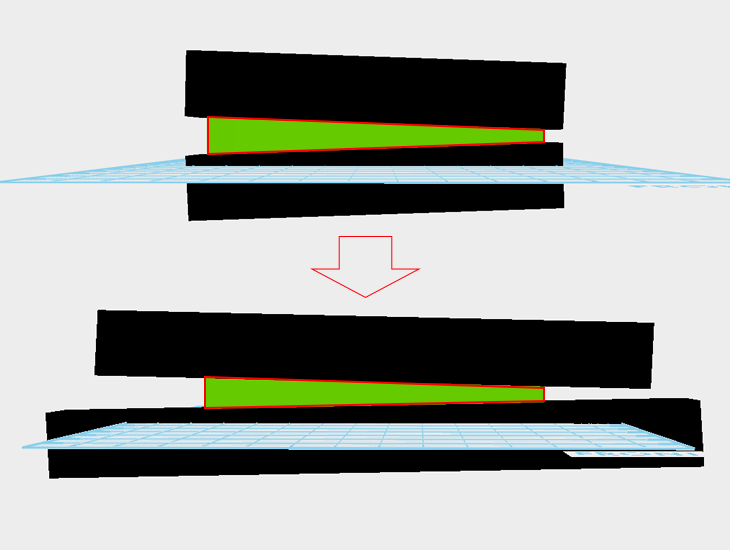 Drag both the cutting parts X axes to make them longer – this will make the incline a bit more gentle.
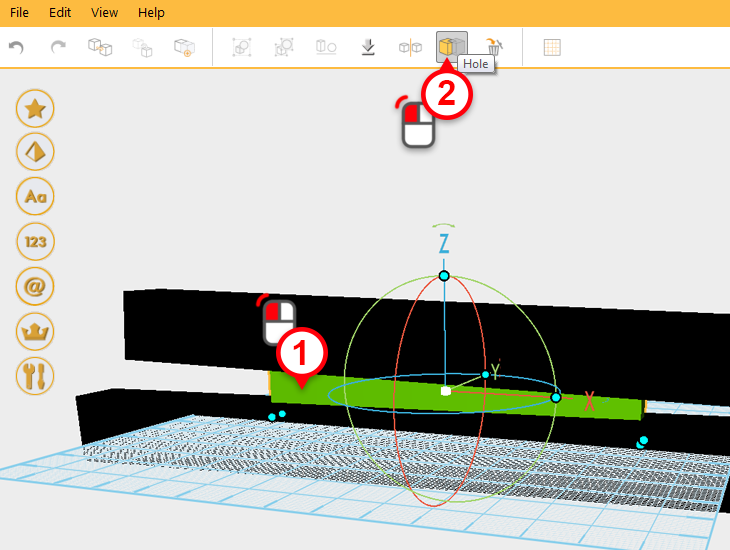
 Select the backbone (1) and click on the Hole button(2). Next, select the cutting part(3) on the top, and click on the hole button again(4) – this will cut the backbone into shape.
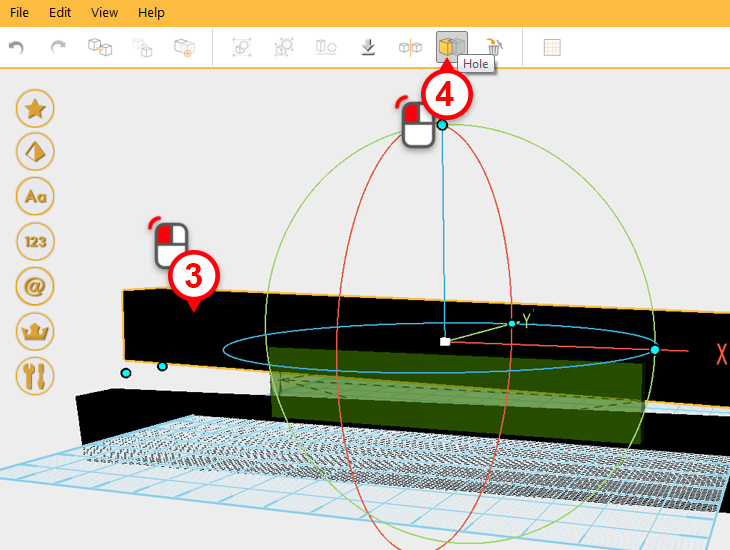
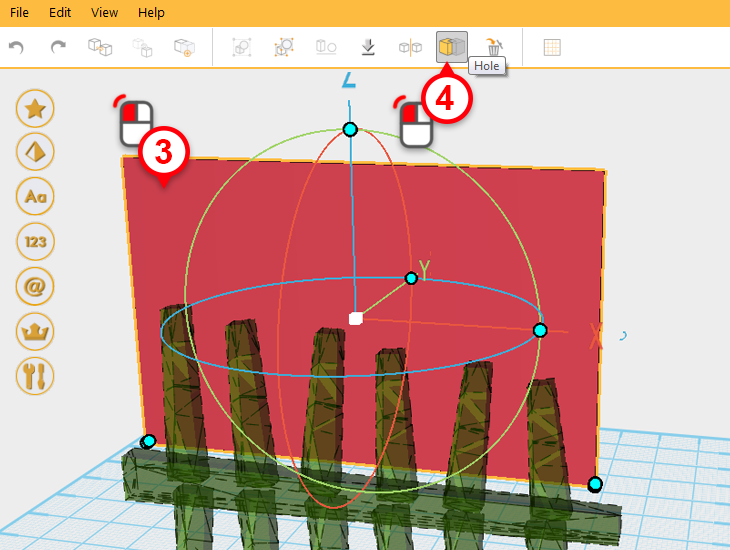
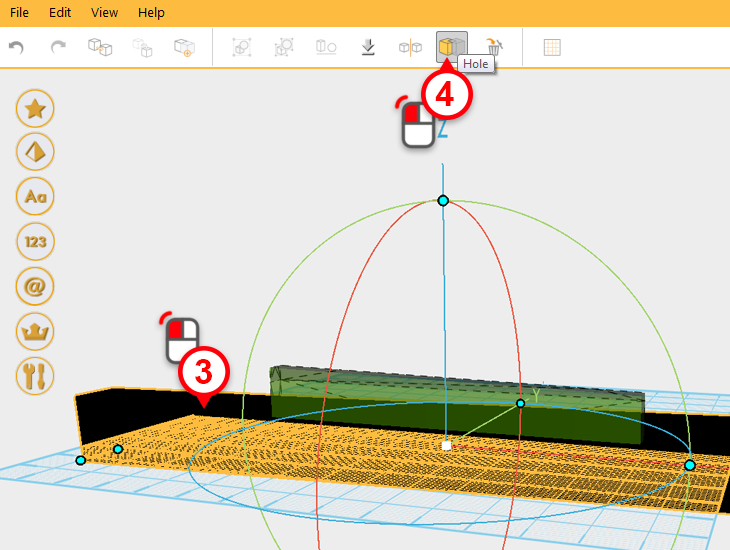 The same as you have just done, click on the cutting part on the bottom(1), and use the hole button to cut the backbone into shape (2-4).
 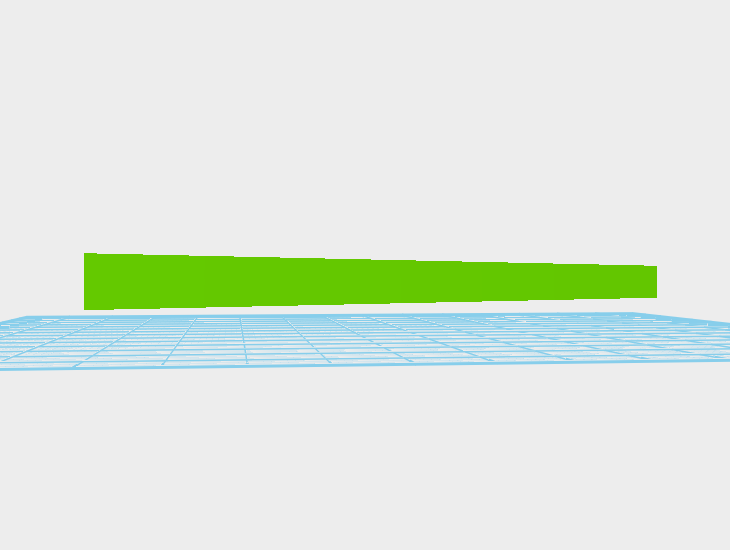 After finishing the backbone it should look as above.
 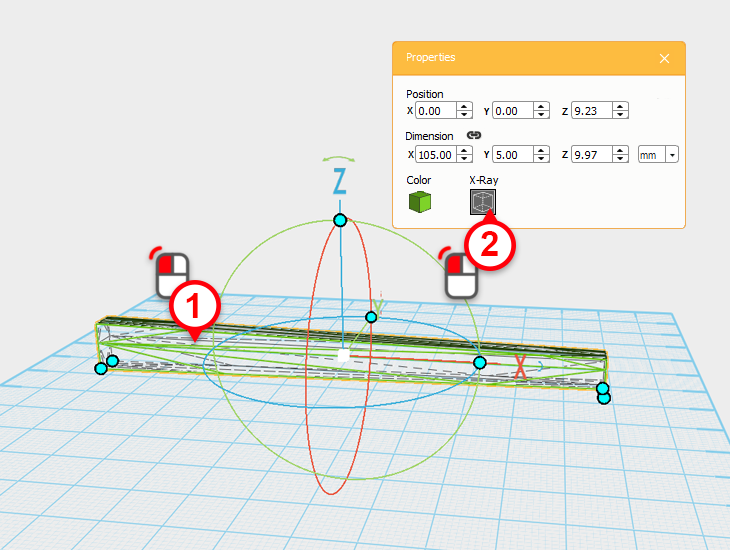 Next you want to use the same method to create the various parts of the rib cage. First select the backbone(1), then click on the X-Ray icon (2) to make the model transparent. This will make it easier to see when you model other parts that intersect with the backbone.
 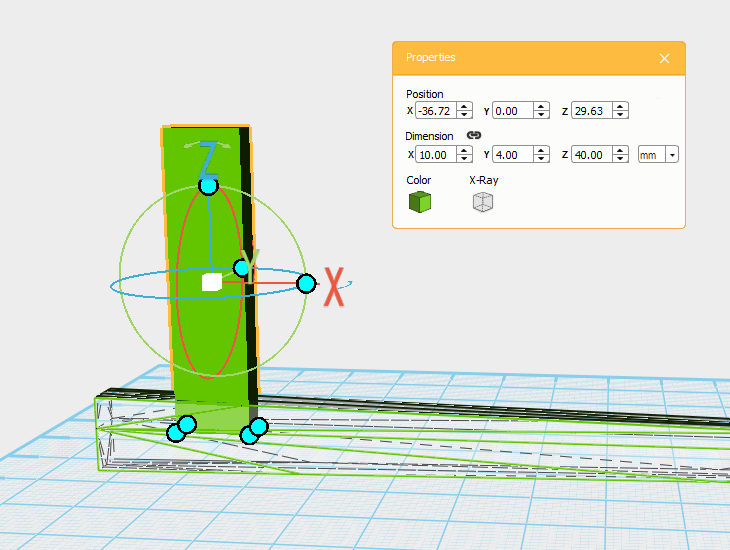 In the center of the plane, create a cube and change the dimensions to X: 10, Y: 4, Z: 40 mm. Set the color to the same as the backbone you made previously, and move it to the same position as displayed in the picture above. You’ll call this part the rib cage.
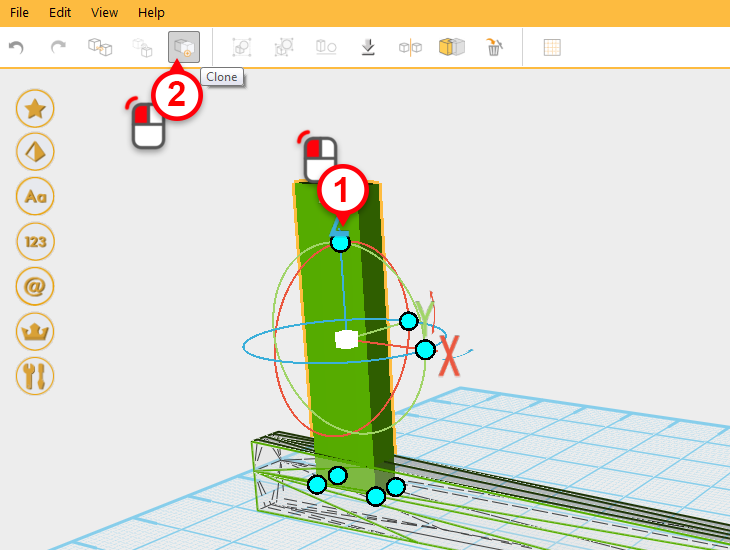
 Select the rib cage(1) and click on the clone icon(2), then use the controller orb to enlarge the cloned part. Next, move the cloned part slightly along the X axis. You’ll call this new part the cutting part.
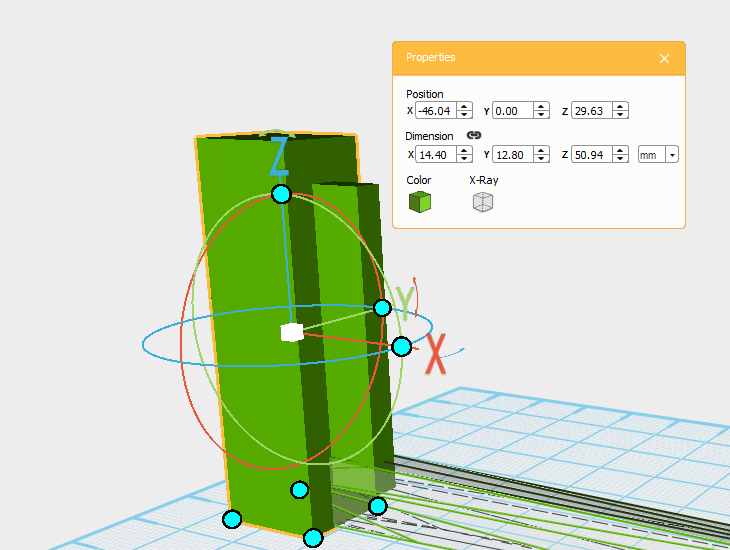
 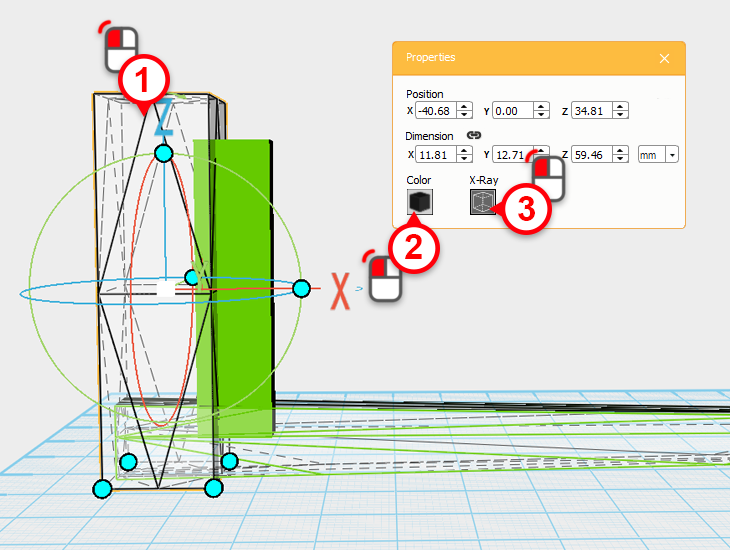 Select the cutting part (1) and change its color to black(2). Next, in the properties window, click on the X-Ray(3) so that you can see the original overlapping rib cage part. Where the two parts overlap is the area that will be cut.
 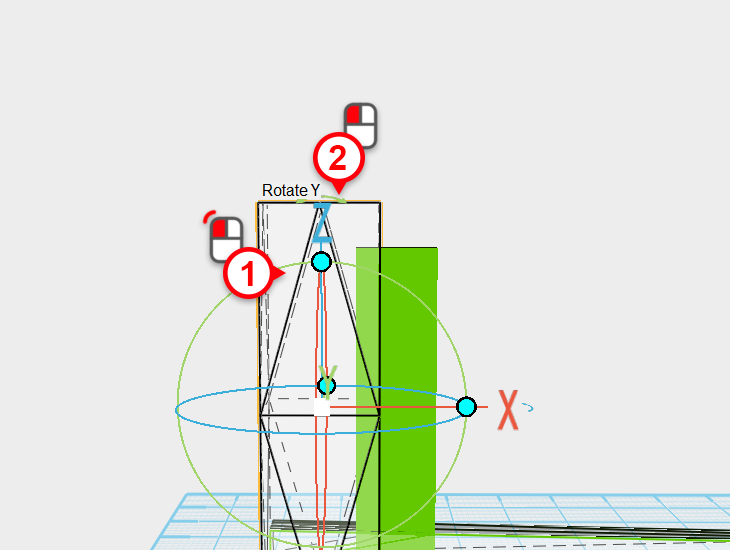 Select the cutting part(1), then click and drag the Z axis arrow (2) to start rotating the part downwards.
 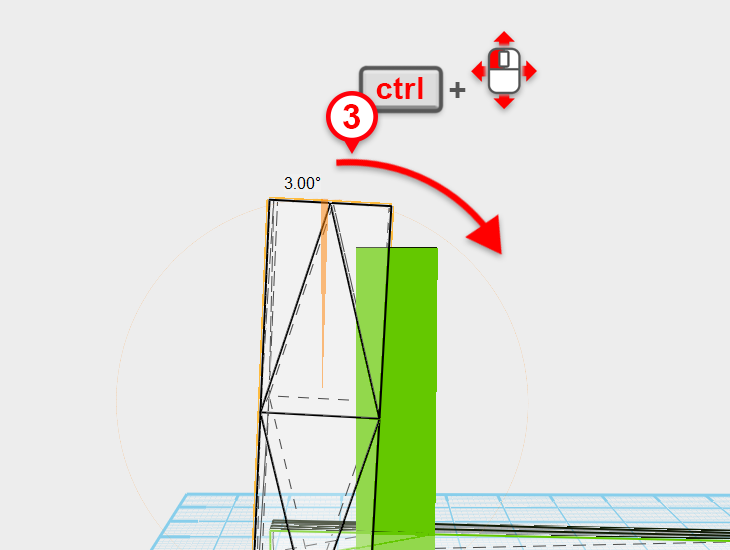 When you start rotating the part, press the and hold the ctrl button to rotate the part in 1 degree increments (3). Rotate the part a total of 3 degrees.
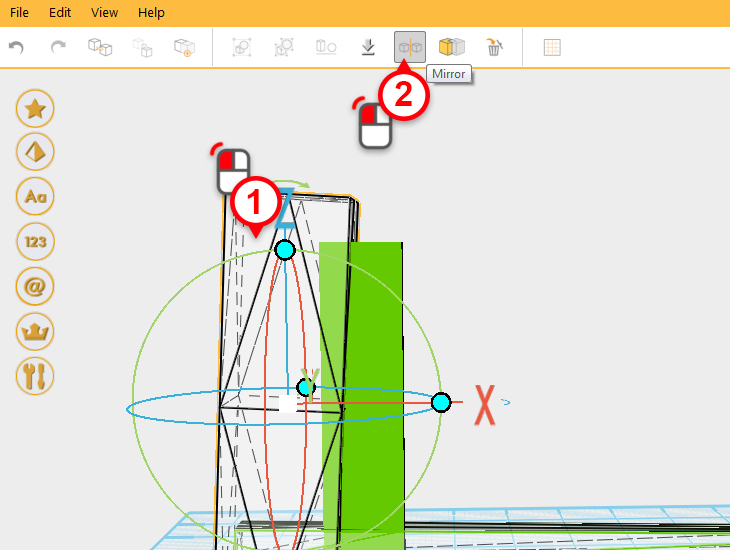
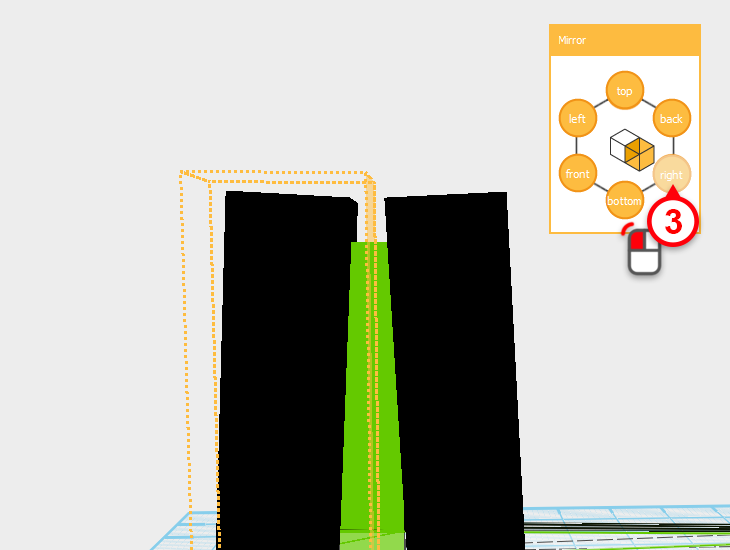 Select the cutting part (1) and click on the mirror button(2). When you do this a mirror window will appear. In the mirror window, click on the button labeled right (3) to create a cutting part mirrored on the right hand side.
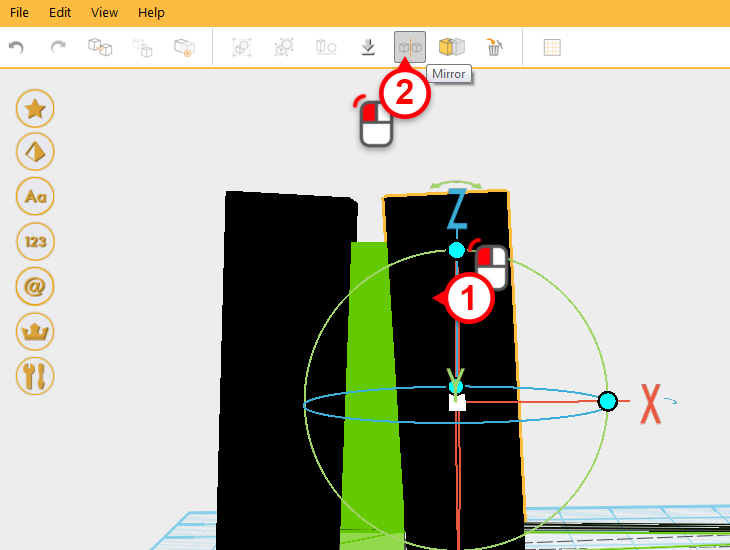
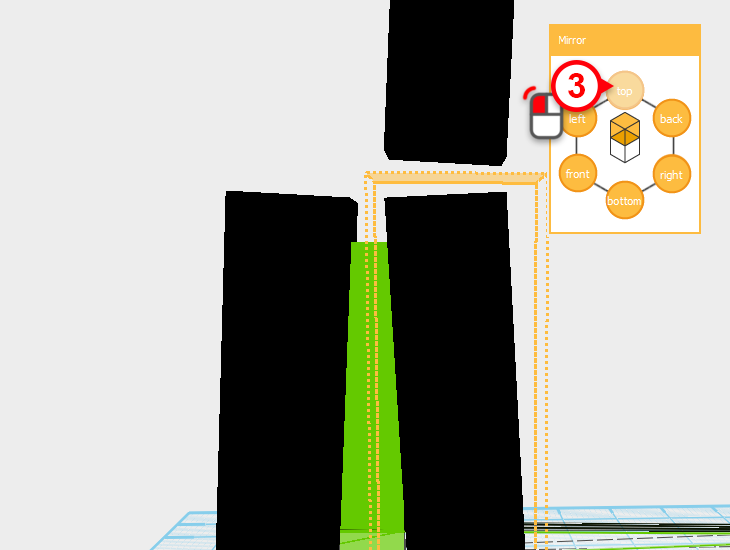 Click on the right-hand side cutting part (1) and press the mirror button (2). Next, in the mirror window, select the top (3) button to create another cutting part mirrored upwards.
 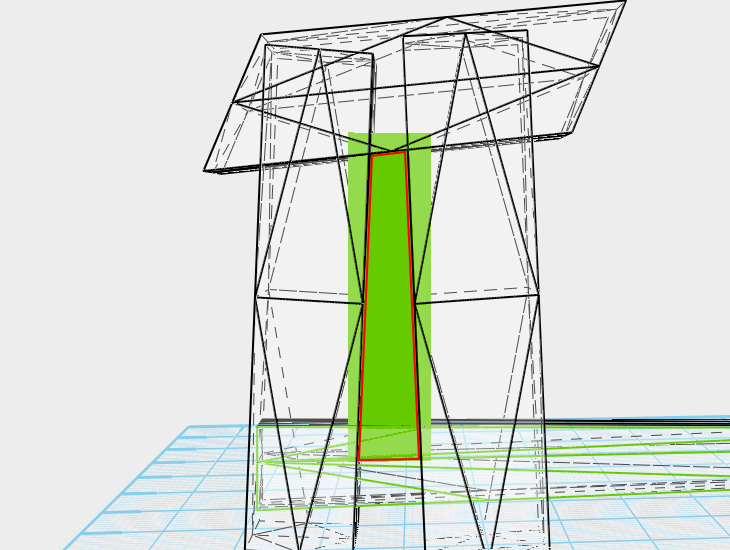 Adjust the third cutting part’s dimensions, angle, and position so that as above, the area outlined in red will be kept.
 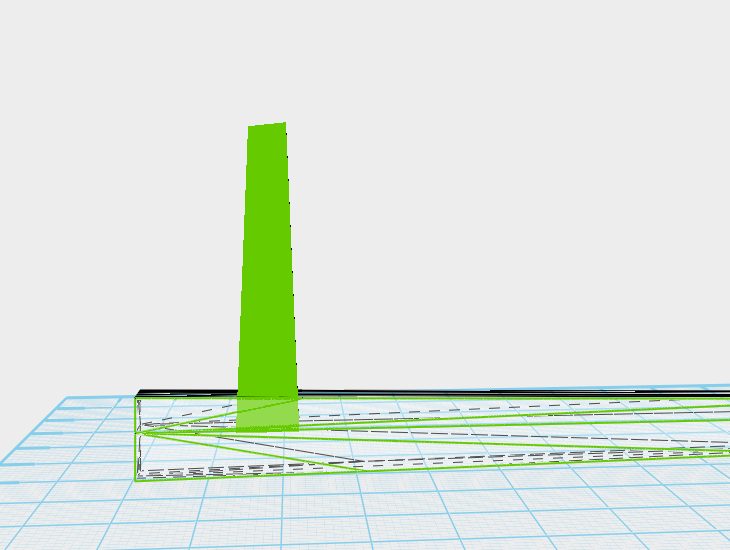 As shown above, use the three cutting parts and the hole function to cut away the undesired parts of the rib cage.
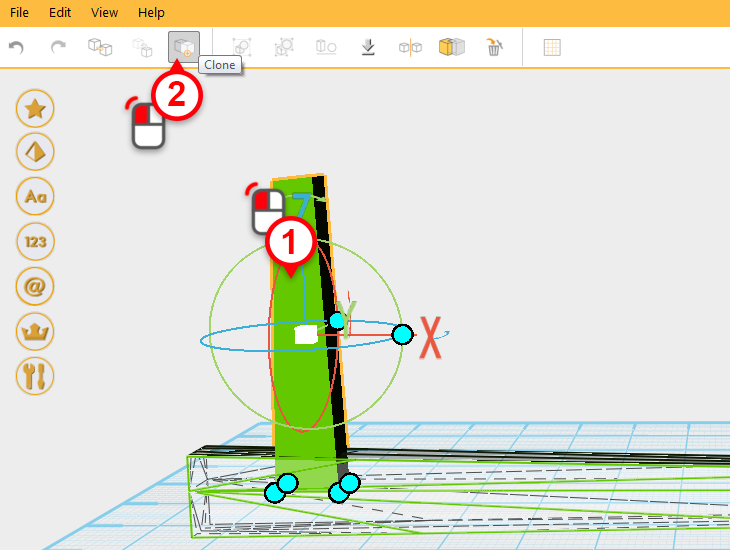
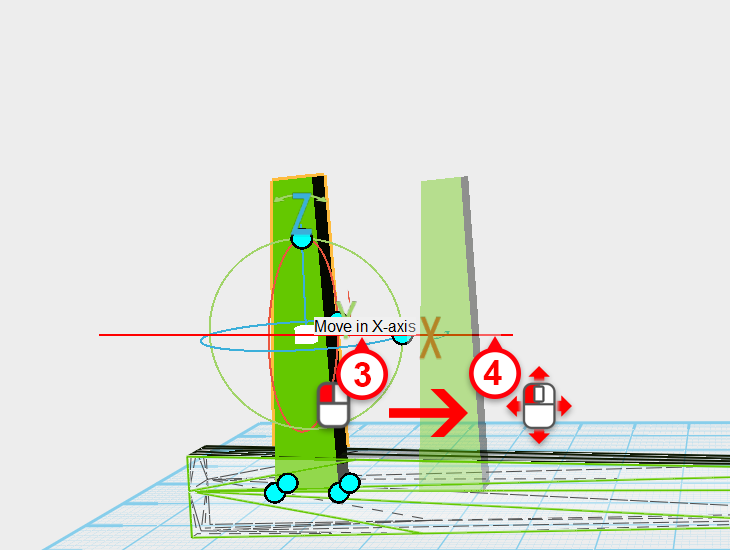 Clone the rib cage (1 & 2) and click and drag (3 & 4) the X axis controller to move the new part.
 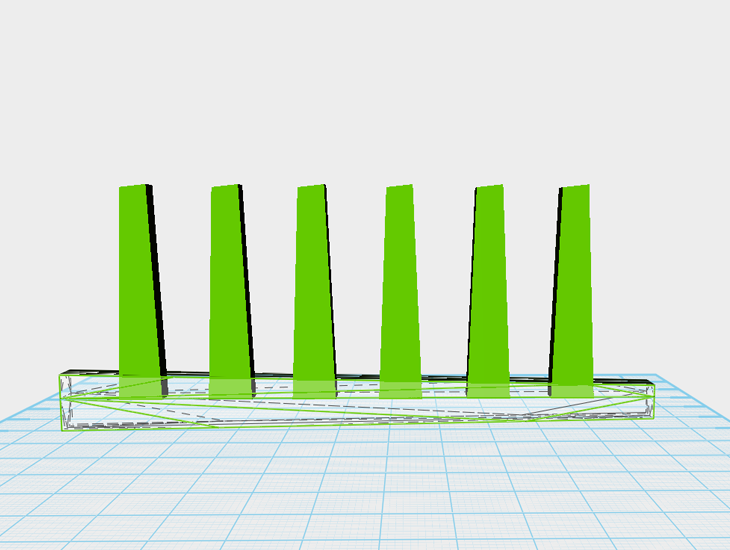 Repeat the cloning process to create and move 6 rib cage parts. Adjust all of the rib cages’ positions using the X axis controller so that they are roughly at an equal distance.
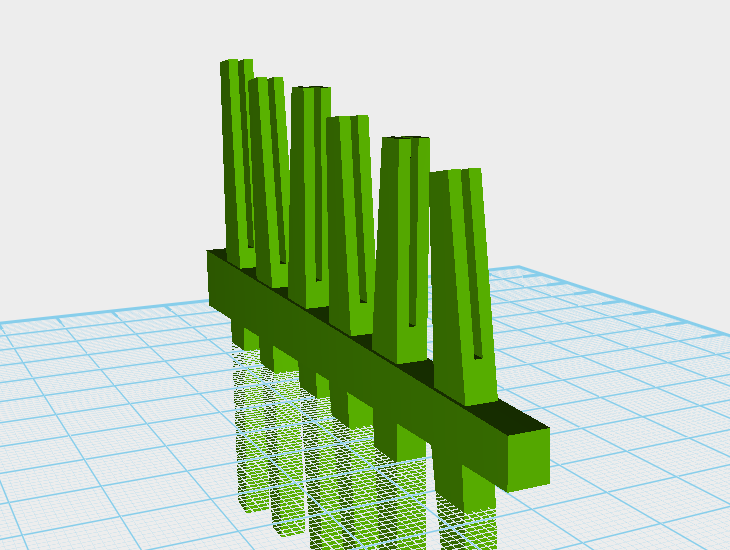
 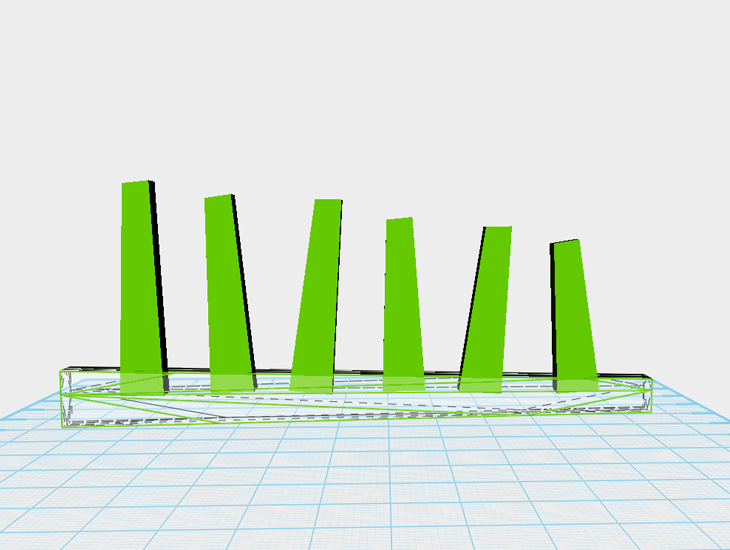 Separately adjust every rib cage’s angle, length, and position to make ribs go from high to low. At the same time, try and keep a certain randomness to the size and angle as shown above.
 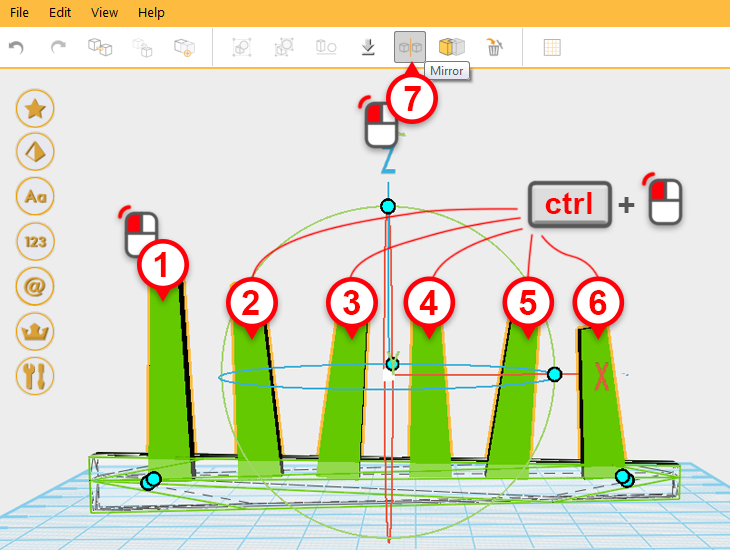 Click and hold (ctrl) while using the mouse to select all the rib cage parts (1-6), then click the mirror button (7).
 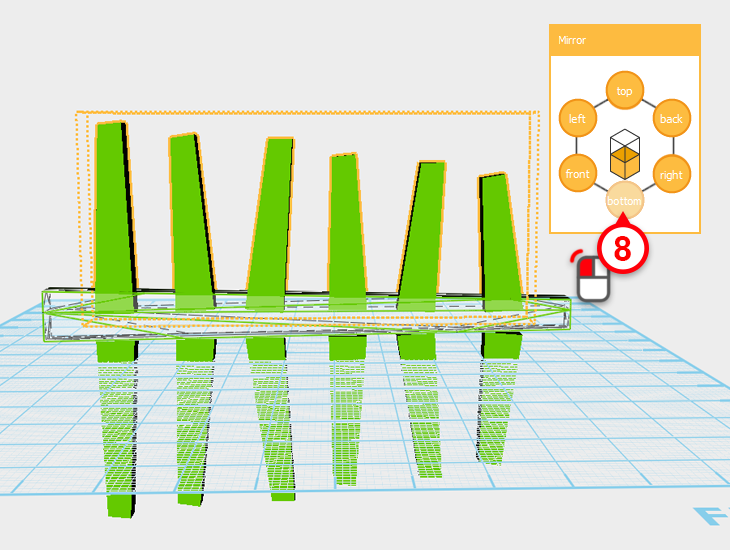 In the mirror window click on bottom button to reflect the rib cage downwards (8).
 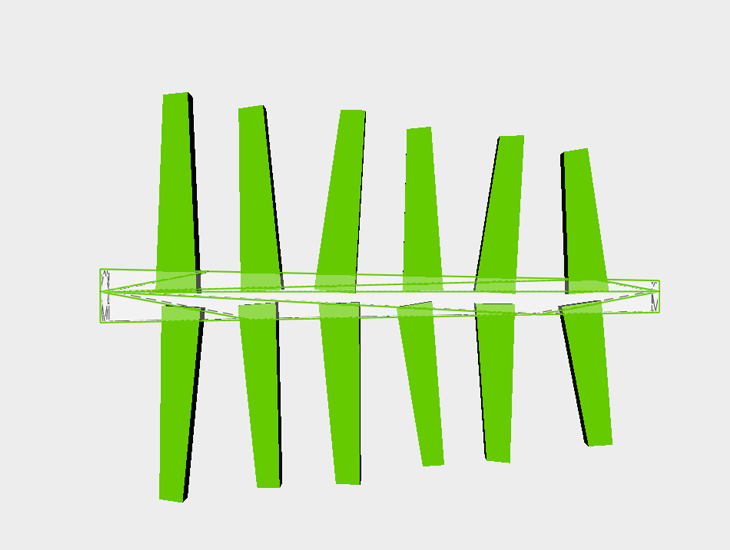 Separately select, move, rotate, and scale the new rib cage to give it a non-uniform feeling, while at the same time ensuring the rib cage parts overlap with the back bone
 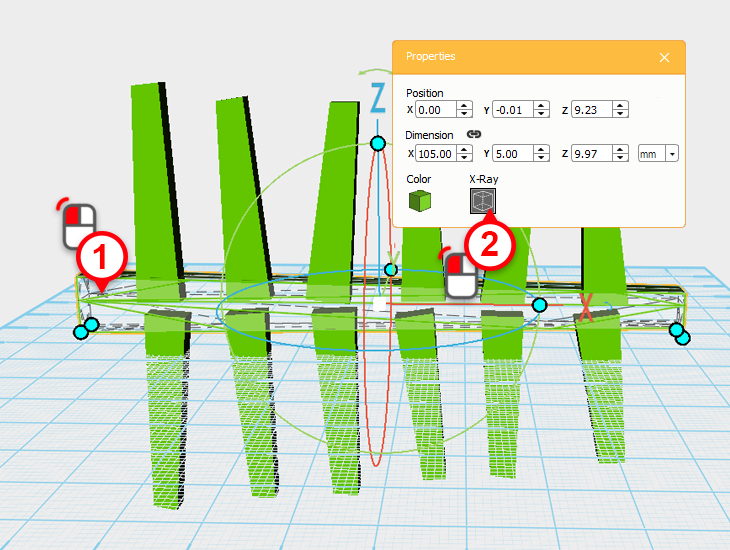 Select the backbone, then click on the (x-ray) button to turn off transparency.
  Individually select all the rib cage and backbone components, then click on the (group) button to complete the fish body.
 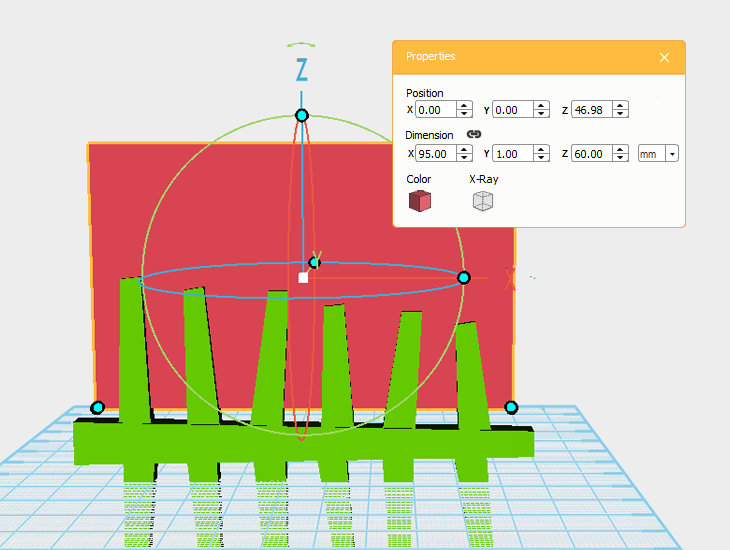 Next, you are going to create a groove in the fish body to put business cards or note paper. Create a cube, change its dimensions to X: 95,Y: 1,Z: 60 mm in the properties window, then move it to the position shown above.
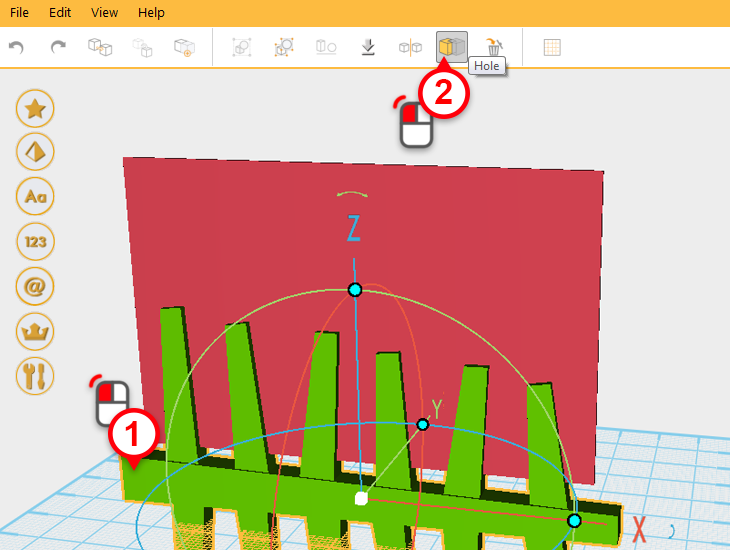
 Select the fish body (1) and click on the hole button(2). Next, select the cube you just created(3) and click the hole button again (4) to create the groove.
 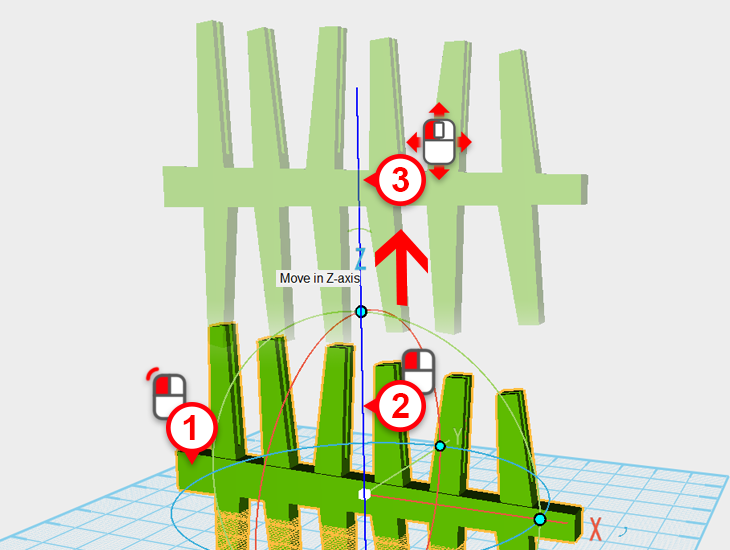 Select the fish body, then using the mouse, click and drag the part up along the Z axis.