XYZmaker tutorial – Robot Hand part 6
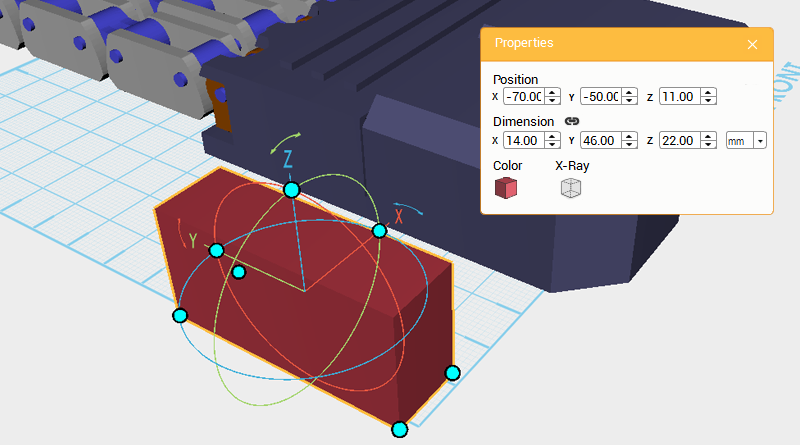 Next start creating the Thumb, for this use the Fingers and Knuckles produced earlier to create this part, but because the base of the thumb is a little different from the other fingers, you will need to produce a new one. Create a Cube and change its dimensions to X: 14,Y: 46,Z: 22 mm, and position to X: -70,Y: -50,Z: 11. Call this part the Thumb base.
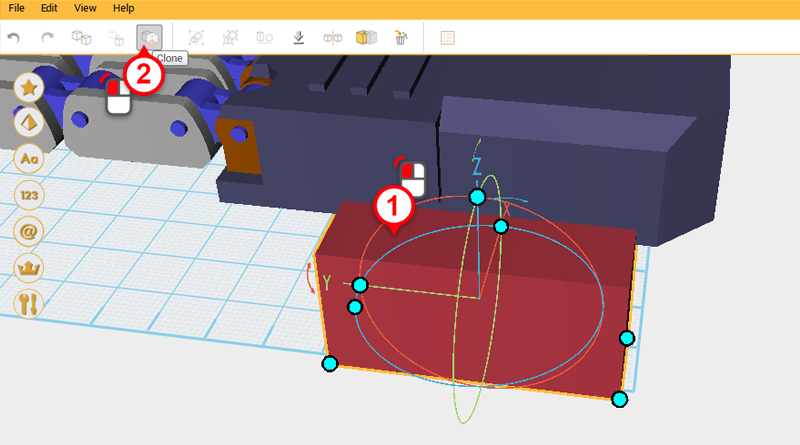
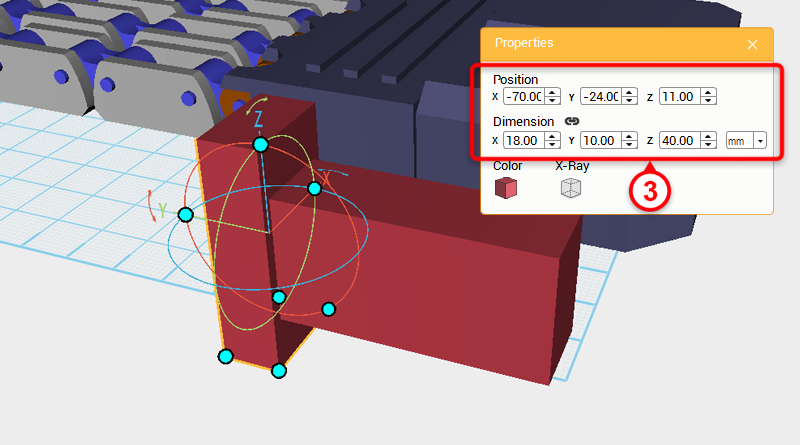 Select the Thumb base and click Clone. Next change the part’s dimensions to X: 18,Y: 10,Z: 40 mm and position to X: -70,Y: -24,Z: 11. Call this part the Cutting part.
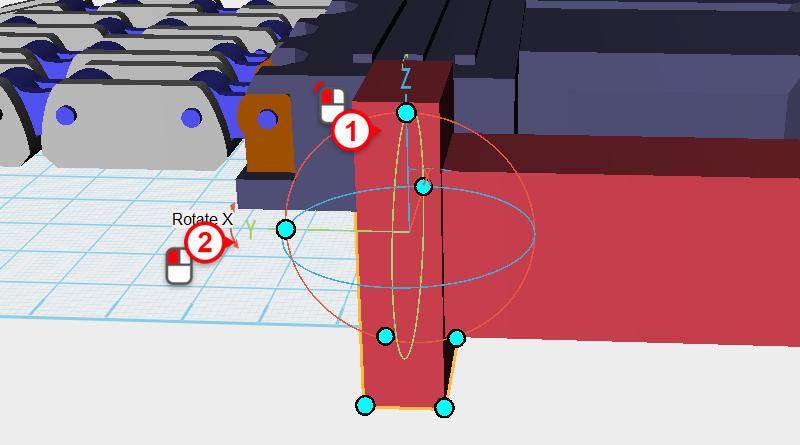
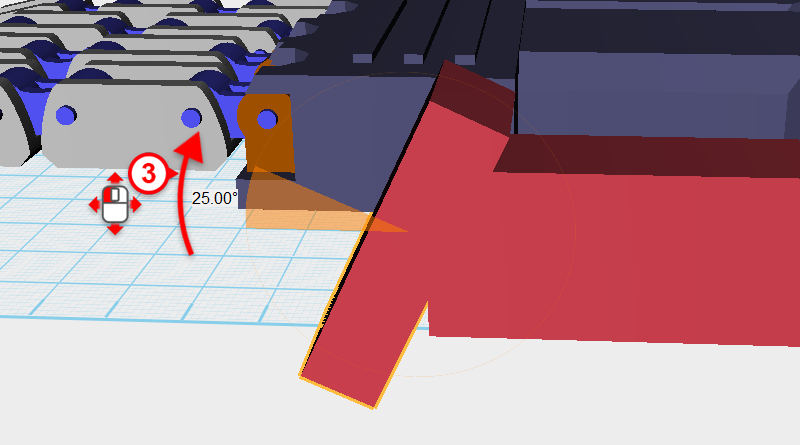 Select the Cutting part, click and hold the arrow next to the Y-axis line and drag it, rotating the part 25°.
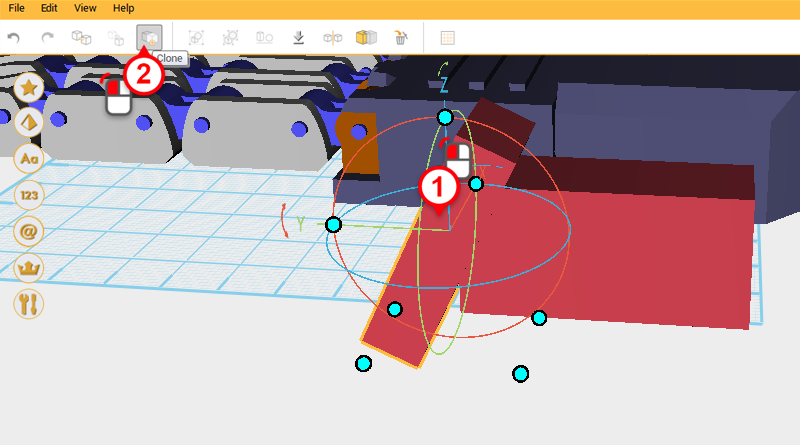
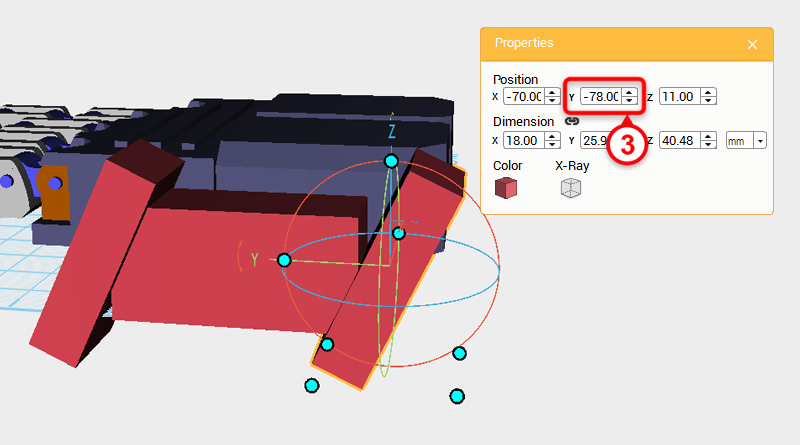 Select the Cutting part and click Clone. Next, change the Y-axis position to -78.
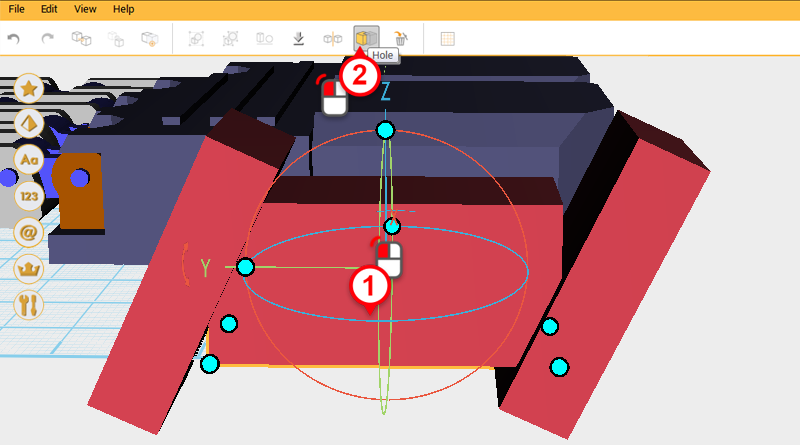
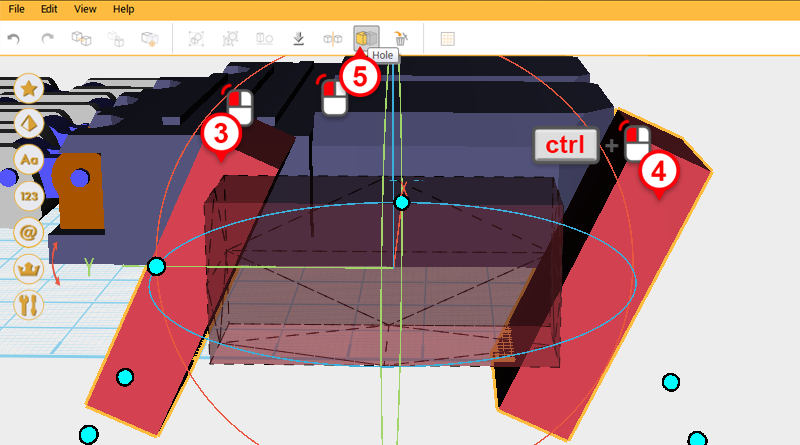
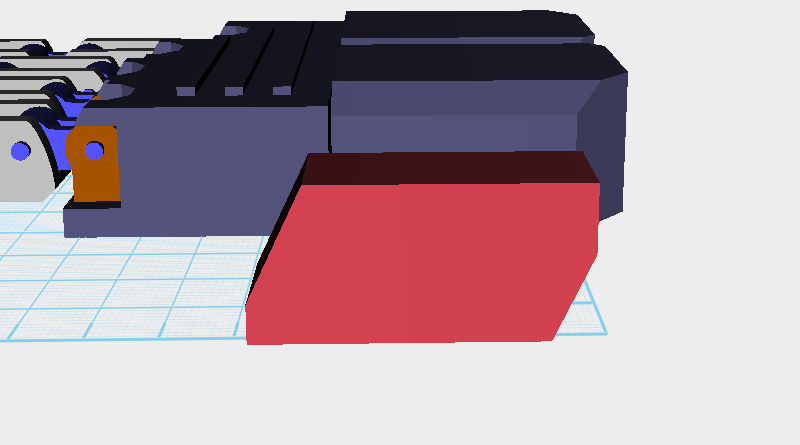 Use the two Cutting parts and the Hole function to cut away from the Thumb base as shown above.
 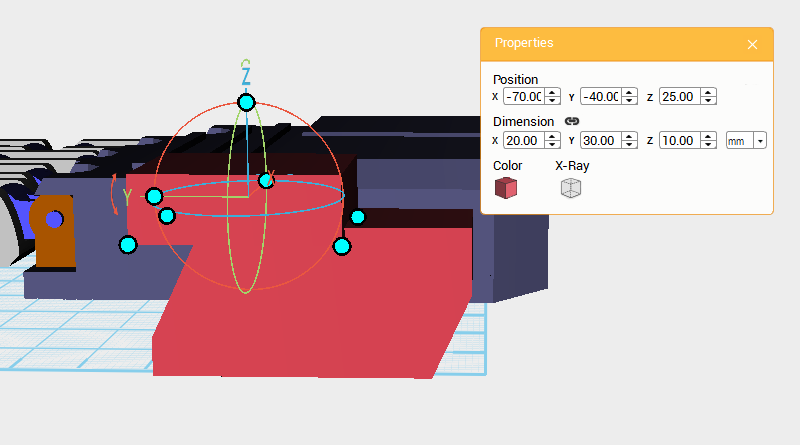 Create a Cube and change its dimensions to X: 20,Y: 30,Z: 10 mm and position to X: -70,Y: -40,Z: 25. Call this part the Cutting part.
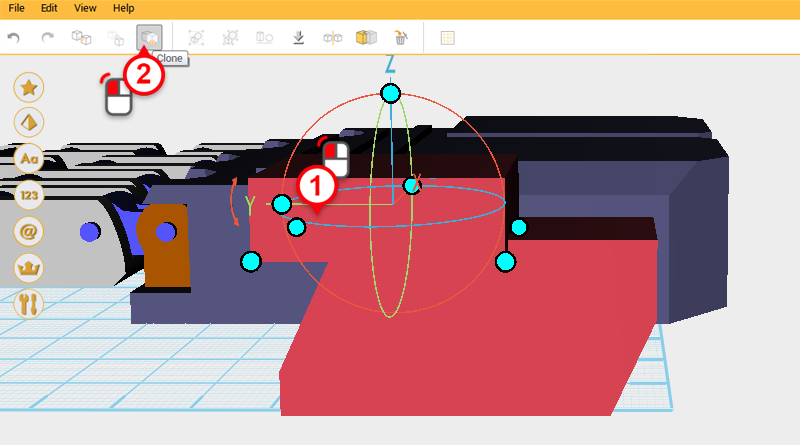
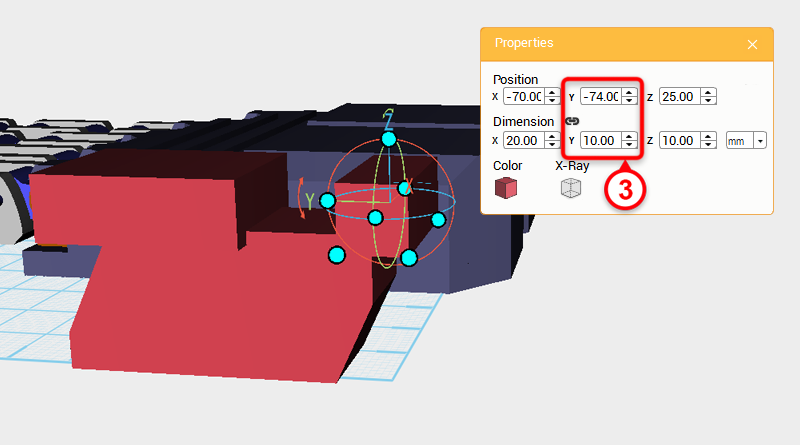 Select the Cutting part and click Clone. Change the cloned part’s Y-axis dimension to 10mm and Y-axis position to -74.
 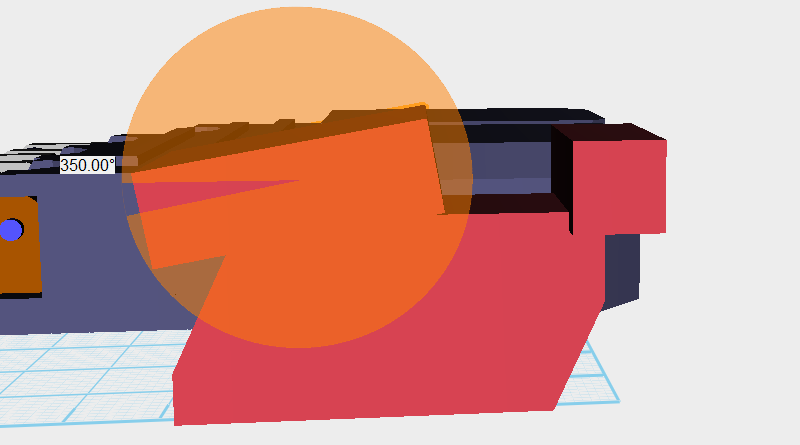 Select the Cutting part in the center-left of the image above and rotate it 350° along the X-axis.
 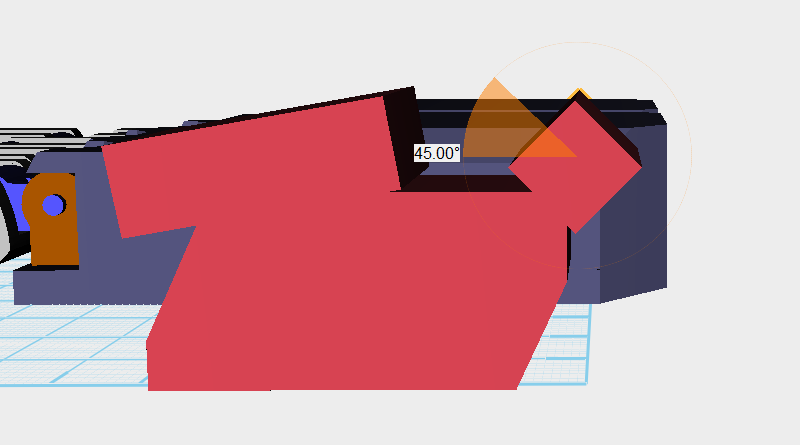 Select the Cutting part in the center-right of the image above and rotate it 45° along the X-axis.
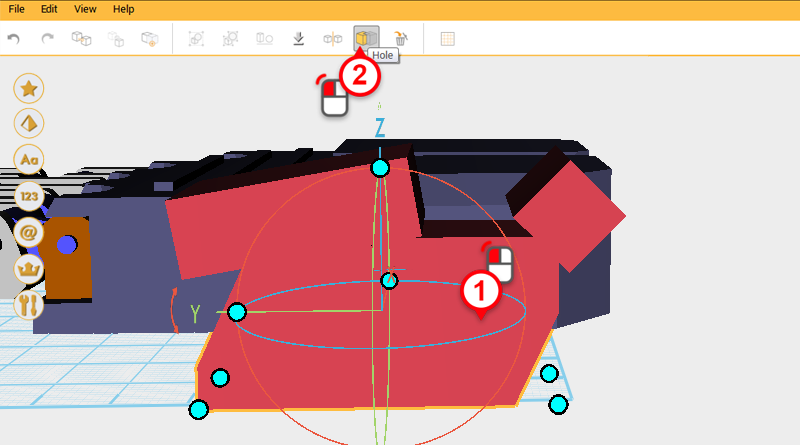
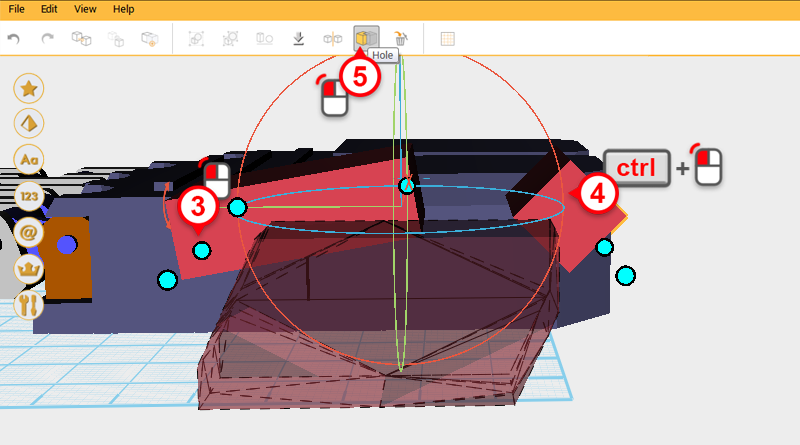
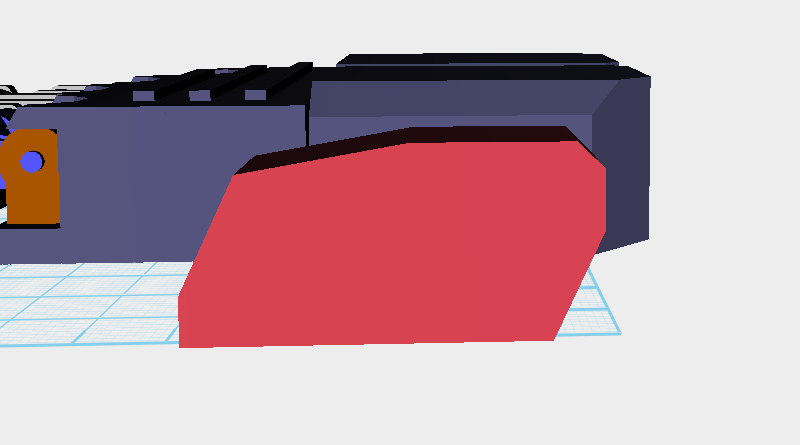 Use the two Cutting parts and the Hole function to continue cutting away from the Thumb base.
 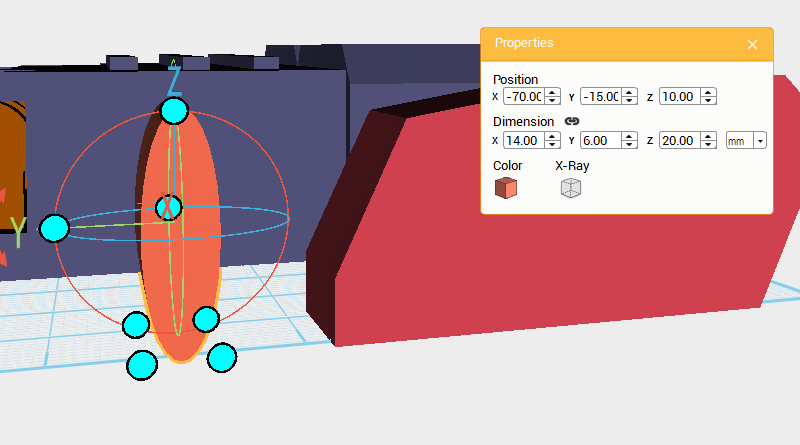 Create a Cylinder, rotate it 90° along the Y-axis, then change its dimensions to X: 14,Y: 6,Z: 20 mm and position to X: -70,Y: -15,Z: 10.
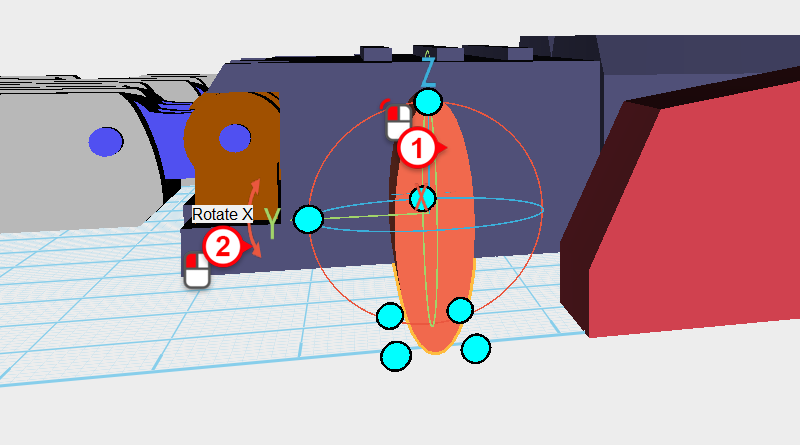
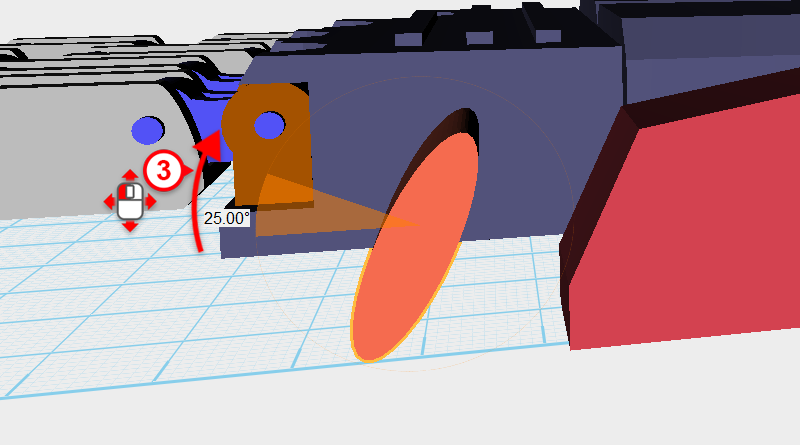 Select the Cylinder and click and drag the arrow next to the Y-axis symbol in the bounding box to rotate the part 25°.
 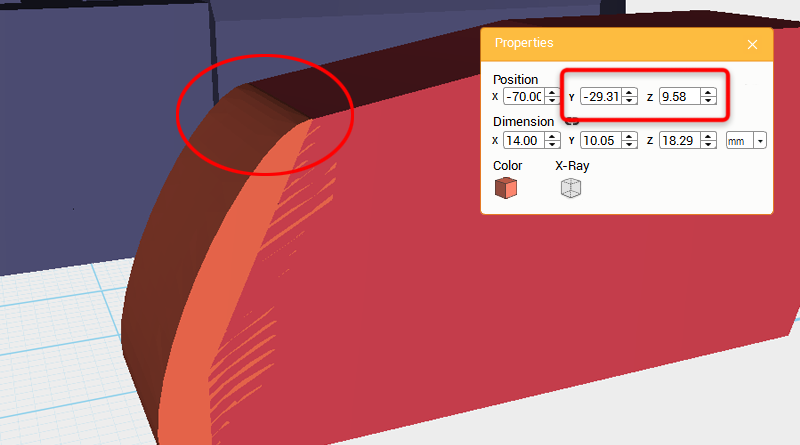 Next, gradually adjust the Y and Z-axis positions so that the Cylinder and the Thumb base meet and there is no gap in the area circled in red. The positions that we have used are Y: -29.31,Z: 9.58.
 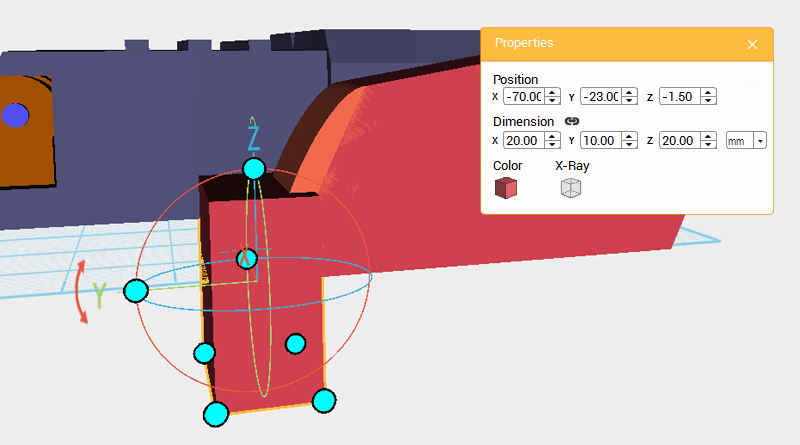 Create a Cube and change its dimensions to X: 20,Y: 10,Z: 20 mm and position to X: -70,Y: -23,Z: -1.5. Call this the Cutting part.
 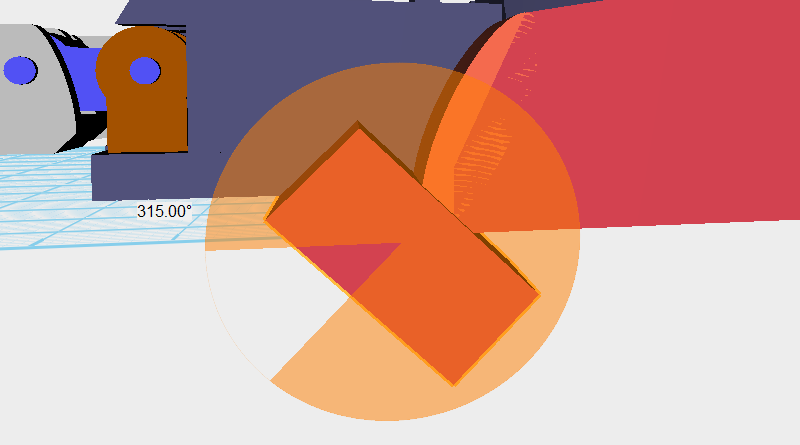 Select the Cutting part and rotate it 315° along the X-axis.
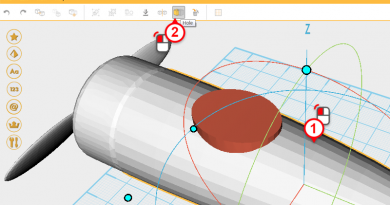
 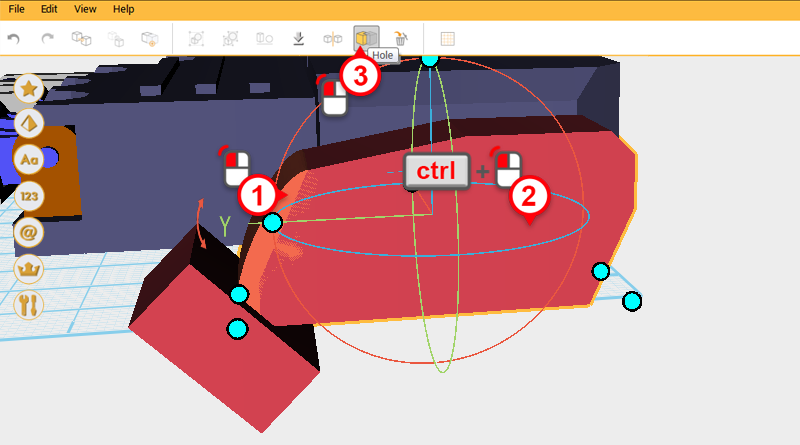 Select the Cylinder, hold down the ctrl key and individually select the Thumb base, then press Hole.
 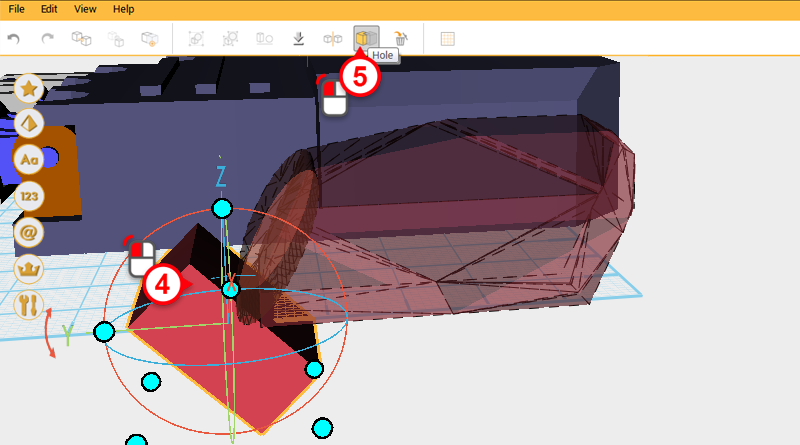 Select the Cutting part and click on Hole again to cut away from the Thumb base.
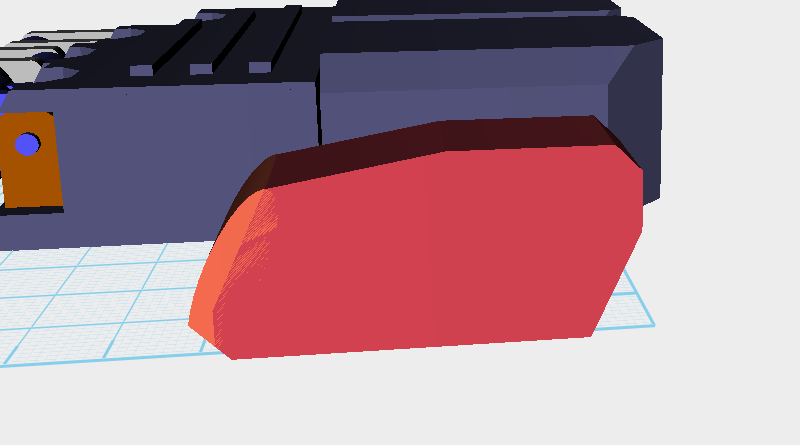
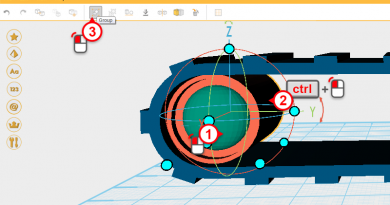
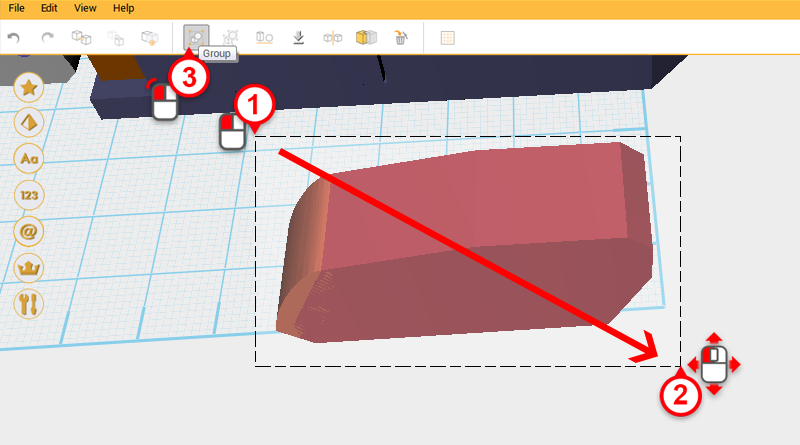 Drag select the parts shown in the image and click Group. The Thumb base is now complete.
 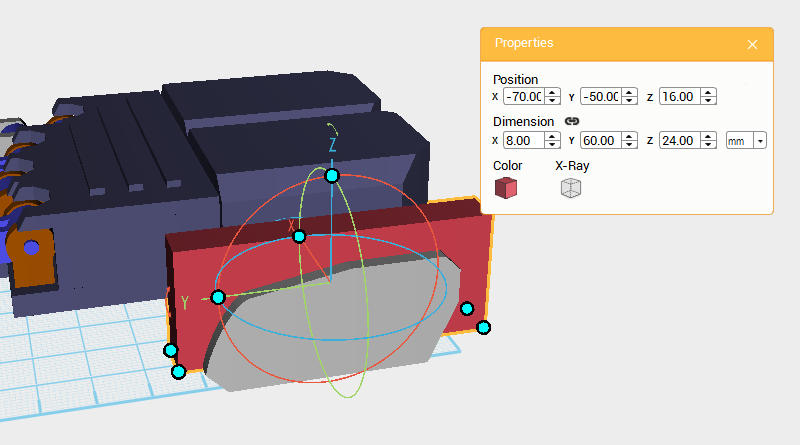 The same as before, cut away a trench from the Thumb base to make space for the knuckle joint. Create a Cube and change its dimensions to X: 8,Y: 60,Z: 24 mm, and position to X: -70,Y: -50,Z: 16. Call this the Cutting part.
 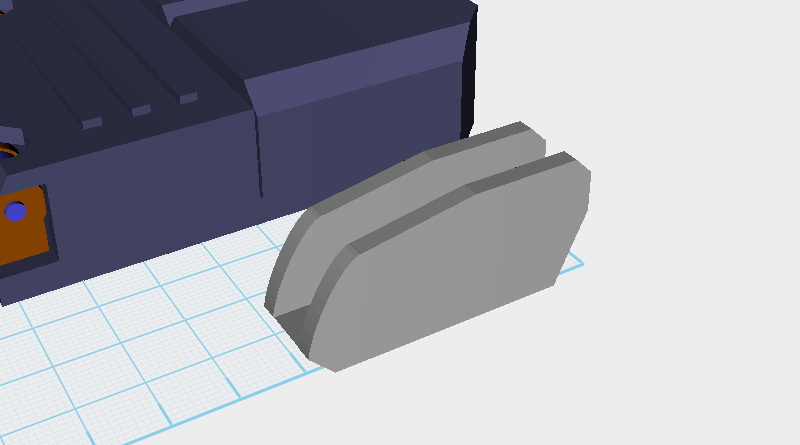 Use the Cutting tool and the Hole function to cut a trench into the Thumb base as shown in the image above.
 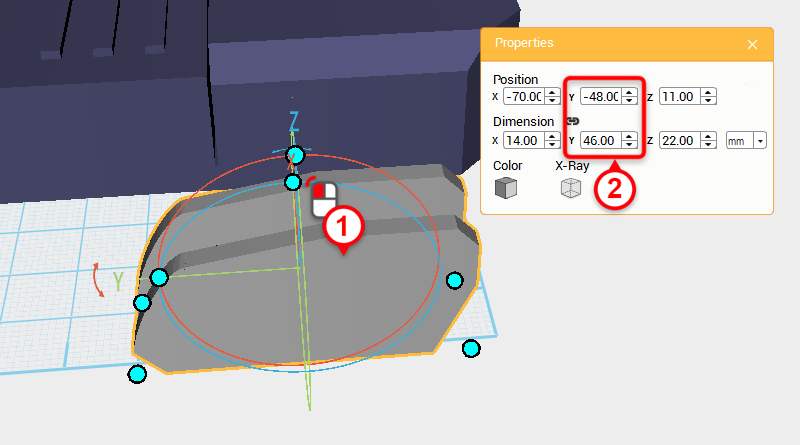 Select the Thumb base and change its Y-axis dimensions to 46mm and Y-axis position to -48.
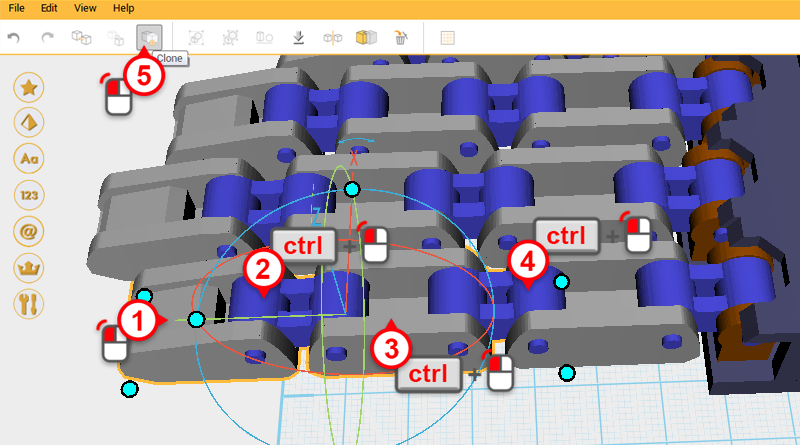
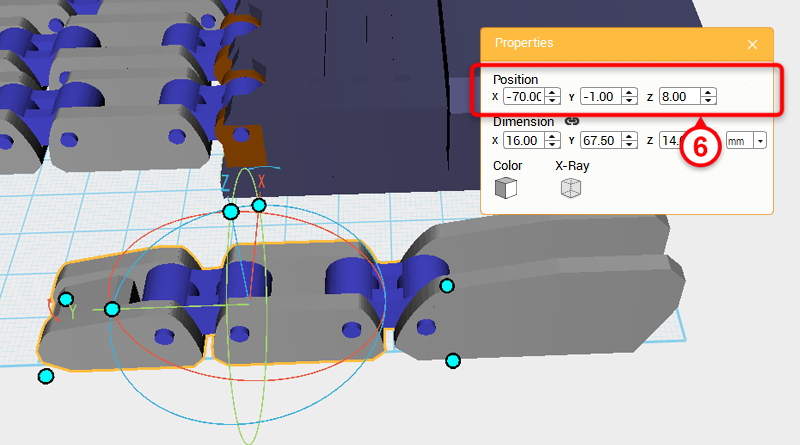 Select the Index fingers’s Finger tip, Finger joint A, and the two connecting Knuckles, then click Clone. Change this new selection of parts position to X: -70,Y: -1,Z: 8。

