XYZmaker tutorial – the Excavator part 6
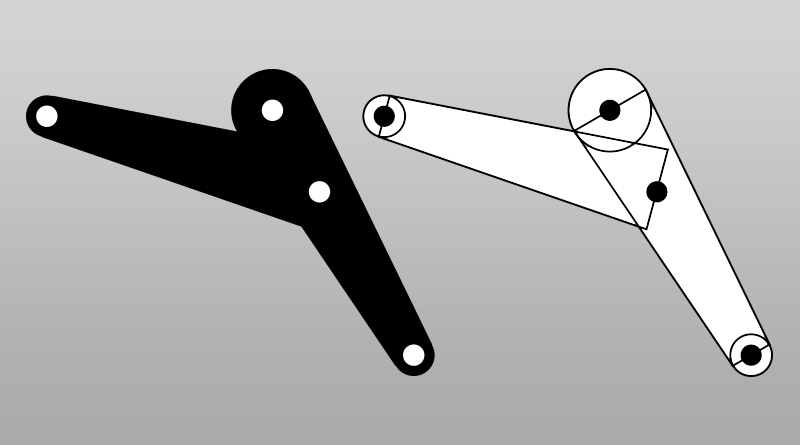 Before you start to make the boom, first in a 2D image plan how the excavator boom will be assembled. As shown in the image above, separate the structure into various shapes, and plan the location of the holes.
 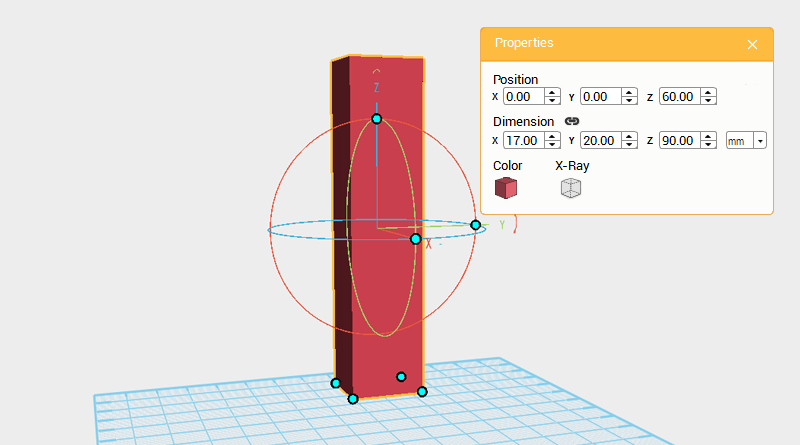 In XYZmaker open a new file and create a cube, adjust its dimensions to X: 17,Y: 20,Z: 90 mm and position to X: 0,Y: 0,Z: 60. Call this the boom.
 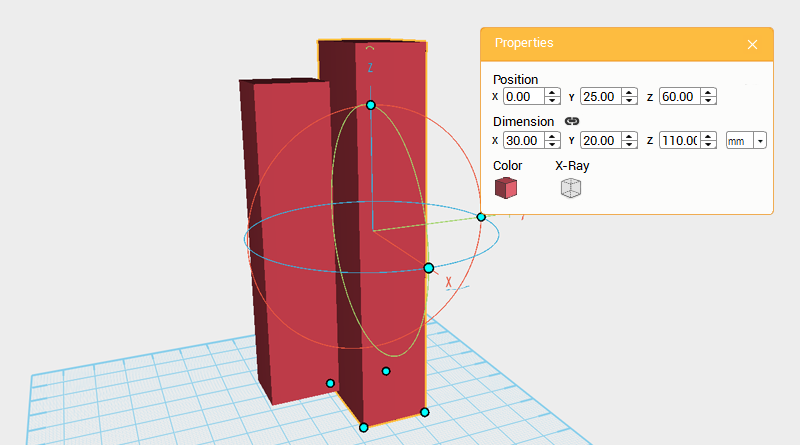 Create a cube and change the dimensions to X: 30,Y: 20,Z: 110 mm and position to X: 0,Y: 25,Z: 60. Call this part the cutting part.
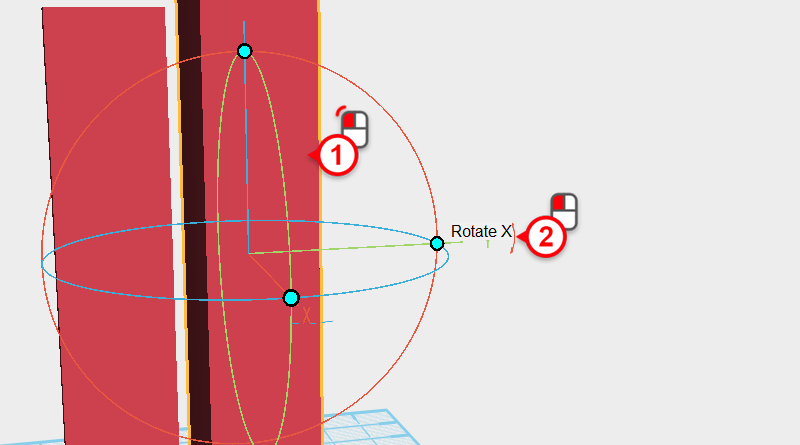
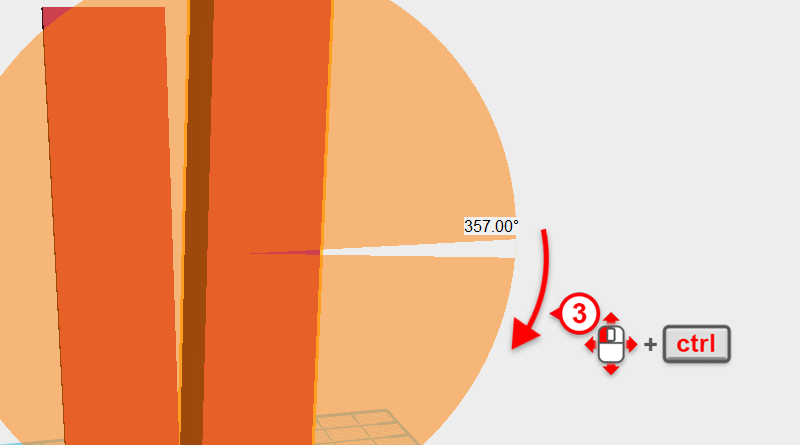 Select the cutting part and click and hold the arrow next to the Y axis in the control orb, then drag the arrow down with the mouse while holding ctrl and rotate the part to 357 °
Tip:Drag the mouse then hold down the ctrl key to rotate in increments of 1°.
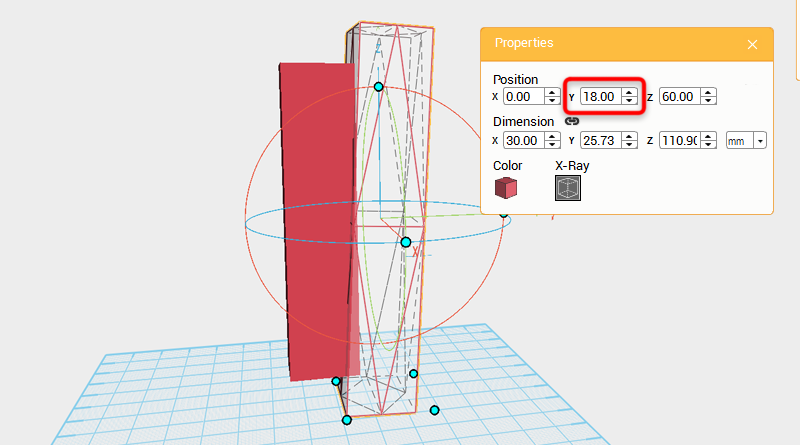 Change the cutting part’s Y axis position to 18.
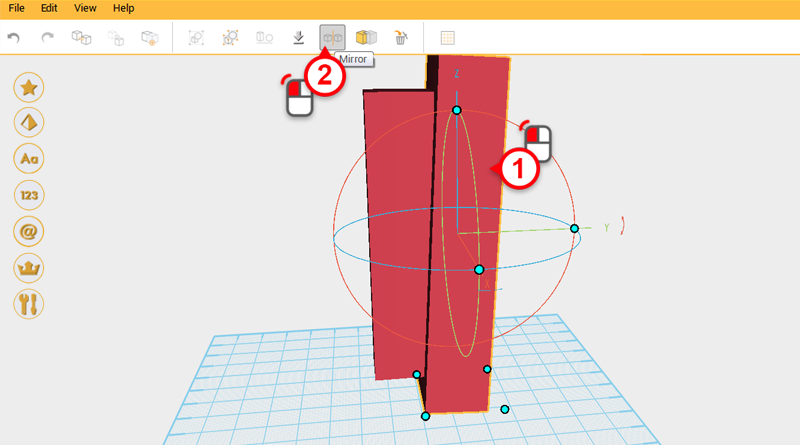
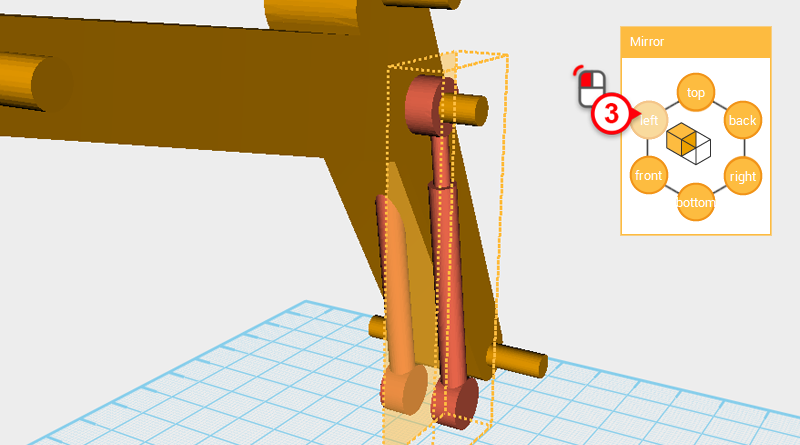
 Select the cutting part and click on the Mirror button, then in the Mirror properties box click on the front button to reflect the cutting part.
 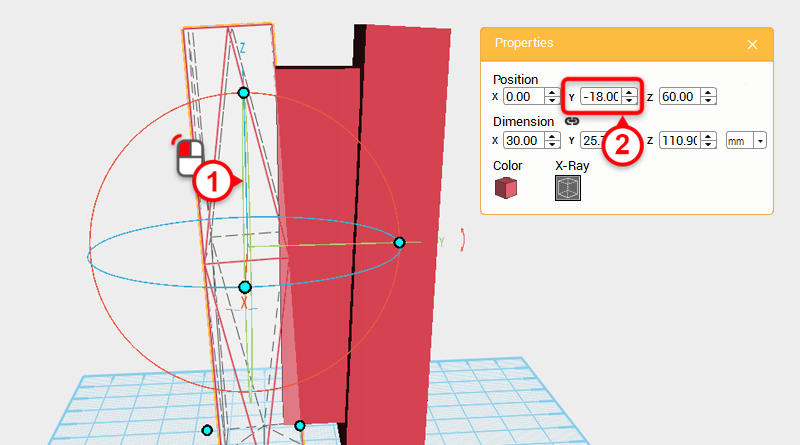 Select cutting part in the left of the image and change the Y axis position to -18.
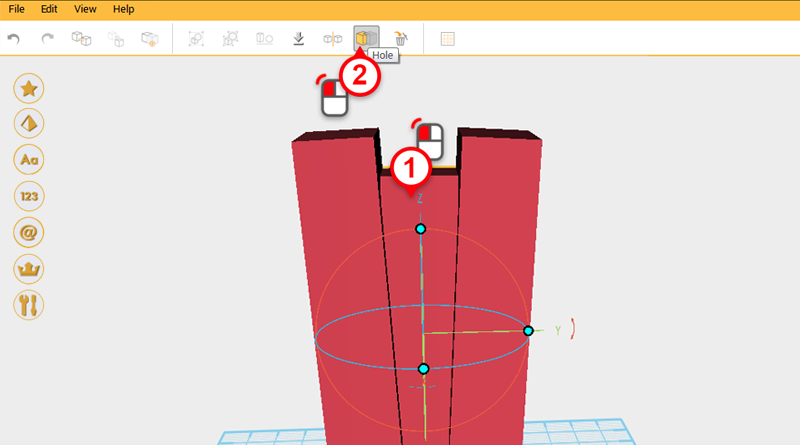
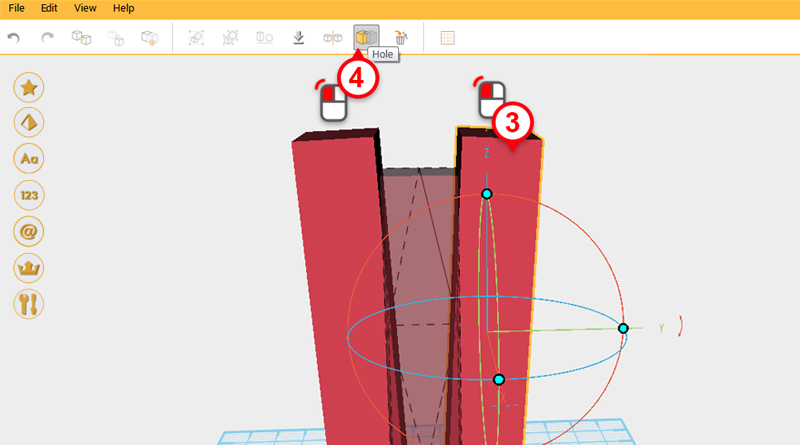
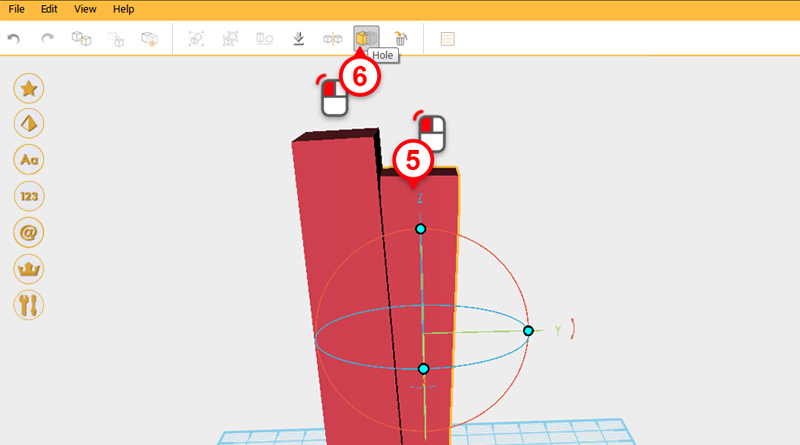
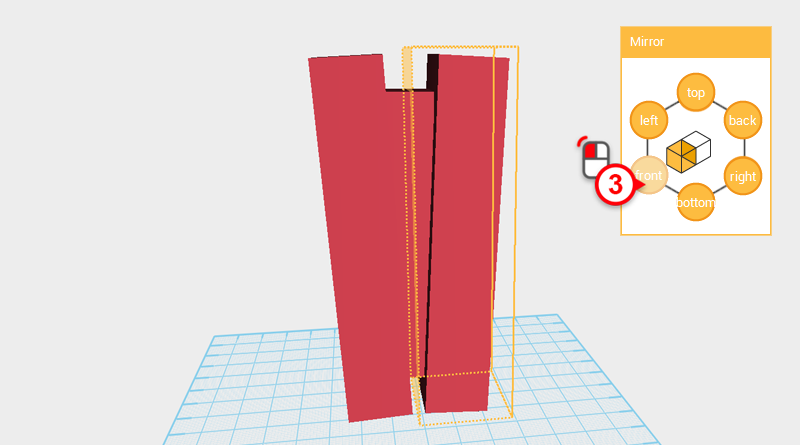
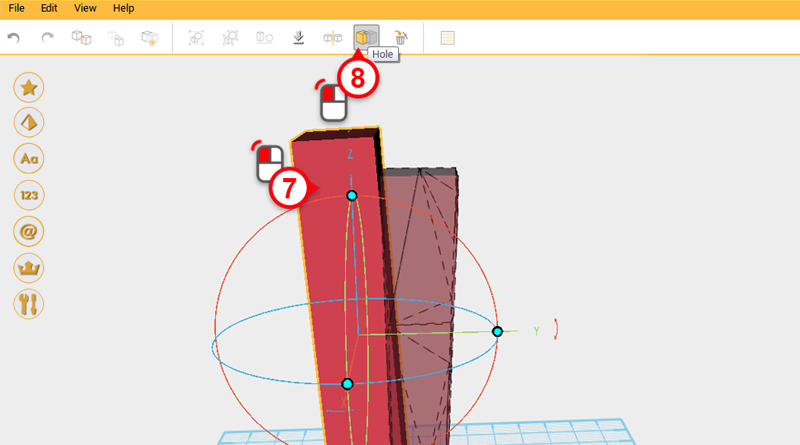 Use the two cutting parts and the Hole function to cut two angles into the boom.
 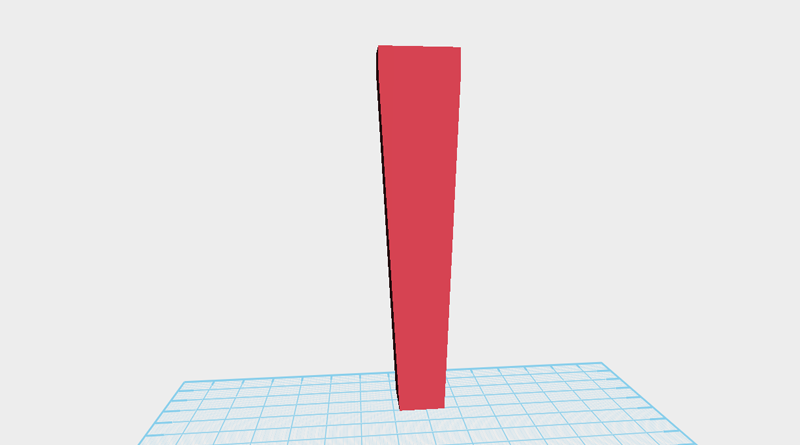 After cutting the boom it should look as above.
 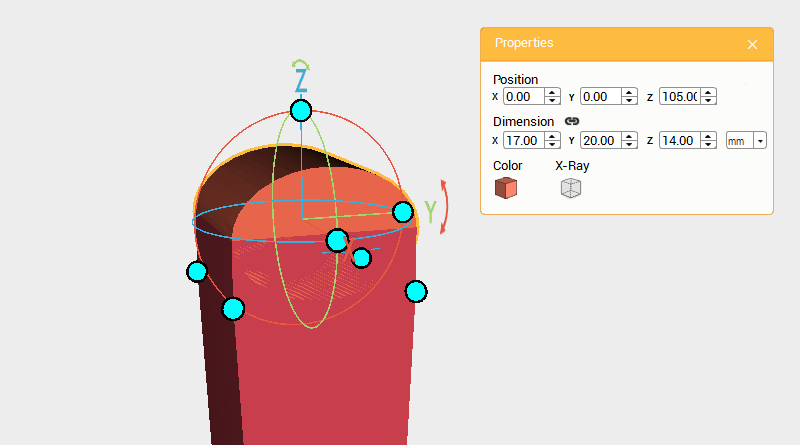 Create a cylinder and rotate it 90 degrees along the Y axis, then change its dimensions to X: 17,Y: 20,Z: 14 mm and position to X: 0,Y: 0,Z: 105.
Tip: Because of misaligned edges take the cylinder and make it elliptical rather than circular.
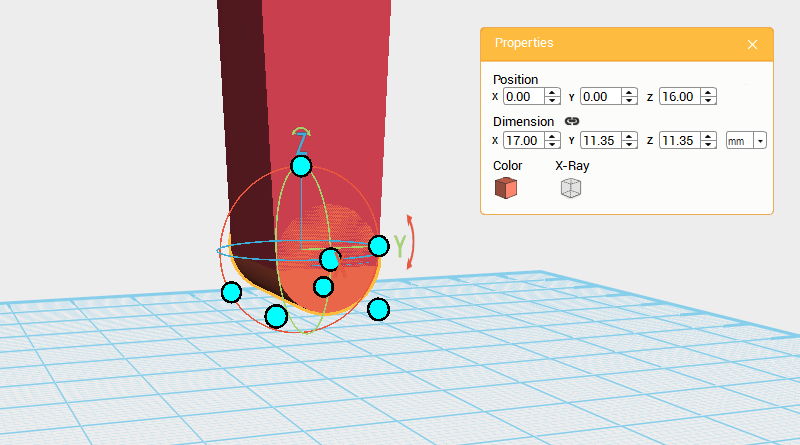 Create another cylinder and rotate it 90° along the Y axis, then change the dimensions to X: 17,Y: 11.35,Z: 11.35 mm and position to X: 0,Y: 0,Z: 16.
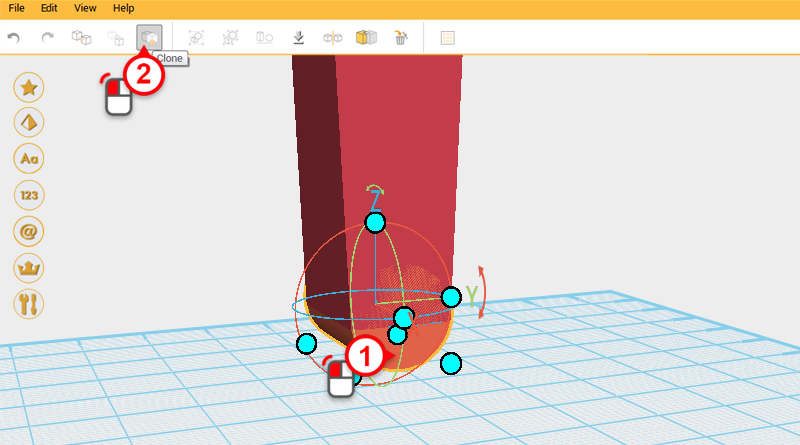
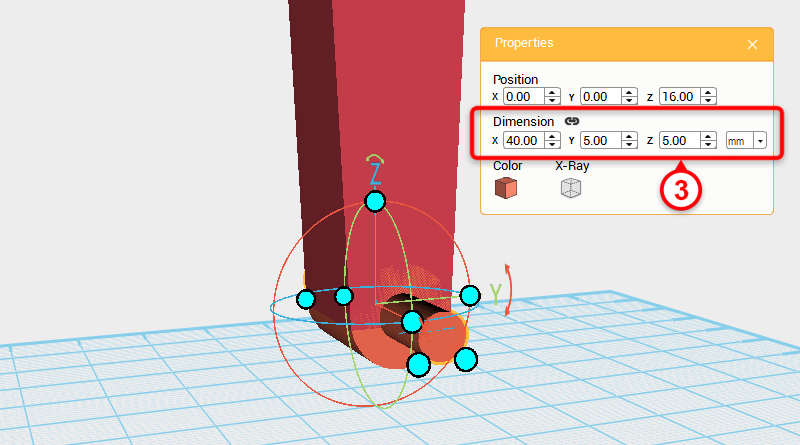 Select the cylinder underneath and click on the Clone button, then change that part’s dimensions to X: 40,Y: 5,Z: 5 mm. This will mark where the shaft will go.
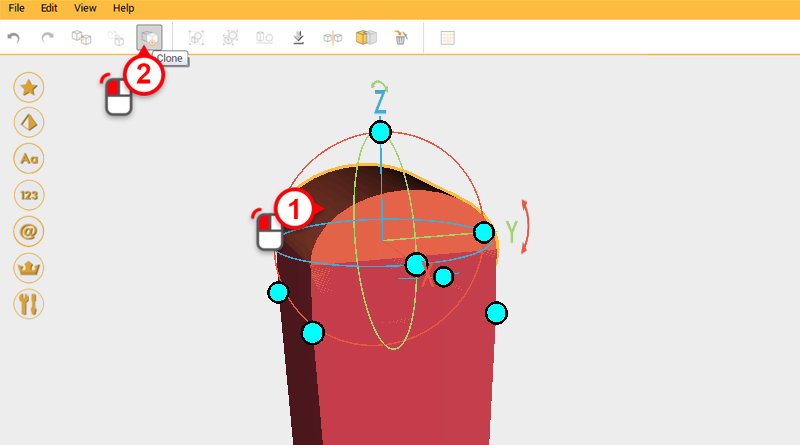
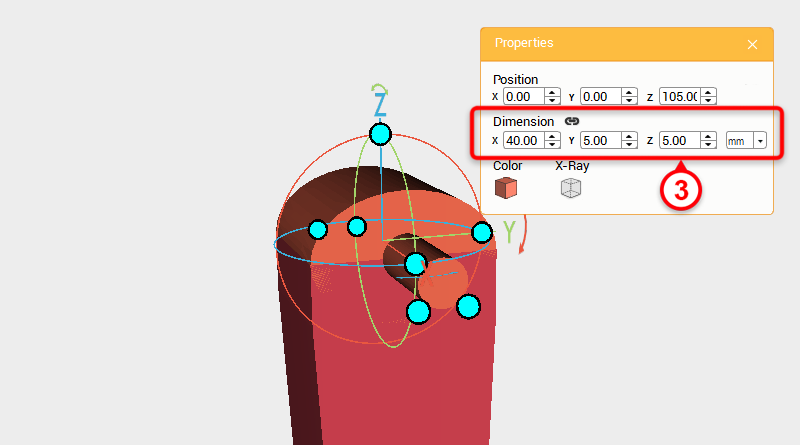 Select the cylinder on top and click on the Clone button, then change that part’s dimensions to X: 40,Y: 5,Z: 5 mm, same as above, this will mark where the shaft will go.
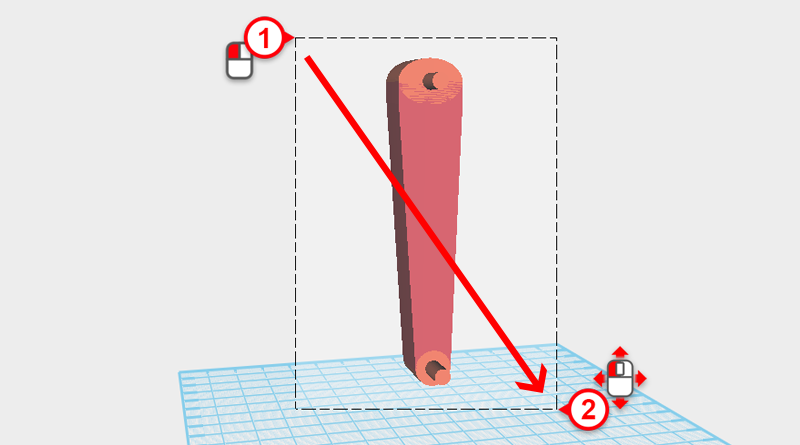

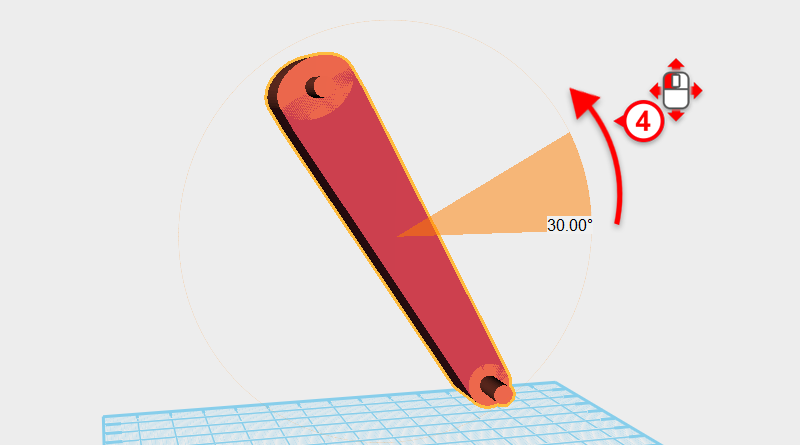 Drag select all the parts and click on the arrow in the control orb next to the Y axis, then drag the mouse to rotate the part 30°.
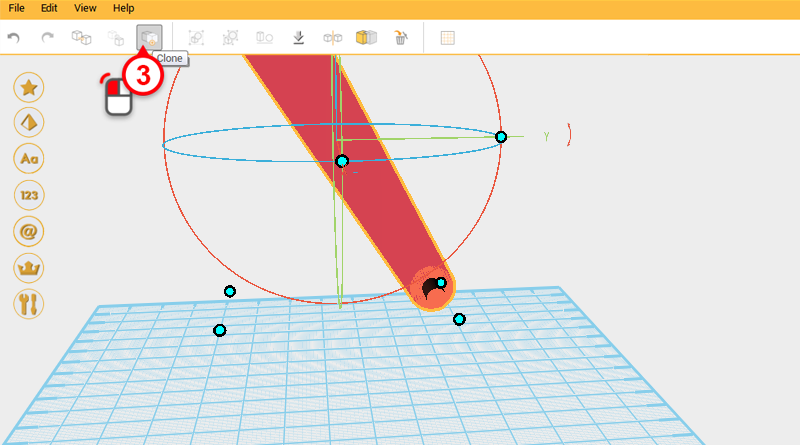 Drag select the bottom 3 parts , and click on the Clone button.
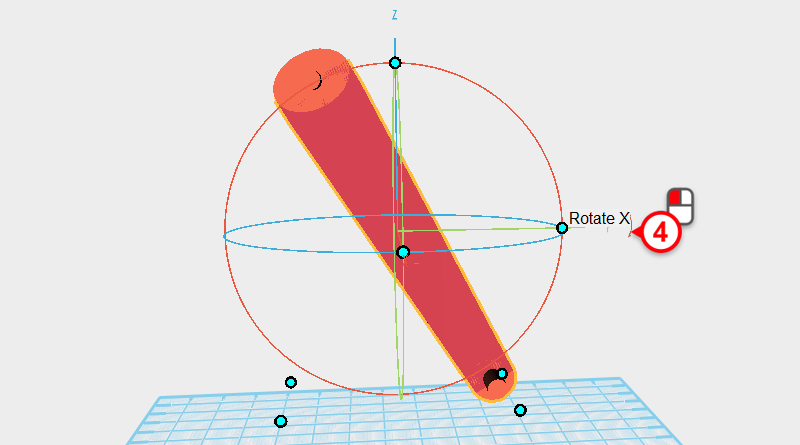
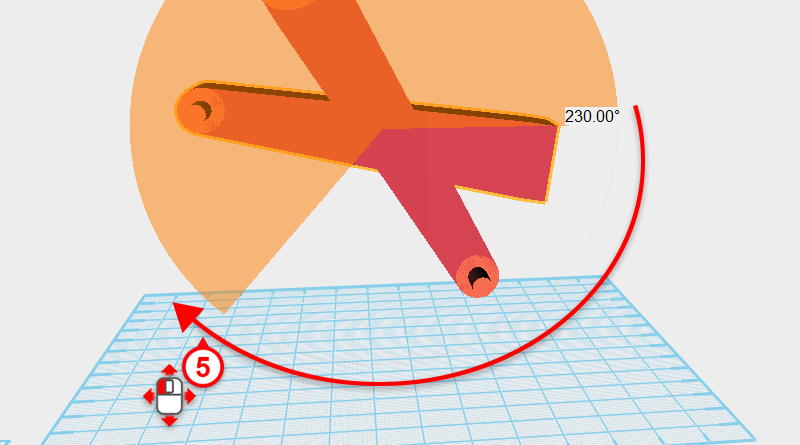 Click and hold the arrow next to the Y axis in the control orb, then move the mouse and rotate the part to 230°.
 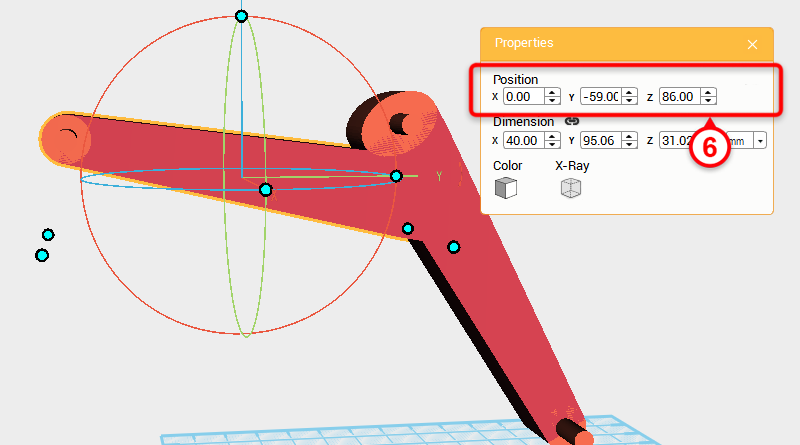 Change the position to X: 0,Y: -59,Z: 86.
 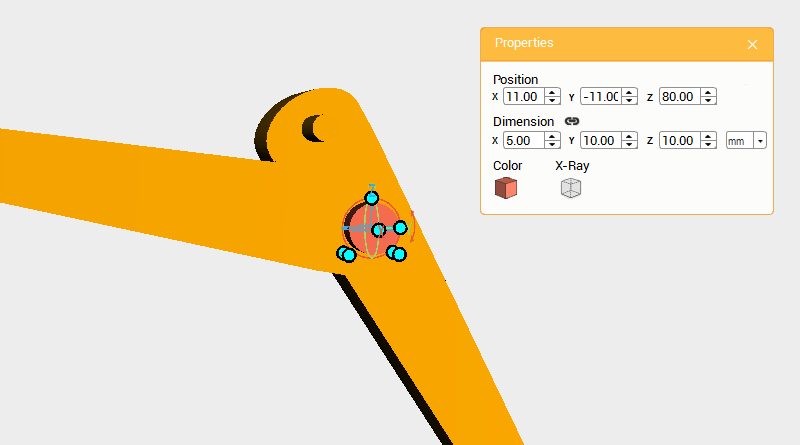 After finishing the main part of the boom, you now need to make and connect the hydraulics to the body. Create a cylinder and rotate it 90° along the Y axis, then change its dimensions to X: 5,Y: 10,Z: 10 mm and position to X: 11,Y: -11,Z: 80.
 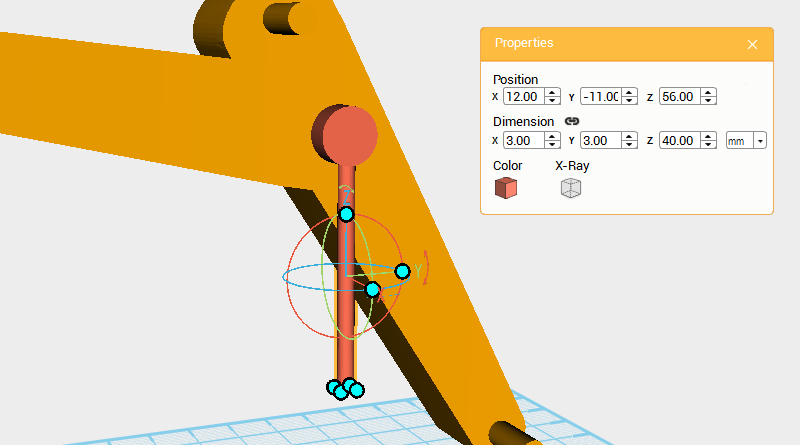 Create a cylinder and change its dimensions to X: 3,Y: 3,Z: 40 mm and position to X: 12,Y: -11,Z: 56.
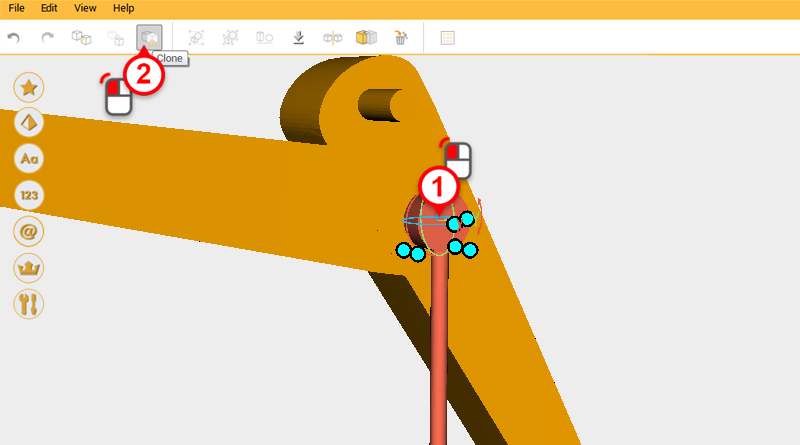
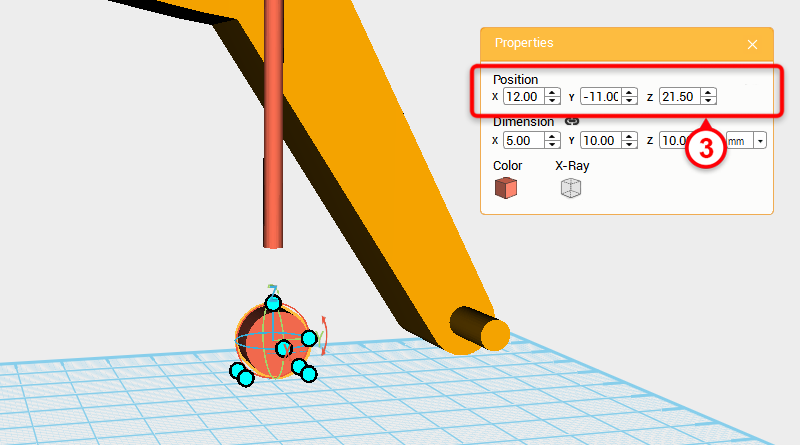 Select the cylinder on top and click on the Clone button. Take the duplicated cylinder and change its position to X: 12,Y: -11,Z: 21.5.
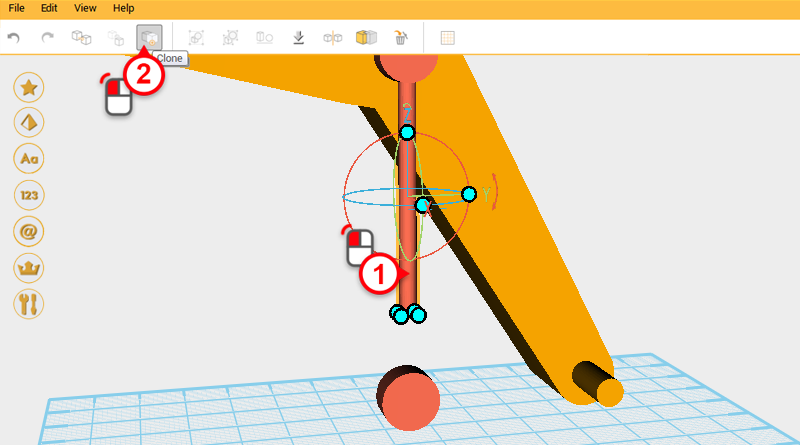
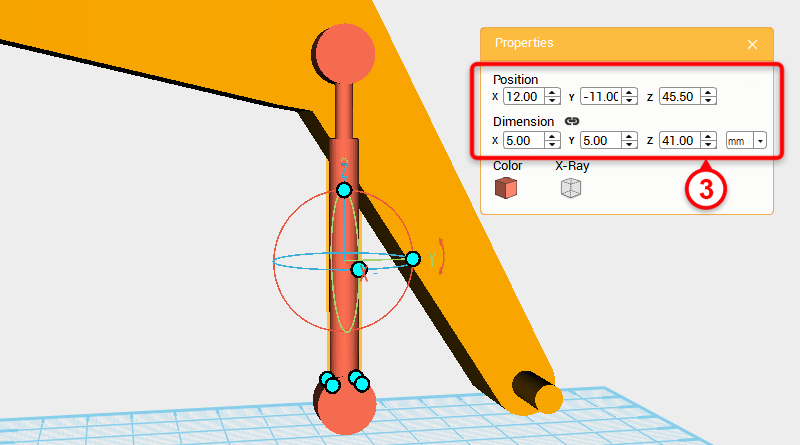 Select the elongated cylinder and click on the Clone button. Take the duplicated cylinder and change its dimensions to X: 5,Y: 5,Z: 41 mm and position to X: 12,Y: -11,Z: 45.5.
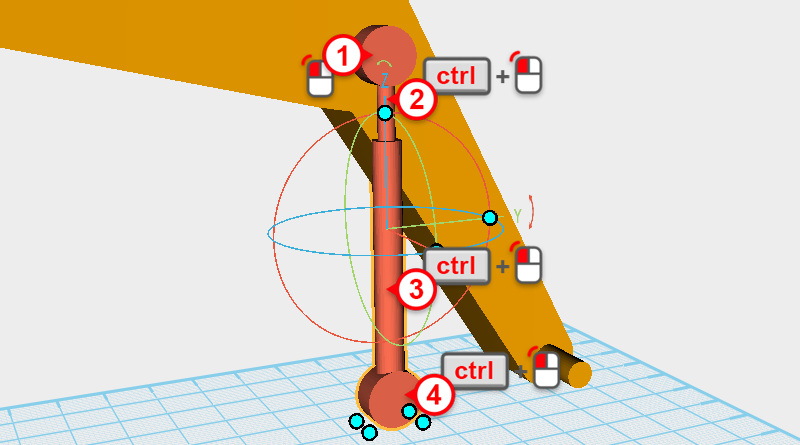
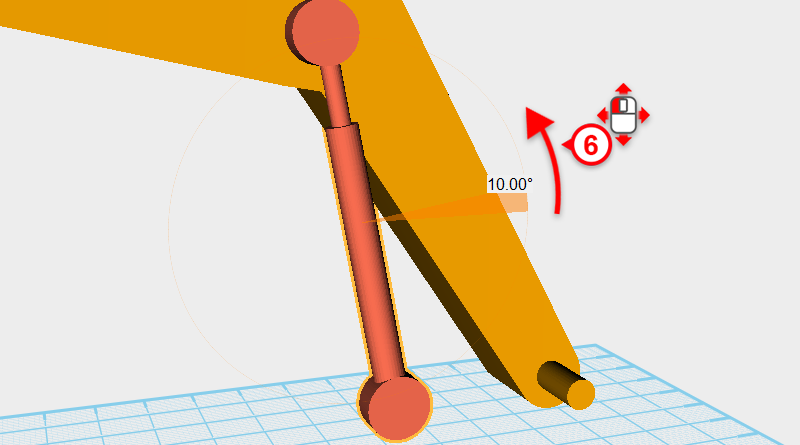 Select all of the hydraulic parts then click on the arrow next to the Y axis, and with the mouse button depressed, drag the cursor to rotate the part to 10 °.
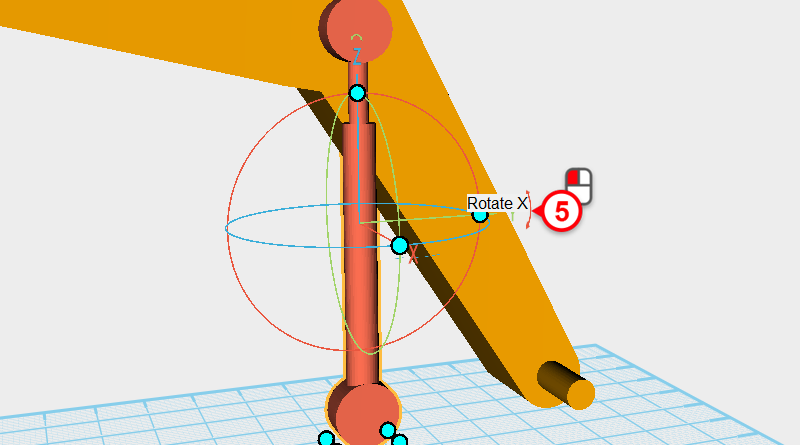
 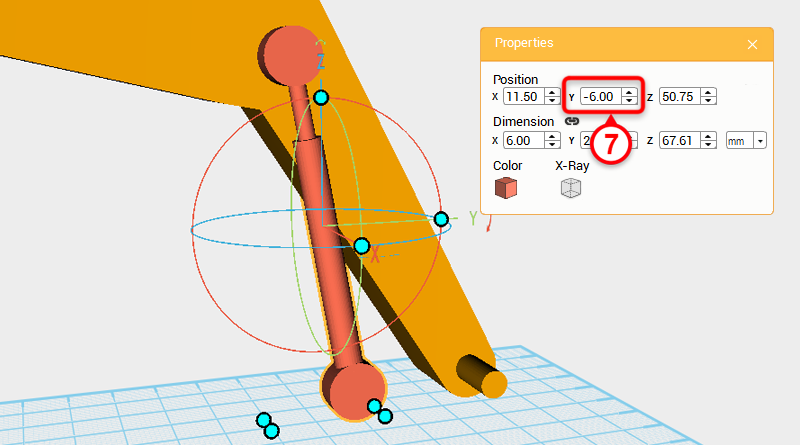 After rotating the part its position will be a little offset, because of this change the Y axis position to -6.
  After confirming the hydraulic rod is in the right position, mark where it and the boom’s rotation point are. Select the cylinder in the image and click on the Clone button.
  Change the duplicated cylinder’s dimensions to X: 40,Y: 5,Z: 5 mm and set its X axis position to 0.
 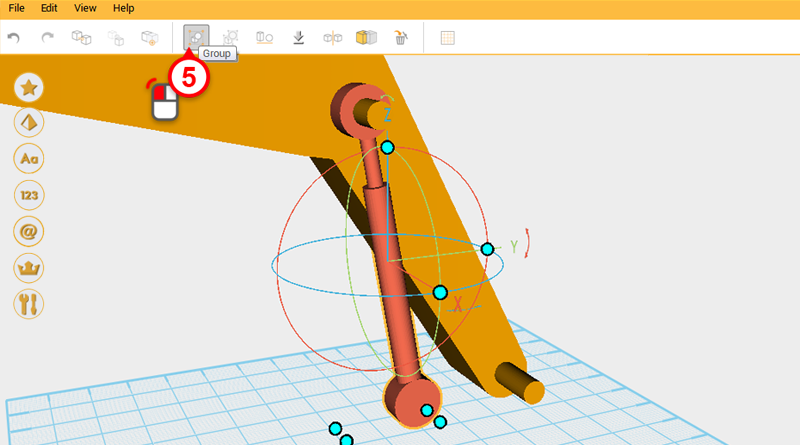 Select the hydraulic parts and click on the Group button to complete the right-side hydraulic rod.
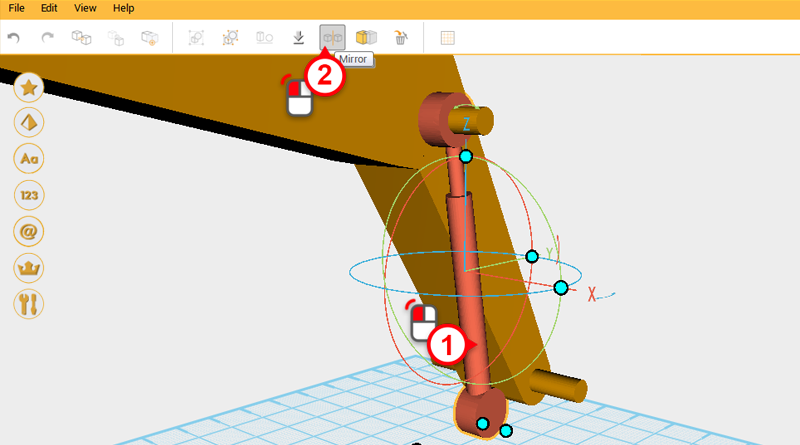
 Select the right-hand hydraulic and click on the Mirror button, in the Mirror properties box click on the left button to create a mirrored part called left-hand hydraulic.
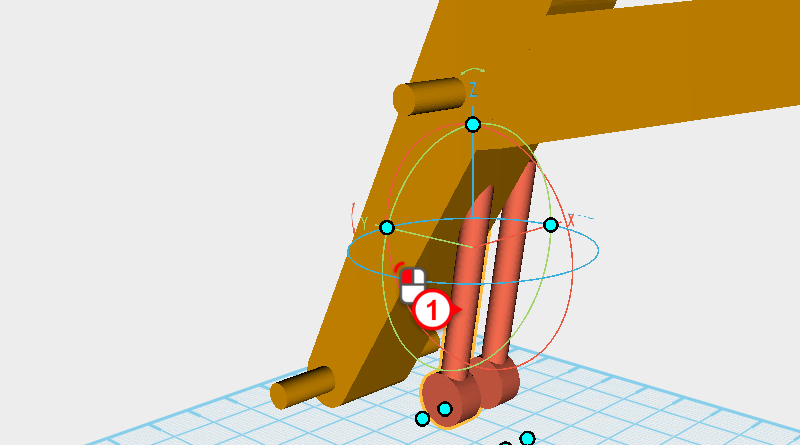
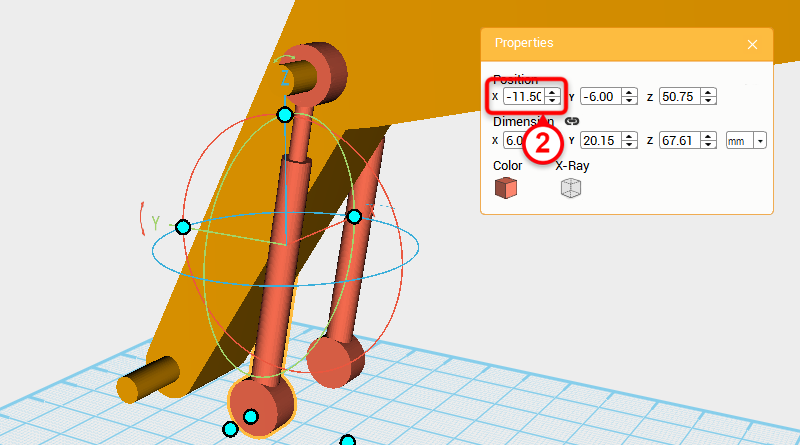 Select the left-hand hydraulic and change its X axis position to -11.5.
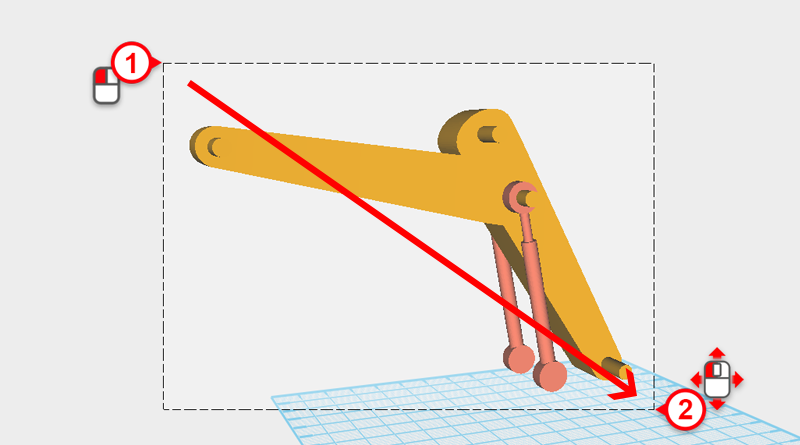
 Drag select all the parts and click on the Group button to finish the boom assembly.
 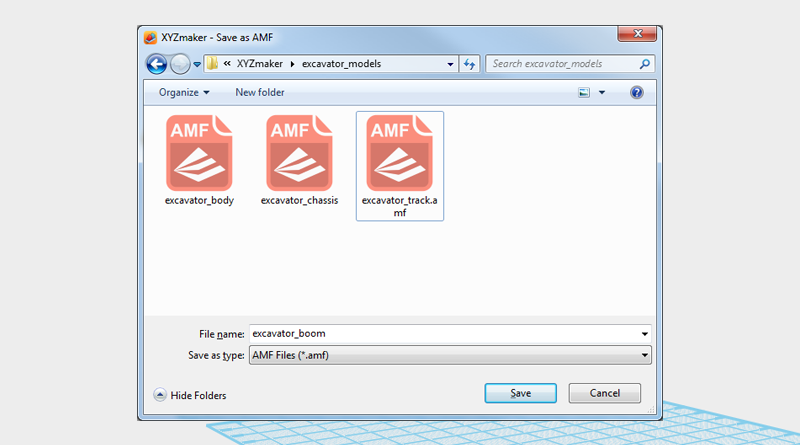 The boom model is pretty much complete, save the part as excavator_boom.amf.